
You also want an ePaper? Increase the reach of your titles
YUMPU automatically turns print PDFs into web optimized ePapers that Google loves.
<strong>AMX</strong> <strong>50.2</strong> <strong>25W</strong> x 2<br />
<strong>AMX</strong> <strong>100.2</strong> <strong>50W</strong> x 2<br />
Owner’s Manual
Dear customer,<br />
Selecting fine audio equipment, such as the unit you have just purchased, is only the beginning of your<br />
musical enjoyment. Now is the time to consider how to maximize the fun and excitement your equipment<br />
has to offer.<br />
AUTOTEK and the Electronic Industry Associations Consumer Electronic Group want you to get the most<br />
out of your equipment by playing it at a safe level, a level that lets the sound come through loud and clear<br />
without annoying blaring distortion; most importantly, without affecting your sensitive hearing.<br />
Sound can be deceiving. Over time your hearing "comfort level" adapts to higher volumes of sound, what<br />
may have sounded "normal" can actually be too loud and harmful to your hearing. Guard against this by<br />
setting your equipment at a safe level BEFORE your hearing adapts.<br />
To establish a "safe level":<br />
• Start you volume control at a low setting.<br />
• Slowly increase the sound until you can hear it comfortably and clearly, and without distortion.<br />
• Once you have established a comfortable "sound level" make a not of this position and do not go above<br />
this setting.<br />
Taking a minute to do this will help to prevent hearing damage in the future. After all, we want you<br />
listening for a lifetime.
Introduction<br />
Your Autotek MEAN MACHINE amplifier has been designed to give you very high performance, and<br />
valuable features, at a reasonable price. Take the time to read over this brief set of instructions, and you<br />
will get full enjoyment from your system.<br />
Installation<br />
The quality of the installation will affect system performance and reliability. You may wish to contact a<br />
dealer or professional installer. The amplifier is generally mounted in the rear trunk area but can be<br />
mounted in any convenient area such as beneath a seat. Please be sure to locate this unit where you have<br />
reasonable air circulation and protection from any hazard with moisture. When considering the mounting<br />
location you should minimize the length of the power supply and speaker leads. Minimizing both leads will<br />
provide higher audio output from the system. It is important to ensure that the cooling fans or the heat sink<br />
are not against a panel or a surface preventing air circulation. Mark the location from the mounting screw<br />
holes by using the amplifier as a template. Drill #29 or 9/64" diameter holes at the marked locations and<br />
firmly fasten the amplifier in place with the mounting screws supplied in the accessory kit. (Refer to Fig. 1)<br />
Caution<br />
Before drilling or cutting any holes investigate the layout of your automobile thoroughly; take care when<br />
working near the gas lines or hydraulic lines and electrical wiring.<br />
Warning<br />
This power amplifier has a protection feature to prevent any damage from misuse or faulty conditions--<br />
excessive heat, short circuited speakers or overload. If the unit senses one of the above conditions, the<br />
protection indicator will light and the system will shut down. To diagnose the problem turn all levels down,<br />
all power off and check the installation for possible wiring mistakes or shorts. In the event the amplifier<br />
shuts down due to excessive heat under adverse conditions simply allow time for the unit to cool down at<br />
which time, the protection indicator will not light.
Fig. 1 INSTALLATION OF AMPLIFIER<br />
Power Supply Connections<br />
The +12VDC and ground wires should be heavy gauge standard copper wires with heavy insulation. The<br />
wire gauge should be 4AWG for the <strong>AMX</strong><strong>50.2</strong> and <strong>AMX</strong><strong>100.2</strong> or larger. In addition, it has a 12V remote<br />
control wire and it should be 14AWG-18AWG. It is preferable to have longer speaker wires and shorter<br />
power supply wires to minimize power losses.<br />
+12V Power<br />
This wire is usually connected directly to the positive battery terminal. Ensure that the + power supply<br />
wire. This connection must be completed by using spade lug with insulating sleeve.<br />
Ground<br />
This connection must be completed by using spade lug with insulation sleeve. This wire is the electrical<br />
ground and must be fastened securely to the vehicle chassis. The best method is to use a threading sheet<br />
metal screw since the threads cut into bare metal. Ensure that all paint coating or other insulation is<br />
removed from around the hole area and using self tapping screw, securely affix the bare wire ends to the<br />
vehicle chassis. Use as short a piece of cable as possible--use the same gauge as for the +12V.<br />
Remote<br />
Many radios or other music sources have an output terminal for connection of the remote turn-on of the<br />
power amplifier. If a radio doesn't have a remote turn-on feature, then you can use the antenna relay wire<br />
which activates the antenna motor. But you must take notice if the power antenna retracts when the tape<br />
player is operating. In this case, you can't use the antenna relay wire to operate the remote turn-on.
Power Input Connection<br />
Fig. 2 POWER INPUT CONNECTIONS<br />
Caution<br />
First make +12V wire connection then the ground connection and finally the remote connection.<br />
Furthermore the +12V wire must always be fused at the battery for protection against possible damage. If<br />
you need to replace the power fuse, replace it with a fuse of the same value. Using a fuse of a different type<br />
or rating may result in a serious hazard.<br />
This amplifier has signal input terminal of RCA connector typ0e for low level inputs. Adjustment of input<br />
levels is accomplished by the gain control of both channels. Adjusting this control allows the amplifier gain<br />
to be controlled to match and balance both channels.<br />
The RCA input connector should be used when connecting the radio/cassette line out and this connection is<br />
usually made by using RCA-RCA connector wires. Red connector is used for Right channel and White<br />
connector is used for Left channel.
SPEAKER OUTPUT CONNECTIONS<br />
Fig. 4 SPEAKER OUTPUT CONNECTIONS—STEREO MODE<br />
Dotted lines show 4-speaker connections. In this case, it is better to use 4 ohm speaker to prevent any damages.<br />
Fig. 5 SPEAKER OUT CONNECTIONS—MONO MODE<br />
• The amplifier can be used in the STEREO and BRIDGED mode as shown in Fig. 4, Fig. 5.<br />
• The speaker wires should be connected to the speaker terminal on amplifier.<br />
• Notice that most speakers have a polarity marking such as "+" or a dot on speaker terminal and these<br />
markings denote the positive terminals of the speaker and are used as a guide to phase the speakers.<br />
Improper phasing causes a loss of bass response.<br />
• When used in the BRIDGE mode the speaker wires should be connected to the output terminals of the<br />
amplifier as shown. (Ref. To Fig. 5)<br />
• When operating 4-speaker system, the impedance of the speaker is an important factor. Do not use less<br />
than 2 ohm in the mono mode.<br />
• Do not use speakers in parallel for less than a 1 ohm load per channel in the stereo mode.<br />
• Too low impedance loads will cause excessive heat radiation from the amplifier and the protection<br />
circuit will be operated to prevent damage. In this case, you must reduce the volume to the proper<br />
level.<br />
Caution<br />
Be careful not to connect speaker (-) to the ground or chassis.
FEATURES AND CONTROLS
1. RCA Line Output Jacks<br />
Full range output from channel L=R inputs is provided at Line Out Jacks and its output frequency can<br />
be adjusted by 3way x-over (Hi/Flat/Low) with line out switch.<br />
2. RCA Low Level Input Jacks<br />
It allows left and right inputs to be connected to the amplifier using RCA plugs.<br />
3. Input Level Control<br />
It allows for the adjustment of the gain of both channels to match the output level of the source. In<br />
addition, it allows for detailed adjustment with L & R level control to be separated.<br />
4. High Variable Controls<br />
Adjust the crossover frequency of the High Pass output only, from 75Hz to 750Hz.<br />
5. Low Variable Controls<br />
Adjust crossover frequency of the LOW Pass output only, from 40Hz to 150Hz.<br />
6. Bass Boost Controls<br />
Adjust the sub boost level of the selected frequency output from 0dB to 24dB.<br />
7. Amplifier X-over switch/Line outs X-over switch<br />
a) Low position: Allows for the control of the low pass frequency range (40Hz-150Hz) by using the<br />
Low Variable Control.<br />
b) Flat position: Allows for full range pass through.<br />
c) High position: Allows for the control of the high pass frequency range (75Hz-750Hz) by using the<br />
High Variable Control.<br />
8. Subsonic Filter<br />
It allows you to delete the frequency under 35Hz with On/Off Switch for Subwoofer speaker<br />
protection.<br />
9. Power LED<br />
It indicates when amplifier is on and no fault exists.<br />
10. Protection LED<br />
It illuminates when fault condition exists, and amplifier immediately shuts down. If illuminated, turn<br />
amplifier off, check for shorted speaker leads and DC noise from RCA input and attempt to re-power<br />
amplifier. When amplifier overheats and thermal protection circuit shuts amplifier off, LED does not<br />
illuminate.<br />
11. Power connection<br />
Connects +12VDC power wire from the battery and also connects ground wire from a suitable ground<br />
point on the chassis.<br />
12. Remote connection<br />
Connects the control wire which allows the amplifier to be turned on and off by the radio cassette<br />
player.<br />
13. Speaker Terminal<br />
It allows the connection of speakers to the amplifier.<br />
14. External Fuse<br />
It offers external fuse to connect from battery directly. <strong>AMX</strong><strong>50.2</strong>: 49A, <strong>AMX</strong><strong>100.2</strong>: 60A.
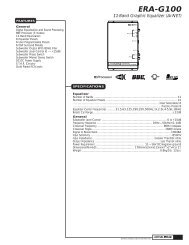
SPECIFICATIONS<br />
MEAN MACHINE <strong>AMX</strong><strong>50.2</strong> <strong>AMX</strong><strong>100.2</strong><br />
*Audio power output per Channel,<br />
both channels driven at 14.4VDC<br />
-4 Ohms 1kHz RMS <strong>25W</strong>x2CH <strong>50W</strong>x2CH<br />
-2 Ohms Bridged RMS 400Wx1CH 800Wx1CH<br />
*THD<br />
-4 Ohm loads 0.02% 0.015%<br />
-2 Ohm loads 0.09% 0.08%<br />
*Signal to Noise Ratio<br />
100dB<br />
*Frequency Response<br />
10Hz-40KHz-1dB<br />
*Crossover: Separate<br />
-High Pass<br />
75Hz-750Hz<br />
-Low Pass<br />
40Hz-150Hz<br />
-Slope<br />
12dB<br />
-Subsonic Filter<br />
@35Hz<br />
-Bass Boost<br />
0dB-24dB<br />
*Input Sensitivity<br />
0.2V-4.0V<br />
*Low level Input Impedance 47 ?<br />
*Damping Factor 300<br />
*Channel Separation<br />
95dB<br />
*Power Supply Consumption 29A 55A<br />
*(Bridge RMS)<br />
*Fuse Rating 40A 60A<br />
*Dimension (W x 10.4 10.4<br />
*Dimension (H x 2.6 2.6<br />
*Dimension (L inch 11.8 14.2<br />
*1. These specifications can be changed without notice<br />
*2. Please note that the features shown in this manual may vary from model to model.