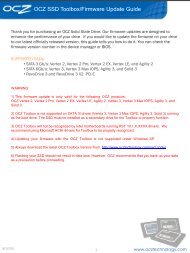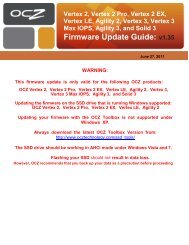
Summit SSD Firmware Update Guide - OCZ
Summit SSD Firmware Update Guide - OCZ
Summit SSD Firmware Update Guide - OCZ

Create successful ePaper yourself
Turn your PDF publications into a flip-book with our unique Google optimized e-Paper software.
If you are not experienced, you may find it helpful to visit our renowned Support forums first:<br />
http://www.ocztechnologyforum.com/forum/showthread.php?73919-Agility-Vertex-Solid2-<br />
Onyx-Turbo-and-also-EX-1.6-FW-<strong>Update</strong><br />
Do not flash to 1.6 unless you are on the 1.5 FW. You cannot flash from 1275, 1370, 1.10, 1.3, 1.42,<br />
or 1.4xB FW to 1.6<br />
Before you start…<br />
You will need the following:<br />
• 1 x Recordable CD<br />
• Downloaded version of the <strong>Firmware</strong> update program<br />
Getting started:<br />
1. You can updated your <strong>OCZ</strong> <strong>SSD</strong> as either the primary boot drive or as a secondary drive<br />
2. Download the firmware upgrade utility .ISO image file that corresponds to your <strong>SSD</strong> model to your drive.<br />
3. Use this .ISO image file to Burn and Create a recordable CD<br />
NOTE: This will create a bootable CD for you to boot off of.<br />
4. Reboot your PC and enter the CMOS Setup utility by pressing Del or F1<br />
5. Change the SATA mode to IDE<br />
6. Change the Boot Device Order to CDROM/DVDROM as your First Boot Device<br />
7. Press F10 to Save and Exit<br />
8. Leave the newly created bootable CD in the drive<br />
9. Turn off the PC<br />
<strong>Firmware</strong> Upgrade Procedure:<br />
NOTE: the current utility does not require any jumper setting on the drive<br />
1. Turn On The PC and boot from the bootable CD<br />
2. You will see a “Select drive to <strong>Update</strong> 1.6” screen<br />
3. Select the number corresponding to the drive you want to update<br />
4. The utility will then prompt you: “Do you want to find Target Drives?”<br />
5. Press “Y” to get a listing of all the <strong>SSD</strong>s attached to the system<br />
6. Select the desired number of the drive you want to upgrade. In most cases it will be “1”<br />
7. This launches the utility which will complete in 1-5 seconds.<br />
8. Repeat the procedure in case multiple drives are upgraded.<br />
9. Turn off the PC.<br />
Verification:<br />
1. Enter the CMOS enter the CMOS Setup utility by pressing Del or F1<br />
2. Change the SATA mode back to the original mode<br />
(as it was set before. If the system was originally running in IDE mode, then no change is necessary)<br />
3. In Windows, Click START / Right click My Computer / Click Manage / Click Device Manager<br />
/ Double-Click Disk Drive / Right Click VERTEX and Click on Properties<br />
4. Select the “Details” tab and click “Device Instance ID” (WinXP) or<br />
“Hardware ID” Windows Vista /Windows 7 to verify the firmware revision number.<br />
NOTE: On very rare occasions, we have noticed an error when trying to update to the FW rev 1.6.<br />
In the event you encounter the message “Bad command or file name”, please press any key to quit the<br />
installation and then email our Technical Support Staff (TS_FIRMWARE@<strong>OCZ</strong>.COM) with your serial<br />
number to help you continue.<br />
Congratulations, you have completed the flashing process. Enjoy!<br />
www.ocztechnology.com