Exhaust System Installation for Ford Taurus SHO ... - 4 Wheel Online
Exhaust System Installation for Ford Taurus SHO ... - 4 Wheel Online
Exhaust System Installation for Ford Taurus SHO ... - 4 Wheel Online

You also want an ePaper? Increase the reach of your titles
YUMPU automatically turns print PDFs into web optimized ePapers that Google loves.
BORLA PERFORMANCE INDUSTRIES<br />
701 Arcturus Ave.<br />
Oxnard, CA. 93033<br />
805-986-8600<br />
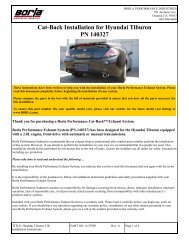
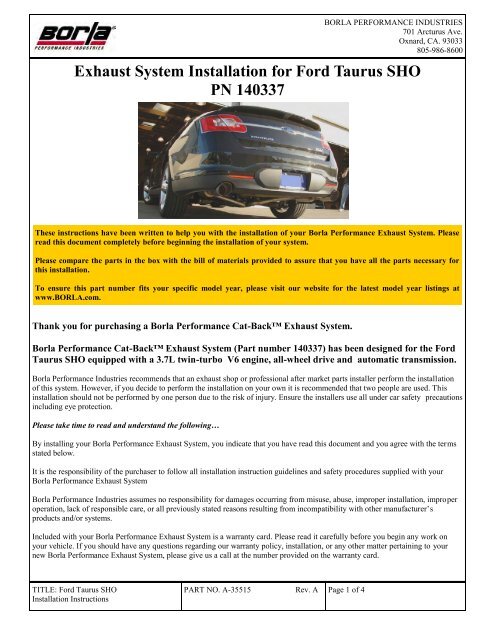
<strong>Exhaust</strong> <strong>System</strong> <strong>Installation</strong> <strong>for</strong> <strong>Ford</strong> <strong>Taurus</strong> <strong>SHO</strong><br />
PN 140337<br />
These instructions have been written to help you with the installation of your Borla Per<strong>for</strong>mance <strong>Exhaust</strong> <strong>System</strong>. Please<br />
read this document completely be<strong>for</strong>e beginning the installation of your system.<br />
Please compare the parts in the box with the bill of materials provided to assure that you have all the parts necessary <strong>for</strong><br />
this installation.<br />
To ensure this part number fits your specific model year, please visit our website <strong>for</strong> the latest model year listings at<br />
www.BORLA.com.<br />
Thank you <strong>for</strong> purchasing a Borla Per<strong>for</strong>mance Cat-Back <strong>Exhaust</strong> <strong>System</strong>.<br />
Borla Per<strong>for</strong>mance Cat-Back <strong>Exhaust</strong> <strong>System</strong> (Part number 140337) has been designed <strong>for</strong> the <strong>Ford</strong><br />
<strong>Taurus</strong> <strong>SHO</strong> equipped with a 3.7L twin-turbo V6 engine, all-wheel drive and automatic transmission.<br />
Borla Per<strong>for</strong>mance Industries recommends that an exhaust shop or professional after market parts installer per<strong>for</strong>m the installation<br />
of this system. However, if you decide to per<strong>for</strong>m the installation on your own it is recommended that two people are used. This<br />
installation should not be per<strong>for</strong>med by one person due to the risk of injury. Ensure the installers use all under car safety precautions<br />
including eye protection.<br />
Please take time to read and understand the following…<br />
By installing your Borla Per<strong>for</strong>mance <strong>Exhaust</strong> <strong>System</strong>, you indicate that you have read this document and you agree with the terms<br />
stated below.<br />
It is the responsibility of the purchaser to follow all installation instruction guidelines and safety procedures supplied with your<br />
Borla Per<strong>for</strong>mance <strong>Exhaust</strong> <strong>System</strong><br />
Borla Per<strong>for</strong>mance Industries assumes no responsibility <strong>for</strong> damages occurring from misuse, abuse, improper installation, improper<br />
operation, lack of responsible care, or all previously stated reasons resulting from incompatibility with other manufacturer’s<br />
products and/or systems.<br />
Included with your Borla Per<strong>for</strong>mance <strong>Exhaust</strong> <strong>System</strong> is a warranty card. Please read it carefully be<strong>for</strong>e you begin any work on<br />
your vehicle. If you should have any questions regarding our warranty policy, installation, or any other matter pertaining to your<br />
new Borla Per<strong>for</strong>mance <strong>Exhaust</strong> <strong>System</strong>, please give us a call at the number provided on the warranty card.<br />
TITLE: <strong>Ford</strong> <strong>Taurus</strong> <strong>SHO</strong><br />
<strong>Installation</strong> Instructions<br />
PART NO. A-35515 Rev. A Page 1 of 4
BORLA PERFORMANCE INDUSTRIES<br />
701 Arcturus Ave.<br />
Oxnard, CA. 93033<br />
805-986-8600<br />
TOOLS:<br />
Minimum Required Tool List:<br />
1 3/8” Drive Ratchet<br />
2 3/8” Drive Extension 3”<br />
3 15mm Socket<br />
4 Pry Bar<br />
5 Metal cutting sawsall<br />
<strong>SHO</strong>P SUPPLIES:<br />
1 Spray Lubricant<br />
Borla Per<strong>for</strong>mance Bill of Materials<br />
1. Front muffler assembly<br />
2. Intermediate pipe assembly<br />
3. R/H Rear Muffler Assy<br />
4. L/H Rear Muffler Assy<br />
5. S/S Clamp 2.50” (Qty 4)<br />
6. S/S Clamp 2.25” (Qty 2)<br />
TITLE: <strong>Ford</strong> <strong>Taurus</strong> <strong>SHO</strong><br />
<strong>Installation</strong> Instructions<br />
PART NO. A-35515 Rev. A Page 2 of 4
BORLA PERFORMANCE INDUSTRIES<br />
701 Arcturus Ave.<br />
Oxnard, CA. 93033<br />
805-986-8600<br />
Caution!!! Never work on a hot exhaust system. Serious injury in the <strong>for</strong>m of burns can result If the vehicle has been in use and the exhaust<br />
system is hot, allow vehicle to cool <strong>for</strong> at least 1 hour. Always wear eye protection when working under any vehicle.<br />
Note: It is our recommendation that you use a hoist or hydraulic lift to facilitate the installation of your new Borla Per<strong>for</strong>mance Cat-Back <strong>Exhaust</strong><br />
<strong>System</strong>.<br />
Taking all under car safety precautions, lift the vehicle using a hoist or hydraulic lift. Once this has been done, you may begin the removal of your<br />
old exhaust system from your vehicle.<br />
Note: Be<strong>for</strong>e removing the original exhaust system from your vehicle, please compare the parts you have received with the bill of materials<br />
provided on the previous page to assure that you have all the parts necessary <strong>for</strong> the installation of your new Borla Per<strong>for</strong>mance Cat-Back <br />
<strong>Exhaust</strong> <strong>System</strong>.<br />
Original <strong>Exhaust</strong> <strong>System</strong><br />
Removal<br />
Note: With a used vehicle, we suggest a penetrating spray lubricant<br />
to be applied liberally to all exhaust fasteners and allowing a significant<br />
period of time <strong>for</strong> the chemical to lubricate the threads be<strong>for</strong>e<br />
attempting to disassemble.<br />
1. <strong>Exhaust</strong> pipe between rear catalytic converter and front muffler<br />
must be cut <strong>for</strong> installation of your new Borla exhaust. OE system<br />
removes in 1-piece as shown. (See Figure 1)<br />
2. Mark a reference line 5” on both pipes between rear catalytic<br />
converters and front muffler. (See Figure 2) Cut both pipes using<br />
a sawsall with a metal-cutting blade.<br />
3. Lubricate all the hangers and rubber isolators.<br />
4. Using a muffler stand or an additional person to support the front<br />
muffler into position, remove the hangers from the rubber isolators<br />
. Support rear mufflers and remove hangars from the rubber<br />
isolators. (See Figure 3) Carefully remove OE exhaust from vehicle.<br />
Figure 1<br />
Figure 2<br />
catalytic converter<br />
Warning: Use extreme caution during installation. Torque all<br />
fasteners according to manufacturer’s torque values and<br />
tightening sequence. DO NOT use air impact tools to tighten<br />
fasteners on Borla Per<strong>for</strong>mance <strong>Exhaust</strong> <strong>System</strong>s. Use of such<br />
tools may result in bent flanges or gasket contact areas leading to<br />
exhaust leaks.<br />
Figure 3<br />
TITLE: <strong>Ford</strong> <strong>Taurus</strong> <strong>SHO</strong><br />
<strong>Installation</strong> Instructions<br />
PART NO. A-35515 Rev. A Page 3 of 4
Borla Per<strong>for</strong>mance Cat-Back <br />
<strong>Exhaust</strong> <strong>System</strong> <strong>Installation</strong><br />
BORLA PERFORMANCE INDUSTRIES<br />
701 Arcturus Ave.<br />
Oxnard, CA. 93033<br />
805-986-8600<br />
1. Place components on ground following layout on page 2. Note<br />
pipe dimensions and clamp diameters.<br />
2. Place two 2.50” clamps over both expanded ends of the front<br />
muffler assembly and set it into position as shown. Do Not<br />
tighten the clamps. (See Figure 4)<br />
3. Place two 2.50”clamps over the expanded end of the intermediate<br />
muffler assembly and place over the front muffler assembly making<br />
sure to install the hangers into the rubber isolators. Do Not<br />
tighten the clamps.<br />
Figure 4<br />
4. Place 2.25” clamp over R/H muffler assembly and place over<br />
passenger-side pipe. Repeat <strong>for</strong> L/H muffler assembly.<br />
(See Figure 5)<br />
5. Check your exhaust system <strong>for</strong> proper clearance under the<br />
vehicle and also <strong>for</strong> tip alignment.<br />
6. Once position has been determined to be correct, tighten the<br />
Accuseal clamp to 32-35 ft. lbs. making sure the clamps<br />
openings are not over any of the notches in the pipes.<br />
(See Figure 6)<br />
Figure 5<br />
7. Be<strong>for</strong>e starting your vehicle, make sure to check all wires, hoses,<br />
brake lines, body parts and tires <strong>for</strong> safe clearance from the<br />
exhaust system.<br />
8. Start vehicle and check <strong>for</strong> any leaks. If any leaks are found,<br />
determine cause (such as loose hardware or incorrectly<br />
positioned clamp) and repair as necessary.<br />
Figure 6<br />
Note: When you first start your vehicle after the installation<br />
of your new Borla Per<strong>for</strong>mance <strong>Exhaust</strong> <strong>System</strong>, there may<br />
be some smoke and fumes coming from the system. This is a<br />
protective oil based coating used in the manufacturing of<br />
mandrel bent per<strong>for</strong>mance exhaust tubing. This is not a<br />
problem and will disappear within a very short period of<br />
time after the exhaust has reached normal operating<br />
temperatures.<br />
TITLE: <strong>Ford</strong> <strong>Taurus</strong> <strong>SHO</strong><br />
<strong>Installation</strong> Instructions<br />
PART NO. A-35515 Rev. A Page 4 of 4