Setting a Username and Department Code for Printing
Setting a Username and Department Code for Printing
Setting a Username and Department Code for Printing

You also want an ePaper? Increase the reach of your titles
YUMPU automatically turns print PDFs into web optimized ePapers that Google loves.
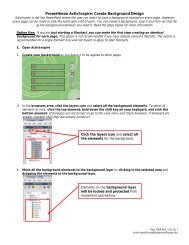
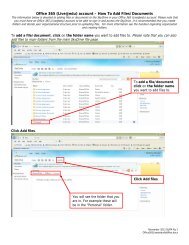
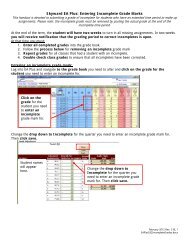
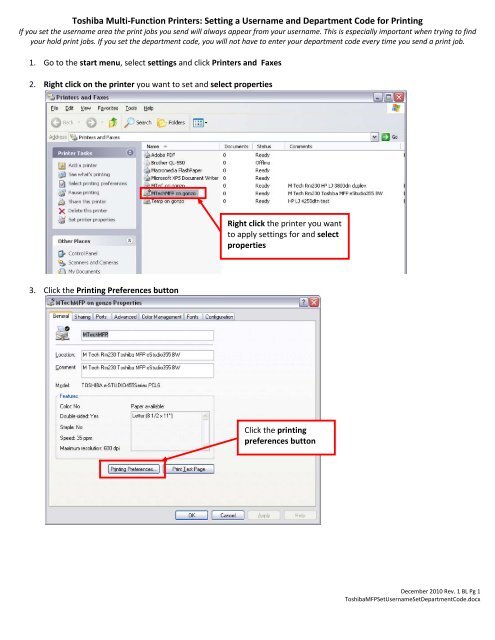
Toshiba Multi‐Function Printers: <strong>Setting</strong> a <strong>Username</strong> <strong>and</strong> <strong>Department</strong> <strong>Code</strong> <strong>for</strong> <strong>Printing</strong><br />
If you set the username area the print jobs you send will always appear from your username. This is especially important when trying to find<br />
your hold print jobs. If you set the department code, you will not have to enter your department code every time you send a print job.<br />
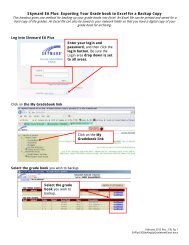
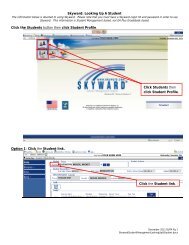
1. Go to the start menu, select settings <strong>and</strong> click Printers <strong>and</strong> Faxes<br />
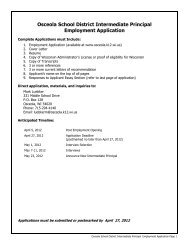
2. Right click on the printer you want to set <strong>and</strong> select properties<br />
Right click the printer you want<br />
to apply settings <strong>for</strong> <strong>and</strong> select<br />
properties<br />
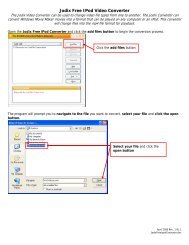
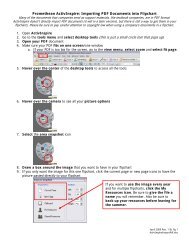
3. Click the <strong>Printing</strong> Preferences button<br />
Click the printing<br />
preferences button<br />
December 2010 Rev. 1 BL Pg 1<br />
ToshibaMFPSet<strong>Username</strong>Set<strong>Department</strong><strong>Code</strong>.docx
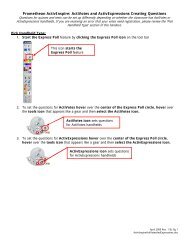
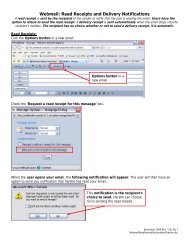
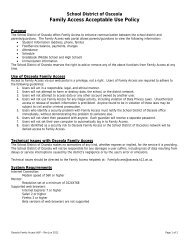
4. Click the Others tab<br />
Click the others tab<br />
5. Enter the username you desire to show up on print jobs <strong>and</strong> enter the department code you want to print from<br />
Enter your username <strong>and</strong><br />
your department code<br />
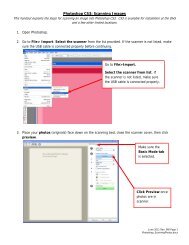
6. Click the apply button <strong>and</strong> your new settings are complete<br />
December 2010 Rev. 1 BL Pg 2<br />
ToshibaMFPSet<strong>Username</strong>Set<strong>Department</strong><strong>Code</strong>.docx