Tactys Operative Technique - Stryker
Tactys Operative Technique - Stryker
Tactys Operative Technique - Stryker

You also want an ePaper? Increase the reach of your titles
YUMPU automatically turns print PDFs into web optimized ePapers that Google loves.
Hand &<br />
Wrist<br />
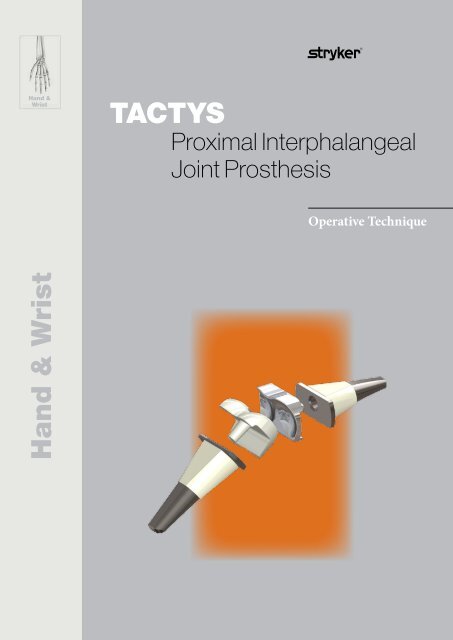
TACTYS<br />
Proximal Interphalangeal<br />
Joint Prosthesis<br />
<strong>Operative</strong> <strong>Technique</strong><br />
Hand & Wrist
TACTYS<br />
This publication sets forth detailed<br />
recommended procedures for using<br />
<strong>Stryker</strong> Osteosynthesis devices and<br />
instruments.<br />
It offers guidance that you should<br />
heed, but, as with any such technical<br />
guide, each surgeon must consider<br />
the particular needs of each patient<br />
and make appropriate adjustments<br />
when and as required.<br />
A workshop training is recommended<br />
prior to first surgery.<br />
All non-sterile devices must be<br />
cleaned and sterilized before use.<br />
Follow the appropriate instructions<br />
for use (IFU). Multi-component<br />
instruments must be disassembled<br />
for cleaning. Please refer to the<br />
corresponding assembly/disassembly<br />
instructions.<br />
See package insert for a complete<br />
list of potential adverse effects,<br />
contraindications, warnings and<br />
precautions.<br />
The surgeon must discuss all relevant<br />
risks, including the finite lifetime of<br />
the device, with the patient, when<br />
necessary.<br />
2
Contents<br />
Page<br />
1. Indications and Contraindications 4<br />
Indications 4<br />
Contraindications 4<br />
Concept 4<br />
Precautions 4<br />
2. Characteristics 5<br />
3. <strong>Operative</strong> <strong>Technique</strong> 6<br />
Approaches 6<br />
Resection of proximal and distal articular surfaces 8<br />
Preparation of the Proximal Phalanx 10<br />
Preparation of the Distal Phalanx 12<br />
Fitting the trial stem 14<br />
Positioning of the trial articulating surfaces 16<br />
Fitting the final implants 18<br />
Closure of the extensor apparatus 19<br />
Ordering Information – Implants 21<br />
Ordering Information – Instruments 22<br />
3
Indications, Precautions & Contraindications<br />
Indications<br />
The <strong>Tactys</strong> prosthesis is intended for<br />
use in hand proximal interphalangeal<br />
joint arthroplasty associated with<br />
osteoarthritis, rheumatoid arthritis,<br />
trauma (fracture) and revision surgery.<br />
Concept<br />
The innovative four-part prosthesis<br />
simulates the physiological movement<br />
of the joint while limiting bone<br />
resection. The design is modular to<br />
suit different morphologies and to<br />
enable intraoperative tensioning of<br />
the joint.<br />
Precautions<br />
<strong>Stryker</strong> Osteosynthesis systems have<br />
not been evaluated for safety and<br />
compatibility in MR environment<br />
and have not been tested for heating<br />
or migration in the MR environment,<br />
unless specified otherwise in the product<br />
labeling or respective operative<br />
technique. Detailed information is<br />
included in the instructions for use<br />
being attached to every implant.<br />
Contraindications<br />
• Acute or chronic infections, local<br />
or systemic.<br />
• Muscular, neurological or vascular<br />
severe deficiency affecting the<br />
articulation.<br />
• Osseous demineralization or<br />
destruction being able to affect the<br />
implant fixing.<br />
• The association of this implant with<br />
implants having another origin is not<br />
agreed.<br />
• Surgical procedures others that those<br />
mentioned in the INDICATIONS<br />
section.<br />
• Do not use on patients who are<br />
allergic to the product’s components<br />
or who have known allergies.<br />
More than 400 configurations at your disposal<br />
4
Characteristics<br />
Proximal articulating surface made of<br />
polymer that can easily be replaced in<br />
the event of revision.<br />
Proximal<br />
Articulating Surface<br />
Ultra-High Molecular<br />
Weight Polyethylene<br />
Distal Articulating Surface<br />
Cobalt-Chromium Alloy<br />
Distal Stem<br />
Titanium Alloy<br />
Half Hydroxyapetite<br />
coating<br />
Press-fit Anatomical<br />
Design<br />
Half Hydroxyapatite<br />
coating<br />
Proximal stem<br />
Titanium Alloy<br />
Press-fit<br />
Anatomical Design<br />
Abutment to<br />
prevent stem<br />
from sinking into<br />
phalanx<br />
Instrumentation<br />
• Ergonomic instrumentation specific<br />
to each phalange.<br />
• Colour-coding for each instrument<br />
and the box<br />
Orange: Distal<br />
Black: Proximal<br />
Proximal<br />
Instrumentation<br />
Trial Implants<br />
Distal<br />
Instrumentation<br />
Identification of XS, S, M, L trial<br />
implants by specific colour code<br />
L<br />
M<br />
S<br />
XS<br />
5
<strong>Operative</strong> <strong>Technique</strong><br />
Approaches<br />
The dorsal approach, thanks to its wide unimpeded access, is particularly<br />
recommended for implanting the <strong>Tactys</strong> prosthesis. However, the choice<br />
of approach is at the surgeon’s discretion according to his experience and training.<br />
Dorsal trans tendinous approach*<br />
Perform a curvilinear skin incision 3<br />
to 4cm along the back of the PIP joint.<br />
3 - 4cm<br />
Perform a median longitudinal<br />
incision into the extensor apparatus<br />
moving to the centre of the insertion<br />
of the central slip and continuing with<br />
the dorsal periosteum of P2.<br />
The incision begins in the middle<br />
of the proximal phalanx and runs<br />
through the centre of the middle<br />
phalanx.<br />
3 - 4cm<br />
Separate the two flaps of the extensor<br />
apparatus, one to radial and the other<br />
to ulnar in order to expose the joint.<br />
It is not necessary to detach the<br />
periosteum.<br />
* Source: Scientific literature on pg 20<br />
6
<strong>Operative</strong> <strong>Technique</strong><br />
Approaches<br />
Chamay-type approach*<br />
The skin approach is curvilinear or<br />
linear dorsal. The incision starts at<br />
the base of P1 and ends at the base<br />
of P2.<br />
3 - 4cm<br />
Proceed with the incision of the<br />
extensor apparatus. The incision starts<br />
from the distal base of P2, at the union<br />
of the lateral slips and of the central<br />
slip and ends in a V or U-shape at the<br />
proximal metaphysis of P1.<br />
Note:<br />
Take care not to incise the<br />
periosteum. It must remain<br />
intact to prevent adhesions<br />
with the tendon.<br />
Lift back the V or U-shape flap of the<br />
extensor. If necessary, proceed with<br />
a resection, exercising caution with<br />
respect to the distal osteophyte.<br />
* Source: Scientific literature on pg 20<br />
7
<strong>Operative</strong> <strong>Technique</strong><br />
Resection of proximal and distal articular surfaces<br />
Resection of the proximal articular<br />
surface (P1)<br />
Resection of the condyle is performed<br />
very close to the proximal insertion<br />
of the lateral ligaments using the<br />
oscillating saw while remaining<br />
perpendicular in both planes to<br />
the axis of the phalanx.<br />
Resect the dorsal osteophytes<br />
if necessary.<br />
Note:<br />
Flex the joint to its maximum<br />
extent. The cut through the<br />
condyle must pass very close<br />
to the lateral ligaments.<br />
Resection of the distal articular<br />
surface (P2)<br />
Perform a minimal resection of the<br />
articular surface of the 2nd phalanx<br />
with the aim of obtaining a flat surface<br />
perpendicular to the two planes and<br />
to the axis of the phalanx. Take care to<br />
give consideration to the insertion of<br />
the lateral ligaments.<br />
The resection is performed using an<br />
oscillating saw or using a burr, a gouge<br />
forceps or bone-cutting forceps.<br />
Note:<br />
The Chamay approach does<br />
not always permit the use of an<br />
oscillating saw for the preparation<br />
of P2. A truncated conical burr<br />
(maximum 5mm diameter) can<br />
be used instead. Be aware of the<br />
central slip when completing the<br />
resection.<br />
Reposition the two phalanges<br />
one facing the other to check the<br />
orthogonality of the cuts relative to<br />
the axis of the finger.<br />
8
<strong>Operative</strong> <strong>Technique</strong><br />
Checking the thicknesses of cuts<br />
The sizing control gauge<br />
(Ref XDI008001) allows you to both:<br />
1. Identify the anatomical dimensions<br />
of the surfaces and thus identify the<br />
most suitable L, M or S implant for<br />
the proximal and distal surface.<br />
Note:<br />
Make a note of the size of the<br />
articular surface previously<br />
selected in order to select the<br />
sizing pin for insertion.<br />
The prothesis is modular. The choice of the sizes of the articular surfaces can be<br />
changed intra-operatively.<br />
2. Measure the gap between the<br />
two phalanges to check whether<br />
the bone resection is sufficient to<br />
accommodate at least one distal<br />
articular surface of thickness “L-,<br />
M- or S-”<br />
If the pin can be inserted into the joint<br />
space then the bone resection<br />
is sufficient.<br />
If the pin does not fit, then the bone<br />
resections need to be adjusted to<br />
achieve a sufficiently large gap adapted<br />
to the selected size (S-, L-, M-).<br />
9
<strong>Operative</strong> <strong>Technique</strong><br />
Preparation of the Proximal Phalanx<br />
Proximal seat<br />
Use of the pre-drilling punch<br />
The punch (Ref XDI006001) has an<br />
anatomical design shaped like the<br />
articular surface. The punch enables<br />
the identification of the drilling<br />
position in the medullary canal.<br />
Position Check<br />
Insertion of the 1.5 diameter wire<br />
(Provided in the <strong>Tactys</strong> instrument<br />
set.)<br />
Take a frontal and lateral X-Ray.<br />
Radiographic criteria:<br />
Positioning must be perfectly<br />
intramedullary and into the axis<br />
of the phalanx in both planes.<br />
Seat Preparation<br />
Fitting a S, M, L Stem<br />
Start the preparation of the housing<br />
using the proximal cannulated rasp<br />
(Ref XRP005001) until it abuts the<br />
proximal surface.<br />
10
<strong>Operative</strong> <strong>Technique</strong><br />
Note:<br />
If very hard bone is encountered,<br />
it may be necessary to alternate<br />
between using the cannulated<br />
rasp and the intramedullary<br />
reamer (Ref XFR003001;<br />
Maximum speed limit of the<br />
centromedullar reamer: 100<br />
000 min- 1 ) or guide wire (Ref<br />
XVIPR02001) in order to<br />
successfully create the housing.<br />
It is advisable to take an X-Ray<br />
to check the progress of the rasp.<br />
Fitting an XS stem<br />
For an XS-sized stem (usually the 5th<br />
digital ray) the housing is prepared<br />
directly using the XS proximal rasp<br />
(Ref XRP006001).<br />
Withdraw the wire, then rasp using<br />
the proximal progressive rasp<br />
(Ref XRP007001) until successfully<br />
obtaining a properly adapted seat.<br />
11
<strong>Operative</strong> <strong>Technique</strong><br />
Use the graduated markings on<br />
the measuring tool (Ref XDI007001)<br />
to assess which stem to select.<br />
Note:<br />
As the prosthesis is fully modular,<br />
the articular surface selected<br />
is compatible with any stem<br />
S, M or L.<br />
Preparation of the Distal Phalanx<br />
Distal seat<br />
Using the pre-drilling punch<br />
The punch (Ref XDI006002) has an<br />
anatomical design shaped like the<br />
articular surface. The punch enables<br />
the identification of the drilling<br />
position in the medullary canal.<br />
Position Check<br />
Insert a 1.5mm diameter wire and take<br />
a frontal and lateral X-Ray to check<br />
that it is correclty positioned.<br />
Radiographic criteria:<br />
Positioning must be perfectly<br />
intramedullary and into the axis<br />
of the phalanx in both planes.<br />
12
<strong>Operative</strong> <strong>Technique</strong><br />
Seat Preparation<br />
Fitting a stem S, M or L<br />
Start to prepare the seat by using<br />
the distal cannulated rasp<br />
(Ref XRP005002).<br />
Note:<br />
If very hard bone is encountered,<br />
it may be necessary to alternate<br />
between using the cannulated<br />
rasp and the intramedullary<br />
reamer (Ref XFR003001;<br />
Maximum speed limit of the<br />
centromedullar reamer: 100<br />
000 min- 1 ) or guide wire (Ref<br />
XVIPR02001) in order to<br />
successfully create the housing.<br />
It is advisable to take an X-Ray to<br />
check the progress of the rasp.<br />
Fitting an XS stem<br />
In the case of an XS-sized stem<br />
(5th digital ray mainly) the seat<br />
is prepared directly using the<br />
“XS distal rasp”.<br />
Withdraw the wire, then rasp using<br />
the distal progressive rasp (Ref<br />
XRP007002), until successfully<br />
obtaining a properly adapted seat.<br />
13
<strong>Operative</strong> <strong>Technique</strong><br />
Use the graduated markings on the<br />
measuring tool (Ref XDI007002)<br />
to assess which stem to select.<br />
Note:<br />
The prosthesis is modular.<br />
The distal stem is neither<br />
dependent on the predetermined<br />
size using the checking tool,<br />
nor on the proximal stem implant<br />
that was originally identified as<br />
being suitable.<br />
Fitting the trial stem<br />
Fitting the proximal trial stem<br />
Fit the stem into the seat then proceed<br />
with impaction using the proximal<br />
impactor (Ref XIM007001).<br />
14
<strong>Operative</strong> <strong>Technique</strong><br />
Fitting the distal trial stem<br />
Impaction is performed using the<br />
distal impactor (Ref XIM007002).<br />
Palmar proximal resection<br />
using the cutting guide<br />
The guide (Ref XVIPR001001)<br />
is positioned to rest against the dorsal<br />
stop of the proximal trial stem.<br />
The pin of the guide is inserted<br />
into the housing of the trial stem.<br />
Use an oscillating saw to complete the<br />
palmar resection<br />
Note:<br />
The use of a narrow saw is<br />
recommended so as to minimise<br />
the risk of damage to the lateral<br />
ligaments.<br />
Dorsal cortex removal<br />
Take care to free the dorsal cortex<br />
of P1 (1), using a saw or a gouge<br />
forceps, so as to eliminate residual<br />
bone debris. If this is necessary, use<br />
the saw to remove final bone debris<br />
from the palmar resection (2).<br />
Note:<br />
The presence of bone debris at the<br />
periphery of the stem may impair<br />
the impactaction of the final<br />
surface and its retention on the<br />
stem.<br />
15
<strong>Operative</strong> <strong>Technique</strong><br />
Positioning of the trial articulating surfaces<br />
Fitting the articulating<br />
trial surfaces<br />
Choose articulating surface implants<br />
taking into account the anatomical<br />
dimensions of the condyle and the gap<br />
previously identified using the sizing<br />
control tool (step 2, page 9). Ensure<br />
that the selected surfaces match the<br />
patient’s anatomy as closely as possible.<br />
Start by positioning a proximal trial<br />
surface, then select a distal trial surface<br />
within the smallest thickness range<br />
(S-, M- or L-).<br />
Note:<br />
When fitting the proximal<br />
surface, it is necessary to<br />
thoroughly check that the<br />
proximal surface is in positive<br />
contact with the trial stem. If not,<br />
cleaning of the stem periphery<br />
(page 15) must be repeated.<br />
Articular tension and<br />
check adjustment<br />
It is possible to adjust articular tension<br />
by inserting a distal surface of a greater<br />
or lesser thickness.<br />
Complete several tests to determine<br />
the best performing combination.<br />
Note:<br />
With a transtendinous approach,<br />
the correctness of the articular<br />
tension can be assessed by the<br />
effect of tenodesis. During<br />
flexion-extension of the wrist,<br />
the tenodesis effect of the extensor<br />
apparatus must allow full flexion<br />
and extension of the PIP.<br />
Implants, stems and surfaces are interchangeable.<br />
16
<strong>Operative</strong> <strong>Technique</strong><br />
Osteophyte check<br />
Take frontal and lateral X-Rays<br />
of the trial implants. Check that<br />
no osteophyte is impairing the<br />
positioning of the implants<br />
Removal of the trial implants<br />
Remove the articulating surfaces using<br />
the forceps (Ref XPI009001) and then<br />
the stems using the removal forceps<br />
(Ref XPI009002).<br />
17
<strong>Operative</strong> <strong>Technique</strong><br />
Fitting the final<br />
implants<br />
Preparation of the extensor<br />
apparatus in the case of<br />
a transtendinous approach and<br />
reinsertion* of the central slip.<br />
Before fitting the final stems, make<br />
two holes on the dorsal face of the<br />
median phalanx for reinsertion of the<br />
extensor apparatus.<br />
Note:<br />
Reinsertion of the central slip is at<br />
the surgeons discretion.<br />
A reinsertion with excessive<br />
tension may cause postoperative<br />
stiffness.<br />
Fitting the final implants<br />
The procedure for fitting the final<br />
implants is exactly the same as the<br />
procedure for fitting the trial implants.<br />
Impaction of the articulating surfaces<br />
is completed using distal and proximal<br />
articulating surface impactors.<br />
1. Insertion of the proximal stem.<br />
2. Inserting the distal stem.<br />
3. Impaction of the proximal surface.<br />
4. Impaction of the distal surface.<br />
Note:<br />
Be sure to follow the correct<br />
order for fitting components. It is<br />
preferable to impact the proximal<br />
surface before the distal surface.<br />
* Source: Scientific literature on pg 20<br />
18
<strong>Operative</strong> <strong>Technique</strong><br />
X-Ray check<br />
Check that the final implants are<br />
properly positioned using frontal<br />
and lateral X-Rays.<br />
Closure of the<br />
extensor apparatus<br />
Dorsal transtendinous approach*<br />
Reinsert the strip of the extensor<br />
apparatus (Fig.1) without excessive<br />
tension of the latter at the base of P2<br />
using two transosseous holes.<br />
Fig.2 shows reinsertion of the extensor<br />
apparatus without reinsertion of the<br />
central slip.<br />
Fig.1<br />
Fig.2<br />
Chamay approach*<br />
Once the prosthesis is fitted, suture<br />
the extensor using a fairly fine thread<br />
by means of individual, separate<br />
points. 20 to 25 points are generally<br />
required.<br />
After closing up the cutaneous flap,<br />
the finger is bandaged and strapped<br />
to the adjoining digit for immediate<br />
mobilization of the phalanges.<br />
Note:<br />
It is important not to hold the<br />
joint in strict extension.<br />
Chamay approach<br />
* Source: Scientific literature on pg 20<br />
19
Proposed postoperative care protocol<br />
The protocol must be tailored to each patient<br />
The following is recommended:<br />
• Strap the finger to the adjoining digit for 15 days and avoid any compressive<br />
dressing<br />
• Prevent any strict, prolonged immobilization in extension<br />
• Prevent any hyperextension<br />
• Focus on immediate rehabilitation in flexion<br />
• Elevate the hand<br />
A 15-day check-up will allow you to assess the degree of mobility of the joint,<br />
to prevent any eventual complications. An X-Ray in full flexion is recommended.<br />
* Scientific Literature: Transtendinous dorsal approach, Chamay approach<br />
Afifi, A. M., A. Richards, et al. (2010). “The extensor tendon splitting approach<br />
to the proximal interphalangeal joint: do we need to reinsert the central slip?” J<br />
Hand Surg Eur Vol 35(3): 188-91.<br />
Bickel, K. D. (2007). “The Dorsal Approach to Silicone Implant Arthroplasty of<br />
the Proximal Interphalangeal Joint.” The Journal of Hand Surgery 32(6): 909-913.<br />
Chamay, A. (1988). “Le lambeau tendineux triangulaire dorsal inversé, porte<br />
ouverte sur l’articulation interphalangienne proximale (IPP).” Annales de<br />
Chirurgie de la Main 7(2): 179-183.<br />
Mercer, D., J. FitzPatrick, et al. (2009). “Extensor Tendon Repair With and<br />
Without Central Slip Reattachment to Bone: A Biomechanical Study.” The Journal<br />
of Hand Surgery 34(1): 108-111.<br />
20
Ordering Information – Implants<br />
REF<br />
Description<br />
WIPSP11<br />
Proximal surface size L<br />
WIPSP10<br />
Proximal surface size M<br />
WIPSP07<br />
Proximal surface size S<br />
WIPTP18<br />
Proximal stem size L<br />
WIPTP16<br />
Proximal stem size M<br />
WIPTP14<br />
Proximal stem size S<br />
WIPTP12<br />
Proximal stem size XS<br />
WIPSD1205 Distal surface size L-<br />
WIPSD1210<br />
Distal surface size L0<br />
WIPSD1215 Distal surface size L+<br />
WIPSD1005 Distal surface size M-<br />
WIPSD1010<br />
Distal surface size M0<br />
WIPSD1015 Distal surface size M+<br />
WIPSD0705 Distal surface size S-<br />
WIPSD0710<br />
Distal surface size S0<br />
WIPSD0715 Distal surface size S+<br />
WIPTD15<br />
Distal stem size L<br />
WIPTD13<br />
Distal stem size M<br />
WIPTD11<br />
Distal stem size S<br />
WIPTD09<br />
Distal stem size XS<br />
21
Ordering Information – Instruments<br />
REF<br />
Description<br />
XDI006001<br />
Proximal punch<br />
XDI006002<br />
Distal punch<br />
XRP005001<br />
Proximal canulated rasp<br />
XRP005002<br />
Distal canulated rasp<br />
XRP007001<br />
Progressive proximal rasp<br />
XRP007002<br />
Progressive distal Rasp<br />
XRP006001<br />
Proximal XS rasp<br />
XRP006002<br />
Distal XS rasp<br />
XDI007001<br />
Proximal stem measuring tool<br />
XDI007002<br />
Distal stem measuring tool<br />
XIM007001<br />
Proximal stem impactor<br />
XIM007002<br />
Distal stem impactor<br />
XIM007003<br />
Proximal surface impactor<br />
XIM007004<br />
Distal surface impactor<br />
XVIPR001001<br />
Palmar cutting guide<br />
XPI009001<br />
Surface forceps<br />
XPI009002<br />
Stem forceps<br />
AGK0215100<br />
Kirchner wire<br />
XTU001001<br />
Wire tube<br />
XDI008001<br />
Size Control Gauge<br />
XFR003001<br />
Centromedullary reamer<br />
XVIPR02001<br />
Guide Wire<br />
22
Ordering Information – Trials<br />
REF<br />
Description<br />
XFA010110<br />
Proximal surface trial size L<br />
XFA010120<br />
Proximal surface trial size M<br />
XFA010130<br />
Proximal surface trial size S<br />
XFA009110<br />
Proximal stem trial size L<br />
XFA009120<br />
Proximal stem trial size M<br />
XFA009130<br />
Proximal stem trial size S<br />
XFA009140<br />
Proximal stem trial size XS<br />
XFA010210 Distal surface trial size L-<br />
XFA010211<br />
Distal surface trial size L0<br />
XFA010212 Distal surface trial size L+<br />
XFA010220 Distal surface trial size M-<br />
XFA010221<br />
Distal surface trial size M0<br />
XFA010222 Distal surface trial size M+<br />
XFA010230 Distal surface trial size S-<br />
XFA010231<br />
Distal surface trial size S0<br />
XFA010232 Distal surface trial size S+<br />
XFA009210<br />
Distal stem trial size L<br />
XFA009220<br />
Distal stem trial size M<br />
XFA009230<br />
Distal stem trial size S<br />
XFA009240<br />
Distal stem trial size XS<br />
23
Notes<br />
24
Notes<br />
25
1275 0120<br />
This document is intended solely for the use of healthcare professionals. A surgeon must always rely on his or her own<br />
professional clinical judgment when deciding whether to use a particular product when treating a particular patient.<br />
<strong>Stryker</strong> does not 1275<br />
dispense medical advice and recommends that surgeons be trained in the use of any particular<br />
product before using it in surgery.<br />
Manufactured by:<br />
Memometal Technologies SA<br />
Campus de Ker Lann<br />
Rue Blaise Pascal<br />
35170 Bruz<br />
France<br />
www.stryker.com<br />
The information presented is intended to demonstrate a <strong>Stryker</strong> product. A surgeon must always refer to the package<br />
insert, product label and/or instructions for use, including the instructions for Cleaning and Sterilization (if<br />
applicable), before using any <strong>Stryker</strong> product. Products may not be available in all markets because product availability<br />
is subject to the regulatory and/or medical practices in individual markets. Please contact your <strong>Stryker</strong> representative<br />
if you have questions about the availability of <strong>Stryker</strong> products in your area.<br />
<strong>Stryker</strong> Corporation or its divisions or other corporate affiliated entities own, use or have applied for the following<br />
trademarks or service marks: <strong>Tactys</strong>, <strong>Stryker</strong>. All other trademarks are trademarks of their respective owners or<br />
holders.<br />
The products listed above are CE marked.<br />
Literature Number : 982384 Rev 0<br />
Copyright © 2012 <strong>Stryker</strong>