2006 March (529kB) - Pacific Soaring Council
2006 March (529kB) - Pacific Soaring Council
2006 March (529kB) - Pacific Soaring Council

You also want an ePaper? Increase the reach of your titles
YUMPU automatically turns print PDFs into web optimized ePapers that Google loves.
(DEPLOYING & STEERING YOUR PARACHUTE)<br />
When we left off, you managed to successfully escape<br />
your disabled aircraft. Unless you bail out on a regular<br />
basis, these next two segments in our three-part series<br />
will involve mostly mental practice and visualization. But<br />
it is valuable practice time that can save your life.<br />
DON’T FALL OUT OF YOUR PARACHUTE<br />
All the practice in the world won’t help if your parachute<br />
doesn’t fit properly. It’s rather embarrassing to be<br />
tumbling in freefall after a successful egress and notice a<br />
parachute just like yours floating a few feet away! You<br />
can fall out of an improperly adjusted harness. This has<br />
happened in the past and it’s so easy to remedy. Your<br />
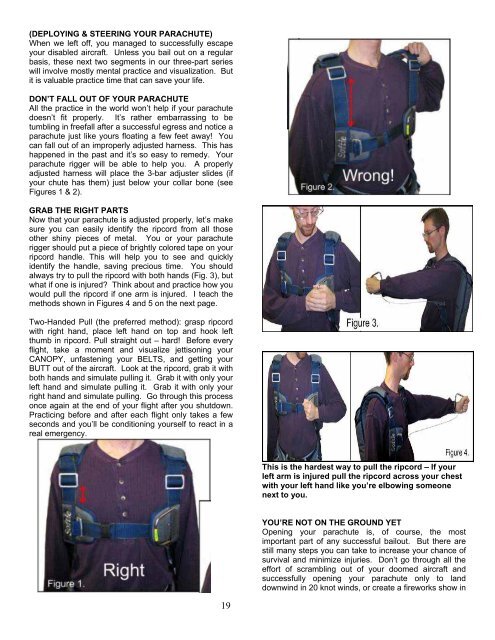
parachute rigger will be able to help you. A properly<br />
adjusted harness will place the 3-bar adjuster slides (if<br />
your chute has them) just below your collar bone (see<br />
Figures 1 & 2).<br />
GRAB THE RIGHT PARTS<br />
Now that your parachute is adjusted properly, let’s make<br />
sure you can easily identify the ripcord from all those<br />
other shiny pieces of metal. You or your parachute<br />
rigger should put a piece of brightly colored tape on your<br />
ripcord handle. This will help you to see and quickly<br />
identify the handle, saving precious time. You should<br />
always try to pull the ripcord with both hands (Fig. 3), but<br />
what if one is injured? Think about and practice how you<br />
would pull the ripcord if one arm is injured. I teach the<br />
methods shown in Figures 4 and 5 on the next page.<br />
Two-Handed Pull (the preferred method): grasp ripcord<br />
with right hand, place left hand on top and hook left<br />
thumb in ripcord. Pull straight out – hard! Before every<br />
flight, take a moment and visualize jettisoning your<br />
CANOPY, unfastening your BELTS, and getting your<br />
BUTT out of the aircraft. Look at the ripcord, grab it with<br />
both hands and simulate pulling it. Grab it with only your<br />
left hand and simulate pulling it. Grab it with only your<br />
right hand and simulate pulling. Go through this process<br />
once again at the end of your flight after you shutdown.<br />
Practicing before and after each flight only takes a few<br />
seconds and you’ll be conditioning yourself to react in a<br />
real emergency.<br />
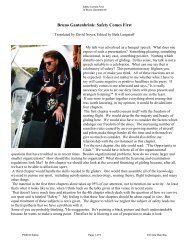
This is the hardest way to pull the ripcord – If your<br />
left arm is injured pull the ripcord across your chest<br />
with your left hand like you’re elbowing someone<br />
next to you.<br />
YOU’RE NOT ON THE GROUND YET<br />
Opening your parachute is, of course, the most<br />
important part of any successful bailout. But there are<br />
still many steps you can take to increase your chance of<br />
survival and minimize injuries. Don’t go through all the<br />
effort of scrambling out of your doomed aircraft and<br />
successfully opening your parachute only to land<br />
downwind in 20 knot winds, or create a fireworks show in<br />
19