
You also want an ePaper? Increase the reach of your titles
YUMPU automatically turns print PDFs into web optimized ePapers that Google loves.
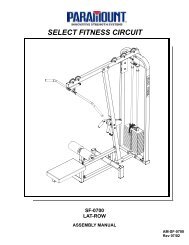
<strong>PFT</strong>-200<br />
FUNCTIONAL TRAINER<br />
ASSEMBLY MANUAL<br />
<strong>AM</strong>-<strong>PFT</strong>-<strong>200A</strong>
A MESSAGE TO OUR CUSTOMERS<br />
Thank you for purchasing the <strong>Paramount</strong> <strong>PFT</strong>-200 Functional Trainer. Because of the many<br />
unique features included in this product, this manual was created to provide you with information<br />
on how to properly assemble and maintain your equipment. Proper maintenance will ensure that<br />
your new equipment will last for years.<br />
For your convenience, product questions can be answered by an Authorized <strong>Paramount</strong> Dealer or<br />
by contacting a <strong>Paramount</strong> Customer Service Representative at:<br />
1-800-721-2121 or 1-323-721-2121<br />
Office hours are Monday-Friday, 7:30 am - 4:30 pm PST<br />
Or email us at nasales@paramountfitness.com<br />
Thank You for your patronage.<br />
<strong>Paramount</strong> <strong>Fitness</strong> Corporation<br />
6450 East Bandini Blvd.<br />
Los Angeles, CA 90040<br />
!<br />
IMPORTANT<br />
REVIEW THE GENERAL MAINTENANCE MANUAL FOR IMPORTANT SAFETY AND MAINTENANCE<br />
TIPS. THE MANUAL HAS BEEN INCLUDED WITH YOUR MACHINE ORDER AND CAN ALSO BE<br />
DOWNLOADED FROM OUR WEBSITE AT: http://www.paramountfitness.com<br />
PLEASE RETAIN THIS MANUAL FOR FUTURE REFERENCE.<br />
2
TABLE OF CONTENTS<br />
SAFETY.......................................................................................................................................... 4<br />
GENERAL CARE AND MAINTENANCE................................................................................................. 5<br />
MACHINE SPECIFICATIONS.............................................................................................................. 6<br />
PREPARATION................................................................................................................................ 7<br />
ASSEMBLING THE MACHINE............................................................................................................ 8<br />
OPTIONAL INCREMENTAL ADDER WEIGHT SYSTEM............................................................................ 10<br />
OPTIONAL ACCESSORY KIT.............................................................................................................. 13<br />
CABLE ROUTING & INFORMATION.................................................................................................... 14<br />
MACHINE LABELS........................................................................................................................... 15<br />
MACHINE DISASSEMBLY................................................................................................................. 16<br />
SERVICE........................................................................................................................................ 18<br />
PAR<strong>AM</strong>OUNT LIMITED WARRANTY................................................................................................... 19<br />
3
SAFETY<br />
1. Review and understand all of the warning labels affixed to this machine and on the facility safety<br />
sign. Replace any warning label at first sign of wear. Labels and the Facility Safety Sign may be<br />
obtained from <strong>Paramount</strong> free of charge.<br />
2. Be certain that the machine operation is understood before it is used. Refer to the instruction label<br />
provided with the machine.<br />
3. Keep children away from this equipment. Supervise use by teenagers.<br />
4. DO NOT high-pin or double-pin the weight stack. DO NOT allow the machine to be used if the top<br />
plate or weight stack is pinned in a raised position. Use an assistant and carefully return the<br />
machine to the proper position with the cap plate resting on the top weight. Inspect the cable to<br />
ensure that it is seated in all of the pulleys.<br />
5. Use ONLY <strong>Paramount</strong> weight selector pins. Other manufacturer’s pins may work free of the weight<br />
stack causing possible injury. Be certain the pin is completely inserted prior to use.<br />
6. Cables: Inspect the entire cable weekly and the end fittings daily. Pay close attention to the area<br />
going over pulleys and to the end connections. Replace all cables at first signs of wear or on an<br />
annual basis. Use only <strong>Paramount</strong> supplied replacement cables.<br />
7. Nuts, Bolts, and Fasteners: Check tightness weekly. If any hardware has become loose, retighten<br />
and/or use Loctite Threadlocker 242.<br />
8. Frames and Lifting Arms: Inspect weekly for integrity and function. Replace any component at first<br />
signs of wear.<br />
9. Adjustment Pins: check the function of the position selector pins on the adjustable arms. Make<br />
sure that the selector pin inserts completely into each position without binding.<br />
10. DO NOT attempt to free any jammed assemblies by yourself as this may cause injury.<br />
11. USE ONLY the <strong>Paramount</strong> incremental adder weight system designed for this machine.<br />
12. Instruct Users NOT to make arm position adjustments during exercise or when pulling on the<br />
cable end. Always support the arms when making position adjustments.<br />
13. Instruct Users to return the handgrips and bars to their rest position before releasing. Sudden<br />
release of the handgrips and bars may cause serious injury to users or bystanders.<br />
14. Instruct users NOT to attach two cables to single bars or handles unless provided by <strong>Paramount</strong> &<br />
specifically designed for this purpose.<br />
15. Instruct Users not to wear loose or dangling clothes or have headphone wires hanging when using<br />
this equipment.<br />
16. It is recommended that users receive a thorough medical exam before commencing an exercise<br />
program. All medical issues should be reviewed to ensure that weight training will not aggravate<br />
pre-existing medical conditions.<br />
17. Check the function of your machine regularly by verifying the following:<br />
• Cables and end fittings are intact.<br />
• All adjustments are possible and carried out with ease.<br />
• The proper selector pin is in the weight stack.<br />
• The exercise is performed smoothly, free of noise and/or binding.<br />
• The guide rods are properly lubricated.<br />
18. If you have any questions, do not hesitate to contact your <strong>Paramount</strong> dealer or <strong>Paramount</strong><br />
<strong>Fitness</strong> Corp. at (800)721-2121 or (323) 721-2121 or nasales@paramountfitness.com.<br />
19. Refer to Maintenance Schedule label on the machine and this manual for when to perform<br />
maintenance.<br />
4
GENERAL CARE AND MAINTENANCE<br />
1. Cable Ends: Inspect end fittings daily for wear. Replace cables at the first sign of wear or on an<br />
annual basis. If the cable tension has been adjusted, be certain that the cable nut is tight.<br />
2. Nuts, Bolts, and Fasteners: Check tightness weekly. If any hardware has become loose, retighten<br />
and/or use Loctite TM brand Threadlocker 242.<br />
3. Frames: Wipe machine with a damp cloth and dry completely each day. This includes painted<br />
parts, chrome parts and upholstered pads.<br />
4. Painted and chrome plated parts: Use Simple Green or similar cleaner for light dirt and grime. Use<br />
Turtle Wax Polishing Compound or a good car polish to remove heavier dirt and grease as well as<br />
for polishing. DO NOT use solvents, lacquer thinner, acetone or finger nail polish remover. For<br />
scuffs and marks that are not removed by the above methods use a soft scrub cleanser. Make<br />
sure all parts are dry upon completion.<br />
5. Weight stack enclosures (shrouds): Wipe down with a damp cloth as needed.<br />
6. Exercise instruction labels: Clean with soap and water as needed.<br />
7. Guide rods: Wipe all dirt and dust from the guide rods before applying a light application of Tri-<br />
Flow TM or other teflon spray lubricant. Spray the Tri-Flow TM on a rag and then wipe the guide rods<br />
with the rag. DO NOT use oil lubricants such as WD-40. Caution: Tri-Flow TM will stain carpet and<br />
clothing.<br />
8. Bronze bushings: Check monthly for signs of wear and replace as needed. Lubricate monthly with<br />
Tri-Flow TM .<br />
!<br />
DO NOT install any fitness equipment near a pool, hot tub or other damp locations. Corrosion<br />
caused by installation in these locations can lead to premature failure of components.<br />
5
MACHINE SPECIFICATIONS<br />
FEATURES<br />
• Two independent weight stacks (170 lb. per stack)<br />
• 2:1 weight stack reduction for low momentum movements.<br />
• 85 lb. max resistance at cable end (per handle).<br />
• (17) weight stack settings in 5 lb. increments (5 lb. - 85 lb.)<br />
• 90” cable travel per handle.<br />
• Machine weight = 730 lbs. [331 kg.]<br />
• Floor loading = 50 lbs/ft 2 [336 kg/m 2 ]<br />
• 12 vertical arm adjustments (154 degrees per arm)<br />
• 9 horizontal arm adjustments (105 degrees per arm)<br />
• OPTIONAL incremental adder weight system. Adds a +2.5 lb [1.13 kg.] increment for a<br />
total of (34) weight stack settings (5 lb. - 87.5 lb.)<br />
[325 CM]<br />
128 IN<br />
[99 CM]<br />
39 IN<br />
[167.6 CM]<br />
66 IN<br />
[162.5 CM]<br />
64 IN<br />
[223.3 CM]<br />
[201.3 CM] 88 IN<br />
79-1/4 IN<br />
6
PREPARATION<br />
HARDWARE BAG CONTENTS<br />
ITEM DESCRIPTION QTY PART #<br />
1 SELECTOR PIN, MAGNETIC 2 B 470<br />
2 MOLDED FOOT 4 S 550<br />
3 SNAP HOOK 2 B1005<br />
4 STRAP HANDLE 2 B1110A<br />
5 WEIGHT STACK LABEL<br />
85 LBS (38.5 KG.)<br />
2 B2173<br />
WEIGHT PLATE REQUIREMENTS<br />
Each machine requires (8) boxes of weight plates,<br />
(4) boxes per weight stack. Each box contains four<br />
10 lb. weight plates.<br />
10 LB. Weight Plate Box<br />
Part Number: B1602<br />
Comprised of<br />
(4) x 10 lb. Weight Plates<br />
TOOL REQUIREMENTS<br />
Ratchet and Socket:<br />
- 9/16” (Basic Installation)<br />
Wrenches:<br />
- 9/16” (Basic Installation)<br />
- 7/8” (Adder Weight Installation)<br />
- 15/16” (Adder Weight Installation)<br />
Phillips Screw Driver (Adder Weight Installation)<br />
Allen wrenches:<br />
- 5/32” (Adder Weight Installation)<br />
- 3/16” (Adder Weight Installation)<br />
- 5/16” (Adder Weight and/or Accessory Kit Installation)<br />
7
ASSEMBLING THE MACHINE<br />
ASSEMBLE FEET TO BASE FR<strong>AM</strong>E<br />
INSTALL WEIGHT PLATES<br />
1. Remove the rear panel held in place<br />
by the three thumbscrews at the top.<br />
2. If you ordered the optional adder<br />
weight system, remove the adder<br />
weight guide rods by pulling down on<br />
the adder weight guide rod retainers<br />
at the top of the guide rods. There is a<br />
spring directly under the guide rod<br />
sleeve. Retain it for re-assembly. (see<br />
page 12).<br />
GUIDE ROD RETAINER<br />
CAP PLATE<br />
GUIDE RODS<br />
3. Remove the bolt holding the guide rod<br />
retainer. Slide the guide-rod retainer<br />
up and allow guide rods to tilt toward<br />
the rear of the machine.<br />
4. Lift cap plate off of the guide rods.<br />
5. Install the weight plates, 16 plates<br />
per stack.<br />
6. Re-assemble the cap plate, guide rod<br />
retainers, incremental adder weight<br />
assembly (if ordered) and rear panel.<br />
8
ASSEMBLING THE MACHINE<br />
INSTALL WEIGHT STACK LABELS<br />
1. Verify that there are 16 weight plates installed on each stack.<br />
2. Wipe the front surface of the weights with isopropyl alcohol and allow to dry completely.<br />
3. Remove the backing from the label. Vertically center the 10 lb. label on the top weight and align<br />
the side of the label liner (front surface) with the outside edge of the pin hole in the weights.<br />
4. Verify that the label strip is straight and then remove the liner. As the liner comes off the labels,<br />
press and rub each label into place.<br />
5. Allow the adhesive to cure for 48 hours. DO NOT attempt to “test” the integrity of the labels after<br />
they have been installed.<br />
6. The part number is B2173 for the 85 lb. label and B2173KG for kg. label.<br />
Individual Labels<br />
LINER<br />
Align with outside<br />
edge of pin holes<br />
ASSEMBLE THE SELECTOR PINS<br />
ATTACH LANYARD RING<br />
9
OPTIONAL INCREMENTAL ADDER WEIGHT SYSTEM<br />
If you purchased your machine with the optional incremental adder weight system, it has been preinstalled.<br />
If you ordered the adder weight system after receiving the machine, these instructions<br />
will show you how to properly assemble it. The following parts are included with your kit:<br />
ITEM PART NUMBER DESCRIPTION QTY.<br />
1 <strong>PFT</strong>2007G301 Guide rods, square 2<br />
2 <strong>PFT</strong>2007W300X Adder weight assembly 2<br />
3 <strong>PFT</strong>2007W399 Base Support 2<br />
4 D 721 Washer, Rubber 2<br />
5 C 608 Screw, socket head, 1/4-20 x 3/4” lg. 4<br />
6 C 747 Lock washer, 1/4 4<br />
7 D 913 Spring, guide rod retainer 2<br />
8 S 572 Guide rod retainer 2<br />
9 9005ADR030X Adder Weight Selector Assembly 2<br />
10 <strong>PFT</strong>2007A199X Plate, Adder Weight Label 2<br />
11 9005ADR035 Cover, Adder Weight Selector 2<br />
12 C 702 Set Screw, cup point, 5/16-18 x 3/8” Lg. 4<br />
13 C 904A Screw, Truss Head, 1/4-20 x 3/4” Lg. 4<br />
14 D 588 Thrust Washer, 1” ID x .125 Thick 4<br />
15 D 160 Wave Spring Washer 2<br />
A. Remove the rear panel.<br />
B. Remove the pulleys from the cap<br />
plates (thereby disconnecting the<br />
cable).<br />
C. Remove the selector pin lanyard<br />
from the front of the cap plate pulley<br />
housing.<br />
D. Remove the weight stack guide rod<br />
retainers and slide the cap plates up &<br />
off the guide rods.<br />
GUIDE ROD RETAINER<br />
CAP PLATE<br />
GUIDE RODS<br />
See following page...<br />
10
OPTIONAL INCREMENTAL ADDER WEIGHT SYSTEM<br />
E. Remove the pulley housing from the cap<br />
plate by unscrewing it from the selector<br />
bar.<br />
F. Assemble the adder weight selector<br />
mechanism, thrust washers, wave spring<br />
washer, cover, and label plate to the cap<br />
plate as shown.<br />
SEE TABLE ON PREVIOUS<br />
PAGE FOR ITEM NUMBERS<br />
PULLEY HOUSING<br />
G. Re-assemble the cap plate and guide<br />
rod retainers to the machine.<br />
H. Re-assemble the cables and pulleys to<br />
the cap plate pulley housing along with the<br />
selector pin lanyard.<br />
CAP PLATE<br />
ASSEMBLY<br />
15 12<br />
14<br />
11<br />
13<br />
9<br />
10<br />
SELECTOR BAR<br />
I. Install the adder weight base supports<br />
with the noted hardware. Make sure to<br />
orient the angled cuts as shown.<br />
CAP PLATE<br />
J. Insert the square adder weight guide<br />
rods into the base supports.<br />
K. Slide the rubber washers and adder<br />
weight assemblies onto the guide rods as<br />
shown.<br />
2<br />
See following page...<br />
4<br />
SHOWN TRANSPARENT FOR CLARITY<br />
1<br />
3<br />
5,6<br />
11
OPTIONAL INCREMENTAL ADDER WEIGHT SYSTEM<br />
L. Assemble the spring and adder weight<br />
guide rod retainer sleeves as shown.<br />
8<br />
7<br />
1<br />
Test the adder weight selector<br />
mechanism. Make sure that it engages<br />
into the adder weight smoothly.<br />
Lubricate the guide rods using a Teflon<br />
based spray lubricant. <strong>Paramount</strong><br />
recommends TriFlow brand.<br />
Test the system by placing the selector pin<br />
into the cap plate and engaging the adder<br />
weight. Pull the cable to its maximum<br />
extension. Verify that it moves freely<br />
without binding or chattering. Return to<br />
the rest position. Verify that the cap plate<br />
returns smoothly.<br />
12
OPTIONAL ACCESSORY KIT HANGER<br />
If you purchased the optional accessory<br />
kit, these instructions will show you how<br />
to properly assemble it to your machine.<br />
1. Remove the rear panel.<br />
2. Remove the two bolts holding the<br />
balance bar. Have someone support<br />
the bar while you remove the bolts.<br />
REMOVE BOLTS<br />
3. Attach the rubber protector sheet to<br />
the front shroud as shown. First,<br />
clean the shroud area with isopropyl<br />
alcohol and let dry completely.<br />
Remove the backing from the rubber<br />
sheet. Start at the top and align the<br />
holes in the sheet with the holes in<br />
the shroud. Lightly press the sheet<br />
onto the shroud face by working your<br />
way from the top middle, out to the<br />
sides, then work your way down. After<br />
the sheet is in position, apply firm<br />
pressure, starting at the middle and<br />
work your way out toward either side.<br />
4. Place the balance bar over the<br />
accessory hanger plate. Line up the<br />
holes with the holes in the shroud and<br />
reinstall bolts. Hint: It may help to<br />
loosen the bolts on the side of the<br />
balance bar to assist in installing the<br />
bolts. Check the alignment and fully<br />
tighten all bolts.<br />
RUBBER PROTECTOR SHEET<br />
ACCESSORY HANGER PLATE<br />
BALANCE BAR<br />
LOOSEN BOLTS<br />
IF NECESSARY<br />
13
CABLE ROUTING & SPECIFICATION<br />
CABLE RETAINER SCREWS<br />
REPLACE CABLES at the first sign of wear OR on an annual basis!<br />
Part number: <strong>PFT</strong>2010CBL100X<br />
14
MACHINE LABELS<br />
The following are the Warning labels required for this <strong>PFT</strong>-200 machine. If any of these<br />
labels are missing or become damaged contact <strong>Paramount</strong>.<br />
Note: these labels are not to scale.<br />
B2051<br />
B2084<br />
LBL-PR-<strong>PFT</strong><strong>200A</strong><br />
LBL-WRN-<strong>PFT</strong><strong>200A</strong><br />
B2173<br />
B2612<br />
If this machine is to be installed in a<br />
public use facility, ASTM F1749<br />
requirements specify that the facility<br />
sign shown to the right is to be<br />
installed in plain view.<br />
If you did not receive the facility sign<br />
with your order, you can obtain one<br />
free of charge from <strong>Paramount</strong> by<br />
calling 1-800-721-2121.<br />
BE ALERT!<br />
THE FITNESS EQUIPMENT IN THIS FACILITY<br />
PRESENTS HAZARDS WHICH, IF NOT AVOIDED,<br />
COULD CAUSE SERIOUS INJURY OR DEATH.<br />
PRIOR TO USING THE EQUIPMENT, READ THE WARNING LABELS<br />
AND INSTRUCTION PLACARDS AFFIXED TO EACH MACHINE.<br />
IF YOU ARE UNSURE ON HOW TO USE A MACHINE, SEEK THE<br />
ASSISTANCE OF OUR FLOOR PERSONNEL. WE WILL BE HAPPY<br />
TO INSTRUCT YOU ON HOW TO USE THE EQUIPMENT PROPERLY.<br />
IMMEDIATELY REPORT ANY PIECE OF EQUIPMENT THAT IS NOT<br />
FUCTIONING PROPERLY TO OUR FLOOR PERSONNEL SO THAT<br />
IT MAY BE EVALUATED AND SERVICED PROMPTLY.<br />
DO NOT ATTEMPT TO USE OR FIX ANY PIECE OF EQUIPMENT<br />
THAT IS NOT FUNCTIONING PROPERLY<br />
ASTM F1749-96<br />
15
MACHINE DISASSEMBLY<br />
If you need to disassemble your machine for any reason (i.e. maneuver the machine through small<br />
doorway during installation), the diagram on the following page will show you the frame clamping<br />
locations.<br />
You will need the following tools:<br />
•Ratchet (1/2” drive, minimum)<br />
•1-7/16” Socket (1/2” drive, minimum)<br />
•6” Extension (1/2” drive, minimum)<br />
•1-1/16” Wrench (or socket)<br />
•7/16” Wrench (for shroud removal)<br />
•3/8” Hex Bit for 1/2” Drive Ratchet<br />
•5/16” Hex Bit or allen wrench (balance bar removal)<br />
DISASSEMBLY STEPS:<br />
1. Remove the Rear Shroud.<br />
2. If the weight stacks are installed, remove them from the machine. Also, remove the guide<br />
rods.<br />
3. Remove both cables.<br />
4. Disassemble the Balance Bar from the Front Shroud by removing (2) bolts.<br />
5. Remove the nuts and washers retaining the front shroud (5 top & 5 bottom).<br />
6. Disassemble the top frame first by removing the (2) 1”-8 lock nuts from inside the front pivot<br />
column tube. Then remove the 1/2”-13 socket head screws and lock washers (2) as shown.<br />
Lift the top frame off of the pivot columns.<br />
7. Remove the front shroud.<br />
8. Remove the (4) 3/4”-10 lock nuts from the base frame. Lift to separate the Pivot Columns<br />
and Support Columns from the machine.<br />
9. To reassemble the machine, follow these steps in reverse order. Loosely assemble ALL frame<br />
components and the front shroud before fully tightening any hardware. MAKE SURE that the<br />
frame hardware is FULLY tightened using a 1/2” drive ratchet. Re-assemble the remainder of<br />
the components.<br />
16
MACHINE DISASSEMBLY<br />
STEP 6<br />
STEP 5<br />
STEP 4<br />
Pivot Column<br />
Support Column<br />
STEP 5<br />
STEP 8<br />
17
SERVICE<br />
HOW TO OBTAIN SERVICE<br />
For warranty service, contact an Authorized <strong>Paramount</strong> Dealer or a <strong>Paramount</strong> Customer Service<br />
representative at 1-800-721-2121 or 1-323-721-2121. You can also email us at<br />
nasales@paramountfitness.com.<br />
Before you call, please have the following information ready:<br />
• Model Number: <strong>PFT</strong>-<strong>200A</strong><br />
• Serial Number: ________________________<br />
• Date of Installation: ____________________<br />
• A brief description of the problem<br />
The serial number tag is located inside of the base<br />
frame at the rear of the machine as shown.<br />
NOTE: Remove the rear panel to access the serial<br />
number information.<br />
Serial Number<br />
FINAL CHECK<br />
1. If you haven’t already done so, lubricate all of the guide rods with a teflon spray lubricant.<br />
<strong>Paramount</strong> recommends using TriFlow TM brand.<br />
2. Verify that the adjustment pins on both arms and both columns can be fully engaged into each<br />
position on the adjustment discs.<br />
3. Verify that the selector pin can be fully inserted into each weight plate.<br />
4. Place the selector pin into the holder on the cap plate. Slowly pull the handle through its full range<br />
of travel and let it retract. Verify that the cable moves freely, without any binding. Repeat this<br />
procedure for the other side.<br />
18
PAR<strong>AM</strong>OUNT LIMITED WARRANTY<br />
<strong>Paramount</strong> warrants to the original purchaser from a <strong>Paramount</strong> authorized dealer that<br />
<strong>Paramount</strong> equipment or equipment from a <strong>Paramount</strong> authorized manufacturing contractor will be<br />
free from defects in material and workmanship under normal use and service for the following periods<br />
and in the following respects:<br />
LIFETIME WARRANTY - Welds, Weight Plates and Guide Rods<br />
FIVE YEAR WARRANTY - Bronze Bushings, Sealed Rotating Bearings and Pulley Wheels<br />
ONE YEAR WARRANTY - Cables, Linear Bearings, Linear Shafts and all other components not<br />
mentioned elsewhere in this warranty<br />
NINETY DAY WARRANTY - Upholstery and Grips<br />
This limited warranty DOES NOT cover and no warranty is given with respect to:<br />
• Products not manufactured by <strong>Paramount</strong><br />
• Products which are altered without the express written consent of <strong>Paramount</strong><br />
• Products purchased other than directly from <strong>Paramount</strong> or through a <strong>Paramount</strong><br />
Authorized Dealer.<br />
All warranty periods begin to run from the date of delivery to the original purchaser. The<br />
obligation of <strong>Paramount</strong> under this warranty is limited to repairing or replacing warranted defective<br />
parts, as <strong>Paramount</strong> may elect, at <strong>Paramount</strong>'s plant in Los Angeles, California, without charge to<br />
purchaser for either parts or labor. Purchaser is responsible for all transportation and insurance costs<br />
on returned or replaced equipment to and from <strong>Paramount</strong>'s plant in Los Angeles.<br />
ANY IMPLIED WARRANTY, INCLUDING BUT NOT LIMITED TO THE IMPLIED WARRANTY OF<br />
FITNESS FOR A PARTICULAR PURPOSE AND THE IMPLIED WARRANTY OF MERCHANTABILITY, IS<br />
LIMITED TO ONE YEAR DURATION FROM THE DATE OF DELIVERY TO THE ORIGINAL PURCHASER.<br />
SOME STATES DO NOT ALLOW LIMITATIONS ON HOW LONG AN IMPLIED WARRANTY LASTS, SO THE<br />
ABOVE LIMITATION MAY NOT APPLY TO YOU. THE REMEDY OF REPAIR AND REPLACEMENT IS THE<br />
EXCLUSIVE AND SOLE REMEDY OF THE PURCHASER. PAR<strong>AM</strong>OUNT SHALL NOT BE LIABLE FOR ANY<br />
SPECIAL, INCIDENTAL, CONTINGENT OR CONSEQUENTIAL D<strong>AM</strong>AGES OF ANY KIND, INCLUDING, BUT<br />
NOT LIMITED TO, D<strong>AM</strong>AGE OF LOSS OF OTHER PROPERTY OR EQUIPMENT AND LOST PROFITS OR<br />
REVENUE. SOME STATES DO NOT ALLOW THE EXCLUSION OR LIMITATION OF INCIDENTAL OR<br />
CONSEQUENTIAL D<strong>AM</strong>AGES, SO THE ABOVE LIMITATION OR EXCLUSION MAY NOT APPLY TO YOU.<br />
No action for breach of this written limited warranty or an implied warranty shall be<br />
commenced more than one year after the accrual of the cause of action. This written limited warranty<br />
is the complete, final and exclusive agreement of the parties with respect to the quality or<br />
performance of the goods and any and all warranties and representations. No modifications of this<br />
limited warranty or waiver of its terms shall be binding on either party unless approved in writing by an<br />
authorized corporate officer of <strong>Paramount</strong>. This limited warranty gives you specific legal rights, and<br />
you may also have other rights which may vary from state to state. Contact <strong>Paramount</strong> <strong>Fitness</strong> Corp.,<br />
6450 E. Bandini Blvd., Los Angeles, California 90040-3185, for a list of authorized dealers or before<br />
returning any defective equipment. <strong>Paramount</strong> <strong>Fitness</strong> Corp. © 2008<br />
PAR<strong>AM</strong>OUNT FITNESS CORPORATION<br />
6450 E. Bandini Blvd., Los Angeles, CA 90040-3185 USA<br />
19
<strong>Paramount</strong> <strong>Fitness</strong> Corporation<br />
6450 E. Bandini Blvd.<br />
Los Angeles, CA 90040-3185<br />
Phone: 1-323-721-2121 Fax: 323-724-2000<br />
1-800-721-2121<br />
www.paramountfitness.com<br />
<strong>AM</strong>-<strong>PFT</strong>-<strong>200A</strong>.fm<br />
REV:6/9/10