

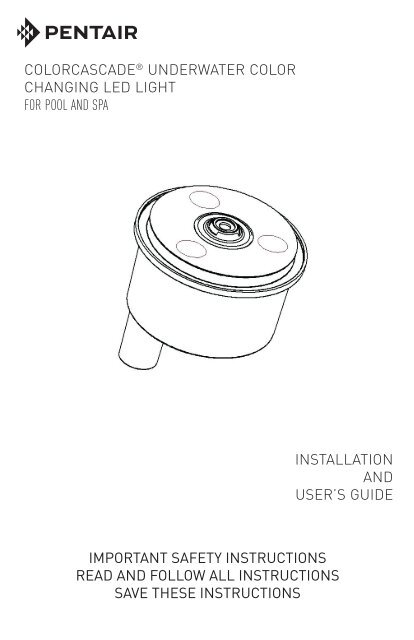
ColorCascade Underwater Color Changing Light ... - Pentair
ColorCascade Underwater Color Changing Light ... - Pentair
ColorCascade Underwater Color Changing Light ... - Pentair

Create successful ePaper yourself
Turn your PDF publications into a flip-book with our unique Google optimized e-Paper software.
COLORCASCADE ® UNDERWATER COLOR<br />
CHANGING LED LIGHT<br />
FOR POOL AND SPA<br />
INSTALLATION<br />
AND<br />
USER’S GUIDE<br />
IMPORTANT SAFETY INSTRUCTIONS<br />
READ AND FOLLOW ALL INSTRUCTIONS<br />
SAVE THESE INSTRUCTIONS<br />
COLORCASCADE ® <strong>Color</strong> Pool and Spa <strong>Light</strong> Installation and User’s Guide
Technical Support<br />
Phone: (800) 831-7133 - Fax: (800) 284-4151<br />
Web sites: www.pentairpool.com and www.staritepool.com:<br />
Contents<br />
IMPORTANT WARNING AND SAFETY INSTRUCTIONS................................ i<br />
Overview ......................................................................................................... 1<br />
Operating <strong><strong>Color</strong>Cascade</strong> <strong>Light</strong>s Using A Wall Switch ...................................... 3<br />
Operating <strong><strong>Color</strong>Cascade</strong> <strong>Light</strong>s In Standard Mode ......................................... 5<br />
Selecting a <strong><strong>Color</strong>Cascade</strong> <strong>Light</strong> Show Mode or Fixed <strong>Color</strong><br />
Using an IntelliBrite Controller ........................................................................ 6<br />
Installing <strong><strong>Color</strong>Cascade</strong> <strong>Light</strong> Fixture (new pool construction) ....................... 7<br />
Installing <strong><strong>Color</strong>Cascade</strong> <strong>Light</strong> Fixture<br />
(after electrical requirements are met) ............................................................ 7<br />
Replacing <strong><strong>Color</strong>Cascade</strong> <strong>Light</strong> Assembly (in an existing pool and spa) .......... 10<br />
Replacing <strong><strong>Color</strong>Cascade</strong> <strong>Light</strong> Assembly<br />
(after electrical requirements are met) .............................................................. 11<br />
Connecting <strong><strong>Color</strong>Cascade</strong> <strong>Light</strong>s to the Automation Control System .............. 12<br />
Setting Up <strong><strong>Color</strong>Cascade</strong> <strong>Light</strong>s with the Automation Control System ............ 14<br />
Connecting <strong><strong>Color</strong>Cascade</strong> <strong>Light</strong>s to an IntelliBrite Controller ......................... 17<br />
Troubleshooting .............................................................................................. 18<br />
APPENDIX:<br />
Accessories Bag Assembly Instructions .......................................................... 20<br />
<strong><strong>Color</strong>Cascade</strong> <strong>Light</strong> Extended Nozzle Installation Instructions ........................ 21<br />
<strong><strong>Color</strong>Cascade</strong> <strong>Light</strong> Replacement Parts .......................................................... 22<br />
LISTED<br />
E344048<br />
READ AND FOLLOW ALL INSTRUCTIONS IN THIS MANUAL.<br />
P/N 512280 Rev A - 12/1712<br />
COLORCASCADE ® <strong>Color</strong> Pool and Spa <strong>Light</strong> Installation and User’s Guide
IMPORTANT WARNING AND SAFETY INSTRUCTIONS<br />
SERIOUS BODILY INJURY OR DEATH CAN RESULT IF THIS LIGHT<br />
IS NOT INSTALLED AND USED CORRECTLY.<br />
INSTALLERS, POOL OPERATORS AND POOL OWNERS MUST<br />
READ THESE WARNINGS AND ALL INSTRUCTIONS BEFORE US-<br />
ING THE POOL AND/OR SPA LIGHT.<br />
Most states and local codes regulate the construction, installation,<br />
and operation of public pools and spas, and the construction of<br />
residential pools and spas. It is important to comply with these codes, many of which<br />
directly regulate the installation and use of this product. Consult your local building and<br />
health codes for more information.<br />
IMPORTANT NOTICE - Attention Installer: This Installation and User’s<br />
Guide (“Guide”) contains important information about the installation, operation<br />
and safe use of this underwater pool and spa light. This Guide should be given<br />
to the owner and/or operator of this equipment.<br />
Before installing this product, read and follow all warning notices<br />
and instructions in this Guide. Failure to follow warnings and<br />
instructions can result in severe injury, death, or property damage.<br />
Call (800) 831-7133 for additional free copies of these instructions. Please refer to www.<br />
pentairpool.com for more information related to this products.<br />
RISK OF ELECTRICAL SHOCK OR ELECTROCUTION:<br />
THE COLORCASCADE® LIGHT REQUIRES HIGH VOLTAGE<br />
WHICH CAN SHOCK, BURN, OR CAUSE DEATH.<br />
BEFORE WORKING ON THIS DEVICE! Always disconnect<br />
power to the pool and/or spa lights at the source circuit<br />
breaker from the light before servicing the light. Failure to do<br />
so could result in death or serious injury to service person,<br />
pool users or others due to electric shock. When installing<br />
and using this electrical equipment, basic safety precautions<br />
should always be followed, include the following:<br />
This underwater light must be installed by a licensed or certified electrician or a<br />
qualified pool professional in accordance with the current National Electrical Code<br />
(NEC), NFPA 70 or the Canadian Electrical Code (CEC), CSA C22.1. All applicable<br />
local installation codes and ordinances must also be adhered to. Improper<br />
installation will create an electrical hazard which could result in death or serious<br />
injury to pool users, installers or others due to electrical shock, and may also cause<br />
damage to power source. Always disconnect the power to the pool light at the<br />
circuit breaker before servicing the light. Failure to do so could result in death or<br />
serious injury to serviceman, pool users or others due to electrical shock.<br />
For countries in compliance with International Electrotechnical<br />
Commission (IEC) regulatory standards: The light fixture must<br />
be installed by a licensed or certified electrician or a qualified pool service person, in<br />
accordance with IEC 364-7-702 and all applicable local codes and ordinance. Improper<br />
installation will create an electrical hazard, which could result in death or serious injury<br />
to pool user, installer or other due to electrical shock and may also cause damage to the<br />
property.<br />
COLORCASCADE ® <strong>Color</strong> Pool and Spa <strong>Light</strong> Installation and User’s Guide<br />
i
ii<br />
IMPORTANT WARNING AND SAFETY INSTRUCTIONS<br />
Risk of Electrical Shock. Connect only to a branch circuit<br />
protected by a ground-fault circuit-interrupter (GFCI). Contact a qualified<br />
electrician if you cannot verify that the circuit is protected by a GFCI. This<br />
light must be connected only to a supply circuit that is protected by a ground-fault circuitinterrupter<br />
(GFCI). Such a GFCI should be provided by the installer and should be tested<br />
on a routine basis. To test the GFCI, push the test button. The GFCI should interrupt<br />
power. Push the reset button. Power should be restored. If the GFCI fails to operate in this<br />
manner, the GFCI is defective. If the GFCI interrupts power to the light without the test<br />
button being pushed, a ground current is following, indicating the possibility of an electric<br />
shock. Do not use this light. Disconnect the light and have the problem corrected by a<br />
qualified service representative before using. Locate your pool so that the wall is at least<br />
10 feet from all electrical receptacles and at least 20 feet from all receptacles not protected<br />
by a GFCI. It is also very important to locate the pool so that it is not under any electrical<br />
wiring, that is less than 18 feet vertically above the pool wall and within an area located 10<br />
feet outside the pool walls. The pool must also never be located under any lighting fixture<br />
or within five (5) feet measured horizontally from any fixture mounted less than five (5) feet<br />
vertically above the pool water level.<br />
NOTICE: The external flexible cable or cord of this luminaire cannot be replaced; if<br />
the cord is damaged, the luminaire shall be destroyed.<br />
Under no circumstances replace lights by splicing wire under water or<br />
behind niche.<br />
<strong><strong>Color</strong>Cascade</strong> ® <strong>Light</strong> is a 12 VAC system. ONLY USE an approved<br />
12 volt AC transformer, sold separately. When using a Junction Box, connect<br />
12 volt AC connections to junction box terminals. Never connect the light directly<br />
to high voltage lines.<br />
INSTALLERS AND INSPECTORS: THE COLORCASCADE LIGHT AND PLASTIC<br />
NICHE FORM A COMPLETE NON-METALLIC LOW VOLTAGE LIGHTING SYSTEM.<br />
THIS CONFIGURATION DOES NOT REQUIRE BONDING OR GROUNDING WHEN<br />
POWERED BY A LISTED 100 WATT OR 300 WATT 12 VAC TRANSFORMER AND<br />
INSTALLED IN COMPLIANCE WITH THE CURRENT NATIONAL ELECTRIC CODE<br />
(NEC). UNBONDED LIGHTING NEC PROVISIONS.<br />
WHEN THE UL LISTED NON-METALLIC COLORCASCADE LIGHT LOW VOLTAGE<br />
LIGHTS ARE USED WITH THE LIGHT APPROVED NICHE, THE CURRENT NEC<br />
PROVIDES AN EXCEPTION TO LUMINAIRE BONDING AND GROUNDING IN<br />
ARTICLE 680.6 AND 680.23 POOL WATER BONDING NEC PROVISIONS: FOR POOL<br />
WATER BONDING REQUIRED BY NEC ARTICLE 680.26C, CONCRETE POOLS ARE<br />
CONSIDERED CONDUCTIVE (REFER TO 680.26 (B)(1) DUE TO THE POROSITY<br />
OF CONCRETE AND THE BONDING OF REBAR. NO ADDITIONAL BONDING IS<br />
REQUIRED.<br />
COLORCASCADE ® <strong>Color</strong> Pool and Spa <strong>Light</strong> Installation and User’s Guide
<strong><strong>Color</strong>Cascade</strong> ® <strong>Color</strong> LED Pool and Spa <strong>Light</strong> Overview<br />
This manual describes how to install and replace the <strong><strong>Color</strong>Cascade</strong> ® <strong>Color</strong> LED <strong>Light</strong>.<br />
The <strong><strong>Color</strong>Cascade</strong> light provides brilliant vivid multi-colors along with spectacular lighting<br />
and underwater “bubbling” effects for your pool and spa. The energy efficient colored array<br />
utilizes IntelliBrite ® <strong>Color</strong> LED <strong>Light</strong> technology and can cycle through colors at varying<br />
speeds and in different sequences of colors. Choose one of the seven pre-programmed<br />
color light shows or select one of the five fixed colors to create virtually endless range of<br />
dramatic underwater lighting effects for a spectacular effect in your pool and spa.<br />
If multiple LED lighting are being used, it is recommended that these lights be run<br />
independent of each other, using a separate transformer for each group or type of light.<br />
Otherwise all lights connected to the same transformer will be working together.<br />
1<br />
Operating Modes (Standard and IntelliBrite)<br />
There are two operating settings within the <strong><strong>Color</strong>Cascade</strong> light, Standard Mode and<br />
IntelliBrite Mode. The default factory setting is IntelliBrite Mode. Use the Standard Mode<br />
setting if you wish to operate the bubbler differently than your other pool lights to make the<br />
water feature stand out and contrast. If there is a <strong><strong>Color</strong>Cascade</strong> light model installed in<br />
your pool or spa that does not support the IntelliBrite Mode feature, you will need to reset<br />
the <strong><strong>Color</strong>Cascade</strong> light to Standard Mode to match the existing set up, see page 5. To<br />
access the Standard Mode setting, you must cycle the power to the <strong><strong>Color</strong>Cascade</strong> light<br />
with 16 off/on sequences. To return to the IntelliBrite Mode setting, cycle the power 17<br />
off/on sequences.<br />
Operating <strong><strong>Color</strong>Cascade</strong> <strong>Light</strong>s Using a Wall Switch<br />
The <strong><strong>Color</strong>Cascade</strong> light can be controlled using a standard wall-mount light switch.<br />
Multiple <strong><strong>Color</strong>Cascade</strong> lights can be connected via a junction box to a single switch so that<br />
all lights can be switched on and off together. The lights are controlled by cycling the AC<br />
power to the 12 VAC power supply and from there to the lights from a standard wall switch.<br />
By turning the switch OFF and ON a specific number of times, the light activates one of<br />
the three light show modes or locks a chosen color.<br />
Operating <strong><strong>Color</strong>Cascade</strong> <strong>Light</strong>s Using Automation Control System<br />
<strong><strong>Color</strong>Cascade</strong> lights can also be automatically controlled via <strong>Pentair</strong> IntelliTouch ® and<br />
EasyTouch ® Control Systems, utilizing the IntelliBrite “Circuit Function”. For more<br />
information refer to the IntelliTouch Control System User’s Guide (P/N 521075),<br />
EasyTouch Control System User’s Guide (P/N 521044).<br />
For more information, see page 14.<br />
COLORCASCADE ® <strong>Color</strong> Pool and Spa <strong>Light</strong> Installation and User’s Guide
2<br />
Using an External Transformer for Multiple <strong><strong>Color</strong>Cascade</strong> ® <strong>Light</strong>s<br />
When using multiple <strong><strong>Color</strong>Cascade</strong> 12 VAC lights on a 100 Watt transformer, it is<br />
recommended that no more than four (4) <strong><strong>Color</strong>Cascade</strong> lights be used. It is also<br />
recommended not to exceed 100 feet of total cable run between the transformer and lights.<br />
Note: For long cable lengths, set transformer to 14 VAC, and use only <strong><strong>Color</strong>Cascade</strong> lights<br />
with the 150” cord option, see diagram below.<br />
100 Watt<br />
Transformer<br />
12 Gauge<br />
(Minimum)<br />
100 ft.<br />
J Box<br />
Note: If a longer cable<br />
run is necessary, it is<br />
recommended that<br />
separate 100 Watt 12 VAC<br />
transformers be used for<br />
each light with no more<br />
than 100 feet of total<br />
cable run between the<br />
transformer and lights.<br />
Maximum wattage when using multiple <strong><strong>Color</strong>Cascade</strong> and<br />
IntelliBrite ® <strong>Color</strong> LED lights (using a 300 Watt Transformer)<br />
IMPORTANT! When using multiple 12 VAC <strong><strong>Color</strong>Cascade</strong> <strong>Light</strong>, IntelliBrite <strong>Light</strong> and<br />
IntelliBrite Landscape <strong>Light</strong>s, the total allowable light wattage is 300 Watts maximum. The<br />
<strong><strong>Color</strong>Cascade</strong> and IntelliBrite light wattages are as follows:<br />
• One <strong><strong>Color</strong>Cascade</strong> light is 16 Watts maximum<br />
• One GloBrite ® <strong>Light</strong> is 23 Watts maximum<br />
• One IntelliBrite Pool <strong>Light</strong> is 30 Watts maximum<br />
• One IntelliBrite Spa <strong>Light</strong> is 18 Watts maximum<br />
• One IntelliBrite Landscape light is 15 Watts maximum<br />
• One MagicStream ® Laminar is 16 Watts maximum<br />
COLORCASCADE ® <strong>Color</strong> Pool and Spa <strong>Light</strong> Installation and User’s Guide
3<br />
<strong><strong>Color</strong>Cascade</strong> <strong>Light</strong>s can be controlled using a standard wall-mount light switch or by the<br />
IntelliBrite ® Controller (see page 3). Multiple <strong><strong>Color</strong>Cascade</strong> lights can be connected via a<br />
junction box and 12 VAC transformer to a single switch so that all lights can be switched<br />
on and off together. <strong><strong>Color</strong>Cascade</strong> lights are controlled by cycling AC power to the 12<br />
VAC transformer from a standard wall switch. By turning the switch Off and On a specific<br />
number of times, the light activates one of the seven light show modes, fixed colors, or<br />
enables the “Hold” and “Recall” feature, see page 6.<br />
Powering on the <strong><strong>Color</strong>Cascade</strong> <strong>Light</strong><br />
When the <strong><strong>Color</strong>Cascade</strong> light is powered on, the previously selected color is<br />
displayed, unless the HOLD or RECALL feature was previously enabled.<br />
Note: If power to the light is off for more than five (5) seconds, the last color show<br />
mode or fixed color that was saved will be displayed.<br />
Selecting a <strong><strong>Color</strong>Cascade</strong> light show mode or fixed color using<br />
a Wall Switch<br />
<strong><strong>Color</strong>Cascade</strong> lights are compatible with IntelliBrite light colors and shows and can be<br />
synchronized with IntelliBrite ® lights. First switch power on to the light; the previously<br />
selected color is displayed, unless the HOLD or RECALL feature was previously enabled..<br />
To select a color show mode (1-7) or fixed color (8-12), turn the wall switch Off/On a<br />
specific number of times. Each number (1-17) shown below corresponds to the number<br />
of times to power-cycle the switch to activate a color light show or fixed color. For details<br />
about saving color effects while in Show modes, see “Hold” and “Recall” feature on page 6.<br />
Number of times to cycle power (1-17)<br />
Operating <strong><strong>Color</strong>Cascade</strong> ® <strong>Color</strong> <strong>Light</strong>s Using a Wall Switch<br />
1 SAm Mode: Cycles through white, magenta, blue and green colors<br />
(emulates the <strong>Pentair</strong> SAm® <strong>Color</strong> <strong>Light</strong>).<br />
2 Party Mode: Rapid color changing building energy and excitement.<br />
3 Romance Mode: Slow color transitions creating a mesmerizing and<br />
calming effect.<br />
4 Caribbean Mode: Transitions between a variety of blues and greens.<br />
5 American Mode: Patriotic red, white and blue transition.<br />
6 California Sunset Mode: Dramatic transitions of orange, red and<br />
magenta tones.<br />
7 Royal Mode: Richer, deeper color tones.<br />
8 Blue: Fixed color.<br />
9 Green: Fixed color.<br />
10 Red: Fixed color.<br />
11 White: Fixed color.<br />
12 Magenta: Fixed color.<br />
13 Hold: Save the current color effect during a color light show.<br />
14 Recall: Activate the last saved color effect.<br />
15 White<br />
16 Standard Mode<br />
17 IntelliBrite Mode<br />
COLORCASCADE ® <strong>Color</strong> Pool and Spa <strong>Light</strong> Installation and User’s Guide
4<br />
Example: To select California Sunset Mode; First switch power on to the light; the<br />
previously selected color is displayed, unless the HOLD or RECALL feature was previously<br />
enabled, then turn the switch off and on six (6) successive times. During the Off/On<br />
switching process, no illumination will occur.<br />
NOTE: During the off/on switching process, before the selected color<br />
is displayed, no illumination will occur. This operating mode is normal<br />
during the switching process. During this period the pool and spa will be<br />
dark and precautions should be taken to avoid unforeseen accidents.<br />
Failure to observe this warning may result in serious injury or death to<br />
pool and spa users.<br />
Random Mode<br />
The <strong><strong>Color</strong>Cascade</strong> ® <strong>Light</strong> has an additional Random Mode. In Random Mode the lights<br />
will randomly transition through the same color palette as in IntelliBrite Mode at a similar<br />
speed to the IntelliBrite Mode. For an example, IntelliBrite American Mode lights up only<br />
in red white and blue and when the IntelliBrite Random Mode is turned on and the light<br />
is set to American Mode it will display red, white and blue, but randomly. The speed of the<br />
transitions is also tied to the IntelliBrite Mode. Sam Mode will change colors slowly and<br />
Party Mode will change more rapidly.<br />
Activating IntelliBrite Random Mode: To toggle IntelliBrite Random Mode On or Off<br />
you need to enter Party Mode(Off-On-Off-On), wait until the lights come on and then enter<br />
Party Mode a second time (Off-On-Off-On) with less than 30 seconds between them.<br />
Resetting All <strong>Light</strong>s: To Reset all the lights you need to enter Party Mode four (4) times<br />
with less than 30 seconds between them. This will turn IntelliBrite Random Mode OFF.<br />
This is needed because should two lights ever get into different states, toggling their<br />
states will never fix the problem.<br />
Saving a color mode or fixed color<br />
When power is switched off to the <strong><strong>Color</strong>Cascade</strong> ® lights, the last color show mode or fixed<br />
color will be saved. The next time the light is powered on, the previously saved color show<br />
mode or fixed color will be displayed. For example, while in Party Mode switch the light off.<br />
Wait more than 10 seconds, switch the light back on to resume Party Mode.<br />
COLORCASCADE ® <strong>Color</strong> Pool and Spa <strong>Light</strong> Installation and User’s Guide
5<br />
Operating <strong><strong>Color</strong>Cascade</strong> ® <strong>Light</strong>s in Standard Mode<br />
To access the Standard Mode setting, you must cycle the power to the <strong><strong>Color</strong>Cascade</strong><br />
<strong>Light</strong> with 16 Off/On sequences. To return to the IntelliBrite Mode, cycle the power Off/On<br />
with 17 sequences By turning the switch Off and On a specific number of times, the light<br />
activates one of the three light show modes or locks a chosen color.<br />
Selecting a color light show mode or fixed color<br />
Switch power on to the <strong><strong>Color</strong>Cascade</strong> light. A random color will flash indicating the<br />
program you are in, followed by the previously selected program mode. To select a color<br />
show mode or fixed color, turn the wall switch off/on a specific number of times. Please<br />
review the chart below and follow the power cycle sequence to activate the various show<br />
feature effects while in “show” modes.<br />
1. Fixed <strong>Color</strong>: Turn power off and then on to “Hold” the <strong>Light</strong> on that specific color (no<br />
matter what color show you are in). If you keep the unit on that color for at least five (5)<br />
seconds, the <strong><strong>Color</strong>Cascade</strong> light will “save” this color and keep it in that mode until you<br />
release it with an additional power off/on sequence. In “Fixed <strong>Color</strong>” mode the light when<br />
powered on, will not flash its program, but immediately go to the “Fixed <strong>Color</strong>” chosen.<br />
2. <strong>Color</strong> Show Mode: Turn power off and then on twice (Off/On, Off/On) to cycle through<br />
the following three color modes. Turning the power on and off twice (Off/On, Off/On) will<br />
continue to cycle through the programs.<br />
Synchronized Mode: All <strong><strong>Color</strong>Cascade</strong> lights on the same circuit will synchronize and<br />
cycle on the same colors. When the units are in this mode, when powered up, the light<br />
will flash a random color one time and then turn all units on white and then start cycling<br />
through the eight colors. The single flash of a random color is the visual confirmation<br />
what color show you have activated. The light will stay in this mode each time the<br />
system is powered on until a program change is made.<br />
Random Mode: Turn the power on and then off twice (Off/On, Off/On) and the light will<br />
cycle to the next program, Random Mode. In this mode each of the <strong><strong>Color</strong>Cascade</strong> lights<br />
will cycle together, but in random colors. When this mode is selected, the light will flash<br />
twice to indicate it is in random mode and then start up in a random color sequence. If<br />
multiple lights are on the same circuit, each light will display different random colors.<br />
Party Mode: Turn the power on and then off twice (Off/On, Off/On) and the light will<br />
cycle to the next program, Party Mode. In this mode each of the <strong><strong>Color</strong>Cascade</strong> lights will<br />
cycle together, but in random colors and in ever increasing cycle speeds until the last<br />
ten seconds at which time the <strong><strong>Color</strong>Cascade</strong> lights will randomly flash different colors at<br />
different times. When this mode is selected, the light will flash three times to indicate it is<br />
in Party Mode and then start up in a random color sequence. If multiple lights are on the<br />
same circuit, each light will display different colors. In the event of a power interruption<br />
or power loss and the units become out of sequence, turn the light switch on and then<br />
off four times (Off/On, Off/On, Off/On, Off/On). The unit will flash five (5) times then<br />
reset all of the lights and start them in Random Mode.<br />
COLORCASCADE ® <strong>Color</strong> Pool and Spa <strong>Light</strong> Installation and User’s Guide
PRINTED ON: 7/29/2009, 600054_ctlg pics.SLDASM<br />
6<br />
Selecting a <strong><strong>Color</strong>Cascade</strong> ® <strong>Light</strong> show mode or fixed color<br />
using an IntelliBrite ® Controller<br />
Instead of using a wall switch, <strong><strong>Color</strong>Cascade</strong><br />
<strong>Light</strong>s can controlled with the IntelliBrite<br />
Controller (P/N 600054, sold separately). The<br />
IntelliBrite controller provides complete control<br />
of your <strong><strong>Color</strong>Cascade</strong> lights. The IntelliBrite<br />
controller can control individual or multiple 12<br />
VAC transformers to control <strong><strong>Color</strong>Cascade</strong> lights.<br />
Multiple <strong><strong>Color</strong>Cascade</strong> lights can be connected<br />
via a junction box to the Controller so that all<br />
lights can be switched on and off together. The<br />
IntelliBrite controller can also control multiple<br />
IntelliBrite ® Controller<br />
<strong><strong>Color</strong>Cascade</strong> and IntelliBrite lights.<br />
Note: For IntelliBrite controller wiring instructions, see page 17.<br />
Using the IntelliBrite Controller: <strong><strong>Color</strong>Cascade</strong> lights are compatible with IntelliBrite<br />
colors and shows and can be synchronized with IntelliBrite color pool/spa and landscape<br />
lights. To select a color light show mode or fixed color mode, rotate the dial so that it points<br />
to the desired selection. The color mode selections start in a clockwise direction from the<br />
9 o’clock position.<br />
Hold and Recall Feature<br />
Note: When <strong><strong>Color</strong>Cascade</strong> lights are powered on, the previously selected color is<br />
displayed, unless the HOLD or RECALL feature was previously enabled.<br />
Hold button/LED: Press this button (LED on) to capture and save a color effect while<br />
displaying one of the light show modes. When the button is pressed, the LED will be on,<br />
indicating that the color effect is captured.<br />
Recall Button/LED: Use this button (LED on) to activate the last saved color effect. When<br />
the button is pressed, the LED will be on, indicating that the color effect is being displayed.<br />
Activating IntelliBrite Random Mode: To toggle IntelliBrite Random Mode On or Off you<br />
need to enter Party Mode, wait until the lights come on turn the dial one notch and then<br />
enter Party Mode a second time with less than 30 seconds between them.<br />
Resetting All <strong>Light</strong>s: To Reset all the lights you need to enter Party Mode four (4) times<br />
with less than 30 seconds between them. This will turn IntelliBrite Random Mode OFF. This<br />
is needed because should two lights ever get into different states, toggling their states will<br />
never fix the problem.<br />
There are two ways to issue the commands with an IntelliBrite controller. You can switch<br />
to Party Mode and then turn the lights on and off using the Green button the desired<br />
number of times or you can switch back and forth between Party Mode and Sam Mode the<br />
desired number of times. Both methods require you to wait until the lights come back on<br />
before repeating the procedure. If the lights are not within sight of the controller, waiting 10<br />
seconds between each change also works.<br />
COLORCASCADE ® <strong>Color</strong> Pool and Spa <strong>Light</strong> Installation and User’s Guide
INSTALLING COLORCASCADE ® LIGHT FIXTURE<br />
(NEW POOL CONSTRUCTION)<br />
7<br />
The following describes how to install the <strong><strong>Color</strong>Cascade</strong> <strong>Light</strong> fixture.<br />
BEFORE STARTING: The following instructions must be completed by the<br />
electrician before the <strong><strong>Color</strong>Cascade</strong> light fixture is installed.<br />
Be sure that the pool or spa meets the requirements of the current National Electrical<br />
Code (NEC) Article 680-22 and all local codes and ordinances. A licensed or certified<br />
electrician must install the electrical system to meet or exceed those requirements<br />
before the underwater light is installed. Some of the requirements of the National<br />
Electrical Code which the pool’s electrical system must meet are as follows:<br />
• The lighting circuit has a Ground Fault Circuit Interrupter (GFCI) for 120<br />
VAC line voltage models, and has an appropriately rated circuit breaker.<br />
The conductors on the load side of the GFCI circuit shall not occupy<br />
conduit, boxes, or enclosures containing other conductors unless the<br />
additional conductors are also protected by a GFCI. Refer to local codes<br />
for complete details.<br />
• The Junction Box and the low voltage transformer is located at least eight<br />
(8) inches (20.3 cm) above ground level and at least 48 inches (1.219 m)<br />
from the edge of the pool; see Figure 2 on page 8.<br />
• To be certain that the pool or spa electrical system meets all applicable<br />
requirements, the electrician should also consult the local building<br />
department.<br />
INSTALLING THE COLORCASCADE ® LIGHT NICHE<br />
(AFTER ELECTRICAL REQUIREMENTS ARE MET)<br />
Note: The pool or spa electrical system can be verified with a Pool and Spa Electrical<br />
Qualification Test Kit. The test kit is available from <strong>Pentair</strong> Aquatic Systems. The electrical<br />
system inspection using this kit must be performed by trained and certified personnel. To<br />
be certain that the pool or spa electrical system meets all current applicable requirements,<br />
the electrician should also consult the local building department. Use only <strong>Pentair</strong> Aquatic<br />
Systems wet niches to ensure proper bonding and grounding connections.<br />
COLORCASCADE ® <strong>Color</strong> Pool and Spa <strong>Light</strong> Installation and User’s Guide
8<br />
Determine a location for the <strong><strong>Color</strong>Cascade</strong> ® <strong>Light</strong><br />
• The <strong><strong>Color</strong>Cascade</strong> <strong>Light</strong> should be located at least 2-1/2 feet from any walls or<br />
other <strong><strong>Color</strong>Cascade</strong> lights (bubblers).<br />
• The <strong><strong>Color</strong>Cascade</strong> light should be installed in water depths between 2” and 10 “.<br />
• The <strong><strong>Color</strong>Cascade</strong> light is designed to be installed flush with the pool finish.<br />
• The <strong><strong>Color</strong>Cascade</strong> light niche is designed for 1-1/2” PVC pipe for the water<br />
supply and 1” conduit for the light cable.<br />
Note: For pressure testing the water line,<br />
use an expandable plug (see Figure 1),<br />
plug not included.<br />
Expandable Plug<br />
(Not Included)<br />
Figure 1<br />
Pressure Testing<br />
WATER LEVEL<br />
2” to 10” PLASTER<br />
Water Depth<br />
4.1”<br />
6.2”<br />
NICHE<br />
GUNITE<br />
GUNITE<br />
1-1/2 “ Schedule 40 PVC<br />
Figure 2<br />
1” PVC<br />
Electrical<br />
Conduit<br />
Note: Prepare the end of the <strong><strong>Color</strong>Cascade</strong> light<br />
power cable and install to the 12 VAC output wires<br />
of an approved transformer (if you are using longer<br />
runs of cables or multiple lights per transformer, it is<br />
recommended to use the 13 VAC or even the 14 VAC<br />
Figure 3<br />
Gunite Cover<br />
Tab for<br />
outer ring<br />
1. Install the <strong><strong>Color</strong>Cascade</strong> light niche in the pool or spa floor as shown in Figure 2.<br />
2. Snap on the gunite cover over the top of the niche (shown above). This will<br />
protect the light cavity of the niche during installation. Note: If a gunite cover is<br />
not available, use masking tape to protect niche cavity from plaster operation.<br />
COLORCASCADE ® <strong>Color</strong> Pool and Spa <strong>Light</strong> Installation and User’s Guide
3. Set the niche in gunite as per current local building codes.<br />
4. Remove the outer edge of the gunite cover by pulling the<br />
tap and exposing the niche plaster ring.<br />
5. Apply plaster up to the outer edge of the gunite cover.The<br />
gunite cover should be the only exposed part of the niche<br />
after plastering, see Figure 2 on page 8.<br />
6. After the plastering has been completed, remove and<br />
dispose of the gunite cover. Retain the screws to fasten<br />
the light assembly into the niche.<br />
9<br />
D A N G E R !<br />
RISK OF ELECTRICAL SHOCK OR ELECTROCUTION<br />
Always disconnect power to the pool light at the circuit breaker<br />
before servicing the light. Failure to do so could result in death<br />
or serious injury to installer, serviceman, pool users, or others<br />
due to electrical shock.<br />
1. Turn off main electrical switch or circuit breaker.<br />
2. Feed cord through Niche and then through conduit to Junction Box or 12<br />
Volt AC Transformer. The <strong><strong>Color</strong>Cascade</strong> ® <strong>Light</strong> has no serviceable parts,<br />
so leave approximately 12 to 18 inches of cord to allow the light to be easily<br />
removed if replacement is required.<br />
NOTE: This is a 12 Volt AC system ONLY. An approved 12 VAC<br />
transformer (sold separately) must be used. If a Junction Box is<br />
used, it would be for 12 VAC connections. Never wire the<br />
<strong><strong>Color</strong>Cascade</strong> light directly to high voltage lines.<br />
3. Cut the cord at the Junction Box or 12 VAC transformer, leaving at least six<br />
(6) inches of cord to make connections.<br />
4. Strip back three (3) inches of the outer cord jacket to expose the two<br />
insulated wires (be careful not to damage the insulation on the two (2) inner<br />
wires).<br />
5. Connect both (2) wires to the corresponding circuit wires in the Junction Box<br />
or 12 Volt AC Transformer and secure the Junction Box cover in place.<br />
6. Install the <strong><strong>Color</strong>Cascade</strong> light assembly into the <strong><strong>Color</strong>Cascade</strong> light niche<br />
and tighten the four screws provided.<br />
7. Install the desired eyeball fitting included with the light assembly (See<br />
Eyeball Instructions on page 20) by firmly pressing it into the center hole. Be<br />
sure it is pressed all the way down to provide a smooth transition. Adjust the<br />
eyeball for proper water direction.<br />
8. Fill the pool until the underwater light is completely submerged in water<br />
before operating the light for more than ten (10) seconds. To check for proper<br />
operation, switch on the main switch or circuit breaker, as well as the switch<br />
which operates the <strong><strong>Color</strong>Cascade</strong> light itself.<br />
COLORCASCADE ® <strong>Color</strong> Pool and Spa <strong>Light</strong> Installation and User’s Guide
10<br />
REPLACING THE COLORCASCADE ® LIGHT ASSEMBLY<br />
(IN AN EXISTING POOL OR SPA)<br />
Risk of Electrical Shock or Electrocution!<br />
This underwater light must be installed by a licensed or certified<br />
electrician or a qualified pool professional in accordance with<br />
the current National Electrical Code (NEC), NFPA 70 or the<br />
Canadian Electrical Code (CEC), CSA C22.1 and all applicable<br />
local codes and ordinances. Improper installation will create an<br />
electrical hazard which could result in death or serious injury to<br />
pool users, installers or others due to electrical shock, and may<br />
also cause damage to property.<br />
Always disconnect the power to the pool light at the circuit<br />
breaker before servicing the light. Failure to do so could result in<br />
death or serious injury to serviceman, pool users or others due<br />
to electrical shock.<br />
Verify that the pool and spa meets the requirements of the current National<br />
Electrical Code and all local codes and ordinances. A licensed or certified<br />
electrician must install the electrical system to meet or exceed those<br />
requirements before the underwater light is installed. Some of the requirements<br />
of the National Electrical Code which the pool’s electrical system must meet are<br />
as follows:<br />
• The lighting circuit has a Ground Fault Circuit Interrupter (GFCI) for line<br />
voltage models, and has an appropriately rated circuit breaker.<br />
• The Junction Box (low voltage transformer) is located at least eight (8)<br />
inches (20.3 cm) above ground level and at least 48 inches (1.219 m) from<br />
the edge of the pool.<br />
• To be certain that the pool’s electrical system meets all applicable<br />
requirements, the electrician should also consult the local building<br />
department.<br />
COLORCASCADE ® <strong>Color</strong> Pool and Spa <strong>Light</strong> Installation and User’s Guide
REPLACING THE COLORCASCADE ® LIGHT ASSEMBLY<br />
(AFTER ELECTRICAL REQUIREMENTS ARE MET)<br />
The following removal and installation instructions describe how to remove and install the<br />
<strong><strong>Color</strong>Cascade</strong> <strong>Light</strong> assembly. Also use these instructions after completing the following<br />
light replacement procedure.<br />
11<br />
Failure to bring the pool or spa’s electrical system up to code requirements<br />
before installing the underwater light will create an electrical hazard which<br />
could result in death or serious injury to pool users, installers, or others due to<br />
electrical shock, and may also cause damage to property.<br />
1. Switch off electrical switch or circuit breaker at the source.<br />
2. Remove Junction Box or Transformer cover. Disconnect the light wires and<br />
attach a fish tape to the existing light power cord. This will assist in pulling<br />
the replacement light power cord through the conduit back to the junction<br />
box.<br />
3. Remove the <strong><strong>Color</strong>Cascade</strong> light assembly from the pool or spa water:<br />
4. Slowly pull the light and attached power cord (with attached fish tape) out of<br />
the niche. Pull the light’s power cord and fish tape out of the niche and place<br />
the light on the deck.<br />
5. Attach the new light power cord to the fish tape and carefully feed the fish<br />
tape and cable to the junction box.<br />
6. Feed cord through Niche and then through conduit to Junction Box or 12 Volt<br />
AC Transformer. The <strong><strong>Color</strong>Cascade</strong> light has no serviceable parts, so leave<br />
approximately 12 to 18 inches of cord to allow the light to be easily removed<br />
if replacement is required.<br />
7. Cut the cord at the Junction Box or 12 volt AC transformer, leaving at least<br />
six (6) inches of cord to make connections.<br />
8. Strip back three (3) inches of the outer cord jacket to expose the two<br />
insulated wires (be careful not to damage the insulation on the two (2) inner<br />
wires).<br />
9. Connect both (2) wires to the corresponding circuit wires in the Junction Box<br />
or 12 Volt AC Transformer and secure the Junction Box cover in place.<br />
10. Install the <strong><strong>Color</strong>Cascade</strong> light assembly into the niche and tighten the four<br />
screws provided.<br />
11. Install the return line fitting included with the light assembly by firmly<br />
pressing it into the center hole. Make sure it is pressed all the way down to<br />
provide a smooth transition. Adjust the ball for proper water direction.<br />
12. Fill the pool until the underwater light is completely submerged in water<br />
before operating the light for more than ten (10) seconds. To check for proper<br />
operation, switch on the main switch or circuit breaker, as well as the switch<br />
which operates the <strong><strong>Color</strong>Cascade</strong> light itself. Proceed to next page for<br />
light installation instructions. Note: The <strong><strong>Color</strong>Cascade</strong> light should not be<br />
powered for more than 30 sec if is not submersed in water.<br />
COLORCASCADE ® <strong>Color</strong> Pool and Spa <strong>Light</strong> Installation and User’s Guide
12<br />
CONNECTING COLORCASCADE ® LIGHTS<br />
TO THE AUTOMATION CONTROL SYSTEM<br />
D A N G E R !<br />
RISK OF ELECTRICAL SHOCK OR ELECTROCUTION<br />
Always disconnect AC power to EasyTouch ® and IntelliTouch ® Control System load<br />
center at the circuit breaker before servicing, or removing the HIGH VOLTAGE<br />
FRONT PANEL. Failure to do so could result in death or serious injury to installer,<br />
service person, pool users, or others due to electrical shock.<br />
1. Load Center: Unlatch the enclosure door spring latch, and open the door.<br />
2. Discharge Electrostatic energy before removing the cover by first<br />
touching the metal part of the enclosure.<br />
3. Loosen the two (2) retaining screws from the HIGH VOLTAGE FRONT<br />
PANEL. Remove the panel from the enclosure.<br />
4. Connect the 120 Volt side of a 12 VAC transformer to the LOAD SIDE of<br />
one of the auxiliary (AUX) relays in the load center.<br />
5. Connect the Neutral conductor from the 12 VAC transformer to the Neutral<br />
bus bar in the load center.<br />
6. After the connection has been completed, close the control panel and<br />
secure it with the two (2) retaining screws.<br />
7. Close the load center front door. Fasten the spring latch.<br />
COLORCASCADE ® <strong>Color</strong> Pool and Spa <strong>Light</strong> Installation and User’s Guide
13<br />
AUXILIARY RELAYS<br />
AUX 1<br />
®<br />
EASYTOUCH 4 AUTOMATION CONTROL<br />
AUX 1<br />
LINE 1<br />
CIRCUIT BREAKER<br />
LINE 1<br />
GROUND<br />
LOAD 1<br />
NEUTRAL<br />
Load Center<br />
Load 1<br />
Neutral<br />
Ground<br />
120V/12V<br />
Step Down<br />
Transformer<br />
(100W or 300W)<br />
(see page 2 for<br />
transformer<br />
load maximum)<br />
Black<br />
White<br />
JUNCTION<br />
BOX<br />
Four <strong><strong>Color</strong>Cascade</strong> 12 VAC<br />
<strong>Light</strong>s require a 100 Watt<br />
transformer.<br />
Black<br />
White<br />
<strong><strong>Color</strong>Cascade</strong> ® <strong>Light</strong> to EasyTouch or IntelliTouch Control<br />
System Load Center Wiring Connection Diagram<br />
Four <strong><strong>Color</strong>Cascade</strong> 12 VAC<br />
<strong>Light</strong>s require a 100 Watt<br />
transformer.<br />
<strong><strong>Color</strong>Cascade</strong> <strong>Light</strong> Standard Wiring Connection Diagram<br />
COLORCASCADE ® <strong>Color</strong> Pool and Spa <strong>Light</strong> Installation and User’s Guide
14<br />
SETTING UP COLORCASCADE ® LIGHTS<br />
WITH THE AUTOMATION CONTROL SYSTEM<br />
EasyTouch ® Control System<br />
The following describes how to setup the <strong><strong>Color</strong>Cascade</strong> <strong>Light</strong> from the EasyTouch Control<br />
System indoor control panel or wireless control panel. From the EasyTouch control<br />
system control panel you can control the light shows.<br />
To set up a <strong><strong>Color</strong>Cascade</strong> light circuit; assign the “<strong>Light</strong> Circuit Name” to the relay<br />
circuit (example; AUX 3, as “Pool <strong>Light</strong>”) and “Function”: assign the name “Pool <strong>Light</strong>”<br />
circuit in the Circuit Func menu as a “light” circuit (IntelliBrite). After assigning the circuit<br />
name and function, the light circuit name “Pool <strong>Light</strong>” can be setup in the CONFIG menu<br />
for light position, color etc.<br />
To assign a Circuit Name go to: MENU > SETTINGS > CIRCUIT NAMES<br />
IntelliFlo<br />
IntelliChlor<br />
Circuit Names<br />
Circuit Func.<br />
<br />
<br />
<br />
Circuit Names <br />
Circuit #: 1/18<br />
Circuit : AUX 1<br />
[POOL LIGHT ] <br />
1. Press the Up/Down button to select a circuit number 1/18. Press the Up<br />
button two times to select AUX 1 to choose this circuit for a light circuit On/<br />
Off button. The circuit number (1/18) corresponds to its assigned circuit<br />
name.<br />
2. Press the Up/Down button to scroll through the list of preset names. Select<br />
a name such as “Pool <strong>Light</strong>.” AUX 1 has now been assigned the circuit name<br />
“Pool <strong>Light</strong>.”<br />
To assign a Circuit Function go to: MENU > SETTINGS > CIRCUIT FUNC.<br />
Circuit / Func. :<br />
[POOL LIGHT ]<br />
[INTELLIBRITE ]<br />
Freeze: No<br />
<br />
<br />
3. Press the Menu button to return to the Settings menu. Press the Down button<br />
to and select “Circuit Func.” Press the Right button to access the Circuit<br />
Func. menu.<br />
4. Press the Up/Down button to select the already assigned circuit name “Pool<br />
<strong>Light</strong>.”<br />
5. Press the Right button to view “Circuit Functions” to assign to light circuit<br />
“Pool <strong>Light</strong>.”<br />
6. Press the Up/Down button to select the type of light circuit function to use.<br />
Select “INTELLIBRITE” for the <strong><strong>Color</strong>Cascade</strong> light circuit function.<br />
7. Press the Menu button three times to return to the main screen.<br />
Operating the <strong><strong>Color</strong>Cascade</strong> lights: The <strong><strong>Color</strong>Cascade</strong> light is ready to operate using<br />
the EasyTouch control panel button 1 (auxiliary 1 circuit). To access the <strong>Light</strong>s menu<br />
screen (special <strong>Light</strong> Features), press Menu > <strong>Light</strong>s. The <strong>Light</strong>s menu settings are:<br />
MODES, COLORS, ALL ON, ALL OFF, SYNC, MAGICSTREAM, CONFIG: From the<br />
Modes screen you can control the color light shows. To access the Modes menu, press<br />
Menu > <strong>Light</strong>s > Modes. See page 3 for <strong><strong>Color</strong>Cascade</strong> color shows.<br />
COLORCASCADE ® <strong>Color</strong> Pool and Spa <strong>Light</strong> Installation and User’s Guide
IntelliTouch ® Control System<br />
The following describes how to setup the <strong><strong>Color</strong>Cascade</strong> ® <strong>Light</strong> from the IntelliTouch<br />
Control System control panel. From the IntelliTouch control system control panel you can<br />
control the light shows. To access the <strong><strong>Color</strong>Cascade</strong> light screens, from the IntelliTouch<br />
control system indoor control panel or the wireless MobileTouch ® Remote Control Panel.<br />
Assigning a Circuit Name<br />
To identify the <strong><strong>Color</strong>Cascade</strong> light connected to the auxiliary circuits (AUX 1, AUX 2)<br />
in the IntelliTouch control system load center, you need to assign the <strong><strong>Color</strong>Cascade</strong><br />
light circuit name to the corresponding auxiliary circuits in the IntelliTouch control<br />
system indoor control panel. Choose a circuit name from the preset list of names for<br />
the <strong><strong>Color</strong>Cascade</strong> light connected to the auxiliary relay installed in the IntelliTouch load<br />
control system center.<br />
Assigning a Circuit Name for the <strong><strong>Color</strong>Cascade</strong> <strong>Light</strong>: To assign a Circuit Name for<br />
the <strong><strong>Color</strong>Cascade</strong> light, go to: MENU > SETUP > ADVANCED > CIRCUIT NAMES ><br />
ASSIGN CIRCUIT NAMES > DISPLAY.<br />
Selecting DISPLAY Screen 1, 2, 3, or 4: The auxiliary circuits that control the pool<br />
and spa equipment can be accessed from the “Display” screen on the Indoor Control<br />
Panel or MobileTouch wireless control panel. Selecting the button next to Display 1,<br />
2, 3, or 4 displays the screen with circuits belonging to that particular expansion Load<br />
Center or Power Center. “Feature Circuits” can also be assigned from this screen.<br />
To assign circuit names for a specific display screen:<br />
Display #1 - This screen shows circuit names for the filter pump, pool and spa modes,<br />
and all high voltage auxiliary circuits connected to the main Load Center or Power<br />
Center. Display #2 - This screen shows circuit names for the additional auxiliary<br />
circuits connected to the first expansion center (Load Center or Power Center).<br />
Display #3 - This screen shows circuit names for the additional auxiliary circuits<br />
connected to the second expansion center (Load Center or Power Center)<br />
Display #4 - This screen shows circuit names for the additional auxiliary circuits<br />
connected to the third expansion center (Load Center or Power Center).<br />
To assign a <strong><strong>Color</strong>Cascade</strong> light circuit name for the MAIN SCREEN:<br />
1. Select the button next to Display #1. These are the circuit names that will be<br />
displayed on the Main Screen. Note: If there is an expansion Load Center or<br />
Power Center installed, select the appropriate Display #2, #3, or #4 associated<br />
with that expansion Load Center or Power Center.<br />
2. From the Main Display screen, press the button next to AUX 1.A small arrow<br />
pointing to AUX 1 is displayed.<br />
3. Use the Up and Down buttons at the bottom of the screen to scroll through<br />
the alphabetical list of preset equipment names. Choose the equipment<br />
name that matches the label name for button number 1 on the Load Center<br />
Outdoor Control Panel.<br />
4. Continue to name other auxiliary circuits (AUX2, AUX3, etc.): After selecting<br />
the equipment name you want to use for AUX 1, press the button next to the<br />
AUX 2 and choose a circuit name. The small arrow indicates which circuit is<br />
selected for naming.<br />
5. Repeat the process to assign the other equipment to circuits on this screen.<br />
6. When you have finished assigning equipment circuit names, press the Save<br />
button. Press the Exit button to return to the Main screen.<br />
7. CONTINUE TO NEXT PAGE to set up the <strong><strong>Color</strong>Cascade</strong> light “Function Circuit.”<br />
15<br />
COLORCASCADE ® <strong>Color</strong> Pool and Spa <strong>Light</strong> Installation and User’s Guide
16<br />
Set up a <strong><strong>Color</strong>Cascade</strong> ® <strong>Light</strong> Circuit Function<br />
To setup an AUX circuit to control the <strong><strong>Color</strong>Cascade</strong> <strong>Light</strong>, assign the circuit light function<br />
an auxiliary relay circuit (AUX 1), then assign the circuit name for that light circuit. The<br />
light circuit name will appear on the main screen. Each <strong><strong>Color</strong>Cascade</strong> light must also be<br />
assigned a circuit function. To assign a Circuit Name for the <strong><strong>Color</strong>Cascade</strong> light, go to:<br />
MENU > SETUP > ADVANCED > CIRCUIT FUNCTIONS<br />
Setup a <strong><strong>Color</strong>Cascade</strong> light function circuit: Assign each light auxiliary relay circuit<br />
a circuit name, then assign that light relay circuit in the “CIRCUIT FUNCTIONS”<br />
section, as “INTELLIBRITE.” To setup the <strong><strong>Color</strong>Cascade</strong> light circuit function (use the<br />
“IntelliBrite” circuit name):<br />
1. Press the button next to the AUX button (the relay auxiliary circuit<br />
connected to the <strong><strong>Color</strong>Cascade</strong> (IntelliBrite) light).<br />
2. Press the right or left side (PREV/NEXT) button next to “INTELLIBRITE.”<br />
Scroll through the circuit functions until “INTELLIBRITE” is displayed.<br />
3. Press the SAVE button on the bottom of the screen. Press the EXIT button to<br />
return to the main screen.<br />
Assign the <strong><strong>Color</strong>Cascade</strong> light circuit to the <strong>Light</strong>s screen:<br />
4. Press the <strong>Light</strong>s button on the bottom of the screen.<br />
5. Press the right side button next to “CONFIGURE.”<br />
6. Press the button next to “NONE” to assign an IntelliBrite light circuit to the<br />
selected button. <strong>Light</strong> names can be setup to display on the left side for<br />
“Spa” features and on the right side for the “Pool” features.<br />
7. Press the top left or right side button to scroll through the available light circuits<br />
which can be used for the <strong><strong>Color</strong>Cascade</strong> (IntelliBrite) lighting features.<br />
Select at the circuit name you wish to use. The displayed circuit names are<br />
circuit names that were previously assigned when assigning a circuit<br />
function.<br />
Operating and Selecting <strong><strong>Color</strong>Cascade</strong> (IntelliBrite) <strong>Color</strong> Modes<br />
From the “Modes” screen you can select various preset show color lighting effects,<br />
such as “American mode” and “Sunset mode,” and SAm Style (an emulation of the<br />
SAm color scheme). Using the “Hold” and “Recall” feature you can also capture and<br />
save a unique color effect to recall at a later time.<br />
Modes screen: To access the IntelliBrite color show “Modes” features from the <strong>Light</strong>s<br />
screen, press the <strong>Light</strong>s button on the bottom of the screen, then press the left side<br />
button next to “MODES.”<br />
Special <strong>Light</strong> Features: Up to twelve (12) IntelliBrite light circuits can be displayed<br />
on the main <strong>Light</strong>s screen (special light features). From the <strong>Light</strong>s screen you can<br />
activate the IntelliBrite lighting features (i.e., color swim, color set). Assuming each<br />
<strong><strong>Color</strong>Cascade</strong> (IntelliBrite) light has its own relay and separate circuit.<br />
Activating IntelliBrite Random Mode: To toggle IntelliBrite Random Mode On or Off<br />
you need to enter Party Mode(Off-On-Off-On), wait until the lights come on and then enter<br />
Party Mode a second time (Off-On-Off-On) with less than 30 seconds between them.<br />
Resetting All <strong>Light</strong>s: To Reset all the lights you need to enter Party Mode four (4) times<br />
with less than 30 seconds between them. This will turn IntelliBrite Random Mode OFF.<br />
This is needed because should two lights ever get into different states, toggling their<br />
states will never fix the problem.<br />
COLORCASCADE ® <strong>Color</strong> Pool and Spa <strong>Light</strong> Installation and User’s Guide
PRINTED ON: 7/29/2009, 600054_ctlg pics.SLDASM<br />
17<br />
CONNECTING COLORCASCADE ® LIGHT TO AN<br />
INTELLIBRITE ® CONTROLLER<br />
RISK OF ELECTRICAL SHOCK OR ELECTROCUTION<br />
TURN power OFF at circuit breaker -<br />
Always disconnect power to the pool light at the circuit<br />
breaker before servicing the light. Failure to do so could<br />
result in death or serious injury to installer, service person,<br />
pool users, or others due to electrical shock.<br />
To wire multiple 12 Volt <strong><strong>Color</strong>Cascade</strong> <strong>Light</strong>s to an IntelliBrite Controller:<br />
12 VAC <strong><strong>Color</strong>Cascade</strong> and IntelliBrite <strong>Light</strong>s<br />
IMPORTANT! When installing 12 VAC <strong><strong>Color</strong>Cascade</strong> lights, connect the lights to the<br />
secondary 12 VAC output of the step down transformer, then connect the IntelliBrite<br />
controller to the 120 VAC primary input of the step down transformer.<br />
Installing the IntelliBrite Controller in the Outlet box<br />
The IntelliBrite Controller mounts onto a standard outlet box (22.5 cubic inches<br />
minimum). After wiring the IntelliBrite Controller, check all wiring connections before<br />
mounting the controller into the outlet box.<br />
To install the IntelliBrite Controller:<br />
1. Neatly arrange the wires in the back of the outlet box.<br />
2. Align the Controller with the screw holes of the outlet box. Secure the Controller<br />
to the outlet box with the two (2) retaining screws.<br />
3. Close the front door of the Controller.<br />
Retaining Screws<br />
Arrange<br />
wires neatly<br />
behind<br />
Controller<br />
Retaining<br />
Screw<br />
Screw hole<br />
Retaining<br />
Screw<br />
Screw hole<br />
IntelliBrite Controller<br />
COLORCASCADE ® <strong>Color</strong> Pool and Spa <strong>Light</strong> Installation and User’s Guide
PROBLEM<br />
CAUSE/ACTION<br />
18<br />
Wiring <strong><strong>Color</strong>Cascade</strong> ® <strong>Light</strong>s to IntelliBrite ® Controller and<br />
300 Watt Transformer<br />
The following diagram shows how to connect <strong><strong>Color</strong>Cascade</strong> <strong>Light</strong>s to an IntelliBrite<br />
Controller using a 300 Watt transformer. Note: For <strong><strong>Color</strong>Cascade</strong> light operating<br />
instructions, see page 3.<br />
300 Watt Transformer<br />
AC Power cord<br />
Extension<br />
cord<br />
GREEN<br />
WHITE<br />
BLACK<br />
wire nut<br />
BLACK<br />
WHITE<br />
RED<br />
GREEN<br />
WHITE<br />
BLACK<br />
120 VAC Input<br />
12 VAC<br />
Transformer<br />
12 VAC Output<br />
12O VAC<br />
GFCI Wall<br />
Outlet<br />
IntelliBrite Controller<br />
12 VAC<br />
<strong><strong>Color</strong>Cascade</strong><br />
<strong>Light</strong>s<br />
Troubleshooting (<strong><strong>Color</strong>Cascade</strong> <strong>Light</strong>)<br />
The light will not<br />
illuminate.<br />
<strong>Light</strong> does not function<br />
properly.<br />
Check the GFCI ground fault wiring and reset if<br />
necessary.<br />
Check the light wiring connection to the junction<br />
box at the pool side and to the AC power switch.<br />
Be sure that there is proper AC power applied<br />
to the light.<br />
COLORCASCADE ® <strong>Color</strong> Pool and Spa <strong>Light</strong> Installation and User’s Guide
PROBLEM<br />
CAUSE/ACTION<br />
19<br />
Troubleshooting (IntelliBrite ® Controller)<br />
Both of the LEDs are<br />
flashing.<br />
The IntelliBrite Controller has detected that the load<br />
has exceeded the maximum allowable wattage or the<br />
output is shorted out<br />
1. Switch off the IntelliBrite Controller OFF. Remove<br />
excessive load or short.<br />
2. Press the IntelliBrite Controller power switch to<br />
power on the unit. Ensure that the LEDs are no longer<br />
flashing.<br />
The light will not<br />
illuminate.<br />
<strong>Light</strong> does not function<br />
properly.<br />
Check the ground fault wiring and reset if necessary.<br />
Check the light wiring connection to the junction box at<br />
the pool side and to the main circuit breaker.<br />
Be sure that there is proper AC power applied to the<br />
light.<br />
COLORCASCADE ® <strong>Color</strong> Pool and Spa <strong>Light</strong> Installation and User’s Guide
20<br />
APPENDIX<br />
ACCESSORIES BAG ASSEMBLY INSTRUCTIONS<br />
<strong><strong>Color</strong>Cascade</strong> ® <strong>Light</strong> Accessories Bag Assembly Contents<br />
• Four mounting screws<br />
• One eyeball housing<br />
• One ¾” eyeball<br />
• One ½” eyeball<br />
• Extended nozzle<br />
It is recommended as an initial setup to use the ¾” eyeball. However, you should use the<br />
eyeball size that better suits the flow rate, water depth, and desired plume height. To<br />
increase the plume height, use the smaller eyeball.<br />
Eyeball Assembly Installation and Replacement Instructions<br />
Eyeball Installation<br />
To install the eyeball assembly<br />
1. Insert the eyeball perpendicular into the eyeball housing opening.<br />
2. Rotate to center the eyeball into the eyeball housing.<br />
COLORCASCADE ® <strong>Color</strong> Pool and Spa <strong>Light</strong> Installation and User’s Guide
Eyeball Replacement<br />
To replace the eyeball assembly<br />
1. Rotate the eyeball, and align it<br />
to the eyeball housing opening.<br />
2. Pull the eyeball out of the<br />
housing.<br />
3. Insert the alternate size eyeball<br />
perpendicular, into the housing<br />
opening.<br />
4. Rotate and center the eyeball<br />
into the eyeball into the eyeball<br />
housing.<br />
21<br />
COLORCASCADE ® LIGHT EXTENDED NOZZLE<br />
INSTALLATION INSTRUCTIONS<br />
The flexible nozzle is recommended in cases where the plume from the <strong><strong>Color</strong>Cascade</strong><br />
<strong>Light</strong> tends to swirl around. The swirling effect is usually caused by a wave action in the<br />
body of water. This flexible nozzle is designed to protect the jet water as it reaches the<br />
surface and protects it from the wave action.<br />
Eyeball Replacement<br />
To replace the eyeball assembly<br />
1. Insert the ¾” eyeball into the eyeball housing.<br />
2. Pull the rubber nozzle through the eyeball until it locks in place.<br />
3. Insert the fitting with the nozzle into the niche.<br />
Note: It is recommended to custom cut the flexible nozzle<br />
once it is installed into the pool. Start off by cutting 1” at<br />
at time until you get the desired plume and the swirling<br />
has stopped. The flexible nozzle is directional so it can be<br />
adjusted for proper water flow to the surface.<br />
COLORCASCADE ® <strong>Color</strong> Pool and Spa <strong>Light</strong> Installation and User’s Guide
22<br />
COLORCASCADE ® LIGHT REPLACEMENT PARTS<br />
<strong><strong>Color</strong>Cascade</strong> <strong>Light</strong> (Bubbler) Replacement Parts List<br />
1. 590046 LED Bubbler replacement light engine with 100’ cord<br />
2. 590047 LED Bubbler replacement light engine with 150’ cord<br />
3. 590048 Accessory Kit<br />
590048<br />
590049<br />
590046 - 100’<br />
590047 - 150’<br />
<strong><strong>Color</strong>Cascade</strong> <strong>Light</strong> Niche Dimensions<br />
6.22”<br />
7.24”<br />
.39”<br />
.30”<br />
4.55”<br />
1-1/2” Socket<br />
2.41”<br />
1” Socket<br />
COLORCASCADE ® <strong>Color</strong> Pool and Spa <strong>Light</strong> Installation and User’s Guide
23<br />
<strong><strong>Color</strong>Cascade</strong> ® <strong>Light</strong> Water Depth and Plume Height Chart<br />
Plume height data should only be used as a reference, actual plume<br />
height may vary based upon a variety of circumstances including but not<br />
limited to system plumbing and water conditions.<br />
COLORCASCADE ® <strong>Color</strong> Pool and Spa <strong>Light</strong> Installation and User’s Guide
PENTAIR AQUATIC SYSTEMS<br />
1620 HAWKINS AVE., SANFORD, NC 27330 • (919) 566-8000<br />
10951 WEST LOS ANGELES AVE., MOORPARK, CA 93021 • (805) 553-5000<br />
WWW.PENTAIRPOOL.COM<br />
All <strong>Pentair</strong> trademarks and logos are owned by <strong>Pentair</strong>, Inc. <strong>Pentair</strong> Aquatic Systems, <strong><strong>Color</strong>Cascade</strong> ® , IntelliBrite ® ,<br />
EasyTouch ® , IntelliTouch ® , and SunTouch ® are trademarks and/or registered trademarks of <strong>Pentair</strong> Water Pool and Spa,<br />
Inc. and/or its affiliated companies in the United States and/ or other countries. Unless expressly noted, names and brands<br />
of third parties that may be used in this document are not used to indicate an affiliation or endorsement between the owners<br />
of these names and brands and <strong>Pentair</strong> Water Pool and Spa, Inc. Those names and brands may be the trademarks or<br />
registered trademarks of those third parties. Because we are continuously improving our products and services, <strong>Pentair</strong><br />
reserves the right to change specifications without prior notice. <strong>Pentair</strong> is an equal opportunity employer.<br />
© 2012 <strong>Pentair</strong> Aquatic Systems. All rights reserved. This document is subject to change without notice.<br />
P/N 512280 REV. A 12/177/12<br />
COLORCASCADE ® <strong>Color</strong> Pool and Spa <strong>Light</strong> Installation and User’s Guide


