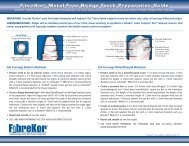
Instructions - Pentron Clinical
Instructions - Pentron Clinical
Instructions - Pentron Clinical

You also want an ePaper? Increase the reach of your titles
YUMPU automatically turns print PDFs into web optimized ePapers that Google loves.
Composite Basic Handling<br />
General Storage and Handling<br />
• If refrigerated, bring material to room temperature prior to use.<br />
• For maximum polymerization, cure in the Sculpture Curing Light Build-up cycle<br />
after each 1 mm application of Sculpture Plus composite. Cure the final layer of<br />
Sculpture Plus incisal material in the Final cure cycle.<br />
• Cover any dispensed material with the light blocking cover to protect the composite<br />
between uses and to prevent premature polymerization from ambient light.<br />
Basic Handling Technique<br />
1. Dispense and cut desired amount of<br />
Sculpture Plus composite. (Fig. 1)<br />
2. Flatten material with metal spatula<br />
to soften and bring to workable<br />
temperature. Avoid folding or<br />
incorporating air into the material.<br />
(Fig. 2)<br />
Fig. 1<br />
3. Shape and flatten Sculpture Plus<br />
composite into a disc with a maximum<br />
thickness of 1mm for ideal handling<br />
during build-up.<br />
4. Allow material to sit for 5-10 seconds<br />
to develop a shiny appearance. The<br />
shiny surface improves workability and<br />
bonding between layers.<br />
Fig. 2<br />
5. Cut small, thin sections of prepared<br />
Sculpture Plus material for application<br />
to dies and/or models for ideal handling<br />
and esthetics. (Fig. 3)<br />
Fig. 3<br />
4