Instructions - Pentron Clinical
Instructions - Pentron Clinical
Instructions - Pentron Clinical

You also want an ePaper? Increase the reach of your titles
YUMPU automatically turns print PDFs into web optimized ePapers that Google loves.
For Beautiful Indirect<br />
Metal-Free Restorations<br />
<strong>Instructions</strong>
Sculpture ® Plus Composites - The New<br />
Standard for Indirect Metal - Free Restorations<br />
+ Indications<br />
• Metal-free anterior/posterior crowns<br />
• Metal-free anterior and posterior bridges with FibreKor ® frameworks<br />
• Cosmetic inlays, onlays and veneers<br />
• Bonded retainers i.e. "Maryland type" bridges<br />
• Metal-free anterior and posterior restorations with FibreKor posts<br />
+ Contraindications<br />
• Metal-free bridges with an individual proximal span of over 15 mm<br />
• Patients with known sensitivity to ingredients in Sculpture Plus material<br />
• Screw retained implant substructures without custom cast metal abutment<br />
Physical Properties Chart<br />
Flexural Strength<br />
140 MPa<br />
Flexural Modulus<br />
13.3 GPa<br />
Water Sorption 15.1 µg/mm 3<br />
Solubility 3.1 µg/mm 3<br />
Depth of Cure (mm)<br />
>2 mm<br />
In vivo Projected Wear Rate<br />
Table of Contents<br />
An Introduction to Sculpture Plus Composites ..................................................2<br />
The Sculpture ® Curing Light ..............................................................................3<br />
Composite Basic Handling Technique ................................................................4<br />
Basic Die/Model Preparation ..............................................................................5<br />
Build-up Techniques<br />
Crown................................................................................................................6<br />
Inlay ..................................................................................................................9<br />
Polishing Technique............................................................................................11<br />
Glazing Technique ..............................................................................................12<br />
Metal-Free Layering Technique ........................................................................13<br />
Body/Incisal Co-ordination Guide......................................................................13<br />
1717 West Collins Ave., • Orange, CA 92867<br />
800.243.3100 • 203.303.2010<br />
CEpartner4U, Esdoorniaan 13, 3951DB Maarn. • The Netherlands. • tel: +31 (0)6.516.536.26
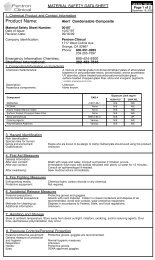
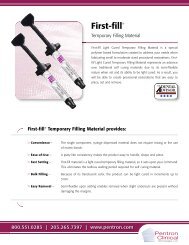
Sculpture ® Plus Composite - The First<br />
Indirect Nano - Hybrid Restoration System<br />
Welcome to the new age of metal-free restorative dental composites.<br />
<strong>Pentron</strong> <strong>Clinical</strong> has taken our clinically proven, high performance Sculpture ®<br />
composites and reformulated them to minimize delamination and deliver<br />
unsurpassed esthetics. The nano-hybrid<br />
composition of Sculpture Plus composites<br />
achieves exceptional polishability while<br />
maintaining the high strength and low<br />
water sorption of our original Sculpture<br />
product.<br />
The resin developed for Sculpture Plus composites<br />
retains our patented polycarbonate<br />
dimethacrylate (PCDMA) in a modified form.<br />
This proprietary resin formulation provides<br />
superior chip, stain and wear resistance. Our unique silanated nano-hybrid filler<br />
component delivers reinforced margins and long-lasting luster for strong and<br />
beautiful restorations.<br />
The Sculpture Plus Kit provides you with all of<br />
the necessary materials and instruments to<br />
make successful and profitable Sculpture Plus<br />
restorations. The kit now includes silicone<br />
tipped instruments that are ideal for contouring<br />
and detailing your Sculpture Plus restorations.<br />
For Sculpture Plus restorations of the highest<br />
quality, <strong>Pentron</strong> <strong>Clinical</strong> has developed the<br />
Sculpture Curing Light. Through extensive<br />
research, <strong>Pentron</strong> has confirmed that pressurizing composite prior to and<br />
during polymerization improves the strength and esthetics of final restorations.<br />
The Sculpture Curing Light is one of the first cure lights to incorporate pressure<br />
and visible light into a single, easy to use unit.<br />
2
Using the Sculpture ®<br />
Curing Light<br />
<strong>Pentron</strong> <strong>Clinical</strong> introduces the<br />
Sculpture Curing Light to provide<br />
maximum functionality and improved<br />
esthetics for your Sculpture Plus<br />
restorations.<br />
The Sculpture Curing Light provides<br />
two standard cure cycles that are<br />
pre-programmed for ideal results with<br />
Sculpture Plus composites. The Buildup<br />
and Final cure cycles both<br />
run automatically with no manual<br />
operations other than the press of a<br />
button. A set-up tray is provided with the Sculpture Curing Light to properly<br />
support and orient your Sculpture Plus restorations during cure.<br />
Build-up Cure Cycle<br />
The Build-up cure cycle is recommended with<br />
each 1 mm application of Sculpture Plus<br />
composite for maximum polymerization. The<br />
pre-set cycle consists of a 5 minute pressure<br />
only segment followed by a 3 minute pressure<br />
and light segment. Pressurizing prior to and<br />
during light cure ensures enhanced bonding<br />
between layers and removes flaws or voids in<br />
the material before they are incorporated into<br />
the restoration during cure.<br />
Final Cure Cycle<br />
The Final cure cycle follows the same cycle as<br />
the Build-up cure, but first purges the cure<br />
chamber of oxygen using nitrogen to produce a hard outer surface ideal for<br />
polishing. This cure cycle is required after the application of the final incisal layer<br />
and is also used if Sculpture Plus LP Glaze is applied after mechanical polishing.<br />
3
Composite Basic Handling<br />
General Storage and Handling<br />
• If refrigerated, bring material to room temperature prior to use.<br />
• For maximum polymerization, cure in the Sculpture Curing Light Build-up cycle<br />
after each 1 mm application of Sculpture Plus composite. Cure the final layer of<br />
Sculpture Plus incisal material in the Final cure cycle.<br />
• Cover any dispensed material with the light blocking cover to protect the composite<br />
between uses and to prevent premature polymerization from ambient light.<br />
Basic Handling Technique<br />
1. Dispense and cut desired amount of<br />
Sculpture Plus composite. (Fig. 1)<br />
2. Flatten material with metal spatula<br />
to soften and bring to workable<br />
temperature. Avoid folding or<br />
incorporating air into the material.<br />
(Fig. 2)<br />
Fig. 1<br />
3. Shape and flatten Sculpture Plus<br />
composite into a disc with a maximum<br />
thickness of 1mm for ideal handling<br />
during build-up.<br />
4. Allow material to sit for 5-10 seconds<br />
to develop a shiny appearance. The<br />
shiny surface improves workability and<br />
bonding between layers.<br />
Fig. 2<br />
5. Cut small, thin sections of prepared<br />
Sculpture Plus material for application<br />
to dies and/or models for ideal handling<br />
and esthetics. (Fig. 3)<br />
Fig. 3<br />
4
Basic Die/Model Preparation<br />
1. Using diestone material, pour the impression<br />
and prepare the model/die in the<br />
usual manner.<br />
2. Optional Step – Re-pour impression using<br />
diestone material without pins for a "solid<br />
model” technique.<br />
Fig. 1<br />
3. Inspect die and blockout any undercut.<br />
Note: All die blockout should be<br />
accomplished with high temp inlay-wax<br />
or polymer blockout material prior to<br />
sealing the die.<br />
4. Mark and define the margins with a<br />
permanent marking pencil. (Fig. 1)<br />
Fig. 2<br />
Fig. 3<br />
5. Protect and seal the margins by applying<br />
a thin coat of Zip Sep* Sealer. Apply a<br />
second coat within 15 seconds. Allow to<br />
dry for 2 minutes. (Fig. 2)<br />
6. Paint a thin coat of Sculpture Plus Die<br />
Spacer all over the die, including margins.<br />
Allow to dry for 5 minutes. For a more<br />
passive fit, a second or third coat should<br />
be applied. Keep any additional coats<br />
1mm away from the margin. Sculpture<br />
Plus Die Spacer also acts as a separator.<br />
(Fig. 3)<br />
7. Use Zip Sep* Sealer to seal contact areas,<br />
opposing models and saddle areas. (Fig. 4)<br />
Note: Use Zip Sep* Sealer and Zip Sep*<br />
Universal Separator when adding to short,<br />
incomplete margins on the die.<br />
* Zip Sep is a trademark of Dental Ventures of America, Inc.<br />
Fig. 4<br />
5
Single Crown Build- up Technique<br />
Please provide the Sculpture Plus Preparation Guides to your dentist and review prior<br />
to operative procedures.<br />
For best results, build Sculpture Plus restorations to contour and avoid over building<br />
material. Sculpture Plus composites do not shrink significantly upon cure.<br />
1. Prepare die/model per preparation<br />
instructions on Page 5.<br />
2. Dispense and prepare desired shades and<br />
amounts of Sculpture Plus materials per<br />
basic handling technique on Page 4.<br />
3. Cut a thin section of prepared Sculpture<br />
Plus Body material and apply it to the<br />
prepared die. (Fig. 1)<br />
Fig. 1<br />
4. Adapt by burnishing the material from<br />
the center to the periphery. (Fig. 2)<br />
5. Remove any excess material from the<br />
margin. (Fig. 3)<br />
Fig. 2<br />
6. If desired, apply a small amount of<br />
Sculpture Plus Neck Paste and/or<br />
Opaceous Body to the cervical area to<br />
achieve a more natural look. (Fig. 4)<br />
Fig. 3<br />
Fig. 4<br />
6
Single Crown Build- up Technique<br />
7. Adapt Neck Paste and/or Opaceous<br />
Body to cervical area. Do not overextend<br />
margins. (Fig. 5)<br />
8. Cure in the Sculpture Curing Light<br />
using the Build-up cure cycle. (Fig. 6)<br />
Fig. 5<br />
9. Apply additional layers as needed (Fig. 7).<br />
Build to contour. Do not over-build.<br />
Note: For maximum cure, incremental<br />
cures with a build up of 1 mm of material<br />
between cures is recommended.<br />
Fig. 6<br />
10. Contour, refine and shape the<br />
restoration during build-up using<br />
metal or silicone tipped instruments.<br />
(Fig. 8)<br />
Note: Build-up steps 9-13 may not<br />
be necessary depending on the<br />
requirements of the restoration.<br />
Fig. 7<br />
Fig. 8<br />
7
Single Crown Build- up Technique<br />
11. Add any desired internal characterization<br />
to final body layer using Sculpture<br />
Plus Color Pastes.<br />
Example: To create a stained vertical<br />
check line, make a thin slice into<br />
uncured layer of Sculpture Plus material<br />
(Fig. 9) and apply a thin line of color<br />
paste as shown. (Fig. 10)<br />
Note: Color pastes are for adding characterization<br />
markings underneath an<br />
incisal layer only. Color paste may be<br />
added after application of the incisal<br />
layer if the incisal material is then<br />
manipulated to fully cover the color<br />
paste. Color pastes are not to be used<br />
as an external stain.<br />
12. Use instruments to push Sculpture Plus<br />
Body material next to characterization<br />
marking, being careful not to cover<br />
them with body material.<br />
Fig. 9<br />
Fig. 10<br />
13. Cure with the Sculpture Curing Light<br />
using the Build-up cure cycle.<br />
14. Add the appropriate shade of Sculpture<br />
Plus Incisal material per recommended<br />
layering technique on Page 13 (Fig. 11).<br />
Build to contour. Do not over-build.<br />
15. Cure incisal layer with the Sculpture<br />
Curing Light using the Final cure cycle.<br />
(Fig. 12)<br />
Fig. 11<br />
16. Build-up is complete.<br />
17. Polish restoration per technique<br />
described on Page 11.<br />
Fig. 12<br />
8
Inlay Build- up Technique<br />
Please provide the Sculpture Plus Preparation Guides to your dentist and review prior<br />
to operative procedures.<br />
For best results, build Sculpture Plus restorations to contour and avoid over building<br />
material. Sculpture Plus composites do not shrink significantly upon cure.<br />
Note: Use similar technique for onlay and veneer restorations.<br />
1. Prepare die/model per preparation<br />
instructions on Page 5.<br />
2. Dispense and prepare desired shades and<br />
amounts of Sculpture Plus materials per<br />
basic handling technique on Page 4.<br />
Fig. 1<br />
3. Cut a thin section of prepared Sculpture<br />
Plus Range Modifier or Body material and<br />
adapt to the preparation floor using<br />
appropriate instruments. (Fig. 1)<br />
4. Apply Sculpture Plus Body material<br />
to the inlay preparation. (Fig. 2)<br />
5. Adapt the material carefully. Body<br />
material should not extend to the<br />
margins. (Fig. 3)<br />
Fig. 2<br />
6. Cure in the Sculpture Curing Light<br />
using the Build-up cycle. (Fig. 4)<br />
Fig. 3 Fig. 4<br />
9
Inlay Build- up Technique<br />
7. Apply additional layers as needed.<br />
Build to contour. Do not over-build.<br />
Note: For maximum cure and polymerization,<br />
incremental cures with a build<br />
up of 1 mm of material between cures<br />
is recommended.<br />
8. Add any desired internal characterization<br />
using Sculpture Plus Color Pastes.<br />
Example: Place brown color paste in<br />
central grooves as shown. (Fig. 5)<br />
Note: Color pastes are for adding characterization<br />
markings underneath an<br />
incisal layer. Color paste may be added<br />
after application of the incisal layer if<br />
the incisal material is then manipulated<br />
to fully cover the color paste. Color<br />
pastes are not to be used as an<br />
external stain.<br />
Fig. 5<br />
Fig. 6<br />
9. Apply Sculpture Plus Incisal material to<br />
the marginal and triangular ridges. Use<br />
a more translucent incisal to blend with<br />
the adjacent natural tooth structure.<br />
(Fig. 6)<br />
10. Contour, refine and shape the<br />
restoration using metal or silicone<br />
tipped instruments.<br />
Fig. 7<br />
11. Cure incisal layer in the Sculpture<br />
Curing Light using the Final cure cycle.<br />
(Fig. 7)<br />
12. Build-up is complete. (Fig. 8)<br />
13. Polish restoration per technique<br />
described on Page 11.<br />
Fig. 8<br />
10
Polishing Technique<br />
1. Add any additional contour using various<br />
grits of abrasives. (Fig. 1)<br />
2. Add final surface texture, as necessary,<br />
using rubber wheels or points. (Fig. 2)<br />
Fig. 1<br />
3. Use Upofix* ® brushes to provide polish<br />
and shine without altering the established<br />
texture. Upofix* ® brushes are effective for<br />
polishing all Sculpture Plus surfaces,<br />
including occlusal surfaces. (Fig. 3)<br />
4. For final, high luster polish, apply<br />
Sculpture Glo ® with a cotton buff wheel<br />
at medium RPM and pressure. (Fig. 4)<br />
Fig. 2<br />
5. Optional Step: Sandblast internal aspect<br />
with 50µ aluminum oxide at 25-30 psi.<br />
6. Optional Step: Glaze with Sculpture Plus<br />
LP Glaze, if desired, per the glazing<br />
technique on Page 12.<br />
7. Submerge restoration in distilled water<br />
to clean. Do not submerge Sculpture Plus<br />
restorations in alcohol at any time.<br />
Fig. 3<br />
8. Restoration is ready for delivery. (Fig. 5)<br />
Fig. 4<br />
Fig. 5<br />
* Upofix ® is a registered trademark of Austenal, Inc.<br />
11
Optional Glazing Technique<br />
1. Apply a thin layer of Sculpture Plus LP glaze<br />
to fully contoured and polished restoration.<br />
(Fig. 1)<br />
Note: For best results, apply Sculpture Plus LP<br />
Glaze directly onto a clean brush, then to your<br />
work. Replace the lid immediately.<br />
2. Cure in the Sculpture Curing Light using the<br />
Final cure cycle.<br />
3. Restoration is ready for delivery.<br />
Fig. 1<br />
Add - Ons and Repairs<br />
Indirect Technique:<br />
1. Adjust the surface requiring repair or additional material using various grits<br />
and abrasives.<br />
2. Surface clean with steamer or isopropyl alcohol (99%). If using an ultrasonic<br />
cleaner, do not submerge Sculpture Plus restorations in alcohol.<br />
3. Air dry restoration.<br />
4. Apply a thin layer of Sculpture Plus Thinning Liquid and cure with visible light in the<br />
Sculpture Curing Light for 1-2 minutes.<br />
Note: For a 1-2 minute light cure with the Sculpture Curing Light, select the<br />
Build-up Cure Cycle then press the "Minutes Down" key until the time display<br />
for "Pressure" reads "0 00." Press the “Select” key and set the desired cure time<br />
for "Pressure & Light". Refer to the Sculpture Curing Light User’s Manual for<br />
full instructions.<br />
5. Add Sculpture Plus material as needed using standard build-up technique.<br />
6. Contour, cure and polish per standard technique.<br />
Direct Chairside Technique<br />
1. Air abrade the surface requiring material addition.<br />
2. Clean with isopropyl alcohol (99%).<br />
3. Air dry restoration.<br />
4. Apply Bond-1 ® or equivalent bonding agent. Remove solvent.<br />
5. Add Simile ® nano-hybrid direct composite, or equivalent, as necessary for repair<br />
and light cure per manufacturer’s instructions.<br />
6. Adjust, finish and polish using standard composite finishing technique.<br />
* Bond-1 ® and Simile ® are registered trademarks of <strong>Pentron</strong> <strong>Clinical</strong><br />
12
Metal-Free Composite Layering Technique<br />
Standard Technique<br />
Modified Technique<br />
Incisal Body Transparent Incisal*<br />
Neck Paste<br />
Opaceous Body<br />
* The addition of transparent incisal creates<br />
a “halo” effect at the incisal edge.<br />
Body/Incisal Coordination Guide<br />
Body Incisal Body Incisal Body Incisal Body Incisal<br />
A0 1-7 B0 I-7 C1 I-8 D2 I-9<br />
A1 1-8 B1 I-8 C2 I-9 D3 I-10<br />
A2 1-8 B2 I-8 C3 I-9 D4 I-9<br />
A3 1-9 B3 I-9 C4 I-10<br />
A3.5 1-9 B4 I-9<br />
A4 1-10<br />
Sculpture ® Plus Transparent Incisal (I-T) may be used for every shade<br />
All Sculpture Plus composite shades can be used as modifiers and may be<br />
combined in a variety of ways to achieve desired results.<br />
13
06J102-Rev 02-Z90M<br />
1717 West Collins Ave., Orange, CA 92867 • Tel: 800.243.3100 / 203.303.2010 • www.pentron.com<br />
CEpartner4U, Esdoorniaan 13, 3951DB Maarn. NL. tel: +31 (0)6.516.536.26