Sculpture® Plus⢠Opaques - Pentron Clinical
Sculpture® Plus⢠Opaques - Pentron Clinical
Sculpture® Plus⢠Opaques - Pentron Clinical

You also want an ePaper? Increase the reach of your titles
YUMPU automatically turns print PDFs into web optimized ePapers that Google loves.
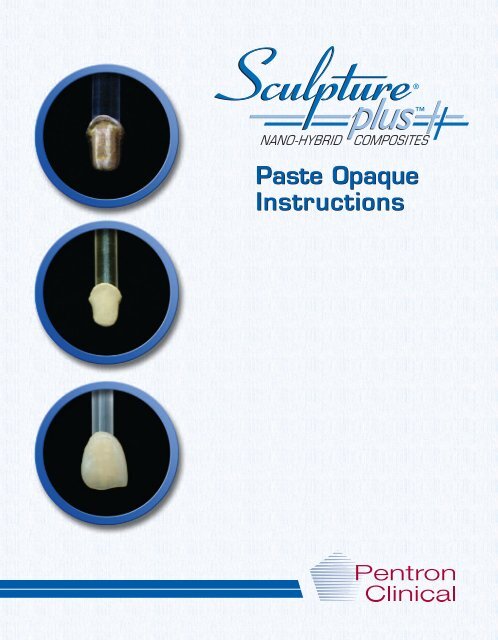
Paste Opaque<br />
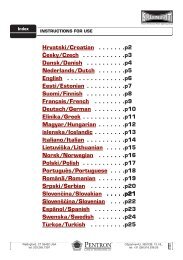
Instructions
Paste <strong>Opaques</strong><br />
Table of Contents<br />
An Introduction to Sculpture Plus <strong>Opaques</strong> Page 2<br />
Indications, Contraindications, Physical Data Page 3<br />
Using the Sculpture ® Curing Light for "Light Only" Cure Page 4<br />
Coping/Framework Preparation Page 5<br />
Sculpture Plus Paste Opaque Technique Page 5<br />
Sculpture Plus Opaque Layering Chart Page 7<br />
Sculpture Plus Opaque Shade Coordination Chart Page 8<br />
1717 West Collins Ave., Orange, CA 92867<br />
For Technical Assistance Call: 800.243.3100 • 203.303.2010<br />
CEpartner4U, Esdoornlaan 13, 3951DB Maarn. • The Netherlands. • tel: +31 (0)6.516.536.26<br />
1
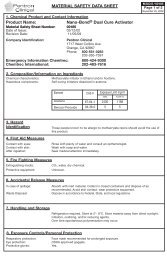
An Introduction to Sculpture ® Plus <strong>Opaques</strong><br />
Sculpture Plus <strong>Opaques</strong> are ideal for use when a doctor or patient desires an<br />
esthetic restoration that provides the familiarity and security of a metal substructure.<br />
Sculpture Plus <strong>Opaques</strong> are compatible with a wide range of alloys. For<br />
added esthetics, the warm gold color of high gold and SinterKor ® copings provide<br />
a life-like glow to Sculpture Plus composite restorations. Sculpture Plus over metal<br />
restorations yield beautifully natural results as well as all of the benefits of<br />
composite restorations including low wear, high stain resistance and kindness to<br />
opposing dentition.<br />
Sculpture Plus <strong>Opaques</strong> are dual component paste opaques that provide<br />
exceptional handling and one-coat coverage. The opaques are packaged in<br />
double barrel syringes to keep the shaded base and catalyst separate until ready<br />
for use. Our unique dual tip dispensing caps provided for use with the syringes<br />
prevent cross contamination and minimize waste. The tips are disposable and we<br />
recommend that you use one for each individual syringe. Caps are provided for<br />
the tips to preserve the material and to protect it from ambient light between<br />
use. Both the syringe tips and the caps are keyed to prevent cross contamination.<br />
The Sculpture Plus Opaque Kit<br />
provides you with a full range of<br />
18 body shades to complement our<br />
Sculpture Plus Composite body shades.<br />
Grey and White Modifiers are provided to<br />
customize shades as necessary. Sculpture Plus Opaque<br />
refills are available in Gingival Light and Gingival Dark shades<br />
required for implant cases. Contact <strong>Pentron</strong> <strong>Clinical</strong> for further information.<br />
2
Sculpture ® Plus <strong>Opaques</strong><br />
+ Indications<br />
• Anterior and posterior crowns with metal copings<br />
• Anterior and posterior bridges with metal substructures<br />
• Anterior and posterior metal implants<br />
• 1mm shoulder preparation<br />
• Use of microbeads for added retention on 1-3 surface restorations recommended<br />
+ Contraindications<br />
• Patients with known sensitivity to ingredients in Sculpture Plus materials<br />
• Screw retained implant substructures without custom cast metal abutment<br />
• Knife edge margins<br />
Opaque Bond Strength Chart<br />
Non Precious (Rex ® III)<br />
Precious (Rx C)<br />
SinterKor ® Gold<br />
30.8 MPa<br />
24.0 MPa<br />
19.9 MPa<br />
Composite Physical Properties Chart<br />
Flexural Strength<br />
140 MPa<br />
Flexural Modulus<br />
13.3 GPa<br />
Water Sorption 15.1 µg/mm 3<br />
Solubility 3.1 µg/mm 3<br />
Depth of Cure (mm)<br />
>2 mm<br />
In vivo Projected Wear Rate<br />
Curing Sculpture ® Plus <strong>Opaques</strong><br />
Sculpture Plus <strong>Opaques</strong> and the Opaque Conditioner, used to facilitate the bond between<br />
the opaque layer and the first composite body layer, are light cure materials. Both the<br />
Sculpture Plus <strong>Opaques</strong> and the Opaque Conditioner do not require exposure to pressure<br />
prior to light cure with pressure. As a result, the time for cure can be reduced by<br />
eliminating the pressure only segment of the cure cycles. The full 8-minute Build-Up and<br />
Final cure cycles are recommended for use once you begin to layer Sculpture Plus<br />
Composites over the opaque layer.<br />
Fig. 1<br />
Fig. 2<br />
Note:<br />
These instructions are provided<br />
to minimize curing<br />
time to 3 minutes for the<br />
opaques and 2 minutes for<br />
the opaque conditioner.<br />
The full 8-minute cure<br />
cycles may be used without<br />
affecting these materials.<br />
Sculpture Plus <strong>Opaques</strong> require a 3 minute light<br />
cure in the Final curing cycle of the Sculpture ®<br />
Curing Light. To set the Sculpture Curing Light<br />
to run the proper cure cycle for an opaque cure,<br />
follow these simple steps:<br />
1. Press the "Final" button to select the Final<br />
cure cycle.<br />
2. Press the "Minutes Down" button 5 times<br />
until the cycle time for the "Pressure"<br />
segment displays "0:00." The default<br />
pressure time setting is 5 minutes.<br />
3. The Sculpture Curing Light is now set for a<br />
3 minute light cure in the Final cycle Fig 1.<br />
4. Press the "Start" button to run the cure<br />
cycle.<br />
Sculpture Plus Opaque Conditioner requires a 2<br />
minute light cure in the Build-Up cycle of the<br />
Sculpture Curing Light. To set the Sculpture<br />
Curing Light for this cure follow these steps:<br />
1. Press the "Build-Up" button to select the<br />
Build-Up cure cycle.<br />
2. Press the "Minutes Down" button 5 times<br />
until the cycle time for the "Pressure"<br />
segment displays "0:00." The default<br />
pressure time setting is 5 minutes.<br />
3. Press the "Select" button to switch to the<br />
"Pressure & Light" segment. The default<br />
time for this segment is 3 minutes.<br />
4. Set the "Pressure & Light" segment time to<br />
"2:00" by pressing the "Minutes Down"<br />
button 1 time until the display reads "2:00."<br />
The Sculpture Curing Light is now set for<br />
a 2 minute light cure Fig 1.<br />
5. Press the "Start" button to run the cure<br />
cycle.<br />
4
Coping Preparation<br />
Wax & Cast Coping<br />
1. Finish and sandblast a cast alloy framework<br />
with AL 2 O 3 abrasive following standard<br />
procedure and clean with steam or with<br />
isopropyl alcohol in an ultrasonic cleaner.<br />
Note: For 1-3 surface restorations, use micro<br />
beads on your wax pattern for added retention.<br />
Apply micro beads following manufacturer’s<br />
instructions. The use of micro beads is optional<br />
for full coverage restorations.<br />
SinterKor ® Coping<br />
1. Clean the finished SinterKor coping with distilled water in an ultrasonic cleaner for<br />
5 minutes. Do not sandblast SinterKor copings.<br />
2. Prepare the coping for opaque application by applying SinterKor Gold Bonder <br />
bonding agent and firing per the instructions in the SinterKor manual.<br />
Note: After firing, the coping will have a matte finish and is ready for opaque application<br />
Fig. 1<br />
Sculpture ® Plus Paste Opaque Technique<br />
1. When coping is completely cooled and dry,<br />
apply a thin layer of Sculpture Plus Metal<br />
Primer to the surface of the coping using<br />
a disposable brush Fig 2. Close tightly and<br />
refrigerate immediately after use.<br />
Note: Sculpture Plus Metal Primer has a black<br />
cap and dropper tip.<br />
2. Allow Sculpture Plus Metal Primer to dry for<br />
30 seconds, then blow dry with a gentle jet<br />
of air for 3-5 seconds.<br />
3. Dispense the selected shade of Sculpture Plus<br />
Opaque Paste onto a glass slab Fig 3.<br />
Note: The cap for the double barrel syringe is<br />
keyed. Ensure the cap is properly aligned before<br />
replacing to prevent cross contamination.<br />
Fig. 2<br />
Fig. 3<br />
5
Sculpture ® Plus Paste Opaque Technique<br />
Fig. 4<br />
Fig. 5<br />
Fig. 6<br />
4. Immediately mix the base and catalyst for<br />
approximately 30 seconds until thoroughly<br />
combined Fig 4.<br />
5. Apply a thin layer of Sculpture Plus Opaque<br />
to the surface of the coping with a disposable<br />
brush Fig 5.<br />
Note: Vibration is not required. Sculpture<br />
Plus <strong>Opaques</strong> will thoroughly mask metal<br />
copings with a single layer application.<br />
6. Light cure in the Sculpture Curing Light,<br />
“Final” cycle for 3 minutes Fig 6.<br />
Note: The cured opaque layer will have a<br />
hard surface finish.<br />
7. Apply a thin layer of Sculpture Plus Opaque<br />
Conditioner over the opaqued coping<br />
using a disposable brush Fig 7. Note:<br />
Sculpture Plus Opaque Conditioner has a<br />
white cap and dropper tip.<br />
8. Light cure in the Sculpture Curing Light<br />
“Build-up” cycle for 2 minutes.<br />
9. The restoration is now ready for Sculpture<br />
Plus Body and Incisal Build-up. Use the<br />
layering technique and incisals per the<br />
instructions on page 6 for Sculpture Plus<br />
restorations over metal. Refer to the<br />
Sculpture Plus Composite Instruction<br />
Manual for details on handling, curing and<br />
polishing techniques.<br />
Note: Cover the opaqued coping with a<br />
minimum 0.75mm thickness of Sculpture Plus<br />
Composites.<br />
Fig. 7<br />
6
Sculpture ® Plus Opaque Layering Chart<br />
Note: The composite layering technique for Sculpture Plus restorations over metal is<br />
different than the metal-free technique detailed in the Sculpture Plus Composite<br />
Instructions. The layering technique illustrated below has been developed to maximize<br />
the esthetics of Sculpture Plus restorations over metal.<br />
Standard Technique<br />
Modified Technique<br />
Metal Coping Body Opaque<br />
Incisal<br />
Transparent Incisal*<br />
* The addition of transparent incisal creates a “halo” effect at the incisal edge.<br />
7
Opaque/Body/Incisal Coordination Guide<br />
Opaque/<br />
Body<br />
Incisal<br />
Opaque/<br />
Body<br />
Incisal<br />
Opaque/<br />
Body<br />
Incisal<br />
Opaque/<br />
Body<br />
Incisal<br />
A0 I-7 B0 I-7 C-1 I-7 D2 I-7<br />
A1 I-7 B1 I-7 C-2 I-7 D3 I-8<br />
A2 I-7 B2 I-7 C-3 I-8 D4 I-7<br />
A3 I-7 B3 I-7 C-4 I-8<br />
A3.5 I-8 B4 I-8<br />
A4 I-7<br />
Note: Sculpture ® Plus Transparent Incisal (I-T) may be used for every shade<br />
All Sculpture Plus composite shades can be used as modifiers and may be<br />
combined in a variety of ways to achieve desired results.<br />
8
1717 West Collins Ave., Orange, CA 92867 • Tel: 800.243.3100 / 203.303.2010 • www.pentron.com<br />
Rx Only • Assembled in USA<br />
Refrigeration required. Store at 2°– 8°C<br />
CEpartner4U, Esdoornlaan 13, 3951DB Maarn. NL. tel: +31 (0)6.516.536.26 Z910M 06J109_Rev01