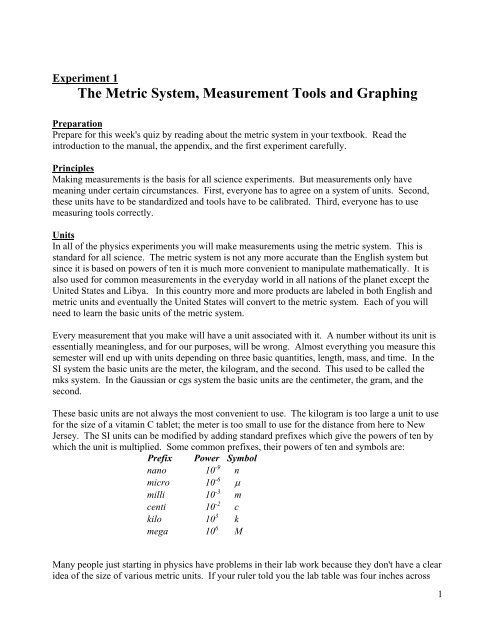
Experiment 1 The Metric System, Measurement Tools And Graphing
Experiment 1 The Metric System, Measurement Tools And Graphing
Experiment 1 The Metric System, Measurement Tools And Graphing

You also want an ePaper? Increase the reach of your titles
YUMPU automatically turns print PDFs into web optimized ePapers that Google loves.
<strong>Experiment</strong> 1<br />
<strong>The</strong> <strong>Metric</strong> <strong>System</strong>, <strong>Measurement</strong> <strong>Tools</strong> and <strong>Graphing</strong><br />
Preparation<br />
Prepare for this week's quiz by reading about the metric system in your textbook. Read the<br />
introduction to the manual, the appendix, and the first experiment carefully.<br />
Principles<br />
Making measurements is the basis for all science experiments. But measurements only have<br />
meaning under certain circumstances. First, everyone has to agree on a system of units. Second,<br />
these units have to be standardized and tools have to be calibrated. Third, everyone has to use<br />
measuring tools correctly.<br />
Units<br />
In all of the physics experiments you will make measurements using the metric system. This is<br />
standard for all science. <strong>The</strong> metric system is not any more accurate than the English system but<br />
since it is based on powers of ten it is much more convenient to manipulate mathematically. It is<br />
also used for common measurements in the everyday world in all nations of the planet except the<br />
United States and Libya. In this country more and more products are labeled in both English and<br />
metric units and eventually the United States will convert to the metric system. Each of you will<br />
need to learn the basic units of the metric system.<br />
Every measurement that you make will have a unit associated with it. A number without its unit is<br />
essentially meaningless, and for our purposes, will be wrong. Almost everything you measure this<br />
semester will end up with units depending on three basic quantities, length, mass, and time. In the<br />
SI system the basic units are the meter, the kilogram, and the second. This used to be called the<br />
mks system. In the Gaussian or cgs system the basic units are the centimeter, the gram, and the<br />
second.<br />
<strong>The</strong>se basic units are not always the most convenient to use. <strong>The</strong> kilogram is too large a unit to use<br />
for the size of a vitamin C tablet; the meter is too small to use for the distance from here to New<br />
Jersey. <strong>The</strong> SI units can be modified by adding standard prefixes which give the powers of ten by<br />
which the unit is multiplied. Some common prefixes, their powers of ten and symbols are:<br />
Prefix Power Symbol<br />
nano 10 -9 n<br />
micro 10 -6 µ<br />
milli 10 -3 m<br />
centi 10 -2 c<br />
kilo 10 3 k<br />
mega 10 6 M<br />
Many people just starting in physics have problems in their lab work because they don't have a clear<br />
idea of the size of various metric units. If your ruler told you the lab table was four inches across<br />
1
you would immediately suspect a problem because you know about how big an inch is. Everyone<br />
can estimate weight in pounds, but most people raised in American can't estimate mass in<br />
kilograms. It is therefore important that you get a sense of various metric measurements so that you<br />
can tell if your measurements are reasonable or not.<br />
In this week's experiment you are going to use two tools to measure length, the meter stick and the<br />
Vernier caliper. <strong>The</strong>n you will plot your data and find the slope.<br />
<strong>The</strong> Meter Stick<br />
<strong>The</strong> meter stick is one meter<br />
(m) long and is divided into<br />
one hundred centimeters<br />
(cm). Each centimeter is in<br />
turn divided into ten<br />
millimeters (mm). <strong>The</strong>refore<br />
you can precisely measure an<br />
object to the nearest<br />
millimeter. It is also possible<br />
to estimate tenths of<br />
millimeters fairly accurately.<br />
<strong>The</strong> meter stick is said to be<br />
precise to the nearest millimeter.<br />
It is a good idea to start measuring from the 1 cm or the 10 cm mark on a meter stick since the ends<br />
of the sticks tend to become worn and inaccurate. Also, whenever it is possible, place the object to<br />
be measured on the meter stick and look straight down at it. This reduces errors induced by<br />
parallax, which is the apparent shift of one object compared to another caused by their different<br />
distances from the observer.<br />
<strong>The</strong> Vernier Caliper<br />
<strong>The</strong> Vernier calipers in the physics labs can be used to precisely measure length to the tenth of a<br />
millimeter. If you look at a caliper you will see that it is just like a meter stick, but with a movable<br />
scale attached. This sliding scale has eleven lines etched on it, and the distance between the first<br />
and the last is exactly 0.9 cm (or 9 mm). <strong>The</strong> lines represent values from 0 to 10. When the jaws of<br />
the caliper are closed the zero on the sliding scale will line up with the zero on the fixed scale.<br />
When the jaws are spread the distance between the zero marks will be the same as the distance<br />
between the jaws.<br />
To use the caliper first clamp it around the object to be measured. <strong>The</strong>n look at the zero line on the<br />
sliding scale and see where it crosses the fixed scale. Read the first two numbers (cm and mm)<br />
from the fixed scale just as you would from a meter stick. To find the last digit, tenths of a<br />
millimeter, look at the lines on the sliding scale. One of the lines will line up exactly (or nearly so)<br />
with one of the lines on the fixed scale. <strong>The</strong> lines on the sliding scale are numbered from zero, and<br />
the number of the line on the sliding scale that lines up with a line on the fixed scale is the value of<br />
the final digit of your measurement (see the diagram). Learning to use a caliper takes practice; your<br />
lab instructor will help you if you have trouble.<br />
2
Accuracy, Precision and Tolerance<br />
<strong>The</strong> smallest difference that you can detect with a measuring tool is called its precision. A meter<br />
stick is precise to the nearest millimeter, the caliper we use in our labs is precise to the nearest tenth<br />
of a millimeter. <strong>The</strong> precision of your instrument determines how many significant digits your<br />
record in your data.<br />
<strong>The</strong> instructions for the experiments you do this semester usually specify the precision of your<br />
measurements by telling you the smallest unit to measure. This does not mean that those are the<br />
units to use when you record the data. For example, the instructions might tell you to measure to<br />
the nearest millimeter. This does not mean that you should record your lengths in millimeters.<br />
Read the directions and use common sense to decide what unit to use. If you have doubts, ask your<br />
instructor.<br />
<strong>The</strong> calibration of the tool and the skill and care of the person using it determine its accuracy. For<br />
example, if your triple beam balance is out of calibration you may measure something to the tenth<br />
of a gram, but the measurement would not be accurate. If you don't position the Vernier calipers<br />
correctly, or misread the scale your answer will be precise to the tenth of a millimeter, but the<br />
answer will not be accurate.<br />
All things don't need to be measured to the same precision. For example, you would want to know<br />
the distance to the next town on the road to within a few kilometers. If you buy a pair of shoes, you<br />
want the length to be right for your feet to within half a centimeter or so. <strong>The</strong> surface of a reflecting<br />
telescope, like the Hubble telescope should be smooth to within half a wavelength of visible light,<br />
about .00025 millimeter.<br />
3
When you buy a box of breakfast cereal, its mass will be about 250 grams plus or minus some<br />
amount, probably about half a gram. It is not necessary for the measurement to be any closer than<br />
that, though the government specifies that the average mass of a large group of cereal boxes must<br />
come close to the stated value. This uncertainty is called the tolerance of a measurement. <strong>The</strong><br />
tolerances for different measurements depend on the size and importance of the measurement as<br />
well as the use for whatever is being measured. Few people would notice if one of your shoelaces<br />
was three centimeters longer than the other, but they would probably notice if one leg of your jeans<br />
was that much longer than the other.<br />
When you make a measurement you can sometimes use your common sense to decide how precise<br />
it should be.<br />
Errors<br />
An error that only affects one piece of data is called a random error. A one time mistake in<br />
reading the measurement tool or transposing two numbers as you record the data are examples of<br />
random errors. A mistake that affects all the data is called a systematic error. Using a device that<br />
is out of calibration or consistently misreading the scale are causes of systematic errors.<br />
<strong>The</strong> Slope of a Line<br />
<strong>The</strong> slope of a line shows you how two variables relate. In other words, it tells you the rate of<br />
change of one variable with respect to the other. This is what most experiments are about. <strong>The</strong><br />
experimenter changes some quantity, measures another and sees how the two relate. For example,<br />
speed is the rate with which position changes with respect to time.<br />
This week you will use your data to calculate the value of a familiar constant, π, the ratio of the<br />
circumference of a circle to its diameter. π is the rate of change of circumference of a circle with<br />
respect to its diameter.<br />
<strong>The</strong> equation for the circumference of a circle is:<br />
C = πD.<br />
This is a linear equation. That means if you plot the circumferences as a function of the diameters<br />
the points will fall on a straight line. <strong>The</strong> general form of this equation is:<br />
y = mx + b.<br />
m is called the slope and b is the y intercept, the value of y when x is equal to zero. <strong>The</strong> slope tells<br />
you how the y variable changes in relation to changes in the x variable:<br />
m = ∆y<br />
∆x .<br />
If you have a graph of linear data like this you can find the slope of the line easily. Look at the data<br />
and draw the best fitting line, the line that comes the closest to all the data points. Sometimes the<br />
4
est fitting line does not actually touch any of the data points. Once you have drawn in the best fit<br />
line, select two points that are on the line and read their coordinates. Point #1 will have coordinates<br />
x 1 ,y 1 , and point #2's coordinates will be x 2 ,y 2 . You can the calculate m:<br />
m = y 2 - y 1<br />
x 2 - x 1<br />
.<br />
<strong>The</strong> units for the slope will be the units for y divided by the units for x.<br />
Equipment<br />
5 plastic disks of different diameters<br />
1 Vernier caliper<br />
1 meter stick<br />
1 strip of paper<br />
Procedure<br />
Remember: Be as precise and as accurate as you can when you are taking measurements. Also,<br />
remember to note the unit as well as the number when you record your measurement. Record the<br />
unit at the top of each column when you are using a data table, that way you don't have to write the<br />
same unit over and over. A measurement that you record<br />
without its correct unit is automatically wrong! Be sure<br />
that you follow all the procedures. Write legibly and use<br />
complete sentences. Identify all answers and calculations.<br />
1. Use the Vernier caliper to measure the diameters of<br />
the disks and record the measurements in the table.<br />
2. Wrap the strip of paper tightly around the<br />
circumference of a disk. Make a mark that crosses<br />
two layers of paper. Use the meter stick to measure<br />
the distance between the marks. Estimate the tenths<br />
of mm. Record your value for the circumference in<br />
the table. Repeat this procedure for each of the<br />
remaining disks.<br />
3. Make a graph of the data. Plot the diameters on the x<br />
(horizontal) axis and the circumferences on the y<br />
(vertical) axis. Remember to choose a scale that<br />
makes your values easy to find. <strong>The</strong> size of the<br />
graph should be consistent with the accuracy of your<br />
units. Also note that the axes need not start at zero,<br />
and remember to label axes and include units. Use<br />
your ruler to draw the line that best fits your data.<br />
Example of a well made graph<br />
5
4. Show your graph to your instructor. If it does not meet with his or her approval change it or,<br />
if necessary, do it again.<br />
5. You have plotted the circumference as a function of the diameter. <strong>The</strong> slope of this line will<br />
give the average value of the function. Pick two widely separated points on the line that are<br />
not data points and record their coordinates. Mark the two points on the line with "X"'s.<br />
Compute the slope of your line using the equation:<br />
<strong>The</strong> slope is ∆C/∆ D = π.<br />
m = y 2 - y 1<br />
x 2 - x 1<br />
.<br />
6. Percent error is a way of judging the accuracy of your experiment. <strong>The</strong> percent error is the<br />
difference between the experimental results and the accepted value, divided by the accepted<br />
value. <strong>The</strong> absolute value of this value is then converted to a percentage:<br />
Percent error =<br />
|accepted value - experimental value|<br />
|accepted value|<br />
x 100<br />
7. Return the discs and the caliper to the cart and put the meter stick away. Put the used paper<br />
strips in the trash.<br />
6