Owner's Manual - QVC.com
Owner's Manual - QVC.com
Owner's Manual - QVC.com

Create successful ePaper yourself
Turn your PDF publications into a flip-book with our unique Google optimized e-Paper software.
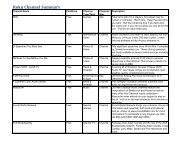
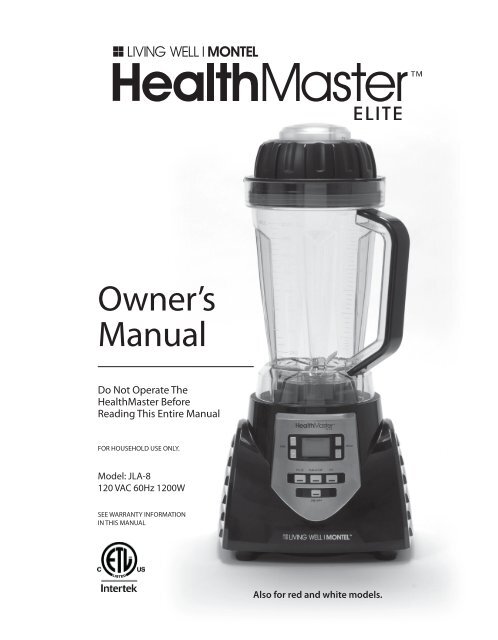
Owner’s<br />
<strong>Manual</strong><br />
Do Not Operate The<br />
HealthMaster Before<br />
Reading This Entire <strong>Manual</strong><br />
FOR HOUSEHOLD USE ONLY.<br />
Model: JLA-8<br />
120 VAC 60Hz 1200W<br />
SEE WARRANTY INFORMATION<br />
IN THIS MANUAL<br />
Also for red and white models.
Contents<br />
Important Safeguards 3–4<br />
Specifications 4<br />
Avoiding Serious Injury and Burns<br />
While Processing Hot Liquids 4<br />
Parts & Accessories 5<br />
Assembling the HealthMaster 6–7<br />
Controls 8<br />
Using the Tamper 8<br />
Using Your HealthMaster 9<br />
Making Hot Soups/Sauce 9<br />
Making Frozen Blends/Treats 9<br />
Making Dough 10<br />
Chopping with the HealthMaster 10<br />
Cleaning and Maintenance 10–11<br />
Troubleshooting 11<br />
Frequently Asked Questions 12–14<br />
Warranty Information 14<br />
Replacement Parts Order Form 15<br />
2
IMPORTANT SAFEGUARDS<br />
IMPORTANT: Read this manual carefully and <strong>com</strong>pletely before attempting to<br />
operate the HealthMaster. Failure to do so could result in serious personal injury.<br />
• Blades are sharp. Handle carefully.<br />
• Children should not be permitted to operate this, or any other kitchen appliance,<br />
without the constant supervision of a qualified adult.<br />
• Do not attempt any home repairs to this unit. Should the unit require repair, such<br />
repair should only be performed by a qualified professional.<br />
• Unit For Indoor Use Only. To reduce the risk of electric shock, never expose any<br />
part of this appliance including the power cord, plug or motorized Base to rain,<br />
moisture or immersion in liquids of any kind.<br />
• The unit has a polarized plug. One prong is narrower than the other and it will<br />
fit only one way into an electrical outlet. Never force the plug into the outlet. If it<br />
doesn’t fit after trying it one way and then reversing it … contact an electrician.<br />
Do not modify the plug in any way.<br />
• Never use an adaptor or an extension cord.<br />
• Never assemble, disassemble or handle the unit while it is plugged into an<br />
electrical outlet. Keep unplugged when not in use.<br />
• The HealthMaster <strong>com</strong>es equipped with a “Tamper” utensil. This is the only utensil<br />
you should ever use while operating this unit. Using other utensils may damage<br />
the unit and cause possible personal injury.<br />
• To prevent overheating, do not block any ventilation intake openings (see page 5).<br />
• Use on a dry, stable surface.<br />
• When preparing fresh baby food always consult with your physician (pediatrician)<br />
before making any dietary changes. Certain fruits and vegetables are not<br />
re<strong>com</strong>mended for infants or young children due to immature digestive systems,<br />
allergies, or other developmental reasons.<br />
• When preparing fresh baby food, to prevent choking, always make sure all fruits<br />
and vegetables are <strong>com</strong>pletely liquified before feeding them to a baby.<br />
• To avoid personal injury: Never remove the Lid while the motor is running. If<br />
something is stuck press the power OFF button, wait for motor to stop running,<br />
unplug the unit then remove the Cap only, insert the Tamper to dislodge stuck<br />
food. If food remains stuck, disassemble and remove the blocked food.<br />
• Make sure the Lid is attached properly before pressing the ON button.<br />
• Avoid contacting moving parts.<br />
• Do not operate any appliance with a damaged cord or plug or after the appliance<br />
malfunctions, or is dropped or damaged in any manner. Return appliance to<br />
the nearest authorized service facility for examination, repair or electrical or<br />
mechanical adjustment.<br />
• The use of attachments, including canning jars, not re<strong>com</strong>mended by the<br />
manufacturer may cause a risk of injury to persons.<br />
3
IMPORTANT SAFEGUARDS (continued)<br />
• Never use hands, fingers, or other utensils to insert food into the Pitcher.<br />
Use the Tamper only.<br />
• Never leave the HealthMaster unattended while motor is running.<br />
• Never add ingredients to the HealthMaster while unit is running at a speed<br />
of higher than #1.<br />
• We do not re<strong>com</strong>mend pressing the RUN button when the Pitcher is empty.<br />
• Always use one hand to hold the Pitcher handle as this unit operates at<br />
high speeds.<br />
• Never put fruits with pits in the HealthMaster. Remove pits prior to placing items<br />
into the Pitcher.<br />
• The maximum capacity is 70 ounces. Use significantly less with thicker ingredients.<br />
• When processing foods with a dense consistency such as peanut butter, grains,<br />
or doughs, do not process for more than 30 seconds at a time. Over processing<br />
can cause the motor to overheat.<br />
• Always make sure the Lid and E-Z Lock Cap are position before use.<br />
• Do not let cord <strong>com</strong>e in contact with stove, other hot surfaces or hang over<br />
edge of table or counter.<br />
WARNING Failure to follow these instructions can result in death,<br />
fire, or electric shock.<br />
Specifications Model: JLA-8 120 VAC 60Hz 1200W<br />
Avoiding Serious Injury and Burns<br />
While Processing Hot Liquids<br />
• Make sure the Lid and E-Z Lock Cap are securely in place and locked when<br />
processing hot liquids.<br />
• When processing hot liquids always start on speed #1. Then increase rapidly to<br />
the required speed for that recipe. Use caution when using hot liquids as steam<br />
may escape from the sides of the E-Z Lock Cap.<br />
• Always hold the Pitcher securely by the handle while processing hot liquids.<br />
SAVE THESE INSTRUCTIONS<br />
4
Parts & Accessories<br />
IMPORTANT: Your HealthMaster has been shipped with the following <strong>com</strong>ponents.<br />
Check everything carefully before use. If any part is missing or has been damaged<br />
in shipping do not use this product and contact shipper using the customer service<br />
number located in the back of this owner’s manual.<br />
E-Z Lock Cap/Measuring Cup<br />
Lid<br />
Handy Tab<br />
for easy open & close<br />
Tamper<br />
Two Liter Pitcher<br />
E-Z Grip Handle<br />
LED Display<br />
Weighted Safety Switch<br />
Time<br />
Buttons<br />
Speed Buttons<br />
PULSE - RUN/STOP - ICE Buttons<br />
ON/OFF Button<br />
Motor Housing Base<br />
Non-Skid Feet<br />
Bottom Air Vents (underside)<br />
5
Assembling The HealthMaster<br />
Unwind power cord to desired length.<br />
Figure A<br />
This appliance was designed with built-in power<br />
cord storage beneath the Base. Store the excess<br />
length of cord neatly underneath to avoid<br />
accidental tipping of machine while in use.<br />
WARNING: Do not plug power<br />
cord into electrical outlet until unit<br />
is fully assembled.<br />
Power to unit will not take place<br />
unless steps 1–5 in this section<br />
are followed carefully.<br />
1. Place the motor Base on<br />
a stable, dry surface.<br />
2. Firmly seat the Pitcher onto the<br />
Base. The Pitcher will fit on the Base<br />
4 different ways. The 4 knobs on<br />
the Base should fit into the corners<br />
under the Pitcher. Once seated<br />
properly, this will activate the<br />
weighted safety switch.<br />
NOTE:<br />
At this point you may want to place the ingredients for processing into the unit. Insert<br />
ingredients into the Pitcher, soft foods first, harder items last. The E-Z Lock Cap can be<br />
removed during operation to add additional ingredients or to insert the Tamper. The<br />
E-Z Lock Cap should only be removed at speed #1. Always replace Cap when you are<br />
finished inserting Tamper or additional ingredients.<br />
6
Assembling The HealthMaster (continued)<br />
3. Insert the E-Z Lock Cap into the Lid<br />
(aligning the Cap’s tabs with the Lid’s slots)<br />
and turn clockwise to the lock symbol.<br />
NOTE:<br />
While the power is ON and as air pressure<br />
inside the Pitcher increases, steam will<br />
release from the openings on the side of<br />
the Cap. To release the steam, turn the Cap<br />
counterclockwise to the unlock symbol.<br />
TABS<br />
4. Place Lid on Pitcher and push<br />
down until Lid lip meets the top<br />
of the Pitcher.<br />
5. Make sure the unit is assembled properly before<br />
connecting the power cord to the electrical outlet. Once<br />
the HealthMaster is plugged in, the ON/OFF button will<br />
light up blue. But the LED Display will not be lit up. This<br />
means the HealthMaster is not on but there is power.<br />
6. BEFORE pushing the ON button — hold the top of the<br />
assembled unit to prevent tipping when starting. Once<br />
you push the ON button, the LED Display will illuminate.<br />
7. After pushing the OFF button wait until the Blades<br />
<strong>com</strong>pletely stop spinning and unit is unplugged before<br />
removing the Cap, Lid, or the Pitcher.<br />
NOTE: Unit will not turn on until Weighted Safety Switch is<br />
fully engaged. Should the unit overheat during operation<br />
the motor will automatically shut off. To restore power<br />
allow the machine to cool down for 35 minutes.<br />
7
Controls<br />
ON/OFF Button: Push once for ON. Push once for OFF.<br />
The button lights up BLUE when the HealthMaster is<br />
plugged in. It is ON when the LED Display is illuminated.<br />
SPEED Selection: Use the (+) and (-) buttons<br />
to select the speed, 1 through 8.<br />
TIME: Use the (+) and (-) buttons to select the<br />
amount of time in minutes, 0 through 10 minutes,<br />
for bigger blending jobs. For quick blending,<br />
manually stop the unit by pressing the<br />
STOP button.<br />
PULSE: Press and release to get a single burst<br />
of speed for each pulse until you have achieved<br />
the desired results. The button lights up BLUE<br />
when activated.<br />
RUN/STOP: Press RUN/STOP to start the<br />
HealthMaster. If the speed was not set,<br />
the HealthMaster will run at speed 1.<br />
The button lights up BLUE when activated.<br />
You must press RUN/STOP again to stop.<br />
ICE: Pressing the ICE button causes the HealthMaster<br />
to operate on a cycle of 1 second on and 4 seconds off.<br />
The button lights up Blue when activated. Press ICE<br />
again to stop.<br />
Using the Tamper<br />
The Tamper is useful when preparing thick or frozen mixtures.<br />
The Tamper can be used while the machine is running.<br />
1. Make sure Lid is secure and locked in place.<br />
2. Remove E-Z Lock Cap from Lid.<br />
3. Insert Tamper through the opening in the Lid.<br />
4. Hold the Pitcher handle with one hand,<br />
grasp Tamper with the other hand.<br />
5. Move up and down or in a circular motion<br />
to move contents around the Blade.<br />
Tips for Using the Tamper:<br />
When preparing thick mixtures that don’t circulate freely, insert the<br />
Tamper and move in a circular motion. This will help remove any air<br />
or ingredients trapped by the Blade. The Lid prevents the Tamper<br />
from making direct contact with the Blade.<br />
NOTE: In the event the motor overheats during operation<br />
it will automatically shut off. To restore power, allow it to<br />
cool down for 35 minutes before using.<br />
8
Using Your HealthMaster<br />
• Always remove all stems and large pits such as peach, mango, apricot, etc.<br />
before processing as these items can damage the Blade and cause the motor to<br />
malfunction.<br />
• Unless otherwise instructed, insert wet ingredients into the HealthMaster first,<br />
then dry ingredients, then ice if needed.<br />
• Thoroughly wash all fruits and vegetables before juicing to remove any dirt<br />
or chemicals.<br />
• Fruits and vegetables juice best when they are fresh and firm.<br />
• Always serve fresh foods immediately. After just a few seconds they begin to lose<br />
vitamin potency.<br />
Making Hot Soups & Sauces<br />
1. Carefully add liquids and solids, avoiding splashing that could cause personal<br />
injury when liquids are hot. (When recipe calls for hot liquid to be added to the<br />
Pitcher, let sit for 3–5 minutes with the E-Z Lock Cap removed, allowing the steam<br />
to escape.)<br />
2. Secure Lid and E-Z LOCK Cap on the Pitcher making sure Cap is in the<br />
locked position.<br />
3. Push the ON control button and then the RUN button.<br />
4. Slowly increase the speed control from #1 to #8 (as specified by the recipe). Let<br />
the machine run until desired consistency or temperature has been reached. The<br />
average cook time is 6–8 minutes on speed #8. This will vary depending on the<br />
texture of the ingredients and the starting temperature.<br />
5. Do not remove Lid and E-Z LOCK Cap until the power is OFF and the unit has been<br />
unplugged. Wait for motor to shut off and the Blades to <strong>com</strong>pletely stop.<br />
6. To open Lid, first remove the E-Z LOCK Cap to let steam escape then remove Lid.<br />
Pureeing Cooked Soups & Sauces<br />
1. Carefully add hot soup or sauce, avoiding splashing that could cause personal<br />
injury. Let sit for 3–5 minutes with the E-Z Lock Cap removed, allowing the steam<br />
to escape before blending.<br />
Making Frozen Blends & Treats<br />
1. To make ice cream and sorbet, add liquids and soft ingredients (i.e. soft fruits)<br />
first, then frozen ingredients. In order to make successful frozen treats with the<br />
HealthMaster you must always follow the re<strong>com</strong>mended ratio of ingredients.<br />
1 part liquid to 3–4 parts frozen ingredients. Changing this ratio can damage the<br />
Blades or the motor.<br />
2. Place the Lid on securely. Remove E-Z LOCK Cap from Lid and insert Tamper.<br />
NOTE: You will need to use the Tamper to move ingredients around quickly.<br />
3. Press ON button. Press RUN button. Increase the speed to #8 (high) and blend<br />
to desired consistency.<br />
9
Making Dough<br />
1. To make dough for fresh bread or pizza, add the dry ingredients into the<br />
Pitcher first. Secure the Lid without the Cap.<br />
2. Press ON button. Increase the speed to 4. Press RUN button. Add the wet<br />
ingredients into the Pitcher while the motor is running. Allow it to run for 5-8<br />
seconds only. Press STOP button.<br />
3. Increase the speed to 8. PULSE approximately 20 times until the mixture<br />
be<strong>com</strong>es a crumbled texture. Press OFF button.<br />
4. Remove the Lid and Pitcher. Pour the dough into a bowl. Turn the gear end of<br />
the Blade under the Pitcher to get all the dough out.<br />
5. Knead the dough into a ball on a floured surface. Place the dough back into a<br />
covered bowl. Let the bowl and dough sit in a warm place for approximately<br />
45 minutes or until doubled in size.<br />
6. Divide dough into pieces to bake bread, pitas, pizza and more.<br />
Chopping with the HealthMaster<br />
The HealthMaster chops food to a fine texture quickly and easily for use in<br />
salads, soups, and baking:<br />
1. Place ingredients in the Pitcher. Do not fill more than 1/4 full.<br />
We re<strong>com</strong>mend using smaller pieces when chopping.<br />
2. Secure Lid and Cap then select ON button.<br />
3. Set to re<strong>com</strong>mended speed.<br />
4. Use the PULSE button until all ingredients have been processed.<br />
NOTE: The speeds may vary depending on the ripeness of ingredients when<br />
using fresh fruits and vegetables.<br />
Re<strong>com</strong>mended Speed Settings For Chopping<br />
• Broccoli #3 –4<br />
• Cauliflower #3 –4<br />
• Zucchini/Squash #3–4<br />
• Hard Boiled Eggs #3 –4<br />
• Olives #2–3<br />
• Potatoes #2–3<br />
• Onions #2–3<br />
• Nuts #3<br />
• Carrots #3 –4<br />
• Mushrooms #2–3<br />
• Breadcrumbs #2–3<br />
Cleaning and Maintenance<br />
1. Press OFF button and wait until the motor <strong>com</strong>pletely stops.<br />
2. Using dry hands, unplug the power cord from electrical outlet.<br />
3. Disassemble the machine.<br />
4. Wash the Lid and Cap in warm soapy water. Rinse and dry thoroughly before<br />
first use.<br />
5. NOTE: DO NOT put unit in dishwasher. We re<strong>com</strong>mend washing the Pitcher<br />
by hand. For safety reasons, do not touch the blade directly with your fingers.<br />
Fill the Pitcher with warm soapy water. Attach the Pitcher to the Base. Then<br />
secure the Lid and Cap in place. Press ON button. Increase the speed to 8.<br />
Then press the RUN button. Allow it to run for about 1 minute. Rinse and dry<br />
thoroughly.<br />
10
Cleaning and Maintenance (continued)<br />
6. Make sure Base and parts are <strong>com</strong>pletely dry before storing in a cool,<br />
dry place.<br />
7. Never use abrasive materials or cleansers to clean the main Base or any of the<br />
parts. This can scratch the finish causing permanent damage.<br />
CAUTION: To avoid personal injury use caution while cleaning inside of<br />
Pitcher as Blades are sharp. Handle carefully.<br />
Troubleshooting<br />
NOTE: The HealthMaster is a very powerful unit. When operating properly,<br />
the motor gives off a loud but smooth sound that changes in pitch as the<br />
motor speed is increased. This is normal.<br />
Problem<br />
There was a burning smell<br />
when the HealthMaster was<br />
first turned on.<br />
Motor does not run after<br />
ON button is pushed.<br />
Normal Loud Smooth Sound<br />
be<strong>com</strong>es unpleasant, more<br />
pronounced and uneven,<br />
producing erratic and<br />
sometimes uncontrolled<br />
unit vibration.<br />
The unit shuts off<br />
while in use.<br />
Possible Reasons and Solution<br />
• There may be a short term Burn-Off Odor when<br />
the HealthMaster is first used. This is from a<br />
lubricant used in manufacturing the motor.<br />
• Check to see if unit is plugged in.<br />
• Pitcher is not seated correctly.<br />
• Check if all parts are assembled properly.<br />
• Check if any food is causing Blade to lock.<br />
• Push power button to OFF immediately.<br />
• Unplug unit and check for proper assembly.<br />
• Reassemble and retry unit.<br />
• The auto shut off feature has been activated<br />
due to overheating.<br />
• Push OFF button, allow to cool down<br />
for 35 minutes.<br />
• Check the thickness and quantity of mixture,<br />
if overloaded, reduce accordingly.<br />
NOTE: In the event the motor overheats during operation it will automatically shut<br />
off. You may have overloaded the HealthMaster. Remove excess contents. To restore<br />
power, allow the machine to cool down for 35 minutes before use.<br />
11
FREQUENTLY ASKED QUESTIONS<br />
about the LIVING WELL MONTEL HealthMaster<br />
This summary briefly answers <strong>com</strong>mon questions. Read operating manual before use.<br />
Q. What is the difference between this unit and other blenders on the market?<br />
A. The Healthmaster is not a typical blender. This unit is designed to do 31 kitchen<br />
jobs in one. The Healthmaster will make everything from hot soups to cold ice<br />
cream in one step.<br />
01. Pulverize fruit.<br />
17. Shred cooked meat.<br />
02. Liquefy vegetables.<br />
18. Mash potatoes.<br />
03. Make frozen treats.<br />
19. Cream butters.<br />
04. Simmer soup.<br />
20. Chop vegetables.<br />
05. Blend smoothies.<br />
21. Emulsify whole produce.<br />
06. Grind nut butters.<br />
22. Dice onions.<br />
07. Whisk salad dressings.<br />
23. Aerate egg whites.<br />
08. Melt chocolate fondue.<br />
24. Juice.<br />
09. Purée baby food.<br />
25. Powder sugar.<br />
10. Grate cheese.<br />
26. Knead dough.<br />
11. Whip cream.<br />
27. Prepare yogurt.<br />
12. Fold batter.<br />
28. Make soy milk.<br />
13. Mince herbs.<br />
29. Create coffee drinks.<br />
14. Mix cocktails.<br />
30. Grind grains.<br />
15. Beat sauces.<br />
31. Make cold sorbets.<br />
16. Crush ice.<br />
Q. What 20 different kitchen appliances can the HealthMaster do the job of?<br />
A. They are as follows:<br />
01 - Blender<br />
02 - Minichopper<br />
03 - 10” cook’s knife<br />
04 - Immersion blender (stick blender)<br />
05 - Snow Cone Maker<br />
06 - Coffee mill / grinder<br />
07 - Spice mill / grinder<br />
08 - Ice Cream maker<br />
09 - Smoothie maker/ bar blender<br />
10 - Ricer<br />
11 - Food mill<br />
12 - Cheese / Veggie grater<br />
13 - Juicer<br />
14 - Meat grinder<br />
15 - Hand mixer<br />
16 - Nut butter maker<br />
17 - Garlic Press<br />
18 - Soy milk maker<br />
19 - Milk shake maker<br />
20 - Latte whip or other milk frothing apparatus<br />
12
Q. What is the Pitcher made out of?<br />
A. It is made of a BPA free plastic.<br />
Q. How many speeds does the unit have?<br />
A. The unit has 8 variable speeds.<br />
Q. What are the dimensions of the unit?<br />
A. 19.75”H x 9” W x 8.25”D (assembled)<br />
Q. How is the unit able to make soups?<br />
A. The centrifugal force of the Blade spinning causes friction which heats up the contents.<br />
Q. How many ounces does the Pitcher hold?<br />
A. 70 ounces (2000ml)<br />
Q. Why is there steam <strong>com</strong>ing from my Lid?<br />
A. There is a Safety Valve release built into the Lid. This allows steam and pressure to<br />
release from the unit when soups are being made. The Cap allows steam and pressure<br />
to release from the sides when hot liquids are being processed.<br />
Q. Why won’t the machine turn on?<br />
A. The unit must be properly assembled or it will not power on at all. The Pitcher must<br />
engage the safety switch. Unit will not turn on until Weighted Safety Switch is engaged.<br />
The display will not light up unless it is properly assembled.<br />
Q. Why has the motor shut off while using?<br />
A. The unit has a built in safety feature that will shut down the machine to prevent<br />
overheating. Allow the machine to cool down for about 35 minutes. The machine will<br />
then power back on.<br />
Q. Why does the Blade only spin once and then stop when<br />
the “ICE” button is pressed?<br />
A. The “ICE” button is only used when trying to move contents from the bottom<br />
of the Pitcher. It is not a feature that will remain running when pressed.<br />
Q. What is the horsepower of the unit?<br />
A. Almost 2 horsepower motor.<br />
Q. What is the wattage?<br />
A. 1200 watts<br />
Q. How often should I change my Blades?<br />
A. The Blades of the unit will never have to be replaced.<br />
13
Q. Is it normal for my machine to be loud?<br />
A. Yes, this is a powerful motor. And there will be some noise associated with it.<br />
Q. Can I make flour in the unit?<br />
A. Yes, you can.<br />
Q. Do vegetables need to be cooked before putting in machine?<br />
A. No.<br />
Q. Is the unit dishwasher safe?<br />
A. The Base is not dishwasher safe. We re<strong>com</strong>mend washing the Pitcher, Lid and Cap<br />
by hand. Fill the Pitcher with warm soapy water. Attach the Pitcher to the Base.<br />
Then secure Lid and Cap in place. Press ON button. Increase the speed to 8. Then<br />
press the RUN button. Allow it to run for about 1 minute. Rinse and dry thoroughly.<br />
Q. Is it normal for the motor to have a slight burning smell?<br />
A. Yes, it is normal for the unit to have a factory smell. After a few uses the smell<br />
will dissipate.<br />
Q. Can anything other than the Tamper be used in the machine?<br />
A. No. The Tamper is specially designed to stop 1 inch above the Blade. We do not<br />
re<strong>com</strong>mend that anything other than the Tamper provided is used.<br />
Manufacturer’s Limited Warranty<br />
The manufacturer warrants that your HealthMaster is free of defects in materials and workmanship and will, at its option, repair<br />
or replace any defective HealthMaster that is returned to it. The HealthMaster motor has a Lifetime Guarantee, and all other parts<br />
and <strong>com</strong>ponents are warranted for 60 days from the original date of purchase. This warranty is valid only in accordance with the<br />
conditions set forth below:<br />
1. Normal wear and tear are not covered by this warranty. This warranty applies to consumer use only, and is void when the product<br />
is used in a <strong>com</strong>mercial or institutional setting.<br />
2. The warranty extends only to the original consumer purchaser and is not transferable. In addition, proof of purchase must be<br />
demonstrated. This warranty is void if the product has been subject to accident, misuse, abuse, improper maintenance or repair, or<br />
unauthorized modification.<br />
3. This limited warranty is the only written or express warranty given by the manufacturer. Any implied warranty of merchantability<br />
or fitness for a particular purpose on this product is limited in duration to the duration of this warranty. Some states do not allow<br />
limitations on how long an implied warranty lasts, so the above limitation may not apply to you.<br />
4. Repair or replacement of the product (or, if repair or replacement is not feasible, a refund of the purchase price) is the exclusive<br />
remedy of the consumer under this warranty. The manufacturer shall not be liable for any incidental or consequential damages for<br />
breach of this warranty or any implied warranty on this product. Some states do not allow the exclusion or limitation of incidental<br />
or consequential damages, so the above limitation or exclusion may not apply to you.<br />
5. This warranty gives you specific legal rights, and you may also have other rights which vary from state to state.<br />
Procedure for Warranty Repairs or Replacement:<br />
If warranty service is necessary, the original purchaser must pack the product securely and send it postage paid with a description of<br />
the defect, proof of purchase, and a check or money order for $29.99 to cover return postage and handling to the following address:<br />
HealthMaster, P.O. Box 3007, Wallingford, CT 06492.<br />
14
HealthMaster Elite Replacement Parts<br />
E-Z LOCK CAP<br />
LID<br />
TAMPER<br />
PITCHER<br />
To order please call or for more information visit:<br />
www.myhealthmaster.<strong>com</strong><br />
or call 1-973-287-5189<br />
Please allow 3–4 weeks for shipping.<br />
YES! Please send me the following<br />
HealthMaster Elite items:<br />
q HealthMaster E-Z Lock Cap<br />
for only $9.99. FREE s&h.<br />
Total $9.99.<br />
q HealthMaster Tamper<br />
for only $9.99. FREE s&h.<br />
Total $9.99.<br />
q HealthMaster Lid<br />
for only $14.99. FREE s&h.<br />
Total $14.99.<br />
q HealthMaster Pitcher<br />
for only $49.99. FREE s&h.<br />
Total $49.99.<br />
q VISA q MasterCard q Discover<br />
Exp. Date________________________________<br />
Credit Card #_____________________________<br />
q Check q Money Order<br />
(NJ, PA, CT residents add sales tax. CA, NV & NY<br />
add applicable rate.) U.S. currency only<br />
Print Name ______________________________<br />
Address_________________________________<br />
Apt._________ City_______________________<br />
State___________________ Zip_____________<br />
Phone# _________________________________<br />
E-mail __________________________________<br />
Please make checks payable to: HEALTHMASTER ELITE<br />
Mail Payment Today To: HEALTHMASTER, 26 Barnes Industrial Rd. North,<br />
P.O. Box 3125, Dept. YD2098, Wallingford, CT 06494<br />
15
OWNER’S MANUAL<br />
Congratulations on your purchase of the HealthMaster Elite.<br />
We are very proud of the functional design and exceptional quality of this product.<br />
Our manufacturing process is geared to deliver long years of product service to our<br />
valued customers. Should you experience any problem with your purchase,<br />
our dedicated customer service staff is here to serve you.<br />
We are available at:<br />
1-973-287-5189<br />
or see our website at:<br />
www.myhealthmaster.<strong>com</strong><br />
Distributed By:<br />
Tristar Products, Inc.<br />
Fairfield, NJ 07004<br />
HME2_IB_TP_ENG_V5_120312