SM088 STEAM MOP - QVC.com
SM088 STEAM MOP - QVC.com
SM088 STEAM MOP - QVC.com
Create successful ePaper yourself
Turn your PDF publications into a flip-book with our unique Google optimized e-Paper software.
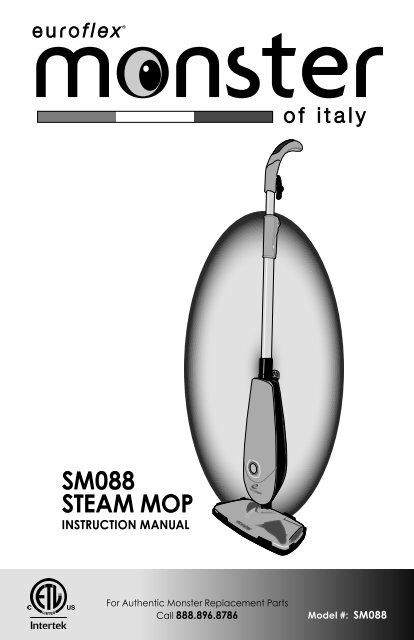
<strong>SM088</strong><br />
<strong>STEAM</strong> <strong>MOP</strong><br />
INSTRUCTION MANUAL<br />
For Authentic Monster Replacement Parts<br />
Call 888.896.8786<br />
Model #: <strong>SM088</strong>
IMPORTANT SAFE<br />
SAVE THESE INSTRUCTIONS<br />
When using an electrical appliance, basic safety precautions<br />
should always be observed, including the following:<br />
Read all instructions before using this appliance.<br />
WARNING: To reduce the risk of fire, electrical shock, or injury:<br />
1. This appliance is authorized for household/residential use only.<br />
2. Do not use outdoors. Do not immerse the Steam Mop in water or other<br />
liquids.<br />
3. Do not allow to be used as a toy. Close attention is necessary when<br />
used by or near children. Do not leave Steam Mop unattended. Always<br />
unplug unit when not in use.<br />
4. Use only as described and for the uses described in this manual. Use only<br />
manufacturer’s approved and supplied parts and accessories. Use of<br />
other accessories is not re<strong>com</strong>mended and will void warranty.<br />
5. Keep cord away from heated surfaces (e.g., cooking surfaces), and<br />
sharp edges and corners.<br />
6. Do not use if power cord or plug has been damaged, or if any part of<br />
appliance has been dropped, damaged, left outdoors, or dropped in<br />
water. Do not attempt to disassemble or repair appliance. Return it to<br />
manufacturer or an authorized service center for examination or repair.<br />
7. Do not wrap cord too tightly around appliance. Never carry by the cord,<br />
or yank to disconnect from an outlet. To unplug, always grasp plug to<br />
remove from outlet – do not pull on cord.<br />
8. Do not handle cord or appliance with wet hands or without shoes on.<br />
9. Look closely at Steam Mop and follow all labels and marking instructions.<br />
10. Do not put any objects into openings. Do not use with any opening<br />
blocked.<br />
11. Keep hair, loose clothing, fingers, and all parts of body away from<br />
openings and moving parts.<br />
12. Use caution near the Base of the appliance while in use. Contact with<br />
steam may cause burns.<br />
13. Be sure Tank Cap is inserted and remains inserted during use.<br />
14. Never use cleaning solutions, perfumes, oils or other chemical substances<br />
other than tap or distilled/demineralized water in the Steam Mop. Use of<br />
chemicals may damage Steam Mop and will void your warranty.<br />
15. When in use, never turn the appliance on its side. Do not direct steam at<br />
people, animals or other electrical equipment (i.e, inside an oven).<br />
16. Do not operate around flammable or <strong>com</strong>bustible liquids such as gasoline,<br />
or in areas where fumes may be present.<br />
2 Safety Instructions
TY INSTRUCTIONS<br />
17. Not for space heating purposes.<br />
18. To reduce the likelihood of circuit overload, do not operate another<br />
high wattage appliance on the same circuit. Plug in to a standard (120V,<br />
60Hz) electrical outlet.<br />
19. Do not use extension cords or outlets with inadequate voltage. Use only<br />
heavy duty, high-rated extensions cords.<br />
20. Store appliance indoors in a cool, dry place.<br />
21. If appliance is damaged, it must be repaired by manufacturer or its<br />
service agent or a similarly qualified person in order to avoid safety issues<br />
to the operator.<br />
22. This appliance is not intended for use by persons (including children) with<br />
reduced physical, sensory or mental capabilities, or lack of experience<br />
and knowledge, unless they have been given supervision or instruction<br />
concerning use of appliance by a person responsible for their safety.<br />
23. Read and follow all important notices in this guide.<br />
CAUTIONS<br />
• Do not use your Steam Mop without a Cleaning Pad or Carpet Slide and<br />
Carpet Pad attached to the Mop Base.<br />
• Never leave your Steam Mop in one spot on any surface for any period of<br />
time. Always keep the Steam Mop moving or unplug it when not in use.<br />
*IMPORTANT*<br />
Please read all of the<br />
instructions for use and<br />
Important Safety<br />
Instructions carefully.<br />
Remove and discard all<br />
packaging materials<br />
and keep them out<br />
of the reach of children.<br />
Save your back<br />
No need to<br />
press hard<br />
The steamer<br />
does the<br />
work for you<br />
SAVE THESE INSTRUCTIONS<br />
Safety Instructions<br />
3
What’s Inside? & Product Description<br />
For Authentic Monster Replacement Parts<br />
Call 888-896-8786<br />
One (1) Steam Mop<br />
2<br />
1<br />
3<br />
4<br />
5<br />
6<br />
8<br />
7<br />
9<br />
10<br />
11<br />
12<br />
13<br />
1 - Upper Cord Hook/Release<br />
2 - Expandable Handle<br />
3 - Handle Extension Lock<br />
4 - Handle Extension Tube<br />
5 - Power Cord<br />
6 - Power Cord Clip<br />
7 - Water Tank Cap<br />
8 - Steam Mop Body/Water Tank<br />
9 - Water Level Window<br />
10 - Power Indicator Light<br />
11 - Lower Cord Hook<br />
12 - Mop Base<br />
13 - Carpet Slide<br />
14 - Carpet Pad<br />
15 - Cleaning Pad<br />
16 - Water Cup<br />
Technical Data<br />
Adapter Input: 120V~, 60Hz<br />
Power: 1500 watts<br />
Tank Capacity: 380 ml/12.8 oz<br />
14<br />
15<br />
16<br />
4 What’s Inside? & Product Description
1<br />
Steam Mop Assembly<br />
IMPORTANT: FOLLOW THESE INSTRUCTIONS CAREFULLY!<br />
A. Assemble Handle<br />
• Insert the Handle into the Handle Extension Tube. Be sure the<br />
Extension Handle Lock is open (as shown).<br />
NOTE: Match the shape of the end of the Handle with the shape of the<br />
opening at the top of the Extension Tube. Do not force the Handle<br />
into the Extension Tube opening.<br />
• Once the Handle is inserted, adjust<br />
it to the desired length.<br />
• Snap the Extension Tube Lock down<br />
to secure the Handle in position.<br />
FOR EASY STORAGE – Open the Extension Tube Lock and push the<br />
Handle down to shorten. Snap Lock down to maintain Handle’s position.<br />
B. Insert Handle/Extension Tube into<br />
Steam Mop Body/Water Tank<br />
• Insert the open end of the Handle<br />
Extension Tube into the opening at the<br />
top of the Steam Mop Body/Water Tank.<br />
NOTE: Be sure to match the shape of the<br />
end of the Extension Tube with the shape<br />
of the opening at the top of the Steam Mop<br />
Body. Do not force the Extension Tube into<br />
the Steam Mop Body opening.<br />
• You will hear a “Click” when the<br />
Extension Tube is securely locked<br />
in place.<br />
Before Use<br />
CLICK!<br />
5Before Use
Before Use<br />
C. Attach Cleaning Pad to Steam Mop Base<br />
WARNINGS<br />
• To prevent floor damage, ALWAYS attach either the CLEANING PAD<br />
or the CARPET SLIDE with CARPET PAD to your Steam Mop. NEVER use<br />
Mop without one of these attachments affixed to the Base.<br />
• to ensure a surface is suitable for steam cleaning, ALWAYS test a small,<br />
inconspicuous portion of the surface BEFORE using steam on it.<br />
Affix either the Cleaning Pad or<br />
Carpet Slide and Carpet Pad to<br />
the Base of the Steam Mop.<br />
The Steam Mop Base has six<br />
(6) “grip strips” that hold the<br />
Cleaning Pad in place.<br />
Bottom view of Steam Mop Base<br />
showing six (6) “grip strips”<br />
For Authentic Monster Replacement Parts<br />
Call 888-896-8786<br />
ATTACH CLEANING PAD<br />
Place Cleaning Pad face down on the floor,<br />
wide side forward. Hold Steam Mop about 2”<br />
above Pad and gently place Steam Mop on<br />
the Pad.<br />
Firmly press Steam Mop down to assure Pad<br />
is securely adhered to the Mop Base.<br />
USE ON HARDWOOD FLOORS<br />
For hardwood floors, use only on “sealed”<br />
hardwood surfaces. Carefully control the<br />
amount of steam used when cleaning, as too<br />
much water could cause damage.<br />
IMPORTANT CAUTIONS!<br />
to ensure A surface is suitable for steam cleaning, ALWAYS test<br />
a small, inconspicuous portion of THE SURFACE BEFORE using<br />
steam ON IT.<br />
• LINOLEUM FLOORS: Pre-test all Linoleum floors, as steam can cause<br />
wax to be stripped from, and consequently damage, some varieties<br />
of linoleum flooring.<br />
• PAINTED WOOD, GLOSSY LEATHER & PLASTIC SURFACES: These<br />
surfaces may be dulled or bleached by the use of steam.<br />
• MISCELLANEOUS FABRICS: Use caution with steam on fabrics as many<br />
fabrics are sensitive to heat and steam, and can be easily damaged.<br />
6 Before Use
D. Attach Carpet Pad and Carpet Slide to Steam Mop Base<br />
Use the Carpet Slide to clean carpets and rough surfaces. Placing<br />
the Carpet Slide over the Carpet Pad enables your Steam Mop to<br />
slide easily over rough, textured surfaces.<br />
ALWAYS TEST A SMALL, INCONSPICIOUS PORTION OF THE SURFACE<br />
BEFORE APPLYING <strong>STEAM</strong>.<br />
Before Use<br />
ATTACH CARPET PAD AND CARPET SLIDE<br />
Place Carpet Slide face up on floor. Center<br />
and place Carpet Pad on top of Carpet Slide,<br />
wide side forward.<br />
Hold Steam Mop about 2” above Pad and<br />
gently place Steam Mop on the Pad.<br />
Firmly press down to assure Carpet Pad is attached<br />
to Steam Mop Base and Mop Base is<br />
seated on Carpet Slide.<br />
NOTE: See “Maintenance & Cleaning” for care and<br />
cleaning instructions for Cleaning Pads.<br />
E. Filling Water Tank with Water<br />
We re<strong>com</strong>mend filling the Water Tank before plugging in your Steam<br />
Mop and getting started. You can refill the Water Tank at any time<br />
during use.<br />
*IMPORTANT*<br />
Use tap water – distilled or demineralized water if tap water is too hard.<br />
NEVER add detergents, perfumes, oils or other chemical substances to<br />
the Water Tank for regular operation.<br />
For Authentic Monster Replacement Parts<br />
Call 888-896-8786<br />
• Remove Water Tank Cap by grasping it<br />
firmly and pulling it from the Tank opening.<br />
Continued on next page<br />
Before Use<br />
7
Before Use<br />
E. Filling Water Tank with Water (continued)<br />
For Authentic Monster Replacement Parts<br />
Call 888-896-8786<br />
• Use the provided Water<br />
Cup to add tap, distilled<br />
or demineralized water<br />
ONLY to the Water Tank.<br />
• Fill to the “MAX FILL” line on the Water<br />
Level Window. DO NOT overfill Water Tank.<br />
• Replace Tank Cap by firmly pressing it back<br />
in the Tank opening.<br />
CAUTION<br />
MAX FILL<br />
MINIMUM<br />
Do not plug in your Steam Mop until you are ready to begin cleaning.<br />
Because the <strong>SM088</strong> Steam Mop is equipped with a pump, the water<br />
heats up very quickly (approximately 25 seconds).<br />
REMEMBER<br />
Using Your Steam Mop<br />
• You can add water to the Water Tank at any time during operation.<br />
• Be sure the Steam Mop is not seated on a painted or unsealed wood<br />
surface while it is heating up.<br />
• Do not allow Steam Mop to sit in the same location for too long while<br />
it is in use, as this can cause damage to surfaces.<br />
2<br />
Using the <strong>SM088</strong> Steam Mop<br />
A. Release the Power Cord for Use<br />
Before using the Steam Mop, <strong>com</strong>pletely unwind the Power<br />
Cord. Release Power Cord using the Upper Cord Hook/Release<br />
(see “G.” on page 10 for instructions).<br />
8 Before Use & Using Your Steam Mop
B. Starting the Appliance<br />
WARNINGS<br />
• ALWAYS attach either the CLEANING PAD or the CARPET PAD<br />
with CARPET GLIDE to your Steam Mop. NEVER use Mop without<br />
one of these attachments affixed to the Base.<br />
• to ensure a surface is suitable for steam cleaning, ALWAYS test a<br />
small, inconspicuous portion of the surface BEFORE using steam<br />
on it.<br />
• Never leave Steam Mop in the same location for too long while<br />
it is in use, as this can cause damage to surfaces.<br />
• NEVER add detergents, perfumes, oils or other chemical substances<br />
to the Water Tank for regular operation.<br />
Using Your Steam Mop<br />
• Be sure the Water Tank is filled to “MAX<br />
FILL” with tap, distilled or demineralized<br />
water and the Water Tank Cap is<br />
securely in place.<br />
• Plug in the <strong>SM088</strong> Steam Mop.<br />
• The Power Indicator Light on the front<br />
of the Steam Mop Body will illuminate<br />
(white) when the Mop is plugged in.<br />
C. Steam Cleaning Floors<br />
• Be prepared for the Steam Mop to produce steam very quickly<br />
(approximately 25 seconds).<br />
• Once Mop has heated, begin cleaning and disinfecting your<br />
pre-tested surface.<br />
• Keep the Steam Mop moving in a slow and steady motion.<br />
For stubborn floor stains:<br />
• Dampen the stain with a detergent that is <strong>com</strong>patible with the floor<br />
surface (check manufacturer’s re<strong>com</strong>mendations).<br />
• UNPLUG <strong>MOP</strong> WHEN APPLYING DETERGENT TO STAIN, then plug<br />
Steam Mop in and steam clean area.<br />
• Wipe up any excess detergent with a damp cloth, and then dry the<br />
area with a dry cloth.<br />
For Authentic Monster Replacement Parts<br />
Call 888-896-8786<br />
NOTE: Steam Mop will stop producing steam when the Water Tank is empty.<br />
When this happens refill Water Tank with water up to the “MAX FILL”<br />
line on the Water Level Window.<br />
Using Your Steam Mop<br />
9
Using Your Steam Mop<br />
D. Steam Cleaning Carpets and Rough Surfaces<br />
Use the Carpet Slide to clean carpets and rough surfaces. Placing<br />
the Carpet Slide over the Carpet Pad enables your Steam Mop to<br />
slide easily over rough, textured surfaces (see “D.” on page 7 for<br />
attachment instructions).<br />
ALWAYS TEST A SMALL, INCONSPICIOUS PORTION OF THE SURFACE<br />
BEFORE APPLYING <strong>STEAM</strong>.<br />
• Unplug the Steam Mop before placing it on the Carpet Slide.<br />
• Once plugged in and Mop has heated, begin cleaning.<br />
• Keep the Steam Mop moving in a slow and steady motion over<br />
carpets and rough surfaces.<br />
E. Refilling Water Tank During Use<br />
• Remove Water Tank Cap.<br />
• Fill Water Tank to “MAX FILL” with tap, distilled or demineralized<br />
water using the Water Cup provided.<br />
• Firmly push Tank Cap in the Tank opening and allow about 25<br />
seconds for steam to be produced, then begin steaming.<br />
REMINDERS<br />
For Authentic Monster Replacement Parts<br />
Call 888-896-8786<br />
• Always use tap water – if tap water is too hard, use distilled or<br />
demineralized water to avoid damaging surfaces, and possibly<br />
the Steam Mop.<br />
• NEVER add detergents, perfumes, oils or other chemical<br />
substances to the Water Tank for regular operation.<br />
F. The Power Cord Clip<br />
The Power Cord can be easily clipped<br />
to itself for storage by using the Power<br />
Cord Clip.<br />
G. The Upper Cord Hook/Release<br />
Use the Upper Cord Hook/Release to quickly<br />
release and unwrap the Power Cord.<br />
Simply turn the Upper Cord Hook/Release<br />
right or left to release the Power Cord.<br />
10 Using Your Steam Mop
3<br />
Cleaning and Rinsing Steam Mop<br />
If distilled or demineralized water is regularly used there is no<br />
need to clean the Water Tank.<br />
Rinsing the Water Tank<br />
We re<strong>com</strong>mend you periodically rinse the Steam Mop to prevent the<br />
accumulation of calcium and sediment caused by hard water use.<br />
After 10-15 uses:<br />
• Fill Water Tank 3/4 full with hot tap water<br />
• Shake unit several times.<br />
• Plug in Steam Mop and flush out steam into a sink or bathtub.<br />
• Wipe the Steam Mop Base with a damp cloth and wipe dry.<br />
NEVER HOLD THE <strong>STEAM</strong>ER UNDER TAP TO FILL. Use the Water Cup<br />
provided to fill.<br />
Maintenance & Cleaning<br />
Cleaning the Water Tank<br />
If you use tap water, we rec<strong>com</strong>end cleaning the Water Tank every<br />
3-4 months (depending on mineral buildup). Use a Hard Water Mineral<br />
Remover (found in most hardware or small appliance stores).<br />
• Plug in and run Steam Mop in sink or bathtub until all water has<br />
flushed from the Water Tank.<br />
• Follow manufacturer’s instructions on cleaner package, and fill<br />
tank with specified amount of cleaner.<br />
• Flush cleaner from Water Tank and fill with water. Rinse thoroughly<br />
and flush water from Tank. Repeat flushing with water until water<br />
from Tank <strong>com</strong>es out clear.<br />
• Replace Tank Cap and store appliance properly.<br />
Cleaning of Water Tank and Steam Mop is the sole responsibility of appliance<br />
owner and is not covered by the product warranty.<br />
Before first use after cleaning the Waer Tank, hold Steam Mop<br />
so it is facing downward and direct steam into a sink or standing<br />
shower to clear any leftover residue from Tank. When clean drops<br />
of water appear, wipe clean with soft cloth. Your Steam Mop is<br />
ready for use.<br />
For Authentic Monster Replacement Parts<br />
Call 888-896-8786<br />
4 Cleaning and Carpet Pad Care & Cleaning<br />
Your Cleaning and Carpet Pads are designed for hundreds of uses.<br />
Clean Pads regularly, following the instructions printed on the Pad<br />
label found on each Pad.<br />
Maintenance & Cleaning<br />
11
LIMITED WARRANTY<br />
Euroflex Americas warrants this product to be free from defects in material and workmanship for a<br />
period of one (1) year from the date of the original purchase, when utilized for normal household use,<br />
subject to the following conditions, exclusions and exceptions.<br />
Should any defect covered by the terms of the limited warranty be discovered within one (1) year,<br />
Euroflex Americas will repair or replace any defective part provided the unit is returned by the original<br />
purchaser, freight prepaid, to:<br />
U.S.: Euroflex Americas, 3795 Lamar Avenue, Memphis, TN 38118 USA<br />
Canada: Euroflex Canada, 391 Steelcase Road, W., Unit 16, Markham, ON., L3R 3V9, Canada<br />
Proof of purchase and $9.95 for handling and return packing/shipping charges must be included.<br />
The liability of Euroflex Americas under this warranty is limited solely to the cost of the replacement<br />
parts or the <strong>com</strong>plete unit at our option. LABOR CHARGES ARE NOT INCLUDED.<br />
This warranty does not cover normal wear of parts and does not apply to any unit that has been<br />
tampered with or used for <strong>com</strong>mercial purposes. This warranty does not apply to any defect arising<br />
from misuse of the product, negligence, failure to follow Euroflex’s instructions, use on current or<br />
voltage other than that stamped on the product, alteration or repair not authorized by Euroflex,<br />
or damage due to faulty packaging or mishandling in transit (by any <strong>com</strong>mon carrier). Repair or<br />
disassembly by anyone other than a Euroflex authorized service center will void the warranty.<br />
This warranty is extended to the original purchaser of the unit and excludes all other legal and/<br />
or conventional warranties. The responsibility of Euroflex Americas, if any, is limited to the specific<br />
obligations expressly assumed by it under the terms of the limited warranty. In no event is Euroflex<br />
Americas liable for incidental or consequential damages of any nature whatsoever. Some States/<br />
Provinces do not permit the exclusion or limitation of incidental or consequential damages, so the<br />
above may not apply to you.<br />
This warranty gives you specific legal rights which vary from state to state or province to province.<br />
If you have questions or concerns regarding your Euroflex appliance, please contact Customer<br />
Service. Please do not return any product without contacting Euroflex for return authorization.<br />
Unauthorized returns, as well as C.O.D. shipments, will be refused.<br />
*Important: After receiving return authorization, carefully pack item to avoid damage in shipping.<br />
Be sure to include your name, <strong>com</strong>plete address and phone number with note giving purchase<br />
information, model number and what you believe is the problem with item. We re<strong>com</strong>mend you insure<br />
the package (as damage in shipping is not covered by your warranty). Mark the outside of your<br />
package “ATTENTION CUSTOMER SERVICE”.<br />
We are constantly striving to improve our products, therefore the specifications contained<br />
herein are subject to change without notice.<br />
For Authentic Monster Replacement Parts,Call: 888-896-8786<br />
You can register your product online at: www.euroflexusa.<strong>com</strong><br />
EUROFLEX AMERICAS<br />
CUSTOMER SERVICE • 888.896.8786<br />
Patent Pending<br />
<strong>SM088</strong> 7/21/10<br />
EFLX-027AA


