Drafting patterns for panties using pants' patterns - Leena's.com
Drafting patterns for panties using pants' patterns - Leena's.com
Drafting patterns for panties using pants' patterns - Leena's.com

You also want an ePaper? Increase the reach of your titles
YUMPU automatically turns print PDFs into web optimized ePapers that Google loves.
Home<br />
page<br />
Svensk<br />
manual<br />
Suomeksi<br />
PatternMaker dealers<br />
Counter started<br />
2000-01-01<br />
Site Map<br />
December 5th, 2001<br />
PatternMaker®<br />
Pattern <strong>Drafting</strong> Sofware<br />
<strong>for</strong> PC<br />
Versions & prices<br />
Download & buy<br />
Demo version<br />
Macro collections<br />
Services<br />
Contact in<strong>for</strong>mation<br />
Learning<br />
Center<br />
Tutorials<br />
Measuring<br />
Sewing<br />
instructions<br />
Sewing projects<br />
Pattern drafting<br />
PDF-version of this page<br />
Get AcrobatReader<br />
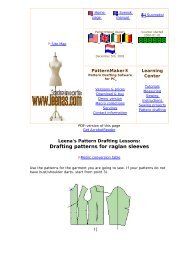
<strong>Leena's</strong> Pattern <strong>Drafting</strong> Lessons:<br />
<strong>Drafting</strong> <strong>patterns</strong> <strong>for</strong> <strong>panties</strong> <strong>using</strong> <strong>pants'</strong><br />
<strong>patterns</strong><br />
Metric conversion table<br />
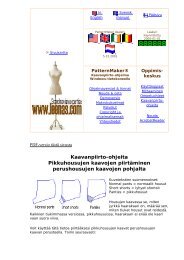
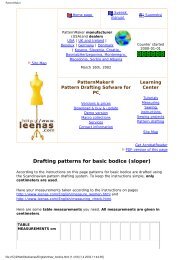
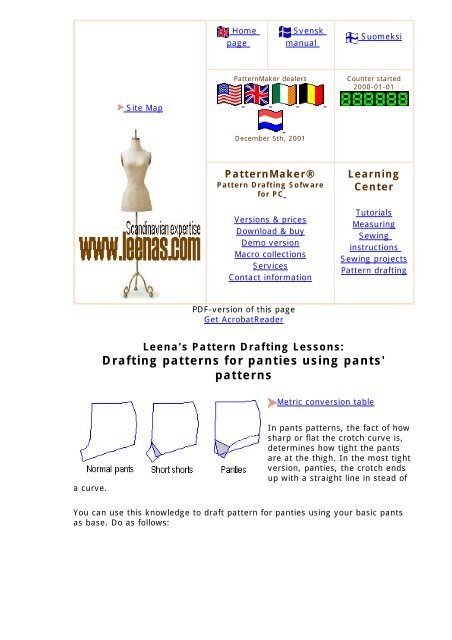
a curve.<br />
In pants <strong>patterns</strong>, the fact of how<br />
sharp or flat the crotch curve is,<br />
determines how tight the pants<br />
are at the thigh. In the most tight<br />
version, <strong>panties</strong>, the crotch ends<br />
up with a straight line in stead of<br />
You can use this knowledge to draft pattern <strong>for</strong> <strong>panties</strong> <strong>using</strong> your basic pants<br />
as base. Do as follows:
Back piece<br />
1-3 Draw a straight line<br />
along the CB line<br />
4-5 Draw a straight,<br />
horizontal line along the<br />
crotch line; you get point<br />
2 at the intersection of<br />
lines 1-3 and 4-5<br />
4-6 Square 5 cm down<br />
from point 4. Rotate line<br />
2-4-6 so that line 2-4 will<br />
go along line 1-3<br />
2-7 Square 9 cm to the<br />
right from point 2<br />
11-8 Measure the desired<br />
side seam height from<br />
point 11 to point 8.<br />
Connect points 7 and 8<br />
with straight line<br />
9 Mark point 9 at the<br />
middle of line 7-8<br />
10 Measure 2 cm to get<br />
point 10<br />
Draft <strong>patterns</strong> according<br />
to the drawing. Cut away<br />
back crotch piece 2-4-6-<br />
7.<br />
Front piece<br />
12-14 Draw a straight<br />
line along the CF line<br />
15-16 Draw a straight,<br />
horizontal line along the<br />
crotch line<br />
15-17 Square 5 cm down<br />
from point 15. Rotate line<br />
13-15-17 so that line 15-<br />
17 will go along line 12-<br />
14<br />
13-18 Measure 5 cm to
the right from point 13<br />
20-19 Measure the<br />
desired side seam height<br />
from point 20 to point 19.<br />
Connect points 19 and 18<br />
with straight line.<br />
22 Mark point 22 at the<br />
middle of line 18-19<br />
21 Measure 3 cm from<br />
point 22 to get point 21<br />
Draft <strong>patterns</strong> according<br />
to the drawing. Cut away<br />
front crotch piece 13-15-<br />
17-18.<br />
Connect front and back<br />
crotch pieces.<br />
If necessary, scale the <strong>patterns</strong> <strong>for</strong> elastic fabric. If you have PatternMaker you<br />
can scale the <strong>patterns</strong> easily with it. If not , do it manually. Later I shall write<br />
instructions to this website of how to do the manual scaling.<br />
Copyright © 2001 Leena Lähteenmäki, Järvenpää, Finland