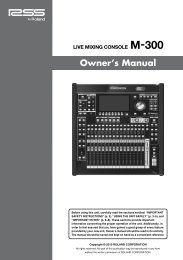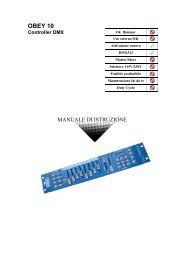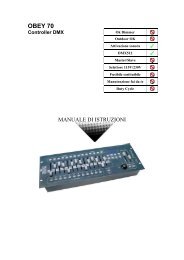
Owners Manual - Roland
Owners Manual - Roland
Owners Manual - Roland

You also want an ePaper? Increase the reach of your titles
YUMPU automatically turns print PDFs into web optimized ePapers that Google loves.
WARNING: To reduce the risk of fire or electric shock, do not expose this apparatus to rain or moisture.<br />
CAUTION<br />
RISK OF ELECTRIC SHOCK<br />
DO NOT OPEN<br />
ATTENTION: RISQUE DE CHOC ELECTRIQUE NE PAS OUVRIR<br />
CAUTION: TO REDUCE THE RISK OF ELECTRIC SHOCK,<br />
DO NOT REMOVE COVER (OR BACK).<br />
NO USER-SERVICEABLE PARTS INSIDE.<br />
REFER SERVICING TO QUALIFIED SERVICE PERSONNEL.<br />
The lightning flash with arrowhead symbol, within an<br />
equilateral triangle, is intended to alert the user to the<br />
presence of uninsulated “dangerous voltage” within the<br />
product’s enclosure that may be of sufficient magnitude to<br />
constitute a risk of electric shock to persons.<br />
The exclamation point within an equilateral triangle is<br />
intended to alert the user to the presence of important<br />
operating and maintenance (servicing) instructions in the<br />
literature accompanying the product.<br />
INSTRUCTIONS PERTAINING TO A RISK OF FIRE, ELECTRIC SHOCK, OR INJURY TO PERSONS.<br />
IMPORTANT SAFETY INSTRUCTIONS<br />
SAVE THESE INSTRUCTIONS<br />
WARNING - When using electric products, basic precautions should always be followed, including the following:<br />
1. Read these instructions.<br />
2. Keep these instructions.<br />
3. Heed all warnings.<br />
4. Follow all instructions.<br />
5. Do not use this apparatus near water.<br />
6. Clean only with a dry cloth.<br />
7. Do not block any of the ventilation openings. Install in<br />
accordance with the manufacturers instructions.<br />
8. Do not install near any heat sources such as radiators,<br />
heat registers, stoves, or other apparatus (including<br />
amplifiers) that produce heat.<br />
9. Do not defeat the safety purpose of the polarized or<br />
grounding-type plug. A polarized plug has two blades with<br />
one wider than the other. A grounding type plug has two<br />
blades and a third grounding prong. The wide blade or the<br />
third prong are provided for your safety. If the provided plug<br />
does not fit into your outlet, consult an electrician for<br />
replacement of the obsolete outlet.<br />
10. Protect the power cord from being walked on or pinched<br />
particularly at plugs, convenience receptacles, and the<br />
point where they exit from the apparatus.<br />
11. Only use attachments/accessories specified by the<br />
manufacturer.<br />
12. Use only with the cart, stand, tripod, bracket,<br />
or table specified by the manufacturer, or<br />
sold with the apparatus. When a cart is used,<br />
use caution when moving the cart/apparatus<br />
combination to avoid injury from tip-over.<br />
13. Unplug this apparatus during lightning storms or when<br />
unused for long periods of time.<br />
14. Refer all servicing to qualified service personnel. Servicing<br />
is required when the apparatus has been damaged in any<br />
way, such as power-supply cord or plug is damaged, liquid<br />
has been spilled or objects have fallen into the apparatus,<br />
the apparatus has been exposed to rain or moisture, does<br />
not operate normally, or has been dropped.<br />
WARNING:<br />
IMPORTANT:<br />
For the U.K.<br />
THIS APPARATUS MUST BE EARTHED<br />
THE WIRES IN THIS MAINS LEAD ARE COLOURED IN ACCORDANCE WITH THE FOLLOWING CODE.<br />
GREEN-AND-YELLOW: EARTH, BLUE: NEUTRAL, BROWN: LIVE<br />
As the colours of the wires in the mains lead of this apparatus may not correspond with the coloured markings identifying<br />
the terminals in your plug, proceed as follows:<br />
The wire which is coloured GREEN-AND-YELLOW must be connected to the terminal in the plug which is marked by the<br />
letter E or by the safety earth symbol or coloured GREEN or GREEN-AND-YELLOW.<br />
The wire which is coloured BLUE must be connected to the terminal which is marked with the letter N or coloured BLACK.<br />
The wire which is coloured BROWN must be connected to the terminal which is marked with the letter L or coloured RED.<br />
Before using this unit, carefully read the sections entitled: “IMPORTANT SAFETY INSTRUCTIONS”, “USING THE UNIT<br />
SAFELY” (p. 4), and “IMPORTANT NOTES” (p. 6). These sections provide important information concerning the proper<br />
operation of the unit. Additionally, in order to feel assured that you have gained a good grasp of every feature provided by<br />
your new unit, this owner’s manual should be read in its entirety. The manual should be saved and kept on hand as a<br />
convenient reference.<br />
Copyright © 2010 ROLAND CORPORATION<br />
All rights reserved. No part of this publication may be reproduced in any form without the written permission of ROLAND CORPORATION.<br />
<strong>Roland</strong> is a registered trademark of ROLAND CORPORATION in the United States and/or other countries.
USING THE UNIT SAFELY<br />
About WARNING and CAUTION Notices About the Symbols<br />
The symbol alerts the user to important instructions or<br />
Used for instructions intended to alert the<br />
warnings.The specific meaning of the symbol is<br />
user to the risk of death or severe injury<br />
determined by the design contained within the triangle. In<br />
should the unit be used improperly.<br />
the case of the symbol at left, it is used for general<br />
cautions, warnings, or alerts to danger.<br />
Used for instructions intended to alert the<br />
user to the risk of injury or material<br />
The symbol alerts the user to items that must never be<br />
damage should the unit be used<br />
carried out (are forbidden). The specific thing that must<br />
improperly.<br />
not be done is indicated by the design contained within<br />
the circle. In the case of the symbol at left, it means that<br />
* Material damage refers to damage or<br />
the unit must never be disassembled.<br />
other adverse effects caused with<br />
respect to the home and all its<br />
The symbol alerts the user to things that must be<br />
furnishings, as well to domestic animals<br />
carried out. The specific thing that must be done is<br />
or pets.<br />
indicated by the design contained within the circle. In the<br />
case of the symbol at left, it means that the power-cord<br />
plug must be unplugged from the outlet.<br />
ALWAYS OBSERVE THE FOLLOWING<br />
• Connect mains plug of this model to a mains socket<br />
outlet with a protective earthing connection.<br />
..................................................................................................................................<br />
• Do not open or perform any internal modifications on<br />
the unit.<br />
..................................................................................................................................<br />
• Do not attempt to repair the unit, or replace parts<br />
within it (except when this manual provides specific<br />
instructions directing you to do so). Refer all servicing<br />
to your retailer, the nearest <strong>Roland</strong> Service Center, or an<br />
authorized <strong>Roland</strong> distributor, as listed on the<br />
“Information” page.<br />
..................................................................................................................................<br />
• Never install the unit in any of the following locations.<br />
• Subject to temperature extremes (e.g., direct<br />
sunlight in an enclosed vehicle, near a heating duct,<br />
on top of heat-generating equipment); or are<br />
• Damp (e.g., baths, washrooms, on wet floors); or are<br />
• Exposed to steam or smoke; or are<br />
• Subject to salt exposure; or are<br />
• Humid; or are<br />
• Exposed to rain; or are<br />
• Dusty or sandy; or are<br />
• Subject to high levels of vibration and shakiness.<br />
..................................................................................................................................<br />
• This unit should be used only with a stand that is<br />
recommended by <strong>Roland</strong>.<br />
..................................................................................................................................<br />
• The unit should be connected to a power supply only<br />
of the type described as marked on the rear side of<br />
unit.<br />
• When using the unit with a stand recommended by<br />
<strong>Roland</strong>, the rack or stand must be carefully placed so it<br />
is level and sure to remain stable. If not using a rack or<br />
stand, you still need to make sure that any location you<br />
choose for placing the unit provides a level surface that<br />
will properly support the unit, and keep it from<br />
wobbling.<br />
..................................................................................................................................<br />
• Use only the attached power-supply cord. Also, the<br />
supplied power cord must not be used with any other<br />
device.<br />
..................................................................................................................................<br />
• Do not excessively twist or bend the power cord, nor<br />
place heavy objects on it. Doing so can damage the<br />
cord, producing severed elements and short circuits.<br />
Damaged cords are fire and shock hazards!<br />
..................................................................................................................................<br />
• This unit, either alone or in combination with an<br />
amplifier and headphones or speakers, may be capable<br />
of producing sound levels that could cause permanent<br />
hearing loss. Do not operate for a long period of time at<br />
a high volume level, or at a level that is uncomfortable.<br />
If you experience any hearing loss or ringing in the ears,<br />
you should immediately stop using the unit, and<br />
consult an audiologist.<br />
..................................................................................................................................<br />
• In households with small children, an adult should<br />
provide supervision until the child is capable of<br />
following all the rules essential for the safe operation<br />
of the unit.<br />
..................................................................................................................................<br />
• Protect the unit from strong impact.<br />
(Do not drop it!)<br />
..................................................................................................................................<br />
..................................................................................................................................<br />
4
USING THE UNIT SAFELY<br />
• Do not allow any objects (e.g., flammable material,<br />
coins, pins); or liquids of any kind (water, soft drinks,<br />
etc.) to penetrate the unit.<br />
..................................................................................................................................<br />
• Immediately turn the power off, remove the power<br />
cord from the outlet, and request servicing by your<br />
retailer, the nearest <strong>Roland</strong> Service Center, or an<br />
authorized <strong>Roland</strong> distributor, as listed on the<br />
“Information” page when:<br />
• The power-supply cord or the plug has been<br />
damaged; or<br />
• If smoke or unusual odor occurs<br />
• Objects have fallen into, or liquid has been spilled<br />
onto the unit; or<br />
• The unit has been exposed to rain (or otherwise has<br />
become wet); or<br />
• The unit does not appear to operate normally or<br />
exhibits a marked change in performance.<br />
..................................................................................................................................<br />
• Do not force the unit’s power-supply cord to share an<br />
outlet with an unreasonable number of other devices.<br />
Be especially careful when using extension cords—the<br />
total power used by all devices you have connected to<br />
the extension cord’s outlet must never exceed the<br />
power rating (watts/amperes) for the extension cord.<br />
Excessive loads can cause the insulation on the cord to<br />
heat up and eventually melt through.<br />
..................................................................................................................................<br />
• Before using the unit in a foreign country, consult with<br />
your retailer, the nearest <strong>Roland</strong> Service Center, or an<br />
authorized <strong>Roland</strong> distributor, as listed on the<br />
“Information” page.<br />
..................................................................................................................................<br />
• Do not put anything that contains water (e.g., flower<br />
vases) on this unit. Also, avoid the use of insecticides,<br />
perfumes, alcohol, nail polish, spray cans, etc., near the<br />
unit. Swiftly wipe away any liquid that spills on the unit<br />
using a dry, soft cloth.<br />
• The unit should be located so that its location or<br />
position does not interfere with its proper ventilation.<br />
..................................................................................................................................<br />
• This (VR-700) for use only with <strong>Roland</strong> stand KS-G8. Use<br />
with other stands is capable of resulting in instability<br />
causing possible injury.<br />
..................................................................................................................................<br />
• Always grasp only the plug on the power-supply cord<br />
when plugging into, or unplugging from, an outlet or<br />
this unit.<br />
..................................................................................................................................<br />
• Please be sure to read and adhere to the cautionary<br />
notices contained in the instructions that came with<br />
this product.<br />
Please note that, depending on the manner in which<br />
keyboard performances are carried out, you may<br />
encounter situations where the keyboard falls off the<br />
stand or the stand topples over, even though you have<br />
followed all of the instructions and advice contained<br />
within the product’s manual. For this reason, you<br />
should always perform a safety check each time you<br />
use the stand.<br />
..................................................................................................................................<br />
• At regular intervals, you should unplug the power plug<br />
and clean it by using a dry cloth to wipe all dust and<br />
other accumulations away from its prongs. Also,<br />
disconnect the power plug from the power outlet<br />
whenever the unit is to remain unused for an extended<br />
period of time. Any accumulation of dust between the<br />
power plug and the power outlet can result in poor<br />
insulation and lead to fire.<br />
..................................................................................................................................<br />
• Try to prevent cords and cables from becoming<br />
entangled. Also, all cords and cables should be placed<br />
so they are out of the reach of children.<br />
..................................................................................................................................<br />
• Never climb on top of, nor place heavy objects on the<br />
unit.<br />
..................................................................................................................................<br />
• Never handle the power cord or its plugs with wet<br />
hands when plugging into, or unplugging from, an<br />
outlet or this unit.<br />
..................................................................................................................................<br />
• If you need to move the instrument, disconnect the<br />
power cord and all cords coming from external devices.<br />
At least two persons are required to safely lift and move<br />
the unit. It should be handled carefully, all the while<br />
keeping it level. Make sure to have a firm grip, to<br />
protect yourself from injury and the instrument from<br />
damage.<br />
..................................................................................................................................<br />
• Before cleaning the unit, turn off the power and unplug<br />
the power cord from the outlet (p. 18).<br />
..................................................................................................................................<br />
• Whenever you suspect the possibility of lightning in<br />
your area, pull the plug on the power cord out of the<br />
outlet.<br />
..................................................................................................................................<br />
• Should you remove music rest attachment screws, keep<br />
them in a safe place out of children’s reach, so there is<br />
no chance of them being swallowed accidentally.<br />
..................................................................................................................................<br />
5
IMPORTANT NOTES<br />
Power Supply<br />
• Do not connect this unit to same electrical outlet that is being used by<br />
an electrical appliance that is controlled by an inverter (such as a<br />
refrigerator, washing machine, microwave oven, or air conditioner), or<br />
that contains a motor. Depending on the way in which the electrical<br />
appliance is used, power supply noise may cause this unit to<br />
malfunction or may produce audible noise. If it is not practical to use a<br />
separate electrical outlet, connect a power supply noise filter between<br />
this unit and the electrical outlet.<br />
• Before connecting this unit to other devices, turn off the power to all<br />
units. This will help prevent malfunctions and/or damage to speakers<br />
or other devices.<br />
• Although the LEDs are switched off when the POWER switch is<br />
switched off, this does not mean that the unit has been completely<br />
disconnected from the source of power. If you need to turn off the<br />
power completely, first turn off the POWER switch, then unplug the<br />
power cord from the power outlet. For this reason, the outlet into<br />
which you choose to connect the power cord’s plug should be one<br />
that is within easy reach and readily accessible.<br />
Placement<br />
• Using the unit near power amplifiers (or other equipment containing<br />
large power transformers) may induce hum. To alleviate the problem,<br />
change the orientation of this unit; or move it farther away from the<br />
source of interference.<br />
• This device may interfere with radio and television reception. Do not<br />
use this device in the vicinity of such receivers.<br />
• Noise may be produced if wireless communications devices, such as<br />
cell phones, are operated in the vicinity of this unit. Such noise could<br />
occur when receiving or initiating a call, or while conversing. Should<br />
you experience such problems, you should relocate such wireless<br />
devices so they are at a greater distance from this unit, or switch them<br />
off.<br />
• Do not expose the unit to direct sunlight, place it near devices that<br />
radiate heat, leave it inside an enclosed vehicle, or otherwise subject it<br />
to temperature extremes. Also, do not allow lighting devices that<br />
normally are used while their light source is very close to the unit (such<br />
as a piano light), or powerful spotlights to shine upon the same area of<br />
the unit for extended periods of time. Excessive heat can deform or<br />
discolor the unit.<br />
Maintenance<br />
• To clean the unit, use a dry, soft cloth; or one that is slightly dampened.<br />
Try to wipe the entire surface using an equal amount of strength,<br />
moving the cloth along with the grain of the wood. Rubbing too hard<br />
in the same area can damage the finish.<br />
• Never use benzine, thinners, alcohol or solvents of any kind, to avoid<br />
the possibility of discoloration and/or deformation.<br />
Repairs and Data<br />
• Please be aware that all data contained in the unit’s memory may be<br />
lost when the unit is sent for repairs. Important data should always be<br />
backed up on a USB memory, or written down on paper (when<br />
possible). During repairs, due care is taken to avoid the loss of data.<br />
However, in certain cases (such as when circuitry related to memory<br />
itself is out of order), we regret that it may not be possible to restore<br />
the data, and <strong>Roland</strong> assumes no liability concerning such loss of data.<br />
Before Using USB Memories<br />
• Carefully insert the USB memory all the way in—until it is firmly in<br />
place.<br />
• Never touch the terminals of the USB memory. Also, avoid getting the<br />
terminals dirty.<br />
• USB memories are constructed using precision components; handle<br />
the USB memories carefully, paying particular note to the following.<br />
• To prevent damage to the USB memories from static electricity, be<br />
sure to discharge any static electricity from your own body before<br />
handling the USB memories.<br />
• Do not touch or allow metal to come into contact with the contact<br />
portion of the USB memories.<br />
• Do not bend, drop, or subject USB memories to strong shock or<br />
vibration.<br />
• Do not keep USB memories in direct sunlight, in closed vehicles, or<br />
other such locations.<br />
• Do not allow USB memories to become wet.<br />
• Do not disassemble or modify the USB memories.<br />
• When moved from one location to another where the temperature<br />
and/or humidity is very different, water droplets (condensation) may<br />
form inside the unit. Damage or malfunction may result if you attempt<br />
to use the unit in this condition. Therefore, before using the unit, you<br />
must allow it to stand for several hours, until the condensation has<br />
completely evaporated.<br />
• Do not allow rubber, vinyl, or similar materials to remain on the unit for<br />
long periods of time. Such objects can discolor or otherwise harmfully<br />
affect the finish.<br />
• Do not allow objects to remain on top of the keyboard. This can be the<br />
cause of malfunction, such as keys ceasing to produce sound.<br />
• Do not paste stickers, decals, or the like to this instrument. Peeling<br />
such matter off the instrument may damage the exterior finish.<br />
• Depending on the material and temperature of the surface on which<br />
you place the unit, its rubber feet may discolor or mar the surface.<br />
You can place a piece of felt or cloth under the rubber feet to prevent<br />
this from happening. If you do so, please make sure that the unit will<br />
not slip or move accidentally.<br />
6
IMPORTANT NOTES<br />
Additional Precautions<br />
• Please be aware that the contents of memory can be irretrievably lost<br />
as a result of a malfunction, or the improper operation of the unit. To<br />
protect yourself against the risk of loosing important data, we<br />
recommend that you periodically save a backup copy of important<br />
data you have stored in the unit’s memory on a USB memory.<br />
• Unfortunately, it may be impossible to restore the contents of data<br />
that was stored on a USB memory, or in the unit’s memory once it has<br />
been lost. <strong>Roland</strong> Corporation assumes no liability concerning such<br />
loss of data.<br />
• Use a reasonable amount of care when using the unit’s buttons,<br />
sliders, or other controls; and when using its jacks and connectors.<br />
Rough handling can lead to malfunctions.<br />
• When connecting / disconnecting all cables, grasp the connector<br />
itself—never pull on the cable. This way you will avoid causing shorts,<br />
or damage to the cable’s internal elements.<br />
• A small amount of heat will radiate from the unit during normal<br />
operation.<br />
• To avoid disturbing your neighbors, try to keep the unit’s volume at<br />
reasonable levels. You may prefer to use headphones, so you do not<br />
need to be concerned about those around you (especially when it is<br />
late at night).<br />
• When you need to transport the unit, package it in the box (including<br />
padding) that it came in, if possible. Otherwise, you will need to use<br />
equivalent packaging materials.<br />
• Do not apply undue force to the music stand while it is in use.<br />
• Use only the specified expression pedal (EV-5 or EV-7; sold separately).<br />
By connecting any other expression pedals, you risk causing<br />
malfunction and/or damage to the unit.<br />
• The usable range of D Beam controller will become extremely small<br />
when used under strong direct sunlight. Please be aware of this when<br />
using the D Beam controller outside.<br />
• The sensitivity of the D Beam controller will change depending on the<br />
amount of light in the vicinity of the unit. If it does not function as you<br />
expect, adjust the sensitivity as appropriate for the brightness of your<br />
location.<br />
* is either registered trademark or trademark of <strong>Roland</strong><br />
Corporation in the United States and/or other countries.<br />
* MPEG Layer-3 audio compression technology is licensed<br />
from Fraunhofer IIS Corporation and THOMSON Multimedia<br />
Corporation.<br />
* MMP (Moore Microprocessor Portfolio) refers to a patent<br />
portfolio concerned with microprocessor architecture, which<br />
was developed by Technology Properties Limited (TPL).<br />
<strong>Roland</strong> has licensed this technology from the TPL Group.<br />
* All product names mentioned in this document are<br />
trademarks or registered trademarks of their respective<br />
owners.<br />
7
Contents<br />
USING THE UNIT SAFELY ................................................................................4<br />
IMPORTANT NOTES ........................................................................................6<br />
Features of the VR-700 ................................................................................ 12<br />
Names of Things and What They Do .......................................................... 14<br />
Top Panel....................................................................................................................................................................................14<br />
Rear Panel...................................................................................................................................................................................17<br />
Getting Ready .............................................................................................. 18<br />
Placing the VR-700 on the KS-G8 Stand ..........................................................................................................................18<br />
Connecting the Power Cord ................................................................................................................................................18<br />
Turning the Power On/Off....................................................................................................................................................19<br />
Turning the Power On..............................................................................................................................................19<br />
Turning the Power Off..............................................................................................................................................19<br />
Connecting Pedals ..................................................................................................................................................................20<br />
Connecting a Pedal Keyboard...............................................................................................................................20<br />
Connecting an Expression Pedal and Damper Pedal ...................................................................................20<br />
Connecting Playback Equipment ......................................................................................................................................21<br />
Connecting an Amp and Speakers......................................................................................................................21<br />
Connecting Headphones........................................................................................................................................21<br />
Connecting USB Memory .....................................................................................................................................................22<br />
Attaching the Music Rest......................................................................................................................................................22<br />
Adjusting the Volume............................................................................................................................................................23<br />
Listening to the Demo Songs..............................................................................................................................................23<br />
Indications in the Display .....................................................................................................................................................24<br />
Disabling Panel Operations (Lock Function) .................................................................................................................25<br />
Controls That can be Operated Even While Locked......................................................................................25<br />
Turning the Lock Function On/Off ......................................................................................................................25<br />
Restoring the Factory Settings (Factory Reset).............................................................................................................26<br />
Playing the VR-700 ...................................................................................... 27<br />
About the VR-700’s Parts ......................................................................................................................................................27<br />
Upper Part ....................................................................................................................................................................27<br />
Lower Part.....................................................................................................................................................................27<br />
Pedal Part......................................................................................................................................................................28<br />
Organ Sounds and Ensemble Sounds..............................................................................................................................28<br />
Playing Organ Sounds and Ensemble Sounds Together (Layer)............................................................................29<br />
Layering Ensemble Sounds....................................................................................................................................29<br />
Layering Two Ensemble Sounds ..........................................................................................................................30<br />
Playing Organ Sounds or Ensemble Sounds Individually.........................................................................................33<br />
Playing Only an Ensemble Sound........................................................................................................................33<br />
Playing Only the Organ Sound .............................................................................................................................33<br />
Playing the Sounds of Two Parts on the Keyboard (Split) ........................................................................................34<br />
Boundary Between Upper and Lower Parts (Split Point) ............................................................................35<br />
Using the D Beam Controller to Modify the Sound ....................................................................................................36<br />
D Beam Effects ............................................................................................................................................................36<br />
8
Creating Organ Sounds ............................................................................... 38<br />
About Virtual Tonewheel Sound Generators ................................................................................................................38<br />
Varying the Sound in Real Time (Harmonic Bars) ........................................................................................................38<br />
Using the Harmonic Bars to Create Sounds .....................................................................................................39<br />
Harmonic Bars and Overtones ..............................................................................................................................39<br />
Using Percussion to add a Sense of Attack ....................................................................................................................41<br />
Adding Modulation to the Sound (Vibrato and Chorus)...........................................................................................42<br />
Turning on Vibrato or Chorus................................................................................................................................42<br />
Changing the Vibrato or Chorus Type ...............................................................................................................42<br />
Adding Rotary Speaker Modulation .................................................................................................................................43<br />
Making the Sound Distort.......................................................................................................................................44<br />
Adding Reverberation (Reverb)..........................................................................................................................................44<br />
Changing the Reverb Type.....................................................................................................................................44<br />
Using a Pedal to Adjust the Volume .................................................................................................................................45<br />
Playing Ensemble Sounds........................................................................... 46<br />
Selecting an Ensemble Sound ............................................................................................................................................46<br />
Octave Shift ...............................................................................................................................................................................46<br />
Effects for the Ensemble Sound .........................................................................................................................................46<br />
Storing Your Favorite Settings (Favorites) ................................................ 47<br />
Selecting a Favorite ................................................................................................................................................................47<br />
Saving the Current Settings as a Favorite.......................................................................................................................47<br />
Initializing the Favorites........................................................................................................................................................47<br />
Backing up Favorites to USB Memory..............................................................................................................................48<br />
Restoring from USB Memory...............................................................................................................................................48<br />
Playing Rhythms and Songs (Player Functions)........................................ 49<br />
Playing Internal Rhythms......................................................................................................................................................49<br />
Playing Songs from USB Memory......................................................................................................................................50<br />
Changing the Tempo .............................................................................................................................................................50<br />
Various Settings (Function mode).............................................................. 51<br />
Operations in Function Mode.............................................................................................................................................51<br />
Editing Parameter Values .....................................................................................................................................................51<br />
Confirming System Parameters..........................................................................................................................................51<br />
Parameter List ...........................................................................................................................................................................52<br />
Organ Sound Parameters........................................................................................................................................52<br />
Percussion Parameters.............................................................................................................................................52<br />
Rotary Parameters .....................................................................................................................................................53<br />
Ensemble Sound Parameters ................................................................................................................................53<br />
Equalizer Settings ......................................................................................................................................................54<br />
Pedal, Bend Lever, and Foot Controller Settings............................................................................................54<br />
Player Parameters ......................................................................................................................................................56<br />
MIDI Input/Output Settings ...................................................................................................................................57<br />
System Settings ..........................................................................................................................................................59<br />
V-LINK Settings ...........................................................................................................................................................60<br />
Deleting Favorite Sets, Formatting USB Memory, Initializing the System ............................................60<br />
Deleting a Favorite Backup..................................................................................................................................................61<br />
Formatting USB Memory ......................................................................................................................................................62<br />
9
Appendix ..............................................................................63<br />
Using V-LINK to Control Video Equipment................................................ 64<br />
Connection Example ..............................................................................................................................................................64<br />
Turning V-LINK On/Off...........................................................................................................................................................64<br />
Connecting MIDI Equipment ...................................................................... 65<br />
The VR-700’s Internal Structure..........................................................................................................................................65<br />
Sound Generator Section........................................................................................................................................65<br />
MIDI Routing................................................................................................................................................................65<br />
Connecting an External MIDI Keyboard ..........................................................................................................................66<br />
Playing a Desired Part (Factory Settings) ..........................................................................................................66<br />
Playing the Upper Part or Lower Part.................................................................................................................66<br />
Connecting an External MIDI Sequencer........................................................................................................................66<br />
Local Control Setting................................................................................................................................................66<br />
Connecting your Computer.................................................................................................................................................67<br />
Local Control Setting................................................................................................................................................67<br />
Ensemble Sound List ................................................................................... 68<br />
Internal Rhythm Pattern List ...................................................................... 71<br />
List of Effects for the Ensemble Sounds..................................................... 72<br />
List of the Factory Installed Favorites........................................................ 75<br />
Troubleshooting .......................................................................................... 77<br />
Error Messages............................................................................................. 79<br />
Specifications............................................................................................... 80<br />
Index ............................................................................................................. 82<br />
Information .................................................................................................. 86<br />
10
* The MIDI implementation is available on <strong>Roland</strong>’s website.<br />
http://www.roland.com/products/en/<br />
From the above page, proceed to the VR-700 page and download the MIDI implementation.<br />
Convention used in this manual<br />
• Text enclosed in square brackets [ ] indicates the name of a button, such as the [UPPER] button.<br />
• Lines that begin with or an asterisk * are cautionary statements that you must be sure to read.<br />
• (p. **) indicates a reference page.<br />
• The explanations in this manual include illustrations that depict what should typically be shown by the display. Note, however, that your<br />
unit may incorporate a newer, enhanced version of the system (e.g., includes newer sounds), so what you actually see in the display may<br />
not always match what appears in the manual.<br />
11
Features of the VR-700<br />
The Pursuit of Excellence—Redefining the Basic Stage Keyboard<br />
An organ, piano, and synthesizer all condensed into a single instrument<br />
A full-fledged organ, high-quality piano, and a synthesizer equipped with all the standard sounds—all of this and more contained in<br />
one easy-to-use, light, compact package. This one instrument is just about all you need for most any live performance; and since it’s<br />
highly portable, you save on the amount of time it takes to get set up for a performance.<br />
• Creating Organ Sounds .......................................................................................... p. 38<br />
• Selecting an Ensemble Sound ............................................................................. p. 46<br />
• Ensemble Sound List ............................................................................................... p. 68<br />
A total organ sound–from sound generation to sound reinforcement<br />
Equipped with a virtual tone wheel sound generator, which forms the core of the <strong>Roland</strong> organ sound. In addition, the VR-700 offers a<br />
completely realistic and expressive organ experience, including the characteristic effects and sound reproduction methods of vintage<br />
organs.<br />
• About Virtual Tonewheel Sound Generators ................................................. p. 38<br />
Rotary sound<br />
What would an organ performance be without rotary speakers? The VR-700 faithfully re-creates the sound of rotating speakers,<br />
including the acoustical characteristics of the tweeter (which change depending on the angle), and the way that changes in the speed<br />
of the rotation occur. To enjoy a realistic, rotary sound that is filled with a sense of presence, all you need to do is connect a keyboard<br />
amplifier or powered monitor.<br />
• Adding Rotary Speaker Modulation .................................................................. p. 43<br />
Overdriven sound<br />
Whether it be the unique characteristics of the vacuum-tube circuitry that was at the heart of the original rotary speakers, the<br />
acoustical properties of the speaker cabinets, or the frequency responses of a variety of amplifiers—all these and more are faithfully<br />
simulated by the VR-700. Simply by switching the amp type, you can enjoy a variety of sounds for your performances—from a warm,<br />
deeply resonating sound to a fat, overdriven sound typical of rock. In addition, for each amp type, you can select from a number of<br />
variations for the drive sound.<br />
• Making the Sound Distort ..................................................................................... p. 44<br />
Enhanced playability thanks to 76-key waterfall keyboard and harmonic bars<br />
With a waterfall keyboard and fast-firing algorithms, the VR-700 is capable of a wide variety of performance techniques, from delicate<br />
glissandos to fast, successive notes. And, it is equipped with nine harmonic bars, which are essential when you want to control the<br />
sound in real time. Thanks to this, a wide variety of organ sounds can be controlled at will. In addition, the VR-700 can essentially be<br />
turned into a two-manual + pedalboard organ—all you need to do is split the keyboard into two zones using the Split function, then<br />
add on an optional PK-25A/7A pedalboard.<br />
• Varying the Sound in Real Time (Harmonic Bars) ......................................... p. 38<br />
• Playing the Sounds of Two Parts on the Keyboard (Split) ......................... p. 34<br />
• Connecting a Pedal Keyboard.............................................................................. p. 20<br />
12
Features of the VR-700<br />
Ensemble section offers high-quality piano and synth sounds<br />
Comes with a stringently selected collection of sounds geared for ensembles. Thanks to the adoption of “88-key multisampling,”<br />
which results in very realistic sounds, you’ll be able to richly express every nuance of your music. Moreover, a wide variety of acoustic<br />
sounds, including analog synthesizers and other electronic musical instruments, and realistic string sounds have also been included,<br />
making it easy for you to contribute a wealth of sounds when playing in a band.<br />
• Ensemble Sound List ............................................................................................... p. 68<br />
Easy operation—geared for live performances<br />
We’ve placed buttons or knobs right there on the panel for most of functions that a performer needs access to when playing live. And,<br />
since everything has been grouped together according to function, the VR-700 can be controlled simply and logically. Additionally,<br />
we’ve made the buttons self-illuminating, so you don’t need to worry about finding things when you’re on a dark stage. Together, this<br />
means that even the first-time user should experience no problems when using the VR-700, since it’s operation is intuitive.<br />
And, once you have a certain combination of sounds you like, and have made a whole range of detailed settings, you can store your<br />
efforts as a “Favorite,” and have instant access to it later simply by pressing a button.<br />
• Names of Things and What They Do ................................................................. p. 14<br />
• Storing Your Favorite Settings (Favorites)....................................................... p. 47<br />
Equipped with player feature<br />
The instrument comes stocked with a variety of rhythm patterns, which can be used as a “rhythm guide.” Thanks to this, you can gain<br />
practice along more musical lines, when compared to simply using a metronome.<br />
In addition, the inclusion of a USB memory connector allows you to make use of SMF, WAV, AIFF, and MP3 files stored on USB flash<br />
drives. Such files can be played back when practicing or be used as backing while performing.<br />
• Playing Rhythms and Songs (Player Functions) ............................................ p. 49<br />
Beautifully refined design<br />
The VR-700’s metallic-colored body presents a striking image on stage. And, the distinctive quality of it’s real wood side panels can<br />
only get better with age.<br />
* Like all fine products made of wood, the wooden side panels can be easily scratched. Please treat them with the care they deserve.<br />
13
Names of Things and What They Do<br />
Top Panel<br />
fig.VR-700Front.eps<br />
[V-LINK] button<br />
This button turns V-LINK on/off (p. 64).<br />
When this is on, the VR-700 can be used to control a V-LINK<br />
compatible video device connected to the VR-700.<br />
Organ control/Bender lever<br />
You can use the lever to vary the sound in real time.<br />
* The [ORGAN CONTROL] button and [BENDER] button cannot be<br />
turned on simultaneously.<br />
[MASTER VOLUME] knob<br />
This knob adjusts the volume of the output from the OUTPUT<br />
connectors on the rear panel and the PHONES jack (p. 23).<br />
Control<br />
Function<br />
When this button is pressed to turn it on, the lever<br />
will control the organ sound (p. 43).<br />
D Beam<br />
You can vary the organ sound or ensemble sound by moving your<br />
hand above the D Beam controller (p. 36).<br />
[ORGAN CONTROL]<br />
button<br />
* Only organ<br />
sounds will be<br />
affected.<br />
Change speed of<br />
speaker rotation<br />
Pitch up<br />
Change speed of<br />
speaker rotation<br />
If this button is pressed to turn it on, the lever will<br />
vary the pitch of the sound or apply vibrato.<br />
[BENDER] button<br />
* Only ensemble<br />
sounds will be<br />
affected.<br />
Pitch down<br />
Modulation<br />
Pitch up<br />
Harmonic bars<br />
Use these to create the organ sound. You can adjust the tone in real<br />
time while you perform (p. 38).<br />
[ENSEMBLE VOLUME] bar<br />
This adjusts the volume of the ensemble sound (p. 29).<br />
14
Names of Things and What They Do<br />
fig.VR-700Front.eps<br />
Display section<br />
Display<br />
Control<br />
Display<br />
[DISPLAY/EXIT]<br />
button<br />
[FUNCTION/ENTER]<br />
button<br />
[+] button,<br />
[–] button<br />
Function<br />
This indicates the state of the VR-700 or the<br />
current value of a setting (p. 24).<br />
Indicators for TONE, PLAYER, and TEMPO are<br />
located at the left of the display.<br />
This button changes the content shown in the<br />
display (p. 24). In Function mode, this button<br />
operates as the [EXIT] button to exit Function<br />
mode.<br />
Press this button to switch to Function mode.<br />
In Function mode, this button serves for the<br />
[ENTER] button to execute an operation.<br />
Use these buttons to edit a value.<br />
ENSEMBLE section<br />
Tone buttons<br />
ORGAN section<br />
HARMONIC BAR<br />
Here you can select the part that will reflect the settings of the<br />
harmonic bars (p. 39).<br />
Control<br />
Tone buttons<br />
[OCTAVE SHIFT]<br />
button<br />
[TO LOWER/PEDAL]<br />
button<br />
Function<br />
These buttons select the category of ensemble<br />
sounds (p. 46).<br />
This button sounds the selected ensemble sound<br />
at a higher or lower octave (p. 46).<br />
This sounds the selected ensemble sound in the<br />
lower part or pedal part (p. 29).<br />
Control<br />
[LOWER] button,<br />
[UPPER] button<br />
[ORGAN ON] button<br />
[MANUAL] button<br />
VIBRATO/CHORUS<br />
These buttons turn the vibrato and chorus effects on/off for the<br />
organ sound (p. 42).<br />
PERCUSSION<br />
Function<br />
These buttons select the part to which the organ<br />
sound settings of the harmonic bars will apply.<br />
If you press both buttons simultaneously, the<br />
harmonic bars will be assigned to the pedal part.<br />
Switches on/off the production of the organ<br />
sound for all parts.<br />
For the part selected by the [LOWER] button or<br />
[UPPER] button, this button updates the organ<br />
sound of that part to the current state of the<br />
harmonic bars.<br />
These buttons specify the organ sound’s percussion (the attack<br />
heard when you press a key) (p. 41).<br />
EFFECT<br />
Control<br />
[CONTROL] knob<br />
[ON] button<br />
REVERB section<br />
Here you can apply reverberation to the organ sounds and<br />
ensemble sounds.<br />
Control<br />
Function<br />
This knob adjusts the effect that’s applied to the<br />
ensemble sound (p. 46).<br />
This button turns the effect on/off for the<br />
ensemble sound (p. 46).<br />
Function<br />
[LEVEL] knob Adjusts the depth of the reverb effect (p. 44).<br />
[TYPE] button Selects the type of reverb effect (p. 44).<br />
ROTARY SOUND<br />
Here you can specify the rotary effect (the modulation produced by<br />
a rotating speaker) (p. 43).<br />
15
Names of Things and What They Do<br />
fig.VR-700Front.eps<br />
PLAYER section<br />
Here you can play back internal rhythm patterns, or MIDI files and<br />
audio files saved on external memory connected to the USB<br />
MEMORY connector.<br />
PLAYER<br />
Control<br />
[RHYTHM/SONG]<br />
button<br />
[ ] (Play/<br />
Stop) button<br />
Function<br />
Use this button to specify playback of either<br />
internal rhythm patterns or files stored on<br />
external memory.<br />
This button plays the file.<br />
During playback, pressing this button will stop<br />
playback.<br />
FAVORITE section<br />
FAVORITE<br />
The organ sounds and ensemble sounds that you use frequently,<br />
together with their state, can be registered as Favorites. Once<br />
you’ve registered your favorite settings, you’ll be able to call them<br />
up simply by pressing one of the [FAVORITE] buttons.<br />
Control<br />
[SPLIT] button<br />
[LAYER] button<br />
[WRITE] button<br />
Function<br />
This button divides the keyboard into two zones,<br />
allowing you to play a different tone in each zone<br />
(p. 34).<br />
This button allows you to play the ensemble<br />
sound and the organ sound together (p. 29).<br />
Use this button to register the organ sounds,<br />
ensemble sound, and other panel settings as<br />
favorite settings. For details refer to “Saving the<br />
Current Settings as a Favorite” (p. 47).<br />
[BANK] button Use this button to select a bank of favorites (p. 46).<br />
FAVORITE buttons:<br />
[1]–[8]<br />
[FILE LOAD] button<br />
[FILE SAVE] button<br />
Use these to callup favorite settings you’ve<br />
registered (p. 46).<br />
These buttons allow you to save or load all the<br />
favorite settings in the VR-700’s internal memory<br />
to or from USB memory connected to the USB<br />
MEMORY connector (p. 48).<br />
16
Names of Things and What They Do<br />
Rear Panel<br />
fig.VR-700Rear.eps<br />
[POWER] switch<br />
Turns the power on/off (p. 19).<br />
* If you need to turn off the power completely, first turn off the<br />
[POWER] switch, then unplug the power cord from the power outlet.<br />
Refer to “Power Supply” (p. 6).<br />
AC IN (AC inlet)<br />
Connect the included power cord here (p. 18).<br />
USB connectors<br />
PEDAL connectors<br />
Connector<br />
DAMPER PEDAL<br />
connector<br />
EXP PEDAL<br />
connector<br />
CONTROL PEDAL<br />
connector<br />
Function<br />
Connect a damper pedal here (p. 20).<br />
Even after you take your fingers off the keyboard,<br />
notes will be sustained as long as you hold down<br />
the pedal.<br />
Connect an expression pedal here. You can use<br />
this pedal to adjust the volume (p. 20).<br />
Connect an expression pedal or damper pedal<br />
here (p. 20). You can use this pedal to control<br />
various functions of the VR-700 (p. 55).<br />
Connector<br />
USB MEMORY<br />
connector<br />
USB MIDI connector<br />
MIDI connectors<br />
Connector<br />
MIDI OUT/V-LINK<br />
connector<br />
MIDI PEDAL IN<br />
connector<br />
MIDI IN connector<br />
Function<br />
Connect USB memory (sold separately) here (p.<br />
22).<br />
You can use a USB cable (sold separately) to<br />
connect this to your computer so that MIDI<br />
messages can be transmitted and received (p. 67).<br />
Function<br />
You can use a MIDI cable (sold separately) to<br />
connect this to a MIDI sound module or other MIDI<br />
device, and transmit performance data from the<br />
VR-700 to that device (p. 65).<br />
If you connect this to a V-LINK compatible video<br />
device, your performance on the VR-700 can<br />
control the video device (p. 64).<br />
You can connect a pedal keyboard here, and<br />
perform using the pedals (p. 20).<br />
You can use a MIDI cable (sold separately) to<br />
connect a MIDI keyboard or other MIDI device<br />
here, and use that MIDI device to play the VR-700<br />
(p. 65).<br />
OUTPUT connectors<br />
These are stereo output connectors for the audio signal. The same<br />
signal is output from the XLR connectors (L, R) and from the phone<br />
jacks (L/MONO, R).<br />
About the phone jacks<br />
If you connect a cable only to the L/MONO jacks of the phone<br />
jacks, the sound of the left and right channels will be mixed<br />
and output in monaural.<br />
* The stereo signal will be output from the XLR connectors.<br />
* We recommend that you use stereo output. If you use<br />
monaural output, the quality and character of the sound may<br />
be affected, but this does not indicate a malfunction.<br />
PHONES jack<br />
Connect headphones here (p. 21).<br />
Even if headphones are connected, the audio signal will still be<br />
output from the OUTPUT connectors.<br />
17
Getting Ready<br />
Placing the VR-700 on the KS-G8 Stand<br />
If you place the VR-700 on a stand, you must use the KS-G8 (sold separately).<br />
• When placing the VR-700 on the stand, be careful not to pinch your fingers between the instrument and the stand.<br />
• When lifting the VR-700 onto the stand, make sure to enlist the help of at least one other person.<br />
• Using the VR-700 with any other stand may produce an unstable situation, possibly causing the instrument to fall or overturn, and<br />
resulting in injury or damage.<br />
• For details on how to assemble the stand, refer to the owner’s manual that accompanied the stand.<br />
fig.VKvsKS-G8.eps<br />
Front (keyboard) side<br />
A<br />
B<br />
Top view<br />
B<br />
A<br />
C<br />
Rear panel side<br />
C<br />
1. Place the VR-700 in the position shown in the illustration.<br />
• Position rubber feet “A” on the outside of the stand’s rubber pads.<br />
• Position rubber feet “B” directly above the stand’s arms.<br />
• Position rubber feet “C” so that they contact the inside of the stand’s rubber pads.<br />
* Make sure that the VR-700’s six rubber feet (A–C) are not resting on the stand’s rubber pads.<br />
Connecting the Power Cord<br />
1. Before you begin making connections, confirm the following.<br />
• Is the volume level of the VR-700 or connected amp turned all the way down?<br />
• Is the power to the VR-700 or connected amp turned off?<br />
2. Connect the supplied power cord to the AC Inlet of the VR-700, and plug the other end into an AC outlet.<br />
fig.ConnectPowerCoad.eps<br />
Rear panel<br />
18
Getting Ready<br />
Turning the Power On/Off<br />
Turning the Power On<br />
Once the connections have been completed, turn on power to<br />
your various devices in the order specified. By turning on<br />
devices in the wrong order, you risk causing malfunction and/<br />
or damage to speakers and other devices.<br />
Turning the Power Off<br />
1. Turn the [VOLUME] knob to the minimum position<br />
before you turn off the power.<br />
fig.VolMin.eps<br />
Also minimize the volume of any connected external equipment.<br />
1. Before you turn on the power, make sure that the<br />
[VOLUME] knob is turned all the way down.<br />
fig.VolMin.eps<br />
Also minimize the volume of any connected external audio<br />
equipment.<br />
2. Switch off the power to any connected external<br />
equipment.<br />
3. To turn the power off, press the lower part of the<br />
[POWER] switch located on the VR-700’s rear panel.<br />
2. To turn the power on, press the upper part of the<br />
[POWER] switch located on the VR-700’s rear panel.<br />
fig.P-On.eps<br />
* If you need to turn off the power completely, first turn off the<br />
POWER switch, then unplug the power cord from the power outlet.<br />
Refer to “Power Supply” (p. 6).<br />
The power will turn on, and the display will light up.<br />
* Minimize the volume before you turn on the power. Even if the<br />
volume is minimized, you may hear sound when turning on the<br />
power, but this does not indicate a malfunction.<br />
* Due to a circuitry-protection feature, this unit requires a few<br />
moments after it has been powered up before it is ready for normal<br />
operation.<br />
* If the power is turned off while a Factory Reset is being executed (p.<br />
26), the internal data will be lost, and it may take some time to start<br />
up the next time you switch on the VR-700’s power.<br />
3. Switch on the power to any external equipment that is<br />
connected.<br />
4. Adjust the volume of any external equipment that is<br />
connected.<br />
5. Adjust the VR-700’s volume to an appropriate level.<br />
19
Getting Ready<br />
Connecting Pedals<br />
Connecting a Pedal Keyboard<br />
Connect your pedal keyboard (PK-25A or PK-7A; sold separately) to<br />
the MIDI PEDAL IN connector on the rear panel.<br />
* When making connections, be sure to refer to the PK-25A or PK-7A<br />
owner’s manual as well.<br />
* There’s no need to set the MIDI channel for the PK-25A and PK-7A.<br />
fig.ConnectPedalKey.eps<br />
Connecting an Expression Pedal and<br />
Damper Pedal<br />
* When making connections, please refer also to the owner’s manual<br />
for the pedals you’re using.<br />
fig.ConnectPedals.eps<br />
To MIDI PEDAL IN connector<br />
MIDI cable<br />
Damper pedal<br />
To MIDI OUT connector<br />
Expression pedal<br />
Footswitch<br />
PK-7A<br />
PK-25A<br />
1. Make sure that the VR-700 and the pedal you’ll be<br />
connecting are turned off.<br />
2. Use a MIDI cable (sold separately) to connect the MIDI<br />
OUT connector of the PK-25A or PK-7A to the VR-700’s<br />
MIDI PEDAL IN connector. (The PK OUT connector is not<br />
used.)<br />
3. If desired, connect the FOOT SW OUT connector of the<br />
PK-25A or PK-7A to the VR-700’s CONTROL PEDAL<br />
connector.<br />
* For details on the functions that can be controlled by a foot switch<br />
connected to the VR-700’s CONTROL connector, refer to “Functions<br />
that can be assigned to the control pedal” (p. 55).<br />
* There’s no need to make a connection between the EXPRESSION<br />
OUT connector of the PK-25A or PK-7A and the VR-700.<br />
1. Make sure that the VR-700’s power is turned off.<br />
2. Connect your damper pedal to the DAMPER PEDAL<br />
connector on the rear panel.<br />
3. Connect your expression pedal to the EXP PEDAL<br />
connector on the rear panel.<br />
4. Connect your damper pedal, expression pedal, or foot<br />
switch to the CONTROL PEDAL connector on the rear<br />
panel.<br />
* An expression pedal, damper pedal, and foot switch are not<br />
included. For details on the types of pedals that can be connected to<br />
the VR-700, refer to “Specifications” (p. 80). If you want to purchase<br />
these items, please contact the dealer where you purchased the<br />
VR-700.<br />
* Use only the specified expression pedal (EV-5 or EV-7; sold<br />
separately). By connecting any other expression pedal, you risk<br />
causing malfunction and/or damage to the unit.<br />
20
Getting Ready<br />
Connecting Playback Equipment<br />
fig.ConnectPA.eps<br />
Connecting an Amp and Speakers<br />
1. Make sure that both the VR-700 and the equipment you<br />
intend to connect are switched off.<br />
To prevent malfunction and/or damage to speakers or other<br />
devices, always turn down the volume, and turn off the power<br />
on all devices before making any connections.<br />
2. Use audio cables to connect the VR-700’s rear panel<br />
OUTPUT connectors to your playback equipment<br />
(amplified speakers, mixer, etc.).<br />
* Audio cables are not included. If you want to purchase these items,<br />
please contact the dealer where you purchased the VR-700.<br />
Mixer, etc.<br />
Connecting Headphones<br />
Powered speaker<br />
Headphones<br />
1. Connect your headphones to the PHONES jack on the<br />
VR-700’s rear panel.<br />
* Use headphones that have a 1/4” stereo plug.<br />
Power amp/speaker<br />
About the XLR connector OUTPUT connectors<br />
The XLR connectors are wired as shown in the illustration.<br />
Before you make connections, check the wiring of the<br />
equipment you intend to connect.<br />
fig.XLRJack.eps<br />
1: GND 2: HOT<br />
3: COLD<br />
About the 1/4” phone jack OUTPUT connectors<br />
If you connect a cable only to the L/MONO jack of the phone<br />
jacks, the sound of the left and right channels will be mixed<br />
and output in monaural.<br />
* The stereo signal will be output from the XLR connectors.<br />
* We recommend that you use stereo output. If you use<br />
monaural output, the quality and character of the sound may<br />
be affected, but this does not indicate a malfunction.<br />
21
Getting Ready<br />
Connecting USB Memory<br />
1. Make sure that the VR-700’s power is switched off.<br />
2. Connect your USB memory to the VR-700’s rear panel<br />
USB MEMORY connector.<br />
fig.ConnectUSBmem.eps<br />
Attaching the Music Rest<br />
Here’s how to attach the included music rest.<br />
1. Remove the two music rest fastening screws from the<br />
rear panel.<br />
fig.MusicrestRemove.eps<br />
• Never insert or remove a USB memory device while this unit’s power<br />
is on. Doing so may corrupt the unit’s data or the data on the USB<br />
memory.<br />
2. Tighten the two screws to fasten the music rest in place.<br />
fig.MusicrestAttach.eps<br />
• Carefully insert the USB memory all the way in—until it is firmly in<br />
place.<br />
• If you’re using new USB memory, you must first initialize (format) it<br />
on the VR-700, refer to “Formatting USB Memory” (p. 62).<br />
• For details on USB memory device that can be used with the VR-700,<br />
refer to “Specifications” (p. 80). If you want to purchase USB<br />
memory, please contact the retailer from whom you purchased the<br />
VR-700.<br />
• When attaching the music rest, support it securely with your hand<br />
so that it does not fall.<br />
• Be careful not to pinch your hand or fingers when attaching the<br />
music rest.<br />
• Use only the included screws.<br />
• To detach the music rest, support it with your hand and slowly<br />
remove the screws. After detaching the music rest, firmly tighten<br />
the fastening screws.<br />
• The music rest fastening screws you remove must be kept out of the<br />
reach of small children so that they will not be swallowed<br />
accidentally.<br />
22
Getting Ready<br />
Adjusting the Volume<br />
1. Use the [VOLUME] knob to adjust the volume.<br />
Turning the knob toward the right will increase the volume, and<br />
turning it toward the left will decrease the volume.<br />
You’ll also need to make appropriate volume adjustments on the<br />
connected equipment.<br />
fig.VolAdj.eps<br />
Listening to the Demo Songs<br />
The VR-700 contains 3 demo songs.<br />
No.<br />
Song Title<br />
Composer/<br />
Performer<br />
Copyright<br />
1 Desert Stroll Mano Hanes © 2010 <strong>Roland</strong> Corporation<br />
2 The Odd Mistress Kiyomi Otaka © 2010 <strong>Roland</strong> Corporation<br />
3 7th Dance on a Sun Ray Ralf Schink © 2010 <strong>Roland</strong> Corporation<br />
* All rights reserved. Unauthorized use of this material for purposes<br />
other than private, personal enjoyment is a violation of applicable<br />
laws.<br />
fig.demo-play.eps<br />
1. Simultaneously press the [RHYTHM/SONG] button and<br />
the [<br />
] (Play/Stop) button.<br />
• The VR-700 will enter Demo mode, and the display will indicate<br />
.<br />
• The FAVORITE [1]–[3] buttons will blink.<br />
• In Demo mode, you can’t edit the organ sound, choose ensemble<br />
sounds, or perform.<br />
2. The blinking FAVORITE [1]–[3] buttons correspond to the<br />
four demo songs. When you press one of the buttons, the<br />
corresponding demo song will begin playing.<br />
When the demo song has finished playing, the next demo song will<br />
play.<br />
3. To stop demo song playback, press the [ ]<br />
(Play/Stop) button.<br />
4. To exit Demo mode, press the [DISPLAY/EXIT] button.<br />
* No data for the music that is played will be output from the MIDI<br />
OUT connector and USB MIDI connector.<br />
23
Getting Ready<br />
Indications in the Display<br />
fig.paneldisp.eps<br />
Indications when editing settings<br />
When you’re changing the reverb or chorus type, the display will<br />
indicate the respective type.<br />
fig.disp-type01.eps<br />
From this state, you can press the [DISPLAY/EXIT] button to return to<br />
the previous display.<br />
Indications in Function mode<br />
Bank number<br />
Favorite number<br />
fig.disp-func01.eps<br />
When you switch on the VR-700’s power, the current favorite<br />
number is shown in the display.<br />
When you press the [FUNCTION/ENTER] button, the VR-700 will<br />
enter Function mode. In Function mode you can specify Favorites<br />
and make detailed settings for the VR-700 (p. 51).<br />
Pressing the [DISPLAY/EXIT] button cycles you through the<br />
following choices for what is displayed.<br />
fig.disp-norm01.eps<br />
fig.arrow-right.eps<br />
fig.disp-tone01.eps<br />
Normal state<br />
(indicates the favorite<br />
number)<br />
Tone number of the<br />
ensemble sound<br />
fig.arrow-top.eps<br />
fig.arrow-bottom.eps<br />
fig.disp-tempo01.eps<br />
fig.arrow-reft.eps<br />
fig.disp-player01.eps<br />
Tempo of the internal<br />
rhythm or song (p. 50)<br />
Player function’s rhythm<br />
and song selection (p. 49)<br />
24
Getting Ready<br />
Disabling Panel Operations<br />
(Lock Function)<br />
Lock function is a function that disables operation of the panel’s<br />
buttons, and knobs. By locking the panel, you can prevent settings<br />
from being inadvertently changed while you’re on stage.<br />
Controls That can be Operated Even While<br />
Locked<br />
The following top panel controls can be operated even if the Lock<br />
function is turned on. This allows you to control the sound of the<br />
organ in real time even when the Lock function is on.<br />
• Harmonic bars (see illustration)<br />
• Some buttons and knobs of the organ section (see illustration)<br />
• D Beam controller<br />
• Organ control/Bender lever<br />
Turning the Lock Function On/Off<br />
1. Hold down the HARMONIC BAR [LOWER] button and<br />
press the PLAYER [RHYTHM/SONG] button.<br />
When the panel has been locked, the VR-700 will be in the following<br />
state.<br />
• Song playback will stop.<br />
• The following will be shown in the display.<br />
fig.disp-func01.eps<br />
2. To turn off the Lock function, press the [DISPLAY/EXIT]<br />
button.<br />
Alternatively, you can turn off the Lock function by repeating the<br />
action of step 1.<br />
25
Getting Ready<br />
Restoring the Factory Settings<br />
(Factory Reset)<br />
When you execute the Factory Reset operation, all Favorite settings<br />
in the VR-700 and the values of the system parameters that can be<br />
edited in Function mode will all be returned to their factory-set<br />
condition.<br />
If you want to keep the Favorite settings that are stored in the<br />
VR-700 and the values of the system parameters, back them up<br />
to USB memory as described in “Backing up Favorites to USB<br />
Memory” (p. 48).<br />
1. Press the [FUNCTION/ENTER] button.<br />
The VR-700 will enter Function mode, and the display will indicate<br />
.<br />
2. Use the [–] button or [+] button to make the display<br />
indicate .<br />
3. Press the [STRINGS] button.<br />
The display will indicate .<br />
4. Press the [FUNCTION/ENTER] button.<br />
The display will indicate .<br />
5. To execute the Factory Reset, press the [FUNCTION/<br />
ENTER] button.<br />
The display will indicate<br />
executed.<br />
while the Factory Reset is being<br />
Never turn off the VR-700’s power while the Factory Reset is<br />
being executed.<br />
* If you decide not to execute the Factory Reset, press the [DISPLAY/<br />
EXIT] button.<br />
6. When the Factory Reset is completed, the display will<br />
indicates .<br />
Turn the VR-700’s power off, then on again.<br />
26
Playing the VR-700<br />
About the VR-700’s Parts<br />
The VR-700 has three parts: Upper part, Lower part, and Pedal part.<br />
You can play a different sound in each of the three parts.<br />
Upper Part<br />
When using an external MIDI keyboard<br />
If you connect an external MIDI keyboard to the MIDI IN connector<br />
on the rear panel, you can use your external MIDI keyboard to play<br />
the upper part while using the VR-700’s keyboard to play the lower<br />
part (or vice versa).<br />
fig.part-uploWmidi.eps<br />
External MIDI keyboard<br />
When the Split function (p. 34) is off, the Upper part will sound when<br />
you play the keyboard.<br />
fig.part-upper.eps<br />
VR-700<br />
VR-700<br />
MIDI<br />
Upper part<br />
Upper part<br />
Lower part<br />
Lower Part<br />
If you turn on the Split function, the higher range of the keyboard<br />
will play the upper part and the lower range will play the lower part.<br />
fig.btn-split.eps<br />
• If you’re using an external MIDI keyboard, change the Function<br />
mode setting Sub Keyboard Function to upper (or lower). For more<br />
about the Sub Keyboard Function setting, refer to “Various Settings<br />
(Function mode)” (p. 51) and “Sub Keyboard Function” (p. 57).<br />
• For details on connecting your external MIDI keyboard, refer to<br />
“Connecting an External MIDI Keyboard” (p. 66).<br />
fig.part-uplo.eps<br />
VR-700<br />
Lower part<br />
Upper part<br />
For more about the Split function, refer to “Playing the Sounds<br />
of Two Parts on the Keyboard (Split)” (p. 34).<br />
27
Playing the VR-700<br />
Pedal Part<br />
To turn on the Split function, hold down the [LOWER] and [UPPER]<br />
buttons, and press the [SPLIT] button; the higher range of the<br />
keyboard will play the upper part, and the lower range of the<br />
keyboard will play the pedal part.<br />
fig.btn-splitpedal.eps<br />
Organ Sounds and Ensemble<br />
Sounds<br />
Organ sounds<br />
You can play different organ sounds from each of the VR-700’s three<br />
parts.<br />
The upper, lower, and pedal parts correspond to the upper organ,<br />
lower organ, and pedal organ sounds, respectively.<br />
fig.part-3organ.eps<br />
VR-700<br />
Lower organ<br />
Upper organ<br />
Pedal keyboard<br />
fig.part-uppdl.eps<br />
VR-700<br />
Pedal organ<br />
If you hold down the [LOWER] button and press the [SPLIT]<br />
button, the higher range of the keyboard will play the upper<br />
part, and the lower range of the keyboard will play the lower<br />
part.<br />
When using a pedal keyboard<br />
If you connect a pedal keyboard to the rear panel MIDI PEDAL IN<br />
connector, you can use your pedal keyboard to play the pedal part.<br />
fig.part-pedal.eps<br />
VR-700<br />
Pedal part<br />
Upper part<br />
Ensemble sounds<br />
In addition to organ sounds, you can also play ensemble sounds (p.<br />
46). The VR-700 contains various ensemble sounds. You can play<br />
two ensemble sounds simultaneously.<br />
The two ensemble sounds can be assigned to any desired parts.<br />
The illustration below is a conceptual diagram of sounds assigned to<br />
the upper part and lower part.<br />
fig.part-3organ2ens.eps<br />
VR-700<br />
Ensemble sound 1 Ensemble sound 2<br />
Lower organ<br />
Upper organ<br />
Upper part<br />
Pedal keyboard<br />
MIDI<br />
Pedal keyboard<br />
Pedal organ<br />
Pedal part<br />
For details on connecting your pedal keyboard, refer to<br />
“Connecting a Pedal Keyboard” (p. 20).<br />
28
Playing the VR-700<br />
Playing Organ Sounds and<br />
Ensemble Sounds Together (Layer)<br />
1. Changing the ensemble sound’s variation<br />
fig.ens-assign02.eps<br />
Layering Ensemble Sounds<br />
You can assign an ensemble sound to a desired part, and play it<br />
together with an organ sound.<br />
fig.layer01.eps<br />
When the TONE indicator is lit, you can use the [+] button or [–]<br />
button to select variations of the ensemble sound.<br />
2. Adjusting the ensemble sound’s volume<br />
1. Press the [LAYER] button to turn it on; layering is now<br />
enabled.<br />
2. Press one of the ensemble sound buttons.<br />
The ensemble sound will be assigned to the upper part; when you<br />
play the keyboard, you’ll hear the upper organ and the ensemble<br />
sound together.<br />
fig.Layer-assign01.eps<br />
Use the [ENSEMBLE VOLUME] bar to adjust the volume of the<br />
ensemble sound.<br />
fig.ens-assign03.eps<br />
Upper organ<br />
Ensemble sound<br />
• The display will indicate the ensemble sound’s tone number (p. 24).<br />
• If you press an ensemble sound button without pressing the<br />
[LAYER] button, only the ensemble sound will be heard (p. 33).<br />
29
Playing the VR-700<br />
3. Assigning an ensemble sound to the lower part<br />
To assign the ensemble sound to the Lower part, press the [TO<br />
LOWER/PEDAL] button.<br />
The [TO LOWER/PEDAL] button will light and “Lo” will be shown in<br />
the display.<br />
Layering Two Ensemble Sounds<br />
1. Press the [LAYER] button to turn it on; layering is now<br />
enabled.<br />
fig.layer01.eps<br />
At the same time, Split (p. 34) will turn on, allowing you to play the<br />
upper organ sound in the upper part.<br />
fig.ens-assign04.eps<br />
2. While holding down an ensemble sound button, press<br />
the button of another ensemble sound.<br />
• While you hold down the two sound buttons, the display will<br />
indicate the volume balance between the two ensemble sounds (p.<br />
31).<br />
• When you play the upper part, you’ll hear the upper organ and the<br />
two ensemble sounds together.<br />
fig.ens-assign11.eps<br />
Lower organ<br />
Upper organ<br />
Ensemble sound<br />
4. Assigning an ensemble sound to the pedal part<br />
To assign the ensemble sound to the Pedal part, hold down the [TO<br />
LOWER/PEDAL] button while you press the [–] button.<br />
The [TO LOWER/PEDAL] button will light and “Pd” will be shown in<br />
the display.<br />
Upper organ<br />
Ensemble sound 1<br />
When you press the [SPLIT], [LOWER], and [UPPER] buttons<br />
simultaneously, the Split function will turn on; the higher range<br />
of the keyboard will play the upper part, and the lower range of<br />
the keyboard will play the pedal part (p. 28).<br />
Ensemble sound 2<br />
30
Playing the VR-700<br />
The ensemble sound button you pressed first will light red, and the<br />
ensemble sound button you pressed second will light green.<br />
The ensemble sound whose button is lit red is called “ensemble<br />
sound 1,” and the ensemble sound whose button is lit green is<br />
called “ensemble sound 2.”<br />
fig.ens-assign12.eps<br />
2. Adjusting the volume balance of the ensemble<br />
sounds<br />
While holding down the buttons of ensemble sound 1 and<br />
ensemble sound 2, press the [+] button or [–] button to change the<br />
volume balance of the ensemble sounds.<br />
Lights red:<br />
Ensemble sound 1<br />
Lights green:<br />
Ensemble sound 2<br />
1. Changing the ensemble sound’s variation<br />
fig.ens-assign15.eps<br />
For ensemble sound 1<br />
In the same way as when using only one ensemble sound (p. 46), the<br />
variation of ensemble sound 1 can be changed by using the [+]<br />
button or [–] button when the TONE indicator is lit.<br />
Volume of<br />
ensemble sound 1<br />
Volume of<br />
ensemble sound 2<br />
For ensemble sound 2<br />
To change the variation of ensemble sound 2, hold down the button<br />
of ensemble sound 2, and use the [+] button or [–] button.<br />
fig.ens-assign13.eps<br />
31
Playing the VR-700<br />
3. Assigning an ensemble sound to the lower part<br />
4. Assigning an ensemble sound to the pedal part<br />
For ensemble sound 1<br />
In the same way as when using just one ensemble sound (p. 30),<br />
press the [TO LOWER/PEDAL] button; the lower part will switch to<br />
ensemble sound 1, and the [TO LOWER/PEDAL] button will light.<br />
For ensemble sound 2<br />
Hold down the button of ensemble sound 2 and press the [TO<br />
LOWER/PEDAL] button; the lower part will switch to ensemble<br />
sound 2.<br />
fig.ens-assign16.eps<br />
Lights green:<br />
Ensemble sound 2<br />
For ensemble sound 1<br />
In the same way as when using just one ensemble sound (p. 30), the<br />
ensemble sound is assigned to the Pedal part by holding down the<br />
[TO LOWER/PEDAL] button and pressing the [–] button.<br />
The [TO LOWER/PEDAL] button will light and “Pd” will be shown in<br />
the display.<br />
For ensemble sound 2<br />
To assign the Ensemble 2 sound to the Pedal part, hold down both<br />
the Ensemble 2 button and the [TO LOWER/PEDAL] button while<br />
you press the [–] button.<br />
If you hold down the [LOWER] and [UPPER] buttons and press<br />
the [SPLIT] button, the Split function will turn on, allowing you<br />
to play the upper part in the higher range of the keyboard and<br />
the pedal part in the lower range of the keyboard (p. 28).<br />
The [TO LOWER/PEDAL] button indicates the status of<br />
ensemble sound 1. If you hold down the button of ensemble<br />
sound 2, the [TO LOWER/PEDAL] button will instead indicate<br />
the status of ensemble sound 2.<br />
32
Playing the VR-700<br />
Playing Organ Sounds or Ensemble<br />
Sounds Individually<br />
Playing Only an Ensemble Sound<br />
1. Turn off the Split function.<br />
If the Split function is on, press the [SPLIT] button so it’s turned off.<br />
2. Press the ensemble sound button.<br />
fig.Single01.eps<br />
The ensemble sound will be assigned to the upper part.<br />
The organ sound will be muted.<br />
Playing Only the Organ Sound<br />
1. Press the [ORGAN ON] button.<br />
The [ORGAN ON] button will light, and all parts will play the organ<br />
sound.<br />
The ensemble sound selection will be cleared. If you want to<br />
play ensemble sounds again, you’ll need to re-select the<br />
ensemble sound.<br />
Changing a layered part to play only the organ<br />
sound<br />
1. Press the [LAYER] button to turn it off<br />
2. Press the [ORGAN ON] button.<br />
The [ORGAN ON] button will light, and all parts will play the organ<br />
sound.<br />
The ensemble sound selection will be cleared. If you want to<br />
layer ensemble sounds again, enable layering as described in<br />
“Playing Organ Sounds and Ensemble Sounds Together<br />
(Layer)” (p. 29).<br />
• You can switch variations of the ensemble sound, adjust its volume,<br />
and assign it to the lower part or pedal part in the same way as<br />
when Layer is turned on. For details, refer to “Playing Organ Sounds<br />
and Ensemble Sounds Together (Layer)” (p. 29).<br />
• Operation when playing two ensemble sounds is the same as when<br />
Layer is on. For details, refer to “Layering Two Ensemble Sounds” (p.<br />
30).<br />
Switching a layered part to only the ensemble<br />
sound<br />
1. Press the [LAYER] button to turn it off.<br />
The [ORGAN ON] button will go out, and the organ sound will be<br />
muted.<br />
If you’ve layered the organ sound and ensemble sound for<br />
more than one part, the organ sound will be muted for both<br />
parts. It’s not possible to mute the organ sound for just one of<br />
the parts.<br />
33
Playing the VR-700<br />
Playing the Sounds of Two Parts on<br />
the Keyboard (Split)<br />
Playing the upper part and lower part<br />
Playing the upper part and pedal part<br />
To turn on the Split function, hold down the [LOWER] and [UPPER]<br />
buttons, and press the [SPLIT] button; the higher range of the<br />
keyboard will play the upper part, and the lower range of the<br />
keyboard will play the pedal part.<br />
fig.btn-splitpedal.eps<br />
Press the [SPLIT] button; the upper part will be assigned to the<br />
upper zone of the keyboard, and the lower part to the lower zone of<br />
the keyboard.<br />
fig.btn-split.eps<br />
fig.part-uppdl.eps<br />
VR-700<br />
fig.part-uplo.eps<br />
VR-700<br />
Pedal part<br />
Upper part<br />
Lower part<br />
Upper part<br />
Split will automatically be turned on when you assign an<br />
ensemble sound to the lower part (p. 30).<br />
If you hold down the [LOWER] button and press the [SPLIT]<br />
button, the higher range of the keyboard will play the upper<br />
part, and the lower range of the keyboard will play the lower<br />
part.<br />
34
Playing the VR-700<br />
Boundary Between Upper and Lower Parts<br />
(Split Point)<br />
fig.splitpt.eps<br />
The VR-700 has a printed symbol to indicate the boundary (the split<br />
point) between the upper part and lower part.<br />
How the Split Point Is Shown<br />
When indicating the key that is the Split Point, the display<br />
shows the note name followed by a number that signifies the<br />
octave.<br />
fig.disp-split.eps<br />
Note name Octave<br />
Display Note name Display Note name<br />
C<br />
F<br />
C<br />
G<br />
D<br />
A<br />
When you press the [SPLIT] button to turn Split on, the display will<br />
indicate the split point.<br />
E<br />
A<br />
The split point is indicated as the highest key of the lower part<br />
(or the pedal part.)<br />
E<br />
B<br />
Changing the split point<br />
You can use either of the following two ways to change the split<br />
point.<br />
• Hold down the [SPLIT] button and press the key of the desired split<br />
point.<br />
• Hold down the [SPLIT] button and use the [+] button or [–] button to<br />
specify the desired split point.<br />
F<br />
B<br />
35
Playing the VR-700<br />
Using the D Beam Controller to<br />
Modify the Sound<br />
By moving your hand above the D Beam controller you can apply a<br />
variety of effects to the VR-700’s sound.<br />
fig.Dbeam01.eps<br />
D Beam Effects<br />
Effects applied to ensemble sounds<br />
When you press a button, it will light red, and the D Beam effect will<br />
be applied to ensemble sounds.<br />
* For details on how to assign an ensemble sound, refer to “Playing<br />
Organ Sounds and Ensemble Sounds Together (Layer)” (p. 29).<br />
Button (lights red)<br />
[PITCH] button<br />
[FILTER] button<br />
[VOLUME] button<br />
Effect<br />
The pitch will fall as you move your hand<br />
closer to the D Beam controller.<br />
The maximum amount of pitch change<br />
depends on the Function mode “Bend<br />
Range” setting (p. 54).<br />
The high-frequency range will be diminished<br />
as you move your hand closer to the D Beam<br />
controller, producing a more muffled sound.<br />
The volume will decrease as you move your<br />
hand closer to the D Beam controller.<br />
* The D Beam effect will apply to all ensemble sounds.<br />
1. Press a button to select the D Beam effect.<br />
The button will light, and the D Beam effect will be selected.<br />
Press the lit button a number of times until its light goes out; the D<br />
beam will be turned off.<br />
2. While you play, place your hand above the D Beam<br />
controller and slowly move it up and down.<br />
The effect will be applied when you move your hand near the D<br />
Beam controller, and will return to its original state when you move<br />
your hand away. The button will blink when the D Beam controller is<br />
responding.<br />
The usable range of the D Beam controller<br />
Effects applied to organ sounds<br />
When you press a button twice, it will light green, and the D Beam<br />
effect will be applied to organ sounds.<br />
Button (lights green)<br />
[WHEEL BRAKE] button<br />
[RING MOD] button<br />
Effect<br />
The Wheel Brake (p. 37) will be applied as you<br />
move your hand closer to the D Beam<br />
controller. The Wheel Brake will turn off<br />
when you move your hand away from the D<br />
Beam controller.<br />
The Ring Modulator (p. 37) will be applied<br />
when you move your hand close to the D<br />
Beam controller. The closer your hand is to<br />
the D Beam controller, the stronger the Ring<br />
Modulator will be.<br />
fig.splitpt.eps<br />
[SPRING SHOCK] button<br />
A spring reverb shock sound (p. 37) will be<br />
heard when you move your hand close to the<br />
D Beam controller.<br />
* The volume of the spring reverb shock sound can be adjusted by<br />
the REVERB [LEVEL] knob. The spring shock will be more effective if<br />
you choose “SPRING” as the reverb type (p. 44).<br />
The diagram shows the usable range of the D Beam controller.<br />
Moving your hand outside this range will produce no effect.<br />
* The sensitivity of the D Beam controller will change depending<br />
on the amount of light in the vicinity of the unit. If it does not<br />
function as you expect, adjust the sensitivity as appropriate for<br />
the brightness of your location (p. 54).<br />
36
Playing the VR-700<br />
What is the Wheel Brake?<br />
This simulates the way in which the tonewheels stop rotating<br />
when you switch off the power on a tonewheel organ.<br />
Since the amplifier of a tonewheel organ consisted of analog<br />
circuits using vacuum tubes, it would continue to produce<br />
sound for a short time even after the power was turned off.<br />
However, since the organ’s tonewheels would start slowing<br />
down as soon as the power was turned off, this would make<br />
the pitch drop. The technique of stopping the tonewheels was<br />
sometimes used on tonewheel organs. A skilled performer<br />
could use this effect within their music.<br />
What is a Ring Modulator?<br />
This simulates a circuit that produces an unpitched metallic<br />
sound by varying the frequency of the ring modulator’s<br />
internal oscillator.<br />
In hard rock of the past, some organ players applied aggressive<br />
effects such as a ring modulator to their organ in order to<br />
compete with the aggressive playing of the electric guitarist.<br />
A ring modulator is an effect that generates complex overtones<br />
that are not found in the original sound. These complex<br />
overtones create a metallic-sounding resonance.<br />
The word “ring” comes from the ring-shaped circuit that is<br />
formed when a ring modulator is constructed using analog<br />
components.<br />
What is a Spring Reverb?<br />
In the days when analog circuits were used, some reverb units<br />
produced their reverb effects by using a spring. This was the<br />
Spring Reverb. When physical impact is applied to a spring<br />
reverb unit, the springs bounce against each other, producing<br />
a distinctive clashing sound. Some performers used this sound<br />
intentionally.<br />
37
Creating Organ Sounds<br />
About Virtual Tonewheel Sound<br />
Generators<br />
Tonewheel organs are a type of organ that produce their sound by<br />
means of toothed wheels called “tonewheels.”<br />
Tonewheel organs contain numerous tonewheels, with each wheel<br />
corresponding to a key. The tonewheels are rotated by a motor.<br />
When a key is pressed, a pickup detects the motion of that wheel’s<br />
teeth as they rotate past a pickup, and converts this motion into<br />
sound. Because of this method of producing sound, tonewheel<br />
organs are able to produce sounds with a rapid (strong) attack, and<br />
came to be used in a wide range of musical styles.<br />
The VR-700 contains a “virtual tonewheel sound generator,” which<br />
uses digital technology to faithfully simulate the sound-generating<br />
methods of a tonewheel organ. In the same way as a traditional<br />
tonewheel organ, the VR-700 lets you use harmonic bars to create<br />
the basic sound of the organ.<br />
It also uses digital technology to faithfully simulate various<br />
distinctive characteristics of the tonewheel organ, and allows you to<br />
freely vary these.<br />
Ordinarily, the tone wheels revolve at a fixed speed. However, some<br />
performers have been known to use a technique whereby they raise<br />
the pitch by pushing the start switch while they’re performing,<br />
which increases the speed of the tone wheels’ revolution. You can<br />
re-create this effect by turning on the [ORGAN CONTROL] button,<br />
then pushing the bend lever away from yourself.<br />
In addition, it digitally recreates the vibrato, chorus, and rotary<br />
speaker sounds that are indispensable to an organ sound, giving<br />
you a great deal of freedom to create the sound you want.<br />
Varying the Sound in Real Time<br />
(Harmonic Bars)<br />
fig.H-bar.eps<br />
The harmonic bars are controllers that create the basic framework of<br />
the organ sound. By sliding the nine bars in or out, you can vary the<br />
organ sound in real time.<br />
An overtone of a different pitch is assigned to each harmonic bar,<br />
and you can create the organ sound by combining these overtones.<br />
If you push a harmonic bar inward until none of the numerals<br />
printed on it are visible, the overtone corresponding to that<br />
harmonic bar will not be heard. If the harmonic bar is pulled<br />
outward all the way, its volume will be at the maximum.<br />
fig.H-bar-Logic.eps<br />
8’ volume: 8<br />
Time<br />
4’ volume: 5<br />
Time<br />
Time<br />
38
Creating Organ Sounds<br />
Using the Harmonic Bars to Create Sounds<br />
1. Press either the HARMONIC BAR [UPPER] button or the<br />
[LOWER] button to select the part whose sound you want<br />
to create.<br />
fig.pnl-assgn.eps<br />
Harmonic Bars and Overtones<br />
The numbers (16’, 5-1/3’, etc.) printed on each harmonic bar are the<br />
“footage” (a number of feet). The footage plays an important role in<br />
determining the tonal character. 8’ is the basic footage (pitch); you’ll<br />
be creating the sound around this basic pitch.<br />
If you play the middle ‘C’ note (C4), the harmonic bars will be<br />
sounding the following pitches.<br />
fig.H-bar-Harmonic.eps<br />
16’ 5 1/3’ 8’ 4’ 2 2/3’ 2’ 1 3/5’ 1 1/3’ 1’<br />
one octave<br />
below<br />
5th root 8th 12th 15th 17th 19th 22th<br />
Part<br />
Upper part<br />
Lower part<br />
Operation<br />
Press the [Upper] button<br />
Press the [Lower] button<br />
Pedal part<br />
Press the [Upper] button and [Lower]<br />
button simultaneously<br />
“About the VR-700’s Parts” (p. 27)<br />
There are three colors of harmonic bars. Those that are in octave<br />
multiples of 8’ are white, those that are not octave multiples are<br />
black, and the lower-pitched bars are brown.<br />
2. Press the [MANUAL] button.<br />
When you press the [MANUAL] button so it’s lit, the organ sound will<br />
reflect the current settings of the harmonic bars.<br />
3. Move the harmonic bars to modify the sound.<br />
• The sound you create can be saved as a Favorite (p. 47).<br />
• If percussion is turned on, the 1’ sound will not be heard (p. 41).<br />
• For the Pedal part, only the 16’ and 8’ sounds will speak.<br />
• To hear the sound of the lower part, turn Split on, and then use the<br />
left range of the keyboard to play the sound of the lower part (p. 34)<br />
or connect an external MIDI keyboard (p. 66). To hear the sound of<br />
the pedal part, turn Split on, and then use the left range of the<br />
keyboard to play the sound of the pedal part (p. 34) or connect an<br />
external pedal keyboard (p. 20).<br />
39
Creating Organ Sounds<br />
What is footage?<br />
This comes from the length of pipes in a pipe organ. On a<br />
pipe organ, the pipes that sound the fundamental pitch of<br />
each key are considered by convention to have a length of<br />
eight feet (8’). A pipe that is half this length will produce a<br />
pitch that is one octave higher, and a pipe that is double this<br />
length will produce a pitch that is one octave lower. Thus, the<br />
sixteen-foot (16’) pipe is one octave lower, and the four-foot<br />
(4’) pipe is one octave higher.<br />
A tonewheel organ’s overtone structure<br />
In certain regions of a tonewheel organ’s keyboard, the<br />
overtones will not correspond to the configuration of the<br />
harmonic bars. In order to prevent unpleasantly high or low<br />
pitches, the high footage is “folded back down” in oneoctave<br />
units for the high range, while the low footage is<br />
“folded back up” in one-octave units for the low range. The<br />
VR-700 faithfully reproduces this characteristic of tonewheel<br />
organs.<br />
How the harmonic bars are arranged<br />
If you take a look at how the harmonic bars are arranged,<br />
you’ll notice that the 5-1/3’ footage alone is not located in<br />
the order of its pitch. This is because the 5-1/3’ pitch is not a<br />
multiple of the 8’ pitch, but a multiple (the third harmonic) of<br />
the 16’ pitch. In general, sounds consisting only of overtones<br />
that are integer multiples will sound consonant, while sounds<br />
that contain non-integer multiples will sound muddy. Since<br />
the 5-1/3’ pitch is more easily understood as an overtone of a<br />
16’ fundamental, the 5-1/3’ harmonic bar is placed beside the<br />
16’ harmonic bar.<br />
40
Creating Organ Sounds<br />
Using Percussion to add a Sense of Attack<br />
Percussion adds a sharply decaying component to the beginning of<br />
the sound, giving the sound more crispness. When you play legato,<br />
percussion is added only to the first note you play. When you play<br />
staccato, percussion is added to each note.<br />
fig.pnl-perc.eps<br />
* Percussion can be added only to the upper part’s organ sound.<br />
Percussion cannot be added to the lower part, the pedal part, or to<br />
ensemble sounds.<br />
Button ON OFF<br />
[SOFT] button<br />
The percussion sound will be decreased, and the harmonic bars will<br />
have their usual volume.<br />
fig.Perc-Soft.eps<br />
Volume<br />
Percussion sound will decay<br />
Volume of the<br />
harmonic bar<br />
The percussion sound will be at its normal volume, and the sound of<br />
the harmonic bars will be decreased.<br />
fig.Perc-Hard.eps<br />
Volume<br />
Percussion<br />
Volume of the harmonic<br />
bars will decreases<br />
* The volume when percussion is softened can be adjusted by the<br />
Function mode setting “Percussion Soft Level” (p. 52).<br />
The percussion sound will decay more slowly, producing a gentler<br />
attack.<br />
fig.Perc-Slow.eps<br />
Volume<br />
Long decay time<br />
Time<br />
* The volume when percussion is normal can be adjusted by the<br />
Function mode setting “Percussion Normal Level” (p. 52).<br />
The percussion sound will decay quickly, producing a sharper attack.<br />
fig.Perc-Fast.eps<br />
Volume<br />
Short decay time<br />
Time<br />
[SLOW] button<br />
Percussion<br />
Volume of the<br />
harmonic bars<br />
Time<br />
* The percussion decay time can be adjusted by the Function mode<br />
setting “Percussion Slow Time” (p. 52).<br />
Percussion<br />
Time<br />
* The percussion decay time can be adjusted by the Function mode<br />
setting “Percussion Fast Time” (p. 52).<br />
[SECOND] button Percussion of the same pitch as the 4’ harmonic bar will be heard Percussion will not sound.<br />
[THIRD] button Percussion of the same pitch as the 2-2/3’ harmonic bar will be heard. Percussion will not sound.<br />
• If percussion is on, the 1’ harmonic bar will not sound.<br />
• The [SECOND] button and [THIRD] button cannot be turned on simultaneously.<br />
• If you turn the [SOFT] button off, the organ sound specified by the harmonic bars will decrease. This reproduces the characteristics of a tonewheel<br />
organ. The Function mode setting “Percussion H-Bar Level” lets you specify how much the organ volume will decrease when the [SOFT] button is<br />
turned off (p. 52).<br />
41
Creating Organ Sounds<br />
About percussion on a tonewheel organ<br />
The percussion sound on a tonewheel organ does not apply to<br />
all the keys you play. Percussion will apply only to those keys<br />
that are simultaneously pressed from a state of no keys being<br />
pressed.<br />
If you play legato, percussion will apply only to the first note<br />
you play. If you play staccato, percussion will apply to every<br />
note. This is called the “single-trigger algorithm,” and is an<br />
indispensable part of organ performance expression.<br />
On a tonewheel organ, the percussion is created by analog<br />
circuitry. For this reason, the percussion circuit may not have<br />
enough time to recharge if there is only an extremely brief<br />
interval between the releasing of a key to the pressing of the<br />
next key, causing the percussion to sound at a lower volume.<br />
The VR-700 reproduces this characteristic of the circuit’s<br />
recharge time, and provides a Function mode setting<br />
“Percussion Recharge Time” that lets you adjust it (p. 52).<br />
Adding Modulation to the Sound<br />
(Vibrato and Chorus)<br />
By pressing the [VIBRATO] button or [CHORUS] button to turn it on,<br />
you can apply vibrato or chorus to the organ sound.<br />
ig.pnl-vibcho.eps<br />
* You can’t apply vibrato and chorus simultaneously. Nor can you<br />
apply vibrato or chorus with differing settings to the upper part,<br />
lower part, and pedal part.<br />
* Vibrato and chorus will not apply to the percussion sound.<br />
Turning on Vibrato or Chorus<br />
1. Press the [VIBRATO] button or the [CHORUS] button.<br />
The button you pressed will light, and the vibrato or chorus effect<br />
will be applied to the organ sound.<br />
Changing the Vibrato or Chorus Type<br />
The vibrato and chorus effects can each be switched between three<br />
types.<br />
* You can’t switch the vibrato or chorus type when vibrato or chorus<br />
is on.<br />
1. Verify that vibrato or chorus is off, and press the<br />
[VIBRATO] button or [CHORUS] button.<br />
The display will indicate the current vibrato type (V-1, V-2, V-3) or<br />
chorus type (C-1, C-2, C-3).<br />
2. Use the [–] button or [+] button to change the vibrato or<br />
chorus type.<br />
The effect will intensify as the vibrato type (V-1, V-2, V-3) or<br />
chorus type (C-1, C-2, C-3) moves to a higher number.<br />
42
Creating Organ Sounds<br />
Adding Rotary Speaker Modulation<br />
fig.pnl-rot.eps<br />
You can add the modulating sound that is typical of an organ with a<br />
rotary speaker connected.<br />
Detailed settings for the rotary speaker<br />
In Function mode you can make detailed settings for the rotary<br />
speaker (p. 53).<br />
Speaker volume<br />
You can specify the volumes of the tweeter and the woofer.<br />
• Volume of the tweeter: Rotary Tweeter Level<br />
• Volume of the woofer: Rotary Woofer Level<br />
The most typical rotary speaker unit contained a high-frequency<br />
speaker (tweeter) and a low-frequency speaker (woofer), each of<br />
which rotated at a different speed. The VR-700 simulates the effect<br />
produced by a rotary speaker.<br />
You can use the buttons in the rotary sound section to control the<br />
operation of the rotary speaker.<br />
Button<br />
[ON] button<br />
[SLOW/FAST]<br />
button<br />
[BRAKE] button<br />
Description<br />
Turns on the rotary speaker effect.<br />
Switches the rotational speed of the<br />
rotary speaker.<br />
Press the [SLOW/FAST] button to toggle<br />
between FAST and SLOW.<br />
FAST is selected when the indicator is<br />
blinking rapidly, and SLOW is selected<br />
when the indicator is blinking slowly.<br />
When you turn this on (lit), the rotational<br />
speed of the speaker will slow down and<br />
eventually stop completely.<br />
* The function mode setting “Rotary<br />
Brake Position” lets you specify<br />
whether the speaker will come to rest<br />
at a random angle or at the same angle<br />
each time when the rotation is stopped<br />
completely (p. 52).<br />
You can also use the bender lever (p. 14) or foot pedal to<br />
control the operation of the [SLOW/FAST] button and [BRAKE]<br />
button (p. 55).<br />
Rotational speed switching time<br />
You can specify whether the rotational speed will change<br />
slowly or quickly.<br />
The higher the value, the faster the change.<br />
Changing from SLOW to FAST<br />
• Woofer: Rotary Woofer Rise Time<br />
• Tweeter: Rotary Tweeter Rise Time<br />
Changing from FAST to SLOW<br />
• Woofer: Rotary Woofer Rise Time<br />
• Tweeter: Rotary Tweeter Rise Time<br />
Spread<br />
You can specify the amount by which the sound will appear to<br />
be spread to left and right by the rotation of the speaker.<br />
• Woofer: Rotary Woofer Spread<br />
• Tweeter: Rotary Tweeter Spread<br />
Rotational speed<br />
You can specify the speeds of the SLOW and the FAST rotation.<br />
SLOW rotational speed<br />
• Woofer: Rotary Woofer Slow Speed<br />
• Tweeter: Rotary Tweeter Slow Speed<br />
FAST rotational speed<br />
• Woofer: Rotary Woofer Fast Speed<br />
• Tweeter: Rotary Tweeter Fast Speed<br />
Distance between speaker and microphone<br />
The distance between the speaker and the microphone will<br />
affect the depth of the modulation.<br />
• Rotary Mic Distance<br />
Inconsistency of the speaker’s rotation<br />
Depending on the condition of the rotary speaker, the<br />
speaker’s rotation might not be perfectly consistent, and this<br />
can create distinctive sounds.<br />
• Rotary Speed Randomize<br />
43
Creating Organ Sounds<br />
Making the Sound Distort<br />
1. Turn the Rotary Sound section’s [GAIN] knob toward the<br />
right.<br />
Turning the knob toward the right will raise the gain, adding<br />
distortion to the sound.<br />
Adding Reverberation (Reverb)<br />
fig.pnl-rev.eps<br />
The reverb effect adds reverberation to the sound.<br />
About the amp types<br />
The VR-700 also faithfully simulates the amp that is combined<br />
with the rotary speaker. The VR-700 simulates five different<br />
amp types, allowing you to produce various kinds of distortion.<br />
You can change the amp type by editing the Function mode<br />
setting “Amp Type” (p. 52).<br />
From a jazzy sound to a heavily overdriven sound suitable for<br />
rock, you can change the amp type to enjoy sounds suitable for<br />
a variety of musical styles.<br />
About the Active Amp Enhancer<br />
Emphasizes the peculiarities of a particular amp’s distortion.<br />
When turned on, the sound is modified in a way that makes the<br />
lower range thicker while producing characteristic distortion in<br />
the middle to upper ranges; this modification takes into<br />
account the settings for the amp type and the current statuses<br />
of the expression pedal and harmonic bars.<br />
Turning the [GAIN] knob clockwise makes the effect stronger.<br />
Changes can be made by means of the Function mode’s<br />
“Active Amp Enhancer” (p. 52).<br />
1. Turn the REVERB [LEVEL] knob to adjust the reverb<br />
depth.<br />
Turning the knob toward the right will increase the reverb.<br />
If you turn the knob all the way to the left, there will be no reverb.<br />
Reverberation will be applied both to the organ sound and the<br />
ensemble sounds. You can adjust the reverb balance between<br />
the organ sounds and ensemble sounds. For details, refer to<br />
Function mode “Reverb Send Level” (p. 52, p. 53).<br />
Changing the Reverb Type<br />
By changing the reverb type you can experience the sensation of<br />
performing in a variety of locations.<br />
1. Press the REVERB [TYPE] button.<br />
The reverb type will change each time you press the [REVERB]<br />
button, and the display will indicate the reverb type.<br />
Display Reverb type Character<br />
Room<br />
The reverberation of a room<br />
Hall<br />
The reverberation of a large hall<br />
Cathedral<br />
The reverberation of a cathedral<br />
Spring reverb<br />
The reverberation of a spring<br />
reverb unit<br />
2. Use the [–] button or [+] button to change the reverb<br />
type.<br />
44
Creating Organ Sounds<br />
Using a Pedal to Adjust the Volume<br />
If you connect an expression pedal, you’ll be able to use the pedal to<br />
adjust the volume of the organ sound and ensemble sound.<br />
fig.ConnectPedals.eps<br />
Other settings for the organ sound<br />
In Function mode you can make additional detailed settings<br />
for the tonewheel organ.<br />
Type of tonewheel<br />
Due to the manufacturing precision of the tonewheels and the<br />
performance of the analog circuitry, the sounds produced by<br />
the tonewheels will not be perfect sine waves. This contributes<br />
to the distinctive character of a tonewheel organ. The VR-700<br />
can simulate the sounds of four different types of tonewheels.<br />
The tonewheel type can be changed by the Function mode<br />
setting “Wheel Type” (p. 52).<br />
Expression pedal<br />
Stepping on the pedal will increase the volume, while releasing the<br />
pedal will decrease the volume.<br />
* The organ volume will not reach 0 even if you completely release<br />
expression pedal.<br />
For details on connecting an expression pedal, refer to<br />
“Connecting an Expression Pedal and Damper Pedal” (p. 20).<br />
Leakage noise<br />
On a tonewheel organ, a small amount of the signal from<br />
tonewheels unrelated to the keys you pressed will leak into the<br />
sound of the keys you pressed. This “leakage noise” is<br />
considered a drawback of tonewheel organs, but some people<br />
feel it to be an important distinctive element of these organ<br />
sounds.<br />
You can adjust the level of the leakage noise by using the<br />
Function mode setting “Leakage Level” (p. 52).<br />
Key click<br />
This is the click noise heard when you press or release a key.<br />
On the earliest traditional tonewheel organs, a “click” noise<br />
occurred when you pressed or released a key. This was initially<br />
considered a problem, but blues and rock performers began to<br />
take advantage of it in their performances, and it is now<br />
considered a distinctive aspect of some jazz sounds.<br />
The noise that is heard when you press or release a key can be<br />
adjusted in Function mode (p. 52).<br />
• Volume of noise when you press a key:<br />
Key On Click Level<br />
• Volume of noise when you release a key:<br />
Key OFF Click Level<br />
45
Playing Ensemble Sounds<br />
The VR-700 provides ensemble sounds such as piano and strings.<br />
You can play two ensemble sounds simultaneously, and assign<br />
them to the desired parts (p. 28). You can also play ensemble sounds<br />
layered with organ sounds (p. 29).<br />
By combining these sounds with the organ you can make your<br />
performances even more expressive.<br />
fig.pnl-ens.eps<br />
Octave Shift<br />
You can shift the pitch of the ensemble sound in steps of an octave.<br />
1. Hold down the [OCTAVE SHIFT] button and use the [+]<br />
button or [–] button.<br />
* You can shift the pitch in a range from -2 octaves to +2 octaves.<br />
Effects for the Ensemble Sound<br />
An effect suitable for the character of each ensemble sound can be<br />
applied to the ensemble sound.<br />
* The type of effect will differ depending on the category and<br />
variation of the ensemble sound. You can’t change the type of<br />
effect.<br />
Turning the effect on/off<br />
Selecting an Ensemble Sound<br />
1. Press the EFFECT [ON] button.<br />
The button will light, and the effect will turn on.<br />
Changing the amount of effect<br />
“Ensemble Sound List” (p. 68)<br />
1. Press an ensemble sound button; the upper part will<br />
switch to that ensemble sound.<br />
The display will indicate the tone number of that category of sound.<br />
1. Turn the EFFECT [CONTROL] knob.<br />
Turning the knob toward the right will make the effect stronger.<br />
2. Use the [+] button or [–] button to select variations of<br />
that category of sound.<br />
46
Storing Your Favorite Settings (Favorites)<br />
The organ sound settings and ensemble sound settings for the<br />
three parts, along with the Layer and Split status, can be saved as a<br />
“favorite” in the VR-700’s internal memory.<br />
The VR-700’s internal memory can store 64 favorites.<br />
A set of these 64 favorites can also be backed up to USB memory<br />
(sold separately) connected to the USB MEMORY connector.<br />
* Some parameters of Function mode are stored independently for<br />
each favorite. For details on the parameters stored for each favorite,<br />
refer to “Parameter List” (p. 52).<br />
fig.pnl-favolite.eps<br />
Saving the Current Settings as a<br />
Favorite<br />
1. While holding down the [WRITE] button and [BANK]<br />
button, press one of the FAVORITE [1]–[8] buttons to<br />
specify the save-destination bank.<br />
The display will indicate the number of the bank you specified.<br />
You don’t need to specify the bank over again if you intend to<br />
save the Favorite in the current bank.<br />
2. Hold down the [WRITE] button and press one of the<br />
FAVORITE [1]–[8] buttons to specify the save-destination<br />
favorite number.<br />
The display will indicate the favorite number you specified, and the<br />
current settings will be saved as a favorite.<br />
Initializing the Favorites<br />
If you want to erase the 64 favorites stored in internal memory,<br />
returning them to their factory settings, execute the Factory Reset<br />
operation (p. 26).<br />
Selecting a Favorite<br />
When the VR-700 is shipped from the factory, the 64 favorites<br />
contain various sounds and settings.<br />
Try selecting the factory-set favorites, and listen to their sounds.<br />
1. Hold down the [BANK] button and press one of the [1]–<br />
[8] buttons to select a bank.<br />
While you hold down the [BANK] button, the button<br />
corresponding to the currently selected bank will light.<br />
2. Press one of the [1]–[8] buttons to select a favorite.<br />
The selected button will light.<br />
3. Play the keyboard and try out the sound.<br />
If you’re selecting a different favorite within the same bank,<br />
there’s no need to re-specify the bank.<br />
47
Storing Your Favorite Settings (Favorites)<br />
Backing up Favorites to USB<br />
Memory<br />
When you execute this operation, all favorites stored in the VR-700<br />
and the values of system parameters that can be edited in Function<br />
mode will be backed up to USB memory.<br />
1. Connect your USB memory to the rear panel USB<br />
MEMORY connector (p. 22).<br />
2. Press the FAVORITE [FILE SAVE] button.<br />
3. Use the [+] button or [–] button to specify the backup<br />
number.<br />
You can create up to 99 backups (numbered 01–99) on a single USB<br />
memory device.<br />
* If you specify a number for which a backup already exists, the<br />
decimal point at the right edge of the display will light.<br />
* If USB memory is not correctly inserted, the display will indicate<br />
.<br />
4. When you’ve specified the backup number, press the<br />
[FUNCTION/ENTER] button.<br />
Backup to USB memory will begin.<br />
* If you decide not to execute the Backup operation, press the<br />
[DISPLAY/EXIT] button.<br />
* If a backup already exists at the number you’ve specified,<br />
will appear in the display. If you’re sure that you don’t mind<br />
overwriting the existing backup, press the [FUNCTION/ENTER]<br />
button.<br />
If instead you want to select a different number, press the [DISPLAY/<br />
EXIT] button.<br />
Do not switch off the VR-700’s power while the backup is being<br />
executed.<br />
5. When the backup is completed, the display will return to<br />
its previous state.<br />
Restoring from USB Memory<br />
When you execute this operation, the 64 favorites and the system<br />
parameters will be restored into the VR-700’s memory from the USB<br />
backup.<br />
You can choose whether to restore the 64 favorites and system<br />
parameters together, or to restore only the 64 favorites and leave<br />
the system parameters as they were.<br />
When you execute this operation to restore from USB memory,<br />
the 64 favorites currently in the VR-700’s internal memory and<br />
its Function mode system parameters will be erased<br />
(overwritten by the restored data). This data cannot be<br />
recovered, so we recommend that you back it up before you<br />
proceed (p. 48).<br />
1. Connect your USB memory to the rear panel USB<br />
MEMORY connector (p. 22).<br />
2. Press the FAVORITE [FILE LOAD] button.<br />
3. Use the [+] button or [–] button to select the desired<br />
backup number.<br />
* If USB memory is not correctly inserted, the display will indicate<br />
.<br />
4. If you want to restore both the favorites and the system<br />
parameters, press the [FUNCTION/ENTER] button.<br />
If you want to restore only the favorites, hold down the<br />
[BANK] button and press the [FUNCTION/ENTER] button.<br />
* If you decide not to execute the Restore operation, press the<br />
[DISPLAY/EXIT] button.<br />
Do not switch off the VR-700’s power while the restoration is<br />
being executed.<br />
5. When the restoration is completed, the display will<br />
return to its previous state.<br />
48
Playing Rhythms and Songs (Player Functions)<br />
The VR-700 contains 51 rhythm patterns.<br />
It can also play back SMF music data or audio data stored on USB<br />
memory.<br />
Playing Internal Rhythms<br />
Button operations for the Player function<br />
You can use the following buttons to perform operations such<br />
as Play and Stop for the internal rhythms, or for SMF music data<br />
or audio filea stored on USB memory.<br />
fig.btn-allocate.eps<br />
1. Press the PLAYER [RHYTHM/SONG] button.<br />
fig.btn-player.eps<br />
The display will indicate .<br />
If the display does not indicate<br />
[RHYTHM/SONG] button once again.<br />
, try pressing the<br />
Each time you press the [RHYTHM/SONG] button, you’ll<br />
alternate between selecting internal rhythms and selecting<br />
songs from USB memory (p. 49).<br />
2. Use the [+] button or [–] button to select the rhythm that<br />
you want to play.<br />
“Internal Rhythm Pattern List” (p. 71)<br />
Action<br />
Play<br />
Stop<br />
Return to the beginning of the<br />
song<br />
Rewind<br />
Fast-forward<br />
Advance to the beginning of<br />
the next song<br />
Operation<br />
Press the [<br />
Stop) button<br />
] (Play/<br />
Press the [<br />
] (Play/<br />
Stop) button during playback<br />
Press the [–] button<br />
Hold down the [–] button for<br />
several seconds during<br />
playback<br />
Hold down the [+] button for<br />
several seconds during<br />
playback<br />
Press the [+] button<br />
3. Press the [ ] (Play/Stop) button; the rhythm<br />
will play.<br />
4. To stop, press the [ ] (Play/Stop) button once<br />
again.<br />
5. To stop rhythm playback and return to the previous<br />
display, press the [DISPLAY/EXIT] button.<br />
* No data for the music that is played will be output from MIDI OUT<br />
and USB MIDI.<br />
Selecting the rhythm or song to play<br />
Each time you press the PLAYER [RHYTHM/SONG] button,<br />
you’ll switch between selecting internal rhythms or songs from<br />
USB memory.<br />
fig.disp-file.eps<br />
Internal rhythm<br />
Song from USB memory<br />
Music data<br />
Audio file<br />
49
Playing Rhythms and Songs (Player Functions)<br />
Playing Songs from USB Memory<br />
1. Press the PLAYER [RHYTHM/SONG] button a number of<br />
times to access the screen for selecting a song from USB<br />
memory (p. 49).<br />
2. Use the [+] button or [–] button to select the song<br />
number that you want to play.<br />
3. Press the [ ] (Play/Stop) button to play back<br />
the song.<br />
4. To stop, press the [ ] (Play/Stop) button once<br />
again.<br />
5. To end song playback and return to the previous screen,<br />
press the [DISPLAY/EXIT] button.<br />
Songs inside a folder<br />
Folders in USB memory are shown as follows in the display.<br />
fig.disp-flddn.eps<br />
1. Press the [ ] (Play/Stop) button to see the<br />
songs in the folder.<br />
2. To return to the next higher folder, press the [+]<br />
button or [–] button until the screen shown in the<br />
illustration appears, and then press the [ ]<br />
(Play/Stop) button.<br />
fig.disp-fldup.eps<br />
Changing the Tempo<br />
Internal rhythm patterns or music data stored in USB memory can<br />
be played back at the desired tempo.<br />
Audio data stored on USB memory can also be played back at a<br />
different speed without changing its pitch.<br />
1. Press the [DISPLAY/EXIT] button a number of times until<br />
the TEMPO indicator lights.<br />
fig.btn-tempo.eps<br />
Caution when using USB memory<br />
• If you’re using new USB memory, you must first format it on the<br />
VR-700. For the procedure, refer to “Formatting USB Memory”<br />
(p. 62).<br />
• USB memory that was formatted on a computer cannot be<br />
used by the VR-700. USB memory that you want to use with the<br />
VR-700 must be formatted by the VR-700.<br />
• For details on the USB memory that can be used with the VR-<br />
700, refer to “Specifications” (p. 80). To purchase USB memory,<br />
contact the dealer where you purchased the VR-700.<br />
• For details on the format of songs that can be played back by<br />
the VR-700, refer to “Specifications” (p. 80).<br />
• On the VR-700, all songs are indicated by a number. Be aware<br />
that these will differ from the file names shown when the USB<br />
memory is connected to a computer.<br />
• If a folder contains more than 100 songs, it may not be possible<br />
to select songs correctly. Take care that there are no more than<br />
100 songs in a folder.<br />
2. Use the [+] button or [–] button to change the tempo.<br />
• For rhythm patterns or for music data stored on USB memory, the<br />
tempo can be adjusted in a range of 10–500 (BPM).<br />
• For audio data, the playback speed can be adjusted in a range of 75–<br />
125 (%).<br />
50
Various Settings (Function mode)<br />
Operations in Function Mode<br />
1. Press the [FUNCTION/ENTER] button.<br />
The VR-700 will enter Function mode, and the display will indicate<br />
.<br />
2. Use the [+] button or [–] button to select the group<br />
containing the parameter you want to edit.<br />
The sound buttons will blink.<br />
Display Group Refer to...<br />
Editing Parameter Values<br />
You can edit the value of a parameter by using the [–] button or [+]<br />
button.<br />
Depending on how you press these buttons, the value will change<br />
as follows.<br />
Operation<br />
Press the [+] button<br />
Press the [–] button<br />
Hold down the [+] button<br />
Change in value<br />
Value increases<br />
Value decreases<br />
Value continues increasing<br />
Organ sound parameters p. 52<br />
Percussion parameters p. 52<br />
Rotary parameters p. 53<br />
Hold down the [–] button<br />
Hold down the [+] button and<br />
press the [–] button<br />
Hold down the [–] button and<br />
press the [+] button<br />
Press the [+] button and [–]<br />
button simultaneously<br />
Value continues decreasing<br />
Value increases rapidly<br />
Value decreases rapidly<br />
Value is reset to the factory-set value<br />
Ensemble sound parameters p. 53<br />
Equalizer settings p. 54<br />
Pedal, bend lever, and foot<br />
controller settings<br />
p. 54<br />
* The factory settings of the system parameters are listed in the table<br />
on the next and following pages.<br />
* In the case of parameters stored as a Favorite, pressing the [–]<br />
button and [+] button simultaneously will reset the parameter to a<br />
certain value, but please be aware that this is not the value stored in<br />
the Favorite settings.<br />
Player parameters p. 56<br />
MIDI input/output settings p. 57<br />
System settings p. 59<br />
V-LINK settings p. 60<br />
Confirming System Parameters<br />
Of the parameters that can be set in Function mode, some<br />
parameters are stored as part of the system. The setting changes<br />
you make for such system parameters can be stored by carrying out<br />
the following procedure.<br />
1. Edit the value of the parameter.<br />
Deleting favorite sets,<br />
formatting USB memory,<br />
initializing the system<br />
p. 60<br />
2. Press the [WRITE] button.<br />
The display will indicate .<br />
3. After you’ve selected the group, press the sound button<br />
that corresponds to the parameter that you want to edit.<br />
For the correspondence between parameters and sound buttons,<br />
refer to the pages listed above.<br />
3. To write the edited value into memory, press the<br />
[FUNCTION/ENTER] button.<br />
If you decide not to write the edited value, press [DISPLAY/EXIT].<br />
4. Use the [+] button or [–] button to edit the value of the<br />
parameter.<br />
5. When you’ve finished editing, press the [DISPLAY/EXIT]<br />
button to return to the state of selecting a group.<br />
6. Press the [DISPLAY/EXIT] button once again to exit<br />
Function mode.<br />
51
Various Settings (Function mode)<br />
Parameter List<br />
Organ Sound Parameters<br />
With the Group already selected, press the [+] button or [–] button until<br />
* Settings for the following parameters are stored separately for each favorite.<br />
is shown in the display.<br />
Button Parameter Value<br />
[PIANO]<br />
[E.PIANO]<br />
Wheel Type (p. 45)<br />
1 (VINTAGE 1): Tonewheel used in tonewheel organs of the 1970’s.<br />
2 (VINTAGE 2): Tonewheel used in tonewheel organs of the 1960’s.<br />
3 (SOLID): Boosts the low range by adding low frequencies to the VINTAGE 1<br />
tonewheel.<br />
4 (CLEAN): Tonewheel with no leakage noise.<br />
Amp Type (p. 44)<br />
1: A rotary speaker often used in jazz performance.<br />
2: A large stack-type vacuum tube amp often used in British hard rock of the 1970’s and<br />
still used by hard rock guitarists today.<br />
3: A rotary speaker often used in rock performance.<br />
4: A rotary speaker with distortion that can be changed significantly using the [GAIN]<br />
knob.<br />
5: A rotary speaker for which the volume cannot be changed significantly using the<br />
[GAIN] knob, making it easier to adjust the level.<br />
1–4<br />
1–5<br />
[STRINGS] Organ Fine Tune -50– +50 (cent)<br />
[CHOIR/SCAT] Leakage Level (p. 45) 0–127<br />
[BRASS] Key On Click Level (p. 45) 0–31<br />
[SYNTH LEAD] Key Off Click Level (p. 45) 0–31<br />
[SYNTH PAD] Reverb Send Level (p. 44) 0–127<br />
[GUITAR] Active Amp Enhancer (p. 44) OFF, ON<br />
If the Wheel Type is set to 1 (VINTAGE 1), 2 (VINTAGE 2), or 3 (SOLID), the leakage noise will not disappear even if you minimize<br />
the Leakage Level.<br />
Percussion Parameters<br />
With the Group already selected, press the [+] button or [–] button until<br />
is shown in the display.<br />
* For details for each parameter, refer to “Using Percussion to add a Sense of Attack” (p. 41)<br />
* Settings for the following parameters are stored separately for each favorite.<br />
Button Parameter Value<br />
[PIANO] Percussion Soft Level 0–15<br />
[E.PIANO] Percussion Normal Level 0–15<br />
[STRINGS] Percussion Slow Time 0–127<br />
[CHOIR/SCAT] Percussion Fast Time 0–127<br />
[BRASS] Percussion Recharge Time 0–10<br />
[SYNTH LEAD] Percussion H-Bar Level 0–127<br />
52
Various Settings (Function mode)<br />
Rotary Parameters<br />
With the Group already selected, press the [+] button or [–] button until<br />
is shown in the display.<br />
* For details for each parameter, refer to “Adding Rotary Speaker Modulation” (p. 43)<br />
* Settings for the following parameters are stored separately for each favorite.<br />
Button Parameter Value<br />
[PIANO] Rotary Woofer Level 0–127<br />
[E.PIANO] Rotary Tweeter Level 0–127<br />
[STRINGS] Rotary Woofer Rise Time 0–127<br />
[CHOIR/SCAT] Rotary Tweeter Rise Time 0–127<br />
[BRASS] Rotary Woofer Fall Time 0–127<br />
[SYNTH LEAD] Rotary Tweeter Fall Time 0–127<br />
[SYNTH PAD] Rotary Woofer Spread 0–10<br />
[GUITAR] Rotary Tweeter Spread 0–10<br />
[BASS] Rotary Woofer Slow Speed 0–127<br />
[OTHERS] Rotary Tweeter Slow Speed 0–127<br />
When you press the [TO LOWER/PEDAL] button, the sound button will blink green, allowing you to edit the following parameters.<br />
Button Parameter Value<br />
[TO LOWER/PEDAL] ➝ [PIANO] Rotary Woofer Fast Speed 0–127<br />
[TO LOWER/PEDAL] ➝ [E.PIANO] Rotary Tweeter Fast Speed 0–127<br />
[TO LOWER/PEDAL] ➝ [STRINGS] Rotary Mic Distance 0–10<br />
[TO LOWER/PEDAL] ➝ [CHOIR/SCAT] Rotary Speed Randomize 0–10<br />
[TO LOWER/PEDAL] ➝ [BRASS]<br />
Rotary Brake Position<br />
(Position at which the speaker will<br />
be stopped by the ROTARY [BRAKE]<br />
button)<br />
: Stop at a random position (Free)<br />
: Always stop at the same position (Fix)<br />
Ensemble Sound Parameters<br />
With the Group already selected, press the [+] button or [–] button until<br />
* Settings for the following parameters are stored separately for each favorite.<br />
is shown in the display.<br />
Button Parameter Value<br />
[PIANO] Ensemble 1 Expression Switch OFF, ON<br />
[E.PIANO] Ensemble 2 Expression Switch OFF, ON<br />
[STRINGS] Ensemble Fine Tune -50–+50 (cents)<br />
[CHOIR/SCAT] Reverb Send Level 0–127<br />
53
Various Settings (Function mode)<br />
Equalizer Settings<br />
The VR-700 contains a three-band equalizer. When you turn on the EQ Switch (equalizer switch), the equalizer will apply to all organ<br />
sounds, ensemble sounds, and the playback of the player.<br />
With the Group already selected, press the [+] button or [–] button until<br />
is shown in the display.<br />
* Settings for the following parameters are saved in system memory. After editing these, press the [WRITE] button to save the settings in<br />
system memory (p. 51).<br />
Button Parameter Value Factory setting<br />
[PIANO] EQ Switch OFF, ON OFF<br />
[E.PIANO] EQ Input Gain -15–0–+3 (dB) 0 (dB)<br />
[STRINGS] EQ Low Gain -12–0–+12 (dB) 0 (dB)<br />
[CHOIR/SCAT]<br />
EQ Mid Freq<br />
200, 250, 315, 400, 500, 630, 800 (Hz)<br />
1.00, 1.25, 1.60, 2.00, 2.50, 3.15, 4.00, 5.00, 6.30, 8.00 (kHz)<br />
800 (Hz)<br />
[BRASS] EQ Mid Gain -12–0–+12 (dB) 0 (dB)<br />
[SYNTH LEAD] EQ High Gain -12–0–+12 (dB) 0 (dB)<br />
* The shaded parameters are stored in system memory.<br />
Pedal, Bend Lever, and Foot Controller Settings<br />
With the Group already selected, press the [+] button or [–] button until<br />
is shown in the display.<br />
* Settings for parameters other than Bend Range are saved in system memory. After editing these, press the [WRITE] button to save the<br />
settings in system memory (p. 51).<br />
* The Bend Range setting is saved separately for each favorite.<br />
Button Parameter Value Factory setting<br />
[PIANO] Damper Pedal Polarity : Normal<br />
Normal<br />
[E.PIANO] Control Pedal Polarity : Reverse<br />
Normal<br />
[STRINGS]<br />
Control Pedal Assign<br />
Refer to “Functions that can<br />
be assigned to the control<br />
pedal” (p. 55)<br />
Rotary speed<br />
[CHOIR/SCAT] Bender Range 0–24 (semitones) –<br />
[BRASS] D Beam Sensitivity 1–127 127<br />
* The shaded parameters are stored in system memory.<br />
54
Various Settings (Function mode)<br />
Functions that can be assigned to the control pedal<br />
Function<br />
Display<br />
No assign<br />
Switch the rotational speed of the rotary speaker:<br />
Turn the ROTARY [SLOW/FAST] button on/off (p. 43).<br />
Rotational speed of the rotary speaker:<br />
If an expression pedal is connected, control the speed of the rotating speaker between FAST and<br />
SLOW.<br />
Stop the rotary speaker:<br />
Turn the ROTARY [BRAKE] button on/off (p. 43).<br />
ROTARY [GAIN] knob:<br />
If an expression pedal is connected, use the pedal to control the setting of the ROTARY [GAIN] knob<br />
(p. 44).<br />
Wheel brake:<br />
Stop the tone wheels (p. 43).<br />
Crescendo:<br />
If an expression pedal is connected, the pedal will produce the same result as adjusting all of the<br />
harmonic bars simultaneously. If you step all the way down on the pedal, the harmonic bars will be at<br />
maximum volume and the rotary will be in the FAST state. The volume will decrease as you lift up on<br />
the pedal, and when you completely release the expression pedal, the volume will return to the<br />
settings of the harmonic bars.<br />
Soft pedal:<br />
Playing with the pedal held down will soften the tonal character. The soft pedal effect applies only to<br />
piano sounds.<br />
Sostenuto pedal:<br />
Notes that you play with the pedal already pressed will continue sounding even after you release the<br />
key. The sostenuto pedal effect applies only to ensemble sounds.<br />
Turn the effect on/off for the ensemble sound:<br />
Turns the ensemble section’s EFFECT [ON] button on/off (p. 46).<br />
Adjust the amount of effect for the ensemble sound:<br />
If an expression pedal is connected, the pedal will control the ensemble section’s EFFECT [CONTROL]<br />
knob.<br />
Raise the pitch (bend up):<br />
If an expression pedal is connected, the pedal will raise the pitch of the ensemble sound.<br />
Lower the pitch (bend down):<br />
If an expression pedal is connected, the pedal will lower the pitch of the ensemble sound.<br />
Start/stop the player:<br />
The pedal will control the play/stop button.<br />
Player’s tap tempo:<br />
The playback tempo of the rhythm will synchronize to the timing at which you press the pedal.<br />
Call up the next favorite.<br />
Call up the preceding favorite.<br />
55
Various Settings (Function mode)<br />
Player Parameters<br />
With the Group already selected, press the [+] button or [–] button until<br />
is shown in the display.<br />
* The Audio Volume setting is saved in system memory. After editing the setting, press the [WRITE] button to save the setting in system<br />
memory (p. 51).<br />
* The Rhythm Reverb Send Level setting is saved separately for each favorite.<br />
* It is not possible to save the settings of the Rhythm Volume, Song Volume, Song Transpose, Song Play Mode, and Center Cancel<br />
parameters. When you turn on the VR-700’s power, these parameters will automatically return to the values listed below.<br />
Button Parameter Value Factory setting<br />
[PIANO] Rhythm Volume 0–127<br />
100<br />
(at power-up)<br />
[E.PIANO] Rhythm Reverb Send Level 0–127 –<br />
[STRINGS] Song Volume 0–127<br />
127<br />
(at power-up)<br />
[CHOIR/SCAT] Audio Volume 0–127 64<br />
[BRASS] Song Transpose -6–0–+5 (semitones)<br />
0<br />
(at power-up)<br />
[SYNTH LEAD]<br />
Song Play Mode<br />
: Play a single song<br />
: Play all songs<br />
Play a single song<br />
(at power-up)<br />
[SYNTH PAD] Center Cancel OFF, ON<br />
OFF<br />
(at power-up)<br />
* The shaded parameters are stored in system memory.<br />
* Center Cancel is a function that minimizes the sound of the vocals when playing back an audio file. However, depending on the song,<br />
the vocal sound might not be eliminated completely.<br />
56
Various Settings (Function mode)<br />
MIDI Input/Output Settings<br />
With the Group already selected, press the [+] button or [–] button until<br />
is shown in the display.<br />
* Settings for parameters other than Local Control are saved in system memory. After editing these, press the [WRITE] button to save the<br />
settings in system memory (p. 51).<br />
Button Parameter Value Factory setting<br />
[PIANO]<br />
Local Control<br />
Internally connects (ON) or disconnects (OFF) the sound generator of<br />
the organ sounds and ensemble sounds with the keyboard and other<br />
controllers (p. 65).<br />
* To prevent problems such as there being no sound, the Local Control<br />
setting is automatically turned on when you turn on the power.<br />
* If you turn Local Control off, the keyboard unit connected to the MIDI<br />
PEDAL IN connector will be disconnected from the sound generator.<br />
OFF, ON<br />
ON<br />
(at power-up)<br />
[E.PIANO]<br />
Device ID<br />
Specifies the ID number used to identify units when using system<br />
exclusive messages to change the VR-700’s settings.<br />
17–32 17<br />
[STRINGS]<br />
Sub Keyboard Function<br />
Specifies the part that will be played by a keyboard connected to the<br />
MIDI IN connector (p. 66).<br />
OFF,<br />
-U- (UPPER),<br />
-L- (LOWER)<br />
OFF<br />
[CHOIR/SCAT]<br />
MIDI Thru Switch<br />
Specifies whether messages received at the MIDI IN connector will be<br />
transmitted from the MIDI OUT connector (p. 66).<br />
OFF, ON<br />
ON<br />
[BRASS]<br />
USB MIDI Thru Switch<br />
Specifies whether MIDI Thru will be used on the computer when the USB<br />
MIDI connector is connected to your computer (p. 67).<br />
OFF, ON<br />
OFF<br />
[SYNTH LEAD]<br />
Transmit Program Change Switch<br />
Specifies whether the corresponding MIDI message will be transmitted<br />
when you switch Favorites.<br />
OFF, ON<br />
ON<br />
[SYNTH PAD]<br />
Receive Program Change Switch<br />
Specifies whether incoming program change messages will switch<br />
Favorites.<br />
OFF, ON<br />
ON<br />
[GUITAR]<br />
[BASS]<br />
[OTHERS]<br />
Upper Organ MIDI Channel<br />
Specifies the MIDI transmit/receive channel for the upper organ (p. 65).<br />
Lower Organ MIDI Channel<br />
Specifies the MIDI transmit/receive channel for the lower organ (p. 65).<br />
Pedal Organ MIDI Channel<br />
Specifies the MIDI transmit/receive channel for the pedal organ (p. 65).<br />
1–16 1<br />
1–16 3<br />
1–16 2<br />
* The shaded parameters are stored in system memory.<br />
57
Various Settings (Function mode)<br />
When you press the [TO LOWER/PEDAL] button, the sound button will blink green, allowing you to edit the following parameters.<br />
Button Parameter Value Factory setting<br />
[TO LOWER/PEDAL] ➝ [PIANO]<br />
[TO LOWER/PEDAL] ➝ [E.PIANO]<br />
[TO LOWER/PEDAL] ➝ [STRINGS]<br />
[TO LOWER/PEDAL] ➝ [CHOIR/SCAT]<br />
[TO LOWER/PEDAL] ➝ [BRASS]<br />
Ensemble 1 MIDI Channel<br />
Specifies the MIDI transmit/receive channel for the<br />
ensemble part 1 (p. 65).<br />
Ensemble 2 MIDI Channel<br />
Specifies the MIDI transmit/receive channel for the<br />
ensemble part 2 (p. 65).<br />
Rhythm MIDI Channel<br />
Specifies the MIDI transmit/receive channel for the<br />
Internal rhythm part (p. 65).<br />
Spring MIDI Channel<br />
Specifies the MIDI transmit/receive channel for the<br />
spring shock part (p. 65).<br />
Control MIDI Channel<br />
Specifies the MIDI transmit/receive channel used to<br />
control the VR-700. This channel is used to switch<br />
Favorites and to control expression.<br />
1–16 4<br />
1–16 5<br />
1–16 10<br />
1–16 9<br />
1–16 16<br />
[TO LOWER/PEDAL] ➝ [SYNTH LEAD]<br />
MIDI Sound Controllers Switch<br />
Specifies whether harmonic bar data will be<br />
received as MIDI messages.<br />
OFF, ON<br />
ON<br />
[TO LOWER/PEDAL] ➝ [SYNTH PAD]<br />
MIDI General Controllers Switch<br />
Specifies whether wheel brake, rotary speed, and<br />
rotary brake data will be transmitted and received<br />
as MIDI messages.<br />
OFF, ON<br />
ON<br />
[TO LOWER/PEDAL] ➝ [GUITAR]<br />
MIDI/PLAYER Mode<br />
Specifies the internal sound generator used for the<br />
MIDI IN connector, USB MIDI connector, and song<br />
playback. For details, refer to “The VR-700’s Internal<br />
Structure” (p. 65).<br />
-1- (Mode 1),<br />
-2- (Mode 2),<br />
-3- (Mode 3),<br />
-4- (Mode 4)<br />
-1- (Mode 1)<br />
* The shaded parameters are stored in system memory.<br />
* The MIDI channels specified for each of the following parameters must all be different MIDI channels. The same MIDI channel cannot be<br />
shared by more than one parameter.<br />
• Upper Organ MIDI Channel<br />
• Lower Organ MIDI Channel<br />
• Pedal Organ MIDI Channel<br />
• Ensemble 1 MIDI Channel<br />
• Ensemble 2 MIDI Channel<br />
• Spring MIDI Channel<br />
* The Control MIDI channel must be set to a MIDI channel that is different than that of the following parameters.<br />
• Rhythm MIDI Channel<br />
• Ensemble 1 MIDI Channel<br />
• Ensemble 2 MIDI Channel<br />
• Spring MIDI Channel<br />
58
Various Settings (Function mode)<br />
System Settings<br />
With the Group already selected, press the [+] button or [–] button until<br />
is shown in the display.<br />
* Settings for parameters other than Key Transpose are saved in system memory. After editing these, press the [WRITE] button to save the<br />
settings in system memory (p. 51).<br />
* The Key Transpose setting is saved separately for each favorite.<br />
Button Parameter Value Factory setting<br />
[PIANO] Master Tune 415.3–466.2 (Hz) 440.0 (Hz)<br />
[E.PIANO] Key Transpose -6–5 (semitone) –<br />
Notes will sound at a<br />
fixed loudness regardless<br />
of how strongly you play<br />
[STRINGS]<br />
Key Touch<br />
Lighter-feeling keyboard<br />
touch<br />
Normal<br />
Normal<br />
Heavier-feeling<br />
keyboard touch<br />
[CHOIR/SCAT]<br />
Key Touch Velocity<br />
Specifies the strength of the notes when Key<br />
Touch is turned OFF.<br />
1–127 100<br />
[BRASS]<br />
Quick Firing<br />
Enables the Quick Firing function for the organ.<br />
Turning this OFF will make the keyboard less<br />
responsive for glissandi or repeated notes, but<br />
will reduce rebounding (bouncing) when you<br />
release a key.<br />
OFF, ON<br />
ON<br />
Internal clock<br />
[SYNTH LEAD]<br />
Clock Source<br />
Internal clock<br />
MIDI clock<br />
[SYNTH PAD] Clock Out OFF, ON OFF<br />
[GUITAR]<br />
USB Driver<br />
Use the computer’s<br />
standard driver (Generic)<br />
Use the dedicated driver<br />
software (Original)<br />
Generic<br />
[BASS] USB Memory Mode -1-, -2- -2-<br />
* The shaded parameters are stored in system memory.<br />
About master tune<br />
This adjusts the basic pitch of the entire VR-700. The display will show the numerical value of the reference pitch (Hz) with<br />
the 100’s place omitted. For example, if the display indicates “38.5,” the reference pitch is 438.5 (Hz).<br />
USB Driver<br />
Specifies the USB driver to use when you connect your computer via the USB MIDI connector. Leave the USB Driver at the<br />
“Generic” setting. If you change this to “Original,” you’ll need dedicated drive software in order to connect the VR-700 to<br />
your computer. For more about the dedicated driver software, refer to the <strong>Roland</strong> website.<br />
<strong>Roland</strong> website: http://www.roland.com/<br />
USB Memory Mode<br />
In certain cases, data reading may be slow or unsuccessful when you connect USB memory to the USB MEMORY connector.<br />
If so, you may be able to solve the problem by switching this setting.<br />
59
Various Settings (Function mode)<br />
V-LINK Settings<br />
With the Group already selected, press the [+] button or [–] button until<br />
is shown in the display.<br />
* Settings for the following parameters are saved in system memory. After editing these, press the [WRITE] button to save the settings in<br />
system memory (p. 51).<br />
Button Parameter Value Factory setting<br />
[PIANO] Transmit Channel 1–16 10<br />
* The shaded parameters are stored in system memory.<br />
Deleting Favorite Sets, Formatting USB Memory, Initializing the System<br />
With the Group already selected, press the [+] button or [–] button until<br />
is shown in the display.<br />
Button Parameter Operation<br />
[PIANO]<br />
[E.PIANO]<br />
[STRINGS]<br />
Delete Favorite<br />
Delete a favorite backup from USB memory<br />
Format<br />
Format USB memory<br />
Factory Reset<br />
Initialize the VR-700’s internal memory to the factory-set state<br />
p. 61<br />
p. 62<br />
p. 26<br />
60
Various Settings (Function mode)<br />
Deleting a Favorite Backup<br />
Here’s how to delete a specific backup of favorite settings stored on USB memory.<br />
1. Press the [FUNCTION/ENTER] button.<br />
The VR-700 will enter Function mode, and the display will indicate .<br />
2. Hold down the [+] button until the display indicates .<br />
3. Press the [PIANO] button.<br />
The display will indicate .<br />
4. Press the [FUNCTION/ENTER] button.<br />
The display shows the number of the backup to be deleted.<br />
5. Use the [+] button or [–] button to specify the number of the backup that you want to delete.<br />
6. When you’ve selected the number of the backup that you want to delete, press the [FUNCTION/ENTER] button.<br />
The display will indicate .<br />
7. To execute the Delete operation, press the [FUNCTION/ENTER] button.<br />
The specified backup of favorites will be deleted from USB memory.<br />
If you decide not to execute the Delete operation, press [DISPLAY/EXIT].<br />
8. When deletion has been completed, the Function mode screen will reappear.<br />
61
Various Settings (Function mode)<br />
Formatting USB Memory<br />
Here’s how to format USB memory. Before newly purchased USB memory or USB memory that was used with another product can be<br />
used with the VR-700, that USB memory must be formatted using the following procedure.<br />
• USB memory that was formatted by a computer cannot be used by the VR-700. USB memory to be used by the VR-700 must be<br />
formatted by the VR-700.<br />
When you format USB memory, all data stored on that USB memory will be deleted. Be sure to back up any important data to<br />
your computer before you proceed.<br />
1. Press the [FUNCTION/ENTER] button.<br />
The VR-700 will enter Function mode, and the display will indicate .<br />
2. Press the [+] button until the display indicates .<br />
3. Press the [E.PIANO] button.<br />
The display will indicate .<br />
4. Press the [FUNCTION/ENTER] button.<br />
The display will indicate .<br />
5. To execute the Format operation, press the [FUNCTION/ENTER] button.<br />
During formatting the display will indicate .<br />
Never switch off the VR-700’s power while formatting is being performed.<br />
If you decide not to execute the Format operation, press [DISPLAY/EXIT].<br />
6. When formatting is completed, the Function mode screen will reappear.<br />
62
Appendix<br />
63
Using V-LINK to Control Video Equipment<br />
V-LINK (<br />
)is a function that allows you to perform music and video together. By using a V-LINK compatible video device, you can easily<br />
enjoy a variety of video effects that are linked with your performance.<br />
For example, by using the VR-700 in conjunction with the EDIROL Visual Sampler P-10, you can do the following things.<br />
• Use the VR-700’s keys (the leftmost octave) to switch images.<br />
• Use the VR-700’s bend lever to control the image playback speed.<br />
• Use the VR-700’s D Beam controller to control the brightness or hue of the image.<br />
* In order to take advantage of V-LINK between the VR-700 and the P-10, you’ll need to make connections using MIDI cables (sold separately).<br />
Connection Example<br />
fig.V-LINKConnection.eps<br />
This example explains connections with the EDIROL P-10.<br />
Use a MIDI cable to connect the VR-700’s MIDI OUT connector to the P-10’s<br />
MIDI IN connector.<br />
* When making connections, you must first minimize the volume on all devices<br />
and turn off their power to prevent malfunctions or speaker damage.<br />
* Set the Function mode setting “Transmit Channel” (p. 60) to match the MIDI<br />
receive channel of your video device.<br />
MIDI OUT<br />
MIDI IN<br />
EDIROL P-10<br />
VR-700<br />
Turning V-LINK On/Off<br />
1. Press the [V-LINK] button.<br />
The V-LINK function will be turned on, and the [V-LINK] button will light.<br />
Operations on the VR-700<br />
Operating the VR-700’s keyboard and controllers will control the image accordingly.<br />
Keyboard/Controller V-LINK function Transmitted MIDI message Description<br />
Keys (leftmost octave) Clip (1–12) Program Change Switch images.<br />
Bender lever [BENDER] on Playback Speed Pitch Bend Controls the playback speed.<br />
[PITCH] on Playback Speed Pitch Bend Controls the playback speed.<br />
D Beam controller<br />
[FILTER] on Color Cb CC #74 Controls the hue and brightness.<br />
[VOLUME] on Video Fader CC #11 Controls the video fader.<br />
* When V-LINK is on, the lowest 12 keys (one octave) will not produce sound.<br />
2. To turn V-LINK off, press the [VLINK] button once again.<br />
The V-LINK function will turn off, and the [V-LINK] button will go out.<br />
64
Connecting MIDI Equipment<br />
* To prevent malfunction and/or damage to speakers or other<br />
devices, always turn down the volume, and turn off the power on all<br />
devices before making any connections.<br />
MIDI Routing<br />
fig.MIDIroute01.eps<br />
The VR-700’s Internal Structure<br />
External MIDI keyboard<br />
Sound Generator Section<br />
The VR-700 contains a sound generator for organ sounds and<br />
ensemble sounds, and a sound generator for song playback.<br />
The organ/ensemble sound generator is a multi-part sound<br />
generator; with the factory settings, each part is assigned to the<br />
following MIDI channels.<br />
Player<br />
Internal<br />
rhythm<br />
Song<br />
MIDI<br />
IN<br />
MIDI<br />
OUT<br />
USB<br />
MIDI<br />
Organ/ensemble sound generator parts<br />
Upper organ 1<br />
Lower organ 3<br />
Pedal organ 2<br />
Ensemble 1 4<br />
Ensemble 2 5<br />
Internal rhythm 10<br />
Spring shock 9<br />
MIDI channel<br />
(factory setting)<br />
Song playback<br />
sound generator<br />
VR-700<br />
Keyboard/Controllers<br />
Pedal keyboard<br />
Organ/ensemble<br />
sound generator<br />
MIDI<br />
PEDAL<br />
IN<br />
* MIDI messages received at the MIDI PEDAL IN connector are<br />
automatically converted to the MIDI channel specified by “Pedal<br />
Organ MIDI Channel” (p. 57).<br />
Inside the VR-700, MIDI connections are routed as shown in the<br />
illustration.<br />
With the factory settings, MIDI messages received at the MIDI IN<br />
connector or USB MIDI connector will play the corresponding part of<br />
the organ/ensemble sound generator. When a song is played back<br />
on the internal player, it will be sounded by the song playback<br />
sound generator.<br />
* MIDI messages received at the MIDI PEDAL IN connector are<br />
automatically converted to the MIDI channel specified by “Pedal<br />
Organ MIDI Channel” (p. 57).<br />
You can change the MIDI routing by changing the Function mode<br />
setting “MIDI/Player Mode” (p. 57).<br />
MIDI/Player<br />
Mode<br />
Mode 1<br />
(factory setting)<br />
Mode 2<br />
Mode 3<br />
Mode 4<br />
Received at the MIDI<br />
IN connector or USB<br />
MIDI connector<br />
Organ/ensemble<br />
sound generator<br />
Song playback<br />
sound generator<br />
Organ/ensemble<br />
sound generator<br />
Song playback<br />
sound generator<br />
Song playback<br />
Song playback<br />
sound generator<br />
Song playback<br />
sound generator<br />
Organ/ensemble<br />
sound generator<br />
Song playback<br />
sound generator<br />
65
Connecting MIDI Equipment<br />
Connecting an External MIDI<br />
Keyboard<br />
Connecting an External MIDI<br />
Sequencer<br />
fig.ConnectMIDIkey.eps<br />
fig.ConnectMIDISeq.eps<br />
MIDI OUT<br />
External MIDI keyboard<br />
MIDI IN<br />
MIDI OUT<br />
MIDI IN<br />
MIDI sequencer<br />
MIDI IN<br />
MIDI OUT<br />
VR-700<br />
Playing a Desired Part (Factory Settings)<br />
Turn the Function mode setting “Sub Keyboard Function” OFF.<br />
* If “Sub Keyboard Function” is OFF, you can play any desired part of<br />
the organ/ensemble sound generator by setting your MIDI<br />
keyboard to the appropriate MIDI transmit channel (p. 57).<br />
VR-700<br />
You can use a MIDI cable (sold separately) to connect a MIDI<br />
sequencer to the VR-700; the sequencer can record your<br />
performance on the VR-700, and the VR-700 can sound the playback<br />
from the sequencer.<br />
Playing the Upper Part or Lower Part<br />
Set the Function mode “Sub Keyboard Function” to Upper (to play<br />
the upper part) or Lower (to play the lower part).<br />
* If “Sub Keyboard Function” (p. 57) is set to Upper (or Lower), MIDI<br />
messages received at the MIDI IN connector will automatically be<br />
converted to the MIDI channel specified for “Upper Organ MIDI<br />
Channel” (or “Lower Organ MIDI Channel”). The routing will be the<br />
same as for the MIDI PEDAL IN connector (p. 65).<br />
Local Control Setting<br />
If your external MIDI sequencer’s MIDI Thru function is enabled,<br />
change the following Function mode parameters as follows.<br />
• Set “Local Control” to OFF (it will be ON when the power is turned<br />
on)<br />
• Set “MIDI Thru Switch” to OFF (factory setting is ON)<br />
* The “Local Control” setting is not remembered by the VR-700. It will<br />
be ON when you turn on the power.<br />
* If “Sub Keyboard Function” (p. 57) is set to Upper (or Lower), MIDI<br />
messages received at the MIDI IN connector will automatically be<br />
converted to the MIDI channel specified by “Upper Organ MIDI<br />
Channel” (or “Lower Organ MIDI Channel”). The routing will be the<br />
same as for the MIDI PEDAL IN connector (p. 65).<br />
fig.MIDIroute03.eps<br />
MIDI<br />
IN<br />
MIDI<br />
OUT<br />
USB<br />
MIDI<br />
MIDI<br />
Thru<br />
Switch<br />
VR-700<br />
Organ/ensemble<br />
sound generator<br />
Local Control<br />
MIDI<br />
PEDAL<br />
IN<br />
66
Connecting MIDI Equipment<br />
Connecting your Computer<br />
Local Control Setting<br />
fig.ConnectPC.eps<br />
To USB MIDI<br />
USB cable<br />
If you are using sequencer software on your computer, and your<br />
sequencer software’s MIDI Thru function is enabled, change the<br />
following Function mode parameters as follows.<br />
• Set “Local Control” to OFF (it will be ON when the power is turned<br />
on)<br />
• Set “USB MIDI Thru Switch” to ON (factory setting is OFF)<br />
VR-700<br />
Computer<br />
You can use a USB cable (sold separately) to connect the VR-700 to<br />
your computer.<br />
If the VR-700 is connected to a computer in which sequencer<br />
software is installed, the playback from the software can be<br />
sounded by the VR-700, and your performance on the VR-700 can<br />
be recorded by your software.<br />
* If your sequencer software’s MIDI Thru function is not enabled,<br />
there’s no need to change these settings.<br />
* The “Local Control” setting is not remembered by the VR-700. It will<br />
be ON when you turn on the power.<br />
* If “Sub Keyboard Function” (p. 57) is set to Upper (or Lower), MIDI<br />
messages received at the MIDI IN connector will automatically be<br />
converted to the MIDI channel specified by “Upper Organ MIDI<br />
Channel” (or “Lower Organ MIDI Channel”). The routing will be the<br />
same as for the MIDI PEDAL IN connector (p. 65).<br />
Routing when USB MIDI Thru Switch=ON<br />
fig.MIDIroute02.eps<br />
Computer<br />
MIDI<br />
IN<br />
MIDI<br />
OUT<br />
USB<br />
MIDI<br />
VR-700<br />
Organ/ensemble<br />
sound generator<br />
Local Control<br />
MIDI<br />
PEDAL<br />
IN<br />
67
Ensemble Sound List<br />
PIANO group<br />
BRASS group<br />
BASS group<br />
No. Tone Name MSB LSB PC<br />
1 Superior Grd 87 64 1<br />
2 Ultimate Pno 87 64 2<br />
3 Grand VR 87 64 3<br />
4 Pure Grand 87 64 4<br />
5 Mellow Piano 87 64 5<br />
6 Pure Mellow 87 64 6<br />
7 Rock Piano 87 64 7<br />
8 Honky-tonk 87 64 8<br />
9 SuperiorMono 87 64 9<br />
10 GrandVR Mono 87 64 10<br />
E.PIANO group<br />
No. Tone Name MSB LSB PC<br />
1 VR E.Piano 87 65 1<br />
2 Stage Phazer 87 65 2<br />
3 70’s E.Piano 87 65 3<br />
4 60’s E.Piano 87 65 4<br />
5 FM E.Piano 87 65 5<br />
6 S.A.E.P. 87 65 6<br />
7 E.Grand 87 65 7<br />
8 Clav 87 65 8<br />
9 WahWah Clav 87 65 9<br />
10 Natural Hps 87 65 10<br />
STRINGS group<br />
No. Tone Name MSB LSB PC<br />
1 VR Strings 87 66 1<br />
2 Warm Strings 87 66 2<br />
3 Studio Sect. 87 66 3<br />
4 ChmbrStrings 87 66 4<br />
5 JP Strings 87 66 5<br />
CHOIR/SCAT group<br />
No. Tone Name MSB LSB PC<br />
1 Real Choir 87 67 1<br />
2 Jazz Scat 87 67 2<br />
3 Aerial Choir 87 67 3<br />
4 Female Vox 87 67 4<br />
5 Female Aahs 87 67 5<br />
No. Tone Name MSB LSB PC<br />
1 Ac.Brass 87 72 1<br />
2 R&R Brass 87 72 2<br />
3 Bigband Sax 87 72 3<br />
4 VoyagerBrass 87 72 4<br />
5 Jump For KY 87 72 5<br />
SYNTH LEAD group<br />
No. Tone Name MSB LSB PC<br />
1 Vintage Lead 87 68 1<br />
2 Dual Lead 87 68 2<br />
3 Saw Lead 87 68 3<br />
4 SuperSawSlow 87 68 4<br />
5 Jupiter Lead 87 68 5<br />
6 Square Lead 87 68 6<br />
7 BrightSquare 87 68 7<br />
8 Sine Lead 87 68 8<br />
9 Syn.Calliope 87 68 9<br />
10 Doctor Solo 87 68 10<br />
SYNTH PAD group<br />
No. Tone Name MSB LSB PC<br />
1 Soft Pad 87 69 1<br />
2 Silky Way 87 69 2<br />
3 Nu Epic Pad 87 69 3<br />
4 Strings Pad 87 69 4<br />
5 Glass Organ 87 69 5<br />
GUITAR group<br />
No. Tone Name MSB LSB PC<br />
1 Dyna Nylon 87 70 1<br />
2 Steel Gtr 87 70 2<br />
3 Jz Gtr Hall 87 70 3<br />
4 JC Strat 87 70 4<br />
5 Blusey OD 87 70 5<br />
No. Tone Name MSB LSB PC<br />
1 AcousticBass 87 71 1<br />
2 FingerMaster 87 71 2<br />
3 Pick Bass 87 71 3<br />
4 101 Bass 87 71 4<br />
5 Punch MG 87 71 5<br />
OTHERS/GM2 group<br />
No. Tone Name MSB LSB PC<br />
1 Piano+Str. 87 73 1<br />
2 Piano+Pad 87 73 2<br />
3 E.Piano+Str. 87 73 3<br />
4 E.Piano+Pad 87 73 4<br />
5 Bass+RideCym 87 73 5<br />
VR Drum Sets<br />
6 VR Pop Kit 86 64 1<br />
7 VR Rock Kit 86 64 2<br />
8 VR Jazz Kit 86 64 3<br />
9 VR R&B Kit 86 64 4<br />
10 VR House Kit 86 64 5<br />
GM2 Drum Sets<br />
11 STANDARD Set 120 0 1<br />
12 ROOM Set 120 0 9<br />
13 POWER Set 120 0 17<br />
14 ELEC.Set 120 0 25<br />
15 ANALOG Set 120 0 26<br />
16 JAZZ Set 120 0 33<br />
17 BRUSH Set 120 0 41<br />
18 ORCH.Set 120 0 49<br />
19 SFX Set 120 0 57<br />
GM2 Tones<br />
20 Piano 1 121 0 1<br />
21 Piano 1w 121 1 1<br />
22 Piano 1d 121 2 1<br />
23 Piano 2 121 0 2<br />
24 Piano 2w 121 1 2<br />
25 Piano 3 121 0 3<br />
26 Piano 3w 121 1 3<br />
27 Honky-tonk 121 0 4<br />
28 Honky-tonk w 121 1 4<br />
29 E.Piano 1 121 0 5<br />
30 Detuned EP 1 121 1 5<br />
31 Vintage EP 121 2 5<br />
68
Ensemble Sound List<br />
No. Tone Name MSB LSB PC<br />
32 ‘60s E.Piano 121 3 5<br />
33 E.Piano 2 121 0 6<br />
34 Detuned EP 2 121 1 6<br />
35 St.FM EP 121 2 6<br />
36 EP Legend 121 3 6<br />
37 EP Phase 121 4 6<br />
38 Harpsichord 121 0 7<br />
39 Coupled Hps. 121 1 7<br />
40 Harpsi.w 121 2 7<br />
41 Harpsi.o 121 3 7<br />
42 Clav. 121 0 8<br />
43 Pulse Clav. 121 1 8<br />
44 Celesta 121 0 9<br />
45 Glockenspiel 121 0 10<br />
46 Music Box 121 0 11<br />
47 Vibraphone 121 0 12<br />
48 Vibraphone w 121 1 12<br />
49 Marimba 121 0 13<br />
50 Marimba w 121 1 13<br />
51 Xylophone 121 0 14<br />
52 TubularBells 121 0 15<br />
53 Church Bell 121 1 15<br />
54 Carillon 121 2 15<br />
55 Santur 121 0 16<br />
56 Organ 1 121 0 17<br />
57 TremoloOrgan 121 1 17<br />
58 ‘60s Organ 121 2 17<br />
59 Organ 2 121 3 17<br />
60 Perc.Organ 1 121 0 18<br />
61 Chorus Organ 121 1 18<br />
62 Perc.Organ 2 121 2 18<br />
63 Rock Organ 121 0 19<br />
64 Church Org.1 121 0 20<br />
65 Church Org.2 121 1 20<br />
66 Church Org.3 121 2 20<br />
67 Reed Organ 121 0 21<br />
68 Puff Organ 121 1 21<br />
69 Accordion 1 121 0 22<br />
70 Accordion 2 121 1 22<br />
71 Harmonica 121 0 23<br />
72 Bandoneon 121 0 24<br />
73 Nylon-str.Gt 121 0 25<br />
74 Ukulele 121 1 25<br />
75 Nylon Gt o 121 2 25<br />
76 Nylon Gt 2 121 3 25<br />
77 Steel-str.Gt 121 0 26<br />
No. Tone Name MSB LSB PC<br />
78 12-str.Gt 121 1 26<br />
79 Mandolin 121 2 26<br />
80 Steel+Body 121 3 26<br />
81 Jazz Guitar 121 0 27<br />
82 Hawaiian Gt 121 1 27<br />
83 Clean Guitar 121 0 28<br />
84 Chorus Gt 1 121 1 28<br />
85 Mid Tone Gt 121 2 28<br />
86 Muted Guitar 121 0 29<br />
87 Funk Guitar1 121 1 29<br />
88 Funk Guitar2 121 2 29<br />
89 Chorus Gt 2 121 3 29<br />
90 Overdrive Gt 121 0 30<br />
91 Guitar Pinch 121 1 30<br />
92 DistortionGt 121 0 31<br />
93 Gt Feedback1 121 1 31<br />
94 Dist.Rtm Gt 121 2 31<br />
95 Gt Harmonics 121 0 32<br />
96 Gt Feedback2 121 1 32<br />
97 AcousticBass 121 0 33<br />
98 FingeredBass 121 0 34<br />
99 Finger Slap 121 1 34<br />
100 Picked Bass 121 0 35<br />
101 FretlessBass 121 0 36<br />
102 Slap Bass 1 121 0 37<br />
103 Slap Bass 2 121 0 38<br />
104 Synth Bass 1 121 0 39<br />
105 WarmSyn.Bass 121 1 39<br />
106 Synth Bass 3 121 2 39<br />
107 Clav.Bass 121 3 39<br />
108 Hammer 121 4 39<br />
109 Synth Bass 2 121 0 40<br />
110 Synth Bass 4 121 1 40<br />
111 RubberSyn.Bs 121 2 40<br />
112 Attack Pulse 121 3 40<br />
113 Violin 121 0 41<br />
114 Slow Violin 121 1 41<br />
115 Viola 121 0 42<br />
116 Cello 121 0 43<br />
117 Contrabass 121 0 44<br />
118 Tremolo Str. 121 0 45<br />
119 PizzicatoStr 121 0 46<br />
120 Harp 121 0 47<br />
121 Yang Qin 121 1 47<br />
122 Timpani 121 0 48<br />
123 Strings 121 0 49<br />
No. Tone Name MSB LSB PC<br />
124 Orchestra 121 1 49<br />
125 ‘60s Strings 121 2 49<br />
126 Slow Strings 121 0 50<br />
127 Syn.Strings1 121 0 51<br />
128 Syn.Strings3 121 1 51<br />
129 Syn.Strings2 121 0 52<br />
130 Choir 1 121 0 53<br />
131 Choir 2 121 1 53<br />
132 Voice 121 0 54<br />
133 Humming 121 1 54<br />
134 Synth Voice 121 0 55<br />
135 Analog Voice 121 1 55<br />
136 OrchestraHit 121 0 56<br />
137 Bass Hit 121 1 56<br />
138 6th Hit 121 2 56<br />
139 Euro Hit 121 3 56<br />
140 Trumpet 121 0 57<br />
141 Dark Trumpet 121 1 57<br />
142 Trombone 1 121 0 58<br />
143 Trombone 2 121 1 58<br />
144 Bright Tb 121 2 58<br />
145 Tuba 121 0 59<br />
146 MuteTrumpet1 121 0 60<br />
147 MuteTrumpet2 121 1 60<br />
148 French Horn1 121 0 61<br />
149 French Horn2 121 1 61<br />
150 Brass 1 121 0 62<br />
151 Brass 2 121 1 62<br />
152 Synth Brass1 121 0 63<br />
153 Synth Brass3 121 1 63<br />
154 AnalogBrass1 121 2 63<br />
155 Jump Brass 121 3 63<br />
156 Synth Brass2 121 0 64<br />
157 Synth Brass4 121 1 64<br />
158 AnalogBrass2 121 2 64<br />
159 Soprano Sax 121 0 65<br />
160 Alto Sax 121 0 66<br />
161 Tenor Sax 121 0 67<br />
162 Baritone Sax 121 0 68<br />
163 Oboe 121 0 69<br />
164 English Horn 121 0 70<br />
165 Bassoon 121 0 71<br />
166 Clarinet 121 0 72<br />
167 Piccolo 121 0 73<br />
168 Flute 121 0 74<br />
169 Recorder 121 0 75<br />
69
Ensemble Sound List<br />
No. Tone Name MSB LSB PC<br />
170 Pan Flute 121 0 76<br />
171 Bottle Blow 121 0 77<br />
172 Shakuhachi 121 0 78<br />
173 Whistle 121 0 79<br />
174 Ocarina 121 0 80<br />
175 Square Lead1 121 0 81<br />
176 Square Lead2 121 1 81<br />
177 Sine Lead 121 2 81<br />
178 Saw Lead 1 121 0 82<br />
179 Saw Lead 2 121 1 82<br />
180 Doctor Solo 121 2 82<br />
181 Natural Lead 121 3 82<br />
182 SequencedSaw 121 4 82<br />
183 Syn.Calliope 121 0 83<br />
184 Chiffer Lead 121 0 84<br />
185 Charang 121 0 85<br />
186 Wire Lead 121 1 85<br />
187 Solo Vox 121 0 86<br />
188 5th Saw Lead 121 0 87<br />
189 Bass+Lead 121 0 88<br />
190 Delayed Lead 121 1 88<br />
191 Fantasia 121 0 89<br />
192 Warm Pad 121 0 90<br />
193 Sine Pad 121 1 90<br />
194 Polysynth 121 0 91<br />
195 Space Voice 121 0 92<br />
196 Itopia 121 1 92<br />
197 Bowed Glass 121 0 93<br />
198 Metallic Pad 121 0 94<br />
199 Halo Pad 121 0 95<br />
200 Sweep Pad 121 0 96<br />
201 Ice Rain 121 0 97<br />
202 Soundtrack 121 0 98<br />
203 Crystal 121 0 99<br />
204 Synth Mallet 121 1 99<br />
205 Atmosphere 121 0 100<br />
206 Brightness 121 0 101<br />
207 Goblins 121 0 102<br />
208 Echo Drops 121 0 103<br />
209 Echo Bell 121 1 103<br />
210 Echo Pan 121 2 103<br />
211 Star Theme 121 0 104<br />
212 Sitar 1 121 0 105<br />
213 Sitar 2 121 1 105<br />
214 Banjo 121 0 106<br />
215 Shamisen 121 0 107<br />
No. Tone Name MSB LSB PC<br />
216 Koto 121 0 108<br />
217 Taisho Koto 121 1 108<br />
218 Kalimba 121 0 109<br />
219 Bagpipe 121 0 110<br />
220 Fiddle 121 0 111<br />
221 Shanai 121 0 112<br />
222 Tinkle Bell 121 0 113<br />
223 Agogo 121 0 114<br />
224 Steel Drums 121 0 115<br />
225 Woodblock 121 0 116<br />
226 Castanets 121 1 116<br />
227 Taiko 121 0 117<br />
228 Concert BD 121 1 117<br />
229 Melodic Tom1 121 0 118<br />
230 Melodic Tom2 121 1 118<br />
231 Synth Drum 121 0 119<br />
232 TR-808 Tom 121 1 119<br />
233 Elec.Perc. 121 2 119<br />
234 Reverse Cym. 121 0 120<br />
235 Gt FretNoise 121 0 121<br />
236 Gt Cut Noise 121 1 121<br />
237 BsStringSlap 121 2 121<br />
238 Breath Noise 121 0 122<br />
239 Fl.Key Click 121 1 122<br />
240 Seashore 121 0 123<br />
241 Rain 121 1 123<br />
242 Thunder 121 2 123<br />
243 Wind 121 3 123<br />
244 Stream 121 4 123<br />
245 Bubble 121 5 123<br />
246 Bird 1 121 0 124<br />
247 Dog 121 1 124<br />
248 Horse Gallop 121 2 124<br />
249 Bird 2 121 3 124<br />
250 Telephone 1 121 0 125<br />
251 Telephone 2 121 1 125<br />
252 DoorCreaking 121 2 125<br />
253 Door 121 3 125<br />
254 Scratch 121 4 125<br />
255 Wind Chimes 121 5 125<br />
256 Helicopter 121 0 126<br />
257 Car Engine 121 1 126<br />
258 Car Stop 121 2 126<br />
259 Car Pass 121 3 126<br />
260 Car Crash 121 4 126<br />
261 Siren 121 5 126<br />
No. Tone Name MSB LSB PC<br />
262 Train 121 6 126<br />
263 Jetplane 121 7 126<br />
264 Starship 121 8 126<br />
265 Burst Noise 121 9 126<br />
266 Applause 121 0 127<br />
267 Laughing 121 1 127<br />
268 Screaming 121 2 127<br />
269 Punch 121 3 127<br />
270 Heart Beat 121 4 127<br />
271 Footsteps 121 5 127<br />
272 Gun Shot 121 0 128<br />
273 Machine Gun 121 1 128<br />
274 Laser Gun 121 2 128<br />
275 Explosion 121 3 128<br />
70
Internal Rhythm Pattern List<br />
No.<br />
Name<br />
No.<br />
Name<br />
01 8-Beat Pop<br />
02 16-Beat Pop<br />
03 Shuffle Pop 1<br />
04 Shuffle Pop 2<br />
05 8-Beat Funk<br />
06 16-Beat Funk<br />
07 8-Beat Rock 1<br />
08 8-Beat Rock 2<br />
09 8-Beat Rock 3<br />
10 16-Beat Rock<br />
11 Rock 1<br />
12 Rock 2<br />
13 Rock 3<br />
14 Powerful Rock<br />
15 Progressive Rock<br />
16 R&B Pop<br />
17 R&B<br />
18 Ballad 1<br />
19 Ballad 2<br />
20 Fusion<br />
21 West Coast<br />
22 Motown<br />
23 Bluegrass<br />
24 Swing 1<br />
25 Swing 2<br />
26 Fast Swing 1<br />
27 Fast Swing 2<br />
28 Jazz Brush 1<br />
29 Jazz Brush 2<br />
30 Jazz Waltz<br />
31 5/4 Swing<br />
32 7/4 Swing<br />
33 Afro-Cuban<br />
34 Blues 1<br />
35 Blues 2<br />
36 Gospel 1<br />
37 Gospel 2<br />
38 Latin Pop 1<br />
39 Latin Pop 2<br />
40 Latin Fusion<br />
41 Bossa Nova 1<br />
42 Bossa Nova 2<br />
43 Bossa Nova 3<br />
44 Salsa<br />
45 Samba<br />
46 Slow Beat<br />
47 Back Beat<br />
48 Hip’n’Hop<br />
49 Elec Dance<br />
50 Acid Jazz<br />
51 Hi-Hat Count<br />
71
List of Effects for the Ensemble Sounds<br />
PIANO group<br />
No.: Name Default Effect name<br />
1: Superior Grd<br />
Parameters assigned to<br />
the Knobs<br />
Description<br />
2: Ultimate Pno<br />
3: Grand VR<br />
4: Pure Grand<br />
5: Mellow Piano<br />
On<br />
SYMPATHETIC<br />
RESONANCE<br />
Depth<br />
On an acoustic piano, holding down the damper pedal allows other<br />
strings to resonate in sympathy with the notes you play, creating rich<br />
and spacious resonances. This effect simulates these sympathetic<br />
resonances.<br />
6: Pure Mellow<br />
7: Rock Piano Off ENHANCER Sens<br />
Controls the overtone structure of the high frequencies, adding sparkle<br />
and tightness to the sound.<br />
8: Honky-tonk<br />
9: SuperiorMono<br />
10: GrandVR Mono<br />
On<br />
SYMPATHETIC<br />
RESONANCE<br />
Depth<br />
On an acoustic piano, holding down the damper pedal allows other<br />
strings to resonate in sympathy with the notes you play, creating rich<br />
and spacious resonances. This effect simulates these sympathetic<br />
resonances.<br />
E.PIANO group<br />
No.: Name Default Effect name<br />
Parameters assigned to<br />
the Knobs<br />
Description<br />
1: VR E.Piano On TREMOLO Rate Cyclically modulates the volume to add tremolo effect to the sound.<br />
2: Stage Phazer On PHASER Rate<br />
This is a stereo phaser. A phase-shifted sound is added to the original<br />
sound and modulated.<br />
3: 70’s E.Piano On MODULATION DELAY Balance Adds modulation to the delayed sound.<br />
4: 60’s E.Piano Off AUTO PAN Rate Cyclically modulates the stereo location of the sound.<br />
5: FM E.Piano On MODULATION DELAY Balance Adds modulation to the delayed sound.<br />
6: S.A.E.P. On ENHANCERŮCHORUS Chorus Balance This effect connects an enhancer and a chorus in series.<br />
7: E.Grand Off TREMOLO CHORUS Depth<br />
8: Clav Off MULTI STAGE PHASER Rate<br />
This is a chorus effect with added Tremolo (cyclic modulation of<br />
volume).<br />
Extremely high settings of the phase difference produce a deep phaser<br />
effect.<br />
9: WahWah Clav On AUTO WAH <strong>Manual</strong> Cyclically controls a filter to create cyclic change in timbre.<br />
10: Natural Hps Off CHORUS Depth This is a stereo chorus.<br />
STRINGS group<br />
No.: Name Default Effect name<br />
Parameters assigned to<br />
the Knobs<br />
Description<br />
1: VR Strings Off ENHANCER Sens<br />
Controls the overtone structure of the high frequencies, adding sparkle<br />
and tightness to the sound.<br />
2: Warm Strings Off EQUALIZER Low Gain This is a low frequency stereo equalizer.<br />
3: Studio Sect. Off MULTI TAP DELAY Delay Time This effect provides four delays.<br />
4: ChmbrStrings Off ENHANCER Sens<br />
Controls the overtone structure of the high frequencies, adding sparkle<br />
and tightness to the sound.<br />
5: JP Strings Off EQUALIZER Low Gain This is a low frequency stereo equalizer.<br />
CHOIR/SCAT group<br />
No.: Name Default Effect name<br />
Parameters assigned to<br />
the Knobs<br />
Description<br />
1: Real Choir Off ISOLATOR Boost/Cut High<br />
2: Jazz Scat Off 3D CHORUS Depth<br />
This is an equalizer which cuts the volume greatly, allowing you to add<br />
a special effect to the sound by cutting the volume in high range.<br />
This applies a 3D effect to the chorus sound. The chorus sound will be<br />
positioned 90 degrees left and 90 degrees right.<br />
3: Aerial Choir Off LONG DELAY Delay Time A delay that provides a long delay time.<br />
4: Female Vox Off SPACE-D Depth<br />
This is a multiple chorus that applies two-phase modulation in stereo. It<br />
gives no impression of modulation, but produces a transparent chorus<br />
effect.<br />
5: Female Aahs Off MULTI TAP DELAY Delay Time This effect provides four delays.<br />
72
List of Effects for the Ensemble Sounds<br />
BRASS group<br />
No.: Name Default Effect name<br />
Parameters assigned to<br />
the Knobs<br />
Description<br />
1: Ac.Brass Off ISOLATOR Boost/Cut High<br />
This is an equalizer which cuts the volume greatly, allowing you to add<br />
a special effect to the sound by cutting the volume in high range.<br />
2: R&R Brass<br />
3: Bigband Sax<br />
Off EQUALIZER High Gain This is a high frequency stereo equalizer.<br />
4: VoyagerBrass Off ISOLATOR Boost/Cut Mid<br />
This is an equalizer which cuts the volume greatly, allowing you to add<br />
a special effect to the sound by cutting the volume in mid range.<br />
5: Jump For KY Off LONG DELAY Delay Time A delay that provides a long delay time.<br />
SYNTH LEAD group<br />
No.: Name Default Effect name<br />
Parameters assigned to<br />
the Knobs<br />
Description<br />
1: Vintage Lead On DELAY Balance This is a stereo delay.<br />
2: Dual Lead On 3TAP PAN DELAY Balance Produces three delay sounds; center, left and right.<br />
3: Saw Lead On EQUALIZER Low Gain This is a low frequency stereo equalizer.<br />
4: SuperSawSlow On STEP PAN Rate This uses a 16-step sequence to vary the panning of the sound.<br />
5: Jupiter Lead On 3D CHORUS Depth<br />
This applies a 3D effect to the chorus sound. The chorus sound will be<br />
positioned 90 degrees left and 90 degrees right.<br />
6: Square Lead On LONG DELAY Delay Time A delay that provides a long delay time.<br />
7: BrightSquare On SERIAL DELAY Delay Time This delay connects two delay units in series.<br />
8: Sine Lead On TREMOLO CHORUS Depth<br />
This is a chorus effect with added Tremolo (cyclic modulation of<br />
volume).<br />
9: Syn.Calliope On MULTI TAP DELAY Delay Time This effect provides four delays.<br />
10: Doctor Solo On SERIAL DELAY Delay Time This delay connects two delay units in series.<br />
SYNTH PAD group<br />
No.: Name Default Effect name<br />
Parameters assigned to<br />
the Knobs<br />
Description<br />
1: Soft Pad On EQUALIZER High Gain This is a high frequency stereo equalizer.<br />
2: Silky Way On ISOLATOR Boost/Cut Mid<br />
This is an equalizer which cuts the volume greatly, allowing you to add<br />
a special effect to the sound by cutting the volume in mid range.<br />
3: Nu Epic Pad On MODULATION DELAY Balance Adds modulation to the delayed sound.<br />
4: Strings Pad On AUTO PAN Rate Cyclically modulates the stereo location of the sound.<br />
5: Glass Organ On 3D CHORUS Depth<br />
This applies a 3D effect to the chorus sound. The chorus sound will be<br />
positioned 90 degrees left and 90 degrees right.<br />
GUITAR group<br />
No.: Name Default Effect name<br />
Parameters assigned to<br />
the Knobs<br />
Description<br />
1: Dyna Nylon Off LONG DELAY Delay Time A delay that provides a long delay time.<br />
2: Steel Gtr Off CHORUS Depth This is a stereo chorus.<br />
3: Jz Gtr Hall Off 3D CHORUS Depth<br />
This applies a 3D effect to the chorus sound. The chorus sound will be<br />
positioned 90 degrees left and 90 degrees right.<br />
4: JC Strat On CHORUS➝DELAY Delay Balance This effect connects a chorus and a delay in series.<br />
5: Blusey OD On OVERDRIVE Level<br />
Creates a soft distortion similar to that produced by vacuum tube<br />
amplifiers.<br />
73
List of Effects for the Ensemble Sounds<br />
BASS group<br />
No.: Name Default Effect name<br />
The parameter assigned<br />
to the [CONTROL] knob<br />
Description<br />
1: AcousticBass Off EQUALIZER Low Gain This is a low frequency stereo equalizer.<br />
2: FingerMaster Off 3D CHORUS Depth<br />
This applies a 3D effect to the chorus sound. The chorus sound will be<br />
positioned 90 degrees left and 90 degrees right.<br />
3: Pick Bass On EQUALIZER Low Gain This is a low frequency stereo equalizer.<br />
4: 101 Bass Off ISOLATOR Boost/Cut Mid<br />
5: Punch MG Off HEXA-CHORUS Depth<br />
This is an equalizer which cuts the volume greatly, allowing you to add<br />
a special effect to the sound by cutting the volume in mid range.<br />
Uses a six-phase chorus (six layers of chorused sound) to give richness<br />
and spatial spread to the sound.<br />
OTHERS/GM2 group<br />
No.: Name Default Effect name<br />
The parameter assigned<br />
to the [CONTROL] knob<br />
Description<br />
1: Piano+Str.<br />
2: Piano+Pad<br />
On<br />
SYMPATHETIC<br />
RESONANCE<br />
Depth<br />
On an acoustic piano, holding down the damper pedal allows other<br />
strings to resonate in sympathy with the notes you play, creating rich<br />
and spacious resonances. This effect simulates these sympathetic<br />
resonances.<br />
3: E.Piano+Str. On PHASER Rate<br />
This is a stereo phaser. A phase-shifted sound is added to the original<br />
sound and modulated.<br />
4: E.Piano+Pad On MODULATION DELAY Balance Adds modulation to the delayed sound.<br />
5: Bass+RideCym<br />
6–10: (VR Drum Sets)<br />
Off EQUALIZER Low Gain This is a low frequency stereo equalizer.<br />
11–: (GM2 Tones)<br />
74
List of the Factory Installed Favorites<br />
* Items appearing in parentheses within the harmonic bar and percussion columns do not provide for the immediate production of<br />
sound after the Favorite has been selected, due to the fact that the [ORGAN ON] button is extinguished, or that Split or Layer is turned<br />
off.<br />
No.<br />
HARMONIC BAR<br />
Upper<br />
Lower<br />
Pedal<br />
VIBRATO/<br />
CHORUS<br />
PERCUSSION<br />
ROTARY<br />
SOUND<br />
WHEEL<br />
TYPE<br />
AMP TYPE<br />
ENSEMBLE<br />
1 2<br />
SPLIT/<br />
LAYER<br />
Description<br />
Bank 1: This is a collection of the most representative organ settings and ensemble sounds; they’ve been set up so they can be accessed simply by pressing a single<br />
button.<br />
1-1<br />
88 8800 000<br />
(83 8000 000)<br />
8 0<br />
–<br />
THIRD<br />
SOFT<br />
FAST<br />
SLOW SOLID TYPE 4 – – – Rock organ with overdrive.<br />
1-2<br />
88 8000 000<br />
83 8000 000<br />
8 0<br />
–<br />
THIRD<br />
SOFT<br />
FAST<br />
SLOW VINTAGE 2 TYPE 1 – – SPLIT<br />
Orthodox settings for a percussive<br />
jazz organ.<br />
1-3<br />
88 8000 008<br />
(83 8000 000)<br />
8 0<br />
– – FAST VINTAGE 1 TYPE 1 – – –<br />
Funk organ with a piercing metallic<br />
reverberation.<br />
1-4<br />
00 8888 888<br />
00 0806 000<br />
8 0<br />
– – SLOW VINTAGE 2 TYPE 1 – – SPLIT<br />
Gospel organ with a bright, solemn<br />
tone.<br />
1-5<br />
(88 8800 000)<br />
(83 8000 000)<br />
8 0<br />
–<br />
(THIRD)<br />
(SOFT)<br />
(FAST)<br />
SLOW SOLID TYPE 4 Superior Grd – –<br />
Grand piano that delivers a full range<br />
of expression—from weak notes to<br />
strong ones.<br />
1-6<br />
(88 8800 000)<br />
(83 8000 000)<br />
8 0<br />
–<br />
(THIRD)<br />
(SOFT)<br />
(FAST)<br />
SLOW SOLID TYPE 4 VR E.PIANO – – Standard electric piano with tremolo.<br />
1-7<br />
(88 8800 000)<br />
(83 8000 000)<br />
8 0<br />
–<br />
(THIRD)<br />
(SOFT)<br />
(FAST)<br />
SLOW SOLID TYPE 4 Vintage Lead – –<br />
Synth lead sound that is fat and has<br />
lots of presence.<br />
1-8<br />
88 8800 000<br />
00 0000 000<br />
8 0<br />
–<br />
THIRD<br />
SOFT<br />
FAST<br />
FAST SOLID TYPE 4 Superior Grd Silky Way<br />
SPLIT<br />
LAYER<br />
TO LOWER<br />
Keyboard divided into two—righthand<br />
side has organ and pad sounds<br />
layered together, while grand piano<br />
is assigned to the left-hand side.<br />
Bank 2: Settings for a Variety of Organs<br />
2-1<br />
88 8000 000<br />
(83 8000 000)<br />
8 0<br />
–<br />
SECOND<br />
SOFT<br />
FAST<br />
SLOW SOLID TYPE 2 – – –<br />
Progressive rock organ with a<br />
generous amount of overdrive.<br />
2-2<br />
88 8080 880<br />
(83 8000 000)<br />
8 4<br />
– – FAST SOLID TYPE 4 – – –<br />
Rock organ with enhancement<br />
applied to the overtones of the<br />
harmonic bars.<br />
2-3<br />
80 0000 888<br />
83 8000 000<br />
8 0<br />
C-3 – SLOW VINTAGE 2 TYPE 1 – – SPLIT<br />
Jazz organ with settings geared<br />
towards ballads.<br />
2-4<br />
88 8888 888<br />
83 8000 000<br />
8 0<br />
C-3 – FAST VINTAGE 2 TYPE 1 – – SPLIT<br />
Full drawbar settings for adding<br />
excitement.<br />
2-5<br />
80 0800 020<br />
00 0608 022<br />
0 8<br />
–<br />
SECOND<br />
SOFT<br />
FAST<br />
SLOW VINTAGE 2 TYPE 1 – – SPLIT<br />
Light-hearted organ sound suited for<br />
Latin music.<br />
2-6<br />
86 0000 068<br />
00 0606 000<br />
0 8<br />
V-1 – SLOW VINTAGE 2 TYPE 1 – – SPLIT<br />
An organ evocative of classic pop<br />
songs from the fifties and earlier.<br />
2-7<br />
80 0000 008<br />
00 0804 000<br />
8 0<br />
– – FAST VINTAGE 2 TYPE 1 – – SPLIT<br />
A retro organ that simulates the<br />
sound of the accompaniment to<br />
silent movies.<br />
2-8<br />
80 8808 008<br />
00 8808 000<br />
8 0<br />
– – SLOW VINTAGE 2 TYPE 1 – – SPLIT<br />
Settings for simulating the pipe<br />
organ of a church.<br />
75
List of the Factory Installed Favorites<br />
No.<br />
HARMONIC BAR<br />
Upper<br />
Lower<br />
Pedal<br />
VIBRATO/<br />
CHORUS<br />
PERCUSSION<br />
ROTARY<br />
SOUND<br />
WHEEL<br />
TYPE<br />
AMP TYPE<br />
ENSEMBLE<br />
1 2<br />
SPLIT/<br />
LAYER<br />
Description<br />
Bank 3: The settings here focus mainly on ensemble sounds, and allow for different sounds to be played from separate zones, by making use of the Split function.<br />
3-1<br />
(88 8800 000)<br />
(83 8000 000)<br />
8 0<br />
–<br />
(THIRD)<br />
(SOFT)<br />
(FAST)<br />
SLOW SOLID TYPE 4<br />
Bass+RideCy<br />
m<br />
Superior Grd<br />
SPLIT<br />
TO LOWER<br />
Evocative of a piano trio, with a grand<br />
piano and acoustic bass with<br />
cymbals.<br />
3-2<br />
(88 8800 000)<br />
(83 8000 000)<br />
8 0<br />
–<br />
(THIRD)<br />
(SOFT)<br />
(FAST)<br />
SLOW SOLID TYPE 4 FingerMaster VR E.Piano<br />
SPLIT<br />
TO LOWER<br />
Simulates plugged jazz, with electric<br />
piano and electric bass.<br />
3-3<br />
(88 8800 000)<br />
(83 8000 000)<br />
8 0<br />
–<br />
(THIRD)<br />
(SOFT)<br />
(FAST)<br />
SLOW SOLID TYPE 4 Syn.Strings1 Warm Strings<br />
SPLIT<br />
TO LOWER<br />
Strings ensemble that combines<br />
sounds with a fast attack with those<br />
having a slow attack.<br />
3-4<br />
80 8808 008<br />
(83 8000 000)<br />
8 0<br />
– – SLOW CLEAN TYPE 1 Real Choir –<br />
SPLIT<br />
TO LOWER<br />
Settings for a spiritual sound<br />
evocative of a pipe organ and choir.<br />
3-5<br />
(88 8800 000)<br />
(83 8000 000)<br />
8 0<br />
–<br />
(THIRD)<br />
(SOFT)<br />
(FAST)<br />
SLOW SOLID TYPE 4 Voice Jazz Scat<br />
SPLIT<br />
TO LOWER<br />
Evocative of jazz vocals, scat and<br />
chorus are combined; they change in<br />
accord with your playing dynamics.<br />
3-6<br />
(88 8800 000)<br />
(83 8000 000)<br />
8 0<br />
–<br />
(THIRD)<br />
(SOFT)<br />
(FAST)<br />
SLOW SOLID TYPE 4 FingerMaster Ac.Brass<br />
SPLIT<br />
TO LOWER<br />
Settings suitable for pops or rock<br />
combining clean, expressive brass<br />
sounds with electric bass.<br />
3-7<br />
(88 8800 000)<br />
(83 8000 000)<br />
8 0<br />
–<br />
(THIRD)<br />
(SOFT)<br />
(FAST)<br />
SLOW SOLID TYPE 4 Pick Bass Blusey OD<br />
SPLIT<br />
TO LOWER<br />
Combination of lead guitar that has a<br />
pleasant overdrive and picking bass<br />
with well-defined notes.<br />
3-8<br />
88 8800 000<br />
(83 8000 000)<br />
8 0<br />
–<br />
THIRD<br />
SOFT<br />
FAST<br />
SLOW SOLID TYPE 4 VR Pop Kit –<br />
SPLIT<br />
TO LOWER<br />
Drum set combined with an organ.<br />
Allows you to play drum solos on the<br />
keyboard.<br />
Bank 4: In this bank, the harmonic bars and percussion remain the same, while changes have been made in the parameter settings for a variety of organs. You may<br />
want to use these settings as templates when creating your own original organ sounds.<br />
4-1<br />
88 8800 000<br />
(83 8000 000)<br />
8 0<br />
–<br />
THIRD<br />
SOFT<br />
FAST<br />
SLOW SOLID TYPE 4 – – –<br />
Rock organ with overdrive applied to<br />
it.<br />
4-2<br />
88 8800 000<br />
(83 8000 000)<br />
8 0<br />
–<br />
THIRD<br />
SOFT<br />
FAST<br />
SLOW VINTAGE 2 TYPE 1 – – –<br />
Emphasizes the cabinet resonance of<br />
rotary speakers; the wheel type is<br />
VINTAGE 2 and the amp type is type<br />
1.<br />
4-3<br />
88 8800 000<br />
(83 8000 000)<br />
8 0<br />
–<br />
THIRD<br />
SOFT<br />
FAST<br />
SLOW VINTAGE 1 TYPE 3 – – –<br />
Emphasizes the overdrive’s<br />
distortion; the wheel type is VINTAGE<br />
1 and the amp type is type 3.<br />
4-4<br />
88 8800 000<br />
(83 8000 000)<br />
8 0<br />
–<br />
THIRD<br />
SOFT<br />
FAST<br />
SLOW CLEAN TYPE 1 – – –<br />
With a wheel type of CLEAN, these<br />
settings keep leakage noise and click<br />
noise at a minimum.<br />
4-5<br />
88 8800 000<br />
(83 8000 000)<br />
8 0<br />
–<br />
THIRD<br />
SOFT<br />
FAST<br />
SLOW SOLID TYPE 4 – – –<br />
With these settings, the rotational<br />
speed of the rotary speakers will<br />
seem even slower when set to SLOW,<br />
and even faster when set to FAST.<br />
4-6<br />
88 8800 000<br />
(83 8000 000)<br />
8 0<br />
–<br />
THIRD<br />
SOFT<br />
FAST<br />
SLOW SOLID TYPE 4 – – –<br />
With these settings, the transition<br />
time between SLOW and FAST with<br />
the rotary effect is made shorter.<br />
4-7<br />
88 8800 000<br />
(83 8000 000)<br />
8 0<br />
–<br />
THIRD<br />
SOFT<br />
FAST<br />
SLOW SOLID TYPE 4 – – –<br />
With these settings, the sense of<br />
rotational speed for the rotary effect<br />
will be at its greatest.<br />
4-8<br />
88 8800 000<br />
(83 8000 000)<br />
8 0<br />
–<br />
THIRD<br />
SOFT<br />
FAST<br />
SLOW SOLID TYPE 4 – – –<br />
These settings place emphasis on the<br />
volume of organ percussion and the<br />
ability to produce rapid, consecutive<br />
notes.<br />
Bank 5: Same settings as the Bank 1<br />
Bank 6: Same settings as the Bank 2<br />
Bank 7: Same settings as the Bank 3<br />
Bank 8: Same settings as the Bank 4<br />
76
Troubleshooting<br />
If you think there’s a problem, read this first.<br />
Symptom Cause/Action Page<br />
Power will not turn on Is the power cord correctly connected to the VR-700 and to an AC outlet? p. 18<br />
Buttons don’t work<br />
Could Panel Lock be enabled?<br />
Hold down the HARMONIC BAR [LOWER] button and press the PLAYER [RHYTHM] button to<br />
release Panel Lock.<br />
Could the VR-700 be in Demo mode?<br />
Press the [DISPLAY/EXIT] button to exit Demo mode.<br />
p. 25<br />
p. 23<br />
Is your playback equipment (amp and speaker) powered up? p. 19<br />
Could the volume of your playback system (amp and speaker) have been lowered?<br />
Check the volume of your playback system.<br />
p. 19<br />
Are your amp, speakers, or headphones connected correctly? p. 21<br />
No sound/Insufficient volume<br />
Organ sound is not heard<br />
Could the VR-700’s volume be lowered?<br />
Check the setting of the [MASTER VOLUME] knob and the [ENSEMBLE VOLUME] bar.<br />
Could the expression pedal have been used to adjust the volume?<br />
While being careful about the volume depress, step on the pedal.<br />
Could the Local Control setting be off?<br />
Turn the Local Control setting on again, or turn the VR-700’s power off, then on again.<br />
Could all of the harmonic bars be pushed in?<br />
Pull the harmonic bars toward yourself.<br />
Could the wheel brake key be applied?<br />
Use the foot switch or D Beam to release the wheel brake.<br />
p. 14<br />
p. 23<br />
p. 45<br />
p. 57<br />
p. 38<br />
p. 43<br />
Ensemble sound is inaudible or<br />
not loud enough<br />
Pull out the [ENSEMBLE VOLUME] lever to increase the volume of the ensemble sound. p. 14<br />
Could the volume have been adjusted by the expression pedal?<br />
If the Ensemble Expression Switch is on, the volume of the ensemble sound will be controlled<br />
by the expression pedal. While being careful about the volume, depress the expression pedal.<br />
p. 54<br />
Noise is heard when you press or<br />
release a key<br />
Pitch is incorrect<br />
Harmonic bar 1’ is not heard<br />
MIDI messages are not<br />
transmitted/received correctly<br />
Pedal doesn’t work, or is stuck<br />
Can’t read/write USB memory<br />
This is not a malfunction.<br />
The VR-700 reproduces the noise that is heard when a key of a tonewheel organ is turned on/<br />
off. You can eliminate this noise by setting the Function mode Key On Click Level and Key Off<br />
Click Level settings to 0.<br />
Could the tuning be incorrect?<br />
The pitch of the organ sounds can be adjusted by the Function mode setting “Organ Fine Tune”<br />
(p. 52), and the pitch of the ensemble sounds can be adjusted by the “Ensemble Fine Tune”<br />
setting (p. 53) The overall pitch is adjusted by “Master Tune” (p. 59). Check these settings.<br />
Could the VR-700 be transposed?<br />
Either disable the transpose setting, or re-specify it.<br />
Could the wheel brake have been left on?<br />
Operate the foot switch or D Beam, to release the wheel brake.<br />
Could percussion be on?<br />
If percussion is on, the 1’ harmonic bar will not sound.<br />
Is each part’s MIDI channel set correctly?<br />
In the Function mode MIDI group of settings, specify the correct MIDI transmit/receive channel<br />
for each part.<br />
Is the pedal connected correctly?<br />
Check the pedal connections.<br />
Is the pedal polarity set correctly?<br />
Set the Function mode parameters “Damper Pedal Polarity” and “Control Pedal Polarity”<br />
appropriately for the polarity of the pedal you are using.<br />
If you connect a pedal while the power is on, the pedal effect may be “stuck.” Make sure that<br />
you connect pedals after you’ve switched off the VR-700’s power.<br />
Have you assigned a function to the pedal?<br />
A variety of functions can be assigned to the pedal connected to the CONTROL PEDAL<br />
connector. Check the Function mode setting “Control Pedal Assign.”<br />
Are you using USB memory (sold separately) made by <strong>Roland</strong>?<br />
We cannot guarantee operation if other USB memory is used.<br />
If you’re unable to read or write USB memory, try changing the Function mode setting “USB<br />
Memory Mode.”<br />
p. 45<br />
–<br />
p. 59<br />
p. 43<br />
p. 41<br />
p. 57<br />
p. 20<br />
p. 54<br />
–<br />
p. 54<br />
–<br />
p. 59<br />
77
Troubleshooting<br />
Symptom Cause/Action Page<br />
A buzzing sound is heard from<br />
external equipment<br />
No sound when using the player<br />
to play rhythm or a file<br />
No sound when you play keys in<br />
the lower region<br />
Could external devices be connected to more than one AC outlet?<br />
If you’ve connected the VR-700 to external equipment, you must connect all equipment to the<br />
same AC power outlet.<br />
Could the Local Control setting be Off?<br />
Turn the Local Control setting On, or turn the VR-700’s power off, then on again.<br />
Could V-LINK be turned on?<br />
When V-LINK is on, the bottom octave of keys are assigned to control an external video device;<br />
they will not produce sound.<br />
p. 18<br />
p. 57<br />
p. 64<br />
78
Error Messages<br />
Indication Situation Action<br />
E.02 An error occurred during writing. The external media may not yet be initialized.<br />
E.10 No external media is inserted. Insert the external media and try again.<br />
E.11 Not enough free space at the save destination.<br />
E.14 An error occurred during writing.<br />
Insert other external media or delete unneeded files, and try<br />
again.<br />
The external media may be corrupted.<br />
Insert other external media and try again. Alternatively, you can<br />
initialize the external media.<br />
E.15 The file is unreadable. The data format is not compatible with the VR-700.<br />
E.16 Data was not called up in time for playback of the song. You may be able to play the song after waiting a few seconds.<br />
E.18 This audio format is not supported.<br />
For details on the format of songs that can be played back by the<br />
VR-700, refer to “Specifications” (p. 80).<br />
E.30 The internal memory of the VR-700 is full. –<br />
E.40<br />
The VR-700 cannot deal with the excessive MIDI data sent from<br />
the external MIDI device.<br />
Reduce the amount of MIDI data sent to the VR-700.<br />
E.41 A MIDI cable has been disconnected. Connect it properly and securely.<br />
E.43 A MIDI transmission error has occurred. Check the MIDI cable and connected MIDI device.<br />
E.51 There may be a problem with the system.<br />
E.65 The USB MEMORY connector was subjected to excessive current.<br />
Repeat the procedure from the beginning. If it is not solved after<br />
you have tried several times, contact the nearest <strong>Roland</strong> service<br />
center.<br />
Make sure that there is no problem with the external media, then<br />
turn the power off, then on again.<br />
79
Specifications<br />
VR-700: V-Combo<br />
Keyboard<br />
Keyboard<br />
Waterfall 76-keys (with velocity)<br />
Tone Generator<br />
Organ Part<br />
Ensemble Part and Player Section<br />
Virtual Tonewheel<br />
PCM<br />
Part<br />
Organ<br />
Ensemble<br />
Player<br />
Upper, Lower, Pedal<br />
2 parts<br />
Rhythm/SMF playback/Audio playback<br />
Max. Polyphony<br />
Organ Part<br />
Ensemble Part and Player Part<br />
Wave Memory<br />
Full Polyphony<br />
128 voices<br />
128M bytes (in 16-bit linear)<br />
Organ Part<br />
Harmonic Bar 16’, 5-1/3’, 8’, 4’, 2-2/3’, 2’, 1-3/5’, 1-1/3’, 1’<br />
Vibrato/Chorus<br />
Percussion<br />
Rotary Sound<br />
Tone Wheel Type<br />
V-1/V-2/V-3/C-1/C-2/C-3<br />
SECOND/THIRD, SOFT, SLOW<br />
SLOW/FAST, BRAKE, ROTARY GAIN<br />
VINTAGE 1/VINTAGE 2/SOLID/CLEAN<br />
Amplifier Type TYPE 1/TYPE 2/TYPE 3/TYPE 4/TYPE 5<br />
Ensemble Part<br />
Tones<br />
Effect<br />
Function<br />
65 tones<br />
5 rhythm sets<br />
256 GM2 tones<br />
9 GM2 rhythm sets (includes SFX set)<br />
ON/OFF, CONTROL<br />
OCTAVE SHIFT, TO LOWER/PEDAL, ENSEMBLE VOLUME<br />
Player section<br />
Rhythm<br />
Playable format<br />
51 patterns<br />
Standard MIDI File format 0, 1<br />
Audio File WAV/AIFF (44.1 kHz, 16-bit linear), MP3<br />
Others<br />
Favorite<br />
Function<br />
D Beam<br />
Reverb<br />
External Memory<br />
Display<br />
Connectors<br />
Power Consumption<br />
Dimensions (not includes Music Rest)<br />
64 settings<br />
SPLIT, LAYER, V-LINK<br />
PITCH/FILTER/VOLUME/WHEEL BRAKE/RING MOD/SPRING SHOCK<br />
ROOM/HALL/CATHEDRAL/SPRING, LEVEL<br />
USB Memory Key<br />
7 segment with 3 digits<br />
OUTPUT connectors: XLR (L, R), 1/4” Phone type (L/MONO, R)<br />
PHONES connector: Stereo 1/4” Phone type<br />
CONTROL PEDAL connector<br />
EXPRESSION PEDAL connector<br />
DAMPER PEDAL connector<br />
MIDI connectors: IN, PEDAL IN, OUT<br />
USB Connectors: MIDI, Memory<br />
AC Inlet<br />
13 W<br />
1,260 (W) x 395 (D) x 128 (H) mm<br />
49-5/8 (W) x 15-9/16 (D) x 5-1/16 (H) inches<br />
80
Specifications<br />
Weight (not includes Music Rest)<br />
Accessories<br />
Options<br />
16.0 kg<br />
35 lbs 5 oz<br />
Music Rest<br />
Power Cord<br />
Owner’s <strong>Manual</strong><br />
Damper Pedal:<br />
Expression Pedal:<br />
Stereo Headphones:<br />
Pedalboard:<br />
Keyboard Stand:<br />
Bench:<br />
USB Memory Key:<br />
DP-10, DP-2, BOSS FS-5U<br />
EV-7, EV-5, BOSS FV-500L<br />
RH-300, RH-A30, RH-D30<br />
PK-25A, PK-7A<br />
KS-G8<br />
BNC-88, BNC-15-DR<br />
M-UF2G<br />
* In the interest of product improvement, the specifications and/or appearance of this unit are subject to change without prior notice.<br />
81
Index<br />
A<br />
AC inlet ............................................................................................. 17<br />
Audio data ...................................................................................... 49<br />
B<br />
Backup<br />
Delete ........................................................................................ 61<br />
Favorite ..................................................................................... 48<br />
BANK button ........................................................................... 16, 47<br />
BENDER button ............................................................................. 14<br />
Bender lever ................................................................................... 14<br />
BRAKE button ................................................................................ 43<br />
C<br />
Center Cancel ................................................................................ 56<br />
Chorus .............................................................................................. 42<br />
CHORUS button ............................................................................ 42<br />
Clock Source .................................................................................. 59<br />
Computer ........................................................................................ 67<br />
CONTROL PEDAL connector .................................................... 17<br />
D<br />
D Beam ...................................................................................... 14, 36<br />
Damper pedal ................................................................................ 20<br />
DAMPER PEDAL connector ....................................................... 17<br />
Delete<br />
Backup ....................................................................................... 61<br />
Demo song ..................................................................................... 23<br />
Device ID ......................................................................................... 57<br />
Distortion ........................................................................................ 44<br />
E<br />
EFFECT CONTROL knob ...................................................... 15, 46<br />
EFFECT ON button ................................................................ 15, 46<br />
Ensemble sounds ......................................................................... 28<br />
ENSEMBLE VOLUME bar ............................................................ 14<br />
Equalizer .......................................................................................... 54<br />
EXP PEDAL connector ................................................................ 17<br />
Expression pedal .......................................................................... 20<br />
External MIDI keyboard ............................................................. 27<br />
F<br />
Factory Reset ................................................................................. 26<br />
Fast-forward ................................................................................... 49<br />
Favorite<br />
Save ............................................................................................ 47<br />
FAVORITE button ......................................................................... 16<br />
FAVORITE section ......................................................................... 16<br />
FILE LOAD button ........................................................................ 16<br />
FILE SAVE button .......................................................................... 16<br />
FILTER button ................................................................................ 36<br />
Foot switch ..................................................................................... 20<br />
H<br />
HARMONIC BAR ............................................................................ 15<br />
Harmonic Bar ................................................................................. 38<br />
Headphones ................................................................................... 21<br />
I<br />
Initialize<br />
Factory setting ........................................................................ 26<br />
Favorites .................................................................................... 47<br />
USB memory ............................................................................ 62<br />
K<br />
Key click ........................................................................................... 45<br />
Key Touch ........................................................................................ 59<br />
Key Transpose ................................................................................ 59<br />
KS-G8 ................................................................................................. 18<br />
L<br />
Layer .................................................................................................. 29<br />
LAYER button ................................................................................. 16<br />
Leakage noise ................................................................................ 45<br />
Lock function ................................................................................. 25<br />
LOWER button ............................................................................... 15<br />
Lower part ....................................................................................... 27<br />
M<br />
MANUAL button ........................................................................... 15<br />
MASTER VOLUME knob .............................................................. 14<br />
MIDI IN connector ........................................................................ 17<br />
MIDI keyboard ............................................................................... 66<br />
MIDI OUT/V-LINK connector ..................................................... 17<br />
MIDI PEDAL IN connector .......................................................... 17<br />
MIDI sequencer ............................................................................. 66<br />
Music rest ........................................................................................ 22<br />
O<br />
OCTAVE SHIFT button .......................................................... 15, 46<br />
ON button ....................................................................................... 43<br />
ORGAN CONTROL button .......................................................... 14<br />
ORGAN ON button ....................................................................... 15<br />
Organ sounds ................................................................................ 28<br />
OUTPUT connector ...................................................................... 17<br />
82
Index<br />
P<br />
Part .................................................................................................... 27<br />
Pedal ................................................................................................. 20<br />
Pedal keyboard ...................................................................... 20, 28<br />
Pedal part ........................................................................................ 28<br />
PERCUSSION .................................................................................. 15<br />
Percussion ....................................................................................... 41<br />
PHONES jack .................................................................................. 17<br />
Pitch<br />
Bender Range ......................................................................... 54<br />
Ensemble .................................................................................. 53<br />
Master Tune ............................................................................ 59<br />
Organ ......................................................................................... 52<br />
PITCH button ................................................................................. 36<br />
Play .................................................................................................... 49<br />
Playback speed ............................................................................. 50<br />
Player ................................................................................................ 49<br />
PLAYER section ............................................................................. 16<br />
Polarity ............................................................................................. 54<br />
Power cord ..................................................................................... 18<br />
POWER switch ............................................................................... 19<br />
R<br />
Restore ............................................................................................. 48<br />
Reverb .............................................................................................. 44<br />
REVERB LEVEL knob ..................................................................... 15<br />
REVERB section ............................................................................. 15<br />
REVERB TYPE button ................................................................... 15<br />
Rewind ............................................................................................. 49<br />
Rhythm pattern ............................................................................ 49<br />
RING MOD button ........................................................................ 36<br />
Ring Modulator ............................................................................. 37<br />
ROTARY SOUND ............................................................................ 15<br />
Rotary speaker ............................................................................... 43<br />
Rotational speed .......................................................................... 43<br />
Routing ............................................................................................ 65<br />
S<br />
SECOND button ............................................................................ 41<br />
SLOW button ................................................................................. 41<br />
SLOW/FAST button ..................................................................... 43<br />
SMF music data ............................................................................. 49<br />
SOFT button ................................................................................... 41<br />
Song Transpose ............................................................................ 56<br />
Split ................................................................................................... 34<br />
SPLIT button ................................................................................... 16<br />
Spring Reverb ................................................................................ 37<br />
SPRING SHOCK button ............................................................... 36<br />
Stand ................................................................................................. 18<br />
Stop ................................................................................................... 49<br />
System parameter ........................................................................ 51<br />
T<br />
Tap tempo ....................................................................................... 55<br />
Tempo .............................................................................................. 50<br />
THIRD button ................................................................................. 41<br />
TO LOWER/PEDAL button ......................................................... 15<br />
Tone button .................................................................................... 15<br />
Tonewheel type ............................................................................ 45<br />
Transpose<br />
Key ............................................................................................... 59<br />
Song ........................................................................................... 56<br />
Tweeter ............................................................................................ 43<br />
U<br />
UPPER button ................................................................................ 15<br />
Upper part ....................................................................................... 27<br />
USB Driver ....................................................................................... 59<br />
USB memory ................................................................................... 22<br />
USB MEMORY connector ........................................................... 17<br />
USB Memory Mode ...................................................................... 59<br />
USB MIDI connector .................................................................... 17<br />
V<br />
Variation ........................................................................................... 46<br />
Vibrato .............................................................................................. 42<br />
VIBRATO button ............................................................................ 42<br />
VIBRATO/CHORUS ........................................................................ 15<br />
Virtual tonewheel ......................................................................... 38<br />
V-LINK ............................................................................................... 64<br />
V-LINK button ................................................................................ 14<br />
Volume<br />
Audio .......................................................................................... 56<br />
Ensemble .................................................................................. 29<br />
Master ........................................................................................ 23<br />
Pedal ........................................................................................... 45<br />
Rhythm ...................................................................................... 56<br />
Song ........................................................................................... 56<br />
Volume balance ............................................................................ 31<br />
VOLUME button ............................................................................ 36<br />
W<br />
Wheel Brake .................................................................................... 37<br />
WHEEL BRAKE button ................................................................. 36<br />
Woofer .............................................................................................. 43<br />
83
This product complies with the requirements of EMCD 2004/108/EC and LVD 2006/95/EC.<br />
For EU Countries<br />
FEDERAL COMMUNICATIONS COMMISSION<br />
RADIO FREQUENCY INTERFERENCE STATEMENT<br />
For the USA<br />
This equipment has been tested and found to comply with the limits for a Class B digital device, pursuant to Part 15 of the<br />
FCC Rules. These limits are designed to provide reasonable protection against harmful interference in a residential<br />
installation. This equipment generates, uses, and can radiate radio frequency energy and, if not installed and used in<br />
accordance with the instructions, may cause harmful interference to radio communications. However, there is no guarantee<br />
that interference will not occur in a particular installation. If this equipment does cause harmful interference to radio or<br />
television reception, which can be determined by turning the equipment off and on, the user is encouraged to try to correct the<br />
interference by one or more of the following measures:<br />
– Reorient or relocate the receiving antenna.<br />
– Increase the separation between the equipment and receiver.<br />
– Connect the equipment into an outlet on a circuit different from that to which the receiver is connected.<br />
– Consult the dealer or an experienced radio/TV technician for help.<br />
This device complies with Part 15 of the FCC Rules. Operation is subject to the following two conditions:<br />
(1) this device may not cause harmful interference, and<br />
(2) this device must accept any interference received, including interference that may cause undesired operation.<br />
Unauthorized changes or modification to this system can void the users authority to operate this equipment.<br />
This equipment requires shielded interface cables in order to meet FCC class B Limit.<br />
NOTICE<br />
This Class B digital apparatus meets all requirements of the Canadian Interference-Causing Equipment Regulations.<br />
AVIS<br />
For Canada<br />
Cet appareil numérique de la classe B respecte toutes les exigences du Règlement sur le matériel brouilleur du Canada.<br />
WARNING<br />
For C.A. US (Proposition 65)<br />
This product contains chemicals known to cause cancer, birth defects and other reproductive harm, including lead.<br />
Model Name :<br />
Type of Equipment :<br />
Responsible Party :<br />
Address :<br />
Telephone :<br />
DECLARATION OF CONFORMITY<br />
Compliance Information Statement<br />
VR-700<br />
Digital Organ<br />
<strong>Roland</strong> Corporation U.S.<br />
5100 S. Eastern Avenue, Los Angeles, CA 90040-2938<br />
(323) 890-3700<br />
For the USA<br />
84
For EU Countries<br />
For China<br />
85
Information<br />
Information<br />
86