VIR-7840NRBT - Soundstream
VIR-7840NRBT - Soundstream
VIR-7840NRBT - Soundstream

You also want an ePaper? Increase the reach of your titles
YUMPU automatically turns print PDFs into web optimized ePapers that Google loves.
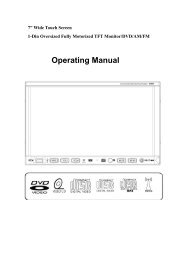
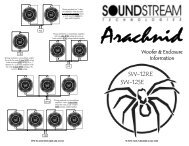
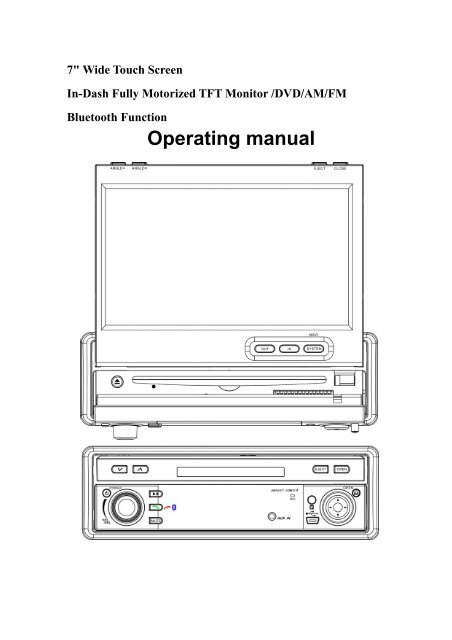
7" Wide Touch Screen<br />
In-Dash Fully Motorized TFT Monitor /DVD/AM/FM<br />
Bluetooth Function<br />
Operating manual
SAFETY INFORMATION<br />
PLEASE READ COMPLETELY AND BECOME FAMILIAR WITH THE CONTENTS<br />
OF THIS MANUAL BEFORE INSTALLATION AND OPERATION OF THIS UNIT,<br />
AND KEEP IT CAREFULLY FOR FUTURE REFERENCE.<br />
This unit is a class 1 laser product. The laser beam may cause hazardous<br />
radiation if exposure to laser system directly. Do not attempt to disassemble the<br />
unit personally.<br />
This unit has been designed and manufactured to assure personal safety. Improper<br />
use can result in electric shock or fire hazard. The safeguards incorporated in this<br />
unit protect you if you observe the following procedures for installation, use and<br />
servicing. This unit doesn't contain any parts that can be repaired by the user. If the<br />
unit requires maintenance, contact an authorized service center.<br />
Warnings<br />
-Do not expose the product to rain, water or excessive moisture. This could cause<br />
electrical shorts, fire or other damage.<br />
-This product is designed to operate with a 12 volt DC, negative ground battery<br />
system. Use the proper power supply.<br />
-The monitor is operated automatically. Do not push in or pull out the monitor or try to<br />
reverse the monitor manually! Do not attempt to adjust the monitor angle upward or<br />
downward manually. It will cause damage to the Monitor Mechanism Structure.<br />
-Do not impact the monitor with a hard object. It may cause permanent damage.<br />
-Do ground all equipments and works in order to avoid causing damage to the unit<br />
by electrostatic discharges.<br />
-The user who handles this product takes all necessary precautions to avoid ESD<br />
(Electro-Static Discharge) failures.<br />
-Do not attempt to install or service your unit by yourself. Installation or servicing of<br />
the unit by persons without training and experience in electronic equipment and<br />
automotive accessories may be dangerous and could expose you to the risk of<br />
electric shock or other hazards.<br />
1
Cautions:<br />
To reduce the risk of fire or electric shock, and annoying interference, use only the<br />
recommended accessories.<br />
While driving, keep the volume level low enough to be aware of road and traffic<br />
conditions.<br />
Parking in direct sunlight can produce very high temperatures inside your vehicle.<br />
Give the interior a chance to cool down before starting playback.<br />
Do not use any chemical solvent, cleaning agent or corrosive detergent to clean<br />
away dirt on the surface of the TFT monitor screen. It may cause irreversible damage.<br />
Small black and shiny dots inside the liquid crystal panel are normal for liquid<br />
crystal product.<br />
In extremely cold temperatures, the movement of the picture may be slow and the<br />
picture may be dark, but this is not a malfunction. The unit will work normally once<br />
reach its operating temperature.<br />
Do not use and store the unit in dusty, high temperature and high humidity<br />
environments.<br />
Do not use the unit immediately when you bring it from cold to warm place. Fast<br />
growing temperature, may cause moisture condensing which influence the unit for<br />
certain time.<br />
NOTE:<br />
This user's manual only for reference.<br />
Modifying rights are reserved.<br />
Modifications are subject to change without notice.<br />
2
FEATURES<br />
- Fully Motorized Screen Telescopes Out And Up Including Front To Back Angling<br />
- (Optional) Navigation Black Box Module With Navteq Maps Of North America<br />
- Drop Down Detachable Front Panel For Invisible DVD Insertion Slot<br />
- Electronic Touch Screen Functions Include DVD, Radio, USB, & MP-3/4<br />
- Front Panel Display When The Monitor Is Closed<br />
- Electronic Touch Screen Functions Include OSD Functions<br />
- DVD/DVD-RW/CD/CD-R/CD-RW/MP-3/MP-4/Divx<br />
- Menus Can Be Displayed On Screen Via OSD (Fourteen Languages)<br />
- 30-Second Electronic Anti-shock Mechanism<br />
- Accessory iPod Input Connection (Cable Not Included)<br />
- USB Mini Input For Mp-3 Music, Divx, Xvid & Mp-4 Movies<br />
- IR Repeater For External Remote Eye<br />
- Antenna Trigger Wire<br />
- Amplifier Trigger Wire<br />
- Brake Screen Safety Trigger<br />
- AM/FM With 30 Pre-sets (18/FM - 12AM)<br />
- Auto Store Pre-set Scan<br />
- 4-Channel High Power 50 X 4 Channels (Mosfet Power)<br />
- Dual RCA Outputs (Front & Rear)<br />
- Sub Woofer Selectable Frequency Outputs (80, 120, 160Hz)<br />
- Variable Sub Woofer Volume Control<br />
- 1-Auxiliary Video Input For Back-up Camera<br />
- 1-A/V In For Secondary Source Input<br />
- 1-RCA Video Output<br />
- LO/DX And Stereo Mono Selector Switch<br />
- Electronic (Bass, Treble, Volume, Balance, Fader)<br />
- Pre-set EQ Functions (Rock, Pop, Classic, Jazz, User)<br />
- Digital Clock<br />
- DVD, PAL/NTSC Selectable<br />
- USA/EUROPE Frequency Stepping<br />
- Resolution: 1440 X 234<br />
- Panel Brightness: 350 NIT<br />
- ISO/DIN<br />
- Full Function Remote Control<br />
- Last Position DVD Memory<br />
- Bluetooth Function<br />
- Improved Graphic User Interface<br />
3
TABLE OF CONTENTS<br />
Safety Information…………………………………………….………………………….1<br />
Features…………………………………………………………….……………………… 3<br />
Table of Contents…………………………………….………….………………………....4<br />
Accessories………………………………………….…….………………………………..5<br />
Unit Installation………………………………………….….……………………………….6<br />
Unit Removal…………………………………………….…….…………………………....8<br />
Wiring Connection…………………………………………..……………………………...9<br />
Front Panel………………………………………………………..………………………12<br />
Remote Control…………………………………………………………………………….17<br />
Basic Operation…………………………………………………………………………….22<br />
Touch Screen Operations………………………………………………….……………..24<br />
Touch Screen Calibrate……………………………………….……………………..24<br />
Main Menu…………………………………………………….………………………25<br />
Radio Operations………………………………………………….……………….…26<br />
DVD Operations………………………………………………….……………….…..29<br />
USB Operations………………………………………………….………………..…31<br />
Bluetooth Operations …………..…………………………………….………………32<br />
iPod Operations…………………………………………………….……………..…40<br />
AV IN Operations……………………………………………………………………42<br />
AUX Operations……………………………………………………………………43<br />
NAVI Operations…………………………………………………….………….……44<br />
System Setup………………………………………………………………….……48<br />
DVD Setup Menu…………………………………………………………….………..….52<br />
Trouble shooting………………………….…………………………………….….…...…58<br />
Specifications…………………………………………………………………………......61<br />
Disc Notes………………………………………………………………………………...62<br />
4
ACCESSORIES<br />
1 2 3<br />
4<br />
Bolt Steel Bar x 1 M5X5 Screws x 4 Keys x 2<br />
5 6 7<br />
8<br />
Connecter Wire x 1 Trim Bezel x 1 Remote Control x 1 Box x 1<br />
9 10 11<br />
12<br />
Mounting Sleeve x 1 Operational Manual x 1 Nut M5 x 1 USB Cable x 1<br />
13 14 15 16<br />
AUX Cable x 1 External Microphone x 1 SD Card Adapter x 1 iPod Cable x 1(option)<br />
5
UNIT INSTALLATION<br />
Please read all of the instructions before beginning the installation. Recommend<br />
having your unit installed by a professional installation shop.<br />
Tools and Supplies:<br />
You will need these tools and supplies to install your unit:<br />
- Torx type, flat-head and Philips screwdrivers<br />
- Wire cutters and strippers<br />
- Tools to remove existing radio (screwdriver, socket wrench set or other tools)<br />
- Electrical tape<br />
- Crimping tool<br />
- Volt meter/test light<br />
- Crimp connections<br />
- 16 gauge wire for power connections<br />
- 8 gauge speaker wire<br />
Warnings:<br />
Choose the mounting location where the unit will not interfere with the safe driving<br />
conditions.<br />
Install the unit where it does not get in the driver's way and can not injure the<br />
passenger if there is a sudden stop, like an emergency stop.<br />
Avoid installing the unit where it would be subject to high temperature, such as from<br />
direct sunlight, or from hot air, from the heater, or where it would be subject to dust,<br />
dirt or excessive vibration.<br />
Cautions:<br />
Before finally installing the unit, connect the wiring temporarily and make sure it is all<br />
connected up properly, the unit and the system work properly.<br />
Use only the parts included with the unit to ensure proper installation. The use of<br />
unauthorized parts can cause malfunctions.<br />
Consult with your nearest dealer if installation requires the drilling of holes or other<br />
modifications of the vehicle.<br />
If installation angle exceeds 30 degrees from horizontal, the unit might not give its<br />
optimum performance.<br />
6
● Securing the Unit to the Mounting Bracket.<br />
Installation Method<br />
1. Install the front panel into the unit.<br />
2. Bend the claws outward for tight fit, if necessary. Install the Mounting Box into the<br />
dashboard, tighten the unit in place.<br />
3. Install the Frame to the unit.<br />
7
UNIT REMOVAL<br />
1. Detach the front panel.<br />
2. Insert the keys that supply to the unit at both sides of the unit (shown as illustrated)<br />
until pull the keys to make it possible to remove the unit from the dashboard.<br />
8
WIRING CONNECTION<br />
Cautions:<br />
-To prevent short circuits, remove the key from the ignition and disconnect the<br />
terminal of the battery.<br />
-Make the proper input and output cable connections for each unit.<br />
-Connect the wiring harness cables in the following order: ground wire, battery wire,<br />
ignition wire.<br />
-Reconnect the terminal of the battery.<br />
-Do not connect the yellow wire of this product directly to the battery terminal.<br />
-Do remember to connect the red wire of this product to the ACC. of the ignition key<br />
switch. Failure to do may result in draining off the battery charge prematurely.<br />
-If the fuse blows, first make sure that the cables have not caused a short circuit, then<br />
replace the old fuse with new one with the same rating.<br />
-Do not let unconnected cables or terminals touch the metal on the car or other<br />
conductor.<br />
-To prevent short circuits, do not remove the caps form unused terminals or from the<br />
ends of the unconnected cables.<br />
-After the monitor unit is installed, check whether the brake lamps, blinkers, wiper, etc.<br />
on the vehicle are working properly. If not, please make sure they are proper installed.<br />
-Insulate unconnected wires with vinyl tape or other similar material.<br />
Disconnecting the Battery<br />
To prevent a short circuit, be sure to turn off the ignition and remove the negative (-)<br />
battery cable prior to installation.<br />
Reconnecting the Battery<br />
When wiring is complete, reconnect the battery negative terminal.<br />
Warning:<br />
Be sure to use the correct type and amperage Fuse to avoid damaging the unit.<br />
Fuse of the Battery wire in Main Unit: 1 amp;<br />
Fuse of the ACC wire in Main Unit: 1 amp;<br />
9
Wiring Diagram<br />
NOTE:<br />
1, Plug the external microphone input into the MIC-IN jack for Bluetooth.<br />
2, Please separate Battery Units before setting products to prevent from fire and<br />
electric shock. Mounting the antenna near to a radio antenna will result in noise. In<br />
this case, consult your dealer concerning mounting location.<br />
10
Wiring Diagram<br />
11
FRONT PANEL<br />
1. ANGLE - 11. MINI USB<br />
2. ANGLE + 12. LEFT / UP / RIGHT / DOWN / ENTER / BAND<br />
3. EJECT 13. REL<br />
4. OPEN / CLOSE 14. EJECT<br />
5. POWER / SOURCE 15. RESET<br />
6. VOLUME / MENU / SEL 16. OUT<br />
7. MUTE 17. IN<br />
8. CALL / TRANSFER 18. SYSTEM/NAVI<br />
9. PLAY / PAUSE 19. AUX IN<br />
10. REMOTE 20. MIC<br />
12
1. [ANGLE -] / 2. [ANGLE +]<br />
Adjust the view angle of the monitor to choose the best displaying effect.<br />
1- Continual angle adjustment<br />
Hold on pressing the [ANGLE +] / [ANGLE -] buttons to adjust the angle of TFT<br />
monitor upward / downward by continual increasing / decreasing.<br />
2- Single step angle adjustment<br />
Press the [ANGLE +] / [ANGLE -] buttons to adjust the angle of TFT monitor upward /<br />
downward by singly increasing / decreasing.<br />
3. [EJECT]<br />
When flip down the front panel, press to eject / load a disc.<br />
4. [OPEN] / [CLOSE]<br />
When unit power off, press the [OPEN] button to turn unit on and the monitor will<br />
spread out and turn around to the last angle position.<br />
When unit power on, press to open / close the Monitor.<br />
1- Open the TFT Monitor<br />
Press the [OPEN] button, the monitor will spread out and turn around to the last angle<br />
position.<br />
2- Close the TFT Monitor<br />
Press the [CLOSE] button, the monitor will turn downward and completely retract in.<br />
5. [POWER/SOURCE]<br />
Press the [POWER/SOURCE] button to turn the unit ON;<br />
Hold on pressing the button to turn the unit OFF.<br />
When the unit in turned ON, press the [POWER/SOURCE] button to toggle between<br />
the different modes as following:<br />
RADIO – DVD – USB – IPOD – AV IN – AUX – NAVI – BLUETOOTH – RADIO<br />
NOTE:<br />
The unit could be switched to DVD Mode if disc inside;<br />
The unit could be switched to USB Mode if Mini USB connected;<br />
The unit could be switched to IPOD Mode if iPod connected;<br />
6. [VOL/MENU/SEL]<br />
Rotate the button clockwise / anticlockwise to increase / decrease the volume.<br />
Press the button vertically to return the main menu.<br />
Hold on pressing the button vertically to enter the EQ setting as following:<br />
USER – POP – CLASSIC – ROCK – JAZZ – USER<br />
7. [MUTE]<br />
Press the [MUTE] button to switch off the sound; press it again to resume to the<br />
previous volume level.<br />
13
8. [CALL/TRANSFER]<br />
Press to call a number or to receive a cell phone call.<br />
Hold on pressing to reject or hang up a call.<br />
When talking the phone, touch the icon to transfer the call between the unit and your<br />
cell phone.<br />
9. [ ll]<br />
Press to pause playback when playing; press again to continue playing.<br />
10. REMOTE<br />
Infrared Remote Receiver.<br />
11. MINI USB<br />
Connect an USB device to play the songs, pictures, videos in USB.<br />
12. [LEFT] / [UP] / [RIGHT] / [DOWN] / [ENTER] / [BAND]<br />
Under the DVD Setup menu:<br />
Press the [∨] / [∧] buttons to move the cursor upward / downward to select item.<br />
Press the [] buttons to move the cursor leftward / rightward to select item.<br />
Press vertically to confirm the operation.<br />
Under RADIO Mode:<br />
Press the [] buttons to switch the stored stations.<br />
Hold on pressing the [] buttons to fast seeking the next available channel by<br />
decreasing / increasing the tuning frequency; seeking will stop by pressing any button.<br />
Press the [∨] / [∧] buttons to decrease / increase the frequency step by step.<br />
Hold on pressing the [∨] / [∧] buttons to fast seeking by decreasing / increasing the<br />
tuning frequency; seeking will stop when loose the button.<br />
Press vertically to switch the FM/AM wave band as following:<br />
FM1 - FM2 - FM3 - AM1- AM2 - FM1<br />
13. REL<br />
Press to flip down the front panel.<br />
14. [EJECT]<br />
When flip down the front panel, press to eject / load a disc.<br />
15. [RESET]<br />
Press to reset the unit.<br />
16. [OUT] / 17. [IN]<br />
Press the [OUT] / [IN] buttons to move the monitor forward / backward by singly step.<br />
There are 4 steps to move the monitor forward / backward totally.<br />
14
18. [SYSTEM/NAVI]<br />
Press to enter / exit the NAVI mode.<br />
Hold on pressing to enter / exit the System Parameter Setup menu.<br />
19. AUX IN<br />
Connect an audio device to this jack to listen to the device through your car speakers.<br />
20. MIC<br />
Microphone.<br />
15
FRONT PANEL DISPLAY<br />
1. EQ Indicator:<br />
It turns on to indicate the POP/CLASSIC/JAZZ/ROCK when corresponding setup.<br />
It turns off when custom setup.<br />
2. Disc Icon:<br />
It rotates when playing disc under the DVD Mode.<br />
3. Main Display Area:<br />
Display the information such as working mode, characters, playback time & number of<br />
track, radio frequency etc.<br />
4. LOUD Icon:<br />
It displays when the LOUD function on.<br />
It disappears when the LOUD function off.<br />
5. ST Icon:<br />
It displays when the STEREO function on.<br />
It disappears when the STEREO function off.<br />
6. Disc Type Indicator:<br />
It turns on to indicate DVD, CD, VCD, and MP3 when playing corresponding discs.<br />
16
REMOTE CONTROL<br />
1. POWER/SOURCE 13. PREVIOUS 25. SYSTEM/NAVI<br />
2. MUTE 14. SLOW / END CALL 26. F.FWD<br />
3. NUMBER BUTTONS 15. TITLE / PBN 27. RIGHT(Seek up)<br />
4. MENU /* 16. ZOOM / CALL 28. STOP<br />
5. AUDIO /# 17. SUBTITLE / PBP 29. D.ANGLE<br />
6. LOUD / EQ 18. OPEN/CLOSE/P.ANGLE 30. PLAY / PAUSE<br />
7. UP (Tune up) 19. SETUP 31. NEXT<br />
8. LEFT (Seek Down) 20. VOLUME+ 32. A-B / PHONE PAIR<br />
9. ENTER / BAND 21. VOLUME- 33. REPEAT / PHONE<br />
10. PROGRAM 22. DISPLAY 34. PAL / NTSC / AP<br />
11. DOWN(Tune Down) 23. PBC / AST / CLEAR 35. STEREO / MP<br />
12. RANDOM / TRANSFER 24. F.REV<br />
17
1. [POWER/SOURCE]<br />
Same functions as key on front panel.<br />
2. [MUTE]<br />
Press the [MUTE] button to switch off the sound; press it again to resume to the<br />
previous volume level.<br />
3. [NUMBERS 0~9]<br />
For 1~6, press these buttons to store the current radio station or recall the stored<br />
station under the Radio Mode.<br />
For 0~9, press these buttons to select the tracks, and input the number code.<br />
4. [MENU]<br />
Press to return to the boot menu when playing DVD disc.<br />
5. [AUDIO]<br />
Press to select dialogue language when playing DVD disc.<br />
Press to select left audio channel, right audio channel or stereo when playing VCD<br />
disc.<br />
6. [LOUD/EQ]<br />
Press to adjust the EQ setting as following:<br />
USER – POP – CLASSIC – ROCK – JAZZ – USER<br />
Hold on pressing to turn the LOUD function on / off.<br />
7. [∧] / 8. [] Direction Key<br />
Under the DVD Setup menu:<br />
Press the [∨] / [∧] buttons to move the cursor upward / downward to select item.<br />
Press the [] buttons to move the cursor leftward / rightward to select item.<br />
Under RADIO Mode:<br />
Press the [] buttons to switch the stored stations.<br />
Hold on pressing the [] buttons to fast seeking the next available channel by<br />
decreasing / increasing the tuning frequency; seeking will stop by pressing any button.<br />
Press the [∨] / [∧] buttons to decrease / increase the frequency step by step.<br />
Hold on pressing the [∨] / [∧] buttons to fast seeking by decreasing / increasing the<br />
tuning frequency; seeking will stop when loose the button.<br />
9. [BAND/ENTER]<br />
In RADIO mode, press the [BAND] button to switch the wave band as following:<br />
FM1 – FM2 - FM3 - AM1- AM2 - FM1<br />
In DVD mode, press the [ENTER] button to confirm the Setup Menu.<br />
18
10. [PROGRAM]<br />
Press to enter / exit the PROGRAM Function when playing the VCD, CD, MP3 disc.<br />
12. [RANDOM/TRANSFER]<br />
Press to turn RAMDOM function on / off when playing CD / VCD disc (PBC OFF).<br />
When talking the phone, press to transfer the call between the unit and your cell phone.<br />
13. [PREVIOUS]<br />
Press to skip to play the pervious track.<br />
14. [SLOW/END CALL]<br />
Press to activate slow motion playback. (DVD Mode only)<br />
Press to reject or hang up a call.<br />
15. [TITLE/PBN]<br />
Press to enter the title menu when playing DVD disc.<br />
Press to enter the next page of phone number list in phonebook.<br />
16. [ZOOM/CALL]<br />
Press to magnify the picture display when play DVD, VCD disc.<br />
Press to call a number or to receive a cell phone call.<br />
17. [SUB-T/PBP]<br />
Press to select the subtitle language when playing DVD disc.<br />
Press to enter the previous page of phone number list in phonebook.<br />
18. [OPEN/CLOSE/P.ANGLE]<br />
Same functions as key on front panel.<br />
19. [SETUP]<br />
Press to enter the DVD SETUP menu.<br />
20. [VOL+] / 21. [VOL-]<br />
Press to increase / decrease the volume.<br />
22. [DISPLAY]<br />
Press to display current playback information when playing DVD disc.<br />
23. [PBC/AST/CLEAR]<br />
Press to select the PBC function on / off when playing VCD disc.<br />
Hold on pressing to seek radio station automatically under RADIO.<br />
Press to cancel or clear the numbers you have input.<br />
19
24. [F.REV]<br />
Press to select fast reverse with different speed.<br />
25. [SYSTEM/NAVI]<br />
Same functions as key on front panel.<br />
26. [F.FWD]<br />
Press to select fast forward with different speed.<br />
28. [STOP]<br />
Press to stop the playback.<br />
29. [ANGLE]<br />
Press the [ANGLE] button during playback to select different viewing angles with<br />
interactive DVD media.<br />
30. [PLAY/PAUSE]<br />
Press to pause the playback when playing; press again to continue playing.<br />
31. [NEXT]<br />
Press to skip to play the next track.<br />
32. [A-B/PHONE PAIR]<br />
Press to setup A-B repeat playing.<br />
33. [REPEAT/PHONE]<br />
Press to select the chapter / title / disc to repeat playing.<br />
34. [P/N/AUDIO PLAYER]<br />
Press the button to switch the video output (PAL/NTSC) when playing DVD disc.<br />
35. [STEREO/MUSIC PAIR]<br />
Press to turn the stereo on / off under Radio Mode.<br />
20
REPLACING THE BATTERIES<br />
If the remote control has no function or if the operating range reduced, replace the old<br />
battery with new one.<br />
1. Pull out the battery holder. Follow the<br />
arrow 1 slide it to the right toward the<br />
battery while at the same time pull the<br />
battery holder away from the remote<br />
control.<br />
2. Place the new battery. Place the new<br />
lithium battery with the (+) side up.<br />
3. Push the holder back. Using the finger<br />
to push in the holder back until the<br />
locking sound is heard.<br />
21
BASIC OPERATIONS<br />
Startup<br />
Press the [POWER/SOURCE] button on the panel or remote control to startup the<br />
power, the TFT monitor will spread out automatically and the system return to the<br />
working Mode when last turn off.<br />
Turnoff<br />
Hold on pressing the [POWER/SOURCE] button on the panel or remote control to<br />
turnoff the power, the TFT monitor will retract automatically.<br />
NOTE:<br />
Close the ACC without turnoff, the unit will turn off automatically; and the TFT monitor<br />
will retract within 10 seconds automatically to protect the TFT monitor. Start the ACC<br />
again, the unit will startup and return to the last working Mode automatically, but the<br />
monitor does not spread out.<br />
Working Mode<br />
When the unit in turned ON, press the [POWER/SOURCE] button to toggle between<br />
the different modes as following:<br />
RADIO – DVD – USB – IPOD – AV IN – AUX – NAVI – BLUETOOTH – RADIO<br />
NOTE:<br />
The unit could be switched to DVD Mode if disc inside;<br />
The unit could be switched to USB Mode if Mini USB connected;<br />
The unit could be switched to IPOD Mode if iPod connected;<br />
Detachable Front Panel<br />
The front panel is detachable.<br />
Taking out the front panel, the unit will turnoff automatically and the TFT monitor will<br />
retract after 5 mins automatically.<br />
NOTE:<br />
1, don’t make any operation within 5 mins.<br />
2, this function is burglarproof for unit security.<br />
22
Auto Antenna Control<br />
Connect the auto antenna control wire AUTO_ANT (see Wiring Diagram); the antenna<br />
will lift when the unit startup; it will descend when the unit turnoff.<br />
Brake Control<br />
It is necessary to connect the Brake Control wire to the Hand-brake switch of the car.<br />
While driving, the TFT monitor will display the alarm picture (see as follows) in order to<br />
ensure the safety.<br />
Under the Rear View Mode, the Brake Control function is no effective.<br />
Protection of the TFT Monitor<br />
During the movement of the TFT monitor, if it is halted by force, then the unit will begin<br />
self-protection to prevent from any damage on the motorized mechanical structure.<br />
Press the [OPEN] button or shut down the ACC and then restart, the TFT monitor will<br />
act as the follow list to recover; if not, then please consult with an authorized service<br />
center.<br />
Halt<br />
Self-protection<br />
Press the [OPEN]<br />
button<br />
Shut down the<br />
ACC and restart<br />
While extending Retraction Extending Retraction<br />
While retraction<br />
While turning<br />
upward<br />
While turning<br />
downward<br />
Stop at the halt place and<br />
retract after 3 seconds<br />
Turning downward and<br />
retraction<br />
Stop at the halt place<br />
Extending<br />
Extending<br />
Turning downward<br />
and retract ion<br />
Retraction<br />
Turning downward<br />
and retract ion<br />
Turning downward<br />
and retract ion<br />
23
TOUCH SCREEN OPERATIONS<br />
TOUCH SCREEN CALIBRATE<br />
When “Power Off”, press the buttons 1, 2, 3, 4, 5, [BAND] of remote control to enter<br />
the CALIBRATE page:<br />
To touch the points from 1 to 5 until the points change to brighter by using a ballpoint<br />
pen or pencil.<br />
After all 5 points change to brighter, the unit would finish the CALIBRATE and power<br />
off again. Then the Touch Screen is restored to their default positions.<br />
24
MAIN MENU<br />
Touch the icon “MORE” to enter the 2 nd page of main menu:<br />
25
RADIO OPERATIONS<br />
Touch the icon “RADIO” to enter the 1st operation page of RADIO Mode:<br />
1~6. STORED CHANNEL<br />
Manual Store Radio Station<br />
Hold on touching the icon, you can store current radio frequency to the stored channel.<br />
For example, the current frequency is 98.5MHZ, by hold on touching the icon 1, you<br />
can store the radio station of 98.5MHZ to the channel 1.<br />
After manual store radio station, the former stored stations will be instead.<br />
In each wave band, the number icons 1 to 6 represent the stored radio stations.<br />
To hold on pressing the number buttons 1~6 of remote control performs same<br />
operation.<br />
Recall a Preset Station<br />
Touch the icon 1~6 to recall the corresponding stored station in M1~M6 channels.<br />
To press the number buttons 1~6 of remote control performs same operation.<br />
7. FREQUENCY<br />
8. SEEK – / 9. SEEK +<br />
Touch the icon to seek the next available channel by increasing / decreasing the<br />
tuning frequency.<br />
Press any button to stop seeking.<br />
Seeking will stop automatically when seek an available channel then play this station.<br />
The unit will stop on the beginning frequency if no available station after seeking one<br />
cycle.<br />
To hold on pressing [>] / [
10. BAND<br />
Touch the icon to switch the FM/AM wave band as following:<br />
FM1 - FM2 - FM3 - AM1- AM2 - FM1<br />
To press the [BAND] button of panel or remote control performs same operation.<br />
11. NEXT PAGE<br />
Touch the icon to enter the 2 nd page of RADIO Mode:<br />
1. DOWN / 2. UP<br />
Touch the icons to adjust the frequency downward / upward by step decreasing /<br />
increasing.<br />
Hold on touching the icons has same function with [SEEK-] / [SEEK+].<br />
To press the [∨] / [∧] buttons of remote control performs same operation.<br />
3. LOCAL: ON / OFF<br />
When you are using the local searching function of LOCAL, you can only receive the<br />
radio station with strong enough signals and fine state.<br />
4. NEXT PAGE<br />
Touch the icon to enter the 3 rd page of RADIO Mode:<br />
27
1. ASM<br />
Seeking and store the stations<br />
1. Hold on touching the icon to seek stations with the strongest signal from the<br />
lowest frequency point in the entire wave bands; press any button to stop seeking.<br />
After seeking, the former stored stations will be instead.<br />
2. Store the received effective radio frequency to the six stored channels M1~M6.<br />
3. The unit will play the stations one by one for few seconds; press any button to stop<br />
playing.<br />
4. It is independent for FM & AM frequency. There are 3 wave bands of FM1、FM2、<br />
FM3 & 2 wave bands of AM1、AM2, each can store 6 radio stations, totally 30<br />
radio stations.<br />
5. The unit will stop on the beginning frequency if no available station after seeking<br />
one cycle.<br />
6. To press the [AST] button of panel or hold on pressing the [PBC/AST] button of<br />
remote control performs same operation.<br />
2. P.SCAN<br />
The unit will play the stored stations one by one for few seconds from FM1, FM2, FM3,<br />
AM1, AM2; press any button to stop playing.<br />
3. MENU<br />
Touch the icon to return the main menu.<br />
4. NEXT PAGE<br />
Touch the icon to enter the 1 st page of RADIO Mode.<br />
28
DVD OPERATIONS<br />
Touch the icon “DVD” to enter the DVD Mode if disc inside.<br />
The unit will switch to DVD Mode automatically if loading disc.<br />
The unit will switch to RADIO Mode automatically if ejecting disc.<br />
1st operation page of DVD Mode:<br />
1. PREV / 2. NEXT<br />
Touch the icon to go to the pervious / next chapter, track or song.<br />
To press the [Previous] / [Next] buttons of remote control performs same operation.<br />
3. F.REV / 4. F.FWD<br />
Touch the icon to select fast reverse / forward search. Touch the [PLAY] icon to<br />
resume to normal playback.<br />
To press the [F.REV] / [F.FWD] buttons of remote control performs the same<br />
operation.<br />
5. PLAY<br />
Touch the icon to play or pause the disc.<br />
To press the [PLAY/PAUSE] button of panel or remote control performs the same<br />
operation.<br />
6. EXIT<br />
Touch the icon to exit the TOUCH ICONS display.<br />
29
7. STOP<br />
During movie playback, touch the icon once; the DVD player memorizes the location<br />
where you stopped (touch the [PLAY] icon to resume playing from the memorized<br />
location). If you touch the icon twice, the playback will start from the beginning of the<br />
disc when you touch the [PLAY] icon.<br />
To press the [STOP] button of remote control performs the same operation.<br />
8. NEXT PAGE<br />
Touch the icon to enter the 2 nd page of DVD Mode:<br />
1~4. DOWN / UP / LEFT / RIGHT<br />
Touch the direction icons (UP / DOWN / LEFT / RIGHT) to move the cursor to the<br />
selected item.<br />
To press the direction buttons (UP / DOWN / LEFT / RIGHT arrow) of remote control<br />
performs same operation.<br />
5. ENTER<br />
Touch the icon to confirm the selection.<br />
To press the [ENTER] button of remote control performs same operation.<br />
6. EXIT<br />
Touch the icon to exit the TOUCH ICONS display.<br />
7. MENU<br />
Touch the icon to return the main menu.<br />
8. NEXT PAGE<br />
Touch the icon to enter the 1 st page of DVD Mode.<br />
30
USB OPERATIONS<br />
Touch the icon “USB” to enter the USB Mode if USB connected.<br />
The unit will switch to USB Mode automatically if connecting USB.<br />
When disconnecting USB, the unit will switch to RADIO Mode automatically if there is<br />
no disc in the unit; and the unit will switch to DVD Mode automatically if there is a disc<br />
inside.<br />
Under USB Mode, all operations are same as DVD operations.<br />
SD Card Adapter<br />
Connect the SD Card Adapter by USB port, the unit will be switched to DVD Mode<br />
automatically, and play the songs, pictures, videos in SD Card.<br />
31
BLUETOOTH OPERATIONS<br />
Touch the BLUETOOTH icon to enter the Bluetooth mode:<br />
1, RETURN 2, PHONE CALL 3, PHONEBOOK<br />
4, AUDIO 5, SETTINGS<br />
1, RETURN<br />
Touch the icon to return the MAIN MENU.<br />
To press the [DISPLAY] button of remote control performs same operation.<br />
2, PHONE CALL<br />
Touch the icon to enter the phone calling.<br />
3, PHONE BOOK<br />
Touch the icon to enter the phone book lookup.<br />
4, AUDIO<br />
Touch the icon to enter the audio device operation.<br />
5, SETTINGS<br />
Touch the icon to enter the Bluetooth settings.<br />
NOTE:<br />
To press the [BAND] button of remote control to toggle between the different working<br />
pages as following:<br />
PHONE CALL – PHONE BOOK – AUDIO – SETTINGS – PHONE CALL<br />
32
SETTINGS<br />
1, INFORMATION DISPLAY 2, AUTO ANSWER 3, PHONEC CONNECT<br />
4, PHONE PAIRING 5, AUDIO PARING 6, PIN CODE<br />
NOTE:<br />
Touch the icon 2~6, when item is changed to blue color, the item is selected. And touch it<br />
again and the item is changed to red color, the operation is active.<br />
To press the [∨] / [∧] buttons of remote control to select the item, and the item would be<br />
changed to blue color; To press the [] buttons of remote control to activate the<br />
operation, and the item would be changed to red color.<br />
1, INFORMATION DISPLAY<br />
2, AUTO ANSWER<br />
Touch the icon to select auto / manual answer when call is coming.<br />
3, PHONEC CONNECT<br />
Touch the icon to select auto / manual phone connect when return back the car.<br />
4, PHONE PAIRING<br />
Touch the icon, then see the below words on information display:<br />
Then set the phone to pair with unit.<br />
Touch the icon again to cancel the pairing, and see the below words on information<br />
display:<br />
When paring finished, set the phone connect with unit, then you can see the phone name<br />
on information display.<br />
To press the [PHONE PAIR] button of remote control under SETTINGS page performs<br />
same operation.<br />
33
5, AUDIO PARING<br />
Touch the icon, then see the below words on information display:<br />
Then set the audio device to pair with unit.<br />
Touch the icon again to cancel the pairing, and see the below words on information<br />
display:<br />
When paring finished, set the audio device connect with unit, then you can see the audio<br />
device name on information display.<br />
To press the [MUSIC PAIR] button of remote control under SETTINGS page performs<br />
same operation.<br />
6, PIN CODE<br />
You can change the PIN code by remote control. Press the [CLR] key of remote control to<br />
clear the PIN code, and input the new 4 digitals number, press the [SETUP] of remote<br />
control to save the new code.<br />
NOTE:<br />
The unit can pair with totally 5 different devices including cell phones and audio players.<br />
1, When you want to connect another paired cell phone with unit, to press the [PHONE]<br />
button of remote control to disconnect the current connecting cell phone; use the another<br />
cell phone to connect with the unit without paring operations.<br />
2, When you disconnected the current connecting cell phone, also you can press the<br />
[PHONE] button of remote control to connect the cell phone with the unit again.<br />
3, When you want to connect another paired audio player with unit, to press the [AUDIO<br />
PLAYER] button of remote control to disconnect the current connecting audio player; use<br />
the another audio player to connect with the unit without paring operations.<br />
4, When you disconnected the current connecting audio player, also you can press the<br />
[AUDIO PLAYER] button of remote control to connect the audio player with the unit again.<br />
34
PHONE CALL<br />
1, INFORMATION DISPLAY 2, CALL 3, CLEAR<br />
4, END CALL 5, TRANSFER 6, NUMBER KEYS<br />
1, INFORMATION DISPLAY<br />
2, CALL<br />
To touch the icon to call a number or to receive a cell phone call.<br />
To press the [CALL] button of remote control performs same operation.<br />
3, CLEAR<br />
To touch the icon to cancel or clear the numbers you have input.<br />
To press the [CLEAR] button of remote control performs same operation.<br />
4, END CALL<br />
To touch the icon to reject or hang up a call.<br />
To press the [END CALL] button of remote control performs same operation.<br />
5, TRANSFER<br />
When talking the phone, touch the icon to transfer the call between the unit and your cell<br />
phone.<br />
To press the [TRANSFER] button of remote control performs same operation.<br />
6, NUMBER KEYS<br />
To touch the icon to enter a phone number.<br />
To press the number buttons of remote control performs same operation.<br />
35
CALLING OUT<br />
When call out, you will see the below information:<br />
Then when talking, you will see the below information:<br />
And end the call, you will see the below information:<br />
CALLING IN<br />
When call in, you will see the below image:<br />
Then when talking, you will see the below image:<br />
And when end the call, you will see the below image:<br />
36
PHONEBOOK<br />
1, TRANSFER 2, CALL 3, END CALL<br />
4, PREVIOUS PAGE 5, NEXT PAGE 6, INFORMATION DISPALY<br />
7, MY PHONEBOOK 8, SIM PHONEBOOK 9, DIALED CALL<br />
10, RECEIVED CALL 11, MISSED CALL<br />
NOTE:<br />
Touch the icon 7~11, when item is changed to blue color, the item is selected. And touch it<br />
again and the item is changed to red color, the operation is active.<br />
To press the [∨] / [∧] buttons of remote control to select the item, and the item would be<br />
changed to blue color; To press the [] buttons of remote control to activate the<br />
operation, and the item would be changed to red color.<br />
1, TRANSFER<br />
When talking the phone, touch the icon to transfer the call between the unit and your cell<br />
phone.<br />
To press the [TRANSFER] button of remote control performs same operation.<br />
2, CALL<br />
To touch the icon to call a number or to receive a cell phone call.<br />
To press the [CALL] button of remote control performs same operation.<br />
3, END CALL<br />
To touch the icon to reject or hang up a call.<br />
To press the [END CALL] button of remote control performs same operation.<br />
4~5, PREVIOUS PAGE / NEXT PAGE<br />
There are 5 numbers in each page, touch the icon to see previous / next page.<br />
To press the [PBP] / [PBN] buttons of remote control performs same operation.<br />
6, INFORMATION DISPLAY<br />
7, MY PHONEBOOK<br />
The phone numbers are stored in phone.<br />
37
8, SIM PHONEBOOK<br />
The phone numbers are stored in SIM card.<br />
9, DIALED CALL<br />
The phone numbers are dialed in phone.<br />
10, RECEIVED CALL<br />
The phone numbers are received in phone.<br />
11, MISSED CALL<br />
The phone numbers are missed in phone.<br />
Touch the icon to enter the phonebook, you will see the below image:<br />
1, INFORAMTION DISPLAY 2, CURRENT PHONE NUMBER<br />
3, RETURN<br />
NOTE:<br />
Touch the icon 2, when item is changed to blue color, the item is selected.<br />
To press the [∨] / [∧] buttons of remote control to select the item and the item would be<br />
changed to blue color.<br />
1, INFORAMTION DISPLAY<br />
You will see the phone number of the item in blue color.<br />
2, CURRENT PHONE NUMBER<br />
If this number is stored, you will see the name; if not, you will see the phone number.<br />
3, RETURN<br />
Touch the icon to return to PHONE BOOK page.<br />
To press the [DISPLAY] button of remote control performs same operation.<br />
38
AUDIO<br />
1, PREVIOUS 2, NEXT 3, PLAY / PAUSE<br />
4, INFORAMTION DISPLAY 5, EQUALIZER DISPLAY<br />
1, PREVIOUS<br />
Touch the icon to select the previous track.<br />
To press the [PREVIOUS] button of remote control performs same operation.<br />
2, NEXT<br />
Touch the icon to select the next track.<br />
To press the [NEXT] button of remote control performs same operation.<br />
3, PLAY / PAUSE<br />
Touch the icon to pause playback when playing; touch it again to continue playing.<br />
To press the [PLAY / PAUSE] button of remote control performs same operation.<br />
4, INFORAMTION DISPLAY<br />
It could be displayed the name of connecting audio device.<br />
39
IPOD OPERATIONS<br />
Touch the icon “IPOD” to enter the IPOD Mode if iPod connected.<br />
The unit will switch to IPOD Mode automatically if connecting iPod.<br />
The unit will switch to RADIO Mode automatically if disconnecting iPod.<br />
NOTE:<br />
It is available for iPod operations with an additional iPod cable which is optional<br />
accessory.<br />
Music Operation<br />
1. The Number of Playing Song<br />
2. The Total Songs in Play List<br />
3. The Playing Time<br />
4. The Name of Playing Song<br />
5. The Name of Artist<br />
6. The Name of Album<br />
7. PREV / 8. NEXT<br />
Touch the icon to go to the pervious / next chapter, track or song.<br />
To press the [PREVIOUS] / [NEXT] buttons of remote control performs same<br />
operation.<br />
9. F.REV / 10. F.FWD<br />
Hold on touching the icon to select fast reverse / forward search. Touch the [PLAY] to<br />
resume to normal playback.<br />
To press the [F.REV] / [F.FWD] buttons of remote control performs the same<br />
operation.<br />
40
11. PLAY / PAUSE<br />
Touch the icon to play or pause the disc.<br />
To press the [PLAY/PAUSE] button of panel or remote control performs the same<br />
operation.<br />
12. VIDEO<br />
Touch the icon to switch to the VIDEO operation.<br />
13. MENU<br />
Touch the icon to return the main menu.<br />
14. EXIT<br />
Touch the icon to exit the TOUCH ICONS display.<br />
Video Operation<br />
1. MUTE<br />
Touch the icon to switch off the sound; touch it again to resume to the previous volume<br />
level.<br />
2. MUSIC<br />
Touch the icon to switch to the MUSIC operation.<br />
3. MENU<br />
Touch the icon to return the main menu.<br />
4. EXIT<br />
Touch the icon to exit the TOUCH ICONS display.<br />
41
AV IN OPERATIONS<br />
Touch the icon “AV IN” to enter the AV IN Mode:<br />
1. MUTE<br />
Touch the icon to switch off the sound; touch it again to resume to the previous volume<br />
level.<br />
2. EQ<br />
The user can set to adjust the audio output to your preference:<br />
USER – POP – CLASSIC – ROCK – JAZZ – USER<br />
3. MENU<br />
Touch the icon to return the main menu.<br />
4. EXIT<br />
Touch the icon to exit the TOUCH ICONS display.<br />
NOTE:<br />
It is available to switch to AUX mode under AV IN mode only. Connect an<br />
external audio device to AUX IN jack to listen to the device through your car<br />
speakers.<br />
42
AUX OPERATIONS<br />
1. MUTE<br />
Touch the icon to switch off the sound; touch it again to resume to the previous volume<br />
level.<br />
2. EQ<br />
The user can set to adjust the audio output to your preference:<br />
USER – POP – CLASSIC – ROCK – JAZZ – USER<br />
3. MENU<br />
Touch the icon to return the main menu.<br />
4. EXIT<br />
Touch the icon to exit the TOUCH ICONS display.<br />
NOTE:<br />
There are 2 RCA Audio Inputs & 1 RCA Video Input for unit.<br />
43
NAVI OPERATIONS<br />
Touch Screen Calibrate<br />
When 1 st time to enter NAVI mode, you will see the CALIBRATE screen. Please touch<br />
the points from 1 to 5 by using a ballpoint pen or pencil.<br />
To verify the calibration, please touch the points from 1 to 5 again.<br />
Then the following screen is displayed:<br />
44
The Touch Screen is restored to their default positions. Touch anywhere of panel to<br />
finish the calibration and go to the following screen:<br />
Read information and touch “I agree” button at the bottom of the screen, then enter<br />
the NAVI mode.<br />
NOTE:<br />
If change the NAVIBOX to connect another unit, please take out the SD card from the<br />
NAVIBOX and connect with computer, the following screen is displayed on computer:<br />
Delete the file “calib.ifo” only. Insert the SD card into NAVIBOX again, and connect<br />
the NAVIBOX with another unit.<br />
45
Go to NAVI mode<br />
Touch the icon “NAVI” to enter the NAVI Mode if NAVIbox connected:<br />
Following screen will be displayed:<br />
Read information and touch “I agree” button at the bottom of the screen.<br />
Enter the NAVI mode by main menu, the NAVI operations are effective only, all other<br />
processes are disable such as Radio, CD etc.<br />
NOTE:<br />
Under NAVI mode, please view all operations by Navigation Device NAVIBOX-1<br />
User’s manual.<br />
46
Quick Access Key [NAVI]<br />
Under any working mode, press the [NAVI] button to switch to NAVI mode; press the<br />
NAVI button again to return the previous working mode.<br />
For example, under Radio mode, press the [NAVI] button to switch to NAVI mode;<br />
press the button again to quit the NAVI mode and return back the Radio mode.<br />
Enter the NAVI mode by Quick Access Key, the previous working mode is still working<br />
on background.<br />
For example, under Radio mode, press the [NAVI] button to switch to NAVI mode, and<br />
you can still listen to the radio stations. But when voice of Navigation comes, the radio<br />
will be interrupted until voice of Navigation ends.<br />
No NAVIBOX Connection<br />
Touch the “NAVI” icon to enter the following screen if the NAVIBOX not connected:<br />
1. MENU<br />
Touch the icon to return the main menu.<br />
47
SYSTEM SETUP<br />
Touch the icon “SETUP” or press the [SYSTEM] button of panel to enter the SETUP of<br />
system parameters:<br />
1. SYSTEM SETUP<br />
2. VIDEO SETUP<br />
3. AUDIO SETUP<br />
4. MORE AUDIO SETUP<br />
5. CLOCK SETUP<br />
Touch the icon 1~5 to select the main menus directly.<br />
6. SAVE SETTINGS<br />
Touch the icon 5 to save all settings and exit SETUP.<br />
SETUP MENU OPERATION<br />
Press the [BAND] button of remote control to switch the main menus as following:<br />
SYSTEM – VIDEO – AUDIO – MORE AUDIO – CLOCK – SYSTEM<br />
Press the [∨] / [∧] buttons of remote control to select the item you want to change.<br />
Press the [] buttons of remote control to change the value of item.<br />
Holding on pressing the [SYSTEM] button of panel to exit SETUP of system<br />
parameters.<br />
48
SYSTEM SETUP<br />
RADIO AREA: USA – JAPAN – OIRT – EUROPE – ASIA – USA<br />
BLUETOOTH: ON/OFF<br />
DEFAULT: The unit will restore all default settings of Sound Parameter, Picture<br />
Parameter & Tuner Parameter.<br />
VIDEO SETUP<br />
BRIGHTNESS: 0 ~ 64<br />
CONTRAST: 0 ~ 64<br />
COLOR: 0 ~ 64<br />
HUE: 0 ~ 64<br />
VIDEO TYPE:<br />
NTSC – PAL – AUTO – NTSC<br />
NOTE:<br />
It is available to setup of HUE under NTSC VIDEO TYPE only.<br />
49
AUDIO SETUP<br />
BASS: - 15 ~ + 15<br />
TREBLE: - 15 ~ + 15<br />
BALANCE: L 15 ~ R 15<br />
FADER: F 15 ~ R 15<br />
MORE AUDIO SETUP<br />
SUB-WF FRQ: 80HZ – 120HZ – 160HZ – OFF – 80HZ<br />
SUB-WF VOL: 0 ~ 15<br />
BEEP SOUND: ON / OFF<br />
50
CLOCK SETUP<br />
CLOCK:<br />
12H / 24H<br />
DISPLAY:<br />
ON / OFF<br />
HOUR: 00 ~ 23<br />
MINUTE: 00 ~ 59<br />
51
DVD SETUP MUNE<br />
SETUP MENU OPERATION<br />
Press the [SETUP] button of remote control to enter the DVD SETUP Menu.<br />
Press the [] buttons to switch the main menus as following:<br />
SYSTEM – LANGUAGE – AUDIO – VIDEO – SPEAKER – DIGITAL<br />
Press the [∧] / [∨] buttons to enter the submenus from main menus.<br />
Press the [∧] button on the top submenu or press the [∨] button on the bottom of<br />
submenu to exit the submenus to main menus.<br />
Press the [∧] / [∨] buttons to select the submenus as your need.<br />
Press the [>] or [ENTER] buttons to enter the items of submenus.<br />
Press the [
SYSTEM MENU<br />
TV SYSTEM<br />
Following options are available for the TV Display:<br />
NTSC<br />
SCREEN SAVER<br />
Select ON or OFF.<br />
VIDEO<br />
Following options are available for the TV Display:<br />
INTERLACE-YUV TV-RGB P-SCAN YPBPR S-VIDEO<br />
TV TYPE<br />
Following options are available for the TV Display:<br />
4 : 3 PS 4 : 3 LB 16 : 9<br />
PASSWORD<br />
Setup the password for Parental Ratings change. The default password is 0000.<br />
RATING<br />
Following options are available for the Parental Ratings:<br />
1 KID SAFE 2 G 3 PG 4 PG 13<br />
5 PG - R 6 R 7 NC - 17 8 ADULT<br />
The Parental Ratings could be changed after the correct password input.<br />
DEFAULT<br />
The unit will restore all default settings by selecting this option.<br />
53
LANGUAGE SETUP<br />
OSD LANGUAGE<br />
Following options are available for the OSD LANGUAGE:<br />
ENGLISH GERMAN SPANISH FRENCH PORTUGUESE<br />
ITALIAN RUSSIAN DUTCH SWEDISH KOREAN<br />
DANISH NORWEGIAN POLISH HUNGARIAN<br />
AUDIO LANGUAGE<br />
Following options are available for the AUDIO LANGUAGE:<br />
ENGLISH GERMAN SPANISH FRENCH PORTUGUESE<br />
ITALIAN RUSSIAN DUTCH SWEDISH KOREAN<br />
DANISH NORWEGIAN POLISH HUNGARIAN<br />
SUBTITLE LANGUAGE<br />
Following options are available for the SUBTITLE LANGUAGE:<br />
ENGLISH GERMAN SPANISH FRENCH PORTUGUESE<br />
ITALIAN RUSSIAN DUTCH SWEDISH KOREAN<br />
DANISH NORWEGIAN POLISH HUNGARIAN<br />
MENU LANGUAGE<br />
Following options are available for the MENU LANGUAGE:<br />
ENGLISH GERMAN SPANISH FRENCH PORTUGUESE<br />
ITALIAN RUSSIAN DUTCH SWEDISH KOREAN<br />
DANISH NORWEGIAN POLISH HUNGARIAN<br />
DIVX LANGUAGE<br />
Following options are available for the DIVX LANGUAGE:<br />
CENTRAL EU<br />
WESTERN EU<br />
KOREAN<br />
54
AUDIO SETUP<br />
AUDIO OUT<br />
Following options are available for the AUDIO OUT:<br />
SPDIF / OFF SPDIF / RAW SPDIF / PCM<br />
KEY<br />
Following options are available for the KEY:<br />
b -4 -2 0 +2 +4 #<br />
VIDEO SETUP<br />
BRIGHTNESS<br />
Following options are available for the BRIGHTNESS:<br />
0 2 4 6 8 10 12<br />
55
CONTRAST<br />
Following options are available for the CONTRAST:<br />
0 2 4 6 8 10 12<br />
HUE<br />
Following options are available for the HUE:<br />
-6 -4 -2 0 +2 +4 +6<br />
SATURATION<br />
Following options are available for the SATURATION:<br />
0 2 4 6 8 10 12<br />
SPEAKER SETUP<br />
DOWNMIX<br />
Following options are available for the DOWNMIX:<br />
LT / RT Stereo VSS<br />
BASS MODE<br />
Following options are available for the BASS MODE:<br />
ALL LG SPK ALL SM SPK MIXED SPK<br />
56
DIGITAL SETUP<br />
OP MODE<br />
Following options are available for the OP MODE:<br />
LINE OUT<br />
RF REMOD<br />
DYNAMIC RANGE<br />
Following options are available for the DYNAMIC RANGE:<br />
FULL 6 / 8 4/ 8 2 /8 OFF<br />
DUAL MONO<br />
Following options are available for the DUAL MONO:<br />
STEREO MONO L MONO R MIX MONO<br />
57
TROUBLE SHOOTING<br />
If any of problem persists after checking the below list, Please consult your<br />
nearest service dealer.<br />
Never attempt to disassemble and repair unit personally.<br />
Problem Cause Corrective Action<br />
GENERAL<br />
Unit will not power<br />
on<br />
Remote control<br />
does not<br />
No/low audio<br />
output<br />
Poor sound quality<br />
or distortion<br />
Unit resets itself<br />
when engine is off<br />
TUNER<br />
Weak station<br />
searching<br />
ACC Fuse blown<br />
Car battery fuse blown<br />
illegal operation<br />
Battery depleted<br />
Battery installed incorrectly<br />
Improper audio output<br />
connection Volume set too low<br />
Speakers damaged<br />
Heavily biased volume balance<br />
Speakers wiring is in contact<br />
with metal Part or car<br />
Pirate disc is in use<br />
Speaker power rating not<br />
compatible with unit<br />
Speaker is shorted<br />
Incorrect connection between<br />
ACC and Positive battery wire<br />
Auto antenna is not fully<br />
extended<br />
Auto antenna not properly<br />
connected LOCAL function is<br />
activated<br />
Install new fuse with correct rating<br />
Install new fuse with correct rating<br />
Press the RESET button located in<br />
the bottom right<br />
corner of the front panel<br />
Replace battery with new one<br />
Remove battery and install correctly<br />
Check wiring and correct<br />
Increase volume level<br />
Review wiring diagram and check<br />
MUTE connection Replace speakers<br />
Adjust the channel balance to the<br />
center position Insulate all speaker<br />
wiring connections<br />
Use original copy<br />
Connect proper speakers<br />
Check speaker contact<br />
Check wiring and correct<br />
Connect the auto antenna control<br />
cable properly Connect the auto<br />
antenna control cable properly Turn<br />
LOCAL function off<br />
58
Problem Cause Corrective Action<br />
TFT MONITOR<br />
Monitor does not<br />
open automatically<br />
No image<br />
Flashing image or<br />
interference<br />
appears on screen<br />
Prolonged image<br />
or improper<br />
height/width ratio<br />
display<br />
Monitor stops at<br />
incorrect position<br />
VCD<br />
TFT Auto Open is turned of<br />
Incorrect connection to parking<br />
brake wire PARKING is activated<br />
and parking brake is not<br />
engaged<br />
DVD is not compatible with<br />
current TV system settings<br />
Image blurred, distorted, or dark<br />
Improper video signal<br />
connections Improper aspect<br />
ratio setup<br />
Moving path is blocked<br />
Turn TFT Auto open on<br />
Check wiring and correct<br />
Stop vehicle in safe place and apply<br />
parking brake<br />
Change setup to accommodate disc<br />
Check wiring and correct<br />
Use correct aspect ratio setting<br />
Press OPEN key to restart monitor<br />
movement<br />
Cannot insert disc Disc already inside unit Eject current disc and insert new one<br />
Disc does not play<br />
back<br />
Image blurred ,<br />
distorted, or dark<br />
PBC cannot be<br />
used during VCD<br />
playback<br />
No repeat or<br />
searching while<br />
playing VCD<br />
Disc is warped or scratched<br />
Disc is dirty or wet<br />
Incompatible disc is used<br />
Disc rating exceeds Parental<br />
Lock rating limit<br />
Disc region code is not<br />
compatible with unit<br />
Disc is inserted upside down<br />
Disc is illegally copied<br />
PBC is not available on the disc<br />
PBC is on<br />
Use disc in good condition<br />
Clean disc with soft cloth<br />
Use compatible disc Change parental<br />
Lock settings to lower restriction<br />
Use compatible disc<br />
Change Parental Lock settings to<br />
lower restriction Use disc with proper<br />
region cod<br />
Insert disc with label side up<br />
Use original disc<br />
Turn PBC off<br />
59
Problem Cause Corrective Action<br />
MP3<br />
Interruption Disc is dirty or scratched Clean disc or replace<br />
occurred during<br />
playback<br />
Cannot read disc File is damaged/bad recording Recreate disc with good files<br />
Incorrect playback<br />
message<br />
displayed<br />
Message is longer than LCD can<br />
display<br />
Error Messages<br />
Message<br />
Displayed<br />
Loading<br />
No disc<br />
Bad Disc<br />
Unknown disc<br />
Region Error<br />
Error<br />
Cause<br />
Disc is being read<br />
Disc is dirty<br />
Disc is upside down<br />
Disc not present in loading<br />
compartment<br />
Disc is dirty<br />
Disc is upside down<br />
Disc format is not compatible<br />
with this unit<br />
DVD is not compatible with<br />
region code of unit<br />
illegal mechanism operation<br />
Corrective Action<br />
Clean disc with soft cloth<br />
Insert disc with label side up<br />
Insert disc<br />
Clean disc with soft cloth<br />
Insert disc with label side up<br />
Press EJECT key for5 seconds to<br />
reset loading mechanism<br />
60
SPECIFICATIONS<br />
GENERAL<br />
Supply Voltage<br />
: 14.4 V DC (10.8-16 V DC Allowable)<br />
Load Impedance<br />
: 4 Ω<br />
Max Power Output : 50 W x 4<br />
Bass 100Hz<br />
: ≥ 10dB<br />
Treble 10KHz<br />
: ≥ 10dB<br />
Dimension (approx)<br />
: 187 x 188 x 60 mm (d/w/h)<br />
Mounting (approx)<br />
: 160 x 178 x 50 mm (d/w/h)<br />
FM TUNER<br />
Frequency Range<br />
IF<br />
Usable Sensitivity<br />
Stereo Separation<br />
Frequency Response<br />
: 87.5-107.9 MHz (USA)<br />
: 87.5-108.0 MHz (Europe/China)<br />
: 10.7 MHz<br />
: ≤ 15 dBµV<br />
: ≥ 27 dB(1KHz)<br />
: 20-10000 Hz<br />
AM TUNER<br />
Frequency Range<br />
IF<br />
Usable Sensitivity<br />
: 530-1710 KHz (USA)<br />
: 522-1620 KHz (Europe)<br />
: 531-1602 KHz (China)<br />
: 450 KHz<br />
: ≤ 34 dBµV<br />
DVD PLAYER<br />
Signal System<br />
: PAL/NTSC<br />
Signal-to-noise Radio<br />
: ≥ 80 dB(1KHz)<br />
Distortion : ≤ 0.5%<br />
MONITOR<br />
Resolution<br />
: 1440 (w) x 234 (H) (RGB)<br />
Brightness : 350 cd/m 2<br />
Contrast : 300:1<br />
NOTE:<br />
Specifications and design are subject to modification without notice due to<br />
improvements in technology.<br />
61
DISC NOTES<br />
■ Disc formats supported by this player<br />
Handling and Cleaning<br />
● Dirty, dusty, scratched or warped discs will cause misoperation.<br />
● Do not place stickers or make scratches on discs.<br />
● Do not warp discs.<br />
● A disc should always be kept in its case when not in use to prevent from damage.<br />
● Do not place discs in the following places:<br />
1. Direct sunlight.<br />
2. Dirty, dusty and damp areas.<br />
3. High temperature places.<br />
4. On the seats or dashboard.<br />
Disc Cleaning<br />
Use a dry soft cloth to wipe the surface. If the disc is quite dirty, use a soft<br />
cloth slightly moist with isopropyl (rubbing) alcohol. Never use solvent such<br />
as benzene, thinner or conventional record cleaners which may mar the<br />
surface of the disc.<br />
NOTE:<br />
A disc may became somewhat scratched (although not enough to made it unusable),<br />
which depends on your handing it in the condition of the usage environment. These<br />
scratches are not an indication of any problem with the player.<br />
“Dolby” and the double-D symbol are trademarks of Dolby Laboratories.<br />
Repairing New Discs with Rough Spots<br />
A new disc may have rough edges on its inside<br />
and outside edges. If a disc with rough edges is<br />
used, the proper setting will not be performed<br />
and the player will not play the disc. Therefore,<br />
remove the rough edges in advance by using a<br />
ballpoint pen or pencil. To remove the rough edges,<br />
press the side of the pen or pencil against the<br />
inside and outside edges of the disc.<br />
62