
Create successful ePaper yourself
Turn your PDF publications into a flip-book with our unique Google optimized e-Paper software.
Using the sequencer<br />
Using the sequencer<br />
Recording MIDI and audio<br />
Auto Song Setup<br />
The Auto Song Setup feature copies the current<br />
Program or Combination into a Song, and then puts<br />
the system in record‐ready mode. When inspiration<br />
strikes, you can use this function to start recording<br />
immediately. To do so from Program mode:<br />
1. Hold down the ENTER key and press the<br />
SEQUENCER REC/WRITE key.<br />
The Setup to Record dialog box will open and ask “Are<br />
you sure?”<br />
2. Press OK.<br />
The system switches to Sequencer mode, with record<br />
already enabled.<br />
3. Press the START/STOP key to start the sequencer<br />
and begin recording.<br />
With the default settings, there will be a two measure<br />
count‐down before recording starts.<br />
4. Play what you’d like to record, and then press<br />
START/STOP to stop recording.<br />
The sequencer will automatically return to the<br />
beginning of the Song (beat 1 of measure 1, as shown in<br />
the upper right‐hand corner: 001 : 01 . 000).<br />
5. Press START/STOP to hear what you recorded.<br />
Since you started in Program mode, your playing will<br />
have been recorded on Track 1. If you used the Drum<br />
Track, it will have been recorded on Track 10. For<br />
Combinations, more tracks are used as needed.<br />
Adding another MIDI track<br />
1. If KARMA was on, press the front‐panel KARMA<br />
button to turn it off.<br />
2. Turn off the Multi REC check‐box, in the upper<br />
right of the display.<br />
Auto Song Setup turns this on to record the Program’s<br />
Drum Track, or multiple channels in a Combination.<br />
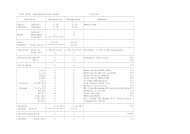
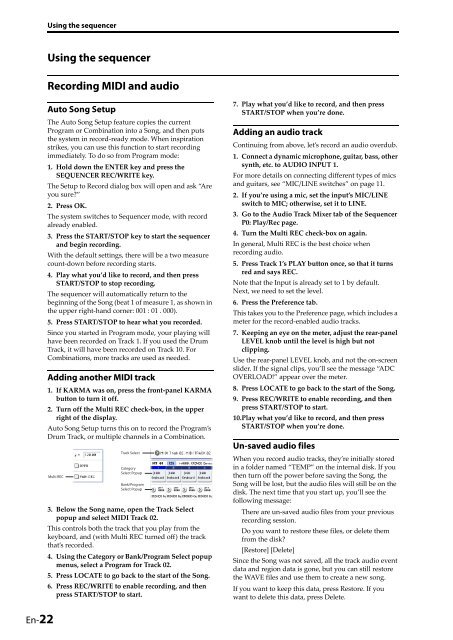
Multi REC<br />
Track Select<br />
Category<br />
Select Popup<br />
Bank/Program<br />
Select Popup<br />
3. Below the Song name, open the Track Select<br />
popup and select MIDI Track 02.<br />
This controls both the track that you play from the<br />
keyboard, and (with Multi REC turned off) the track<br />
that’s recorded.<br />
4. Using the Category or Bank/Program Select popup<br />
menus, select a Program for Track 02.<br />
5. Press LOCATE to go back to the start of the Song.<br />
6. Press REC/WRITE to enable recording, and then<br />
press START/STOP to start.<br />
7. Play what you’d like to record, and then press<br />
START/STOP when you’re done.<br />
Adding an audio track<br />
Continuing from above, let’s record an audio overdub.<br />
1. Connect a dynamic microphone, guitar, bass, other<br />
synth, etc. to AUDIO INPUT 1.<br />
For more details on connecting different types of mics<br />
and guitars, see “MIC/LINE switches” on page 11.<br />
2. If you’re using a mic, set the input’s MIC/LINE<br />
switch to MIC; otherwise, set it to LINE.<br />
3. Go to the Audio Track Mixer tab of the Sequencer<br />
P0: Play/Rec page.<br />
4. Turn the Multi REC check‐box on again.<br />
In general, Multi REC is the best choice when<br />
recording audio.<br />
5. Press Track 1’s PLAY button once, so that it turns<br />
red and says REC.<br />
Note that the Input is already set to 1 by default.<br />
Next, we need to set the level.<br />
6. Press the Preference tab.<br />
This takes you to the Preference page, which includes a<br />
meter for the record‐enabled audio tracks.<br />
7. Keeping an eye on the meter, adjust the rear‐panel<br />
LEVEL knob until the level is high but not<br />
clipping.<br />
Use the rear‐panel LEVEL knob, and not the on‐screen<br />
slider. If the signal clips, you’ll see the message “ADC<br />
OVERLOAD!” appear over the meter.<br />
8. Press LOCATE to go back to the start of the Song.<br />
9. Press REC/WRITE to enable recording, and then<br />
press START/STOP to start.<br />
10.Play what you’d like to record, and then press<br />
START/STOP when you’re done.<br />
Un-saved audio files<br />
When you record audio tracks, they’re initially stored<br />
in a folder named “TEMP” on the internal disk. If you<br />
then turn off the power before saving the Song, the<br />
Song will be lost, but the audio files will still be on the<br />
disk. The next time that you start up, you’ll see the<br />
following message:<br />
There are un‐saved audio files from your previous<br />
recording session.<br />
Do you want to restore these files, or delete them<br />
from the disk?<br />
[Restore] [Delete]<br />
Since the Song was not saved, all the track audio event<br />
data and region data is gone, but you can still restore<br />
the WAVE files and use them to create a new song.<br />
If you want to keep this data, press Restore. If you<br />
want to delete this data, press Delete.<br />
En-22