Download IB for NT32100DVB NEXT TL 20 10 2010-4-12.pdf - Cello
Download IB for NT32100DVB NEXT TL 20 10 2010-4-12.pdf - Cello
Download IB for NT32100DVB NEXT TL 20 10 2010-4-12.pdf - Cello

Create successful ePaper yourself
Turn your PDF publications into a flip-book with our unique Google optimized e-Paper software.
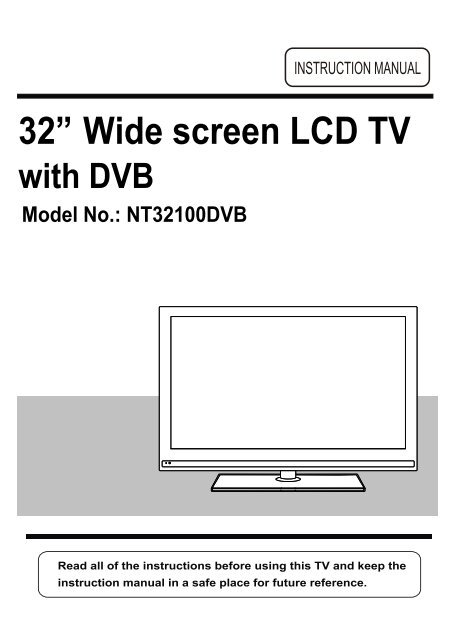
32” Wide screen LCD TV<br />
with DVB<br />
Model No.: <strong>NT32<strong>10</strong>0DVB</strong>
LCD Screen<br />
Although the LCD screen is made with high-precision technology and<br />
99.99% or more of the pixels are effective, black dots may appear or<br />
bright points of light (red, blue or green) may appear constantly on the<br />
LCD screen and is not a malfunction.
CONTENTS<br />
Safety Precautions<br />
Caution 1<br />
Safety In<strong>for</strong>mation 2<br />
Getting Started<br />
Names of each part(Front View) / Accessories<br />
3<br />
Connections 4<br />
Remote control 5<br />
Basic Use<br />
Powering the LCD TV / Selecting input source<br />
Operating the Menu<br />
8<br />
9<br />
Application<br />
Customizing the TV SETTINGS <strong>10</strong><br />
Customizing the PICTURE Settings<br />
Customizing the SOUND Settings<br />
Customizing the SETUP Settings<br />
Customizing the EXTRAS Settings<br />
12<br />
13<br />
14<br />
15<br />
Maintenance and Service<br />
Trouble shooting 16<br />
Specifications 17
Safety Precautions<br />
Caution<br />
The lightening flash with arrowhead symbol inside an equilateral triangle is<br />
intended to alert the user to the presence of un-insulated "dangerous voltage"<br />
within the products enclosure that may be of sufficient magnitude to constitute a<br />
risk of electric shock to the persons.<br />
The exclamation point inside an equilateral triangle is intended to alert the user to<br />
the presence of important operating and maintenance (servicing) instructions in<br />
the literature accompanying the appliance.<br />
Correct disposal of this Product<br />
“Correct Disposal of Product”<br />
This sign indicates that this product may not be disposed of with your regular household waste.<br />
The recycling and separate collection of such products is your responsibility. Please drop off the<br />
above-mentioned waste at a designated place <strong>for</strong> recycling waste electrical and electronic<br />
equipment. If you do not know where to drop off your waste equipment <strong>for</strong> recycling, please<br />
contact your local city office or household waste collection service.<br />
This appliance complies with European Safety and Electrical<br />
directives<br />
Caution:Suffocation Notice!!<br />
Packaging materials are not toys, please keep away from children. Plastic bags can cause suffocation<br />
when pulled over the head.<br />
1
Safety Precautions<br />
Safety In<strong>for</strong>mation<br />
To ensure reliable and safe operation of this equipment, please read carefully all of the<br />
instructions in this user guide, especially the safety in<strong>for</strong>mation below.<br />
Electrical safety<br />
The TV set should only be connected to a mains supply which matches that stated on<br />
the label on the rear of the TV.<br />
To prevent overload, do not share the same mains supply socket with too many other<br />
items of equipment.<br />
- Do not place any connecting wires where they may be stepped on or tripped over.<br />
- Do not place heavy items, which may damage the cables, on them.<br />
- Hold the Mains plug, not the cable, when removing from a socket.<br />
- During a thunderstorm or while leaving the TV <strong>for</strong> long periods, disconnect the<br />
aerial (if outdoor) and the plug from the mains supply socket.<br />
- Do not allow water or moisture to enter the TV. Do NOT use the TV in<br />
wet or moist areas such as Bathrooms, steamy kitchens or near swimming pools.<br />
Pull the plug out immediately, and seek professional help if:<br />
- the mains plug or cable is damaged<br />
- liquid is spilt onto the set, or if it is accidentally exposed to water or moisture<br />
- anything accidentally penetrates the ventilation slots<br />
- the set doesn't work normally.<br />
- Do NOT remove the safety covers. There are no user serviceable parts inside. You<br />
may invalidate the warranty. Qualified personnel must only service this apparatus.<br />
- To avoid battery leakage, remove exhausted batteries from the remote control<br />
handset, or when not using <strong>for</strong> a long period.<br />
- Do NOT break open or throw exhausted batteries on a fire.<br />
Physical safety<br />
Do NOT block ventilation slots in the back cover. You may place the TV in a cabinet,<br />
but ensure at least 5cm (2") clearance all around.<br />
Do NOT tap or shake the TV screen, you may damage the internal circuits. Take good<br />
care of the remote control, do not drop.<br />
To clean the TV use a soft dry cloth. Do NOT use solvents or petrol based fluids. For<br />
stubborn stains, you may use a damp soft cloth with diluted detergent.<br />
2
TV/Radio<br />
Menu<br />
Exit<br />
VOL<br />
Picture<br />
SD1<br />
Help<br />
SD2<br />
Source<br />
abc<br />
-Day<br />
def<br />
ghi jkl mno<br />
pqrs tuv wxyz<br />
Recording Lists<br />
Pic Swap<br />
Info<br />
Sound<br />
+Day<br />
CH<br />
Getting Started<br />
Names of each part<br />
TV/AV MENU CH+ CH- VOL+ VOL- POWER<br />
TV/AV MENU CH+ CH- VOL+ VOL- POWER<br />
LED Indicator<br />
Remote Control<br />
Window(keep clear)<br />
Accessories<br />
TV<br />
Remote Guide<br />
Guide<br />
Quick<br />
Start<br />
USER GUIDE<br />
OK<br />
R<br />
P<br />
DVD<br />
Menu<br />
S<br />
Converter cable<br />
<strong>for</strong> AV IN<br />
USER GUIDE<br />
Remote Guide<br />
1 2 3<br />
4 5 6<br />
7 8 9<br />
SUB 0 TXT<br />
QUICK START GUIDE<br />
Warranty Card<br />
A<br />
B<br />
Batteries <strong>for</strong><br />
Remote Control<br />
Converter cable<br />
<strong>for</strong> YPBPR video<br />
Converter cable<br />
<strong>for</strong> MINI SCART<br />
QUICK START GUIDE<br />
Warranty Card<br />
3
Getting Started<br />
Connections<br />
AC POWER IN<br />
1. AC POWER INPUT: <strong>10</strong>0-240V AC 50/60HZ.<br />
2. Audio out(R/L): Connect to audio input of external equipment.<br />
3. HDMI 1/2/3: (High definition multimedia interface) Connect to the HDMI output on external equipment.<br />
4. VGA: (Video Graphics Adaptor) connect to the VGA on a PC to display PC graphics.<br />
5. PC AUDIO IN: Connect PC audio cable <strong>for</strong> PC sound.<br />
6. COAX: Output to Audio amplifier.<br />
7. Mini SCART 1/2: Connect to scart connectors of dvd players or similar equipment.<br />
8. YPbPr AUDIO: Connect to the YPbPr output of external equipment.<br />
9. AV-IN(AUDIO+VIDEO): Connect to the AV output of external equipment(Audio shared with YPbPr).<br />
<strong>10</strong>. Headphone out: Connect to headphone.<br />
11. RF: <br />
12. Common Interface:<br />
CI slot.<br />
4
Basic Use<br />
Power On / Off the LCD TV<br />
To turn on the LCD TV<br />
Press the power button on the LCD TV or the<br />
indicator will light green.<br />
To turn off the LCD TV<br />
Press the power button on the LCD TV or the<br />
indicator will light red.<br />
button on the remote control, the standby<br />
button on the remote control, the standby<br />
When you initially turn on the LCD TV you will see the first time installation menu as below:<br />
Ensure that the aerial is plugged in to the TV,<br />
Make sure your Remote is in TV mode (by<br />
pressing TV button), switch on the TV by<br />
pressing . You will see the first time<br />
installation menu.<br />
Press the button on the remote control to<br />
start the tuning procedure. This process will<br />
find all available ATV and DTV channels and<br />
store them.<br />
By pressing the Quick Start button the first<br />
time installation can be recalled at any time.<br />
You can select the input source menu by pressing the Source button on the remote control or the<br />
TV / AV button on the LCD TV.<br />
Source<br />
OK<br />
DTV<br />
TV<br />
SCART 1<br />
SCART 2<br />
AV<br />
YPBPR<br />
VGA<br />
HDMI 1<br />
HDMI 2<br />
HDMI 3<br />
8
Basic Use<br />
1. Turn the LCD TV on<br />
2. Press the MENU button on the Remote Control.<br />
<br />
4. Press the EXIT button to exit the Menu.<br />
TV SETTINGS MENU<br />
Allows you to search channels and set up a variety of channel options.<br />
Allows you to customize the sound options and effects.<br />
SETUP MENU:<br />
Allows you to setup a variety of setup options.<br />
DVD Setup<br />
EXTRAS MENU:<br />
Allows you to set up a variety of lock/time and setup options.<br />
ct the required options in the menus.<br />
9
Application<br />
Customizing the TV Settings<br />
Use the and buttons to select the TV SETTINGS menu(as the picture above), press button to enter the<br />
menu.<br />
The TV SETTINGS menu includes the following options :<br />
Auto Scan Press and buttons to select the Country, and press and buttons<br />
to select “Start”, and press OK button to start auto tuning.<br />
DTV Manual Scan Press button to enter the submenu.<br />
Press or button to select a channel<br />
and press OK button to start search.<br />
<strong>10</strong>
Application<br />
Customizing the TV Settings<br />
ATV Manual Tuning Press button to enter the submenu.<br />
Storage To<br />
Select a position to store the program.<br />
Current CH<br />
Select a program you want to tune.<br />
Search Press and buttons to manual search.<br />
Fine-Tune Press and buttons to fine-tune.<br />
Skip<br />
Select “Yes” to skip the program when you<br />
scan the programs by CH+/-<br />
Frequency<br />
Display the current channel’s frequency.<br />
Press RED button to save all the setups you have changed.<br />
Program Edit: Press<br />
button to enter the submenu as the following picture.<br />
SWAP<br />
Delete: Select a channel and press the red button on the remote control, Delete will appear on the right<br />
of the program edit menu next to the channel you have chosen. Press the red button again to confirm<br />
the delete, the channel will be deleted. However if you decide not to continue to delete press the<br />
menu button to quit.<br />
SWAP : Select a program, and press YELLOW button, then you can use and buttons to change the<br />
position of the program, press YELLOW again to confirm the change. Press menu to exit and it will<br />
automatically save the current set.<br />
Skip: Select a channel and press the blue button to label the channel, as long as the channel has a skip label<br />
it will be skipped when searching through the channels with the CH+/- buttons.<br />
Note: The function SWAP can not be used in DTV mode.<br />
CI In<strong>for</strong>mation<br />
Please contact your “pay perview” provider who can supply a viewing card and cam unit with<br />
instructions <strong>for</strong> their use.<br />
11
Application<br />
Use the and buttons to select the PICTURE menu(as the picture above), press button to enter the<br />
menu.<br />
Picture Mode<br />
Choose from Standard, Dynamic, User and Mild.<br />
Note: Contrast, Brightness and Colour are only available and can be adjusted in the User mode<br />
option in the Picture Mode Settings.<br />
Contrast<br />
Brightness<br />
Colour<br />
Sharpness<br />
Tint<br />
Controls the difference between the brightest and darkest regions of the picture.<br />
Controls the overall brightness of the picture<br />
Control the colour.<br />
Increase this setting to see crisp edges in the picture; decrease it <strong>for</strong> soft edges .<br />
Controls the tint ( NTSC mode only).<br />
Colour Temperature<br />
Choose from Standard, Cool, User and Warm.<br />
Note: Red, Green and Blue are only available in PC, VGA mode when in Colour Temperature Mode.<br />
Aspect Ratio<br />
Noise Reduction<br />
Choose from Auto, 4:3, 16:9, Zoom1 and Zoom2.<br />
Reduce any interference noise by selecting “ON”.<br />
12
Application<br />
Use the and buttons to select the SOUND menu(as the picture above), press button to enter the<br />
menu.<br />
Sound Mode<br />
Allows you to select among: Standard, Music, Movie, Sports and User.<br />
Treble (Can be adjusted when the sound mode is set to User)<br />
Controls the relative intensity of higher pitched sounds.<br />
Bass (Can be adjusted when the sound mode is set to User)<br />
Controls the relative intensity of lower pitched sounds.<br />
Balance<br />
Auto Volume<br />
Surround Sound<br />
To adjust the balance of the left and right sound track, or turn off the volume of the<br />
left and right sound track.<br />
Control the volume of the program automatically when you turn on the function by<br />
selecting “On”.<br />
Turn on/off the surround sound function by selecting “off”/“surround”.<br />
13
Application<br />
Customizing the SETUP Settings<br />
Use the and buttons to select the OPTION menu(as the picture above), press button to enter the<br />
menu.<br />
The SETUP menu includes the following options:<br />
Language Allows you to select menu language.<br />
Audio Language (can be selected in tv mode)<br />
Allows you to select audio language.<br />
Subtitle Language (can be selected in tv mode)<br />
Allows you to select subtitle language.<br />
Country<br />
Defaulted to UK.<br />
Reset Setting Press button to restore factory default.<br />
14
Application<br />
Customizing the EXTRAS Settings<br />
Use the and buttons to select the EXTRAS menu(as the picture above), press button to enter the<br />
menu.<br />
The EXTRAS menu includes the following options :<br />
Set Password<br />
Child Lock<br />
Sleep Timer<br />
Set pin code. The default is 0000. If the Pin code has been changed you<br />
must enter the present code.<br />
New : Enter the new password.<br />
Confirm: Enter the new password and press OK to complete the change.<br />
Lock the channel, you have to enter the code to view the channel. Use <br />
button to select the channel, and press the green button on the remote control<br />
to set, and there will be a “ ” on the channel, press the green button again to<br />
cancel.<br />
Allows you to setup the sleep timer among: <strong>10</strong>min, <strong>20</strong>min, 30min, 60min, 90min,1<strong>20</strong>min,<br />
180min, 240min and off.<br />
First Time Installation<br />
* Please ensure that the aerial is connected to the connector labelled “RF”<br />
on the rear of the TV. Press “OK” to start the tuning process.<br />
* You can select “Language”(OSD display language), When you have<br />
selected, press buttons to select “OK”.<br />
PC Setup(only in VGA mode)<br />
Press<br />
button to enter the submenu to adjust the picture of the screen.<br />
15
Maintenance and Service<br />
Trouble shooting<br />
Do not use other functions that are not mentioned in this user’s manual.<br />
In case a problem occurs with your LCD TV, please take the following steps first.<br />
If you still have the problem, turn the power off and contact your dealer or an authorized service center.<br />
Problem<br />
No power to TV.<br />
Check all connections.<br />
Action<br />
The screen appears too<br />
slowly after the power is turned on.<br />
Screen is too bright or too dark.<br />
Screen is too large or too small.<br />
Stripes appear on the screen<br />
and it shakes.<br />
Blocky image or image stops intermittently<br />
This problem occurs <strong>for</strong> a brief time in the process of<br />
image elimination processing in order to hide temporary screen noise<br />
that occurs when the power is turned on. But if the screen does not<br />
come after 1 minute contact your dealer or an authorized service<br />
center.<br />
Per<strong>for</strong>m brightness adjustment or Contrast adjustment.<br />
Adjust the screen size.<br />
Maybe due to interference from mobile phones, hairdryers or electric drills<br />
Check all aerial connections. Try using aerial booster.<br />
Screen appears, Voice is not heard<br />
Remote control does not work<br />
1. Press the "MUTE"button.<br />
2. Increase the sound level by pressing volume adjustment button.<br />
3. Check if sound terminal of external input is connected properly.<br />
4. Check if audio cables are connected properly.<br />
5. Select and check the other input.<br />
If the sound still does not work and the other channels are the<br />
same after you have done as the above, contact your dealer or<br />
an authorized service center.<br />
1. Check if main power is On.<br />
2. Check that the batteries of the remote controller were loaded<br />
properly.<br />
3. Check to see if any obstacle exists between the LCD TV and<br />
the remote control , then remove it, if any.<br />
4. If the batteries have no power, replace them with two new<br />
batteries.<br />
5. Ensure the remote control is in TV mode by pressing the TV<br />
button.<br />
This LCD TV is <strong>for</strong> household use and registered as harmless on electromagnetic waves.<br />
There<strong>for</strong>e, you can use it in every location as well as residential areas.<br />
16
Maintenance and Service<br />
Specifications<br />
TV<br />
TVSystem<br />
PAL BG/DK/I<br />
Screen size<br />
32"(diagonal)<br />
Resolution<br />
19<strong>20</strong>x<strong>10</strong>80pixels<br />
Aerial input 75 (unbalanced)<br />
Audio output power 2x6W<br />
Power Consumption<br />
Weight<br />
AC <strong>10</strong>0-240V 50/60Hz <strong>10</strong>0W<br />
11.4 kg<br />
Remote control<br />
Type<br />
Control distance<br />
Control angle<br />
Batteries<br />
Dimensions<br />
Weight<br />
infrared<br />
5m<br />
30° (horizontal)<br />
2 x 1.5 V, size AA<br />
60 x <strong>20</strong>4 x 32mm<br />
140 g (without battery)<br />
17
MU0315981AUMT00