MicroBPM manual.pdf - Red Sound Systems
MicroBPM manual.pdf - Red Sound Systems
MicroBPM manual.pdf - Red Sound Systems

You also want an ePaper? Increase the reach of your titles
YUMPU automatically turns print PDFs into web optimized ePapers that Google loves.
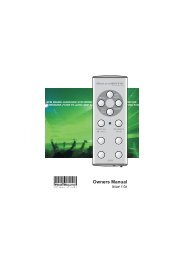
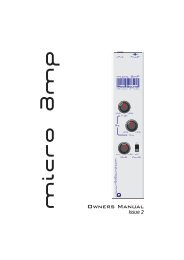
FRONT PANEL/CONNECTORS<br />
FRONT PANEL CONTROLS AND<br />
CONNECTORS<br />
1<br />
2<br />
3<br />
Here’s a quick guide to the controls and connectors<br />
on the MICRO BPM.<br />
1 AUDIO INPUT - Connector<br />
Use the input cable ( supplied) to connect this<br />
socket to the headphone monitor output on your<br />
mixing desk.<br />
4<br />
5<br />
2 AUDIO INPUT LEVEL - Indicator<br />
Use this bi-colour red/green LED to maintain the<br />
ideal input level. See ‘ Setting the correct Input<br />
Level ’ on page 3.<br />
3 POWER IN - Connector<br />
Connect the output plug of the AC adaptor<br />
supplied with the MICRO BPM to this socket.<br />
(or optional Rechargeable Battery Pack)<br />
-<br />
+<br />
4 BEAT - Indicator<br />
This LED flashes on each beat to visually indicate<br />
the tempo.<br />
6<br />
5 BPM - Display<br />
The four digit BPM reading from the monitored<br />
audio signal will be displayed here.<br />
-<br />
+<br />
6 EQUALIZATION - Rotary controls<br />
The centre-click, High (6.5kHz) and Low (100Hz)<br />
EQ controls can be used to cut or boost the audio<br />
signal whenever adjustment is required.<br />
7<br />
7 LEVEL - Rotary control<br />
This knob controls the output level to the<br />
connected headphones.<br />
8 HEADPHONE OUT - Connector<br />
Connect the plug from your headphones to this<br />
6.3mm gold-plated socket.<br />
9 STEREO / MONO - Switch<br />
Use this switch to monitor the audio signal in<br />
stereo (up) or mono (down).<br />
/<br />
8 9<br />
PAGE<br />
2