SoundBITE micro MANUAL issue1... - Red Sound Systems
SoundBITE micro MANUAL issue1... - Red Sound Systems
SoundBITE micro MANUAL issue1... - Red Sound Systems

Create successful ePaper yourself
Turn your PDF publications into a flip-book with our unique Google optimized e-Paper software.
ZER... FILTER FX... AUTO LOOP SAMPLER... BPM ENGINE...AUDIO/MIDI SYNCHRONIZER...FILTER FX...AUTO LOOP SAMPLER...<br />
AMPLER...BPM ENGINE...AUDIO/MIDI SYNCHRONIZER...FILTER FX...AUTO LOOP SAMPLER...BPM ENGINE...AUDIO/MIDI SYNCHR<br />
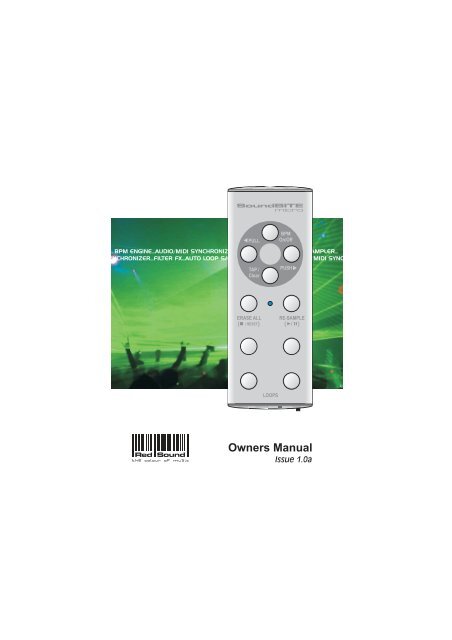
Owners Manual<br />
Issue 1.0a
Introduction<br />
Welcome<br />
Congratulations! By purchasing the new <strong><strong>Sound</strong>BITE</strong> <strong>micro</strong> you<br />
have joined an exclusive club of re-mixers and Djs who have<br />
discovered the future of DJ’ing - using automatic loop samples to<br />
remix tracks on the fly and mixing MIDI sequencer audio with<br />
CD/Vinyl playback in real-time!<br />
The loop sampler section is based on our successful <strong><strong>Sound</strong>BITE</strong><br />
model. You can make 24-bit loop samples (at 96kHz) in real-time at<br />
the touch of a button without missing a beat! What's more, you can<br />
automatically sync together up to four loops with equal ease.<br />
Previously, to make MIDI happen in time with music was a matter of<br />
painstaking and time-consuming tweaking of MIDI tempos and<br />
sound source pitch controls to keep them even remotely<br />
synchronised. The <strong><strong>Sound</strong>BITE</strong> <strong>micro</strong> automatically synchronises<br />
audio and MIDI with key features to further simplify and enhance<br />
your performance.<br />
At the heart of the <strong><strong>Sound</strong>BITE</strong> <strong>micro</strong> is <strong>Red</strong> <strong>Sound</strong>'s highly<br />
acclaimed BPM Analysis Engine (now enhanced to ‘V3’ for<br />
improved performance!), which shoulders the responsibility of<br />
calculating the tempo of the music. This leaves you free to<br />
concentrate on mixing the loop samples and/or adjusting the realtime<br />
controls on your MIDI sequencer.<br />
With straight-forward connections and setup, a compact palm-sized<br />
case and fully portable battery operation, the <strong><strong>Sound</strong>BITE</strong> <strong>micro</strong> will<br />
integrate perfectly into any DJ/studio setup.<br />
<strong><strong>Sound</strong>BITE</strong> <strong>micro</strong> will definitely transform your live performance or<br />
studio re-mix and one last thing: don't worry, you can't go wrong…<br />
<strong><strong>Sound</strong>BITE</strong> <strong>micro</strong> won't let you!<br />
1
Controls & Connections<br />
Top Panel<br />
1<br />
2<br />
3<br />
7<br />
4 6<br />
5<br />
1. BPM ON/OFF: use this button to disengage and re-engage the<br />
BPM engine. Also, this button switches the power on/off.<br />
2. PULL/PUSH: use these buttons to adjust the synchronization<br />
between the loops/midi clock and audio input.<br />
3. TAP/CLEAR: use this button to manually tap in a tempo or clear<br />
the current BPM value. Also, the BPM range can be set and<br />
[FILTER] mode can be accessed when this button is pressed and<br />
held down.<br />
2
Controls & Connections<br />
4. ERASE ALL (STOP/RESET): in [LOOP] mode, use this button to<br />
instantly erase all the recorded loops. In [MIDI] mode, use this<br />
button to stop/reset the MIDI clock output.<br />
5. LOOPS: use these four buttons to record, playback and mute the<br />
four loop samples.<br />
6. RE-SAMPLE: in [LOOP] mode, use this button to re-sample<br />
(over-record) any pre-recorded loops. In [MIDI] mode, use this<br />
button to run/pause the MIDI clock output.<br />
7. INDICATOR: this tri-colour led indicates various operational<br />
conditions such as BPM engine lock, battery condition etc.<br />
Front Panel<br />
1 2 3 4<br />
1. MIDI IN: use this socket to merge your other MIDI output signals<br />
with the <strong><strong>Sound</strong>BITE</strong> <strong>micro</strong>’s own MIDI clock (only use the special<br />
<strong>Red</strong> <strong>Sound</strong> MIDI adaptor cable supplied!).<br />
2. MIDI OUT: use this socket to send the MIDI clock/merged signal<br />
to your MIDI sequencer (only use the special <strong>Red</strong> <strong>Sound</strong> MIDI<br />
adaptor cable supplied!).<br />
3. HEADPHONES: use this socket to connect your headphones.<br />
4. MODE: use this switch to select [MIDI] or [LOOP] control modes.<br />
3
Controls & Connections<br />
Rear Panel<br />
1 2 3<br />
1. LOOPS OUT: use this socket to connect the loop sample output<br />
to a spare channel on your mixing desk.<br />
2. 6VDC POWER: use this socket to connect the supplied power<br />
adapter for AC operation or battery charging.<br />
3. INPUT: use this socket to connect the audio signal from your<br />
mixing desk (headphone monitor feed is recommended)<br />
Quick Start Guide<br />
If you want to quickly try out the performance of <strong><strong>Sound</strong>BITE</strong> <strong>micro</strong>,<br />
please first read the following points carefully:<br />
CONNECTIONS: Before making any connections, make sure that<br />
the power on all your equipment is turned OFF. Connect the audio<br />
and MIDI cables for a basic system setup as shown on page 6.<br />
TURNING ON THE POWER: Make sure all connections have been<br />
made correctly and that the volume controls on the mixing desk and<br />
amplifier system are completely turned down. Connect the power<br />
supply (included) to the ‘power in’ socket on the rear panel of<br />
<strong><strong>Sound</strong>BITE</strong> <strong>micro</strong> and plug it into a suitable AC outlet, then press &<br />
hold the [BPM ON/OFF] button for 2 seconds. Next, turn ON the<br />
power of the mixing desk then the power to the amplifier system.<br />
SETTING UP: Select a suitable audio track (dance orientated<br />
music with defined beat information), start the playback on the<br />
4
Controls & Connections<br />
connected sound source and route this signal to the headphone<br />
monitor output on the mixing desk (check this using the<br />
headphones now connected to the headphone output on<br />
<strong><strong>Sound</strong>BITE</strong> <strong>micro</strong>). The input level is automatically set by the<br />
internal AGC (automatic gain control). The tri-colour indicator should<br />
now change to a [BLUE] indication (the four [LOOP] button<br />
indicators flashing at the BPM rate of the audio track).<br />
RECORDING/PLAYING BACK LOOPS: Ensure the [MODE] switch<br />
is set to the [LOOP] position. Now simply press one of the four loop<br />
buttons whenever you want to start recording a loop - the tri-colour<br />
indicator and selected loop button will flash for the corresponding<br />
number of beats (defaults are 4, 8, 16 & 32 beats) as the loop is<br />
recorded. If for instance, you pressed the 4 beat loop button, the<br />
indicators would flash 4 times and then instantly playback the 4 beat<br />
loop. To mute the loop, simply press the same loop button again<br />
[this button now switches the loop on/off]. Now try recording some<br />
of the other loops and playing them back in combination. To clear all<br />
the loops press & hold the [ERASE ALL] button. To replace a single<br />
loop, press the [RE-SAMPLE] button once, then press the desired<br />
loop button to start the re-sample recording process.<br />
CONTROLLING EXTERNAL MIDI SEQUENCERS: Ensure the<br />
[MODE] switch is set to the [MIDI] position and check that your midi<br />
sequencer is set to receive external midi clock. Now, press the<br />
[RUN/PAUSE] button in time with the beat of the audio input. Your<br />
midi sequencer should start playing in time with the audio input. If<br />
the synchronisation is slightly out, simply use the [PULL/PUSH]<br />
buttons to shift the midi clock position (NOTE: avoid assigning the<br />
midi driven audio back into the headphone monitor as this will<br />
create a feedback loop which will disrupt the synchronisation<br />
performance)<br />
Please read the following “OPERATION” section fully to appreciate<br />
the range of features and facilities <strong><strong>Sound</strong>BITE</strong> <strong>micro</strong> has to offer.<br />
5
Controls & Connections<br />
Connections<br />
OUTPUT CABLE [SUPPLIED]<br />
TWIN RCA TO 3.5mm JACK<br />
INPUT CABLE [SUPPLIED]<br />
6.3mm TO 3.5mm JACK<br />
CONNECT TO<br />
SPARE INPUT<br />
CHANNEL ON<br />
MIXING DESK<br />
R<br />
L<br />
RED PSU<br />
IMPORTANT NOTE !<br />
BEFORE USE, PLEASE FIT THE<br />
CORRECT AC PLUG FOR YOUR<br />
REGION -<br />
(UK - EURO - US/JAPAN - AUS)<br />
TO SUITABLE<br />
AC WALL<br />
SOCKET<br />
(SEE NOTE!)<br />
DJ MIXING DESK<br />
HEADPHONE<br />
MONITOR<br />
OUTPUT<br />
IMPORTANT NOTE !<br />
AVOID ASSIGNING MIDI-DRIVEN<br />
AUDIO TO THE HEADPHONE<br />
MONITOR ON THE MIXING DESK<br />
AS THIS WILL CREATE A FEED-<br />
BACK LOOP WHICH MAY DISRUPT<br />
THE SYNCHRONISATION<br />
MIDI CABLES [SUPPLIED]<br />
5PINDINTOMINIUSB<br />
MIDI<br />
OUT<br />
MIDI<br />
IN<br />
HEADPHONES<br />
AUDIO OUTPUT<br />
COMPUTER<br />
MIDI SEQUENCER<br />
(OR OTHER MIDI SEQUENCER DEVICE)<br />
6
Operation<br />
Battery<br />
Your <strong><strong>Sound</strong>BITE</strong> <strong>micro</strong> contains an internal Polymer Lithium-ion<br />
rechargeable battery. This is non-user accessible/replaceable item.<br />
Should you experience any problems with the battery performance<br />
please contact your local <strong>Red</strong> <strong>Sound</strong> dealer /Distributor for advice.<br />
If the following guidelines are followed the battery should provide<br />
many years of trouble-free operation.<br />
CHARGING: to charge the battery, simply connect the supplied<br />
power adapter to a suitable AC mains outlet - typical recharging<br />
time is approximately 2-3 hours. In [SLEEP] mode the tri-colour<br />
indicator flickers to show battery charge status as follows:<br />
Fast [GREEN] flicker = battery charging<br />
Slow [GREEN] flicker = battery OK<br />
Slow [RED] flicker = battery low<br />
BATTERY LIFE: depending on usage (number of indicators on,<br />
loops recorded etc) the session battery life should be as follows:<br />
Sleep mode = 12 hours +<br />
Active mode = 5>6 hours +<br />
<strong><strong>Sound</strong>BITE</strong> <strong>micro</strong> automatically dims the brightness of all the<br />
indicators whilst running on battery power. When the charger is<br />
plugged in, the indicators will also be dimmed but only until the<br />
battery is fully charged.<br />
TIP! Check for high-brightness indicators to confirm battery is fully<br />
charged.<br />
When the battery voltage drops to a critical level during normal<br />
operation, the tri-colour indicator will show the following warning:<br />
Slow [RED] pulse = Low battery warning<br />
7
Operation<br />
As soon as you see this low battery indication please connect the<br />
charger to a suitable AC outlet to avoid disruption to <strong><strong>Sound</strong>BITE</strong><br />
<strong>micro</strong>’s normal operation.<br />
Battery Tips<br />
* Use only original <strong>Red</strong> <strong>Sound</strong> batteries and chargers<br />
* New batteries or batteries stored for a long time may take more<br />
time to charge<br />
* When charging the battery, keep the <strong><strong>Sound</strong>BITE</strong> <strong>micro</strong> near<br />
normal rom temperature<br />
* When storing your <strong><strong>Sound</strong>BITE</strong> <strong>micro</strong> keep it in a cool, dry place<br />
* Never expose the battery/ <strong><strong>Sound</strong>BITE</strong> <strong>micro</strong> to temperatures<br />
below - 10 C (14F) or above 45 C (113F). Never leave <strong><strong>Sound</strong>BITE</strong><br />
<strong>micro</strong> in a vehicle that may be exposed to direct sunlight<br />
* It is normal for batteries to gradually wear down and require longer<br />
charging times. If you notice a change in your battery life, it is<br />
probably time to purchase a new battery - please contact your local<br />
authorised <strong>Red</strong> <strong>Sound</strong> dealer/distributor for replacement battery<br />
information<br />
WARNING! Never dispose of the battery/ <strong><strong>Sound</strong>BITE</strong> <strong>micro</strong> in a fire<br />
because the battery can explode<br />
8
Operation<br />
Power On/Off<br />
After connecting <strong><strong>Sound</strong>BITE</strong> <strong>micro</strong> to your system as detailed on<br />
page 6, insert the power adapter plug into the rear panel socket<br />
marked [6VDC]. The internal battery will now start charging and<br />
internal power will be switched on however, <strong><strong>Sound</strong>BITE</strong> <strong>micro</strong><br />
features a special [SLEEP] mode to economise on battery life. In<br />
[SLEEP] mode, the tri-colour indicator will flicker at low brightness.<br />
To ‘wake-up’ <strong><strong>Sound</strong>BITE</strong> <strong>micro</strong>, simply press & hold the [BPM<br />
ON/OFF] button for approximately 2 seconds. The tri-colour<br />
indicator will now light [RED] to indicate power is on and the BPM<br />
engine is idle (no beat detected). Your <strong><strong>Sound</strong>BITE</strong> <strong>micro</strong> is now<br />
ready to use!<br />
When you want to conserve battery life, simply press & hold the<br />
[BPM ON/OFF] button again for approximately 2 seconds. All the<br />
indicators will now switch off.<br />
TIP! You can use [SLEEP] mode to store loop samples whilst<br />
travelling. Any loops recorded during normal operation will be stored<br />
in memory for later use. Providing the battery is fully charged you<br />
can store the loops for up to 10 hours.<br />
BPM Range<br />
This is where you set the working range of the BPM engine. There<br />
are three individual operating ranges covering a total range of 60 -<br />
230 BPM. This allows <strong><strong>Sound</strong>BITE</strong> <strong>micro</strong> to work with most dance<br />
music styles, from the slowest Soul to the fastest Drum & Bass. The<br />
default setting is 90-180BPM, which covers most dance music<br />
requirements. To change the range setting, first press & hold the<br />
[TAP/CLEAR] button and then press either:<br />
[PULL] button - selects the low range (60-120BPM) or...<br />
[PUSH] button - selects the high range (115-230BPM)<br />
9
Operation<br />
During this operation the tri-colour indicator shows the following<br />
colours for each BPM range:<br />
[RED] = Low range<br />
[GREEN] = Mid range<br />
[BLUE] = High range<br />
If the BPM engine is active (detecting a beat from the audio input) it<br />
will be automatically cleared when a new range setting is selected.<br />
The BPM engine will then re-calculate the value within the new<br />
range, providing beat information is present.<br />
TIP! BPM values outside of the selected range limit cannot be<br />
accurately analysed. Always check the general tempo of the music<br />
you are playing falls within the selected BPM range. For most<br />
applications we recommend the default Mid range of 90-180BPM.<br />
BPM Aquisition<br />
Start the playback of a suitable audio track (containing definable<br />
beat information). The tri-colour indicator will change from [RED] to<br />
[BLUE] and the four [LOOP] buttons will start flashing in time with<br />
the audio track.<br />
<strong><strong>Sound</strong>BITE</strong> <strong>micro</strong> is now ready to record synchronised loops and<br />
transmit MIDI clock information - please see ‘RECORDING AND<br />
PLAYING LOOPS’ on page 14 and ‘MIDI CLOCK<br />
SYNCHRONISATION’ on page 18 for further information.<br />
During tempo analysis of the audio track, any progressive shift in<br />
tempo (slowly changing the audio playback speed using a CD/vinyl<br />
deck pitch control) should be tracked by <strong><strong>Sound</strong>BITE</strong> <strong>micro</strong>. If the<br />
beat information in the audio track stops (or the audio track itself is<br />
paused etc), the tri-colour indicator will revert to [RED] to show that<br />
there is no active beat lock.<br />
10
Operation<br />
The tri-colour indicator shows the following colours for each BPM<br />
engine condition:<br />
[RED] = Engine IDLE (or BPM lock lost)<br />
[BLUE] = Engine ON and locked-in to audio beat<br />
[BLUE FLASH] = Engine ON but disengaged<br />
TIP! The BPM engine will continue looping samples and sending<br />
MIDI clock at the last detected BPM rate if the regular beats in the<br />
audio track become unavailable. This feature allows the loops/MIDI<br />
clock to continue operating through quiet passages or at the end of<br />
the audio track.<br />
Disengaging the BPM Engine<br />
The BPM engine can be temporarily disengaged when there is a<br />
possibility of erratic audio input tempo disrupting the playback<br />
speed of the loops/MIDI clock (during cueing procedures etc).<br />
To disengage the BPM engine, press the [BPM ON/OFF] button<br />
once (avoid holding it down too long as you may activate [SLEEP]<br />
mode accidently). The tri-colour indicator will flash [BLUE] to<br />
indicate the BPM engine is now disengaged.<br />
The last detected BPM value will be used to control the loop/midi<br />
clock tempo and any further beat information will be ignored until<br />
such time as the BPM engine is re-engaged. You can now cue in<br />
confidence - the loop playback and MIDI clock will remain stable no<br />
matter what happens to the audio input signal.<br />
To re-engage the BPM engine simply press the [BPM ON/OFF]<br />
button once again. The tri-colour indicator will once again light solid<br />
[BLUE] to indicate the BPM engine is now re-engaged and<br />
operating normally.<br />
11
Operation<br />
TAP/Clear<br />
This multi-function button allows you to manually enter a tempo by<br />
hand, clear the current BPM value and also access [FILTER] mode<br />
(see page 20). The [TAP] function should be used to set the BPM<br />
rate if there is no beat information in the audio signal. The [CLEAR]<br />
function can be used to cancel the current BPM reading at any time.<br />
TAP: To enter a BPM value from an ‘IDLE’ condition (no audio beat<br />
detected) use your finger to tap in a tempo on the [TAP] button<br />
(within the BPM range). After 4- 6 taps the tempo should be<br />
recognised and the tri-colour indicator will change to [BLUE].<br />
The [TAP] function can be used to override the BPM engine if it is in<br />
'free-wheeling’ mode only. Use a finger to tap in the new tempo.<br />
After a few taps the updated tempo will be recognised and the loop<br />
playback/MIDI clock will immediately change to the new BPM rate.<br />
The [TAP] function can also be used to assist the BPM engine as it<br />
analyses more complex rhythm tracks. Tapping along with the<br />
tempo of the track can help the software recognise patterns within<br />
the music and so lock-in and adjust the BPM and/or synchronisation<br />
itself.<br />
TIP! Subsequent valid beat information detected by the BPM engine<br />
will override any manual changes made with the [TAP] function.<br />
CLEAR: The current BPM value can be cleared (erased) at any<br />
time to allow for tempo re-calculation. This feature can be useful if<br />
the audio playback tempo changes (major pitch adjustments/new<br />
track starting etc) or if any unusual beat information confuses the<br />
BPM engine.<br />
To clear the current BPM reading and reset <strong><strong>Sound</strong>BITE</strong> <strong>micro</strong> to an<br />
‘IDLE’ status, press and hold down the [TAP/CLEAR] button for<br />
approximately 1 second. After releasing the button the tri-colour<br />
indicator will change to [RED].<br />
12
Operation<br />
The BPM engine will now re-calculate the tempo. However, if no<br />
new tempo is detected, any recorded loops can still be played back<br />
at the last detected BPM rate (the MIDI clock output will also<br />
continue at the same rate) - e.g. the cleared BPM value is<br />
memorised for loop playback/MIDI clock continuity purposes.<br />
Manually Setting a BPM Value<br />
You can manually set a BPM value when there is no beat<br />
information available for the BPM engine to detect or when<br />
[DISENGAGE] mode is selected.<br />
To manually set a BPM value, first ensure the [MODE] switch is set<br />
to the [LOOP] position and the BPM engine is either ‘idle’ (tri-colour<br />
indicator is [RED]) or disengaged (tri-colour indicator is flashing<br />
[BLUE]).<br />
Press and hold down the [RE-SAMPLE] button, then (after a one<br />
second protection period) press the [PULL] button repeatedly to<br />
decrement the BPM value or the [PUSH] button repeatedly to<br />
increment the BPM value (default setting is 120BPM from an idle<br />
condition). The default BPM value will only apply if the BPM engine<br />
has not previously registered a tempo.<br />
Hardware Reset<br />
In the unlikely event that your <strong><strong>Sound</strong>BITE</strong> <strong>micro</strong> stops responding to<br />
controls/functions etc you can easily perform a hardware reset to<br />
reinitialize the software.<br />
To perform a hardware reset, gently press the tip of a pen or other<br />
similar blunt pointed object into the small access hole on the rear<br />
panel (adjacent to the <strong>Red</strong> <strong>Sound</strong> bar-code logo). Afterwards, press<br />
& hold the [BPM ON/OFF] button to ‘wake-up’ the operating system<br />
(NOTE: any recorded loop samples will be lost during a hard reset<br />
operation)<br />
13
Operation<br />
Recording & Playing Loops<br />
You can record and playback up to 4 individual loops, each with<br />
different beat durations. There are no input level settings to adjust<br />
as the on-board AGC (automatic gain control) takes care of all level<br />
adjustments automatically however, please note that loop output<br />
levels may be slightly lower than other line level devices in your<br />
system due to <strong><strong>Sound</strong>BITE</strong> <strong>micro</strong>’s low-voltage battery system.<br />
To record perfect loops, the BPM engine must be active and<br />
registering a BPM value (you can record loops without the BPM<br />
engine but the loops will not be automatically synchronised).<br />
Ensure the [MODE] switch is set to the [LOOP] position!<br />
Your <strong><strong>Sound</strong>BITE</strong> <strong>micro</strong> is factory programmed with four default<br />
preset loop sample lengths (4, 8, 16, 32 beats). The default loops<br />
are configured as follows:<br />
4 BEATS<br />
8 BEATS<br />
16 BEATS<br />
32 BEATS<br />
TIP! You can tailor these loop settings to your own personal<br />
requirements by programming and downloading new software loop<br />
configuration dumps from the <strong>Red</strong> <strong>Sound</strong> website - please visit<br />
www.redsound.com for further information on this exciting feature.<br />
14
Operation<br />
RECORDING LOOPS: Only one loop can be recorded at a time.<br />
From boot-up (or after pressing the [ERASE ALL] button) the four<br />
loop pads will be empty. Ensure that the BPM engine is active (or a<br />
tempo has been tapped in) - the empty loop pads are now identified<br />
by flashing blue indicators in the [LOOP] buttons.<br />
To start recording a loop, simply press the desired [LOOP] button<br />
once.<br />
TIP! When a new BPM is detected, wait a few seconds before<br />
recording the loop. This allows the BPM value to settle and will<br />
ensure more accurate loop synchronisation throughout the track.<br />
During the loop recording process both the tri-colour indicator and<br />
selected loop button will flash [BLUE] to show a ‘count-down’ of the<br />
number of beats in the loop (Example: press the 16 beat loop button<br />
- both indicators will flash 16 times)<br />
When the recording cycle is complete the tri-colour indicator will<br />
revert back to its previous condition. The recorded loop will now<br />
play back automatically, the indicator in the button staying ON to<br />
show that the loop pad contains a sample. To mute the sample<br />
playback, simply press the [LOOP] button again. The indicator in<br />
the button now goes OFF to show that the loop has been muted.<br />
Toggling the button ON/OFF will play/mute the loop accordingly.<br />
RECORDING START POINT: The exact timing of when you press<br />
the loop button is not critical with regard to loop creation e.g. if you<br />
start recording a 4 beat loop slightly after the beat (missing a downbeat<br />
kick drum for instance), <strong><strong>Sound</strong>BITE</strong> <strong>micro</strong> will automatically<br />
create a perfect 4 beat loop and include the kick drum of the<br />
following phrase instead (i.e. the loop will be in synchronisation and<br />
have a precise 4 beat duration no matter where you start the<br />
recording). This feature allows you to easily capture and loop any<br />
section of the audio track.<br />
15
Operation<br />
ABORTING THE LOOP RECORDING: You can abort the loop<br />
recording process at any time during the recording phase by simply<br />
pressing the selected [LOOP] button once again.<br />
Now try recording some more loops using the other loop pads. A<br />
total of four loops can be recorded and played back simultaneously<br />
or individually muted as desired. You can even mute/play prerecorded<br />
loops as another loop pad is being recorded!<br />
TIP! <strong><strong>Sound</strong>BITE</strong> <strong>micro</strong>’s memory is non-volatile so please<br />
remember that any recorded loops could be lost if the internal<br />
battery fully discharges before the power adapter is reconnected. In<br />
power [SLEEP] mode, the loops should be safely retained for a<br />
period of 8 >10 hours.<br />
Erasing Loops<br />
This is where you erase all the loops simultaneously. To erase any<br />
recorded loops simply press the [ERASE ALL] button and hold for<br />
approximately half a second - the tri-colour indicator will flash [RED]<br />
rapidly several times to confirm all recorded loops have been<br />
erased. The four loop pads are now empty and ready for the next<br />
recording session.<br />
Re-Sampling Loops<br />
This is where you re-sample (replace) existing loops individually<br />
without erasing all the loops as detailed in the previous section. You<br />
can also use this mode to record empty loop pads if desired. To<br />
enter this mode press the [RE-SAMPLE] button once.<br />
The indicators in the [LOOP] pads will now flash. Un-recorded loop<br />
pad indicators will flash alternately to those loop pads that contain<br />
recorded samples to identify the two different conditions.<br />
16
Operation<br />
To re-sample (or record) a loop, simply press the desired [LOOP]<br />
button once (whether it is pre-recorded or empty). The tri-colour<br />
indicator and loop button indicator will flash a count-down of the<br />
number of beats in the loop whilst the sample is recording, as with<br />
normal record mode. When the recording process is complete, resample<br />
mode is automatically cancelled.<br />
Other Loop Edit Features<br />
These additional features allow you to control the output level of the<br />
loop samples and vary the synchronisation of the loops in relation to<br />
the incoming audio.<br />
LOOP SYNC ADJUSTMENTS - ALL LOOPS: You can adjust the<br />
synchronisation point of ALL recorded loops simultaneously. This<br />
may be necessary if the BPM engine loses audio beat information<br />
during a track and the loop starts to drift-out of synchronisation, or<br />
you may wish to creatively move the relative position of loops (try<br />
moving the loops half a beat compared to the input audio to achieve<br />
a new syncopated rhythm).<br />
To make an adjustment simply press the [PULL] or [PUSH] buttons<br />
during normal loop playback to adjust the overall loop<br />
synchronisation setting.<br />
LOOP OUTPUT LEVEL: Once a loop has been recorded you can<br />
adjust its output level if required e.g. the Auto Gain Control may<br />
boost quieter passages and so this feature lets you trim the level to<br />
suit.<br />
To boost/cut the output level of a loop, first press and hold down the<br />
[LOOP] button when it is in [PLAY] mode (indicator ON).<br />
RANGE = -20dB to +6dB<br />
17
Operation<br />
To increase/decrease the volume simply use the [PULL] or [PUSH]<br />
buttons whilst still holding down the [LOOP] button. To exit this<br />
mode simply release the [LOOP] button.<br />
LOOP SYNC ADJUSTMENTS - INDIVIDUAL LOOPS: Use this<br />
feature to adjust the synchronisation of each loop independently.<br />
To adjust the synchronisation point of an individual loop, first press<br />
and hold down the [LOOP] button when it is in [MUTE] mode<br />
(button indicator OFF). To increment/decrement the loops’ sync<br />
point simply press the [PULL] or [PUSH] buttons whilst still holding<br />
down the [LOOP] button. As the loop synchronisation is adjusted,<br />
the loop playback will be automatically ‘time stretched’ (playback<br />
speed slowed down or speeded up) whilst keeping the same pitch.<br />
To exit this mode simply release the [LOOP] button.<br />
RECORDING LOOPS WITHOUT THE BPM ENGINE: You can still<br />
record loops, even if there is no beat information available to trigger<br />
the BPM engine. First, manually set a BPM value (see page 13),<br />
then press the [RE-SAMPLE] button and a [LOOP] button to create<br />
the non-synchronised loops.<br />
MIDI Clock Synchronisation<br />
Ensure the [MODE] switch is set to the [MIDI] position!<br />
Set the connected MIDI sequencer to recognise external<br />
MIDI<br />
Clock commands - please consult the sequencer manufacturers<br />
operation manual to make the necessary settings.<br />
Run/Pause Control ( / )<br />
Select a suitable pattern, clip or song on your MIDI sequencer.<br />
18
Operation<br />
RUN: To run the MIDI sequencer, press the [RUN/PAUSE] button<br />
once. The selected pattern in your MIDI sequencer should now be<br />
playing in synchronisation with the audio input track.<br />
TIP! To set the initial alignment of the MIDI sequence and audio<br />
track, press this button quite accurately on the desired beat. Any<br />
misalignment error can easily be corrected using the [PULL] and<br />
[PUSH] buttons - see page 20 for details<br />
NOTE! due to PC MIDI interface latency specifications you may find<br />
there is a short delay between pressing the [RUN/PAUSE] button<br />
and your PC sequencer actually starting the sequence playback. If<br />
this occurs try to anticipate it by pressing [RUN] slightly earlier.<br />
PAUSE: To pause the MIDI sequencer at any time, press the<br />
[RUN/PAUSE] button again. The MIDI sequencer's pattern or song<br />
will be held at the pause position and will only continue from that<br />
point if the [RUN/PAUSE] button is pressed once again.<br />
RESET: If you want to run the MIDI pattern from the start point<br />
again, in [PAUSE] mode press the [STOP/RESET] button once<br />
before pressing the RUN/PAUSE button again. This resets the MIDI<br />
pattern/song to beat 1/bar1 (Note: do not press the [STOP/RESET]<br />
button twice as this will reset the sync position - see next page)<br />
TIP! The <strong><strong>Sound</strong>BITE</strong> <strong>micro</strong> will continue running the MIDI clock<br />
output indefinitely at the last detected BPM rate if the beats in the<br />
audio track become unavailable (vocal sections/end of track etc).<br />
Stop/Reset Control<br />
RESET (BEAT 1/BAR 1): For details on the [RESET] function in<br />
[PAUSE] mode please see above.<br />
STOP: The [STOP] function is used to stop the MIDI clock and<br />
19
Operation<br />
simultaneously reset the midi sequence to beat1/ bar1. If pressed<br />
just once the audio/midi synchronisation will be maintained (the<br />
timing of when you press the [RUN/PAUSE] button will not be<br />
critical - the sync will be automatically locked). If however<br />
[STOP/RESET] is pressed a second time the current audio/midi<br />
synchronisation lock will be cleared (the timing of when you next<br />
press the [RUN] button will need to be made accurately on the<br />
beat). Use this function to reset the sync point if you’re changing<br />
audio tracks or if you’re unhappy with the alignment at any time.<br />
MIDI Clock Synchronisation Adjustments<br />
You can adjust the synchronisation of the MIDI clock output during a<br />
performance. This may be necessary if the BPM engine loses beat<br />
information during a track (the MIDI clock starts to drift-out of<br />
synchronisation with the audio) or you may wish to creatively move<br />
the beat position of the MIDI sequencer.<br />
To make an adjustment (first check that the [MODE] switch is in the<br />
[MIDI] position!) simply use the [PULL] or [PUSH] buttons to retard<br />
or advance the MIDI clock synchronisation position.<br />
Filter Mode<br />
In this mode, <strong><strong>Sound</strong>BITE</strong> <strong>micro</strong> operates as an ‘insert’ FX module<br />
allowing you to use analog style filter effects to process the<br />
incoming audio signal in real-time before feeding it straight back to<br />
the mixing desk input via the [LOOPS OUT] connector. There are<br />
three types of filter available:<br />
LOW-PASS FILTER: this progressively removes the higher<br />
frequencies<br />
HIGH-PASS FILTER - this progressively removes the lower<br />
frequencies<br />
20
Operation<br />
BAND-PASS FILTER - this removes lower and higher frequencies<br />
at the same time leaving a ‘band’ of passable frequencies.<br />
To select [FILTER] mode, press & hold the [TAP/CLEAR] button for<br />
approximately 4 seconds without touching any of the other<br />
buttons/controls. The tri-colour indicator will now change to a<br />
continuous flash-cycle [RED-GREEN-BLUE etc] to show [FILTER]<br />
mode is active.<br />
TIP! The loop sampling functions are disabled in this mode but any<br />
recorded loops will be stored for later use. The MIDI clock will<br />
continue to run when [FILTER] mode is selected.<br />
In [FILTER] mode the [PULL] and [PUSH] buttons become the<br />
master controls for editing the filter sound.<br />
The default setting for<br />
the FILTER is OFF.<br />
To progressively apply the HIGH-PASS filter effect simply press &<br />
hold the [PUSH] button. To progressively apply the LOW-PASS filter<br />
effect simply press & hold the [PULL] button.<br />
The BAND-PASS filter effect can be accessed between the maximum<br />
LOW-PASS and HIGH-PASS filter settings e.g. continuing to<br />
press & hold down either the [PULL] or [PUSH] buttons will ‘morph’<br />
the filter effect into the BAND-PASS filter area. In this respect the<br />
three filter types are seamlessly joined together in a continuous ‘3-<br />
sectioned cycle’ allowing you to move between LOW, BAND and<br />
HIGH filter types by simply pressing & holding either the [PULL] or<br />
[PUSH] buttons.<br />
FILTER RESONANCE: This feature allows you to adjust the level of<br />
filter [RESONANCE]. Filter resonance is a boost in level of the<br />
frequencies around the filter frequency cut-off point. Increasing the<br />
[RESONANCE] value will add more harmonic dynamics to the<br />
sound. To adjust the filter [RESONANCE] setting, first press & hold<br />
21
Operation<br />
the [BPM ON/OFF] button and then press either the [PULL] button<br />
to decrease the value or [PUSH] button to increase the value (Note:<br />
[SLEEP] mode is not available in [FILTER] mode). The normal [RE-<br />
SAMPLE] and 4 x [LOOP] button functions are also de-activated in<br />
this mode however, these buttons can now be used to access<br />
additional [FILTER] mode parameters as follows:<br />
INPUT LEVEL: the analog input signal level can be adjusted to<br />
ensure the straight-thru signal does not overload the hardware and<br />
cause distortion. The software automatically sets a default signal<br />
level when [FILTER] mode is activated. To adjust the input signal<br />
level first press and hold the [RE-SAMPLE] button and then use<br />
either the [PULL] button to decrease the audio signal level or the<br />
[PUSH] button to increase the audio signal level.<br />
FILTER POSITION MEMORY: the 4 x [LOOP] buttons can be used<br />
as ‘hot-keys’ to access and memorize favorite filter settings. The<br />
upper left [LOOP] button (default 4 beat loop button) is ‘hard-wired’<br />
to the OFF setting so you can easily cancel the filter at any time by<br />
simply pressing this button.<br />
To set the user-defined filter memory hot-keys simply use the<br />
[PULL] or [PUSH] button to find the preferred filter setting and then<br />
press and hold (for approx 0.5 seconds) one of the other 3 [LOOP]<br />
buttons. The blue indicator in the selected [LOOP] button will light to<br />
confirm the filter setting has been stored.<br />
The filter can also be controlled by Continuous Controllers via the<br />
MIDI IN port (Frequency = CC 74 and Resonance = CC 75)<br />
To exit [FILTER] mode, simply press & hold the [TAP/CLEAR]<br />
button for 0.5 seconds. The tri-colour indicator will revert to its<br />
[IDLE] mode condition [RED]. The filter ‘hot-key’ settings will be<br />
memorised if you return to [FILTER] mode. The BPM engine/loop<br />
recording and MIDI clock functionality will now be re-activated.<br />
22
Hints & Tips<br />
Disengaging the BPM Engine - A Few Applications<br />
As you cue and/or move the pitch slider back and forth whilst<br />
monitoring in the headphones, all this musical and rhythmical<br />
information gets transmitted to <strong><strong>Sound</strong>BITE</strong> <strong>micro</strong> via PFL. Naturally<br />
this cueing 'tempo' you create is irregular, sending small<br />
fluctuations to <strong><strong>Sound</strong>BITE</strong> <strong>micro</strong>, which will intelligently track the<br />
BPM and time stretch any stored samples accordingly.<br />
The times when you don’t want <strong><strong>Sound</strong>BITE</strong> <strong>micro</strong> to do this are in<br />
the two examples below. Imagine beat mixing against a track on a<br />
turntable whose tempo constantly changes with small fluctuations, it<br />
would be nearly impossible. Therefore, you can instruct the sampler<br />
not to analyse tempo changes (see page 11) and no matter how<br />
fast/slow or in which direction you spin the forthcoming track,<br />
<strong><strong>Sound</strong>BITE</strong> <strong>micro</strong> will play any samples back and run the MIDI<br />
clock at a fixed tempo, steady as a rock.<br />
LEARNING TO MIX - You can use <strong><strong>Sound</strong>BITE</strong> <strong>micro</strong> as an aid to<br />
enhance your beat mix skills. It's always easier to practice beat<br />
mixing against a clean 4/4 rhythm with minimal melody/vocals. Now<br />
you can have an infinite looping clean sample of your choice to<br />
practice mixing against. Just record/playback the loop and disengage<br />
the BPM engine.<br />
MIXING VINYL TO VINYL USING ONE TURNTABLE - Most dance<br />
tracks are structured to have a clean introduction (intro) and exit<br />
(outro) to facilitate mixing and to avoid melody clashes. Now you<br />
can sample either the start or the end of the track (we recommend<br />
16 or 32 beat loops) and, using your crossfader, blend the outgoing<br />
track into your long sample, put a new record on the same turntable<br />
and mix against the sample. Just record/playback the loops and disengage<br />
the BPM engine.<br />
23
Specification<br />
<strong><strong>Sound</strong>BITE</strong> <strong>micro</strong> Specification<br />
Sample rate/Conversion resolution: 96kHz / 24 bit<br />
Polyphony: 4 sample loops<br />
Sample loop length: 4, 8,16, 32 (default)<br />
MIDI Implementation:<br />
System real time / Clock commands = transmitted<br />
Continuous Controllers:<br />
Filter Frequency = 74<br />
Filter Resonance = 75<br />
Effects: Low-Pass / High-Pass / Band-Pass Filters<br />
BPM range: 60 - 230BPM (3 ranges)<br />
Connections: Audio input, Loops output, Monitor output, MIDI In,<br />
MIDI Out, AC adapter input<br />
Power Supply: 6vDC 1A 1mm plug (centre pin +)<br />
Dimensions: 136(H)x51(W)x14(D)mm 51/4”(H)x 2”(W)x 9/16”(D)in<br />
Weight: 100g (4oz)<br />
Accessories (included):<br />
Input Cable: 6.3mm jack to 3.5mm jack<br />
Output Cable: 6.3mm jack to twin RCA<br />
MIDI In/Out: 2 x DIN plug to USB mini plug<br />
Mounting kit: 4 x rubber feet /2xsticky pads<br />
* Specification and /or appearance subject to change without prior<br />
notice due to product improvement.<br />
24