Download Stanton T.55 USB Manual
Download Stanton T.55 USB Manual
Download Stanton T.55 USB Manual
Create successful ePaper yourself
Turn your PDF publications into a flip-book with our unique Google optimized e-Paper software.
IMPORTANT SAFETY PRECAUTIONS<br />
1. Read Instructions - All the safety and operating instructions should be read before this product is operated.<br />
2. Retain Instructions - The safety and operating instructions should be retained for future reference.<br />
3. Heed Warnings - All warnings on the appliance and in the operating instructions should be adhered to.<br />
4. Follow Instructions - All operating and use instructions should be followed.<br />
5. Water and Moisture - The appliance should not be used near water – for example, near a bathtub, washbowl, kitchen sink, laundry<br />
tub, in a wet basement, or near a swimming pool, and the like.<br />
6. Heat - Appliance should be situated away from heat sources such as radiators, heat registers, stoves, or other appliances (including<br />
amplifiers) that produce heat.<br />
7. Power Sources - This product should be operated only from the type of power source indicated on the rating label. If you are not<br />
sure of the type of power supply to your home, consult your product dealer or local power company. For products intended to<br />
operate from battery power, or other sources, refer the operating instructions.<br />
8. Grounding or Polarization - This product may be equipped with a polarized alternating current line plug (a plug having one blade<br />
wider than the other). This plug will fit into the power outlet only one way. This is a safety feature. If you are unable to insert the plug<br />
fully into the outlet, try reversing the plug. If the plug should still fail to fit, contact your electrician to replace your obsolete outlet. Do<br />
not defeat the safety purpose of the polarized plug.<br />
9. Power-Cord Protection - Power-supply cords should be routed so that they are not likely to be walked on or pinched by items placed<br />
upon or against them, paying particular attention to the cord in areas adjacent to plugs, convenience receptacles, and the point<br />
where they exit from the appliance.<br />
10. Cleaning - The appliance should be cleaned only as recommended by the manufacturer. Clean only with a dry cloth.<br />
11. Non-use Periods - The power cord of the appliance should be unplugged from the outlet when left unused for a long period.<br />
12. The apparatus shall not be exposed to dripping or splashing and that no objects filled with liquids, such as vases, shall be placed on<br />
apparatus.<br />
L'appareil ne doit pas être exposé aux écoulements ou aux éclaboussures et aucun objet ne contenant de liquide, tel qu'un vase, ne<br />
doit être placé sur l'objet.<br />
13. Main plug is used as disconnect device and it should remain readily operable during intended use. In order to disconnect the<br />
apparatus from the mains completely, the mains plug should be disconnected from the mains socket outlet completely.<br />
La prise du secteur ne doit pas être obstruée ou doit être accessible pendant son utilisation. Pour être complètement déconnecté de<br />
l'alimentation d'entrée, la prise doit être débranchée du secteur.<br />
14. Damage Requiring Service - The appliance should be serviced by qualified service personnel when:<br />
a. The power-supply cord or the plug has been damaged; or<br />
b. Objects have fallen, or liquid has been spilled into the appliance; or<br />
c. The appliance has been exposed to rain; or<br />
d. The appliance does not appear to operate normally or exhibits a marked change in performance; or<br />
e. The appliance has been dropped, or the enclosure is damage.<br />
15. Servicing - The user should not attempt any service to the appliance beyond that described in the operating instructions. All other<br />
servicing should be referred to qualified service personnel.<br />
16. Ventilation - Slots and openings in the cabinet are provided for ventilation and to ensure reliable operation of the product and to<br />
protect it from overheating, and these openings must not be blocked or covered. The openings should never be blocked by placing<br />
the product on a bed, sofa, rug, or other similar surface. This product should not be placed in a built-in installation such as a<br />
bookcase or rack unless proper ventilation in the manufacturer’s instructions have been adhered to.<br />
17. Attachments - Do not use attachments not recommended by the product manufacturer as they may cause hazard<br />
18. Accessories - Do not place this product on an unstable cart, stand, tripod, bracket, or table. Do not place this product on an unstable<br />
cart, stand, tripod, bracket, or table. The product may fall, causing serious injury to a child or adult, and serious damage to the<br />
product. Use only with a cart, stand, tripod, bracket, or table recommended by the manufacturer, or sold with the product. Any<br />
mounting of the product should follow the manufacturer’s instructions, and should use a mounting accessory recommended by the<br />
manufacturer.<br />
19. Replacement Parts - When replacement parts are required, be sure the service technician has used replacement parts specified by<br />
the manufacturer or have the same characteristics as the original part. Unauthorized substitutions may result in fire, electric shock,<br />
or other hazards.<br />
20. Safety Check - Upon completion of any service or repairs to this product, ask the service technician to perform safety checks to<br />
determine that the product is in proper operating condition.<br />
21. This product complies with EUWEEE regulations. Disposal of end of life product should not be treated as municipal waste. Please<br />
refer to your local regulations for instructions on proper disposal of this product.<br />
22. Carts and Stands - The appliance should be used only with a cart or stand that is recommended by the manufacturer. An appliance<br />
and cart combination should be moved with care. Quick stops, excessive force, and uneven surfaces may cause the appliance and<br />
cart combination to overturn.<br />
23. Warning - The mains plug is used as disconnect device, the disconnect device shall remain readily operable.<br />
24. This equipment is a Class II or double insulated electrical appliance. It has been designed in such a way that it does not require a<br />
safety connection to electrical earth.<br />
25. Caution Marking was located at bottom enclosure of the apparatus.<br />
Les précautions d'emploi sont inscrites en bas de l'appareil.<br />
1
ASSEMBLY<br />
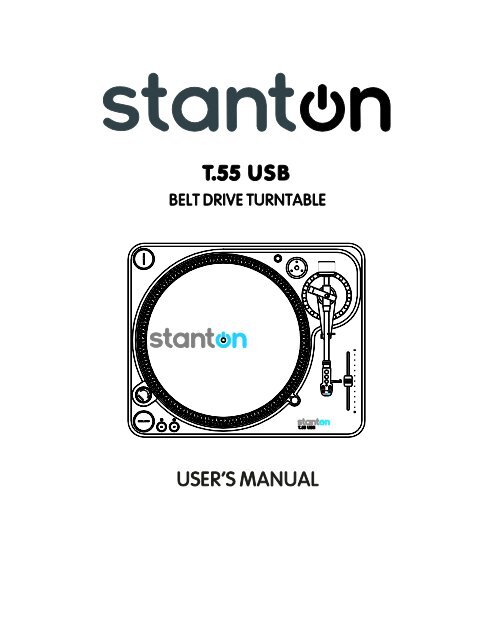
Thank you for purchasing the <strong>T.55</strong> <strong>USB</strong> turntable from <strong>Stanton</strong>. The <strong>T.55</strong> <strong>USB</strong> is built upon <strong>Stanton</strong>’s heritage of designing<br />
audiophile products for the most discriminating listener. Before assembling the <strong>T.55</strong> <strong>USB</strong> please check to make sure the following<br />
items are included with the main unit in the carton.<br />
AC cord<br />
<strong>Stanton</strong> Cartridge pre-mounted on<br />
RCA cable<br />
headshell except on model <strong>T.55</strong><strong>USB</strong>X,<br />
45 rpm adaptor<br />
no cartridge included<br />
Counter weight<br />
iZotope Music & Speech Cleaner<br />
Cloth dust cover<br />
Software<br />
Platter with belt (Belt is located<br />
User <strong>Manual</strong><br />
underneath the platter)<br />
Target light<br />
Slipmat<br />
Confirm all of the above parts are included in the box prior to assembling the turntable.<br />
1) Remove the platter from its protective wrapping and place on the spindle of the main unit.<br />
2) Loop the belt over the motor pulley. Be sure it does not twist.<br />
3) Remove the slipmat from its protective wrapping and place on the platter.<br />
4) Place the counter-weight on the back of the tonearm assembly.<br />
5) If desired, place the 45rpm adaptor in its allocated holder on the main unit.<br />
PLACEMENT<br />
<br />
<br />
<br />
<br />
Do not place the unit in a location where it will be exposed to direct sunlight or near a heating appliance.<br />
Do not place the unit in a location where there is high humidity or a lot of dust.<br />
Cartridge may pick up slight sound pressures or vibrations from the speakers, vibration from the floor or through the air.<br />
The legs have functions for adjusting the height of the unit itself. Adjust the legs to stabilize the main body horizontally.<br />
CONNECTIONS<br />
Before connecting the unit it is advised that you also consult your current equipment instruction manual.<br />
Note: Be sure to turn off the equipment before you make<br />
changes to the different connections.<br />
1. Connect the power cord to an AC outlet.<br />
2. Connect the RCA cable to the PHONO input of your<br />
amplifier.<br />
Output terminals<br />
Amplifier(Receiver)<br />
L (White)<br />
L Channel<br />
R (Red)<br />
R Channel<br />
You can also use a line input by setting the phono / line switch<br />
at the rear of the turntable to line.<br />
3. Connect a PC via <strong>USB</strong> cable.<br />
2
TONEARM AND CARTRIDGE SETTING<br />
The major cause of problems with acoustic performance and skipping on the vinyl is the lack<br />
of proper set up of the needle and turntable adjustments. The needle is designed to operate<br />
at a specific angle to the vinyl. The <strong>T.55</strong> <strong>USB</strong> has several adjustments to correctly position<br />
the needle to the vinyl!<br />
1. The first adjustment is the installation of the cartridge-headshell assembly into the tone arm<br />
tube lock. The <strong>T.55</strong> <strong>USB</strong> includes a <strong>Stanton</strong> cartridge pre-mounted to the headshell. Holding<br />
the tone arm tube in one hand, insert the cartridge-headshell into the tube lock with the other<br />
hand. Turn the lock ring clockwise (when viewed from the rear) until the headshell is locked<br />
tightly into the tone arm. Remove the needle protector from the cartridge and place the<br />
needle on record. View the needle from the front and insure that the needle is perpendicular<br />
to the record surface. If some adjustment is needed, simply loosen the lock ring and rotate<br />
the cartridge headshell until the needle is perpendicular to the record surface. Then re-tighten<br />
the lock ring.<br />
2. The second adjustment is the needle (or stylus) pressure. Start with the cartridge headshell<br />
assembly mounted into the tone arm. Remove any needle protectors provided. With tone arm<br />
free, adjust the tone arm counterweight by rotating the rear section until the tone arm floats in<br />
a balanced condition above the record or mat. Do not allow the needle to drop onto the mat<br />
or the turntable platter during this adjustment. You might damage the needle tip. Now,<br />
carefully hold the tone arm in one hand while rotating the numbered ring on the front of the<br />
counter-weight with the other hand to the “0” setting. Next, without touching the numbered<br />
ring, Rotate the rear counterweight until the desired needle pressure reading is next to the<br />
line on top of the tone arm tube. The recommended stylus pressure for the <strong>Stanton</strong> cartridge<br />
is between two and five grams. NOTE: Counterweight may differ from the one in Figure 2.<br />
OPERATIONS<br />
1. Rotate the power dial clockwise to turn on the power. The speed indicator and the strobe-illuminator will light up.<br />
2. Place a record on the slip mat, when playing a 45rpm record with a large center hole, place the 45-rpm adaptor on the center<br />
spindle.<br />
3. Set the rotation speed (33/45) to match the record.<br />
4. Remove the stylus protector, release the arm clamp.<br />
5. Press the Start/Stop button, the turntable platter will start to rotate.<br />
6. Move the tonearm over the desired groove.<br />
7. When play is finished, move the tonearm to the arm rest, secure the tonearm with the arm clamp.<br />
8. Press the Start/Stop button to stop the platter rotating and rotate the power dial to turn off the power.<br />
MAINTENANCE<br />
- For best results & proper care of your equipment use <strong>Stanton</strong> Vinyl Cleaner (VC-1) for your records and Stylus Cleaner Kit for styli<br />
(SC-4).<br />
- Clean the stylus periodically with a soft brush to prevent the accumulation of dust.<br />
- When the sound becomes distorted or noisy, check the stylus. If worn out, replace it with a new one.<br />
- Do not use any volatile materials such as alcohol, thinner, benzine, etc., as they may harm the paint and damage the housing.<br />
3
CONTROL OVERVIEW<br />
1. Start/Stop - Press this button to start or stop the platter.<br />
2. Strobe dots - The dots around the edge of the platter are used in<br />
conjunction with the light located inside the motor On/Off switch. While<br />
the platter is in rotation, the dots help to indicate the speed of rotation.<br />
The speed is lower than the displayed speed (33,45) when the dots are<br />
flowing to the right. It is higher than the displayed speed (33,45) when<br />
the dots are flowing to the left. When the strobe is stopped, the platter<br />
is rotating at the displayed speed.<br />
3. Slipmat<br />
4. Center spindle<br />
5. Power on/off<br />
- On - Rotate right<br />
- Off - Rotate left<br />
Note: The Power ON/OFF terminates all audio from both RCA & <strong>USB</strong><br />
outputs.<br />
6. Platter revolution speeds<br />
- 33 rpm Press 33<br />
- 45 rpm Press 45<br />
7. Target light - Insert target light to the deck and it will light up.<br />
8. Pitch slider - Use this to change the speed of the platter when the<br />
PITCH indicator is lit.<br />
9. Headshell locking nut - Attach headshell by inserting into the front<br />
end of the tone arm, then turn the locking nut clockwise with the head<br />
shell firmly held horizontally.<br />
10. Tonearm<br />
11. Tonearm clamp and rest - Use this rest for the tone arm and<br />
clamp it in position during transportation.<br />
12. Counterweight - Use this to balance the tonearm and to adjust the<br />
stylus pressure.<br />
13. 45rpm adapter holder - Place the attached 45rpm adapter here.<br />
14. Headshell & Cartridge holder - For preparing / storing a cartridge<br />
on a headshell when cleaning or troubleshooting.<br />
15. Output L&R - This is the standard analog output (RCA jacks)<br />
which can be connected either to a phono or line input on any DJ<br />
mixer, depending on the setting of the phono / line selector.<br />
16. Phono/Line switch - Switches the RCA output to either phono or<br />
line level.<br />
17. <strong>USB</strong> vinyl/<strong>USB</strong> switch - Used for bypassing the phono preamp<br />
from the turntable output when using the <strong>USB</strong> cable only.<br />
18. <strong>USB</strong> socket - Connect the <strong>USB</strong> cable (included) to this socket and<br />
to a <strong>USB</strong> connector on your computer. After connecting the turntable to<br />
your computer, you can record your vinyl to your hard disk using the<br />
included iZotope Music & Speech Cleaner software.<br />
Note: maximum <strong>USB</strong> cable length is 3 meters.<br />
19. Power cord connector - Used to connect the supplied power<br />
cord.<br />
4
CREATING A CD FROM AN LP<br />
The <strong>T.55</strong> <strong>USB</strong> includes a <strong>USB</strong> computer interface and iZotope CD software for Windows and MAC. Users can download the free<br />
Audacity software for recording directly from the <strong>T.55</strong> <strong>USB</strong>. By connecting the <strong>T.55</strong> <strong>USB</strong> to your computer and using the correct<br />
software, you can custom CDs from your record albums.<br />
In addition to creating CDs, you can edit the LP tracks, clean up clicks and noise, and apply special audio effects if desired. You can<br />
even make custom mixes with one track crossfading to another. To take full advantage of these features, be sure to read the Us er<br />
<strong>Manual</strong> or Help files in the software.<br />
AUDACITY SOFTWARE OVERVIEW<br />
(for PC and MAC)<br />
Audacity is free software, licensed under the General Public License (GPL). More information as well as open source code can be<br />
found on the web at http://audacity.sourceforge.net/<br />
Set up procedure<br />
1. Start by connecting your <strong>T.55</strong> <strong>USB</strong> to the computer using a <strong>USB</strong> cable (included).<br />
2. <strong>Download</strong> and install the audacity recording software by visiting http://audacity.sourceforge.net/.<br />
3. Open Audacity.<br />
4. Go to Edit then Preferences.<br />
5. Click Audio I/O tab.<br />
6. Choose recording device <strong>USB</strong> Audio Codec from the drop down menu.<br />
7. Choose Channels (2 Stereo).<br />
8. Select the Software Playthrough (Play new track while recording it) option.<br />
9. Click OK.<br />
5
AUDACITY SOFTWARE OVERVIEW<br />
(for PC and MAC)<br />
Recording & saving tracks<br />
10. When you are ready to record, click the Red record button on the computer.<br />
11. When you have finished the recording, click the Yellow stop button. Click the Green play button to playback your finished<br />
recording. You can now click File and choose Export As AIFF (Macintosh) or Wave (Windows) to save the recording. This will save<br />
the entire recording as one audio file.<br />
12. If you want to record the entire side of an LP, or a continuous selection of songs, repeat steps 1-3 above. When you are<br />
finished, you will be able to see each song as a waveform, with silence in-betwen each song. If you stop the recording and then start<br />
again, the new recording will appear as new audio tracks below the previous recording.<br />
If you want to separate the recorded audio into different tracks, drag the cursor over a song segment in the waveform window to<br />
high light it, and then from the File menu select Export Selection As AIFF (Macintosh) or Wave (Windows). If you want to save it<br />
as an MP3 file, then choose Export Selection As MP3. Give the file a name when prompted. Repeat for each song segment.<br />
13. You can remove silences at the start or end of the recording by draging the cursor over the silent region and then choosing<br />
Delete or Cut from the Edit windows.<br />
14. For a Macintosh, after you have recorded your track, burn them to a CD using the Mac OS X finder, or with other Macintosh CD<br />
creation programs.<br />
For Windows, use Windows Explorer or another Windows CD creation program to burn a CD.<br />
6
This turntable includes the highly regarded Music and Speech Cleaner software application from iZotope Inc.<br />
Music & Speech Cleaner's intuitive step-by-step interface guides you through the cleanup process without slowing you down. Based<br />
on the same advanced noise reduction technology the experts use, the program provides professional-quality results at a nonexpert<br />
price. Music & Speech Cleaner works with a range of compatible file types, meaning it works with your favorite software, like<br />
Apple iMovie or Adobe Premiere Elements. Cleaned files can also be imported into iTunes to create MP3 or AAC files and then<br />
burned to an audio CD.<br />
Installation<br />
To install the software simply insert the CD and start the installer. Full instructions will guide you through the installation procedure.<br />
The serial number can be found on the CD Package and the base of your turntable.<br />
Note:<br />
The Minimum required computer specifications are listed below:<br />
Microsoft Windows 8 (32/64-bit)<br />
Microsoft Windows 7 (32/64-bit)<br />
Microsoft Windows Vista (32/64-bit)<br />
Microsoft Windows XP (SP2 or later) (32-bit)<br />
1GB RAM, 10 MB hard disk space, 800 x 600 monitor resolution (or higher)<br />
Apple Mac OSX 10.8.x (Mountain Lion 64-bit)<br />
Apple Mac OSX 10.7.x (Lion 64-bit)<br />
Apple Mac OSX 10.6.x (Snow Leopard 64-bit)<br />
Apple Mac OSX 10.5.x (Leopard 32-bit)<br />
1GB RAM, 10 MB hard disk space, 800 x 600 monitor resolution (or higher)<br />
7
SPECIFICATIONS<br />
General<br />
Model: <strong>T.55</strong> <strong>USB</strong><br />
Dimensions<br />
452(W) x 370(D) x 87(H)mm<br />
Weight<br />
5.4Kgs<br />
Power supply<br />
AC 100V, 50/60Hz (For Japan)<br />
AC 110V, 60Hz (For Taiwan)<br />
AC 120V, 60Hz (For U.S.A., Canada, Mexico)<br />
AC 220V, 50Hz (For United Arab Emirates, Chile, Argentina)<br />
AC 220V, 60Hz (For Philippines)<br />
AC 230V, 50Hz (For Europe, New Zealand, South Africa, Singapore, Israel)<br />
AC 240V, 50Hz (For Australia, U.K.)<br />
Power consumption 6.5W<br />
Turntable Section<br />
Type<br />
2-speed full manual<br />
Motor<br />
DC motor<br />
Driving Method<br />
Belt drive<br />
Speeds<br />
33 ⅓ and 45rpm<br />
Wow and Flutter<br />
Less than 0.2% WRMS (JIS WTD) with 33⅓rpm<br />
S/N Ratio<br />
More than 50dB (DIN-B)<br />
Pitch Controls +/-10%<br />
Start Time<br />
Less than 1 sec. with 33 ⅓rpm<br />
Braking Time<br />
Less than 1 sec. with 33 ⅓rpm<br />
Time for Speed Change<br />
Less than 1 sec. from 33 ⅓ to 45 rpm.<br />
Less than 1 sec. from 45 to 33 ⅓ rpm.<br />
<strong>USB</strong> Function<br />
<strong>USB</strong> Rec./Play Function<br />
A/D,D/A<br />
16bit 44.1KHz or 48KHz <strong>USB</strong> Selectable<br />
Computer interface<br />
<strong>USB</strong> 1.1 Compliant windows XP or MAC OS X<br />
Tonearm Section<br />
Type<br />
Static balanced straight shaped tonearm with cardan’s suspension<br />
Effective Arm Length<br />
191mm<br />
Tracking Force Adjustment Range 0~4g<br />
Applicable Cartridge Weight 5.5g<br />
Needle Pressure Range 2~5g<br />
Audio Section<br />
Phono Phono Output 2.5~5.0 mV at 1KHz 5cm/sec (HP-4005)<br />
Frequency Response 20Hz-20KHz +1/-3dB<br />
Channel Separation More than 14dB<br />
Channel Balance<br />
Within 2.5dB at 1KHz<br />
Line Line Output Output 45~90 mV at 1KHz Line 5cm/sec (HP-4005)<br />
Frequency Response 20Hz-20KHz/RIAA -lter +1/-3dB (IN:1KHz/4mV)<br />
8
WARRANTY<br />
Thank you for choosing one of Gibson Pro Audio’s brands (<strong>Stanton</strong>, KRK, or Cerwin Vega!).<br />
Your satisfaction is extremely important to us. We proudly stand behind the quality of our work and appreciate that you put your trust in us. Registering<br />
your merchandise will help us guarantee that you are kept up to date on our latest advances.<br />
To Register Merchandise Purchased from an Authorized Gibson Pro Audio Dealer in the U.S.:<br />
Please go to: http://www.gibson.com and register online.<br />
Or you may send your warranty card to:<br />
Gibson Customer Service<br />
309 Plus Park Blvd.<br />
Nashville, TN 37217<br />
If you have any questions you may contact customer service at:<br />
1-800-4GIBSON (1-800-444-2766)<br />
e-mail: service@gibson.com<br />
FOR MERCHANDISE PURCHASED FROM AN AUTHORIZED GIBSON PRO AUDIO DISTRIBUTOR OUTSIDE OF THE US, PLEASE CONTACT THE<br />
DISTRIBUTOR FROM WHOM YOU PURCHASED YOUR MERCHANDISE FOR TO REGISTER YOUR WARRANTY AND FOR HANDLING AND<br />
RESOLUTION OF ALL WARRANTY-RELATED ISSUES.<br />
Gibson Pro Audio Warranty<br />
If at any time your Gibson Pro Audio product (which includes <strong>Stanton</strong>, KRK, or Cerwin Vega! brands) malfunctions as a result of faulty<br />
materials or workmanship, Gibson Pro Audio or one of Gibson Pro Audio’s Authorized Service Centers in the US will repair the defect(s) or replace the<br />
merchandise, as it deems appropriate at its sole discretion.<br />
Warranty Period (from date of Purchase as listed on the Bill of Sale):<br />
<strong>Stanton</strong><br />
One (1) year for all <strong>Stanton</strong> products.<br />
KRK<br />
Three (3) years from all studio monitors.<br />
One (1) year all headphones, computer audio devices, including room correction devices.<br />
Cerwin Vega!<br />
Five (5) years for all passive speaker systems.<br />
Three (3) years for all active speaker systems.<br />
One (1) year for mixers.<br />
Gibson will warrant all replacement parts and repairs for ninety (90) days from the date of original shipment.<br />
In the unlikely event that your merchandise is destroyed, lost or damaged beyond repair while in the possession of Gibson or one of Gibson Pro Audio’s<br />
Authorized Service Centers for repair, Gibson will replace that merchandise with one of the same or most similar style of a value not in excess of the<br />
original purchase price of your merchandise. Any insurance covering the merchandise, including but not limited to c ollector's value insurance, must be<br />
carried by owner at owner's expense.<br />
For the fastest and safest merchandise return, please use the original shipping carton and packaging materials. Gibson cannot be responsible for any<br />
damages incurred during the shipping process due to poor or inadequate packing.<br />
THIS WARRANTY IS EXTENDED TO THE ORIGINAL RETAIL PURCHASER ONLY AND MAY NOT BE TRANSFERRED OR ASSIGNED TO<br />
SUBSEQUENT OWNERS. IN ORDER TO VALIDATE YOUR WARRANTY, AND AS A CONDITION PRECEDENT TO WARRANTY COVERAGE<br />
HEREUNDER, YOU MUST REGISTER YOUR WARRANTY WITHIN FIFTEEN (15) DAYS FOLLOWING THE ORIGINAL DATE OF PURCHASE.YOUR<br />
PROOF OF PURCHASE OR SALES RECEIPT MUST ACCOMPANY ALL REQUESTS FOR WARRANTY COVERAGE.<br />
This warranty is subject to the following limitations:<br />
THIS WARRANTY DOES NOT COVER<br />
1. Any merchandise that has been altered or modified in any way or upon which the serial number has been tampered with or altered.<br />
2. Any merchandise whose warranty card has been altered or upon which false information has been given.<br />
3. Any merchandise that has been damaged due to misuse, negligence, or improper operation.<br />
4. Any merchandise that has been damaged by accident, flood, fire, lightening, or other acts of God.<br />
5. Shipping damage of any kind.<br />
6. Any merchandise that has been subjected to extremes of humidity or temperature.<br />
7. Any merchandise that has been purchased from an unauthorized dealer, or upon which unauthorized repair or service has been performed.<br />
9
GIBSON MAKES NO OTHER EXPRESS WARRANTY OF ANY KIND WHATSOEVER. ALL IMPLIED WARRANTIES, INCLUDING WARRANTIES OF<br />
MERCHANTABILITY AND FITNESS FOR A PARTICULAR PURPOSE, EXCEEDING THE SPECIFIC PROVISIONS OF THIS WARRANTY ARE<br />
HEREBY DISCLAIMED AND EXCLUDED FROM THIS WARRANTY. SOME STATES AND/OR COUNTRIES DO NOT ALLOW THE EXCLUSION OR<br />
LIMITATION OF IMPLIED WARRANTIES SO THAT THE ABOVE MAY NOT APPLY TO YOU.<br />
GIBSON SHALL NOT BE LIABLE FOR ANY SPECIAL, INDIRECT CONSEQUENTIAL, INCIDENTAL OR OTHER SIMILAR DAMAGES SUFFERED BY<br />
THE PURCHASER OR ANY THIRD PARTY, INCLUDING WITHOUT LIMITATION, DAMAGES FOR LOSS OF PROFITS OR BUSINESS OR<br />
DAMAGES RESULTING FROM USE OR PERFORMANCE OF THE MERCHANDISE, WHETHER IN CONTRACT OR IN TORT, EVEN IF GIBSON OR<br />
ITS AUTHORIZED REPRESENTATIVE HAS BEEN ADVISED OF THE POSSIBILITY OF SUCH DAMAGES, AND GIBSON SHALL NOT BE LIABLE<br />
FOR ANY EXPENSES, CLAIMS, OR SUITS ARISING OUT OF OR RELATING TO ANY OF THE FOREGOING.<br />
FOR MERCHANDISE PURCHASED FROM AN AUTHORIZED GIBSON PRO AUDIO DISTRIBUTOR OUTSIDE OF THE US, PLEASE CONTACT THE<br />
DISTRIBUTOR FROM WHOM YOU PURCHASED YOUR MERCHANDISE FOR THE HANDLING AND RESOLUTION OF ALL WARRANTY ISSUES.<br />
FOR THESE PURCHASES, THE ABOVE-DESCRIBED WARRANTY IS NOT APPLICABLE.<br />
How to Obtain Warranty Service<br />
Warranty Service outside the United States:<br />
To initiate a warranty repair, please contact the Authorized Gibson Pro Audio distributor from whom you purchased your merchandise, and follow the<br />
distributor’s return/warranty policy.<br />
Warranty Service for Merchandise Purchased from an Authorized Gibson Pro Audio Dealer in the U.S:<br />
In the event of malfunction of your Gibson Pro Audio merchandise, the Dealer or Owner must call Customer Service @ 1-800-4GIBSON (1-800-444-<br />
2766) and obtain a Return Authorization number from the customer service agent. No merchandise may be returned to Gibson without such prior Return<br />
Authorization, and the Return Authorization number must be written on the outside of the shipping package. The Customer Service agent will provide the<br />
address and additional shipping instructions. Owner must ship the merchandise, freight, and insurance pre-paid to the address provided by the customer<br />
service representative. Only Authorized Gibson Pro Audio Service Centers may perform warranty service and any service performed by unauthorized<br />
persons will void this warranty. Gibson disclaims liability for defects or damage caused by services performed by unauthorized persons or non-warranty<br />
service not performed by Gibson or an Authorized Gibson Pro Audio Service Center.<br />
When contacting Gibson, you must include a complete written description of the malfunction of the merchandise. If non-warranty work is required or<br />
recommended, a quotation will be issued and must be approved by you before any non-warranty work is commenced. You should consider quotations<br />
obtained for non-warranty work immediately and advise the Authorized Gibson Pro Audio Service Center or Gibson of your wishes. You are not required<br />
to purchase non-warranty work in order to obtain service on materials covered by this warranty. Following its inspection of merchandise upon its arrival,<br />
Gibson or the Authorized Gibson Pro Audio Service Center will advise you or your dealer of the approximate date of completion. The repaired<br />
merchandise or part will be returned to you or your dealer, freight collect insured.<br />
No representative or other person is authorized to assume for Gibson any liability except as stated in this warranty. This warranty gives you specific<br />
rights which vary from state to state or from country to country.<br />
For further information, write:<br />
Customer Service Dept.,<br />
Gibson Customer Service<br />
309 Plus Park Blvd.<br />
Nashville, TN 37217<br />
Or call:<br />
1-800-4GIBSON<br />
Microsoft® Windows is a registered trademark of Microsoft® Corp. Apple® OSX is a registered trademark of<br />
Apple® Corp.Virtual DJ is a registered trademark of Atomix Productions<br />
10
T55<strong>USB</strong> – LITS00029 REV-D 8/4/2013<br />
11


