SCS.1d - Stanton
SCS.1d - Stanton
SCS.1d - Stanton

Create successful ePaper yourself
Turn your PDF publications into a flip-book with our unique Google optimized e-Paper software.
<strong>SCS.1d</strong><br />
Deck Control Surface<br />
User Manual
Important Safety Instructions<br />
• Read and follow the provided instructions before operating this unit.<br />
• Adhere to all warnings and security advices, and retain this document for future reference.<br />
Installation: Install the unit in accordance with the provided instructions<br />
Power Supply:<br />
• The unit should be connected to a power supply outlet only of the voltage and frequency marked on its rear panel.<br />
• The power supply cord should be routed so that it is not likely to be walked on or pinched.<br />
• The power supply cord of the unit should be unplugged from the wall outlet when it is to be unused for a long period of time,<br />
or during electrical storms.<br />
Placement and Environment:<br />
• Locate the unit away from direct sunlight and any equipment that produces heat such as power supplies, amplifiers, and heaters.<br />
• Place your <strong>SCS.1d</strong> on stable surfaces, away from vibration and from sources that generate hum or noise, such as transformers,<br />
or electric motors.<br />
• The location and position of the unit should not interfere with its proper ventilation.<br />
• Do not use this unit near water. For example, near a bathtub, washbowl, kitchen sink, laundry tub, in a wet basement, or near a<br />
swimming pool.<br />
• To reduce the risk of fire or electric shock do not expose the equipment to rain or moisture or use it in damp or wet conditions.<br />
• Protect the unit from excessive dirt and dust.<br />
• Avoid drinks spillage, tobacco ash, and smoke (especially that associated with smoke machines).<br />
• Do not place heavy objects on the unit surface.<br />
Cleaning: Unplug the unit from the wall outlet before cleaning. Never use benzine, thinner, or other solvents for cleaning. Use only a<br />
soft damp cloth.<br />
Service:<br />
• The unit contains no user-serviceable parts.<br />
• The manufacturer is not responsible for any damage or personal injury resulting from unauthorized user servicing or modifications.<br />
Please read the warranty.<br />
• The warranty will be void if any unauthorized service by the user is detected.<br />
• If service is required, please contact <strong>Stanton</strong> Tech at +1 954.316.1500 (Option 3)<br />
WARNINg<br />
To reduce the risk of electric shock, do not expose this apparatus to rain or moisture. Ensure that the apparatus is not exposed to splashing and that no objects<br />
filled with liquids, such as vases, are placed on the apparatus.<br />
CAUTION<br />
DO NOT OPEN<br />
RISK OF ELECTRIC SHOCK<br />
CAUTION: To reduce the risk of electric shock, do not remove any cover.<br />
No user serviceable parts inside. Refer servicing to qualified personnel only.<br />
The lighting flash with arrowhead symbol within the equilateral triangle is intended to alert the user to the presence of un-insulated<br />
“dangerous voltage” within the product enclosure that may be significant enough to constitute a risk of electric shock.<br />
The exclamation point within the equilateral triangle is intended to alert the user to the presence of important operation and maintance<br />
(servicing) instructions in the literature accompanying this appliance.<br />
CAUTION<br />
To prevent electric shock, do not use this polarized plug with an extension cord, receptacle or other outlet unless the blades can be fully inserted to prevent blade<br />
exposure.<br />
ii
Contents<br />
Contents<br />
1. Introduction ……………………………………………………………………………………………………………………………………................. 1<br />
1.1 Welcome to the <strong>SCS.1d</strong> ………………………………………………………………….…......….................................................. 1<br />
1.2 Overview ……………………………………………………………………………………………………………………………….……............... 2<br />
1.3 Unpacking ………………………………………………………………………………………………………………….................................. 2<br />
2. Connecting the <strong>SCS.1d</strong> …………………………………………………………………………………………………………………….................. 3<br />
2.1 Connecting to Your Computer ……………………………………………………………………………………………….……........…….. 3<br />
2.2 Connecting to the SCS.1m……………………………………………………………………………………………………........................ 4<br />
2.3 SCS.1m Setups ……………………………………………………………………………………………………………………………................ 4<br />
3 <strong>SCS.1d</strong> Description …………………………………………………………………………………………………………………….…..........…….... 5<br />
3.1 Top Panel Functional Groups ………………………………………………………………………………........................................ 5<br />
3.2 Encoder Section …………………………………………………………………………………………………….……………….........…......... 7<br />
3.3 Trigger Section ………………………………………………………………………………………………………...……........……................ 7<br />
3.4 Platter / Global Section .................................................................................................................................... 8<br />
3.5 Pitch Section ……………………………………………………………………………………………………………...........................……... 9<br />
3.6 Transport Section …………………………………………………………………………………......…………..….…........…................... 9<br />
3.7 Preset Switcher Section ………………………………………………………………………………………………..…......................... 10<br />
4 SCS.1m Software Installation …………………………………………………………………………………………………………............... 11<br />
4.1 Windows XP …………………………………………………………………………………………………………………………….................. 12<br />
4.2 Mac OS X …………………………………………………………………………………………………………………………….…................... 20<br />
5 DaRouter ………………………………………………………………………………………………………………………………………..............…. 24<br />
5.1 About DaRouter ………………………………………………………………………………………………………………….………..........…. 24<br />
5.2 Anatomy of DaRouter ……………………………………………………………………………………………………….…………............. 24<br />
5.2.1 Section A ………………………………………………………………………………………………………………….…………............ 25<br />
5.2.2 Section B ……………………………………………………………………………………………………………….………..........…….. 25<br />
5.2.3 Section C …………………………………………………………………………………………………………………….……..........….. 27<br />
5.3 Using DaRouter …………………………………………………………………………………………………………………..…….….........…. 28<br />
5.4 Loading a Preset ………………………………………………………………………………………………………………….………............. 28<br />
5.5 Using a Preset for the First Time ………………………………………………………………………………………………….........….. 28<br />
6 Troubleshooting ………………………………………………………………………………………………………………….………...............…. 29<br />
7 Specifications ……………………………………………………………………………………………………………………..………..............…... 30<br />
Appendix<br />
Optimizing Computers for 1394 (FireWire) ………………………………………………………………………………….………..........….... 31<br />
- DPC (Windows XP-Vista) .................................................................................................................................... 31<br />
- Windows 1394a Bandwidth Limiting Issue (Windows XP-Vista) ....................................................................... 36<br />
- FireWire Chipsets .............................................................................................................................................. 46<br />
iii
Introduction<br />
1. Introduction<br />
1.1 Welcome to the <strong>SCS.1d</strong>!<br />
Thank you for purchasing <strong>SCS.1d</strong>! The <strong>SCS.1d</strong> (<strong>Stanton</strong> Control System 1deck) is the premier deck control surface for laptop<br />
DJs, remixers, VJs, and producers.<br />
Before we begin, there are a few important issues we would like to bring to your attention.<br />
There is a software component to this hardware. It is called DaRouter. DaRouter is a kind of “MIDI processor” that allows<br />
the use of presets. These presets can be application specific mappings, or generic maps that can be applied to a number of<br />
different software packages. In fact, you may already be familiar with the DaRouter software because it is also used with<br />
our SCS.3 line of controllers. Well, DaRouter is even more important for the SCS.1 controllers than it is for the SCS.3<br />
controllers. This is because the DaRouter software for the SCS.1 controllers also contains the driver for them. So it is<br />
important for you to go to http://www.enterthesystem.com/scs1 to download and install the latest DaRouter software.<br />
This single software package gives you the latest presets and the latest version of your driver. Be sure to keep your DaRouter<br />
software updated so you can take advantage of new presets and features as they become available!<br />
This brings us to the next important issue. Please do not connect the SCS.1 hardware to your computer before you go<br />
through the driver install. Most audio interface installers, FireWire or USB, carry the same warning. We know that when<br />
you buy new gear, most people are excited to hook it all up and see what it can do, but in this case, it is better to wait until<br />
you are prompted. The process will go like this…<br />
• You should connect the power to your <strong>SCS.1d</strong> and locate the FireWire connector, but do not connect it to the computer<br />
yet.<br />
• Download and run the DaRouter installer for the <strong>SCS.1d</strong>. This installer is located at www.enterthesystem.com/scs1<br />
• On Windows a dialog box will open telling you to connect and power up your <strong>SCS.1d</strong>. At this point, connect the<br />
FireWire cable to your computer. On a Mac computer you will just need to install DaRouter first, however no dialog<br />
will show for connecting the units.<br />
The driver will then detect the SCS.1 devices connected to your computer and load the drivers for them. Allow the installer<br />
to continue normally. Following these steps is a good idea for any hardware installation you have, and might save you from<br />
possibly having to troubleshoot a problem later.<br />
Finally, we would like to point out that the descriptions of specific functionality of the <strong>SCS.1d</strong> are generic.<br />
The <strong>SCS.1d</strong> is a MIDI controller and does not generate any audio itself. Although it looks like a CD player or turntable, it in<br />
fact is not. The functionality of a given control on the surface of the <strong>SCS.1d</strong> (like the pitch slider for example) is dependent<br />
on what it is assigned to. We had to start somewhere, so we thought it would be best to describe the functionality of the<br />
generic preset. When you are using other presets, you can click on the Preset Documentation button in DaRouter (it’s the<br />
“?” button) to learn all about how that specific preset works with your new <strong>SCS.1d</strong>.<br />
1
Overview<br />
1.2 Overview<br />
The <strong>SCS.1d</strong> was designed for high-precision software control. Thanks to its straightforward interface and intuitive<br />
ergonomics, the <strong>SCS.1d</strong> provides a host of top-notch features at your fingertips, such as high-torque 10” motorized platter,<br />
100mm motorized pitch fader, velocity-sensitive pads, assignable encoder sections, and much more…<br />
The <strong>SCS.1d</strong> (deck) and the SCS.1m are the main components of the SC System 1; <strong>Stanton</strong>‘s most advanced digital control<br />
system for the professional DJ. You can use the <strong>SCS.1d</strong> in conjunction with the SCS.1m for tight integration and full control<br />
of your DJ/VJ application’s main parameters or with other audio interfaces.<br />
• Adjustable high-torque 10” motorized platter with vinyl surface and superior tracking.<br />
• High-resolution vinyl tracking system allows for super-accurate mixing and scratching.<br />
• 100mm pitch fader motorized to maintain sync with software.<br />
• 4 Velocity-sensitive pads assignable to loops, cue points, etc.<br />
• Assignable Encoder section with 360° of LED feedback.<br />
• LCD “scribble strips” for two-way communication with selected software.<br />
• Familiar Transport section for direct music control.<br />
• Perfect for adding maximum control capabilities into existing DJ software.<br />
• Easily controls multiple virtual decks for powerful multi-channel mixes.<br />
Before you start hooking up your new unit, let’s check what is in the box!<br />
1.3 Unpacking<br />
Please check that you have received the following items:<br />
• (1) <strong>SCS.1d</strong> unit<br />
• (1) FireWire cable<br />
• (1) 4 to 6 pin FireWire adapter<br />
• (1) Power cable and adapter (24V)<br />
• (1) Felt slipmat<br />
• (1) Vinyl control disc<br />
• (1) <strong>SCS.1d</strong> Manual<br />
In addition to the above items, remember that to take advantage of the <strong>SCS.1d</strong> full potential you will need the SCS.1m or<br />
a traditional DJ mixer, a Mac or PC computer, a DJ application, and to download and install DaRouter software. So let’s get<br />
started!<br />
2
Connecting the <strong>SCS.1d</strong><br />
2. Connecting the <strong>SCS.1d</strong><br />
2.1 Connecting to Your Computer<br />
Step 1:<br />
Locate the included power cable and adapter (24V) and connect it to the <strong>SCS.1d</strong> and to<br />
your power source. (Figure 2.1)<br />
Figure 2.1<br />
Note If you own both the SCS.1m and the <strong>SCS.1d</strong>, the power adapters look very similar.<br />
Looking at the output voltage will tell you which is for which component, (e.g., 12V for<br />
the SCS.1m, and 24V for the <strong>SCS.1d</strong>). There is also a label on each of the power cords<br />
to specify which product they are to be used with.<br />
Step 2:<br />
Attach the included FireWire cable to the <strong>SCS.1d</strong>. The FireWire ports are clearly labeled<br />
on the back panel of the <strong>SCS.1d</strong>. (Figure 2.2)<br />
Figure 2.2<br />
Step 3:<br />
Download and run the DaRouter installer for the <strong>SCS.1d</strong>.<br />
A dialog box will open telling you to connect and power up your <strong>SCS.1d</strong>. At this point,<br />
turn the <strong>SCS.1d</strong> on and connect the FireWire cable to your computer’s FireWire port<br />
(Figure 2.3). Do not connect the <strong>SCS.1d</strong> until prompted.<br />
Figure 2.3<br />
On laptops, there are two different types of FireWire ports: 6 and 4 pin. Typically, you will find “full sized” 6 pin ports on<br />
Apple laptops. If your computer has a full sized (6 pin) FireWire port, use the included FireWire cable to connect directly<br />
from the <strong>SCS.1d</strong> to your computer.<br />
Most PCs will have a 4 pin FireWire port. So if you have a 4 pin port on your computer, connect the FireWire cable to the<br />
provided 4 to 6 pin adapter, and then just plug it to your computer’s 4 pin FireWire port. Now that power and FireWire are<br />
connected, we can explore hooking up the <strong>SCS.1d</strong> with the SCS.1m (if used).<br />
3
Connecting to the SCS.1m<br />
2.2 Connecting to the SCS.1m<br />
All of the SCS.1 controllers have two FireWire ports on them, so devices can be chained together if needed.<br />
So when connecting a single <strong>SCS.1d</strong> to the SCS.1m, you would go from the unused FireWire port on the SCS.1m<br />
(Figure 2.4), (the other port is connected to your computer) to an open port on the <strong>SCS.1d</strong>. (Figure 2.5)<br />
Figure 2.4 Figure 2.5<br />
Likewise, if you’re connecting two <strong>SCS.1d</strong>s to a SCS.1m, then you would go from the free FireWire port on the first <strong>SCS.1d</strong><br />
to a port on the second. Any other FireWire devices should go at the end of the chain and not before any of the SCS.1<br />
controllers. Let’s take a look of the SCS.1m Setups.<br />
2.3 <strong>SCS.1d</strong> Setups<br />
The following configurations can be used for the <strong>SCS.1d</strong> for typical use cases:<br />
<strong>SCS.1d</strong> + SCS.1m<br />
This mixer-and-deck configuration can be used to emulate a dual-deck setup by using virtual<br />
decks for controlling transport, loop, and effects, while using the mixer to blend and EQ songs<br />
and sounds. This system is the perfect entry into the world of professional SC System laptop<br />
mixing. (Figure 2.6)<br />
Dual <strong>SCS.1d</strong> + SCS.1m<br />
This setup recreates the “traditional” DJ system, allowing users to have two<br />
physical decks, each representing an on-screen deck (which can easily be<br />
toggled to four decks by using virtual decks). The mixer is used for blending,<br />
channel EQ, etc, in a traditional manner. This setup is tailored towards<br />
professional DJs wanting to replace their existing setup with an SC System<br />
controller-based solution. (Figure 2.7)<br />
Single / Dual <strong>SCS.1d</strong> + traditional DJ mixer<br />
The <strong>SCS.1d</strong>(s) can be used with an existing sound card to send audio outputs<br />
from DJ software into an existing analog DJ mixer. This allows users to<br />
incorporate SC System decks into their system while using their favorite<br />
traditional DJ mixer (Figure 2.8).<br />
Figure 2.6<br />
Figure 2.7<br />
Figure 2.8<br />
4
<strong>SCS.1d</strong> Description<br />
3. <strong>SCS.1d</strong> Description<br />
In this chapter, we will briefly describe the top panel of the <strong>SCS.1d</strong>.<br />
It’s important to understand that the <strong>SCS.1d</strong> is a traditional DJ turntable / CD player “analogy” in a control surface.<br />
This means that while the <strong>SCS.1d</strong> looks like a DJ turntable / CD player, at its core, it is really a control surface that sends and<br />
receives control data to and from a computer. As a control surface, the <strong>SCS.1d</strong>’s functionality is completely derived from<br />
the host application (software) that it is controlling.<br />
The <strong>SCS.1d</strong> also utilizes presets in DaRouter to define its capabilities, which can drastically change its functionality depending<br />
on how the preset is configured. So as we discuss the panel and layout it is important to remember that when running a<br />
specific preset its best to read the documentation associated with that preset as it will explain how the <strong>SCS.1d</strong> is tailored<br />
towards the application it is being used with. So in the below explanations we describe the controls and how they<br />
traditionally may be mapped into an application.<br />
3.1 Top Panel Functional groups<br />
To easily understand the main <strong>SCS.1d</strong> Top Panel, we have divided it in six functional groups:<br />
- Encoder Section<br />
- Trigger Section<br />
- Platter / Global Section<br />
- Pitch Section<br />
- Transport Section<br />
- Preset Switcher Section<br />
On the next page, let’s take a look of the Figure 3.1:<br />
5
Top Panel Functional groups<br />
Top Panel Functional groups (continuation)<br />
Figure 3.1<br />
Now, let’s take a closer look of each of the functional groups.<br />
6
Encoder Section<br />
3.2 Encoder Section<br />
This section consists of four rotary push encoders, each with an LED<br />
encoder ring to indicate the value of the encoder, and an LCD “scribble<br />
strip” that can be used to indicate the functionality of each encoder.<br />
Encoders are used to control variable parameters such as effect levels.<br />
Encoders do not physically stop when you turn them; instead the LED<br />
encoder rings indicate the position of the control you are adjusting.<br />
(Figure 3.2)<br />
Figure 3.2<br />
3.3 Trigger Section<br />
The trigger section consists of four velocity sensitive pads, four LCD<br />
“scribble strips”, and seven clicking switches.<br />
Each pad, switch and screen is backlit by multicolor (red, green, orange)<br />
LED’s. The velocity sensitive pads and switches are typically assigned to<br />
trigger actions such a playing cue points, moving loops or killing<br />
frequencies. The LCD “scribble strips” will display functionality and status<br />
depending on the preset.(Figure 3.3)<br />
Figure 3.3<br />
7
Platter / global Section<br />
3.4 Platter / global Section<br />
This section controls the assignment of the platter as well as global<br />
functionality.<br />
The DECK SELECT button will allow you toggle virtual decks on screen.<br />
In this way when you switch virtual decks, the <strong>SCS.1d</strong> will also change<br />
its state to match the on screen deck. By using one physical <strong>SCS.1d</strong> you<br />
can control multiple virtual decks.<br />
The VINYL, CONTROL and BROWSE buttons all modify the motorized<br />
jogwheel’s functionality within the application. The motorized platter is<br />
normally used for scratching and scrubbing through a song when “VINYL”<br />
is activated. However, the Control button allows the platter to be freely<br />
used as a large parameter control such as scratching an effect. BROWSE<br />
is used to scroll the playlists in applications that support mapping to<br />
browser view. Depending on the control mode the ENTER and CANCEL<br />
buttons will allow for expanded functionality with the platter.<br />
(Figure 3.4)<br />
Figure 3.4<br />
SETUP button will allow for adjustments of the overall deck controller. Upon pressing setup you will see the current firmware<br />
version. Using the first encoder will allow you to select a value to change; the second encoder will allow you to adjust the<br />
value.<br />
- Contrast: Adjusts the contrast of the LCD screens.<br />
- Torque: Adjusts the torque of the platter to simulate different turntables.<br />
- MIDI Ch: Changes the output MIDI channel of the device. It is suggested NOT to change this as presets usually expect<br />
the deck to send data from the default MIDI channel.<br />
- Decay: Adjusts the acceleration curve of the encoders.<br />
8
Pitch Section<br />
3.5 Pitch Section<br />
The pitch section represents a traditional pitch control found on a CD<br />
player or turntable. However, the key difference is that the pitch control<br />
is motorized to support functionality such as auto-sync in an application<br />
and updating position when switching virtual decks. It’s important to not<br />
stop the motorized fader while it’s moving to prevent damage.<br />
The RESET button will center the pitch slider to 0% automatically.<br />
The RANGE button will change the sensitivity of the pitch slider (as long<br />
as the application supports the ranges). (Figure 3.5)<br />
Figure 3.5<br />
3.6 Transport Section<br />
The transport section is analogous to the transport controls on a CD<br />
player however it places a few extra buttons for common functions<br />
found in DJ applications (such as auto sync). Each of the 4 main transport<br />
buttons are multi color back lit to indicate status.<br />
Along with the 4 main transport buttons are seek forward and<br />
backwards as well as scan forward and backwards. Above the seek and<br />
scan buttons is a freely assignable backlit button. (Figure 3.6)<br />
Figure 3.6<br />
9
Preset Switcher Section<br />
3.7 Preset Switcher Section<br />
The preset switcher section controls switching of presets on the <strong>SCS.1d</strong>.<br />
Presets are generally related towards switching presets for the encoder<br />
section, trigger section or pitch slider. Presets are groups of controls with<br />
functionality focused towards doing a single task. For instance, a loop<br />
preset will contain all the controls needed to create, move and modify<br />
a loop.<br />
Preset configuration and functionality are highly dependent on the<br />
application the <strong>SCS.1d</strong> is being used with. As with the rest of the controls<br />
it’s very important to read the preset documentation from within<br />
DaRouter for information on how the unit is configured. (Figure 3.7)<br />
Figure 3.7<br />
10
<strong>SCS.1d</strong> Software Installation<br />
4. <strong>SCS.1d</strong> Software Installation<br />
Before installing the SCS1 software (DaRouter and drivers) make sure you follow these guidelines:<br />
1) Windows: Do NOT connect the SCS.1 controller(s) until prompted by the driver installer.<br />
2) Windows: When intending to use multiple SCS.1 controllers at once (mixer + decks) make sure you connect ALL the<br />
devices during the driver installer.<br />
3) Always check the <strong>Stanton</strong> website (listed below) for the latest drivers and firmware.<br />
To fully maximize SCS.1 capabilities and take advantage of its great features, some software needs to be installed with it.<br />
In fact, the SCS.1 Software Installation process differs greatly between Mac and PC computers.<br />
- On a Mac, the <strong>SCS.1d</strong> is a class compliant FireWire device, which means that it will connect to the system without<br />
drivers, however, because the <strong>SCS.1d</strong> uses a proprietary high speed MIDI system it is necessary to install DaRouter<br />
to communicate with the <strong>SCS.1d</strong> and create a virtual MIDI port for the host application to receive MIDI messages<br />
through. On the Mac you will simply need to install DaRouter, connect the unit(s) and start using your desired preset.<br />
- In Windows, a high level FireWire driver must be installed to communicate with the <strong>SCS.1d</strong>. Once this driver is<br />
installed the <strong>SCS.1d</strong> and can communicate with DaRouter. Upon installing DaRouter, both the FireWire and virtual<br />
MIDI port driver are installed. It is important to not connect the <strong>SCS.1d</strong> until prompted. It is also important to connect<br />
all units that will be used when installing the driver (if using multiple <strong>SCS.1d</strong>’s or with a SCS.1m).<br />
In either case, (Mac or PC) the DaRouter software needs to be installed. This software acts as an intermediary between<br />
your SCS.1 controllers and your performance software, intercepting and processing MIDI messages before sending them<br />
out to your application of choice. This process takes less than a millisecond, and gives you some amazing power. Not only<br />
does it allow you to quickly change the MIDI output of the SCS.1 controllers (by switching presets), it also allows for<br />
logic-based programming that your performance software may or may not be capable of performing. This means that it is<br />
actually possible to add or change some functionality in your software of choice. This can be as simple as adding MIDI data<br />
to an application that does not normally support it, to totally changing the behavior of a given control.<br />
In short, if you are a PC user, you will run one installer that will install the SCS.1 driver and DaRouter. If you are a Mac user,<br />
you do not need to install any driver but you must install DaRouter.<br />
Before walking through specific installation procedures for Mac and PC, you will need to download the latest version of<br />
DaRouter from the <strong>Stanton</strong> website:<br />
www.enterthesystem.com/scs1<br />
So, let’s follow the specific instructions for each platform.<br />
11
DaRouter Installation - Windows XP<br />
4.1 Windows XP<br />
1. Double click the executable file (.exe). If the following Open File- Security Warning appears, click Run. (Figure 4.1)<br />
Figure 4.1<br />
2. The <strong>Stanton</strong> SCS.1 DaRouter Setup Wizard will guide you through the installation process. Click Next. (Figure 4.2)<br />
Figure 4.2<br />
12
DaRouter Installation - Windows XP<br />
3. To install the software for the first time, choose the Standard option. To update your previously installed version,<br />
choose Custom. In this example, let’s choose Standard. (Figure 4.3)<br />
Figure 4.3<br />
4. Read the License Agreement, select the “I accept the agreement” option, and then click Next. (Figure 4.4)<br />
Figure 4.4<br />
13
<strong>Stanton</strong> 1394 ASIO Driver Installation - Windows XP<br />
5. The installation of the ASIO driver will begin. Make sure that your SCS.1 controller(s) are properly connected but<br />
do not turn them ON yet. When you are ready, click Next. (Figure 4.5)<br />
Figure 4.5<br />
6. Please wait while <strong>Stanton</strong> 1394 ASIO Driver is being installed, and then turn your SCS.1 controllers ON and click OK.<br />
(Figure 4.6)<br />
Figure 4.6<br />
14
<strong>Stanton</strong> 1394 ASIO Driver Installation - Windows XP<br />
7. We are almost ready to complete the <strong>Stanton</strong> 1394 ASIO Driver Setup installation. Click Next. (Figure 4.7)<br />
Figure 4.7<br />
8. <strong>Stanton</strong> 1394 ASIO Driver has been installed. Click Finish to close this wizard. (Figure 4.8)<br />
Figure 4.8<br />
15
Bome’s Virtual MIDI Ports Installation - Windows XP<br />
9. Now let’s install Bome’s Virtual MIDI ports. Read carefully the following instructions and click OK. (Figure 4.9)<br />
Figure 4.9<br />
10. Select No, not this time and click Next. (Figure 4.10)<br />
Figure 4.10<br />
16
11. Select Install the software automatically and click Next. (Figure 4.11)<br />
Bome’s Virtual MIDI Ports Installation - Windows XP<br />
Figure 4.11<br />
12. Click Continue Anyway. (Figure 4.12)<br />
Figure 4.12<br />
17
13. Click Finish to complete the Bome’s Virtual MIDI Port device. (Figure 4.13)<br />
Bome’s Virtual MIDI Ports Installation - Windows XP<br />
Figure 4.13<br />
18
Installation Verification - Windows XP<br />
To check that your drivers and software are properly installed, open Device Manager. On your desktop, right click<br />
My Computer icon and click Properties. In the System Properties window, click the Hardware tab, and then the<br />
Device Manager button. (Figure 4.14)<br />
Figure 4.14<br />
You will see a new section called <strong>Stanton</strong> 1394 Audio Devices that includes the <strong>Stanton</strong> 1394 Virtual Device and a hardware<br />
specific driver for each controller you have connected. Check that the SCS.1m and <strong>SCS.1d</strong> devices are attached to your<br />
computer.<br />
You can also click the Start button and verify that all associated applications appear there. (Figure 4.15)<br />
Figure 4.15<br />
You will see a driver program group, along with an SCS.1 DaRouter icon. That is it. You are done!<br />
19
DaRouter Installation - Mac OS X<br />
4.2 Mac OS X<br />
To install DaRouter, first make sure that your SCS1 controller is not connected and then follow the next instructions:<br />
1. Double click the .dmg file to expand it. (Figure 4.16)<br />
Figure 4.16<br />
2. Double click the DaRouter.pkg file to start the installer. (Figure 4.17)<br />
Figure 4.17<br />
20
DaRouter Installation - Mac OS X<br />
3. Once the installer has started, click Continue. (Figure 4.18)<br />
Figure 4.18<br />
4. Read the license agreement and click Continue. In the next dialog, click Agree. (Figure 4.19)<br />
Figure 4.19<br />
21
DaRouter Installation - Mac OS X<br />
5. Next, you can set the default path of the program. Click Install unless you want to install DaRouter to a specific<br />
destination. (Figure 4.20)<br />
Figure 4.20<br />
6. DaRouter will be installed. Once done, click Close. (Figure 4.21)<br />
Figure 4.21<br />
22
DaRouter Installation - Mac OS X<br />
7. DaRouter will be installed into your Applications folder and the presets will be placed in your home directory.<br />
Plug in your SCS.1 controller, power it ON, connect the FireWire cable to your computer, start DaRouter, and read the<br />
rest of this documentation. (Figure 4.22)<br />
Figure 4.22<br />
Now that you have installed DaRouter, let’s learn about it.<br />
23
DaRouter<br />
5. DaRouter<br />
5.1 About DaRouter<br />
DaRouter is an application developed between <strong>Stanton</strong> and Bome’s Software, which allows the SCS.1 devices to specifically<br />
integrate and interact with audio applications. DaRouter takes incoming messages coming from a SCS.1 device using a<br />
proprietary high speed messaging protocol and translates them to the host target audio application through the form of<br />
presets. This translation process allows the unit to change its functionality depending on which mode the unit is in and the<br />
desired host application functionality. Every single action on the SCS.1 controllers is processed through DaRouter, which<br />
means that as applications evolve, so do presets… More importantly, presets can be created and edited freely with virtually<br />
no limit to what SCS.1 controllers can do, thus opening up a whole element in control surface DJing. It is important to<br />
constantly check the <strong>Stanton</strong> website and forums for new presets.<br />
5.2 Anatomy of DaRouter<br />
DaRouter is the brains behind interaction between SCS.1 controllers and the application they are being used with. DaRouter<br />
is designed to sit in the background and just translate MIDI but does have some functionality to load presets and configure<br />
your SCS.1 controllers with DaRouter/Active preset. Before we load a preset, let’s take a quick tour of what everything<br />
inside of DaRouter does. To easily describe DaRouter, we divided its interface in three sections: A, B, and C respectively.<br />
(Figure 5.1)<br />
Figure 5.1<br />
24
DaRouter - Section A<br />
5.2.1 Section A<br />
Active Preset Dropdown<br />
The Active Preset is the currently used preset. In this drop down menu,<br />
all pre-installed presets will be listed as well as any presets dragged or<br />
manually loaded into DaRouter. To load a preset into DaRouter, just<br />
select one from the list.<br />
At the bottom of the drop down list is a Browse listing that can be used<br />
to manually browse a preset using a file explorer dialog.<br />
Restart Preset Button<br />
The Restart button will start the currently running preset. This should<br />
not need to be used, but gives you the option to restart a preset in case<br />
of any problems.<br />
Figure 5.2<br />
Preset Documentation Button<br />
The Preset Documentation button (shown as “?”) will load the HTML documentation associated with the selected preset.<br />
The preset documentation includes all the setup instructions for using the preset with the application it was designed for.<br />
To fully take advantage of the SCS.1m capabilities it is strongly recommended to click the Preset Documentation button and<br />
read its content every time that you load a new preset. (Figure 5.2)<br />
5.2.2 Section B<br />
Device Configuration<br />
This section indicates if a device is required for use with a preset, and if<br />
that device is connected. For “Single” presets, only one device is<br />
required. For “Dual” presets, two devices are required. When a device<br />
is not used in a preset, the image will be ghosted. When a device is used,<br />
the image will be gray, and when the device is detected (plugged in), it<br />
will glow blue to indicate connectivity.<br />
Device Dropdown<br />
Figure 5.3<br />
The device dropdown menu will list any detected devices by their serial<br />
number. Selecting a device will assign it to the deck used in the preset.<br />
Once this assignment is made, DaRouter will remember the assignment<br />
for future use so you do not need to assign the device each time.<br />
(Figure 5.3)<br />
25
DaRouter - SCS.1m Options<br />
Options<br />
Below each Device Dropdown menu there is a button called Options. Clicking on it will allow you to change several<br />
important settings.<br />
For example, if you click the SCS.1m Options button the SCS.1m Audio<br />
Control Panel will open so you will be able to Start and Stop the streaming<br />
process, access the Deferred Procedure Calls (DPC) Latency Checker (for<br />
more information please read the Appendix), and select the Sampling<br />
Rate, FireWire Latency, and ASIO Buffering settings. (Figure 5.4)<br />
Start / Stop Streaming – Use this to start or stop the audio stream<br />
between the driver and hardware. If streaming has been stopped then no<br />
audio will be passed to the hardware.<br />
DPC Latency Tool – <strong>Stanton</strong> includes a troubleshooting tool for detecting<br />
high DPC latency. When there is high DPC latency apparent on a machine<br />
it can affect the performance of audio and MIDI streaming. You must have<br />
low DPC latency to achieve consistent performance and low latencies.<br />
Sampling Rate – Sampling rate will set the resolution of the audio coming<br />
from the outputs of SCS.1m. Higher sampling rates mean more audio<br />
fidelity but also more processing on the computer and should only be<br />
used on newer machines. Another consideration is the material being<br />
played. For instance, 96 kHz should only be used if your source audio is<br />
high resolution whereas 44.1 kHz or 48 kHz should be used for MP3’s and<br />
CD quality content.<br />
FireWire Latency – This sets the latency or speed in which audio is sent<br />
to the hardware. Low latency will make the controls feel “snappier.”<br />
However, your computer must be able to support these low speeds. If the<br />
computer cannot support low latency, then audio hiccups or “drop outs”<br />
might be observed. If low latency is not achieved with a high-end<br />
machine, it is suggested to use the DPC tool and follow the instructions<br />
in Appendix for system optimization.<br />
Figure 5.4<br />
ASIO Buffering – This controls the buffers used between the driver and<br />
host application. Low buffering will mean higher speed / lower latency<br />
but requires a high-end computer.<br />
26
DaRouter - <strong>SCS.1d</strong> Options<br />
Now, if you click the <strong>SCS.1d</strong> Options button the <strong>SCS.1d</strong> Control Panel will<br />
open, so you will be able to change the Scratch Engage, the Scratch<br />
Release, and Pitch Bend Sensitivity values. (Figure 5.5)<br />
Scratch Engage Sensitivity – The <strong>SCS.1d</strong> uses an algorithm to detect<br />
scratching to accommodate MIDI scratching implementation in host<br />
applications such as Traktor. The Scratch Engage slider will set how quickly<br />
the scratch algorithm will detect that you are trying to perform a scratch.<br />
Higher settings will make the algorithm more snappy. However, if you set<br />
this value too high you run the risk of mistriggering a scratch message<br />
with the slightest variance in record speed.<br />
Scratch Release Sensitivity – This slider controls how quickly the <strong>SCS.1d</strong><br />
will detect the record being released and catching up to speed with the<br />
platter thus entering regular playback mode and disabling scratching in<br />
the host application.<br />
Figure 5.5<br />
Pitch Bend Sensitivity – The <strong>SCS.1d</strong> also has the ability to detect when<br />
the platter is being rubbed manually by hand to slow or speed the track<br />
up. This is detected when the platter and record change speed at the same<br />
time (whereas with scratching the platter keeps spinning at its set speed).<br />
Setting this value will change the sensitivity and once again, making it too<br />
sensitive might cause mistriggers of the pitch bend message going to the<br />
host application.<br />
5.2.3 Section C<br />
Activity Monitor<br />
The activity monitor indicates messages flowing in and out of DaRouter.<br />
The first arrow indicates an incoming message. The DaRouter icon<br />
indicates a translation occurring, and the last arrow indicates an<br />
outgoing message. The images will glow blue to indicate they are<br />
processing an action.<br />
Logos<br />
Just for bling... actually, they do link to websites.<br />
Version<br />
This displays the current version of DaRouter. (Figure 5.6)<br />
Figure 5.6<br />
27
Using DaRouter<br />
5.3 Using DaRouter<br />
When using DaRouter, there are two basic types of presets that you may utilize; generic and application specific. The generic<br />
preset allows you to configure the application to the SCS.1 controllers through conventional MIDI Learn. However, the<br />
application specific presets are designed to work specifically with certain applications and provide logic in the<br />
SCS.1 controllers that is focused towards that application.<br />
5.4 Loading a Preset<br />
Confirm that no preset is loaded and your SCS.1 controller(s) is connected. At this point, you may select the preset you<br />
wish to use and then read its included documentation by clicking the “?” button. Also, remember to check the <strong>Stanton</strong><br />
website for the latest presets as they are constantly being updated to support new functionality and applications!<br />
5.5 Using a Preset for the First Time<br />
1) Select the desired preset you would like to use depending on which application you are using DaRouter with.<br />
2) Move any faders, switches or knobs on the SCS.1 controllers, to confirm feedback is making its way into DaRouter<br />
and the unit should load the preset and stop flashing.<br />
3) Now you are ready to use the preset.<br />
Important Click the “?” button next to the preset (Figure 5.7) to read its included HTML documentation which explains<br />
setting up the host application and the functionality of the SCS.1 with that particular preset.<br />
Figure 5.7<br />
For more information about the specific SCS.1 presets always check the <strong>Stanton</strong> website for the latest presets and<br />
documentation.<br />
28
Troubleshooting<br />
6. Troubleshooting<br />
1. I have both the SCS.1m and <strong>SCS.1d</strong>, and when I try to power them up nothing happens. What is wrong?<br />
You probably have the power supplies for each controller swapped. If you plug the wrong power cord into a unit, it<br />
won’t power up. The power cable for the SCS.1m supplies 12V, and the one for the <strong>SCS.1d</strong> supplies 24V. You can also<br />
tell which is which by the color-coding. For example, gray for the SCS.1m and blue for the <strong>SCS.1d</strong>.<br />
2. Can I use the FireWire cable alone to power the SCS.1 controllers?<br />
No, the SCS.1 controllers require external power. We intentionally wanted power to be supplied to guarantee that<br />
consistent performance is achievable as not all bus power on the FireWire port is stable across machines.<br />
3. I cannot find the driver for my controller.<br />
In Windows, the driver installer is combined into the SCS.1 DaRouter software. In OS X, the SCS.1m controllers is Core<br />
Audio compliant and doesn’t need a driver, however both the <strong>SCS.1d</strong> and SCS.1m require DaRouter to translate their<br />
control data into MIDI. As stated in the installation procedure, make sure you download the latest driver from the<br />
<strong>Stanton</strong> website.<br />
4. My computer does not have a 6 pin FireWire port on it.<br />
Use the 6 to 4 pin adapter included in the packaging.<br />
5. My computer doesn’t have a FireWire adapter at all.<br />
In most cases, a FireWire interface can be easily added to a computer. For laptops, you need to look for either a PCMCIA<br />
or ExpressCard based adapter (which one to use depends on the card slot your computer is equipped with).<br />
For desktops, you should use an add-in PCI FireWire card. Please do not use a USB-to-FireWire adapter cable because<br />
it will severely degrade performance. Check the appendix of this manual for suggestions on choosing a FireWire card.<br />
6. I am getting click and pops in my audio.<br />
This can be many things. Do you hear noise even when there’s no software playback? If so, then the cause is likely a<br />
ground loop (especially if it goes away when running the computer on battery power). If not, does increasing the<br />
buffering in the driver make the problem go away? If so, then it could be an issue with your system performance.<br />
For OS tweaks, please read the Appendix Optimizing Computers for 1394.<br />
If neither of the previous options seems to fix the issue, let’s try a couple of more alternatives. Do you have multiple<br />
FireWire devices connected? If so, try using just the SCS.1m. If that addresses your issue, then try re-ordering the<br />
devices in the FireWire chain. You should always have the SCS.1 controllers “closest” to the computer and plug other<br />
devices (drives, etc) into them (or run your drives on a separate port altogether). If you’re running Windows XP, you<br />
might need the SidSpeed fix outlined in the appendix of this manual.<br />
To contact Tech Support, please call us at +1 954.316.1500 and select the SCS.1 option.<br />
29
Specifications<br />
7. Specifications<br />
Motor Type<br />
Motor Speeds<br />
Starting Torque<br />
Start / Stop Time<br />
16 Pole, 3 phase, brushless DC motor<br />
33 1/3 rpm, 45 rpm<br />
>4.5 kgf.cm<br />
.2 seconds<br />
FireWire Speed FireWire 400<br />
Power<br />
24 VDC / 3.0 Amps<br />
30
Appendix - Optimizing Computers for 1394<br />
Appendix<br />
Optimizing Computers for 1394 (FireWire)<br />
When using any computer for live audio applications it is always suggested to perform certain optimizations to ensure<br />
consistent performance. For the most part live audio is not always the highest consideration for both hardware designers<br />
and software programmers. With that being said, <strong>Stanton</strong> has put together this guide and included one of the most widely<br />
used troubleshooting tools (DPC Latency Checker) with the SCS1 to help optimize your computer by performing certain<br />
tweaks, which we have found increases performance and stability substantially.<br />
If you are having issues getting your computer to recognize the SCS.1 controllers then it is suggested to start with the<br />
SidSpeed fix. If you are having issues with audio performance (drop outs) then it is first suggested to perform the following<br />
steps:<br />
• Disable wireless internet devices<br />
• If running Windows on a Mac (Boot Camp), kill the process “KbdMgr.exe”<br />
• Disable ACPI<br />
• Perform DPC checks (below)<br />
• Perform the SidSpeed fix (below)<br />
• Check the brand of 1394 host controller you are using.<br />
Please read the next page about the (DPC) Latency Checker.<br />
DPC (Windows XP-Vista)<br />
During the SCS.1 driver installation process, we are also installing the Deferred Procedure Calls (DPC) Latency Checker.<br />
This useful Windows application not only analyzes how your computer is handling real-time data streams but also helps<br />
you to find the potential cause for drop-outs (interruptions in real-time audio and video stream). In fact, the DPC Latency<br />
Checker will allow you to find out the driver that causes the excessive DPC latencies so then you are able to disable it<br />
through the Windows Device Manager. In other words, using this application will help you to optimize your system so<br />
everything runs smoothly while using the SCS.1 controllers.<br />
Let’s take a look of its main window. (Figure A.1)<br />
31
Appendix - DPC (Windows XP-Vista)<br />
Figure A.1<br />
The green Bar Graph shows the current latency value over time. Each bar represents the maximum DPC latency occurred<br />
within one second. Every second, bars are scrolled from right to left and a new bar is added at the right-hand side,<br />
(representing the most recent value).<br />
DPC Latency Checker updates its internal statistical data at an interval displayed as Test Interval.<br />
The Current Latency value indicates the maximum DPC latency measured within the last second.<br />
The Absolute Maximum value represents the maximum latency measured since the tool was started.<br />
Click Reset to clear this value.<br />
To stop the Latency click Stop, and to exit the application click Exit.<br />
32
Appendix - DPC (Windows XP-Vista)<br />
For example, a typical problem is shown in the next figure. Red bars indicate excessive DPC latency. (Figure A.2)<br />
Figure A.2<br />
So let’s open Device Manager to find out the driver that causes the excessive DPC latencies. On your desktop, right click<br />
My Computer icon and click Properties. In the System Properties window, click the Hardware tab, and then click the<br />
Device Manager button. In the next page, please check Figure A.3.<br />
33
Appendix - DPC (Windows XP-Vista)<br />
Figure A.3<br />
Now, before you start finding out which device could be the cause of the excessive DPC latency, please follow these<br />
suggestions:<br />
You should not disable:<br />
• any device listed in Device Manager under System devices or Computer<br />
• the hard disk that contains the system partition<br />
• the IDE/ATAPI or SATA controller this hard disk is connected to<br />
• the system keyboard<br />
• the mouse, track point or touch pad device<br />
• the USB controller external keyboard and/or mouse devices are connected to<br />
• the display controller listed under Display adapters<br />
Try to disable the following devices first:<br />
• Network adapters for Ethernet and Wireless LAN (W-LAN)<br />
• ACPI Power Management<br />
• Internal modems<br />
• Internal sound devices (on-board sound systems)<br />
• Any PCI or PCI Express add-on card, any PCCard or ExpressCard, e.g., TV tuner cards, ISDN or DSL adapters,<br />
modems, etc.<br />
34
Appendix - DPC (Windows XP-Vista)<br />
To disable a device, right-click on it (e.g. on the Ethernet adapter) and choose Disable. The disabled device will be marked<br />
with a red cross. (Figure A.4)<br />
Figure A.4<br />
Now, check the DPC Latency Checker to see if the excessive latency values (red bars) disappeared. If yes, we have found<br />
the problem, if not, try the next device. To enable a device again, choose Enable from the context menu.<br />
After you have identified the device driver which is responsible for the dropouts, visit the device vendor's Web site or<br />
contact its Customer Support department to find an update for this driver. If there is no update available at the moment,<br />
you may decide to disable that particular device while you are using streaming applications.<br />
35
Appendix - Windows 1394a Bandwidth Limiting Issue (Windows XP-Vista)<br />
Windows 1394a Bandwidth Limiting Issue (Windows XP-Vista)<br />
First, let’s explain a little about what the SidSpeed Fix is. Basically, SidSpeed is a value in your windows registry that regulates<br />
the speed of your FireWire bus. It can have a value from 0-3 (0=S100 speed, 1=S200 speed, 2=S400 speed, and 3=800<br />
speed). If a SidSpeed value larger than 3 is used, then Windows will reject that and use a value of 0 instead, so it’s important<br />
to use a value of 0-3.<br />
Normally, the default value for SidSpeed is 2, which corresponds to a transfer rate of 400 mbps (FireWire 400).<br />
This speed is standard for most audio interfaces, including ours. The problem is that there are situations where this value<br />
can be lowered to “0” during an OS update and result in choppy and unusable performance for streaming audio. This issue<br />
seems to have first been encountered in the SP2 update for Windows XP…<br />
http://support.microsoft.com/kb/885222<br />
…and came back again with the XP SP3 update.<br />
http://support.microsoft.com/kb/955408/en-us<br />
We’ve also seen incorrect (or no) SidSpeed value set in Windows Vista. So now that you have some background, let’s walk<br />
through a fix that should work regardless of what version of Windows you’re using.<br />
Log in as Administrator on your computer (or as a User that has Administrator rights). Click on Start, and then click Run.<br />
(Figure A.5)<br />
Figure A.5<br />
This will open the Run command box. In the entry field, type the word regedit (Figure A.6)<br />
Figure A.6<br />
36
Appendix - Windows 1394a Bandwidth Limiting Issue (Windows XP-Vista)<br />
This will open your Registry Editor, which will look like this…(Figure A.7)<br />
Figure A.7<br />
Now, before we go any further, we need to give you a warning and back some things up.<br />
The registry is a dangerous place to be playing around. Using this tool makes it very easy to completely ruin your installation<br />
of Windows. Please do not do anything that isn’t outlined in this guide. If you have any question at all about what you<br />
should be doing, stop and contact Technical Support.<br />
OK, now we’re ready to backup your registry (or at least the part of it that we’ll be modifying). Look in the left hand side of<br />
the split pane in regedit and locate the branch called HKEY_LOCAL_MACHINE. Click it once to highlight it. (Figure A.8)<br />
Figure A.8<br />
37
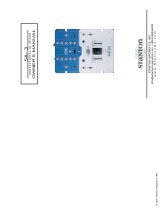
Now click File, and then click Export. A new window will pop up. (Figure A.9)<br />
Appendix - Windows 1394a Bandwidth Limiting Issue (Windows XP-Vista)<br />
Figure A.9<br />
At the bottom of the new window, there is an area called Export Range. Make sure that Selected Branch is marked, and<br />
that the text in the field there says HKEY_LOCAL_MACHINE. Go to the top of the window and find the Save In drop down.<br />
Select a location to save the backup that you will remember (like your desktop). Now go down to the File Name field and<br />
type in a name for the backup. Press the Save button and wait until the hourglass disappears. You have now backed up a<br />
registry branch. Although this is not necessary, at this point I would recommend also saving the registry backup you just<br />
made to an external device like a USB flash drive. If you make a mistake and there are problems booting into Windows<br />
later, this will make restoring the registry much easier. Now let’s look for the SidSpeed value.<br />
Expand HKEY_LOCAL_MACHINE (Figure A.10)<br />
Figure A.10<br />
38
Appendix - Windows 1394a Bandwidth Limiting Issue (Windows XP-Vista)<br />
Then expand the SYSTEM branch. (Figure A.11)<br />
Figure A.11<br />
Then expand CurrentControlSet. (Figure A.12)<br />
Figure A.12<br />
39
Appendix - Windows 1394a Bandwidth Limiting Issue (Windows XP-Vista)<br />
Now expand Enum. (Figure A.13)<br />
Figure A.13<br />
40
Then expand the PCI branch. (Figure A.14)<br />
Appendix - Windows 1394a Bandwidth Limiting Issue (Windows XP-Vista)<br />
Figure A.14<br />
Now we need to find the specific key for your FireWire controller. As you can see, all the devices are named in a way that<br />
does not seem to make a whole lot of sense. It is not as hard as it may look.<br />
41
Appendix - Windows 1394a Bandwidth Limiting Issue (Windows XP-Vista)<br />
Leave the Regedit window open and go back to Start > Run. Type in devmgmt.msc and then press OK. (Figure A.15)<br />
Figure A.15<br />
This will open your Device Manager. Look for your FireWire controller (commonly called IEEE 1394). One example is<br />
highlighted in Figure A.16.<br />
Figure A.16<br />
Right click on your FireWire device and click Properties.<br />
42
Now click on the Details tab. (Figure A.17)<br />
Appendix - Windows 1394a Bandwidth Limiting Issue (Windows XP-Vista)<br />
Figure A.17<br />
See this string of text? This is what we are going to look for in the PCI branch we have open in Regedit.<br />
Going back to Regedit, we can see that I got a little lucky and have it as the first key. (Figure A.18)<br />
Figure A.18<br />
43
Appendix - Windows 1394a Bandwidth Limiting Issue (Windows XP-Vista)<br />
If you expand out the device subkey, you’ll find another subkey called Device Parameters. Click it to select it and look in<br />
the right pane. (Figure A.19)<br />
Figure A.19<br />
In the example above, the SidSpeed key actually exists, but it is set to the incorrect speed. Double click on the SidSpeed<br />
value and a window will open. In that window will be a field called Value Data. If that value is a 0 or 1, CHANGE IT to a 3<br />
and press OK. If you do not see the SidSpeed value at all, keep reading. (Figure A.20)<br />
Figure A.20<br />
44
Appendix - Windows 1394a Bandwidth Limiting Issue (Windows XP-Vista)<br />
If you do not have the SidSpeed value, you will need to make one. Right click in the right pane and select New > DWORD<br />
Value. (Figure A.21)<br />
Figure A.21<br />
Once you have created a new string, name it SidSpeed (Figure A.22)<br />
Figure A.22<br />
Finally, double click SidSpeed and change its value data to 3 as outlined above. Press OK and close the Registry Editor.<br />
If you encounter an error during any step of this process (especially Vista users and errors about not having proper rights<br />
to alter a registry value), please contact <strong>Stanton</strong> Technical support. If you made a mistake and need to restore your registry,<br />
just double click on the backup you made right before we started and follow the prompts. Reboot afterwards.<br />
45
Appendix - FireWire Chipsets<br />
FireWire Chipsets<br />
High definition audio flowing over FireWire requires a consistent stream between the chipset in the host computer and<br />
the chipset in the SCS1 device. Unfortunately, some FireWire chipsets have known issues when it comes to the reliability<br />
and synchronization required for streaming audio. It is suggested to use name brand PCI and PCMCIA cards such as Adaptec®<br />
when your PC does not have FireWire capabilities, as some no-name or “OEM” FireWire cards will use chipsets of FireWire<br />
that have subpar performance and can affect stability or at worst the device will not work at all. <strong>Stanton</strong> recommends the<br />
Texas Instruments® FireWire chips for streaming audio. It is also suggested to stay away from Agere® chipsets as in testing<br />
issues have been identified with these chipsets. Most Apple computers utilize Texas Instruments chipsets. However, it was<br />
reported that in late 2007 Apple had switched to Agere chipsets for some production runs.<br />
The easiest way to check if you have a Texas Instruments chipset is to run Device Manager and check the name of your<br />
host controller. (Figure A.23)<br />
Figure A.23<br />
46
Registration Card<br />
Thank you for choosing <strong>Stanton</strong>!<br />
Your satisfaction is extremely important to us. We proudly stand behind the quality of our work and appreciate that you<br />
put your trust in us. Registering your product will help us guarantee that you are kept up to date on our latest advances.<br />
Warranty Service in the United States:<br />
Please contact <strong>Stanton</strong> Tech Support BEFORE sending your product. In some cases, our Tech Support team can resolve your<br />
problem immediately, avoiding down time due to shipping delays. However, if Tech Support determines that a repair is<br />
needed; please call us at +1 954.316.1500 (Option 3) to obtain a Return Authorization Number (RA#) PRIOR to shipping<br />
your product to us.<br />
Warranty Service outside the United States:<br />
To initiate a warranty repair, please contact the authorized <strong>Stanton</strong> dealer from whom you purchased your product, and<br />
follow the dealer’s return policy.<br />
Save your shipping boxes and all packaging materials!<br />
For the fastest and safest product return to <strong>Stanton</strong>, please use the original shipping carton and packaging materials. <strong>Stanton</strong><br />
cannot be responsible for any damages incurred during the shipping process due to poor or inadequate packing.<br />
Please remember to insure your shipment!<br />
47
<strong>Stanton</strong> Warranty<br />
<strong>Stanton</strong> Warranty<br />
Through <strong>Stanton</strong>'s authorized dealers around the World, <strong>Stanton</strong>, or one of <strong>Stanton</strong>'s authorized distributors outside the U.S., will, without charge, repair<br />
or replace, at the sole discretion of the entity responsible for making the repair or providing the replacement, any <strong>Stanton</strong> merchandise proved defective<br />
in material or workmanship for a period of one (1) year following the date of original purchase. Exceptions to this warranty are as noted below:<br />
The warranty for mechanical parts which are subject to wear and tear are limited to either the earlier of thirty (30) days following the date of original<br />
purchase or for 10,000 cycles for switches.<br />
<strong>Stanton</strong> will warrant all replacement parts and repairs for ninety (90) days from the date of original shipment. Repairs made necessary by reason of misuse,<br />
alteration, normal wear, or accident are not covered under this warranty.<br />
Returns<br />
Authorized <strong>Stanton</strong> dealers are only authorized to sell and distribute merchandise within a specific country. All goods requiring warranty repair or<br />
replacement must be returned (freight prepaid if not hand-delivered) to the authorized <strong>Stanton</strong> dealer from whom the merchandise was purchased and in<br />
the same country where the merchandise was purchased. For purposes of purchases made via the Internet, the merchandise must be returned to the<br />
authorized <strong>Stanton</strong> dealer in the country where the authorized <strong>Stanton</strong> dealer which sold the merchandise to purchaser is located and not the authorized<br />
<strong>Stanton</strong> dealer in the country where the purchaser is located or the country in which the merchandise was received. Any returns to a non-authorized dealer<br />
or to an authorized <strong>Stanton</strong> dealer not in the same country as the merchandise was intended to be sold or as set forth above will void this warranty.<br />
To initiate a warranty repair, you must contact the authorized <strong>Stanton</strong> dealer from whom you purchased the merchandise, and follow such authorized<br />
<strong>Stanton</strong> dealer's return policy.<br />
<strong>Stanton</strong> assumes no risk and shall be subject to no liability for damages or loss resulting from the specific use or application made of the merchandise.<br />
<strong>Stanton</strong>'s liability for any claim, whether based on breach of contract, negligence, infringement of any rights of any party, or product liability, and relating<br />
to the merchandise shall not exceed the price received by <strong>Stanton</strong> from your purchase of such merchandise. In no event will <strong>Stanton</strong> be liable for any<br />
special, incidental or consequential damages (including loss of use, loss of profit and claims of third parties) however caused, whether by the negligence of<br />
<strong>Stanton</strong> or otherwise. To the extent permitted by law and except as otherwise provided above, <strong>Stanton</strong> disclaims any express or implied warranties of<br />
merchantability or fitness for a particular purpose.<br />
The above warranty provides you with specific legal rights. You may also have additional rights, which are subject to variation from state to state and country<br />
to country.<br />
If there is a dispute regarding the warranty of merchandise that does not fall under the warranty conditions stated above, please include a written explanation<br />
with the merchandise when returned pursuant to the terms and conditions set forth herein.<br />
48
Copyright © 2008 <strong>Stanton</strong> Magnetics, Inc.<br />
SC System, DaRouter, SCS.1m, and <strong>SCS.1d</strong> are trademarks of the <strong>Stanton</strong> Group.<br />
All other trademarks are property of their respective owners, who are in no way affiliated with <strong>Stanton</strong> DJ or SC System products.<br />
All information included in the User Manual is subject to change without notice.<br />
(+1.877.578. 6866)<br />
LITS00032 04/01/2009