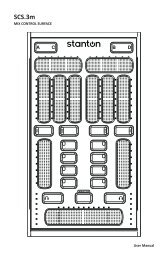
STR8-20 - Stanton
STR8-20 - Stanton
STR8-20 - Stanton

You also want an ePaper? Increase the reach of your titles
YUMPU automatically turns print PDFs into web optimized ePapers that Google loves.
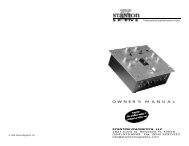
ASSEMBLY<br />
1. Remove the main unit with the packing from the box<br />
and take off the packing.<br />
2. Insert the turntable platter onto the center spindle.<br />
3. Set the slip mat on the platter.<br />
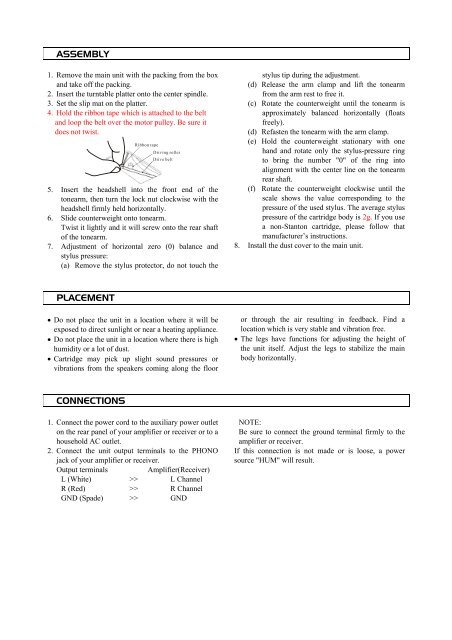
4. Hold the ribbon tape which is attached to the belt<br />
and loop the belt over the motor pulley. Be sure it<br />
does not twist.<br />
Ribbon tape<br />
Driving roller<br />
Drive belt<br />
5. Insert the headshell into the front end of the<br />
tonearm, then turn the lock nut clockwise with the<br />
headshell firmly held horizontally.<br />
6. Slide counterweight onto tonearm.<br />
Twist it lightly and it will screw onto the rear shaft<br />
of the tonearm.<br />
7. Adjustment of horizontal zero (0) balance and<br />
stylus pressure:<br />
(a) Remove the stylus protector, do not touch the<br />
stylus tip during the adjustment.<br />
(d) Release the arm clamp and lift the tonearm<br />
from the arm rest to free it.<br />
(c) Rotate the counterweight until the tonearm is<br />
approximately balanced horizontally (floats<br />
freely).<br />
(d) Refasten the tonearm with the arm clamp.<br />
(e) Hold the counterweight stationary with one<br />
hand and rotate only the stylus-pressure ring<br />
to bring the number "0" of the ring into<br />
alignment with the center line on the tonearm<br />
rear shaft.<br />
(f) Rotate the counterweight clockwise until the<br />
scale shows the value corresponding to the<br />
pressure of the used stylus. The average stylus<br />
pressure of the cartridge body is 2g. If you use<br />
a non-<strong>Stanton</strong> cartridge, please follow that<br />
manufacturer’s instructions.<br />
8. Install the dust cover to the main unit.<br />
PLACEMENT<br />
• Do not place the unit in a location where it will be<br />
exposed to direct sunlight or near a heating appliance.<br />
• Do not place the unit in a location where there is high<br />
humidity or a lot of dust.<br />
• Cartridge may pick up slight sound pressures or<br />
vibrations from the speakers coming along the floor<br />
or through the air resulting in feedback. Find a<br />
location which is very stable and vibration free.<br />
• The legs have functions for adjusting the height of<br />
the unit itself. Adjust the legs to stabilize the main<br />
body horizontally.<br />
CONNECTIONS<br />
1. Connect the power cord to the auxiliary power outlet<br />
on the rear panel of your amplifier or receiver or to a<br />
household AC outlet.<br />
2. Connect the unit output terminals to the PHONO<br />
jack of your amplifier or receiver.<br />
Output terminals<br />
Amplifier(Receiver)<br />
L (White) >> L Channel<br />
R (Red) >> R Channel<br />
GND (Spade) >> GND<br />
NOTE:<br />
Be sure to connect the ground terminal firmly to the<br />
amplifier or receiver.<br />
If this connection is not made or is loose, a power<br />
source "HUM" will result.