Instruction Manual - Steadicam
Instruction Manual - Steadicam
Instruction Manual - Steadicam

Create successful ePaper yourself
Turn your PDF publications into a flip-book with our unique Google optimized e-Paper software.
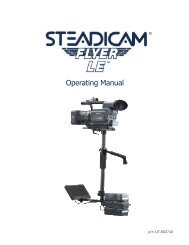
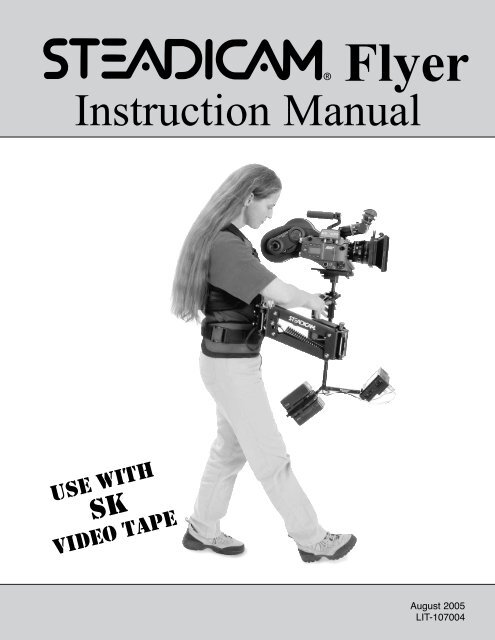
Flyer<br />
<strong>Instruction</strong> <strong>Manual</strong><br />
use with<br />
sk<br />
video tape<br />
August 2005<br />
LIT-107004
STEADICAM FLYER<br />
MANUFACTURED AND DISTRIBUTED BY<br />
The Tiffen Company<br />
90 Oser Avenue<br />
Hauppauge, NY 11788<br />
Telephone: 1-631-273-2500<br />
FAX: 1-631-273-2557<br />
www.steadicam.com steadicam@tiffen.com www.tiffen.com<br />
Technical Support<br />
1-818-843-4600 ext.17<br />
Manufactured in the United States of America<br />
Copyright The Tiffen Company 2005<br />
All rights reserved.
TABLE OF CONTENTS<br />
Contents<br />
How To Use This <strong>Manual</strong> And Videotape<br />
I PART IDENTIFICATION AND SLED ASSEMBLY 5 –12<br />
Introduction to the <strong>Steadicam</strong> Flyer 5<br />
Unpacking the Flyer & Identifying Parts 6 – 8<br />
II MOUNTING THE CAMCORDER ON THE SLED 9 –12<br />
III BALANCE ADJUSTMENTS 13 –18<br />
Rough Balance Adjustments 13 –15<br />
Fine Balance Adjustments 16 –18<br />
IV THE VEST AND THE ARM 19 – 20<br />
The Vest The Arm 19 – 20<br />
V BASIC OPERATING POSITIONS 21 – 27<br />
Arm Lift Angle 21<br />
Undocking & Docking 22 – 23<br />
Adjusting the Arm Tension 24<br />
Position & Posture 25 – 26<br />
Moving Around in the <strong>Steadicam</strong> 27<br />
Practice Exercises: Introduction<br />
IV EXERCISES 1 AND 2 28 – 30<br />
Exercise 1: Walking the Line 29<br />
Exercise 2: Over the Shoulder<br />
0<br />
Vll EXERCISES 3, 4 AND 5 1 – 33<br />
Exercise 3: The Switch<br />
1<br />
Exercise 4: The Reverse Switch<br />
2<br />
Exercise 5: Walk and Switch<br />
<br />
VIII EXERCISES 6 AND 7 4 – 35<br />
Exercise 6: Pan and Tilt<br />
4<br />
Exercise 7: Walk and Switch With the Monitor On<br />
5<br />
XlIll ADDITIONAL EXERCISES AND ADJUSTMENTS 6 – 39<br />
Trimming for Headroom<br />
6<br />
Following a Moving Subject<br />
7<br />
Adjusting the Bridge<br />
8<br />
Other Adjustments<br />
9<br />
X SAFETY PRECAUTIONS 40<br />
Xl TROUBLESHOOTING 41
How To Use<br />
This <strong>Manual</strong><br />
and Videotape<br />
Flyer<br />
This manual and the accompanying videotape are to be used together<br />
to instruct you in setting up and using your <strong>Steadicam</strong> Flyer. Begin by<br />
watching section I of the tape, “Parts Identification and Sled Assembly”,<br />
without trying to follow along. If You see anything in the tape that is unclear,<br />
rewind and watch it again. When you come to the end of section 1, stop<br />
the tape and open your manual to “Parts Identification and Sled Assembly”.<br />
Then follow the step-by-step instructions in the manual.<br />
There are corresponding manual sections for each section on the tape,<br />
then follow along with the manual. When you finish the steps in the<br />
manual, return to the videotape.<br />
The Flyer is not difficult to learn but you will want to develop good habits<br />
from the start. AIIow two sessions of about two hours each for Iearning<br />
and practice. It is helpful to have a friend to work with, especially in the<br />
sections on operating where a spotter can compare your movements<br />
with those on the tape. Take turns practicing and spotting for each other.
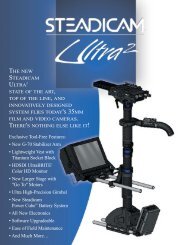
Flyer<br />
The <strong>Steadicam</strong> Flyer is part of the family of Academy Award winning<br />
<strong>Steadicam</strong> systems invented by Garrett Brown and designed, developed,<br />
manufactured and distributed around the world by The Tiffen Company,<br />
90 Oser Avenue, Hauppauge, New York. The Flyer is made to be used<br />
with video camcorders weighing 4 -15 pounds. Its basic parts are a SLED<br />
on which the camcorder is mounted, articulated ARM and VEST.<br />
The Flyer is designed to give the operator the mobility and flexibility of<br />
a handheld camcorder with the precision and smoothness of a dolly. The<br />
Flyer achieves this image stability in several ways.<br />
The relatively lightweight camcorder is made more stable by means of the<br />
CENTER POST with its BATTERY/MONITOR counterweight at one end.<br />
This makes the camcorder less susceptible to operator motion. It also lowers<br />
the camcorder’s center of gravity to a point on the center post from which<br />
the camcorder’s movement can be more precisely controlled.<br />
Near the center of gravity, we put a GIMBAL. The gimbal isolates the sled<br />
from unwanted angular motion. Angular motion disturbs the viewers eye<br />
much more than up and down or side-to-side camcorder movement.<br />
Giving the operator a MONITOR to watch instead of an eyepiece further<br />
isolates the camcorder from operator motion.<br />
For additional support, the system includes an ARM and a VEST. They<br />
support the weight of the camcorder and sled, dissipate high and low<br />
frequency vibrations from the operator and spread the weight and torque<br />
of the camcorder and counterweight system over the operator’s upper body.<br />
<br />
Introduction<br />
To The<br />
<strong>Steadicam</strong><br />
Flyer<br />
Section 1:<br />
Parts identification<br />
and Sled Assembly
Parts ID and<br />
Sled Assembly<br />
Begin by unpacking the parts<br />
of the Flyer System:<br />
❑ Vest<br />
❑ Arm<br />
Flyer<br />
❑ Sled (stage, center post, gimbal,<br />
monitor, battery holder<br />
❑ Tiffen SteadiSTAND<br />
❑ Docking bracket<br />
❑ Power cable (4 pin XLR to small<br />
2 pin Lemo)<br />
Vest<br />
Upper Sled<br />
❑ Video cable (BNC to BNC)<br />
❑ “T” handle Allen wrench<br />
7” 16:9 LCD Color Monitor Flyer System<br />
on SteadiSTAND<br />
You will need several<br />
additional items to assemble<br />
and balance the FlYER.<br />
Gather them now:<br />
❑ A charged NP-1 type or a charged<br />
Anton Bauer Proformer or Pag Mini<br />
Super Pack battery or “V-Mount”<br />
battery for the <strong>Steadicam</strong>.<br />
(If you have not already done<br />
so, charge the battery now.)<br />
❑ Your 4 - 15 pound video camcorder<br />
or camcorder<br />
❑ Videotape for your camcorder.<br />
❑ A large flat head screwdriver.<br />
❑ A roll of masking or paper tape.<br />
❑ A grease pencil<br />
❑ A sandbag (optional)<br />
(<strong>Steadicam</strong> Sandbag #FFR-000014)<br />
Arm Extended<br />
Low Mode Kit (optional)<br />
”T“ Handle Allen Wrench<br />
Arm Extended<br />
<strong>Instruction</strong> Tape<br />
Accessory Pack<br />
Screws/Cable Adapter<br />
<br />
Docking Bracket<br />
SteadiSTAND
Flyer<br />
Set up the Tiffen SteadiSTAND and docking bracket:<br />
❑ Set up your stand at a height halfway between<br />
your shoulder and elbow.<br />
❑ Put the docking bracket on the stand and tighten<br />
the docking bracket locking knob.<br />
❑ To open the yoke, push the button at the end of<br />
the aircraft pin and pull the aircraft pin out of the<br />
yoke.<br />
Adjust the monitor position:<br />
❑ Tilt the monitor to about 45 degrees.<br />
Fore/Aft Side-to-Side Video BNC<br />
Stage<br />
Assembly<br />
Locking<br />
Knob<br />
Parts ID and<br />
Sled Assembly<br />
Post<br />
12 VDC<br />
Lemo<br />
Power<br />
Connector<br />
If the gimbal is not already at the top<br />
of the center post, move it there:<br />
❑ Insert the “T” handle Allen wrench into the<br />
locking Allen bolt on the gimbal.<br />
❑ Loosen the bolt.<br />
❑ Slide the gimbal to the top of the center post,<br />
but leave enough space between top to gimbal<br />
and bottom of the stage to accommodate the<br />
docking yoke.<br />
Control<br />
Handle<br />
Gimbal<br />
Locking Screw<br />
Gimbal
Parts ID and<br />
Sled Assembly<br />
Put Batteries into<br />
battery holders:<br />
❑ If you are using the Anton<br />
Bauer Hytron 50 or Pag<br />
Mini Super Pack or<br />
“V-Mount” slip the battery<br />
into the quick release<br />
plate on the top sled of<br />
the battery mounting<br />
bracket..<br />
❑ For NP-1 type batteries,<br />
insert battery into battery<br />
holder on top side of the<br />
battery mounting bracket<br />
and close cover.<br />
❑ Note that for all four battery<br />
types the top attachment<br />
is for active use and<br />
the bottom attachment<br />
serves to carry a spare<br />
battery to also serve as a<br />
counterweight for use with<br />
heavier accessories.<br />
(NOTE: F-24 sled has<br />
both battery holders active<br />
- switch selection - 12/24)<br />
Dock the sled in the<br />
docking bracket:<br />
❑ Hold the sled upright, with<br />
the adjusting knobs on the<br />
stage facing away from<br />
the grip stand. Put the<br />
center post into the bracket<br />
so the bottom of the<br />
stage rests on the yoke.<br />
❑ Push the aircraft pin<br />
back through the yoke,<br />
securing the post in the<br />
bracket.<br />
Flyer
Flyer<br />
Find your camcorder’s center of balance:<br />
❑ Remove the battery from your camcorder. You<br />
will not need it and it adds weight to the system.<br />
(Camera must have 12 volt AUX input)<br />
Mounting<br />
the Camcorder<br />
on The Sled<br />
❑ Put the quick release plate on your camcorder.<br />
❑ Hold the camcorder by the handle with two<br />
fingers of one hand. Move your fingers back and<br />
forth until camcorder hangs level and balanced.<br />
❑ With a grease pencil, mark the place on the<br />
quick release plate that is directly below your<br />
fingers on handle. This Is the center of balance.<br />
It is usually under the front edge of the<br />
shoulder rest.<br />
Marking the camcorder’s center of balance<br />
❑ Remove the quick release plate from<br />
the camcorder.<br />
Remove the dovetail from the stage:<br />
❑ Loosen the dovetail locking knob one half turn<br />
only. (If you unscrew this knob all the way the<br />
spring may pop out, so use one half turn only.)<br />
❑ Safety stops on the dovetail and a safety catch<br />
on the sled keep the camcorder assembly from<br />
sliding off the stage when the dovetail locking<br />
knob is loose. Locate the safety catch under<br />
the stage. Pull the dovetail to the back of the<br />
stage until the safety catch stops it. Pull the<br />
safety catch down and slide the dovetail out<br />
of the stage.<br />
❑ Make sure the safety catch springs back into<br />
its position when the dovetail is out.<br />
Safety Catch<br />
Dovetail<br />
Locking Knob<br />
Fore-Aft Knob<br />
Side-to-Side Knob<br />
Center Post<br />
Section II:<br />
Mounting the camcorder<br />
on the Sled
Mounting<br />
the Camcorder<br />
on The Sled<br />
10<br />
Flyer<br />
Attach the quick release plate to the dovetail:<br />
❑ Examine the dovetail.<br />
Turn it over to locate the<br />
rack, the three rows of<br />
large and small slots, and<br />
the stops.<br />
❑ Remove the screws that<br />
are stored at the front of<br />
the dovetail. Set them<br />
aside for the moment.<br />
❑ Put the quick release<br />
plate and the dovetail<br />
on a table in front of<br />
you side by side, bottom<br />
sides up, both facing<br />
forward. The rack of the<br />
dovetail should be on<br />
your right.<br />
❑ Without changing the<br />
orientation of the dovetail,<br />
place it on top of<br />
the quick release. The<br />
rack should still be on<br />
the right. Line up the<br />
center row of slots in<br />
the dovetail with the<br />
screw holes on the<br />
quick release.<br />
❑ Slide the dovetail forward<br />
or backward until the center<br />
of the dovetail rack is<br />
over the center of balance<br />
you marked on the quick<br />
release.<br />
❑ Move the dovetail forward<br />
or back no more than<br />
1/4”, until one large quick<br />
release screw hole and<br />
one small quick release<br />
screw hole show through<br />
the corresponding size<br />
slots in the dovetail.<br />
Choose holes as far<br />
apart as possible<br />
for maximum stability.<br />
❑ Insert the large and small<br />
screws and tighten them<br />
with a screw driver.<br />
Stops<br />
Rack<br />
Forward<br />
Note: If your camcorder does<br />
not have a position to insert<br />
both screws – use the provided<br />
positioning pin.
Flyer<br />
Take a moment to look at the stage<br />
before you put the dovetail back on:<br />
❑ Make sure the safety catch has returned to<br />
its proper position.<br />
❑ Turn the fore/aft knob. Watch the pinion<br />
move. The pinion engages with the rack<br />
on the dovetail plate.<br />
❑ Turn the side-to-side adjustment knob.<br />
Watch the stage move.<br />
Put the dovetail back into the stage:<br />
❑ Insert the dovetail with quick release<br />
attached into the back of the stage.<br />
Slide it forward until it clicks. If you<br />
encounter resistance, engage the rack<br />
and pinion by gently pushing the plate<br />
forward while turning the fore/aft knob<br />
until you hear the click of the safety<br />
catch. The fore/aft knob will now move<br />
the dovetail fore and aft. Set it in<br />
the center of its range of movement.<br />
Tighten the dovetail locking knob<br />
securely. Clip your camcorder onto<br />
the quick release plate.<br />
Forward<br />
Safety Catch<br />
<strong>Steadicam</strong> Stage<br />
Mounting<br />
the Camcorder<br />
on The Sled<br />
Pinion<br />
Side-to-Side Knob<br />
Fore/Aft Knob<br />
11
Mounting<br />
the Camcorder<br />
on The Sled<br />
Flyer<br />
Connect the power and video cables.<br />
❑ Connect the BNC - BNC<br />
video cable (BNC-phono<br />
“RCA” adapter provided)<br />
from “Deck Video<br />
Playback Out” on the<br />
camcorder to the “Video”<br />
input on the back of<br />
the stage. (“Deck Video<br />
Out” is preferred so you<br />
can watch playback.)<br />
❑ Connect the power cable<br />
by plugging the two-pin<br />
Lemo into the Power<br />
output on the back of the<br />
stage and the XLR into<br />
the 12V DC power input<br />
on your camcorder.<br />
❑ Make the cables neat with<br />
cable ties or tape. Make<br />
sure you do not inhibit<br />
fore and aft movement.<br />
❑ Power up the monitor and<br />
camcorder to make sure<br />
you have a picture. If you<br />
do not, try adjusting the<br />
brightness and contrast.<br />
❑ Turn the system off.<br />
Power 12vdc<br />
F-24 Stage Assembly<br />
Video<br />
F24 HD/SDI Monitor<br />
7” Color Monitor<br />
This is the end of Section II. The camcorder Is now mounted on the sled.<br />
Turn back to the videotape and watch Section III, “Balance Adjustments”<br />
before you go on to balance the rig.<br />
12
Flyer<br />
The sled should be docked in the docking bracket.<br />
Perform a rough fore/aft balance adjustment by<br />
centering the camcorder over the center post:<br />
❑ Loosen the dovetail locking knob under the<br />
stage.<br />
❑ Turn the fore/aft knob to move the camcorder<br />
forward or back until your center of balance<br />
mark on the quick release plate is over the<br />
center post.<br />
❑ Re-tighten the dovetail locking knob.<br />
If you find you can not get the center of balance<br />
over the center post, remove the camcorder,<br />
quick release plate and dovetail from the stage<br />
and reposition the quick release slightly forward<br />
or back on the dovetail. See instructions in<br />
Section II, “Mounting the Camcorder on the Sled”<br />
Rough Balance<br />
Adjustments<br />
Perform a rough side-to-side<br />
balance adjustment:<br />
❑ Look under the camcorder for the quick release<br />
mounting holes.<br />
❑ Turn the side-to-side knob on the stage<br />
until the mounting holes are lined up with<br />
the center post.<br />
Section III:<br />
Balance<br />
Adjustments<br />
13
Rough Balance<br />
Adjustments<br />
To further adjust the<br />
balance, we need to<br />
put the sled on the<br />
docking bracket balancing<br />
stud where it<br />
can move freely:<br />
❑ Pull the aircraft pin and<br />
remove the sled and<br />
camcorder from the<br />
docking bracket.<br />
❑ Loosen the locking<br />
knob of the docking<br />
bracket and turn the<br />
bracket 180 degrees<br />
to get the yoke out of<br />
the way. Tighten the<br />
locking knob.<br />
❑ Put the gimbal mounting<br />
hole on the bracket<br />
balancing stud. (You may<br />
want to sandbag the<br />
grip stand for stability<br />
here. Tiffen Sandbag<br />
FFR-000014)<br />
Before letting go of the<br />
sled, be certain that it feels<br />
bottom heavy. If the sled<br />
wants to top over with the<br />
gimbal at the top of the<br />
post, the camcorder<br />
weighs more than 15<br />
pounds and is beyond the<br />
weight specifications of<br />
the <strong>Steadicam</strong> Flyer.<br />
Flyer<br />
14
Flyer<br />
The stability of the <strong>Steadicam</strong> depends on it being slightly<br />
bottom heavy. If it is top heavy, it will tip over. If it is too<br />
bottom heavy, it will be sluggish and hard to aim. If it is just<br />
slightly bottom heavy, it will be both stable and easy to control.<br />
To achieve vertical balance, put the gimbal, which acts as a<br />
pivot point, just above the center of gravity on the center post:<br />
❑ Lift the center post to horizontal. Hold it securely.<br />
❑ Rotate the center post until the gimbal locking<br />
Allen bolt is accessible<br />
Rough Balance<br />
Adjustments<br />
❑ With one hand firmly holding the camcorder or<br />
the center post, use the T handle Allen wrench<br />
to loosen the gimbal locking bolt. (Remember,<br />
keep the post horizontal when the bolt is loosened!)<br />
Take the wrench out of the bolt but keep<br />
it within reach.<br />
❑ Grasp the center post and carefully slide the<br />
post in the gimbal. Use your thumb to push<br />
against the gimbal. Find the place where the<br />
sled is balanced on the gimbal like a see-saw<br />
on a fulcrum. Then slide the post through the<br />
gimbal 1/3 to 1/2” more, until it is a little bottom<br />
heavy, that is, heavier at the monitor end than<br />
at the camcorder end.<br />
❑ Tighten the gimbal locking bolt. (Be careful<br />
not to over tighten as the Allen wrench can<br />
generate tremendous force.) The unit should<br />
be in rough vertical balance.<br />
❑ Lower the post back to vertical.<br />
WARNING: IF YOU LOOSEN THE GIMBAL LOCKING BOLT WHEN<br />
THE CENTER POST IS VERTICAL, THE CAMCORDER AND STAGE<br />
WILL DROP RAPIDLY AND DAMAGE THE STEADICAM.<br />
15
Fine Balance<br />
Adjustments<br />
Flyer<br />
Look at the <strong>Steadicam</strong> from the side.<br />
If the camcorder lens tipped up or down:<br />
❑ Hold the center post at vertical.<br />
❑ Loosen the dovetail locking knob.<br />
❑ Move the camcorder forward or backward by turning the fore/aft knob until<br />
the camcorder is level.<br />
❑ Re-tighten the dovetail locking knob.<br />
Fine tune the side-to-side balance:<br />
❑ Look at the sled from the front. If the post is not vertical, adjust the sideto-side<br />
knob on the stage until the center post is vertical. (Use the bubble<br />
level on the monitor to help you find the right position.)<br />
Fine tune vertical balance by using this simple<br />
“drop time” test:<br />
❑ Make sure the dovetail<br />
locking knob Is tight.<br />
❑ Stand behind the grip<br />
stand, so the stand is<br />
between you and the<br />
sled.<br />
0.00<br />
❑ Grasp the center post<br />
near the base and move<br />
the center post from vertical<br />
to horizontal. Hold it<br />
there.<br />
❑ Look to be sure the<br />
monitor is not going to<br />
hit the stand when you<br />
let go of the center post,<br />
and put your free hand<br />
near the stand to catch<br />
the center post when It<br />
drops.<br />
0.02<br />
❑ Let go of the center post.<br />
❑ Count how many seconds It takes the center post to fall to vertical.<br />
Try using “One Mississippi, Two Mississippi” or use a stopwatch.)<br />
16
Flyer<br />
If the rig has a drop time of less than two seconds it is too<br />
bottom heavy. You need to move the bottom mass (the lower<br />
sled, monitor and battery) closer to the gimbal. If the drop<br />
time is more than two seconds, the rig is top heavy. You need<br />
to move the top mass (the upper sled, stage and camcorder)<br />
closer to the gimbal:<br />
❑ Lift the center post to horizontal again.<br />
(Remember, never loosen the gimbal<br />
locking bolt when the post is vertical.)<br />
❑ Rotate the center post until the gimbal locking<br />
Allen bolt is accessible and hold the center post<br />
and gimbal firmly. With your free hand, use the<br />
T handle Allen wrench to loosen the gimbal<br />
locking bolt.<br />
Fine Balance<br />
Adjustments<br />
0.00<br />
❑ Slide the center post through the gimbal. Move<br />
the lower portion of the sled about 1/4” closer<br />
to the gimbal if the rig was bottom heavy. Move<br />
the upper portion of the sled about 1/4” closer<br />
to the gimbal if the rig was top heavy.<br />
❑ Re-tighten the gimbal locking bolt.<br />
❑ Re-do the drop test. Keep making small<br />
adjustments until the sled is balanced.<br />
Balance Note:<br />
0.02<br />
“Drop-Time” of 2 to 2 1/2 seconds ok.<br />
You will eventually determine what works best for you.<br />
Gimbal<br />
Locking<br />
Allen Bolt<br />
17
Fine Balance<br />
Adjustments<br />
Flyer<br />
Recheck the fore/aft and side-to-side balance by looking at the<br />
sled. Trim with the fore/aft and side-to-side knobs if necessary.<br />
Many experienced<br />
<strong>Steadicam</strong> operators<br />
adjust their sleds for<br />
a three second drop<br />
time which gives them<br />
a slightly less bottom<br />
heavy rig and more<br />
delicate control. For<br />
more on this, please<br />
see “Additional<br />
Adjustments”.<br />
This is the end<br />
of Section III.<br />
You have now<br />
balanced the<br />
sled. Turn on<br />
the videotape<br />
and watch<br />
Section IV,<br />
“The Vest and<br />
The Arm”, then<br />
continue in<br />
the manual.<br />
18
Flyer<br />
The Vest<br />
Please read the vest instructions completely before you<br />
try to put the vest on. It is very helpful to have a friend<br />
help you the first time you put on the vest. Otherwise<br />
use a full-length mirror.<br />
Open the vest:<br />
❑ Loosen both chest straps.<br />
❑ Release the hip straps.<br />
❑ Open the chest buckle on<br />
the same side.<br />
❑ Open the shoulder buckle<br />
on the same side.<br />
Put on the vest.<br />
The vest buckles top to bottom:<br />
❑ Slip the vest on.<br />
❑ Buckle the open shoulder buckle.<br />
❑ Buckle the open chest buckle.<br />
❑ Center the chest plate on your chest by tightening the the chest straps<br />
evenly and attach loose ends to velcro.<br />
Flyer Vests, 2 sizes,<br />
compact & regular<br />
❑ Push down on the chest plate to seat the shoulder pads on your shoulders.<br />
❑ Pull out the chest plate release pin and adjust the center spar up or down<br />
so the hip pad sits centered on your hip bones (i.e. the pad is half above<br />
and half below the hip bones.) Replace the chest plate release pin in the<br />
nearest hole.<br />
❑ Tighten the hip straps completely and evenly. Be sure the Velcro straps are<br />
horizontal on the hip pads when you are done.<br />
❑ The vest should be very snug, but not uncomfortable. Adjust strap tension<br />
if necessary.<br />
Section IV:<br />
Balance<br />
Adjustments<br />
19
The Vest<br />
Flyer<br />
Practice removing the vest. The vest should be unbuckled<br />
from bottom to top:<br />
❑ Undo the hip strap first.<br />
❑ Undo the chest<br />
buckle above it.<br />
❑ Undo the shoulder<br />
buckle above the<br />
open chest buckle<br />
and slip out of vest.<br />
When you put it back<br />
on, you will not need<br />
to re-adjust the chest<br />
plate,or the chest<br />
straps.<br />
Flyer Vest<br />
20
Flyer<br />
Determining your threads is part of basic operating<br />
technique:<br />
❑ Two adjustment screws in the socket block on the vest and two<br />
“rod ends” in the mating section of the arm determine the angle<br />
lift of the arm.<br />
❑ These two adjustments are your “threads”. They are personal and<br />
critical for good operating. Some combination of adjustment of these<br />
screws - and your physique and posture - will make the arm lift<br />
straight up when carrying the sled.<br />
❑ The angles of adjustment are not directly “in-out” and “side-to-side”,<br />
but rotated about 30 degrees clockwise (relative to the operator).<br />
We can suggest approximate threads to start, but the only way to<br />
test your threads is to pick up the <strong>Steadicam</strong> and see what happens.<br />
❑ For almost all operators, regardless of body type, the typical adjustment for<br />
the “side-to-side” screws (the rod ends in the arm) is 1.5 to 2 turns out on<br />
the top screw and ALWAYS all the way in on the bottom screw.<br />
❑ Use the rollers when the arm is not under load. The two side-toside<br />
screws work independently of one another. Do not tighten<br />
the lower screw, but be sure it is all the way in, and then back it<br />
out 1/8th of a turn.<br />
The “in-out” adjustment on the socket block varies<br />
greatly by the operator’s body type.<br />
❑ If you have big pecs and a flat stomach, the top screw is almost<br />
all the way in. If you’ve been eating well and exercising less, the<br />
top screw will be further out.<br />
❑ Always dial in the top screw first to your setting, then turn in the bottom<br />
screw until it just snugs up against the fitting. There is no need to tighten<br />
the bottom screw very hard.<br />
❑ With both pairs of screws properly adjusted, the camera will float in all<br />
positions with the operator standing relatively comfortable.<br />
3. If you want to operate “goofy-foot,” - with the sled on the right side<br />
- you will need to reverse the socket block.<br />
Arm Lift Angle<br />
Looking down at the<br />
top “in-and-out” screw.<br />
Count the threads<br />
indicated by the<br />
arrow. This is a typical<br />
adjustment for a<br />
person in reasonable<br />
shape.<br />
Use rollers to adjust<br />
the “side-to-side”<br />
screws. When wearing<br />
the rig, be sure to<br />
hold the centerpost in<br />
line with the “in-out”<br />
thumbscrews. This<br />
will take the loading<br />
off the side-to-side<br />
screws.<br />
Now turn on the videotape and watch<br />
Section V, “Basic Operating Positions”.<br />
You may take the arm & vest off. Remove<br />
the arm BEFORE you take off the vest!<br />
21
Unlocking<br />
and Docking<br />
Flyer<br />
With the vest on and the arm attached to the vest,<br />
undock the rig:<br />
❑ Face the side of the camcorder and<br />
bow at the waist. Don‘t bend your<br />
knees. (It is helpful to have a friend<br />
spotting you the first time you do it.)<br />
❑ Lift the gimbal mounting hole to the<br />
same angle as the post on the connection<br />
arm and place the post in<br />
the hole. Work it in by straightening<br />
and jiggling a little. (Be sure the pin<br />
is inserted all the way into the<br />
mounting hole.)<br />
❑ Use your right hand to hold the arm<br />
and gimbal together. With the other,<br />
pull the aircraft pin out of the<br />
docking yoke.<br />
❑ Place your left hand on the center<br />
post just below the gimbal to steady<br />
the camcorder. Do not try to hold on<br />
to the camcorder.<br />
❑ Move so your left shoulder is next<br />
to the camcorder, bend your knees,<br />
straighten your back and step back<br />
from the stand to remove the sled<br />
from the docking bracket.<br />
You are now holding the <strong>Steadicam</strong>.<br />
Take a deep breath. Relax.<br />
1<br />
2<br />
3<br />
Section V:<br />
Basic Operating<br />
Positions<br />
22
Flyer<br />
Holding the <strong>Steadicam</strong> will feel awkward at first.<br />
Don‘t worry – you will gain endurance and coordination<br />
rapidly as you practice with it. Practice replacing the sled<br />
in the docking bracket now:<br />
❑ Bow from the waist and put<br />
the center post in the bracket<br />
with the stage resting on the<br />
docking yoke.<br />
❑ Put the aircraft pin back in the<br />
docking yoke to secure the sled.<br />
❑ Jiggle a little to slide the arm<br />
post out of the gimbal mounting<br />
hole and step back.<br />
❑ Rest. Stretch.<br />
When you don‘t have time to dock<br />
and undock, you can relieve some<br />
muscle tension by holding the rig<br />
close to your body on either side<br />
or clasping the camcorder close to<br />
your chest. You can even sit down.<br />
Unlocking<br />
and Docking<br />
4 5<br />
6 7<br />
8 9<br />
23
Adjusting the<br />
Arm Tension<br />
For Your<br />
Camcorder<br />
Flyer<br />
The arm tension is adjusted for the heaviest camcorder<br />
it can hold so it does not bottom out when you put the<br />
camcorder and sled on the arm for the first time. Now<br />
adjust the arm for the weight of your camcorder:<br />
❑ With the vest on, attach the arm and undock the rig.<br />
❑ Move the arm to the middle of its booming (up and down range) and<br />
let go. (If it stays where it is, you are probably close to the right adjustment.)<br />
❑ If the camcorder rises, press down on the articulating arm until it is<br />
horizontal and turn the weight adjustment knob counter-clockwise a<br />
couple of turns.<br />
❑ Let the camcorder go again. If it falls, increase the tension by making the<br />
arm horizontal and turning the weight adjustment knob clockwise. If the<br />
camcorder rises, loosen the tension again.<br />
❑ Keep making small adjustments until the camcorder does not rise or fall<br />
when you let go of it in the middle of its booming range.<br />
Remember, the weight adjustment knob turns freely when the<br />
articulating arm is horizontal.<br />
(Do not force or use A pliers type tool to adjust.)<br />
24
Flyer<br />
Position the arm:<br />
❑ Move the camcorder to your left so the arm<br />
crosses your body.<br />
❑ Adjust the arc of the arm so the rig feels<br />
comfortable to you. Keep the camcorder<br />
close to your body.<br />
Position<br />
and Posture<br />
Move your torso to feel how your<br />
body controls the <strong>Steadicam</strong>:<br />
❑ Lean your shoulders back and hips forward.<br />
Feel the camcorder try to move back. Lean<br />
forward from the hips. Feel the camcorder<br />
try to move forward.<br />
❑ Hold your shoulders still and move your hips<br />
from side-to-side. Note how the <strong>Steadicam</strong><br />
moves with the tilt of your hips.<br />
❑ Try to position your body so the camcorder<br />
stays in place with only light fingertip control<br />
from your hands.<br />
Caution: If you rest your right hand on the<br />
connecting arm, keep your fingers out of the<br />
space between the elbow and the articulating<br />
arm. A sudden rise of the camcorder could<br />
injure your fingers if they are in this place.<br />
25
Posture<br />
and Position<br />
Position your hands:<br />
❑ Place the fingers of your<br />
left hand on the center<br />
post just below the gimbal.<br />
All five fingers should<br />
be LIGHTLY in contact<br />
with the post. This hand<br />
will point the camcorder<br />
and do pans and tilts.<br />
❑ Place the fingers of your<br />
right hand on the gimbal,<br />
a little more firmly. This<br />
hand fine tunes the position<br />
of the <strong>Steadicam</strong>,<br />
moving it side-to-side or<br />
closer to or farther from<br />
your body. The right hand<br />
will also boom the arm<br />
up and down.<br />
Flyer<br />
Remember, use your fingertips.<br />
If the Flyer is properly<br />
adjusted, no more<br />
force will be needed.<br />
Clenching the center post<br />
or gimbal will counteract<br />
the <strong>Steadicam</strong>‘s “float”.<br />
Light fingertip control is the<br />
key to a steady camcorder<br />
and smooth moves.<br />
CAUTION: IF YOU REST YOUR RIGHT HAND ON THE CONNECTING<br />
ARM, KEEP YOUR FINGERS OUT OF THE SPACE BETWEEN THE<br />
ELBOW AND THE ARTICULATING ARM. A SUDDEN RISE OF THE<br />
CAMCORDER COULD INJURE YOUR FINGERS IF THEY ARE IN THIS<br />
SPACE. This is incorrect for operation.<br />
Note: Normal <strong>Steadicam</strong> position is close to the body. Pictures<br />
showing <strong>Steadicam</strong> away from body for illustration purposes only.<br />
26
Flyer<br />
Practice moving around in the <strong>Steadicam</strong> and get<br />
used to the way it feels:<br />
❑ Walk around. Pay attention to the way your movements and posture<br />
affect the <strong>Steadicam</strong>. Relax your muscles and control the Flyer with<br />
your body position and a light, finger-tip touch. Leave the monitor off<br />
for now. Don‘t worry about “making shots”.<br />
As the <strong>Steadicam</strong> gets farther away from your body, you must lean back<br />
a bit more and use your arm reach to keep that light balanced touch. If<br />
you lean forward the <strong>Steadicam</strong> will try to move away from you, requiring<br />
a firmer grip and tiring your back muscles more quickly.<br />
Moving Around<br />
in the<br />
<strong>Steadicam</strong><br />
❑ Swing the arm around to find its range of motion. Note how to avoid<br />
hitting your leg with the battery.<br />
❑ Practice gentle boom moves with your right hand. Find the lowest<br />
and highest positions the camcorder can reach. These are the stops.<br />
The <strong>Steadicam</strong> does not function at these extremes. The ideal place<br />
to work is near the center of the <strong>Steadicam</strong>‘s range.<br />
❑ Put the <strong>Steadicam</strong> on the grip stand and take a break.<br />
Stretch and relax.<br />
This is the end of Section V. Turn the videotape on and watch<br />
Section Vl, “Exercises 1 & 2”.<br />
27
Practice<br />
Exercises<br />
Flyer<br />
The following practice exercises are designed with<br />
two purposes: To get you familiar with moving in the<br />
Flyer, and to help you begin to develop operating<br />
skills.<br />
These exercises may seem very different to you<br />
than heroic and complex “<strong>Steadicam</strong> shots” like<br />
following waiting or running actors across open or<br />
bumpy terrain. But it is important to note that having<br />
a lot of action in the frame can hide important operating<br />
mistakes. These exercises will teach you good<br />
habits and skill from the start.<br />
Prepare for the exercises. You will need a space<br />
where you can walk in a straight line for 15 to<br />
25 feet.<br />
❑ Put up a 2 x 2 foot tape cross on the wall,<br />
placing the crossing tape lines horizontal<br />
and vertical.<br />
❑ Make a straight tape line on the floor<br />
perpendicular to the wall. The line should<br />
start abut three feet from the wall and run<br />
for 15 to 25 feet.<br />
Practice<br />
exercises<br />
28
EXERCISE 1: Walking the line<br />
Flyer<br />
Practice<br />
Exercises<br />
In this exercise, you will learn to move the<br />
camcorder smoothly along a straight line.<br />
❑ Get into the rig. Leave the monitor off. Position<br />
the arm across your body and the camcorder<br />
on your left side.<br />
❑ Stand at one end of the tape line on the floor<br />
with the center post directly over the line.<br />
❑ Walk forward. Look down to see that you are<br />
keeping the center post over the tape line. If<br />
you have trouble getting it there, adjust the<br />
arm or your distance from the line. Don't forget:<br />
FINGERTIPS on the center post and gimbal.<br />
❑ Go back the other way. Lean slightly forward as<br />
you walk forward to get a smooth start. Try walking<br />
with your knees slightly bent. Go back and forth<br />
until you feel comfortable with this. Don't worry if<br />
there is some bounce in the camcorder as you<br />
walk. It will steady as you improve.<br />
Section VI:<br />
exercises 1 & 2<br />
29
Practice<br />
Exercises<br />
EXERCISE 2: Over the shoulder<br />
Flyer<br />
In this exercise, you will learn to<br />
shoot with the camcorder pointing<br />
back over your shoulder.<br />
This is useful if you are walking<br />
in front of your subject.<br />
❑ Walk the tape line on the floor<br />
with the camcorder shooting back<br />
over<br />
your left shoulder. Shooting this<br />
way lets you see where you're<br />
going.<br />
❑ Keep the center post over the<br />
tape line as in the previous exercise.<br />
Do this several times until<br />
you are comfortable with it.<br />
This is the end of Section Vl,<br />
“Exercises 1 & 2”. Start the<br />
videotape and watch Section Vll,<br />
“Exercises 3, 4 & 5” before you<br />
attempt to do them.<br />
30
EXERCISE 3: The switch<br />
Flyer<br />
Practice<br />
Exercises<br />
In this exercise, you will learn to make a move around your <strong>Steadicam</strong><br />
so you can change the direction of your travel without changing the<br />
direction of the camcorder:<br />
❑ Stand at one end of the tape line, with the<br />
camcorder pointing forward and the center<br />
post over the line (Figure 1).<br />
❑ Step back with your right foot to start the<br />
camcorder moving back (Figure 2).<br />
❑ Let your fingertips slide around the center<br />
post as you move.<br />
❑ Step your left foot to your left, across the<br />
tape line (Figure 3).<br />
❑ Pivot on your left foot and step your right foot<br />
across the line, so your right foot comes down<br />
facing the new direction of travel (Figure 4).<br />
❑ Step and go. The camcorder is still facing the<br />
same direction but now it is "over the shoulder"<br />
and you are moving in the opposite direction<br />
(Figure 5).<br />
❑ Walk a few steps along the tape line then<br />
come to a smooth stop.<br />
❑ Turn the camcorder around and try the move<br />
again. Repeat the move until you feel comfortable<br />
with it.<br />
Section VII:<br />
exercises 3, 4 & 5<br />
31
Practice<br />
Exercises<br />
EXERCISE 4: The reverse switch<br />
Flyer<br />
In this exercise, you will again change your direction of travel without<br />
changing the direction the camcorder is aimed. You begin with the<br />
camcorder over your shoulder this time.<br />
❑ Stand at one end of<br />
the tape line, with<br />
the camcorder pointed<br />
over your shoulder<br />
and the center<br />
post over the line<br />
(Figure 1).<br />
❑ Begin the move by<br />
pivoting to your left<br />
to start the camcorder<br />
moving<br />
along the line.<br />
❑ Step back and turn<br />
with your left foot<br />
(Figure 2).<br />
❑ Step across the line<br />
with your right foot<br />
so your body moves<br />
around the camcorder<br />
and the right<br />
foot lands in the new<br />
direction of travel<br />
(Figure 3).<br />
❑ Step your left foot across the center line and go (Figure 4).<br />
❑ Walk a few paces along the tape line. Come to a smooth stop. Repeat this<br />
move until you feel comfortable with it.<br />
32
Flyer<br />
EXERCISE 5: The walk and switch<br />
Practice<br />
Exercises<br />
This combines the previous three exercises.<br />
❑ Lean forward for a gentle start. Walk forward with the center post<br />
over the tape line. Aim at the cross on the wall.<br />
❑ At the end of the line, come to a gentle stop and do the Switch:<br />
step the right foot back ... step the left foot across the line ...<br />
pivot step ... and go.<br />
❑ When you get to the other end of the tape line, stop gently and<br />
do a Reverse Switch: pivot to the left ... step and turn with the left foot ...<br />
step across the line with the right foot ... step the left foot across the<br />
line and go.<br />
Keep the camcorder pointing at the tape cross. Repeat the exercise<br />
until it gets comfortable.<br />
This is the end of Section Vll, “Exercises 3, 4 & 5”. Take a well deserved<br />
break and watch Section VIII of the videotape, “Exercises 6 & 7”.<br />
33
Practice<br />
Exercises<br />
EXERCISE 6: Pan and tilt<br />
Flyer<br />
In this exercise, you will practice smooth and controlled<br />
pans and tilts.<br />
❑ Make a small circle on the center of the <strong>Steadicam</strong> monitor screen<br />
with a grease pencil.<br />
❑ Get into the rig and power up your system (at last). Set the lens to<br />
medium wide angle.<br />
❑ With your left hand resting LIGHTLY on the center post just below<br />
the gimbal, and your right hand on the gimbal, practice pans. Aim the<br />
camcorder at the cross you made earlier on the wall, so the circle on<br />
the monitor is over the left end of the horizontal tape line. Gently pan<br />
right and stop at the right end of the tape. Practice feathering your<br />
starts and stops.<br />
❑ Practice tilts. Place the monitor circle on the bottom of the vertical<br />
tape line. Tilt up the line and stop at the top. Feather starts and stops.<br />
Tip: When you tilt, you can avoid unwanted panning by adjusting<br />
your grip. Move the pinkie of your “tilt” hand onto the back of<br />
the center post for stabilization.<br />
Section VIII:<br />
exercises 6 & 7<br />
34
Flyer<br />
EXERCISE 7: Walk and switch with the monitor on<br />
Practice<br />
Exercises<br />
Repeat Exercise 5 with the monitor turned on.<br />
❑ Walk the line, switch, walk back and reverse switch. Keep an eye<br />
on the monitor and try to keep the dot in the center on the center<br />
of the tape cross.<br />
❑ When you are getting good at this exercise, put tape in your<br />
camcorder and record the move. Play it back. Look for smooth<br />
moves, smooth starts and smooth stops. If the move gets really<br />
easy, zoom in.<br />
This is the end of the Exercise Sections and the end of the<br />
videotape. Be sure to read the rest of the manual, especially<br />
Section X, “Safety Precautions”. You will find instructions for<br />
more exercises and adjustments in the next section,<br />
“Additional Exercises and Adjustments”.<br />
35
Additional<br />
Exercises &<br />
Adjustments<br />
Trimming for headroom<br />
Flyer<br />
So far, we have assumed the camcorder’s rest position should be exactly<br />
horizontal. This is not always the case. You can use the balance and trim<br />
of the flyer <strong>Steadicam</strong> to work for your shots. If you are going to have<br />
to hold the camcorder at a tilt for much of a shot, (like looking up at a tall<br />
actor), you can adjust the fore/aft trim so the flyer seeks the proper tilt<br />
angle. You might trim for the hardest part of a shot. Proper trimming reduces<br />
the need to use your left hand. The smaller the force applied to the center<br />
post, the smaller will be the disturbance to the image.<br />
❑ Walk up stairs with the camcorder aimed at the top of the stairs.<br />
Before you begin, adjust trim for the desired tilt.<br />
❑ Make a shot going down stairs with the camcorder aimed at the<br />
bottom and the trim adjusted for the desired tilt.<br />
❑ Make shots going up and down stairs with the camcorder aimed<br />
over your shoulder. Once again, adjust trim before making the shot.<br />
36<br />
Section iX:<br />
Additional exercises &<br />
Adjustments
Following a moving subject<br />
Flyer<br />
Additional<br />
Exercises &<br />
Adjustments<br />
The following additional exercises will help you become accustomed<br />
to more complex moves and to following a moving subject. You will<br />
need a friend or co-worker to act as your subject. Do these exercises<br />
with the monitor on. Run the tape and check playback.<br />
In this exercise, you will learn to adjust for head room<br />
with the boom function.<br />
❑ Start with the camcorder boomed low. Have a person walk past you.<br />
❑ Boom up as the subject approaches, then down as the subject moves<br />
away. The object is to hold headroom with the boom function, not the<br />
tilt. This avoids keystoning the set or showing unnecessary floor or<br />
ceiling details.<br />
2. Practice shooting to the side.<br />
❑ Have your friend walk as you walk alongside.<br />
❑ Vary the distance between the camcorder and the subject.<br />
❑ Move from a medium to a close shot.<br />
❑ Walk on the other side of the subject.<br />
Create simple scenarios. You might ask your subject<br />
to go from one room to another, pick up an object<br />
and carry it to a third room.<br />
❑ Rehearse the move to determine where you want the <strong>Steadicam</strong><br />
to be as you follow the action.<br />
❑ Record the move on tape, watch playback and re-do the move<br />
until you get a take you are happy with.<br />
❑ Do two or three shots like this.<br />
37
Additional<br />
Exercises &<br />
Adjustments<br />
Adjusting for<br />
right side operation<br />
Flyer<br />
Some shots (like moving along<br />
a wall close to the right of the<br />
camcorder) will require you to<br />
reverse the bridge and operate<br />
with the camcorder on the right<br />
side of your body. You should<br />
eventually learn to operate the<br />
<strong>Steadicam</strong> in both configurations.<br />
❑ With the sled docked and the<br />
arm removed, turn the adjusting<br />
rollers counter-clockwise to<br />
begin removal of the arm interface.<br />
Turning both equally, the<br />
male arm vest interface assembly<br />
will separate from the two<br />
adjustment rods. Turn the piece<br />
180° to reverse procedure.<br />
Turn rollers until the male component<br />
is fully assembled onto<br />
the rods. Then use normally.<br />
❑ To become accustomed to this<br />
position, practice Exercises 1 -<br />
7 with the bridge on the left and<br />
the camcorder on your right.<br />
Please be careful when removing<br />
& replacing the screws to<br />
be properly aligned.<br />
38
Other adjustments<br />
Flyer<br />
Additional<br />
Exercises &<br />
Adjustments<br />
Changing the vertical balance:<br />
As you get more experienced, you may want to adjust vertical balance for<br />
a three second drop time. This makes the rig less bottom heavy and a less<br />
bottom heavy rig gives you more delicate control. This is especially useful<br />
when a shot requires a lot of tilting. On the other hand, level shots that do<br />
not require a lot of tilt are easier to do with a slightly more bottom heavy rig.<br />
To get a more bottom heavy rig, adjust the sled in the gimbal for a quicker<br />
drop time.<br />
Cleaning the vest liner:<br />
The liner of the <strong>Steadicam</strong> vest is held in place with Velcro. It can be<br />
removed and washed by hand with mild soap and water. The foam inserts<br />
should be removed so they do not get wet*. After washing, air dry thoroughly.<br />
When you replace the liner, conform it to the shape of the vest.<br />
*Note:<br />
Some vests do not have conversion to remove foam. Just wash and<br />
allow to - AIR - dry. Commercial laundry’s can wash and dry pads.<br />
39
Safety<br />
Precautions<br />
Flyer<br />
<strong>Steadicam</strong> operating safety is largely a matter of common sense.<br />
Here is a quick list of ideas about avoiding problems:<br />
❑ Check the area you'll be shooting in before you shoot, without wearing<br />
the gear. Make sure your path is clear. Look for obstacles and note<br />
anything you might run into or trip over.<br />
❑ Use a spotter to guide you around objects and to catch you if you fall.<br />
Rehearse with the spotter.<br />
❑ Rehearse getting on and off cranes and other vehicles, including<br />
connecting and disconnecting carabineers and safety harnesses.<br />
Check knots.<br />
❑ Use appropriate footwear.<br />
❑ Use kneepads in rough terrain or when moving quickly. Some<br />
operators always wear kneepads.<br />
❑ Avoid situations where one commonly falls like skis, skates or<br />
running in loose sand or snow.<br />
❑ Never use the flyer in a helicopter.<br />
❑ Above all, never be pressured into shooting when you feel it is unsafe.<br />
Section X:<br />
Safety Precautions<br />
40
Flyer<br />
Trouble<br />
Shooting<br />
1. If the flyer comes out of horizontal trim as you<br />
work, adjust the fore/aft or side-to-side knobs.<br />
2. If the bottom of the rig "pendulums" (keeps<br />
moving when you stop a move), adjust the<br />
vertical balance for a slightly longer drop time<br />
(less bottom heavy).<br />
3. If the rig feels unstable and wants to tip at the<br />
top, adjust the vertical balance for a slightly shorter<br />
drop time (more bottom heavy).<br />
4. If the rig tends to drift toward one side, shift the<br />
alignment of the center spar on the vest to compensate.<br />
If it persists in shifting out of adjustment, you<br />
may be wearing the vest too loosely.<br />
5. If your camcorder is slightly over 15 pounds,<br />
try removing accessories, eyepiece, batteries.<br />
6. It there is no picture on the monitor, check<br />
the switches and cables. Make sure the battery<br />
is charged.<br />
7. Technical Support is available 7:00am pst – 4:00pm<br />
pst daily Monday through Friday. Emergency service<br />
is available 24/7 by calling 1-818-749-8748.<br />
If you need any additional help or advice or if you<br />
want information about <strong>Steadicam</strong> Workshops,<br />
please feel free to call the <strong>Steadicam</strong> support team<br />
at The Tiffen Company. The number is (631) 273-2500<br />
or www.tiffen.com.<br />
Section XI:<br />
Trouble Shooting<br />
41
Notes<br />
Notes<br />
42