
You also want an ePaper? Increase the reach of your titles
YUMPU automatically turns print PDFs into web optimized ePapers that Google loves.
Contents<br />
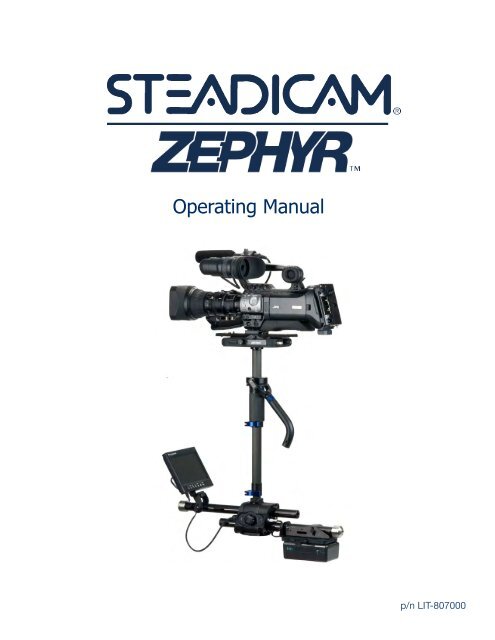
<strong>Operating</strong> <strong>Manual</strong><br />
p/n LIT-807000
STEADICAM ® ZEPHYR <br />
<strong>Operating</strong> <strong>Manual</strong><br />
The Tiffen Company<br />
90 Oser Avenue<br />
Hauppauge, New York 11788<br />
631 273-2500<br />
800 645-2522<br />
631 273-2557 fax<br />
www.steadicam.com<br />
steadicam@tiffen.com<br />
www.tiffen.com<br />
Technical Support<br />
1-818-843-4600 ext.17<br />
Manufactured in the United States of America<br />
2<br />
© 2011 The Tiffen Company, LLC. Written by J. Holway & L. Hayball
Table of Contents<br />
Overview 4<br />
The Zephyr Sled 6<br />
Getting Started 8<br />
Attaching the Camera 10<br />
Balancing 12<br />
The Vest 14<br />
The Arm 16<br />
Setting Your Threads 17<br />
Picking Up the Sled 18<br />
Adjusting the Lift 20<br />
Basic <strong>Operating</strong> 22<br />
Advanced Techniques<br />
Dynamic Balancing 24<br />
Low Mode 26<br />
Accessories 28<br />
Cases and Packing 29<br />
<strong>Operating</strong> a <strong>Steadicam</strong> ® stabilizer will take time and effort. One key to great operating is setting up and<br />
balancing your sled properly. Another is adjusting the vest to your body, and setting the arm to properly lift<br />
the load.<br />
The next steps are learning how to balance yourself with the rig, how to stand and walk, how to prevent<br />
pendular effects as you move, and what each hand is used for.<br />
This manual is to be used to instruct you in setting up and using your <strong>Steadicam</strong> ® Zephyr stabilizer system.<br />
If you have not already done so, we strongly urge you to take a 2, 3, or 6-day <strong>Steadicam</strong> ® workshop for<br />
the best possible training and start to your career as a <strong>Steadicam</strong> ® operator (find more information about<br />
workshops at www.steadicam.com).<br />
The Zephyr is not a push-button magic stick that instantly creates great images. It’s a precision instrument<br />
that responds to your touch. Although it’s not that difficult to operate, it is a skill that takes a bit of time and<br />
effort to learn. The more effort and practice you put into operating, the better you will be, so it’s important to<br />
develop good habits from the beginning.<br />
Several two-hour sessions will get you started, but an operator can always be more skilled with a<br />
<strong>Steadicam</strong> ® stabilizer and also be more effective and artistic in choosing how to start, move, and stop the<br />
camera. In the beginning, it’s helpful and more fun to have a friend work with you. Take turns practicing<br />
and spotting for each other. Use a second video camera to record your exercises – how you stand and move<br />
is critical for great operating.<br />
STEADICAM ® , UltraBrite ® , Ultra 2® and Scout are trademarks of the Tiffen Company, LLC.<br />
The Tiffen Company, 90 Oser Avenue, Hauppauge, NY 11788 • 631-273-2500 • 1-800-645-2522 • www.tiffen.com<br />
Tiffen <strong>Steadicam</strong> ® Operations, Glendale, CA • 818-843-4600 • 1-800-593-3331 • www.steadicam.com<br />
3
Overview<br />
The Tiffen Company takes great<br />
pride in producing the world’s<br />
best stabilizers. The Zephyr <br />
stabilizer continues our tradition<br />
of excellence and innovation,<br />
filling the need for a high<br />
performance, lightweight, and<br />
low-cost rig.<br />
Like all our models, the Zephyr <br />
stabilizer is designed to be<br />
user-friendly, field-serviceable,<br />
tool-free, straightforward, and<br />
versatile so the operator can<br />
quickly and easily configure<br />
the sled, arm, and vest to the<br />
best advantage for each shot.<br />
Change the sled length, balance,<br />
inertia, and go to low mode in<br />
a heartbeat. Solid, versatile,<br />
and fast – it’s a breeze with the<br />
Zephyr system.<br />
The base Zephyr system starts with a sturdy, two section, indexed<br />
telescoping carbon fiber post coupled to a sturdy two-axis vernier<br />
stage for quick and precise balancing. A new solid base is equipped<br />
with independently telescoping monitor and battery rods. The Zephyr <br />
system comes standard with the Tango -ready, tool-free gimbal, 16:9<br />
SD LCD Color monitor, and a single battery mount for 12 volts—either<br />
V-Lock or Anton Bauer (AB). 24 volts is optional.<br />
A word about 12 and 24 volts as used in the manual: 12 and 24 volts<br />
typically refer to the nominal voltages required by cameras and<br />
accessories, but the voltage range accepted by the device might be 10 to<br />
16 volts or 20 to 34 volts. Each camera or accessory has its own range<br />
of useful voltages.<br />
Different battery chemistries and numbers of cells typically result in<br />
nominal battery voltages of 14.4 or 14.8 volts, or with two batteries in<br />
series, 28.8 or 29.6 volts. The actual voltage in a battery might be from<br />
11 to 17 volts, depending on charge and battery type. Nominal battery<br />
voltages are always higher than the nominal required by the device, so<br />
that when the battery is almost depleted, it still has more voltage than<br />
that required by the device.<br />
4
Options for the Zephyr stabilizer<br />
include a 7” high definition<br />
monitor, 24 volts, and a compact<br />
vest, plus batteries, chargers,<br />
cases, stands, power and video<br />
cables, low-mode kits, vehicle<br />
mounts, and other professional<br />
accessories. Visit www.tiffen.com<br />
for more details.<br />
The monitor and the batteries are<br />
adjustable in and out, which, along<br />
with the add-on Merlin weights,<br />
creates many choices for viewing,<br />
balance, and inertial control.<br />
All of the above features are<br />
integral to the Zephyr stabilizer<br />
design, ready to be used when<br />
needed.<br />
Some “12 volt” connectors on<br />
the sled may have a regulated<br />
(fixed) output of 12 to 14.4 volts,<br />
regardless of the voltage of the<br />
batteries at any given moment.<br />
Included in the base package: the<br />
Zephyr Iso-Elastic Stabilizer<br />
Arm, Lightweight Zephyr Vest,<br />
Zephyr Docking and Balancing<br />
Bracket, 8 add-on Merlin <br />
weights, wheeled hard case with<br />
handle, 12 volt power cable,<br />
video cable, 2 video adaptors, the<br />
EFP instructional DVD, and the<br />
owner’s manual.<br />
5
The Zephyr sled<br />
The Zephyr Sled<br />
Camera mounting<br />
platform<br />
Stage<br />
connectors<br />
Side to side<br />
adjustment<br />
knob<br />
Dovetail<br />
lock<br />
Fore-aft<br />
adjustment<br />
knob<br />
Gimbal<br />
clamp<br />
Post<br />
Add-on<br />
weights<br />
Post clamp<br />
Add-on<br />
weights<br />
Clamp for sliding monitor<br />
and battery rods<br />
6
Gimbal<br />
Gimbal<br />
handle<br />
Battery mount<br />
1/4-20 threads<br />
for mounting<br />
accessory weights<br />
additional LEMO<br />
power connector<br />
Registration pin<br />
for monitor rod<br />
HD BNC<br />
connector<br />
Registration pin<br />
for battery rod<br />
7
Prepare the stand and docking bracket<br />
Getting Started<br />
Set up the stand and docking bracket:<br />
• Set up your stand at about chest<br />
height.<br />
• Use one or more sandbags to<br />
stabilize the stand.<br />
• Put the docking bracket on the<br />
stand and tighten the docking<br />
bracket locking knob.<br />
• Push the button at the end of the<br />
aircraft pin and pull the aircraft pin<br />
out of the yoke.<br />
Prepare the sled for the camera<br />
Adjust the monitor position:<br />
• Position the monitor and battery<br />
sliding rods as shown. If required,<br />
you may need to temporarily<br />
remove the locating pin for<br />
the monitor rod to achieve this<br />
extension.<br />
• Add the accessory weights to the<br />
rods as shown. For starters, use<br />
1 middle and 1 starter weight on<br />
each tube.<br />
• Tilt the monitor to about 45 degrees.<br />
Adjust the gimbal position:<br />
• Slide the gimbal close to the top of<br />
the center post, but always leave<br />
enough space between the gimbal<br />
and the stage to accommodate the<br />
docking yoke (about 1in/25mm).<br />
.<br />
8
Adjust the battery position and<br />
attach the batteries:<br />
• Attach the battery onto the battery<br />
mount. Be sure the safety catch is<br />
engaged.<br />
V-lock battery<br />
Remove the dovetail from the<br />
stage and set aside:<br />
• Loosen the dovetail locking knob<br />
until the dovetail can be tilted out<br />
sideways.<br />
• Safety stops on the dovetail keep<br />
the dovetail from sliding off the<br />
stage when the dovetail locking<br />
knob is loose.<br />
• The stops also prevent the dovetail<br />
from being inserted into the front<br />
or rear of the stage. Therefore, do<br />
not attempt to slide the dovetail into<br />
place from the front or back.<br />
dovetail<br />
lock<br />
AB battery<br />
Dock the sled in the docking<br />
bracket:<br />
side to side<br />
adjustment<br />
knob<br />
fore-aft<br />
adjustment<br />
knob<br />
Back of stage:<br />
• Camera power connector. 3 pin<br />
LEMO: EGG.0B.303.<br />
• Standard definition (PAL/NTSC)<br />
composite video in. BNC<br />
• Hold the sled upright, with the<br />
monitor (front) to the left. Place the<br />
center post into the bracket so the<br />
bottom of the stage rests on the<br />
yoke.<br />
• Push the aircraft pin back through<br />
the yoke, securing the post in the<br />
bracket.<br />
Front of stage:<br />
• HD BNC<br />
• Two expansion ports for future<br />
options and accessories.<br />
• Additional power connector.<br />
3-pin LEMO: EGG.0B.303.<br />
9
Attaching the camera to the sled<br />
Attaching the<br />
Camera<br />
We attach the camera to the sled via a dovetail plate. With the Zephyr stabilizer,<br />
this plate has safety stops on the ends, and several holes for mounting screws. We<br />
want to attach the dovetail to the camera so that we have the widest possible range of<br />
adjustment, both fore-aft and side to side.<br />
We start this process by finding the<br />
camera’s center of gravity (c.g.) or<br />
balance point, then properly position the<br />
dovetail plate relative to the camera’s c.g.<br />
Finding the camera’s c.g.:<br />
• If you like, remove the battery from<br />
your camera if it has an auxiliary<br />
power input, either 12 or 24 volts.<br />
With a very heavy camera (15+<br />
pounds/6.8kg or so), this is a good<br />
idea, but it’s not necessary or<br />
advisable with a very light camera.<br />
• Attach all accessories, matte boxes,<br />
obie lights, etc. and load the tape<br />
or film. If the camera has a quickrelease<br />
plate (tripod adaptor), leave<br />
it on the camera.<br />
• Balance the camera fore-aft on a<br />
rod or pencil (as shown) and mark<br />
the balance point with a piece of<br />
tape.<br />
• Repeat for side to side.<br />
Finding the camera’s fore-aft<br />
center of gravity.<br />
Finding the camera’s side to<br />
side center of gravity.<br />
Attaching the dovetail plate:<br />
• Examine the dovetail. Turn it over to<br />
locate the three rows of large and<br />
small slots, and the stops.<br />
• Remove the screws that are stored<br />
at the front of the dovetail.<br />
• Place the dovetail against the<br />
bottom of the camera (or quick<br />
release plate) and move the dovetail<br />
fore-aft until the second slot from<br />
the rear is over the camera’s c.g.<br />
This position is not intuitive, so<br />
pay close attention to this detail.<br />
• Now move the dovetail as little as<br />
possible until one or more screw<br />
holes are accessible. Choose<br />
holes as far apart as possible for<br />
maximum stability.<br />
• Insert the screws and tighten with a<br />
screwdriver.<br />
10
Mounting the camera on the sled:<br />
• Place the camera above the camera mounting platform. Be sure the locking<br />
knob is loose. Angle the right edge of the dovetail into the holder. Be sure to<br />
keep everything parallel. Lower the left side into the holder.<br />
• If the camera won’t drop fully into place, be sure the right side of the dovetail<br />
is fully inserted, all is parallel, and the locking mechanism is out of the way.<br />
It’s a close fit.<br />
• Camera power connector.<br />
3 pin LEMO: EGG.0B.303.<br />
• Standard definition (PAL/NTSC)<br />
composite video in. BNC<br />
Connect the power and video<br />
cables and test that everything<br />
works:<br />
• After the dovetail drops into place, slide the camera until the fore-aft c.g.<br />
mark is about .5in (12mm) behind the centerline of the telescoping posts.<br />
The post is 1.1in (28mm) in diameter, so you can use the back of the post<br />
as a guide for placing the camera c.g.<br />
• Tighten the locking knob to fully lock the camera into place. You are now<br />
ready to static balance the sled.<br />
• Connect the BNC to BNC<br />
video cable (use the BNC to<br />
RCA adapter if necessary)<br />
from the camera to the video<br />
input on the back of the stage.<br />
If necessary, choose the<br />
camera’s video output that<br />
allows you to watch playback<br />
as well as “live” video.<br />
• If necessary, connect the<br />
power cable by plugging the<br />
three-pin Lemo into the Power<br />
output on the back of the stage<br />
and the other end into the<br />
appropriate DC power input on<br />
your camera. Several power<br />
cables are available for various<br />
cameras and voltages. See the<br />
accessories page for the power<br />
cable details.<br />
• Secure the cables with cable<br />
ties, Velcro ® , or gaffer tape.<br />
Leave enough slack for<br />
adjustment of the stage.<br />
• Power up the monitor and<br />
camera to make sure you have<br />
a picture. If you do not, try<br />
adjusting the brightness and<br />
contrast controls; check the<br />
cables, battery voltage, etc.<br />
• Turn off the camera and<br />
monitor.<br />
Now proceed to static balance<br />
the sled.<br />
11
Balancing the sled<br />
Balancing<br />
The <strong>Steadicam</strong> ® Zephyr stabilizing system works, in part, by the careful balancing of<br />
components (camera, monitor, accessories, and battery). We always balance the sled<br />
to help us get the shot, so that the operator does the least amount of work to aim the<br />
camera. There are several components of balance. The first one to work on is “static”<br />
balance, where we balance the sled in all three axes (top-to-bottom, side to side, and<br />
fore-aft), so that the sled hangs upright and is not too bottom heavy.<br />
To adjust the balance, we need to put the sled on the docking bracket<br />
balancing stud where it can hang freely from the gimbal<br />
• Pull the aircraft pin and remove the<br />
sled and camera from the docking<br />
bracket.<br />
• Release the top clamp knob and<br />
slide and extend the docking<br />
bracket. Tighten the locking knob.<br />
• Place the gimbal’s mounting hole<br />
on the balancing stud.<br />
If the sled is neutrally balanced (neither<br />
top nor bottom heavy) it’s impossible to<br />
balance the sled fore-aft or side to side,<br />
and the operator must do all the aiming of<br />
the sled – not good either.<br />
Top to bottom balance<br />
Let’s start with top-to-bottom balance, as<br />
it is one of the least understood aspects of<br />
balance.<br />
It’s best if the sled is slightly bottom<br />
heavy. Clearly, if it is top heavy, it will<br />
tip over. If it is too bottom heavy, it will<br />
hang upright (a good thing) but be hard to<br />
tilt and very hard to control as you move<br />
around (not good at all!).<br />
So immediately, you should understand<br />
that top-to-bottom balance is a<br />
compromise between competing desires.<br />
If it is just slightly bottom heavy, it can<br />
be balanced to hang at a particular angle<br />
and easier to control.<br />
How do we get the right top-to-bottom<br />
balance?<br />
12<br />
Note: changing the<br />
length also changes<br />
the range of lens<br />
heights. This can<br />
be a useful tool with<br />
any weight camera.<br />
Note: Before letting go of<br />
the sled, be certain that<br />
it will hang more or less<br />
upright. If the sled wants<br />
to hang upside down, the<br />
camera weight is beyond<br />
the weight specifications of<br />
the <strong>Steadicam</strong> ® Zephyr .<br />
When balancing a<br />
heavier camera, you<br />
may have to extend<br />
the post. While holding<br />
the bottom of the sled,<br />
release the post clamp<br />
and lengthen the post.<br />
Close the clamp.
First we position the gimbal, which acts<br />
as a pivot point, just a bit above the<br />
center of gravity on the center post, and<br />
here’s how we do that:<br />
• Rotate the center post to horizontal.<br />
Hold it securely.<br />
balance point of<br />
the gimbal<br />
Look at the sled from the side. If the sled is tipped up or down:<br />
• Hold the center post vertical.<br />
• Move the camera forward or<br />
backward by turning the fore-aft<br />
knob until the camera is level. You<br />
can use a bubble level to help you<br />
find vertical.<br />
• With one hand firmly holding the<br />
camera or the center post, open<br />
the gimbal clamp. Remember to<br />
always keep the post horizontal<br />
when the gimbal clamp is<br />
loosened!<br />
• Grasp the center post and carefully<br />
slide the post in the gimbal. Use<br />
your thumb to push against the<br />
gimbal. Find the place where the<br />
sled is balanced on the gimbal<br />
like a seesaw on a fulcrum. Then<br />
slide the post through the gimbal<br />
about 1/2” (12mm) towards the<br />
battery. This will place the sled’s<br />
c.g. 1/2” (12mm) below the gimbal<br />
yoke bearings, and the sled will be<br />
slightly bottom heavy.<br />
• Close the gimbal clamp.<br />
WARNING: If you open<br />
the gimbal clamp when<br />
the center post is<br />
vertical, the whole sled<br />
will drop rapidly and<br />
damage your sled.<br />
We will fine-tune top to bottom balance<br />
after we get close to fore-aft and side to<br />
side balance. We may need to fine-tune<br />
the balance in one axis after we balance<br />
in another axis. The object is to get as<br />
close as possible to the best balance for<br />
the shot.<br />
Fine tune the side to side balance:<br />
• Look at the sled from the front or rear.<br />
Adjust the side to side knob on the stage<br />
until the center post is vertical. Again, you<br />
can use a bubble level to help you find<br />
vertical.<br />
side to side<br />
adjustment<br />
knob<br />
fore-aft<br />
adjustment<br />
knob<br />
Now we are ready to fine-tune the top-to-bottom balance by using the<br />
“drop time” test<br />
• Make sure the dovetail locking knob is tight.<br />
• It’s good to have an assistant hold the stand.<br />
• Rotate the sled to horizontal.<br />
• Let go of the center post.<br />
• Count how many seconds it takes the center post to fall through vertical.<br />
If the rig has a drop time of less than two seconds it is too bottom heavy. You need to<br />
move the sled’s c.g. upwards, closer to the gimbal. If the drop time is more than three<br />
seconds, move the sled’s c.g. lower, further from the gimbal:<br />
• With the rig horizontal, open the clamp and slide the centerpost through the<br />
gimbal about 1/8” (3mm) in the proper direction.<br />
• Close the gimbal clamp.<br />
• Re-do the drop test. Keep making small adjustments until the sled has a 2<br />
to 3 second drop time.<br />
• Recheck the fore-aft and side to side balance by looking at the sled. Trim<br />
with the fore-aft and side to side knobs as necessary.<br />
Note: A drop time of 1 to 4 seconds might be best for a<br />
particular shot. You will eventually determine what works<br />
best for you for average shooting, and what works best<br />
for you for each shot. But let’s start with a 2 to 3 second<br />
drop time.<br />
13
The Vest<br />
The vest<br />
Shoulder<br />
connector<br />
Adjustable<br />
spar<br />
Chest plate<br />
release pin<br />
Shoulder<br />
pad<br />
Use an allen key to<br />
unlock and adjust the<br />
angle of the shoulder<br />
connector<br />
Chest pad<br />
Chest<br />
connectors<br />
Hip<br />
pad<br />
Socket block<br />
Socket block<br />
height adjustment<br />
Note: Shorten or extend the shoulder<br />
straps so that the clip is high on your<br />
shoulders when the chest straps are<br />
horizontal.<br />
Also be sure that the shoulder straps<br />
are evenly extended and at the same<br />
angle to the Velcro ® .<br />
Adjustable<br />
velcro ® straps<br />
14
Putting on the vest<br />
Please read the vest instructions<br />
completely before you try to put the vest<br />
on. It is very helpful to have a friend help<br />
you the first time you put on the vest.<br />
Otherwise use a full-length mirror.<br />
• Pull out the chest plate release pin<br />
and adjust the center spar up or<br />
down so the hip pad sits centered<br />
on your hips. Replace the chest<br />
plate release pin in the nearest<br />
hole.<br />
Open the vest<br />
• Loosen both chest straps.<br />
• Release the hip straps on the left<br />
side.<br />
• Open the chest buckle on the left<br />
side.<br />
• Open the shoulder buckle on the<br />
left side.<br />
• Slip the vest on.<br />
• Close the shoulder buckle.<br />
• Be sure the Velcro ® straps are<br />
horizontal on the hip pads, and<br />
tighten the hip straps completely<br />
and evenly.<br />
Pay close attention to the good<br />
fit of the vest in the photo<br />
above. It’s very important how<br />
the shoulder pads contact the<br />
shoulders and the shoulder<br />
connectors are not too high (a<br />
common mistake).<br />
• Close the chest buckle.<br />
• Center the chest plate on your<br />
chest.<br />
• Tighten the chest straps evenly and<br />
secure the loose, Velcro ® ends.<br />
• Push down on the chest plate to<br />
seat the shoulder pads on your<br />
shoulders.<br />
• Close the buckles at the chest and<br />
hips.<br />
• The vest should be very snug,<br />
but not uncomfortable. Adjust the<br />
straps as necessary.<br />
Removing the vest<br />
The vest should be unbuckled on the left<br />
side only, from bottom to top:<br />
• Undo the hip strap first.<br />
• Undo the chest buckle.<br />
• Undo the shoulder buckle and<br />
slip out of the vest. When you<br />
put it back on, you will not need<br />
to readjust the chest plate or the<br />
chest straps.<br />
Note: A few operators have<br />
body shapes or sizes that<br />
are out of the general range<br />
of adjustments. You may<br />
find you have to add or<br />
remove padding, shorten<br />
or extend straps, etc. to<br />
make the vest fit perfectly.<br />
15
The arm<br />
The Arm<br />
Arm post<br />
Forearm section<br />
Lift<br />
adjustment<br />
knob<br />
Double action<br />
hinge<br />
Steel<br />
springs<br />
Upper arm section<br />
Lift adjustment<br />
knob<br />
Socket quick<br />
release pin<br />
Mounting the arm to the vest<br />
Socket<br />
Rod ends<br />
16<br />
The arm mates with the vest via an<br />
adjustable socket in the arm and a<br />
female socket block on the vest. The two<br />
adjustment screws in the socket block on<br />
the vest and two “rod ends” in the mating<br />
section of the arm determine the lift angle<br />
of the arm. These two adjustments are your<br />
“threads,” and they are specific to your<br />
body size and shape. Setting your threads<br />
correctly is critical for good operating.<br />
Some combination of adjustment of<br />
these screws – and your physique and<br />
posture – will make the arm lift straight<br />
up when carrying the sled. The angles<br />
of adjustment are not directly “in-out”<br />
and “side to side”, but rotated about<br />
30° clockwise (relative to the operator).<br />
We will suggest approximate threads to<br />
start, but the only real way to test your<br />
threads is to pick up the sled and see what<br />
happens. You can’t set your threads fully<br />
without picking up the rig.<br />
The arm socket is inserted into<br />
the socket block on the vest.
Determining your threads is part of basic operating technique<br />
Adjusting your threads<br />
For almost all operators, regardless of<br />
body type, the typical adjustment for the<br />
“side to side” screws (the rod ends in<br />
the arm) is 1.5 to 2 turns out on the top<br />
screw and ALWAYS all the way in on the<br />
bottom screw.<br />
Use the rollers when the arm is not<br />
under load. If you are flying the sled,<br />
lift it up with your left hand to take the<br />
weight off the screws before adjusting<br />
them. The two side to side screws work<br />
independently of one another. Do not<br />
tighten the lower screw, but be sure it is<br />
all the way in, and then back it out 1/8th<br />
of a turn.<br />
The “in-out” screws work in tandem,<br />
and the adjustment varies greatly by the<br />
operator’s body type.<br />
side to side: 2<br />
turns out on top<br />
in-and-out: count<br />
threads here<br />
• If you have big pectorals and a<br />
flat stomach, the top screw is<br />
almost all the way in. If you’ve<br />
been eating well and exercising<br />
less, the top screw will be<br />
further out.<br />
• Always dial in the top screw first<br />
to your setting, then turn in the<br />
bottom screw until it just snugs<br />
up against the fitting. There is<br />
no need to tighten the bottom<br />
screw very hard.<br />
• Always keep a hand on the<br />
free end of the arm, otherwise<br />
it might swing around and hit<br />
something, someone, or you in<br />
the face.<br />
• With both pairs of screws<br />
properly adjusted, the sled<br />
will float in all positions with<br />
the operator standing in good<br />
posture with a vertical torso. If<br />
the threads are not adjusted<br />
well, the sled will tend to fly or<br />
fall away from you.<br />
Goofy foot<br />
If you want to operate “goofy-foot,” – with the sled on the right side – you will<br />
need to reverse the socket block before starting.<br />
• On the vest, remove the breast plate: Loosening the lock; pull the locator<br />
pin; and slide the plate completely off. Then remove the socket block in<br />
the same manner. Flip the block 180° and re-attach (above).<br />
• On the arm, pull the aircraft pin to separate the socket from the arm. Turn<br />
it over and re-attach.<br />
• Set the top screw about two turns out, and the bottom screw all the way in.<br />
17
Picking Up the<br />
Sled<br />
Picking up the sled<br />
1 2 3<br />
Undocking, setting your threads, and docking the sled<br />
With the vest on and the arm attached to the vest, undock the rig:<br />
• Face the sled and bow at the waist.<br />
Do not bend your knees. It is<br />
helpful to have a friend spotting you<br />
the first time you do it.<br />
• Align the gimbal mounting hole to<br />
the arm post and slip the arm post<br />
completely into the hole. It’s easiest<br />
to align the parts if the gimbal<br />
handle is positioned behind the rig<br />
(i.e., not to the side, aimed at you).<br />
• Use your right hand to hold the arm<br />
and gimbal together (frame 4).<br />
• Place your left hand on the center<br />
post just below the gimbal to<br />
control the sled. Do not touch the<br />
camera (frame 4).<br />
• Step forward and stand up straight.<br />
You are now flying the sled, but still<br />
locked in the dock.<br />
• Pull the aircraft pin out of the<br />
docking yoke (frame 6).<br />
• Step back from the stand to remove<br />
the sled from the docking bracket.<br />
• Take a deep breath. Relax.<br />
• Move the sled to a position about<br />
45º off your left hip as shown.<br />
• Aim the sled slightly across your<br />
body (frame 9).<br />
18
4 5 6 7 8 9<br />
Holding the rig might feel awkward at first. Don’t worry<br />
– you will gain control and endurance rapidly as you<br />
practice. The first time is typically the most annoying,<br />
because there are so many adjustments to make before<br />
it all falls into place and “magically” works with you. It<br />
may be that you will want to adjust the lift capacity of the<br />
arm (see pages 20-21) before fine-tuning your threads.<br />
Eventually you must adjust them both.<br />
Test your threads<br />
• Stand as upright as possible, in<br />
good posture, with the rig off your<br />
left hip. Don’t be stiff or tense.<br />
Do not ever let go of the sled<br />
completely, but let it move a little.<br />
• If it tends to stay in place, try<br />
moving it further out in front of you.<br />
Lean back a little as you feel the<br />
vest pushing against your stomach<br />
and pulling your torso forward. The<br />
trick is to lean a little bit away from<br />
the rig – more if it’s further from<br />
you, less as it’s closer to you – so<br />
that the sled wants to stay in place<br />
or float next to you.<br />
• If the sled wants to move off in one<br />
direction rather dramatically and<br />
you can’t lean forward or back<br />
easily to correct it, you need to<br />
adjust your threads. Typically it’s a<br />
matter of the “in-out” screws rather<br />
than the side to side screws.<br />
• If the sled wants to move away from<br />
you, loosen the bottom in-out screw<br />
and dial in the upper screw a few<br />
turns. Snug up the lower screw and<br />
re-test.<br />
• If the sled wants to move towards<br />
you, loosen the upper in-out screw<br />
a few turns, snug up the lower<br />
screw, and re-test.<br />
• Do not get too fussy with your<br />
threads at this point, as much of<br />
the trick is learning to properly<br />
stand and move, rather than<br />
adjusting your threads.<br />
• Take a few steps and experiment<br />
with the feel of it all. Try panning<br />
and tilting. Before you get tired,<br />
dock the sled.<br />
Practice replacing the sled in<br />
the docking bracket<br />
• Step up next to the docking stand<br />
with the camera aimed to the left.<br />
• Insert the center post in the bracket<br />
and rest the stage on the docking<br />
yoke.<br />
• Insert the aircraft pin back in the<br />
docking yoke to secure the sled.<br />
• Bow from the waist and step back.<br />
• Move your left hand to the gimbal<br />
handle, and your right hand to the<br />
arm.<br />
• Hold up the gimbal handle and<br />
let the arm post slide out of the<br />
gimbal mounting hole. Don’t force<br />
it or bend your knees; just find the<br />
correct angle so that the arm post<br />
slips out of the gimbal.<br />
• Always keep a hand on the free end<br />
of the arm, otherwise it might swing<br />
around and hit something.<br />
• Rest. Stretch.<br />
• When you don’t have time to dock<br />
and undock, you can relieve some<br />
muscle tension by holding the rig<br />
close to your body on either side or<br />
clasping the camera close to your<br />
chest.<br />
19
Setting the lift capacity of the arm<br />
Adjusting the Lift<br />
Now it’s time to adjust the arm for the weight of your camera.<br />
Adjusting the arm<br />
Important: The lift<br />
adjustment knobs can<br />
only be turned when the<br />
arm segments are slightly<br />
above horizontal. They<br />
cannot be turned when<br />
the arm is unloaded, i.e.,<br />
when not lifting the sled,<br />
nor if the arm sections<br />
are boomed too far up or<br />
down. Do not force the lift<br />
knobs. At the right angle,<br />
they turn very easily.<br />
• With the vest on, attach the arm<br />
and undock the rig as before.<br />
• Stand with the sled off your left hip,<br />
with the lens slightly crossing your<br />
body.<br />
• Move the arm to the middle of its<br />
boom range and let it rise or fall.<br />
Do not completely let go of the<br />
sled.<br />
• Turn the weight adjustment knob<br />
clockwise until the forearm wants to<br />
float slightly above horizontal.<br />
• Keep making small adjustments<br />
until the forearm settles at a 5º<br />
angle up from horizontal.<br />
20<br />
• Ideally, each section of the arm<br />
should come to rest slightly above<br />
horizontal, about 5º to 10º.<br />
• Adjust the arm section nearest the<br />
sled first (the forearm section).<br />
• If the arm floats at too high an<br />
angle, pull the sled down with your<br />
left hand until the forearm section<br />
is about 5º above horizontal.<br />
Turn the weight adjustment knob<br />
counterclockwise until the forearm<br />
wants to float at this angle.<br />
• If the arm floats at too low an angle,<br />
pull the sled up with your left hand<br />
until the forearm section is about 5º<br />
above horizontal.<br />
• Repeat the process with the upper<br />
arm section, but this time try to get<br />
the upper arm to follow the forearm<br />
as you boom up and down.<br />
• Remember, the weight adjustment<br />
knob turns freely when the arm<br />
section is slightly above horizontal.<br />
Never force it or use a tool to adjust<br />
the arm lift.
Now let’s fly the rig again<br />
• Move the sled off your left hip<br />
as before. Keep the camera<br />
close. This is what we call the<br />
“Missionary.”<br />
• Move your torso ever so slightly to<br />
test how your body angle controls<br />
the sled.<br />
• Repeat with the sled further away<br />
from you, but keep your torso<br />
vertical.<br />
• The sled should stay in place with<br />
only a little help from your right<br />
hand.<br />
CAUTION: IF YOU REST YOUR RIGHT HAND ON THE<br />
CONNECTING ARM, KEEP YOUR FINGERS OUT OF THE<br />
SPACE BETWEEN THE ELBOW AND THE ARTICULATING<br />
ARM. A SUDDEN RISE OF THE CAMERA COULD INJURE<br />
YOUR FINGERS IF THEY ARE IN THIS SPACE.<br />
Boom the sled all the way up and down while watching the arm<br />
sections. Be sure you are in good form at all times. The upper<br />
arm should follow the forearm smoothly and not lag behind in<br />
either direction.<br />
Do not bend over or lean back as you boom the sled up and<br />
down. Boom the sled with your right hand; your left hand is just<br />
for aiming the sled and camera.<br />
21
Hand grips<br />
Basic <strong>Operating</strong><br />
The two-handed technique was invented<br />
by Garrett Brown while working on The<br />
Shining, and it has been the preferred<br />
method of operating ever since.<br />
Basically, the right hand does the work<br />
of positioning the sled in space (moving<br />
horizontally and vertically relative to the<br />
body), and the left hand aims the sled<br />
(and therefore the camera) by panning<br />
and tilting.<br />
If the sled is properly balanced, very little<br />
force will be needed to aim the camera.<br />
Clenching the center post or gimbal hard<br />
will counteract the sled’s “float.” Light<br />
control is the key to a steady camera and<br />
smooth moves.<br />
The left hand also has the interesting job<br />
of keeping the sled level as we move<br />
about. As we accelerate or decelerate,<br />
go around corners, etc., the left hand<br />
must prevent the sled from going offlevel<br />
before it happens. One of the big<br />
operating skills is anticipating how the<br />
sled will behave as we move along. There<br />
are several classic “grips” we use to aim<br />
and control the sled.<br />
Finding your grip<br />
• Grab the center post with your left<br />
hand just below the gimbal. All<br />
five fingers should be LIGHTLY in<br />
contact with the post, but this isn’t<br />
a tea party. Don’t just use your<br />
fingertips – wrap you fingers a bit<br />
around the post.<br />
• The right hand fine tunes the<br />
position of the sled, moving it side<br />
to side or closer to or farther from<br />
your body, and booms the arm<br />
up and down. It also has the job<br />
of eliminating the bounce of the<br />
springs – i.e., preventing unwanted<br />
up and down movements as you<br />
move along.<br />
• Grab the gimbal handle with your<br />
right hand.<br />
• Make sure that this hand does not<br />
cross the bearing and touch any<br />
part of the Y-shaped yoke, as this<br />
will influence the aiming of the sled.<br />
22<br />
The preferred grip, using the<br />
pinkie finger to prevent a<br />
pendulum effect.<br />
Also used, the full hand grip: all<br />
fingers surround the post with<br />
a light touch.
Basic movement<br />
Try moving around and get used to the<br />
way it feels. Pay attention to how your<br />
movements and posture affect the sled.<br />
Relax your muscles and control the<br />
Zephyr stabilizer rig with your body<br />
position and a light, fingertip touch.<br />
Leave the monitor turned off for now.<br />
Don’t worry about making shots – you<br />
want to experiment, test, play.<br />
More Practice and Training<br />
For operators who have not yet taken a workshop, we (once again!) strongly urge you<br />
to do so, as it is the quickest way to learn how to operate properly.<br />
However, there are several good training videos, including the 1990 Classic EFP<br />
Video Training Tape, which has been remastered to DVD. Although some of the<br />
information on the EFP video is specific to the EFP, most of the concepts, information,<br />
and exercises are still taught in the workshops today.<br />
We suggest you spend some time with your <strong>Steadicam</strong> ® stabilizer learning how to start<br />
and stop moves cleanly, pan and tilt, boom up and down, walk the line, do switches,<br />
track sideways, do pass-bys, use long lenses, and a host of other techniques.<br />
Get used to walking with the sled next<br />
to you.<br />
Balancing with your body<br />
As the sled gets farther away from your<br />
body, you must lean back a tiny bit more<br />
and use your arm reach to keep that light<br />
balanced touch.<br />
If you lean forward, the Zephyr will<br />
try to move away from you — fast!<br />
— requiring a firmer grip, tiring your<br />
back muscles more quickly, and most<br />
importantly, not flying properly with that<br />
great <strong>Steadicam</strong> ® stabilizer feel.<br />
Placing the camera in space<br />
Swing the arm around to find its range<br />
of motion. Practice gentle boom moves<br />
with your right hand. Find the lowest and<br />
highest positions the camera can reach.<br />
Avoid hitting the stops as you boom (it<br />
won’t hurt the arm, just your shot).<br />
You already know what you want to<br />
do with your Zephyr stabilizer. The<br />
exercises and concepts presented on the<br />
video will help you quickly develop the<br />
necessary skills to make your shots.<br />
As often said in the workshops, running<br />
around chasing your dog is fun for<br />
awhile, but it’s hard to judge how well<br />
you did or if you are improving.<br />
Many experienced operators are still<br />
perfecting their moving camera skills<br />
after 25 years of operating, and most of<br />
them thought they were pretty good at the<br />
end of their first workshop. How good<br />
you get is part of the artistry and fun of<br />
being an operator. You have a great tool<br />
in your hands. Practice, practice, practice.<br />
23
Dynamic Balancing the <strong>Steadicam</strong> ® Sled<br />
Advanced Techniques<br />
Dynamic Balance<br />
A sled is in dynamic balance when the<br />
center post remains vertical as the sled is<br />
panned (and this is critical) at any and all<br />
panning speeds.<br />
Dynamic balance is extremely important<br />
for precise operating and for whip pans.<br />
For each arrangement of camera, monitor<br />
position, post length, accessories, etc.,<br />
there are many possibilities for statically<br />
balancing the system.<br />
However, for each arrangement of<br />
camera, monitor position, post length,<br />
accessories, etc., there is only one<br />
combination that balances the sled both<br />
statically and dynamically. There is some<br />
leeway as to the required precision of<br />
dynamic balance. What is acceptable<br />
depends upon the operator and the<br />
situation.<br />
Dynamic balance can very easily and<br />
quickly be achieved by the trial and<br />
error method.<br />
In all cases, when a sled is in dynamic<br />
balance, both the camera’s c.g. and the<br />
battery’s c.g. will be to the rear of the<br />
centerline of the center post. This rule<br />
gives you some point to begin balancing<br />
the system.<br />
Three figures to study for understanding dynamic balance<br />
The top figure looks like the Model One or the SK sled. The camera c.g. is centered<br />
over the post; the monitor and battery are on the same horizontal plane, and their<br />
common c.g. is in the post. This unit is in dynamic balance and pans flat.<br />
The second figure has the monitor raised a bit. This looks like most sled<br />
configurations, in either high or low mode. Note that the battery c.g. is closer to the<br />
post, and the camera c.g. has moved to the rear. Why?? See the third figure.<br />
M<br />
B<br />
In the third figure, the monitor has been raised all the way up in front of the camera.<br />
It’s absurd, of course, but it makes a point. Now the common monitor and camera<br />
c.g. is over the post, and the battery’s c.g. is directly under the post.<br />
So you can see that as the monitor is raised, the camera c.g. must move to the rear<br />
and the battery c.g. must move towards the post. With most sleds, the monitor c.g.<br />
is raised above the battery c.g., therefore the camera c.g. is always to the rear of<br />
the centerpost.<br />
M<br />
B<br />
It typically works out that the camera c.g. is pretty close to .5in (12mm) to the rear<br />
– a bit more if the camera is light or the monitor is higher, and somewhat less if the<br />
camera is very heavy or the monitor is lower.<br />
M<br />
B<br />
24
We put the rig in dynamic balance by<br />
first choosing the monitor position and<br />
then placing the camera close to its final<br />
position. Then we discover the one-andonly<br />
ideal position for the battery by the<br />
trial and error method.<br />
First, set up your sled at the proper<br />
length for the shot and place the monitor<br />
where you want it for proper viewing<br />
and inertial control. Typically with the<br />
Zephyr stabilizer system, the monitor<br />
rod will be extended slightly past the first<br />
stop and two weights are attached to the<br />
rod (see page 8). Two weights are also<br />
attached to the battery rod.<br />
Next, position the camera so that its c.g.<br />
is about .5in (12mm) behind the center<br />
post. The center post is just over an inch<br />
in diameter, so you can use the back of<br />
the post as a guide. Next, static balance<br />
by sliding the battery in or out so that<br />
the sled hangs perfectly vertical fore and<br />
aft. Make sure the top-to-bottom balance<br />
is set with a drop time of 2 to 3 seconds.<br />
Trim side to side with the camera, using<br />
the knobs on the stage. Fine-tune the<br />
fore-aft balance with the camera. You<br />
want the sled’s post perfectly vertical.<br />
A spirit level will help you get the post<br />
vertical.<br />
Each time you lock the battery in a new<br />
position, you must rebalance the sled<br />
statically with the camera. Do not move<br />
the monitor! Once you are in static<br />
balance, spin the sled again. Is it better or<br />
worse? Again, you have two choices for<br />
moving the battery.<br />
Re-rack, rebalance, and spin again (and<br />
again!) until the sled pans flat. This<br />
should not take a lot of time.<br />
When the battery is within about .25in<br />
(6mm) of ideal, the sled will behave<br />
nicely – pan flat – and feel “sweet.” We<br />
suggest you do not attempt to do this for<br />
the first time on set!<br />
Adding any accessory or extra Merlin<br />
weights to the sled will affect both static<br />
and dynamic balance. Changing the<br />
length of the sled, and/or moving the<br />
monitor in or out will change both static<br />
and dynamic balance.<br />
How much will dynamic balance change? It<br />
depends on how much things have changed.<br />
Dynamic balance spin test with an Ultra 2<br />
In practice, it’s a lot easier than it sounds<br />
on the page, and luckily, there’s one<br />
great gift in all this: it doesn’t matter for<br />
dynamic balance what weight camera you<br />
are using or if you change lenses, filters,<br />
etc. Really!<br />
So if you make any changes with the<br />
camera – or use a different camera –<br />
there are no worries about getting back<br />
in dynamic balance! You only need to<br />
rebalance statically and you will be in<br />
dynamic balance again. Honest.<br />
Put the other way around: you can set up<br />
your rig in various ways with a practice<br />
camera at home, making it long or short,<br />
monitor in or out, with an extra weight,<br />
etc. Just note or mark the positions of the<br />
monitor and batteries, and you will be<br />
able to get into dynamic balance quickly<br />
on set, regardless of the camera you<br />
carry. Really. Honest. No fooling.<br />
For the complete story, see the Dynamic<br />
Balance Primer and play with the<br />
Dynamic Balance Spreadsheet, available<br />
online at www.steadicam.com.<br />
Give the sled several careful test spins.<br />
Very important: do not spin the rig very<br />
fast – certainly not much faster than a<br />
normal panning speed (3 – 6 rpm). Note<br />
the results. Is it good or bad, i.e., does it<br />
pan flat or wobble? Is it your technique or<br />
is the sled out of dynamic balance?<br />
If your sled is not in dynamic balance, do<br />
not move the monitor!<br />
Instead, move the battery a little bit first,<br />
then rebalance statically with the camera.<br />
There are only two directions to move the<br />
battery: out or in. You have a 50% chance<br />
of choosing the right direction, so stop<br />
worrying about it and give one direction a<br />
test. Just be sure to make a note of which<br />
direction you move the battery.<br />
Spinning a bit wobbly.<br />
Looking good!<br />
25
Configuring the sled for low mode<br />
Advanced Techniques<br />
Low Mode<br />
In order to configure the sled for<br />
low mode operating, you must:<br />
• Flip the monitor and the camera<br />
upside-down.<br />
• Attach the F-bracket to the gimbal.<br />
Use the provided safety pin.<br />
• Rebalance the sled, both statically<br />
and dynamically.<br />
• You also might change to a longer<br />
post in the arm and/or raise the<br />
socket block on the vest to restore<br />
some of the arm’s lost boom range.<br />
The camera will need some means of<br />
attaching a second dovetail to the top of<br />
the camera.<br />
Many film cameras come with dedicated<br />
low mode brackets and 100% video<br />
viewfinders. Some camera-specific low<br />
mode bracketry might also provide<br />
a means of mounting motor rods (or<br />
a dovetail with motor rods), and this<br />
system should not interfere with camera<br />
functions or working with the camera in<br />
high mode.<br />
A low mode handle clamp (P/N 802-<br />
7417) works for some cameras, but<br />
be sure the camera’s handle is strong<br />
enough. Many plastic handles on video<br />
cameras are inadequate, and a custom<br />
cage or bracket is required.<br />
Most operators work with the low mode<br />
bracketry and second dovetail in place —<br />
ready to go at all times.<br />
Attach the second dovetail directly above<br />
the first dovetail. Check that it does not<br />
interfere with changing tapes, film mags<br />
or any other camera functions.<br />
26
Tip: Many video cameras – or video cameras with film lens<br />
adaptors – do not have a proper way to mount a dovetail<br />
above the camera. We suggest you use the “bottom”<br />
dovetail for low mode, shooting upside down. You will need<br />
to flip the image in post production, so be sure that’s okay<br />
before you shoot. You can either leave the monitor upside<br />
down, or physically flip it over for better viewing. The latter<br />
will require electronic flipping of the image.<br />
Flip the monitor by unscrewing the<br />
monitor mount, turn the monitor over and<br />
replace the screw.<br />
Attach the F-bracket to the gimbal handle<br />
by inserting the post into the gimbal<br />
handle and securing it with the pin. The<br />
F-bracket brings the arm back into a<br />
proper relationship with the inverted sled.<br />
Without an F-bracket, the end of the arm<br />
can be next to the camera. When this<br />
is the case, switches are impossible and<br />
operating is severely limited.<br />
Balancing on the stand with<br />
the F-bracket attached.<br />
Balance the sled<br />
The sled can be balanced the same as in<br />
high mode. Hang the rig by its gimbal<br />
on the balancing stud. The camera will<br />
still be on top, but it is upside down.<br />
Balance statically and dynamically. Once<br />
balanced, adjust your drop time so the<br />
camera now falls to the bottom of the<br />
rig: simply slide the gimbal towards the<br />
electronics to achieve a proper drop time.<br />
Cautionary Tip: In low mode, the dovetail<br />
lock works better if the camera weight is<br />
supported as you lock the dovetail.<br />
A useful trick<br />
The range of low mode lens heights<br />
can be lowered by extending the center<br />
post and/or making the rig more bottom<br />
heavy.<br />
Low mode operating<br />
Traditionally, it’s considered harder to<br />
operate in low mode than in high mode.<br />
Why?<br />
Several factors may work together to<br />
make low mode operating harder. The<br />
operator usually holds the sled further<br />
from his body than in high mode. The<br />
operator’s hands are not at the same<br />
height. Many times, the post is tilted from<br />
vertical. The boom range is sometimes<br />
reduced. The rig may not be in dynamic<br />
balance. The operator often cranes his<br />
neck to see the image. In addition, every<br />
director wants the lens height lower or<br />
higher than one can properly reach. And<br />
it’s just plain weird to have the monitor<br />
so far above the lens.<br />
Hand positions for operating<br />
with the F-bracket.<br />
27
Supplied equipment and accessories<br />
Accessories<br />
Scout sled<br />
Scout arm<br />
Scout vest<br />
Soft case<br />
Cable, 3 ft video 078-4122-01<br />
Cable, 12V power 078-7351-01<br />
7” 16:9 Monitor 807-7500<br />
Docking bracket 803-7900<br />
Adaptor, phono-BNC<br />
JCK-130000<br />
Adaptor, BNC-RCA<br />
JCK-130001<br />
Instruction manual<br />
LIT-809000<br />
DVD, EFP Training<br />
DVD-200504<br />
Optional accessories<br />
The <strong>Steadicam</strong> ® Operator’s Handbook LIT-900000<br />
Dovetail plate assembly 802-7417<br />
Low mode kit 078-7393-01<br />
Video low mode cage 078-2038-01<br />
F-bracket for low mode 300-7901<br />
Merlin Start Weights 801-7920-04<br />
Merlin Middle Weights 801-7920-05<br />
Vehicle kit 078-7410-03<br />
SteadiStand 601-7910<br />
Mounting block 803-7801<br />
Thumb screws for block 078-0627-01<br />
Long straps for vest 803-7817<br />
Long arm post 602-7237-01<br />
Cable, 12V power, spare 078-7351-01<br />
Cable, 3 ft video 078-4122-01<br />
1/4-20 camera screws 078-1121<br />
3/8-16 camera screws 078-1122<br />
Tool pouch<br />
FFR-000013<br />
Saddle bag-sand bag/portfolio FFR-000014<br />
<strong>Steadicam</strong> ® cap<br />
FFR-000021<br />
Trolley for system soft case DAA-22B<br />
Batteries<br />
PowerCube battery<br />
FFR-000035<br />
IDX VL-4S battery charger<br />
FFR-000008<br />
IDX VL-2SPlus battery charger<br />
FFR-000005<br />
PowerCube battery hard case 011-0368<br />
Anton Bauer Dionic HC (Li-Ion) battery<br />
Anton Bauer dual charger<br />
Anton Bauer quad charger w/ LCD display<br />
FFR-000151<br />
FFR-900152<br />
FGS-900059<br />
28<br />
Visit www.tiffen.com for a complete list of <strong>Steadicam</strong> ® accessories.
Supplied Equipment and<br />
Accessories<br />
Zephyr sled<br />
Zephyr arm<br />
Zephyr vest<br />
Hard case<br />
Cable, 3 ft video 078-4122-01<br />
Cable, 12 volt power 078-7351-01<br />
7” 16:9 Monitor 602-7500<br />
Docking bracket, 807-7920<br />
Adaptor, Phono-BNC<br />
JCK-130000<br />
Cases & packing<br />
When repacking the sled into the case, make sure the gear gets wiped<br />
down and not put away wet. Remove the batteries. Don’t leave any loose<br />
components in the case as they may work their way over to the monitor and<br />
scratch the display. The arm should be packed inside the vest to keep things<br />
compact.<br />
Most operators have several other cases for their accessories, tools, low mode<br />
brackets, video recorders, video transmitters, diversity receivers, remote focus<br />
equipment, etc.<br />
Zephyr stabilizer system shown with the<br />
optional low mode kit.<br />
Disclaimer: There is no implied or expressed warranty regarding this material. Specifications,<br />
accessories, etc. are subject to change without notice.<br />
The Tiffen Company, 90 Oser Avenue, Hauppauge, NY 11788 • 631-273-2500 • 1-800-645-2522 • www.tiffen.com<br />
Tiffen <strong>Steadicam</strong> ® Operations, Glendale, CA • 818-843-4600 • 1-800-593-3331 • www.steadicam.com<br />
29