Pulsation Dampener - Tapflo
Pulsation Dampener - Tapflo
Pulsation Dampener - Tapflo

Create successful ePaper yourself
Turn your PDF publications into a flip-book with our unique Google optimized e-Paper software.
Models<br />
PD9/20 PD125<br />
PD25 PD200<br />
PD50 PD220<br />
PD70 PD225<br />
PD80 PD400<br />
PD100 PD420<br />
PD120 PD425<br />
<strong>Pulsation</strong> dampeners<br />
E<br />
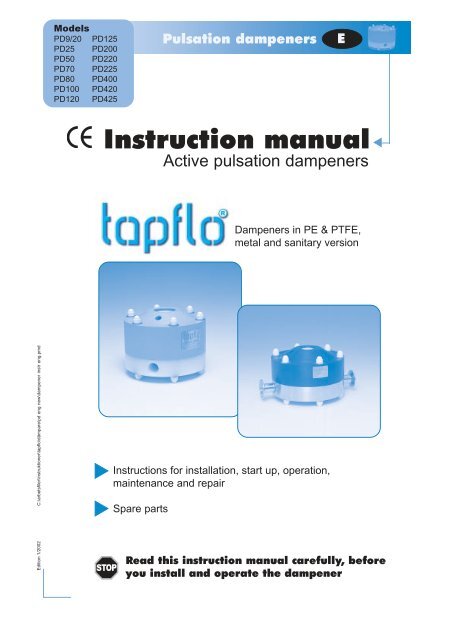
Instruction manual<br />
Active pulsation dampeners<br />
<strong>Dampener</strong>s in PE & PTFE,<br />
metal and sanitary version<br />
Edition 1/2002 C:\arbetsfiler\instruktioner\tapflo\dämpare\pd eng new\dampener instr eng.pmd<br />
STOP<br />
Instructions for installation, start up, operation,<br />
maintenance and repair<br />
Spare parts<br />
Read this instruction manual carefully, before<br />
you install and operate the dampener
CONTENTS<br />
Chapter Content Page<br />
CE certificate 3<br />
1 Installation & safety 4<br />
1.1 The warning symbols 4<br />
1.2 Installing the dampener 4<br />
1.3 Safety 4<br />
1.3.1 Protection 4<br />
1.3.2 Air pressure 4<br />
1.3.3 Noise level 4<br />
1.3.4 Temperature hazards 4<br />
2 Maintenance 5<br />
2.1 Dismantling the dampener 5<br />
2.1.1 Before the dismantling procedure 5<br />
2.1.2 Dismantling procedure 5<br />
2.2 Assembling the dampener 5<br />
3 Spare parts 6<br />
3.1 Spare part drawing/list 6<br />
3.2 Recommended spare parts 7<br />
3.3 How to order parts 7<br />
3.4 <strong>Dampener</strong> code 7<br />
4 Data 8<br />
4.1 Dimensions 8<br />
5 Warranty & repair 9<br />
5 Returning parts 9<br />
5 Warranty 9<br />
Introduction<br />
The active pulsation dampener is the most efficient way to remove pressure variations on the<br />
discharge of the pump. The <strong>Tapflo</strong> pulsation dampener works actively with compressed air and a<br />
diaphragm, automatically setting the correct pressure to minimise the pulsations. The pulsation<br />
dampener is available for all <strong>Tapflo</strong> pump sizes and material versions.<br />
With proper attention to maintenace, <strong>Tapflo</strong> active pulsation dampeners will give efficient and<br />
trouble free operation. This instruction manual will familiarise operators with detailed information<br />
about installing, operating and maintaining the dampener.<br />
Instruction manual pulsation dampeners 2
CE CERTIFICATE<br />
Declaration of conformity<br />
Machinery directive 89/392/EEC, Annex 2A<br />
<strong>Tapflo</strong> AB declares that:<br />
Product name:<br />
Models:<br />
Active pulsation dampener<br />
PD…<br />
Is in conformity with the essential health and safety requirements and technical<br />
construction file requirements of the EC Machinery directive 89/393/EEC with<br />
amendments 91/368/EEC, 93/94 EEC and 93/68 EEC.<br />
Manufacturer:<br />
<strong>Tapflo</strong> AB<br />
Address: Filaregatan 4<br />
S-442 34 Kungälv<br />
Sweden<br />
<strong>Tapflo</strong> AB, september 1st 1999<br />
Börje Johansson<br />
Managing director<br />
Instruction manual pulsation dampeners 3
1. INSTALLATION & SAFETY<br />
1.1 The warning symbols<br />
The following warning symbols are present in this instruction manual. This is what they say.<br />
STOP<br />
This symbol stands next to all safety instructions in this instruction manual where danger<br />
to life and limb may occur. Observe these instructions and proceed with utmost caution<br />
in these situations. Inform also other users of all safety instructions. In addition to the<br />
instructions in this instruction manual, the general safety and accident prevention<br />
regulations must be observed.<br />
!<br />
This signal stands at points in this instruction manual of particular importance for<br />
compliance with regulations and directives, for correct work flow and for the prevention<br />
of damage to and destruction of the complete dampener or its subassemblies.<br />
1.1 Installing the dampener<br />
The pulsation dampener is installed according to the sketch. It can be connected with a nipple<br />
immediately after the pump outlet, or placed independent of the pump with a flexible hose between<br />
the pump and the dampener. Make sure that the dampener does not cause any tension or strain to<br />
the pump. The air hose is connected to the pump air hose with a T-connection, between the pump<br />
and regulator/valves (See sketch. The air to the dampener must have the same flow and pressure<br />
as to the pump).<br />
1.3 Safety<br />
The dampener must be installed according to local and national safety rules.<br />
STOP<br />
The dampeners are constructed for particular applications. Do not use the dampener on<br />
applications different from that for which it was sold without consulting <strong>Tapflo</strong> AB to ascertain<br />
its suitability.<br />
1.3.1 Protection<br />
In the interest of health and safety it is essential to wear protective clothing and safety goggles<br />
STOP when operating, and/or working in the vicinity of <strong>Tapflo</strong> dampeners.<br />
1.3.2 Air pressure<br />
The maximum air pressure for <strong>Tapflo</strong> dampeners is 8 bar. Higher air pressure than 8 bar can<br />
STOP damage the dampener and may cause injury to personel in vicinity of the dampener.<br />
1.3.3 Noise level<br />
At tests, the noise level from a <strong>Tapflo</strong> dampener has not exceeded 70 dB(A).<br />
1.3.4 Temperature hazards<br />
Raised temperature can cause damage on the dampener and/or pipings and may also be hazardous<br />
STOP for personel in the vicinity of the dampener/pipings. Avoid quick temperature changes and do not<br />
exceed the maximum temperature specified when the dampener was ordered.<br />
Instruction manual pulsation dampeners 4
2. MAINTENANCE<br />
2.1 Dismantling the dampener<br />
2.1.1 Before the dismantling procedure<br />
Be sure to drain all liquid from the dampener. Cleanse or neutralize the dampener thoroughly.<br />
STOP Disconnect the air connection and then the suction and discharge connections.<br />
2.1.2 Dismantling procedure<br />
1) Take off the nut covers (57) and unscrew the nuts (37). Pull out the pin screws (14) and the<br />
dampener housing (11) will get separated from the dampender block (12).<br />
2) Remove the the circlip (27) carefully, so that it will not dissappear. Take out the muffler (25).<br />
3) Press down the shaft (16). Hold the shaft by the flat end near the diaphragm with a suitable key.<br />
Unscrew the diaphragm (15) from the shaft by hand.<br />
4) If necessary, take out the dampener block seal (36) and the o-ring (47). Note! If these parts<br />
are removed, they must be replaced with new ones. If the dampener sealing is worn, also<br />
check the shaft for wear. If it is worn, it must be replaced.<br />
Check all components and clean or replace if necessary.<br />
2.2 Assembling the dampener<br />
Follow the dismantling procedure in the oposite direction.<br />
!<br />
Make sure to fasten the nuts (37) equally.<br />
Instruction manual pulsation dampeners 5
3. SPARE PARTS<br />
3.1 Spare part drawing/list<br />
Pos Description Quantity<br />
11 <strong>Dampener</strong> housing 1<br />
12 <strong>Dampener</strong> block 1<br />
14 Pin screw * 4 / 6 / 8<br />
15 Diaphragm 1<br />
16 Shaft 1<br />
25 Muffler 1<br />
27 Circlip 1<br />
36 <strong>Dampener</strong> block seal 3<br />
37 Nut * 8 / 12 / 16<br />
38 Washer * 8 / 12 / 16<br />
47 O-ring (back up for 36) 3<br />
57 Nut cover * 8 / 12 / 16<br />
67 Name plate 1<br />
* = For dampener models in the followin order:<br />
PD9/20, PD25 /<br />
PD50, PD70, PD80, PD100, PD120, PD125 /<br />
PD200, PD220, PD225, PD400, PD420, PD425<br />
Instruction manual pulsation dampeners 6
3. SPARE PARTS<br />
3.2 Recommended spare parts<br />
Even at normal operation some details in the dampener will be worn. In order to avoid expensive<br />
breakdowns we recommend having a few spare parts in stock as follows.<br />
Qty Description Pos<br />
1 Diaphragm 15<br />
1 Muffler 25<br />
3.3 How to order parts<br />
When ordering spare parts for <strong>Tapflo</strong> dampeners, it will simplify if you give the model number<br />
from the nameplate of the dampener, pos No of the item and quantity.<br />
3.4 <strong>Dampener</strong> code<br />
The code details the specification, size and materials of the major components.<br />
<strong>Tapflo</strong> active pulsation<br />
dampener<br />
For <strong>Tapflo</strong> pump size (l/min)<br />
PD C 50 P T<br />
Material of<br />
wetted dampener housing:<br />
A = aluminium<br />
P = polyethylene<br />
S = stainless steel AISI 316L<br />
T = PTFE<br />
Special execution:<br />
C = <strong>Dampener</strong> in conductive<br />
(Ex-zone 0 proof) material<br />
Material of diaphragm:<br />
E = EPDM<br />
W = White (food grade) EPDM<br />
N = NBR (nitrile rubber)<br />
T = PTFE<br />
Z = PTFE with white back<br />
Instruction manual pulsation dampeners 7
4. DATA<br />
4.1 Dimensions<br />
PE & PTFE and metal dampeners<br />
Sanitary dampeners<br />
Dimensions in mm (where other is not indicated)<br />
Dimensions in inch (where other is not indicated)<br />
Dim<br />
<strong>Dampener</strong> size<br />
9/20/25 50/70/80 100/120/125 200/220/225 400/420/425<br />
A 3/8 1/2” 1” 1 1/2” 2”<br />
3/8 1/2 1 1 1/2 2<br />
B 13 15 23 30 38<br />
0.51 0.59 0.91 1.18 1.50<br />
C 1/8” 1/4” 1/4” 1/4” 1/4”<br />
1/8 1/4 1/4 1/4 1/4<br />
ØD 104 150 200 270 350<br />
4.09 5.91 7.87 10.6 13.8<br />
E 70 98 121 184 198<br />
2.76 3.86 4.76 7.24 7.80<br />
F 77 105 127 191 239<br />
3.03 4.13 5.00 7.52 9.41<br />
G 89 119 146 210 260<br />
3.50 4.69 5.75 8.27 10.2<br />
H* - 50 50 77 95<br />
- 2.0 2.0 3.0 3.7<br />
I - TC 1” TC 1 1/2” TC 2” TC 3”<br />
- DN25 DN40 DN50 DN65<br />
- SMS 25 SMS 38 SMS 51 SMS 63.5<br />
* = Dimension for standard TC connection<br />
Instruction manual pulsation dampeners 8
5. WARRANTY & REPAIR<br />
5.1 Returning parts<br />
When returning parts to <strong>Tapflo</strong> AB please follow this procedure:<br />
- Consult <strong>Tapflo</strong> AB for shipping instructions.<br />
- Cleanse or neutralize and rinse the part/dampener. Make sure the part/dampener is completely<br />
empty from liquid.<br />
- Pack the return articles carefully to prevent any damage under transport.<br />
Goods will not be accepted unless the above procedure has been complied with.<br />
5.2 Warranty<br />
<strong>Tapflo</strong> AB warrants products* of it's own manufacture will be free from defects in raw material and<br />
manufacture under normal use and service for a period of not more than one year. <strong>Tapflo</strong>'s obligation<br />
under this warranty being limited to repair or replacement of its products which shall be returned<br />
to <strong>Tapflo</strong> AB. If a dampener or part is received defected, report to <strong>Tapflo</strong> AB immediately.<br />
Parts returned to our company must have written authorisation from <strong>Tapflo</strong> AB. This warranty will<br />
not apply to any of our products which shall have been used other than for their intended use.<br />
* Even when products such as pulsation dampeners operate under normal conditions, some parts are subject to<br />
wear and may have to be replaced within one year. This warranty will not apply to these parts being subject to<br />
wear.<br />
Instruction manual pulsation dampeners 9
DISTRIBUTOR:<br />
<strong>Tapflo</strong> AB · Filaregatan 4 · S-442 34 Kungälv · Sweden<br />
Tel (46) 303 63390 · Fax (46) 303 19916 · E-mail: sales@tapflo.com · www.tapflo.com