


Create successful ePaper yourself
Turn your PDF publications into a flip-book with our unique Google optimized e-Paper software.
13<br />
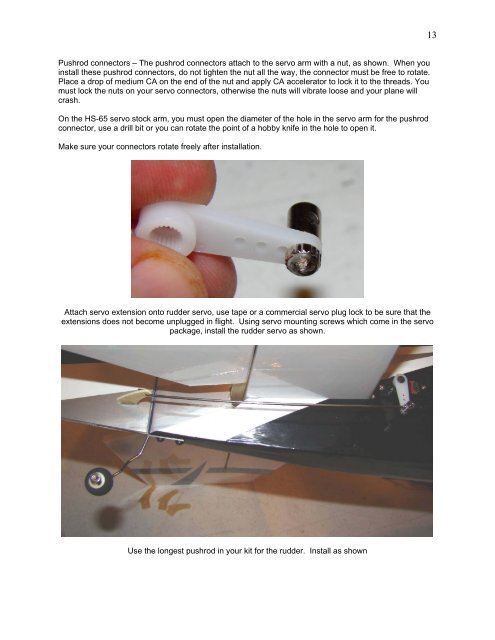
Pushrod connectors – The pushrod connectors attach to the servo arm with a nut, as shown. When you<br />
install these pushrod connectors, do not tighten the nut all the way, the connector must be free to rotate.<br />
Place a drop of medium CA on the end of the nut and apply CA accelerator to lock it to the threads. You<br />
must lock the nuts on your servo connectors, otherwise the nuts will vibrate loose and your plane will<br />
crash.<br />
On the HS-65 servo stock arm, you must open the diameter of the hole in the servo arm for the pushrod<br />
connector, use a drill bit or you can rotate the point of a hobby knife in the hole to open it.<br />
Make sure your connectors rotate freely after installation.<br />
Attach servo extension onto rudder servo, use tape or a commercial servo plug lock to be sure that the<br />
extensions does not become unplugged in flight. Using servo mounting screws which come in the servo<br />
package, install the rudder servo as shown.<br />
Use the longest pushrod in your kit for the rudder. Install as shown


![P01(Oxalys EP) [更新済み].ai - Kyosho](https://img.yumpu.com/26948574/1/184x260/p01oxalys-ep-ai-kyosho.jpg?quality=85)


