Tubifex PowerCore Manual English - TC Electronic
Tubifex PowerCore Manual English - TC Electronic
Tubifex PowerCore Manual English - TC Electronic
You also want an ePaper? Increase the reach of your titles
YUMPU automatically turns print PDFs into web optimized ePapers that Google loves.
TUBIFEX<br />
MANUAL
TABLE OF CONTENT<br />
CONTACT DETAILS . . . . . . . . . . . . . . . . . . . . . . . . . . . . . . . . . . . . . . . . . . . . . . . . . . . . . 4<br />
<strong>TC</strong> SUPPORT INTERACTIVE . . . . . . . . . . . . . . . . . . . . . . . . . . . . . . . . . . . . . . . . . . . . . . 5<br />
WELCOME TO TUBIFEX FOR POWERCORE . . . . . . . . . . . . . . . . . . . . . . . . . . . . . . . . . 6<br />
SYSTEM REQUIREMENTS . . . . . . . . . . . . . . . . . . . . . . . . . . . . . . . . . . . . . . . . . . . . . . . . . 7<br />
GLOBAL CONTROLS . . . . . . . . . . . . . . . . . . . . . . . . . . . . . . . . . . . . . . . . . . . . . . . . . . . . 7<br />
KEYBOARD COMMANDS . . . . . . . . . . . . . . . . . . . . . . . . . . . . . . . . . . . . . . . . . . . . . . . . 7<br />
TUBIFEX<br />
PLUG-IN VIEW . . . . . . . . . . . . . . . . . . . . . . . . . . . . . . . . . . . . . . . . . . . . . . . . . . . . . . 8<br />
SIMPLE MODE . . . . . . . . . . . . . . . . . . . . . . . . . . . . . . . . . . . . . . . . . . . . . . . . . . . . . . 10<br />
SPEAKER SIMULATION . . . . . . . . . . . . . . . . . . . . . . . . . . . . . . . . . . . . . . . . . . . . . . . 11<br />
EXPERT MODE . . . . . . . . . . . . . . . . . . . . . . . . . . . . . . . . . . . . . . . . . . . . . . . . . . . . . 13<br />
NOISE REDUCTION . . . . . . . . . . . . . . . . . . . . . . . . . . . . . . . . . . . . . . . . . . . . . . . . . 14<br />
PRESET MANAGEMENT . . . . . . . . . . . . . . . . . . . . . . . . . . . . . . . . . . . . . . . . . . . . . . . . 16<br />
DEFAULT PRESET LOCATIONS: . . . . . . . . . . . . . . . . . . . . . . . . . . . . . . . . . . . . . . . . . . . 17
CONTACT DETAILS 4<br />
<strong>TC</strong> SUPPORT INTERACTIVE 5<br />
If you would like to get in touch with us, please e-mail: info@tcelectronic.com.<br />
Alternatively, you may contact the <strong>TC</strong> <strong>Electronic</strong> distributor in your area, or write to:<br />
<strong>TC</strong> ELECTRONIC A/S<br />
Customer Support<br />
Sindalsvej 34<br />
Risskov DK-8240<br />
Denmark<br />
www.tcelectronic.com<br />
e-mail: info@tcelectronic.com<br />
e-mail: support@tcelectronic.com<br />
USA:<br />
<strong>TC</strong> <strong>Electronic</strong>, Inc.<br />
742-A Hampshire Rd.<br />
Westlake Village, CA 91361<br />
1-805-373-1828<br />
www.tcelectronic.com<br />
e-mail: support@tcelectronic.com<br />
The <strong>TC</strong> Support Interactive website: www.tcsupport.tc is designed as an online support and<br />
information center. At the site you can find answers to specific questions regarding <strong>TC</strong><br />
software and hardware.<br />
All known issues are stored in a database searchable by product, category, keywords, or<br />
phrases. Under the section “My Stuff” you can login to check the status of your questions,<br />
download materials such as product manuals, software updates and new presets.<br />
This site has been specifically designed to meet the needs of our users.We constantly update<br />
the database and you will find the site to be a huge resource of information. Browse through<br />
Q&A’s and discover new aspects of your <strong>TC</strong> product.<br />
If you can’t find an answer online, you have the option of submitting a question to our<br />
technical support staff who will then reply to you by e-mail.The <strong>TC</strong> Support Team is on<br />
constant alert to help you in any way they can.<br />
© BY <strong>TC</strong> WORKS SOFT & HARDWARE GMBH / <strong>TC</strong> ELECTRONIC A/S 2003.ALL PRODUCT AND COMPANY NAMES ARE<br />
TRADEMARKS OF THEIR RESPECTIVE OWNERS. POWERCORE IS A TRADEMARK OF <strong>TC</strong> WORKS GMBH,VST IS A<br />
TRADEMARK OF STEINBERG MEDIA TECHNOLOGIES GMBH,AUDIO UNITS IS A TRADEMARK OF APPLE COMPUTER.ALL<br />
SPECIFICATIONS SUBJECT TO CHANGE WITHOUT NOTICE.ALL RIGHTS RESERVED.<br />
<strong>TC</strong> Works is a <strong>TC</strong> Group company.
WELCOME TO TUBIFEX 6<br />
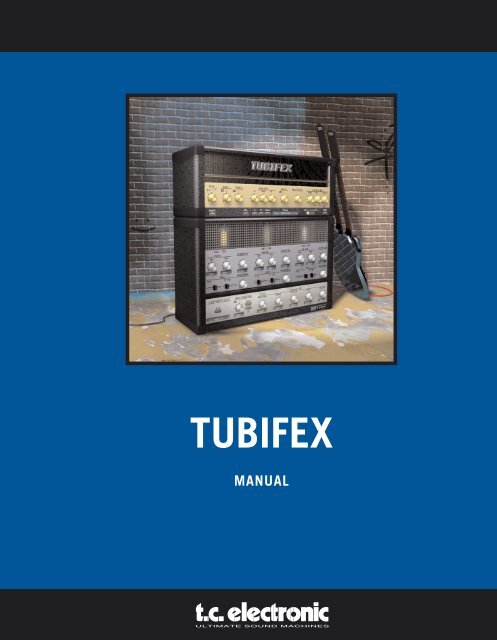
<strong>Tubifex</strong> is a virtual guitar amp equipped with 3 tube stages that are conceived after the classic<br />
12AX7 warm sounding tubes. Since the tubes can be controlled individually, the possibilities of<br />
the plug-in are extremely flexible.The speaker simulator was created from an actual impulse<br />
response of a 2x12” cabinet – and via a knob on the front panel the user is able to control<br />
the microphone position.<br />
On top of this we’ve added a noise reduction section with at fingerprint-based noise<br />
reduction filter plus an expander for further improvement of the over-all sound, and the<br />
settings of the noise reduction section can be saved independently from the amp settings.<br />
A lot of expert parameters allows you to fine tune the character of each tube stage, and it is<br />
possible to create very personal sounding presets.We’ve also included a lot of great sounding<br />
presets, which make the <strong>Tubifex</strong> instantly usable – right out of the box.<br />
<strong>Tubifex</strong> is a “Hybrid” plug-in, utilizing both native CPU and DSP resources. In other words, we<br />
are using the strengths of the two worlds, which ensure that we have both been able to<br />
optimize the DSP performance and been able to make a plug-in with very low latency, which<br />
is crucial for guitar players who want to interact with <strong>Tubifex</strong> in real-time.<br />
The proprietary tube emulation technology used in <strong>Tubifex</strong> provides extremely warm and<br />
analog-sounding distortion without any audible aliasing.<br />
Enjoy!<br />
The <strong>TC</strong> Team<br />
SYSTEM REQUIREMENTS 7<br />
MAC OS X<br />
• POWERCORE PCI or FIREWIRE running system 1.8 or later<br />
• Mac OS X [10.2.4 or higher]<br />
• G4 / 800 MHz or faster; 256 MB RAM<br />
• VST or Audio Unit compatible host application.<br />
• System must meet requirements of the host application<br />
WINDOWS<br />
• POWERCORE PCI or FIREWIRE running system 1.8 or later<br />
• Windows XP<br />
• PIII 1 GHz or faster, 256 MB RAM<br />
• VST compatible host application<br />
• System must meet requirements of the host application<br />
POWERCORE REQUIRED!<br />
The <strong>Tubifex</strong> Plug-In requires a POWERCORE PCI or POWERCORE FIREWIRE to be available<br />
in your system.<strong>Tubifex</strong> requires the DSP power of POWERCORE.<br />
GLOBAL CONTROLS<br />
KEYBOARD COMMANDS<br />
In most host applications,<strong>Tubifex</strong> supports keyboard commands for certain functions.The following<br />
key commands are available for all Plug-In parameters:<br />
KEY COMMANDS IN MAC OS X:<br />
Fine Adjust = Apple<br />
Reset To Default = Alt<br />
KEY COMMANDS IN WINDOWS:<br />
Fine Adjust = Alt<br />
Reset To Default = Shift + Control<br />
SCROLL WHEEL SUPPORT<br />
If you are using a host application that supports this feature, all of the <strong>Tubifex</strong> knobs and<br />
faders support scrolling on both Windows XP and Mac OS X. Simply roll your mouse over a<br />
knob or slider and use the Scroll Wheel to increment / decrement the associated parameter.
PLUG-IN VIEW 8<br />
PLUG-IN VIEW 9<br />
Preset Manager<br />
Simple Mode<br />
Speaker Simulation<br />
Expert Mode<br />
Noise Reduction
“SIMPLE MODE” 10<br />
“SIMPLE MODE” / SPEAKER SIMULATION 11<br />
In the simple non-expert mode, you will just see the “front panel” with the three gain stages,<br />
but you will not have access to the tube parameters or the built-in noise reduction.<br />
TRIM<br />
With the TRIM parameter, you adjust the input level of <strong>Tubifex</strong>.The four LEDs right above the<br />
TRIM knob will indicate the current input level:The optimized level will cause the yellow<br />
LEDs in the middle to light up.You should avoid going into red (the right LED lighting up).<br />
GAIN STAGES<br />
The three valve gain stages have by default the same character.This can be changed in expert<br />
mode, where you have access to some valve parameters. Gain 1 and Gain 2 are in front of the<br />
three band EQ, Gain 3 comes after the EQ.<br />
WARNING: Switching gain stages ON/OFF might lead to drastic gain changes.To prevent damage of<br />
your speakers (and ears…), lower the output volume first and/or insert a limiter after <strong>Tubifex</strong>.<br />
Tip:Think of the first gain stage as pre-gain stage, like having a distortion floor pedal between your<br />
guitar and the amp.<br />
THREE BAND EQ<br />
Lo<br />
Control the bottom end of your guitar tone with this parameter.<br />
Mid<br />
Turning this parameter up will make your guitar sound fatter and fuller.<br />
Hi<br />
This parameter sets the amount of treble and makes your tone brighter as it is turned up.<br />
The Speaker Simulation is based on measurements made on a Marshall 2x12” cabinet.The<br />
default setting in ON, and we recommend to keep it there.<br />
PRES (Presence)<br />
The presence knob let’s you select the amount of overtones introduced by the speaker cone.<br />
At higher values, the Speaker Simulation will sound a little crisper.<br />
DIST (Distance)<br />
Choose the distance between the microphone and the speaker.The mic can be placed either<br />
directly in front of the speaker (“close”), or a little bit away from it (1cm).<br />
AXIS<br />
With this control, you define the position of the “virtual Microphone” in front of your 12”<br />
speaker.At “ON” it is placed in the center of the speaker cone,“OFF” is at the edge.“MID”<br />
is inbetween.<br />
SETUP<br />
Smoothing<br />
The Smoothing parameter will define, how fast the controls on the user interface will follow<br />
on changes.At 100%, the parameters will slowly adjust to the set values, whereas with the<br />
setting “OFF”, they will immediately jump to the new position.<br />
Gliding<br />
The Parameter Gliding will soften the sound changes to avoid (unwanted) digital distortion<br />
(zipper noise) while changing parameters.A high value will however cause changes not to be<br />
effective immediately.The gliding time can be set between 500ms and 2 seconds.<br />
MASTER OUT<br />
This will set the output level of <strong>Tubifex</strong>.This stage is intended to adjust the level to match the<br />
return of your effect in your audio application.This stage is not intended to be driven into<br />
distortion! Please adjust the output level in a way that the red overload LED right above the<br />
MASTER OUT knob does not light up.
“SIMPLE MODE” 12<br />
“EXPERT MODE” 13<br />
LoFi / HiFi<br />
The LoFi/HiFi control has great impact on the sound of <strong>Tubifex</strong>, but also on the required CPU<br />
load.The most “analog” sound you will get with the HiFi setting.This is the setting we recommend<br />
to use when rendering <strong>Tubifex</strong> into a file.<br />
Setting this parameter to the mid position is a compromise between sound and processing<br />
power. Use this setting, in case your machine is not powerful enough for the HiFi setting.<br />
“LoFi” is more an effect setting and will not give you the “analog” feeling you can get with<br />
<strong>Tubifex</strong>. If you prefer “true guitar amp sound”, do not use this setting. However, this is very<br />
CPU efficient.<br />
MIDI<br />
<strong>Tubifex</strong> can be setup to send and receive MIDI data on all its controls. Controller numbers<br />
#20 and above are taken for this.<br />
When you click on the “Expert” button,<strong>Tubifex</strong>’ UI will change and display additional parameters<br />
that are otherwise not accessible. Here you can adjust some valve parameters for each<br />
tube stage, as well as enable and adjust the included noise reduction unit.<br />
The three tube gain stages are offering the same parameters per stage: On top of each stage<br />
you find a button to switch the gain stage on or off.This button has the same behavior as<br />
switching the gain stage on or off in the upper section.<br />
Voltages<br />
Here you can tweak the two tube voltages,Vgk and Vak.This will move the working point of<br />
the tube and therefore change the way of the linearity of the tube’s amplification.This will to<br />
a certain extent act similar to the gain parameter. Both parameters turned to the right will<br />
give you the most linear amplification.<br />
Character<br />
The Character parameter will change the behavior of the amplification: turned to the left, it<br />
will give symmetrical amplification, like you would find it in Power Amps and also in the Tube<br />
Screamer. Turned to the right, the behavior is asymmetrical, which is similar to typical guitar<br />
pre-amps.<br />
NOTE: Switching on “MIDI Send” and then changing presets will cause a huge amount of MIDI<br />
data to be sent! This might cause problems.<br />
Body<br />
With the body parameters, you can adjust the tonal character for each tube stage.<br />
Size<br />
Slide to the left and you will get a full rich tone, with a lot of low end signal. Sliding the fader<br />
further to the left, the sound will get thinner. How much this parameter affects the sound is<br />
set with the Strength parameter.<br />
Strength<br />
The Strength parameter sets the amount of the Size parameter to be applied.When the<br />
slider is set fully in left position,“Size” will have no effect.<br />
Brighthness<br />
The Brightness parameter sets the amount of high frequencies.Turned to the left, the high<br />
frequencies get damped most, whereas they will pass thru if brightness is turned to the right.
NOISE REDUCTION 14<br />
With high gain as it appears with guitar amplification, usually there will be a certain amount of<br />
noise introduced, and with extreme distorted sounds, this might become quite significant.<br />
Because of that,<strong>Tubifex</strong> features a noise reduction section that allows for effective reduction<br />
of the unwanted noise.<br />
REDUCTION PRESETS<br />
You can save and load settings of the Noise Reduction section independent from the other<br />
<strong>Tubifex</strong> settings.This will allow you to save the best noise reduction settings for e.g. certain<br />
guitars or audio interfaces.The preset management works the same as for the “full” presets.<br />
Please have a look at the Preset Management section in this manual.<br />
NOTE: The reduction preset is only a subset of the full preset. If you save a “full”<strong>Tubifex</strong> preset, the<br />
Noise Reduction settings are of course also saved with it.<br />
NOISE REDUCTION<br />
The Noise Reduction in <strong>Tubifex</strong> is a so called ‘fingerprint denoiser’ to remove broadband noise.‘Fingerprint’<br />
in this context doesn’t mean that you have to press your fingers on the display:The<br />
fingerprint (or better: noise print) is a short sample of the noise that you want removed<br />
from the audio signal.<br />
Learn<br />
When you hit the ‘Learn’ button, the Noise Reduction will start taking your signal’s fingerprint<br />
(When Playback isn’t active while you press ‘Learn’, the fingerprint will be taken as soon as<br />
the playback is started).<br />
When there is no fingerprint in memory, the ‘Learn’ button is gray.While the fingerprint is<br />
taken, the button is flashing red.A fingerprint in memory will be indicated by a green ‘Learn’<br />
button.<br />
NOISE REDUCTION 15<br />
EXPANDER<br />
The expander section is best suited for lowering noise in signal pauses, where noise becomes<br />
most obvious and annoying. Expanders allow to reduce unwanted noise in recordings by<br />
using the opposite dynamics process to a compressor:All signal levels below the threshold<br />
will be reduced.<br />
Range<br />
The amount of reduction is defined by the range parameter.With attack, hold time, and release,<br />
you will adjust the dynamic behavior of the expander.<br />
Attack<br />
The attack time defines how fast the signal reduction starts after the level falls below the<br />
threshold.<br />
Hold<br />
The hold time defines how long the expander will stay in “expand” mode after the signal<br />
exceeds the threshold.<br />
Release<br />
The release time determines how long it takes to return to the unexpanded signal from the<br />
end of the hold time.<br />
Reduction Amount<br />
The reduction parameter sets the noise removal’s amount.A high reduction value will reduce<br />
the noise further than a low value.<br />
Inv<br />
Activate ‘Inv’ to monitor to the removed signal parts.This is very helpful when checking<br />
your settings:The more you hear in ‘Inv’ mode, the more you remove from the signal.<br />
If you can hear audio fragments in ‘Inv’ mode, you are driving the Noise Reduction too hard –<br />
you should at least lower the reduction level, or even try to find a better noise print.
PRESET MANAGEMENT 16<br />
<strong>Tubifex</strong>’s comprehensive file based preset architecture makes archiving presets a simple process.This<br />
allows you to organize your presets the way you find most comfortable for your<br />
workflow, and to exchange presets with other users, no matter the platform or application.<br />
Presets are saved as discrete files on your hard drive. Once a preset is saved into the default<br />
location, it will automatically appear in the ‘File’ menu every time you use the Plug-In.The files<br />
can then be organized into subfolders, where you can delete, rearrange or create your own<br />
sub-folders to accommodate your needs. For example, you could create preset folders for<br />
projects, clients or by application and genre, such as ‘Heavy Guitars’.<br />
NOTE: A folder will not appear in the Preset File Menu unless the folder has at least one preset inside!<br />
PRESET FILE MENU<br />
Pressing the ’File’ button will open the Plug-In’s File menu.The following options are available<br />
from the File menu.<br />
LOADING A PRESET<br />
By selecting ’Load’, you can navigate to any folder on the system that you have read access to,<br />
including any shared folder. By default, these will be loaded from the default location for <strong>Tubifex</strong><br />
presets. Only presets located in the default file location will appear in <strong>Tubifex</strong> pop-up preset<br />
menu.<br />
SAVING A PRESET<br />
By selecting ’Save’, you can save your preset to any folder on the system that you have write<br />
access to, including any shared folder. By default, presets are saved to the default location for<br />
the <strong>Tubifex</strong> presets.<br />
PRESET MANAGEMENT 17<br />
DEFAULT PRESET LOCATIONS:<br />
The following locations will describe where you can find the <strong>Tubifex</strong> presets, which are stored<br />
in a folder unique to each plug-in:<br />
MAC OS X<br />
Files are stored in your user folder:<br />
~ \ Library \ Application Support \ POWERCORE \ <strong>TC</strong> <strong>Electronic</strong> \ <strong>Tubifex</strong><br />
(~ Refers to your user folder: Users \ Your User Name)<br />
WINDOWS<br />
Files are stored on the Windows OS hard drive.<br />
~ \ <strong>TC</strong>Works \ System \ Application Support \ POWERCORE \ <strong>TC</strong> <strong>Electronic</strong> \ <strong>Tubifex</strong><br />
(~ \ Refers to the path for your System Hard Drive \ Program Files)<br />
• To delete a file, simply move it to the ’Trash’ or ’Recycle bin’.<br />
• To create a new subfolder that appears in the Plug-In menu, simply create a new<br />
folder in the Plug-In folder that resides in the PRESETS folder of the <strong>Tubifex</strong><br />
default preset location.<br />
NOTE: A folder will not appear in the Preset File Menu unless it has at least one preset inside!<br />
QUICK PRESET COMPARISON<br />
The ‘A / B’ function of <strong>Tubifex</strong> allows for a quick comparison of two different settings. Select<br />
‘Store’ and then ‘A’ or ‘B’ to save a setting into either the ‘A’ or ‘B’ memory.After setting up<br />
both an ‘A’ and a ‘B’ setting, you can simply select either ‘A’ or ‘B’ to immediately compare the<br />
two settings.As these are meant for a quick comparison, these settings are LOST when closing<br />
the Plug-In! If you love your preset, we advise you to save it!


