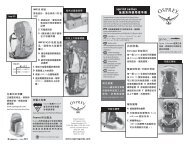
POCO SERIES OWNER'S MANUAL - Osprey Packs, Inc
POCO SERIES OWNER'S MANUAL - Osprey Packs, Inc
POCO SERIES OWNER'S MANUAL - Osprey Packs, Inc

Create successful ePaper yourself
Turn your PDF publications into a flip-book with our unique Google optimized e-Paper software.
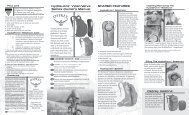
<strong>POCO</strong> <strong>SERIES</strong><br />
CHILD CARRIER<br />
<br />
<br />
<br />
<br />
+ PHOTO: RYAN BONNEAU
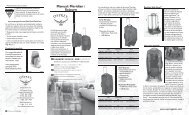
<strong>POCO</strong> <strong>SERIES</strong> OWNER’S <strong>MANUAL</strong><br />
IMPORTANT! READ ALL INSTRUCTIONS BEFORE USING YOUR OSPREY <strong>POCO</strong> <strong>SERIES</strong> CHILD CARRIER<br />
Congratulations on your purchase of an <strong>Osprey</strong> Poco Series child carrier. Our obsession with detail rewards you with a<br />
truly full-featured pack and we want to be sure that you understand and utilize your pack completely. Here’s a full tour<br />
of your pack – from the ground up.<br />
<br />
<br />
<br />
<br />
<br />
<br />
<br />
<br />
<br />
<br />
<strong>Osprey</strong> Child Safety Products, LLC<br />
115 Progress Circle<br />
Cortez, CO 81321 USA<br />
1-866-284-7830<br />
WWW.OSPREYPACKS.COM<br />
1
IMPORTANT! KEEEP THESE INSTRUCTIONS FOR FUTURE REFERENCE<br />
<br />
<br />
WARNING<br />
<br />
+ WARNING – DO NOT USE UNTIL THE CHILD CAN SIT UPRIGHT UNASSISTED.<br />
+ WARNING – DO NOT PLACE CARRIER ON COUNTER TOPS, TABLES, OR OTHER ELEVATED SURFACES.<br />
+ WARNING – Fall or strangulation hazard<br />
+ WARNING – Do not leave the child unattended in this carrier!<br />
+ WARNING – When the child is in the carrier, he or she could be in a position higher than the adult.<br />
Care should therefore be taken to be aware of hazards; e.g. door frames, low branches of trees, etc.<br />
+ WARNING – Ensure 2 child harness buckles, side compression straps and buckle beneath child drool pad are securely<br />
fastened before use.<br />
+ WARNING – When using the carrier the adult shall be aware of the following:<br />
- The adult’s balance may be adversely affected due to movement of the child and also the adult.<br />
- The carrier is suitable for use when undertaking leisure activities but not for sports activities.<br />
- Care should be taken when putting on or removing the carrier.<br />
<br />
<br />
<br />
<br />
<br />
<br />
<br />
<br />
<br />
<br />
<br />
<br />
<br />
<br />
<br />
<br />
<br />
<br />
<br />
<br />
<br />
<br />
<br />
<br />
<br />
2
ADVISORIES<br />
<br />
<br />
+ THE CHILD IN THE CARRIER CAN BECOME TIRED. TAKE FREQUENT BREAKS WHEN USING YOUR <strong>POCO</strong> CHILD CARRIER.<br />
+ BE AWARE THAT THE CHILD IN THE CARRIER MAY SUFFER FROM THE EFFECT OF THE WEATHER AND TEMPERATURE BEFORE YOU DO.<br />
+ IN ORDER TO AVOID INJURY, BE CAREFUL TO PROTECT THE CHILD’S FEET WHEN THE CARRIER IS ON OR NEAR THE FLOOR.<br />
+ TAKE GREAT CARE DURING ANY SUDDEN MOVEMENTS OR WHEN LEANING FORWARD.<br />
+ <strong>POCO</strong> <strong>SERIES</strong> PACKS CARRY A CHILD, A HYDRATION RESERVOIR AND EXTRA GEAR ON YOUR BACK.<br />
+ MAXIMUM LOAD: 22 kg / 48 lbs. (Child, gear and pack combined)<br />
ADDITIONAL OR REPLACEMENT PARTS SHOULD ONLY BE OBTAINED FROM OSPREY CHILD SAFETY PRODUCTS, LLC.<br />
<br />
<br />
<br />
<br />
<br />
<br />
<br />
3
<strong>POCO</strong> PREMIUM / <strong>POCO</strong> PLUS / <strong>POCO</strong><br />
<strong>POCO</strong> PREMIUM<br />
/ <br />
<strong>POCO</strong> PLUS<br />
/ <br />
<strong>POCO</strong><br />
/ <br />
The Poco Series is offered in three models, the Poco Premium, Poco Plus and Poco. The name of each style is printed on<br />
the back of the carrier. The features of each of these models are described below.<br />
<br />
<br />
<br />
<br />
4
ASSEMBLY INSTRUCTIONS<br />
<br />
<br />
Poco Series child carriers come fully assembled. However, for proper use you must deploy the articulating<br />
foot-bar before placing a child in the carrier. Pull the foot-bar back until an audible click is heard.<br />
WARNING: Always test the stability of the pack before use.<br />
<br />
<br />
<br />
<br />
<br />
<br />
<br />
<br />
The padded side wings ship folded inside the drool pad. To set up your Poco to carry a child, release the<br />
side compression, move the wings to the outside of the drool pad ends and re-tighten the side compression<br />
straps to secure. Be sure to check all three red side release buckles (two on child’s harness and one<br />
on hydration sleeve) are secure before using the product.<br />
<br />
<br />
<br />
<br />
<br />
5
HOW TO FIT THE CARRIER TO AN ADULT<br />
<br />
<br />
+ Quick and easy custom fi t is a key feature on Poco Series. Following these instructions will allow any adult to achieve a custom fi t.<br />
<br />
<br />
<br />
+ TORSO LENGTH ADJUSTMENT<br />
To adjust the shoulder harness vertical position, release the cam buckle in the center of the backpanel and loosen the load<br />
lifter straps (above the shoulder straps). The ventilated shoulder straps are free to move up and down over a 6” / 15 cm<br />
adjustment range. The embroidered size scale allows for quick, accurate positioning. Lock the buckle down and the yoke<br />
is fi xed securely. When the shoulder straps are positioned properly, your C7 vertebra (the bump at the base of your neck)<br />
should be located 1”-2” (2.5-5cm) above the top edge of the shoulder harness yoke. Tighten the load lifter straps as needed.<br />
+ TORSO RANGE ON ALL <strong>POCO</strong> STYLES IS 15.5” TO 21.5” (39.5 CM TO 54.5 CM)<br />
<br />
<br />
<br />
<br />
<br />
<br />
<br />
<br />
<br />
<br />
<br />
<br />
<br />
<br />
<br />
<br />
6
HOW TO FIT THE CARRIER TO AN ADULT<br />
<br />
<br />
+ FIT-ON-THE-FLY HIPBELT (<strong>POCO</strong> PREMIUM & PLUS)<br />
The hipbelt will support most of the load, so it is important that it fi ts you properly and comfortably. Make sure the<br />
hipbelt padding wraps around your hipbones. The Fit-on-the-Fly Hipbelt can be adjusted for size while wearing<br />
the Poco child carrier. The hipbelt pads are able to extend 3” / 7.5 cm on each side. Simply separate the hook<br />
and loop on the overlay pad and pull it forward. Press down on the hook and loop to fi x the pad in place. This<br />
<strong>Osprey</strong> exclusive design ensures excellent fi t and load transfer.<br />
+ FIT-ON-THE-FLY HIPBELT RANGE IS 26” TO 48” (66CM TO 122CM)<br />
<br />
<br />
<br />
<br />
<br />
<br />
<br />
<br />
<br />
<br />
<br />
<br />
<br />
<br />
<br />
<br />
7
+ PHOTO: RYAN BONNEAU<br />
8
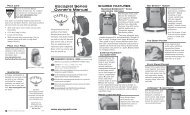
SECURING A CHILD IN THE CARRIER<br />
<br />
<br />
1) Unclip the red buckles and position child<br />
harness straps out of the way.<br />
2) To raise the saddle seat, grasp the webbing<br />
loop on the top back of the seat and pull up. To<br />
lower the seat, lift the large red ladder buckle<br />
behind the harness, grasp the webbing loop<br />
on the top back of the seat and push down.<br />
IMPORTANT: The optimal position is for the child’s<br />
chin height to be just above the top of the frame<br />
in front of them.<br />
3) Place child in child compartment with legs<br />
straddling seat.<br />
4) To adjust strap length for proper fi t, release<br />
the cam levers on the red buckles and slide them<br />
up or down the harness webbing. Be sure to<br />
close the cam levers once adjusted.<br />
5) Fasten the two red quick release buckles<br />
behind the child’s shoulders.<br />
6) Be sure that the harness buckles make an<br />
audible click when fastened and are secure<br />
before use.<br />
7) Older children can use the stirrups for their<br />
feet. Adjust using the ladder buckles for a quick<br />
fi t. To remove the foot stirrups from the Poco,<br />
completely slide the webbing out of the ladder<br />
buckle.<br />
8) The compression straps at the sides of the<br />
child compartment can be used to adjust the<br />
space of the compartment to match the size of<br />
the child.<br />
9<br />
1)<br />
<br />
2) <br />
<br />
<br />
<br />
<br />
<br />
<br />
3) <br />
<br />
4) <br />
<br />
<br />
<br />
5) <br />
<br />
6) <br />
<br />
7) <br />
<br />
<br />
<br />
<br />
8) <br />
<br />
<br />
<br />
1) <br />
<br />
2) <br />
<br />
<br />
<br />
<br />
<br />
<br />
<br />
3) <br />
<br />
4) <br />
<br />
<br />
<br />
<br />
5) <br />
<br />
6) <br />
<br />
<br />
7) <br />
<br />
<br />
<br />
<br />
8)
SECURING A CHILD IN THE CARRIER<br />
<br />
<br />
1. 2. 3.<br />
4/5/6<br />
7. 8.<br />
MAXIMUM LOAD: 22 kg / 48 lbs. (Child, gear and pack combined)<br />
<br />
<br />
REMEMBER! THE SOFT VENTILATED SEAT ADJUSTS UP AND DOWN FOR OPTIMAL<br />
FIT AND BALANCE. ONCE AGAIN, THE OPTIMAL POSITION IS FOR THE CHILD’S CHIN<br />
HEIGHT TO BE JUST ABOVE THE TOP OF THE FRAME IN FRONT OF THEM.<br />
WARNING: AVOID SERIOUS INJURY FROM FALLING OR SLIDING OUT. ALWAYS USE<br />
CHILD RETENTION SYSTEM.<br />
WARNING: DO NOT USE UNTIL CHILD CAN SIT UPRIGHT (AND WEIGHS AT LEAST<br />
16LB / 7.3 KG).<br />
<br />
<br />
<br />
<br />
<br />
<br />
<br />
<br />
<br />
<br />
<br />
<br />
<br />
<br />
<br />
10
11<br />
KEY ACCESSORIES<br />
<br />
<br />
+ SUNSHADE + <br />
<strong>Inc</strong>luded on the Poco Premium and Plus, our Sunshade<br />
deploys quickly and easily – just slide it out of the<br />
pocket and clip in place using the two buckles located<br />
on the panel behind the main harness. Check that the<br />
hook and loop connection at the top of the zippered<br />
pocket is fastened. To stow, release the buckles and<br />
the hook and loop, and slide down into the zippered<br />
pocket at the top of the back of the pack.<br />
(You can upgrade a Poco with a Sunshade purchased<br />
separately.)<br />
To install:<br />
1) Open the zipper that runs along the top of the carrier<br />
behind the child’s seat area.<br />
2) With the logo on the Sunshade facing away from<br />
the carrier, slide the Sunshade down this opening,<br />
leaving several inches of the Sunshade exposed at the<br />
top end.<br />
3) Unzip the large compartment at the base of the carrier.<br />
Inside you will see the lower end of the Sunshade<br />
and a plastic buckle at its center.<br />
4) Pinch open the clasp on this buckle, and slip it<br />
around the vertical webbing behind the Sunshade.<br />
Close the clasp.<br />
5) Push the Sunshade fully down and close the zipper.<br />
<br />
<br />
<br />
<br />
<br />
<br />
<br />
<br />
<br />
<br />
<br />
1) <br />
<br />
2) <br />
<br />
<br />
3) <br />
<br />
<br />
4) <br />
<br />
<br />
5) <br />
<br />
<br />
<br />
<br />
<br />
<br />
<br />
<br />
<br />
<br />
<br />
<br />
<br />
<br />
<br />
1) <br />
<br />
2) <br />
<br />
<br />
<br />
3) <br />
<br />
<br />
4) <br />
<br />
<br />
5)
KEY ACCESSORIES<br />
<br />
<br />
1. 2.<br />
3.<br />
4. 5.<br />
12
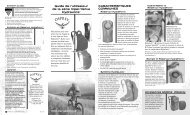
KEY ACCESSORIES<br />
<br />
<br />
+ RAINCOVER<br />
Available separately, the Poco Raincover<br />
provides extra protection from the elements. It<br />
is made of high visibility 70D ripstop nylon with<br />
clear urethane side windows and a refl ective<br />
logo. Always use the following instructions to<br />
attach the Raincover:<br />
TO ATTACH:<br />
1) Pull the raincover out of its pocket and<br />
drape over the sunshade.*<br />
2) Attach the hook and loop straps around the<br />
rear foot bar.<br />
3) NOTE: Child must be seated and secure in<br />
the Poco carrier before proceeding with step 4.<br />
4) Fasten the side release buckles at the base<br />
of the Poco, next to the hipbelt.<br />
5) For extra weather protection for the child<br />
fasten the side release buckles on the front of<br />
the raincover.<br />
6) To allow removal of the child from the Poco<br />
carrier with attached raincover, release the<br />
side release buckles at the lower front and to<br />
the front of the child (#4 and 5) and push the<br />
raincover back.<br />
* The Poco Raincover must be used in conjunction<br />
with the Poco Sunshade.<br />
+ <br />
<br />
<br />
<br />
<br />
<br />
<br />
<br />
1) <br />
<br />
2) <br />
<br />
3) <br />
<br />
<br />
4) <br />
<br />
5) <br />
<br />
<br />
6) <br />
<br />
<br />
<br />
<br />
<br />
<br />
<br />
<br />
<br />
<br />
<br />
<br />
1) <br />
<br />
2) <br />
<br />
3) <br />
<br />
<br />
4) <br />
<br />
5) <br />
<br />
<br />
6) <br />
<br />
<br />
<br />
<br />
<br />
<br />
13
KEY ACCESSORIES<br />
<br />
<br />
1. 2. 4.<br />
5.<br />
+ CARRYING CASE<br />
A carrying case makes it easy to transport the Poco child<br />
carrier. Made of durable 210D nylon double rip fabric, it<br />
features an ID card window, lockable zippers, a removable<br />
shoulder strap and stows into its own stuff sack.<br />
+ <br />
<br />
<br />
<br />
<br />
<br />
<br />
<br />
<br />
<br />
<br />
14
SHARED FEATURES<br />
<br />
<br />
+ REMOVABLE DROOL PAD<br />
Simply undo the hook and loop closures at the top and bottom of the pad, and disconnect the toggles at the sides.<br />
Hand wash or wipe using water and soap, rinse thoroughly and air dry.<br />
+ <br />
<br />
<br />
+ <br />
<br />
<br />
+ PADDED FRAMING<br />
The framing around the child is fully padded for comfort and protection.<br />
+ <br />
<br />
+ <br />
<br />
+ SIDE WING MESH POCKETS<br />
The ventilated side mesh wings on either side of the child seat feature mesh side pockets for stowing toys, bottles, etc.<br />
+ <br />
<br />
<br />
15<br />
+
SHARED FEATURES<br />
<br />
<br />
+ HYDRATION SLEEVE BEHIND BACKPANEL<br />
A hydration reservoir can be stored behind the backpanel. Lift up the lower hook and loop tab on the drool pad, and<br />
release the large side release buckle at the top of the hydration sleeve. Insert the reservoir fully into the sleeve. Be<br />
sure to reconnect the side release buckle and the Drool Pad hook and loop. Route the hose and bite valve through<br />
the slot openings in the back and out to the adult shoulder strap.<br />
+ <br />
<br />
<br />
<br />
<br />
+ <br />
<br />
<br />
<br />
<br />
+ PADDED GRAB HANDLES<br />
Two padded grab handles are located to allow balanced lifting of the child and load in the Poco Child Carrier. Always<br />
use these when lifting the pack onto your back.<br />
+ <br />
<br />
<br />
+ <br />
<br />
<br />
16
SHARED FEATURES<br />
<br />
<br />
+ ALUMINUM FRAME AND HINGES<br />
All Poco carriers feature the same strong and lightweight framing system. The injection-molded hinges provide solid<br />
and trustworthy deployment of the foot base. Always listen for an audible click when deploying the base and ensure<br />
it is securely extended before setting it down on the fl oor. To stow in the carrying case fold the foot bar towards the<br />
front of the pack, wrap the side wings inward and under the child’s harness, and tighten down the side compression<br />
straps. Be sure the Sunshade is properly stowed. Place the carrier in the case, and zip it shut.<br />
+ <br />
<br />
<br />
<br />
<br />
<br />
+ <br />
<br />
<br />
<br />
<br />
<br />
+ COLORS<br />
Koala Grey, Romper Red, or Bouncing Blue<br />
+ <br />
<br />
17<br />
+
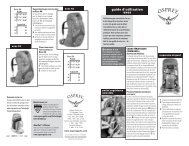
UNIQUE FEATURES / <strong>POCO</strong> PREMIUM<br />
<br />
<br />
<strong>POCO</strong> PREMIUM<br />
1. Detachable daypack adds convenient fl exible capacity. It can be worn by a<br />
larger child.<br />
2. Built-in sunshade<br />
3. Size adjustable hipbelt with zippered mesh pockets<br />
4. Large zippered lower compartment for diapers, jackets, bulky items<br />
5. Inner mesh security pocket<br />
6. Two stretch mesh side pockets<br />
7. Cell phone pocket on shoulder strap<br />
8. Padded lightweight changing pad<br />
<br />
1. <br />
<br />
2. <br />
3. <br />
4. <br />
<br />
5. <br />
6. <br />
7. <br />
8. <br />
<br />
1. <br />
<br />
2. <br />
3. <br />
4. <br />
5. <br />
6. <br />
Cubic <strong>Inc</strong>hes 2075 | Liters 34<br />
7. <br />
<br />
8. <br />
<br />
8<br />
7<br />
3 6<br />
2<br />
1<br />
4<br />
18
UNIQUE FEATURES / <strong>POCO</strong> PLUS<br />
<br />
<br />
<strong>POCO</strong> PLUS<br />
1. Built-in sunshade<br />
2. Size adjustable hipbelt with zippered mesh pockets<br />
3. Large zippered lower compartment for diapers, jackets, bulky items<br />
4. Inner mesh security pocket<br />
5. Two stretch mesh side pockets<br />
6. Stretch mesh pocket on upper front panel offers quick convenient storage<br />
7. Zippered stash pocket on upper front panel<br />
8. Cell phone pocket on shoulder strap<br />
9. Cord loops allow quick attachment of optional Daylite daypack<br />
<br />
1. <br />
2. <br />
3.<br />
4. <br />
5. <br />
6. <br />
7. <br />
8. <br />
9. <br />
8 9<br />
1<br />
6 7<br />
19<br />
<br />
1. <br />
2. <br />
3.<br />
4. <br />
5. <br />
6. <br />
<br />
7. <br />
8. <br />
9. <br />
2<br />
5<br />
Cubic <strong>Inc</strong>hes 1404 | Liters 23<br />
<br />
<br />
3
UNIQUE FEATURES / <strong>POCO</strong><br />
<br />
<br />
<strong>POCO</strong><br />
1. Padded, spacer mesh non-adjustable hipbelt<br />
2. Stretch mesh pocket and zippered slash pocket on upper front panel offers quick<br />
convenient storage<br />
3. Cord loops allow quick attachment of optional Daylite daypack<br />
<br />
1. <br />
2. <br />
<br />
3. <br />
3<br />
2<br />
<br />
1. <br />
2. <br />
<br />
3. <br />
<br />
1<br />
Cubic <strong>Inc</strong>hes 671 | Liters 11<br />
<br />
<br />
20
DAYPACK & DAYLITE ATTACHMENT<br />
<br />
<br />
21<br />
+DAYPACK ATTACHMENT<br />
The Poco Premium comes with a Poco daypack.<br />
To remove, unzip the red tabbed zipper<br />
and detach from the main pack. Unclip the<br />
toggle to remove the pack. To attach the Poco<br />
daypack, clip it onto the toggle on the back of<br />
the Poco Premium. Rezip the red tabbed zipper<br />
to secure.<br />
+ <br />
<br />
<br />
<br />
<br />
<br />
<br />
<br />
<br />
+ <br />
<br />
<br />
<br />
<br />
<br />
<br />
<br />
<br />
<br />
+ DAYLITE ATTACHMENT<br />
The Poco Plus and Poco come<br />
with four cord loops on the back<br />
of the pack for attaching our<br />
Daylite AddOns Series daypack.<br />
To attach, simply push the slider<br />
buckles on each corner of the<br />
Daylite through the cord loops.<br />
+ <br />
<br />
<br />
<br />
<br />
<br />
<br />
<br />
<br />
<br />
+
PACK CARE<br />
<br />
<br />
<strong>Osprey</strong> recommends Nikwax ® products for pack<br />
care. For complete instructions on cleaning your<br />
pack, visit www.ospreypacks.com/PackTech/<br />
PackCare<br />
+ WASHING INSTRUCTIONS<br />
1) Clean your pack and components in a<br />
bathtub or large sink using a mild detergent<br />
and warm water.<br />
2) Agitate the pack gently and then rinse<br />
thoroughly.<br />
3) Hang dry outdoors or in a well ventilated<br />
area out of direct sunlight.<br />
Your pack is an extremely durable product built<br />
for years of use and abuse. However, some<br />
basic procedures will ensure that your pack<br />
holds up optimally.<br />
• After each trip be sure to clean out your<br />
pack thoroughly.<br />
• If it’s wet, hang it to dry.<br />
• Loosen all the straps.<br />
• Wash your pack every now and then.<br />
<br />
® <br />
<br />
<br />
<br />
<br />
1) <br />
<br />
<br />
2) <br />
<br />
3) <br />
<br />
<br />
<br />
<br />
<br />
<br />
<br />
<br />
<br />
<br />
<br />
<br />
<br />
<br />
<br />
<br />
<br />
1) <br />
<br />
<br />
2) <br />
<br />
3) <br />
<br />
<br />
<br />
<br />
<br />
<br />
<br />
<br />
<br />
<br />
<br />
<br />
<br />
22
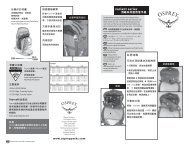
OSPREY CHILD SAFETY PRODUCTS, LLC<br />
115 Progress Circle<br />
Cortez, CO 81321 USA<br />
1-866-284-7830<br />
www.ospreypacks.com<br />
+ QUESTIONS?<br />
Contact <strong>Osprey</strong> Customer Service. Real help from<br />
real people. Scroll over the customer service tab at<br />
www.ospreypacks.com.<br />
+ GUARANTEE<br />
At <strong>Osprey</strong>, sustainability is designed into our packs,<br />
which are built to last a lifetime and backed by a<br />
superb guarantee, no matter how hard you are on<br />
your gear. Visit www.ospreypacks.com for details.<br />
+ PRODUCT REGISTRATION<br />
IMPORTANT! YOU MUST REGISTER THIS PRODUCT!!<br />
SEE LABEL ABOVE! MAIL-IN REGISTRATION CARD<br />
LOCATED IN BOTTOM COMPARTMENT OF CHILD<br />
CARRIER (US ONLY). We will use the information<br />
provided on this card to contact you only if there is a<br />
safety alert or recall for this product. We will not sell,<br />
rent or share your personal information. To register<br />
your product, please complete and mail this card<br />
(USPS business reply mail only) or visit our online<br />
registration at www.ospreypacks.com/PocoRegistration.<br />
You must register your Poco child carrier within<br />
30 days of purchase.<br />
+ <br />
<br />
<br />
<br />
<br />
+ <br />
<br />
<br />
<br />
<br />
<br />
<br />
<br />
+ <br />
<br />
<br />
<br />
<br />
<br />
<br />
<br />
<br />
<br />
<br />
<br />
<br />
<br />
+ <br />
<br />
<br />
<br />
<br />
+ <br />
<br />
<br />
<br />
<br />
<br />
<br />
+ <br />
<br />
<br />
<br />
<br />
<br />
<br />
<br />
<br />
<br />
<br />
<br />
<br />
<br />
<br />
<br />
S12.1v<br />
© 2012 <strong>Osprey</strong> <strong>Packs</strong>, <strong>Inc</strong>.