
You also want an ePaper? Increase the reach of your titles
YUMPU automatically turns print PDFs into web optimized ePapers that Google loves.
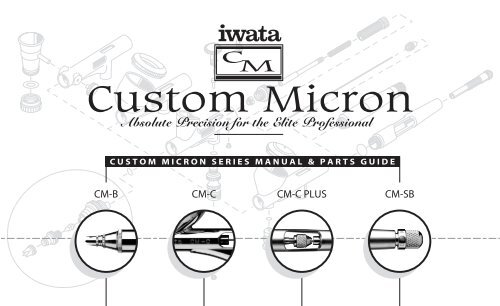
Created for perfection; manufactured with quality; unparalleled in precision: the Custom Micron delivers precise,<br />
accurate, controllable spray to you, the elite professional. Special tooling, precision processes, and meticulous attention<br />
to quality control create an unmatched <strong>airbrush</strong> capable of superb atomization, incredible control, and amazing detail.<br />
PRECISE, ACCURATE CONTROL<br />
FOR DETAILED SPRAYING<br />
distinguish these <strong>airbrush</strong>es as Custom Microns!<br />
ONLY FROM IWATA-MEDEA<br />
Iwata <strong>airbrush</strong>es are designed for the demanding professional. Modern precision machining and carefully selected<br />
materials are used in the manufacturing process to ensure consistent high performance and long life. Each Iwata<br />
Custom Micron <strong>airbrush</strong> is spray-tested before shipment to assure maximum performance and adherence to Iwata’s strict<br />
quality standards. To maintain your Custom Micron at its peak performance, proper care and attention must be observed.
4<br />
IWATA CUSTOM MICRON CM-B, CM-SB, CM-C AND CM-C PLUS<br />
A highly polished, hardened stainless-steel needle provides exceptionally smooth transitions from<br />
areas small to mid-range. The Iwata Custom Micron matched-head system ensures superior atomization.<br />
The pre-set handle allows finely tuned paint flow adjustments.<br />
Iwata Custom Micron B<br />
·The .18mm fluid nozzle is the smallest nozzle and<br />
needle combination Iwata offers for ultimate precision<br />
and accuracy.<br />
·1/16 oz. (1.8 ml) gravity-feed cup cleans up quickly<br />
allowing rapid color changes.<br />
Iwata Custom Micron SB<br />
·The .18mm fluid nozzle is the smallest nozzle and<br />
needle combination Iwata offers for ultimate precision<br />
and accuracy.<br />
·1/8 oz. (3.5 ml) side-feed cup<br />
·Repositionable side feed cup for left or right handed use.<br />
·View the paint surface over the top of the <strong>airbrush</strong>.<br />
·Add the 1/4 oz (7ml) side-feed cup, the 1/2 oz (14ml)<br />
side-feed cup, or the 1 oz (28ml) siphon bottle to increase<br />
the <strong>airbrush</strong>’s versatility.
Iwata Custom Micron C<br />
·The .23mm fluid nozzle allows slightly heavier paint<br />
than the .18mm fluid nozzle.<br />
·1/3 oz. (9 ml) gravity-feed color cup allows you to spray<br />
large amounts of color.<br />
Iwata Custom Micron C Plus<br />
·The .23mm fluid nozzle allows slightly heavier paint than<br />
the .18mm fluid nozzle.<br />
·The Micro Air Control (MAC) Valve enables infinite airflow<br />
control at the <strong>airbrush</strong>’s head providing control between<br />
stipple, fine detail, and background spray effects.<br />
·Solvent-proof Teflon needle packing allows extended<br />
solvent-based paint usage, including automotive paints.<br />
·A redesigned, funnel shaped gravity feed cup allows<br />
greater paint efficiency and ensures a faster, more<br />
thorough clean up.<br />
·The cutaway, pre-set handle allows quick flushes<br />
and rinses.<br />
5
6<br />
See diagram with Parts Listing on Pages 20 and 21.
GETTING STARTED<br />
Compressor<br />
The Custom Micron does not require a high pressure air source<br />
for most applications because lower pressures are best suited for<br />
ultra-fine, slow, high-detail spraying, ideally between 5 and 20 psi.<br />
Any Iwata Studio Series compressor will operate the Custom<br />
Micron efficiently. But realizing the Custom Micron’s full benefits<br />
requires an adjustable or regulated air source with an air storage tank.<br />
Other compressor considerations include the length of use while<br />
spraying and the environment, or amount of space, you spray in.<br />
These Iwata Studio Series models come equipped with an air<br />
regulator for precise air adjustment.<br />
• Smart Jet Pro: Good for small studios and normal use.<br />
• Power Jet Lite: Good for normal studios and extended use.<br />
• Power Jet: Great for normal studios and great for extended use.<br />
• Power Jet Pro: Great for normal studios and great for extended<br />
use. (Two regulators allow two <strong>airbrush</strong>es on same unit.)<br />
Assembly<br />
1. Screw the airhose onto the compressor.<br />
2. Screw the airhose onto the <strong>airbrush</strong>.<br />
3. If using a Smart Jet Pro, Power Jet, Power Jet Lite, or Power Jet Pro<br />
compressor, adjust the pressure to between 10 and 15 psi.<br />
4. Check for any air leaks in the compressor or airhoses<br />
5. Place a few drops of cleaning solution or water into the<br />
<strong>airbrush</strong>’s bowl.<br />
6. Point the <strong>airbrush</strong> away from you.<br />
7. Press down on the main lever (#13) to start airflow through<br />
the <strong>airbrush</strong>.<br />
8. Pull the main lever back opening the <strong>airbrush</strong>’s nozzle.<br />
9. Spray water through the <strong>airbrush</strong> to see how it sprays.<br />
7
8<br />
GENERAL OPERATION<br />
Fine-Line Spray<br />
1. Depress the main lever (#13) to start airflow.<br />
2. Position the <strong>airbrush</strong> close to the surface, between 1/16<br />
and 1/2 inch.<br />
3. Pull the main lever back slightly to start paint flow.<br />
• A longer distance to the paint surface produces wider lines.<br />
• A shorter distance to the paint surface produces<br />
narrower lines.<br />
• Increased air pressure increases spray width.<br />
• Decreased air pressure decreases spray width.<br />
• The smallest lines are determined by skill and practice.<br />
CAUTION: The needle and nozzle are very delicate. Even<br />
a slight bend on the needle’s tip adversely effects the<br />
spray pattern.
Wide-Lines and Blending<br />
1. Depress the main lever (#13)<br />
2. Position the <strong>airbrush</strong> from 1/2 to 6 inches away from<br />
the surface.<br />
3. Pull the main lever back much further to release more paint<br />
to cover the bigger area.<br />
• A longer distance to the paint surface produces wider lines.<br />
• A shorter distance to the paint surface produces<br />
narrower lines.<br />
• Increased air pressure increases spray width.<br />
• Decreased air pressure decreases spray width.<br />
• The Custom Micron’s maximum usable line width is<br />
approximately 1-1/2 inches.<br />
Pre-Set Handle (#12)<br />
A threaded adjusting screw mounted behind the handle limits<br />
the distance the main lever can be pulled back. This provides accurate<br />
paint volume control and is especially useful for repetitive,<br />
precision work.<br />
Cutaway Handle (CM-C Plus Only, Optional for CM-<br />
B, CM-C and CM-SB)<br />
The cutaway handle allows quick paint clog removal without<br />
removing the handle or needle.<br />
1. Grip the exposed needle chuckling nut (#11) with your fingers.<br />
2. Pull it back while simultaneously depressing the main lever (#13).<br />
3. Repeat this process several times until the <strong>airbrush</strong> is clog free<br />
and spraying normally.<br />
• The increased paint flow past needle and nozzle tip removes<br />
many clogs.<br />
• Don’t let the needle “snap” back into place. This could damage<br />
the nozzle.<br />
9
10<br />
Micro Air Control (MAC) Valve (CM-C Plus Only)<br />
The MAC Valve enables infinite airflow control at the <strong>airbrush</strong>’s<br />
head providing control between stipple, fine detail, and background<br />
spray effects.<br />
• Spray coarse stippling effects and increase to full atomization<br />
in a quick turn.<br />
• Fine tuned airflow.<br />
• Maximized paint atomization control.<br />
• Open the valve fully during cleaning. The higher pressure pulls<br />
more paint through the <strong>airbrush</strong>.<br />
Stippling<br />
Iwata <strong>airbrush</strong>es are designed to produce a wide range of<br />
stippling textures.<br />
1. Unscrew the crown cap (#1A).<br />
2. Unscrew the nozzle cap (#1B).<br />
3. Adjust the air pressure between 5 and 30 psi.<br />
• Low air pressure creates coarse stipples.<br />
• High air pressure provides fine stipple effects.<br />
• Paint viscosity also effects stippling texture.
Air Pressure<br />
Working pressures generally vary between 8 and 60 psi, depending<br />
on the type of surface, the desired spray texture, and the paint’s<br />
viscosity. Try using 14 psi or below to take full advantage of the<br />
Custom Micron’s unique, spray characteristics.<br />
• Spray thick paint with greater pressure.<br />
• Spray thin paint with less pressure.<br />
• Spray large paint amounts with greater pressure.<br />
• Spray small paint amounts with less pressure.<br />
WARNING: Do not exceed 98psi<br />
Crown Cap<br />
The crown cap physically protects the needle while spraying very<br />
fine lines. When spraying larger areas with the Custom Micron, we<br />
suggest removing the crown cap.<br />
Paint Preparation<br />
For non-specific <strong>airbrush</strong> paints, proper preparation, including<br />
filtering the paint through a nylon mesh, is critical for best<br />
performance. Thin paint with its proper solvent, and make repeated<br />
passes across the work to build up the color. This improves your<br />
work’s quality and decreases your <strong>airbrush</strong>’s cleaning time.<br />
• Custom Microns spray very thin paint best.<br />
• Thin paint with its proper solvent.<br />
• Filter paint through paint filters or mesh.<br />
Safety Tips<br />
• Always spray in well ventilated areas.<br />
• Do not spray solvent based (flammable) paints around<br />
open flames.<br />
• Use the appropriate respirator to safely filter out paint vapors<br />
particular to your specific paint type.<br />
• Wear eye protection to prevent paint contact with eyes.<br />
• Never exceed the <strong>airbrush</strong>’s pressure limit. (98 psi).<br />
11
12<br />
MAINTENANCE<br />
Cleaning the Airbrush Between Colors<br />
1. Dump out the color cup’s excess paint.<br />
2. Rinse the cup with the appropriate cleaning solution.<br />
3. Use a paper towel to wipe out any leftover paint.<br />
4. Fill the bottom of the cup with cleaner.<br />
5. Spray cleaner until the spray is clear.<br />
6. Add the next color to the color cup.<br />
7. Repeat cleaning procedure when finished.<br />
Cleaning the Needle<br />
1. Unscrew the handle (#12) from the <strong>airbrush</strong> body.<br />
2. Loosen the needle chucking nut (#11).<br />
3. Gently pull the needle (#10) straight out.<br />
4. Fold a soft cloth damp with cleaner over the needle.<br />
5. Rotate the needle to gently wipe the residual paint off.<br />
6. Carefully insert the needle into the <strong>airbrush</strong> until it seats fully<br />
against the nozzle (#1C). You should feel a positive stop. If you feel<br />
a spongy stop, you still have debris in your nozzle.<br />
CAUTION: The most probable time to damage the<br />
needle is when the needle passes through the main<br />
lever (#13) and through the needle packing screw (#5).<br />
If the needle stops abruptly, retract and examine the<br />
trigger mechanism for proper assembly and re-insert<br />
the needle.<br />
7. Tighten the needle chucking nut finger tight.<br />
Pull the main lever back and forth to visually confirm the<br />
needle’s ability to move.<br />
8. Screw the handle back onto the <strong>airbrush</strong> body.<br />
Before Each Session<br />
Spray water or the appropriate paint solvent through the <strong>airbrush</strong><br />
to make sure the <strong>airbrush</strong> is working properly.<br />
After Each Session<br />
Or any time the <strong>airbrush</strong> becomes clogged.<br />
1. Increase the air pressure.<br />
2. Spray cleaning solution for a short time.<br />
3. Clean the needle if necessary<br />
This cleaning method helps clean the paint passage, the nozzle, and<br />
the needle thoroughly.
Lubricating the Needle (#10)<br />
To ensure smooth main lever (#13) action lubricate the needle<br />
when the trigger won’t respond properly.<br />
1. Unscrew the handle (#12).<br />
2. Loosen the needle chucking nut (#11).<br />
3. Remove the needle.<br />
4. Coat the needle slightly with Medea Super Lube starting<br />
1 inch behind the tip.<br />
5. Wipe the needle with a soft, clean cloth, leaving a light coat<br />
of lube behind.<br />
6. Re-insert the needle gently into the <strong>airbrush</strong> until you feel<br />
a positive stop.<br />
7. Tighten the needle chucking nut.<br />
8. Screw the handle onto the <strong>airbrush</strong> body.<br />
DO NOT over-lube the needle; transferring excess<br />
lube into the nozzle may cause severe paint flow<br />
problems.<br />
DO NOT use light machine oil or WD-40 for lubrication.<br />
These lubes cause the needle to stick when it<br />
moves through the needle packing o-ring and can also<br />
get into the air system.<br />
CAUTION: If it becomes absolutely necessary to dismantle<br />
the <strong>airbrush</strong> remember that most situations<br />
do not require tools.<br />
DO NOT use pliers.<br />
Lubricating the Air Piston (#14)<br />
To ensure smooth main lever (#13) action, lubricate the air piston<br />
when the trigger won’t respond properly.<br />
1. Unscrew the handle (#12).<br />
2. Unscrew the needle chucking nut (#11).<br />
3. Remove the needle (#10).<br />
4. Unscrew the needle spring adjuster (#9).<br />
5. Remove the needle spring (#8).<br />
6. Remove the needle chucking guide (#7).<br />
7. Pull the main lever up and out.<br />
8. Turn the <strong>airbrush</strong> body over your hand and jiggle out the<br />
auxiliary lever (#15).<br />
9. Use tweezers to pull out the air valve piston.<br />
13
14<br />
10. Clean the valve piston with a cotton swab.<br />
11. Clean the hole at the bottom of the trigger housing with a<br />
cotton swab.<br />
a. Clean until a Cotton Swab comes back clean.<br />
12. Dab a very small drop of Super Lube on the valve piston shaft.<br />
13. Insert the valve piston back into the hole at the bottom of the<br />
trigger housing.<br />
14. Place the main lever back into the trigger housing.<br />
15. Press the main lever up and down a few times.<br />
a. it should spring back up smoothly when depressed.<br />
16. Place the auxiliary lever back into the trigger housing behind<br />
the main lever.<br />
a. Check the parts guide for the auxiliary lever’s<br />
proper orientation.<br />
b. Grab the small tab on the auxiliary lever from the side.<br />
c. Insert the auxiliary lever sideways into the trigger housing.<br />
d. Twist the auxiliary lever into the proper orientation.<br />
e. Hint: Hold the <strong>airbrush</strong> body with the front slightly<br />
dipped down to let gravity help your efforts.<br />
17. Place the needle chucking guide into the <strong>airbrush</strong> body.<br />
18. Place the needle spring over the needle chucking guide.<br />
19. Screw the needle spring adjuster into the <strong>airbrush</strong> body.<br />
The more you screw it in, the greater the trigger resistance.<br />
The looser it’s adjusted, the smoother the trigger feel<br />
(your personal preference).<br />
20. Push down on the main lever at least once.<br />
21. Carefully insert the needle.<br />
a. Warning: This is the most probable time to bend<br />
the needle point<br />
22. Screw the needle chucking nut onto the needle chucking guide<br />
23. Screw the handle back into the <strong>airbrush</strong> body<br />
DO NOT over-lube the air piston; transferring excess<br />
lube into the air system may cause severe paint flow<br />
problems.<br />
DO NOT use light machine oil or WD-40 for lubrication.<br />
These lubes cause the needle to stick when it<br />
moves through the needle packing o-ring.<br />
CAUTION: If it becomes absolutely necessary to dismantle<br />
the <strong>airbrush</strong> remember that most situations,<br />
unless otherwise directed, do not require tools.
18<br />
REPLACEMENT PARTS AND ACCESSORIES<br />
Head System (#1)<br />
A matched head system consists of four parts hand matched<br />
together. These components and this matching process create the<br />
Custom Micron’s exacting performance.<br />
Though engineered to last decades the components may still<br />
wear or become damaged and need replacement. If this happens,<br />
we recommend replacing the whole head system to keep the<br />
<strong>airbrush</strong>’s exquisite performance at peak levels. However,<br />
replacing only the nozzle can be done by Iwata-Medea’s highly<br />
trained technical department.<br />
The set includes: the needle cap (#1A); the nozzle cap (#1B); the<br />
fluid nozzle (#1C); and the head system base (#1D).<br />
1. Unscrew the handle (#12).<br />
2. Loosen the needle chucking nut (#11).<br />
3. Gently pull the needle (#10) part way back. It doesn’t need to<br />
be fully pulled out.<br />
4. Simply unscrew the entire head system.<br />
NOTE: Removing the head system the first time requires<br />
a good grip and some torque. Wrap a rubber<br />
band around the gnarled base of the head system and<br />
use a pair of standard pliers to unscrew it.<br />
• After removing the head system the first time the plastic cap<br />
functions as a wrench to help remove the head system base from<br />
the <strong>airbrush</strong> body as needed.<br />
5. Screw the new head system onto the <strong>airbrush</strong> body until<br />
finger tight.<br />
• Hand tighten head system.<br />
6. Push the needle all the way forward until it seats in place.<br />
7. Tighten the needle chucking nut.<br />
8. Screw the handle onto the <strong>airbrush</strong> body.<br />
TIP: Keep a spare head system on hand for unforeseen accidents.
Needle (#10)<br />
Iwata needles are precision ground, hardened stainless-steel<br />
capable of withstanding prolonged use. They are, however, easily<br />
physically damaged because of the long, tapered, extremely fine tip.<br />
If the needle point becomes severely bent, it must be straightened<br />
before pulling it back through the nozzle. If not, the bent needle<br />
might damage the nozzle as it’s pulled through.<br />
Quick Disconnect (Optional Accessory)<br />
A quick disconnect joint is screwed onto the airhose and a quick<br />
disconnect adapter is screwed onto each <strong>airbrush</strong>. When using<br />
multiple <strong>airbrush</strong>es the quick disconnect joint facilitates changing<br />
<strong>airbrush</strong>es on the same airhose quickly.<br />
TIP: Keep a spare needle on hand for unforeseen accidents.<br />
• Needles are sharp.<br />
• Needle tips are bent easily.<br />
19
— I W A T A C U S T O M M I C R O N S E R I E S A I R B R U S H E S • M A S T E R P A R T S L I S T —<br />
# Code# Part Name B SB C C+<br />
1 I 535 1 Fluid Head System 0.18 mm n n opt opt<br />
I 535 2 0.23 mm opt opt n n<br />
1A I 535 1D Fluid Head-Needle Crown Cap n n n n<br />
1B I 535 1C Fluid Head-Nozzle Cap n n opt opt<br />
I 535 2C opt opt n n<br />
1C I 535 1B Fluid Head-Nozzle 0.18 mm n n opt opt<br />
I 535 2B 0.23 mm opt opt n n<br />
1D I 535 1A Fluid Head Nozzle Base n n n n<br />
2 I 580 2 Packing Fluid Head (O-ring) n n n n<br />
3A I 525 2 Body - SB* x n x x<br />
3B I 525 3 Body - C* x x n x<br />
3C I 525 1 Body - B* n x x x<br />
3D I 525 6 Body - C+* x x x n<br />
4 I 580 3 Packing Fluid Needle (O-ring) n n n x<br />
5 I 565 1 Needle Packing Screw n n n x<br />
5A I 590 2 Packing Fluid Needle SET (Teflon) opt opt opt n<br />
6 I 590 1 Spring Guide n n n n<br />
7 I 550 1 Needle Chucking Guide n n n n<br />
8 I 570 1 Needle Spring n n n n<br />
9 I 575 1 Needle Spring Adjuster n n n n<br />
10 I 540 1 Fluid Needle 0.18 mm n n opt opt<br />
I 540 2 0.23 mm opt opt n n<br />
I 540 3 0.23 mm x x x n<br />
11 I 560 1 Needle Chucking Nut n n n n<br />
12 I 585 1 Pre-Set Handle Set n n n opt<br />
I 585 2 Pre-Set Handle (Single Cut) opt opt opt n<br />
13 I 545 1 Main Lever n n x x<br />
I 545 2 x x n n<br />
# Code# Part Name B SB C C+<br />
14 I 500 1 Air Piston n n n n<br />
15 I 515 1 Auxiliary Lever n n n n<br />
16 I 580 1 Packing Air Piston (O-ring, 2pcs) n n n n<br />
17 I 510 1 Air Valve Set n n n n<br />
17A I 510 2 Air Valve Body n n n n<br />
17B I 505 1 Air Valve n n n n<br />
17C I 510 4 Air Valve Spring n n n n<br />
17D I 510 3 Air Valve Guide n n n n<br />
18 I 555 1 Needle Chucking Guide Screw n n n n<br />
19A I 530 1 Fluid Cup Lid x x n opt<br />
19B I 618 1 Fluid Cup Lid x x opt n<br />
20 I 045 2 Blanking Cover x n x x<br />
21 I 070 3 Fluid Cup 1/8 oz. x n x x<br />
I 070 4 1/4 oz. x n x x<br />
22 I 150 5 Packing Lower Lid (Gasket) x n x x<br />
23 I 095 6 Lower Lid 1/8 oz. x n x x<br />
I 095 7 1/4 oz. x n x x<br />
28 I 605 1 Packing Handle (O-ring) x x x n<br />
29 I 190 1 Micro Air Control Valve x x x n<br />
30 I 190 2 Packing Mac Valve (O-ring) x x x n<br />
I 165 1 Spanner (nozzle wrench) n n n n<br />
I 160 1 Quick Fit Set (QD and Adaptor) opt opt opt opt<br />
I 160 2 Quick Fit Adaptor (Adaptor only) opt opt opt opt<br />
J 001 Adaptor (Iwata <strong>airbrush</strong>es to opt opt opt opt<br />
Paasche airhose)<br />
J 002 Adaptor (Iwata <strong>airbrush</strong>es to opt opt opt opt<br />
T & C/Badger airhoses)<br />
*Replacement parts not available. n = yes x = no opt = optional n = yes x = no opt = optional<br />
21
22<br />
All Iwata <strong>airbrush</strong>es are Warranted against all manufacturing defects of material and manufacture or workmanship for a<br />
period of FIVE years from the date of purchase. This warranty does not cover fluid needles or fluid nozzles since these parts<br />
need to be replaced occasionally due to normal wear. Any other part or material that is or becomes defective so as not to be<br />
usable within this period will be repaired or replaced. This warranty does not cover damage caused by negligence or <strong>airbrush</strong>es<br />
that have been altered or abused in any way. Call or email Iwata-Medea before returning an <strong>airbrush</strong> for the appropriate<br />
procedure for warranty repairs.<br />
IMAGE NEEDED<br />
Genuine Iwata<br />
Copyright © 2008 Iwata-Medea Inc. All rights reserved. The Iwata-Medea logo, Iwata-Medea®, Iwata Eclipse, Iwata Revolution, Iwata Kustom, Iwata Micron, Sprint Jet,<br />
Smart Jet, Power Jet Pro, Power Jet Lite, Medea Super Lube , Pistol Grip Filter, and all products denoted with ® or are registered trademarks or trademarks of<br />
Iwata-Medea Inc. • Iwata® and the Iwata logo are registered trademarks of Anest Iwata Japan • Teflon is a registered trademark of E.I. dupont de Nemours and Company or its<br />
affiliates. All other trademarks are of their respective owners. For more information visit www.<strong>iwata</strong>-medea.com
— w w w . I W A T A A I R B R U S H . c o m —<br />
Iwata-Medea, Inc. • 1336 N. Mason St. • Portland, Oregon 97217<br />
tel: (503) 253-7308 • fax: (503) 253-0721 • info@<strong>iwata</strong>-medea.com<br />
part no. ICM 110