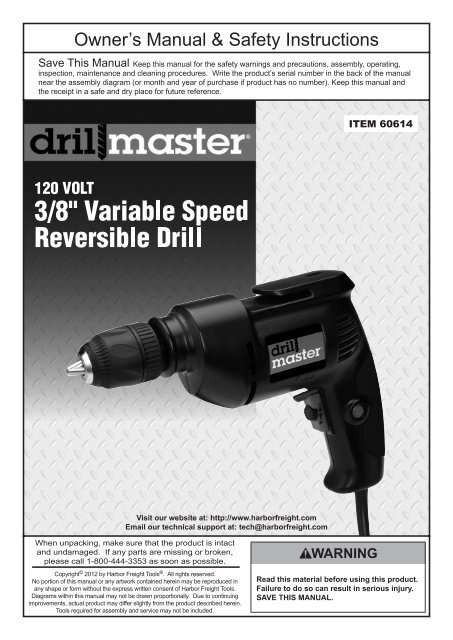
power tool use and care - Harbor Freight Tools
power tool use and care - Harbor Freight Tools
power tool use and care - Harbor Freight Tools
Create successful ePaper yourself
Turn your PDF publications into a flip-book with our unique Google optimized e-Paper software.
Table of Contents<br />
Safety Setup<br />
Operation Maintenance<br />
Safety ......................................................... 2<br />
Setup - Before Use:..................................... 9<br />
Setup........................................................... 9<br />
Operation ................................................... 10<br />
WARNING SYMBOLS AND DEFINITIONS<br />
Maintenance .............................................. 12<br />
Parts List <strong>and</strong> Diagram............................... 14<br />
Warranty..................................................... 16<br />
This is the safety alert symbol. It is <strong>use</strong>d to alert you to potential personal injury hazards.<br />
Obey all safety messages that follow this symbol to avoid possible injury or death.<br />
Indicates a hazardous situation which, if not avoided,<br />
will result in death or serious injury.<br />
Indicates a hazardous situation which, if not avoided,<br />
could result in death or serious injury.<br />
Indicates a hazardous situation which, if not avoided,<br />
could result in minor or moderate injury.<br />
Addresses practices not related to personal injury.<br />
IMPORTANT SAFETY INFORMATION<br />
General Power Tool Safety Warnings<br />
Read all safety warnings <strong>and</strong> instructions.<br />
Failure to follow the warnings <strong>and</strong> instructions may result in electric shock, fire <strong>and</strong>/or serious injury.<br />
Save all warnings <strong>and</strong> instructions for future reference.<br />
The term ″<strong>power</strong> <strong>tool</strong>″ in the warnings refers to your mains-operated (corded) <strong>power</strong> <strong>tool</strong>.<br />
Work area safety<br />
1. Keep work area clean <strong>and</strong> well lit.<br />
Cluttered or dark areas invite accidents.<br />
2. Do not operate <strong>power</strong> <strong>tool</strong>s in explosive<br />
atmospheres, such as in the presence of<br />
flammable liquids, gases or dust. Power <strong>tool</strong>s<br />
create sparks which may ignite the dust or fumes.<br />
3. Keep children <strong>and</strong> byst<strong>and</strong>ers<br />
away while operating a <strong>power</strong> <strong>tool</strong>.<br />
Distractions can ca<strong>use</strong> you to lose control.<br />
Page 2 For technical questions, please call 1-800-444-3353. Item 60614
Electrical safety<br />
1. Power <strong>tool</strong> plugs must match the outlet.<br />
Never modify the plug in any way.<br />
Do not <strong>use</strong> any adapter plugs with grounded<br />
<strong>power</strong> <strong>tool</strong>s. Unmodified plugs <strong>and</strong> matching<br />
outlets will reduce risk of electric shock.<br />
2. Avoid body contact with grounded surfaces<br />
such as pipes, radiators, ranges <strong>and</strong><br />
refrigerators. There is an increased risk of<br />
electric shock if your body is grounded.<br />
4. Do not ab<strong>use</strong> the cord. Never <strong>use</strong> the cord for<br />
carrying, pulling or unplugging the <strong>power</strong> <strong>tool</strong>.<br />
Keep cord away from heat, oil, sharp edges<br />
or moving parts. Damaged or entangled<br />
cords increase the risk of electric shock.<br />
5. When operating a <strong>power</strong> <strong>tool</strong> outdoors,<br />
<strong>use</strong> an extension cord suitable for<br />
outdoor <strong>use</strong>. Use of a cord suitable for outdoor<br />
<strong>use</strong> reduces the risk of electric shock.<br />
Safety<br />
3. Do not expose <strong>power</strong> <strong>tool</strong>s to rain or wet<br />
conditions. Water entering a <strong>power</strong> <strong>tool</strong><br />
will increase the risk of electric shock.<br />
Personal safety<br />
6. If operating a <strong>power</strong> <strong>tool</strong> in a damp location<br />
is unavoidable, <strong>use</strong> a Ground Fault Circuit<br />
Interrupter (GFCI) protected supply.<br />
Use of a GFCI reduces the risk of electric shock.<br />
1. Stay alert, watch what you are doing <strong>and</strong> <strong>use</strong><br />
common sense when operating a <strong>power</strong> <strong>tool</strong>.<br />
Do not <strong>use</strong> a <strong>power</strong> <strong>tool</strong> while you are tired<br />
or under the influence of drugs, alcohol or<br />
medication. A moment of inattention while operating<br />
<strong>power</strong> <strong>tool</strong>s may result in serious personal injury.<br />
2. Use personal protective equipment. Always wear<br />
eye protection. Safety equipment such as<br />
dust mask, non-skid safety shoes, hard hat,<br />
or hearing protection <strong>use</strong>d for appropriate<br />
conditions will reduce personal injuries.<br />
3. Prevent unintentional starting. Ensure the Trigger<br />
is in the off‐position before connecting to<br />
<strong>power</strong> source, picking up or carrying the <strong>tool</strong>.<br />
Carrying <strong>power</strong> <strong>tool</strong>s with your finger on<br />
the Trigger or energizing <strong>power</strong> <strong>tool</strong>s that<br />
have the Trigger on invites accidents.<br />
4. Remove any adjusting key or wrench<br />
before turning the <strong>power</strong> <strong>tool</strong> on.<br />
A wrench or a key left attached to a rotating part<br />
of the <strong>power</strong> <strong>tool</strong> may result in personal injury.<br />
Power <strong>tool</strong> <strong>use</strong> <strong>and</strong> <strong>care</strong><br />
1. Do not force the <strong>power</strong> <strong>tool</strong>. Use the<br />
correct <strong>power</strong> <strong>tool</strong> for your application.<br />
The correct <strong>power</strong> <strong>tool</strong> will do the job better <strong>and</strong><br />
safer at the rate for which it was designed.<br />
2. Do not <strong>use</strong> the <strong>power</strong> <strong>tool</strong> if the Trigger<br />
does not turn it on <strong>and</strong> off.<br />
Any <strong>power</strong> <strong>tool</strong> that cannot be controlled with the<br />
Trigger is dangerous <strong>and</strong> must be repaired.<br />
3. Disconnect the plug from the <strong>power</strong> source<br />
before making any adjustments, changing<br />
accessories, or storing <strong>power</strong> <strong>tool</strong>s.<br />
Such preventive safety measures reduce the<br />
risk of starting the <strong>power</strong> <strong>tool</strong> accidentally.<br />
5. Do not overreach. Keep proper footing <strong>and</strong><br />
balance at all times. This enables better control<br />
of the <strong>power</strong> <strong>tool</strong> in unexpected situations.<br />
6. Dress properly. Do not wear loose clothing or<br />
jewelry. Keep your hair, clothing <strong>and</strong> gloves<br />
away from moving parts. Loose clothes, jewelry<br />
or long hair can be caught in moving parts.<br />
7. If devices are provided for the connection of<br />
dust extraction <strong>and</strong> collection facilities, ensure<br />
these are connected <strong>and</strong> properly <strong>use</strong>d. Use of<br />
these devices can reduce dust‐related hazards.<br />
8. Only <strong>use</strong> safety equipment that has been<br />
approved by an appropriate st<strong>and</strong>ards agency.<br />
Unapproved safety equipment may not provide<br />
adequate protection. Eye protection must be<br />
ANSI‐approved <strong>and</strong> breathing protection<br />
must be NIOSH‐approved for the<br />
specific hazards in the work area.<br />
4. Store idle <strong>power</strong> <strong>tool</strong>s out of the reach of<br />
children <strong>and</strong> do not allow persons unfamiliar<br />
with the <strong>power</strong> <strong>tool</strong> or these instructions<br />
to operate the <strong>power</strong> <strong>tool</strong>. Power <strong>tool</strong>s are<br />
dangerous in the h<strong>and</strong>s of untrained <strong>use</strong>rs.<br />
5. Maintain <strong>power</strong> <strong>tool</strong>s. Check for misalignment<br />
or binding of moving parts, breakage of parts<br />
<strong>and</strong> any other condition that may affect the<br />
<strong>power</strong> <strong>tool</strong>’s operation. If damaged, have the<br />
<strong>power</strong> <strong>tool</strong> repaired before <strong>use</strong>. Many accidents<br />
are ca<strong>use</strong>d by poorly maintained <strong>power</strong> <strong>tool</strong>s.<br />
Maintenance Operation<br />
Setup<br />
Item 60614<br />
For technical questions, please call 1-800-444-3353.<br />
Page 3
6. Keep cutting <strong>tool</strong>s sharp <strong>and</strong> clean. Properly<br />
maintained cutting <strong>tool</strong>s with sharp cutting edges<br />
are less likely to bind <strong>and</strong> are easier to control.<br />
7. Use the <strong>power</strong> <strong>tool</strong>, accessories <strong>and</strong> <strong>tool</strong> bits<br />
etc. in accordance with these instructions,<br />
taking into account the working conditions<br />
<strong>and</strong> the work to be performed. Use of the<br />
<strong>power</strong> <strong>tool</strong> for operations different from those<br />
intended could result in a hazardous situation.<br />
Safety Setup<br />
Operation Maintenance<br />
Service<br />
Have your <strong>power</strong> <strong>tool</strong> serviced by a qualified repair person using only identical replacement parts.<br />
This will ensure that the safety of the <strong>power</strong> <strong>tool</strong> is maintained.<br />
Drill Safety Warnings<br />
1. Use auxiliary h<strong>and</strong>les supplied with the <strong>tool</strong>.<br />
Loss of control can ca<strong>use</strong> personal injury.<br />
2. Hold <strong>power</strong> <strong>tool</strong>s by insulated gripping surfaces<br />
when performing an operation where the cutting<br />
<strong>tool</strong> may contact hidden wiring or its own cord.<br />
Contact with a ″live″ wire will make exposed metal<br />
parts of the <strong>tool</strong> ″live″ <strong>and</strong> shock the operator.<br />
3. Let bit cool before touching, changing<br />
or adjusting it. Bits heat up dramatically<br />
while in <strong>use</strong>, <strong>and</strong> can burn you.<br />
4. If the drill bit jams, release the Trigger immediately;<br />
drill torque can ca<strong>use</strong> injury or break bit.<br />
5. Maintain labels <strong>and</strong> nameplates on the <strong>tool</strong>.<br />
These carry important safety information.<br />
If unreadable or missing, contact<br />
<strong>Harbor</strong> <strong>Freight</strong> <strong>Tools</strong> for a replacement.<br />
6. Avoid unintentional starting.<br />
Prepare to begin work before turning on the <strong>tool</strong>.<br />
7. Do not lay the <strong>tool</strong> down until it has come to<br />
a complete stop. Moving parts can grab the<br />
surface <strong>and</strong> pull the <strong>tool</strong> out of your control.<br />
8. When using a h<strong>and</strong>held <strong>power</strong> <strong>tool</strong>,<br />
maintain a firm grip on the <strong>tool</strong> with both<br />
h<strong>and</strong>s to resist starting torque.<br />
9. Do not leave the <strong>tool</strong> unattended when it is plugged<br />
into an electrical outlet. Turn off the <strong>tool</strong>, <strong>and</strong><br />
unplug it from its electrical outlet before leaving.<br />
10. This product is not a toy.<br />
Keep it out of reach of children.<br />
11. People with pacemakers should consult their<br />
physician(s) before <strong>use</strong>. Electromagnetic fields in<br />
close proximity to heart pacemaker could ca<strong>use</strong><br />
pacemaker interference or pacemaker failure.<br />
In addition, people with pacemakers should:<br />
• Avoid operating alone.<br />
• Do not <strong>use</strong> with Trigger locked on.<br />
• Properly maintain <strong>and</strong> inspect to avoid<br />
electrical shock.<br />
• Properly ground <strong>power</strong> cord. Ground Fault Circuit<br />
Interrupter (GFCI) should also be implemented<br />
– it prevents sustained electrical shock.<br />
12. WARNING: Some dust created by <strong>power</strong> s<strong>and</strong>ing,<br />
sawing, grinding, drilling, <strong>and</strong> other construction<br />
activities, contains chemicals known [to the State<br />
of California] to ca<strong>use</strong> cancer, birth defects or<br />
other reproductive harm. Some examples of<br />
these chemicals are:<br />
• Lead from lead-based paints<br />
• Crystalline silica from bricks <strong>and</strong> cement or<br />
other masonry products<br />
• Arsenic <strong>and</strong> chromium from<br />
chemically treated lumber<br />
Your risk from these exposures varies, depending on<br />
how often you do this type of work. To reduce your<br />
exposure to these chemicals: work in a well ventilated<br />
area, <strong>and</strong> work with approved safety equipment, such<br />
as those dust masks that are specially designed to<br />
filter out microscopic particles.<br />
(California Health & Safety Code § 25249.5, et seq.)<br />
13. WARNING: The brass components of this<br />
product contain lead, a chemical known to<br />
the State of California to ca<strong>use</strong> birth defects<br />
(or other reproductive harm). (California<br />
Health & Safety code § 25249.5, et seq.)<br />
14. WARNING: H<strong>and</strong>ling the cord on this product will<br />
expose you to lead, a chemical known to the State of<br />
California to ca<strong>use</strong> cancer, <strong>and</strong> birth defects or other<br />
reproductive harm. Wash h<strong>and</strong>s after h<strong>and</strong>ling.<br />
(California Health & Safety Code § 25249.5, et seq.)<br />
15. The warnings, precautions, <strong>and</strong> instructions<br />
discussed in this instruction manual cannot cover all<br />
possible conditions <strong>and</strong> situations that may occur.<br />
It must be understood by the operator that<br />
common sense <strong>and</strong> caution are factors<br />
which cannot be built into this product,<br />
but must be supplied by the operator.<br />
Page 4 For technical questions, please call 1-800-444-3353. Item 60614
Vibration Safety<br />
This <strong>tool</strong> vibrates during <strong>use</strong>.<br />
Repeated or long‐term exposure to vibration may<br />
ca<strong>use</strong> temporary or permanent physical injury,<br />
particularly to the h<strong>and</strong>s, arms <strong>and</strong> shoulders.<br />
To reduce the risk of vibration-related injury:<br />
1. Anyone using vibrating <strong>tool</strong>s regularly or for an<br />
extended period should first be examined by a<br />
doctor <strong>and</strong> then have regular medical check-ups to<br />
ensure medical problems are not being ca<strong>use</strong>d or<br />
worsened from <strong>use</strong>. Pregnant women or people who<br />
have impaired blood circulation to the h<strong>and</strong>, past<br />
h<strong>and</strong> injuries, nervous system disorders, diabetes,<br />
or Raynaud’s Disease should not <strong>use</strong> this <strong>tool</strong>.<br />
If you feel any symptoms related to vibration (such<br />
as tingling, numbness, <strong>and</strong> white or blue fingers),<br />
seek medical advice as soon as possible.<br />
2. Do not smoke during <strong>use</strong>. Nicotine reduces<br />
the blood supply to the h<strong>and</strong>s <strong>and</strong> fingers,<br />
increasing the risk of vibration-related injury.<br />
3. Wear suitable gloves to reduce the<br />
vibration effects on the <strong>use</strong>r.<br />
4. Use <strong>tool</strong>s with the lowest vibration<br />
when there is a choice.<br />
5. Include vibration-free periods each day of work.<br />
6. Grip <strong>tool</strong> as lightly as possible (while still keeping<br />
safe control of it). Let the <strong>tool</strong> do the work.<br />
7. To reduce vibration, maintain the <strong>tool</strong> as<br />
explained in this manual. If any abnormal<br />
vibration occurs, stop <strong>use</strong> immediately.<br />
Safety<br />
SAVE THESE INSTRUCTIONS.<br />
Maintenance Operation<br />
Setup<br />
Item 60614<br />
For technical questions, please call 1-800-444-3353.<br />
Page 5
Grounding<br />
Safety Setup<br />
Operation Maintenance<br />
TO PREVENT ELECTRIC SHOCK AND DEATH FROM INCORRECT GROUNDING<br />
WIRE CONNECTION:<br />
Check with a qualified electrician if you are in doubt as to whether the outlet is properly grounded.<br />
Do not modify the <strong>power</strong> cord plug provided with the <strong>tool</strong>. Never remove the grounding prong from<br />
the plug. Do not <strong>use</strong> the <strong>tool</strong> if the <strong>power</strong> cord or plug is damaged. If damaged, have it repaired by a service<br />
facility before <strong>use</strong>. If the plug will not fit the outlet, have a proper outlet installed by a qualified electrician.<br />
Grounded <strong>Tools</strong>: <strong>Tools</strong> with Three Prong Plugs<br />
3-Prong Plug <strong>and</strong> Outlet<br />
1. <strong>Tools</strong> marked with “Grounding Required” have a three<br />
wire cord <strong>and</strong> three prong grounding plug. The plug<br />
must be connected to a properly grounded outlet.<br />
If the <strong>tool</strong> should electrically malfunction or break<br />
down, grounding provides a low resistance path to<br />
carry electricity away from the <strong>use</strong>r, reducing the risk<br />
of electric shock. (See 3-Prong Plug <strong>and</strong> Outlet.)<br />
2. The grounding prong in the plug is connected through<br />
the green wire inside the cord to the grounding<br />
system in the <strong>tool</strong>. The green wire in the cord must<br />
be the only wire connected to the <strong>tool</strong>’s grounding<br />
system <strong>and</strong> must never be attached to an electrically<br />
“live” terminal. (See 3-Prong Plug <strong>and</strong> Outlet.)<br />
3. The <strong>tool</strong> must be plugged into an appropriate outlet,<br />
properly installed <strong>and</strong> grounded in accordance with<br />
all codes <strong>and</strong> ordinances. The plug <strong>and</strong> outlet should<br />
look like those in the preceding illustration.<br />
(See 3-Prong Plug <strong>and</strong> Outlet.)<br />
Double Insulated <strong>Tools</strong>: <strong>Tools</strong> with Two Prong Plugs<br />
Extension Cords<br />
Outlets for 2-Prong Plug<br />
1. Grounded <strong>tool</strong>s require a three wire extension cord.<br />
Double Insulated <strong>tool</strong>s can <strong>use</strong> either<br />
a two or three wire extension cord.<br />
2. As the distance from the supply outlet increases,<br />
you must <strong>use</strong> a heavier gauge extension cord.<br />
Using extension cords with inadequately sized wire<br />
ca<strong>use</strong>s a serious drop in voltage, resulting in loss of<br />
<strong>power</strong> <strong>and</strong> possible <strong>tool</strong> damage. (See Table A.)<br />
1. <strong>Tools</strong> marked “Double Insulated” do not<br />
require grounding. They have a special<br />
double insulation system which satisfies<br />
OSHA requirements <strong>and</strong> complies with<br />
the applicable st<strong>and</strong>ards of Underwriters<br />
Laboratories, Inc., the Canadian St<strong>and</strong>ard<br />
Association, <strong>and</strong> the National Electrical Code.<br />
2. Double insulated <strong>tool</strong>s may be <strong>use</strong>d in either of the<br />
120 volt outlets shown in the preceding illustration.<br />
(See Outlets for 2-Prong Plug.)<br />
3. The smaller the gauge number of the wire, the<br />
greater the capacity of the cord. For example,<br />
a 14 gauge cord can carry a higher current<br />
than a 16 gauge cord. (See Table A.)<br />
4. When using more than one extension cord to make<br />
up the total length, make sure each cord contains at<br />
least the minimum wire size required. (See Table A.)<br />
Page 6 For technical questions, please call 1-800-444-3353. Item 60614
5. If you are using one extension cord for more<br />
than one <strong>tool</strong>, add the nameplate amperes<br />
<strong>and</strong> <strong>use</strong> the sum to determine the required<br />
minimum cord size. (See Table A.)<br />
6. If you are using an extension cord outdoors, make<br />
sure it is marked with the suffix “W-A” (“W” in<br />
Canada) to indicate it is acceptable for outdoor <strong>use</strong>.<br />
7. Make sure the extension cord is properly wired<br />
<strong>and</strong> in good electrical condition. Always replace<br />
a damaged extension cord or have it repaired<br />
by a qualified electrician before using it.<br />
8. Protect the extension cords from sharp objects,<br />
excessive heat, <strong>and</strong> damp or wet areas.<br />
Table A: RECOMMENDED MINIMUM WIRE<br />
GAUGE FOR EXTENSION CORDS* (120/240 VOLT)<br />
NAMEPLATE<br />
AMPERES<br />
(at full load)<br />
EXTENSION CORD<br />
LENGTH<br />
25´ 50´ 75´ 100´ 150´<br />
0 – 2.0 18 18 18 18 16<br />
2.1 – 3.4 18 18 18 16 14<br />
3.5 – 5.0 18 18 16 14 12<br />
5.1 – 7.0 18 16 14 12 12<br />
7.1 – 12.0 18 14 12 10 -<br />
12.1 – 16.0 14 12 10 - -<br />
16.1 – 20.0 12 10 - - -<br />
* Based on limiting the line voltage drop to five volts at<br />
150% of the rated amperes.<br />
Safety<br />
Symbology<br />
Double Insulated<br />
n 0 xxxx/min. No Load Revolutions per Minute (RPM)<br />
A Amperes Risk of Electric Shock.<br />
Canadian St<strong>and</strong>ards Association<br />
WARNING marking concerning Risk<br />
of Eye Injury. Wear ANSI‐approved<br />
safety goggles with side shields.<br />
Underwriters Laboratories, Inc.<br />
Read the manual before<br />
set-up <strong>and</strong>/or <strong>use</strong>.<br />
V<br />
Volts<br />
WARNING marking<br />
~<br />
Alternating Current<br />
concerning Risk of Fire.<br />
Do not cover ventilation ducts.<br />
Keep flammable objects away.<br />
Properly connect <strong>power</strong> cord<br />
to appropriate outlet.<br />
Maintenance Operation<br />
Setup<br />
Item 60614<br />
For technical questions, please call 1-800-444-3353.<br />
Page 7
Specifications<br />
Safety Setup<br />
Operation Maintenance<br />
Electrical Rating 120V~ / 60Hz / 3.2A<br />
Motor Speed<br />
0-3000 RPM<br />
Keyless Chuck Capacity 3/64" to 3/8"<br />
3150240<br />
Page 8 For technical questions, please call 1-800-444-3353. Item 60614
Setup - Before Use:<br />
Read the ENTIRE IMPORTANT SAFETY INFORMATION section at the beginning of this<br />
manual including all text under subheadings therein before set up or <strong>use</strong> of this product.<br />
Note: For additional information regarding the parts listed in the following pages,<br />
refer to Parts List <strong>and</strong> Diagram on page 14.<br />
Functions<br />
Safety<br />
Level<br />
Chuck<br />
Forward/Reverse<br />
Switch<br />
Speed<br />
Limiter Dial<br />
Figure A: Functions<br />
Trigger<br />
Lock Button<br />
Maintenance Operation<br />
Setup<br />
Item 60614<br />
For technical questions, please call 1-800-444-3353.<br />
Page 9
Operating Instructions<br />
Read the ENTIRE IMPORTANT SAFETY INFORMATION section at the beginning of this<br />
manual including all text under subheadings therein before set up or <strong>use</strong> of this product.<br />
Safety Setup<br />
Operation Maintenance<br />
Tool Set Up<br />
TO PREVENT SERIOUS INJURY FROM ACCIDENTAL OPERATION:<br />
Make sure that the Trigger is in the off‐position <strong>and</strong> unplug the <strong>tool</strong> from its<br />
electrical outlet before performing any procedure in this section.<br />
Drill Bit Installation<br />
CAUTION! Wear heavy-duty work gloves to provide<br />
protection when inserting <strong>and</strong> removing drill bits.<br />
Drill bits become very hot during <strong>use</strong>.<br />
Do not remove drill bits until the bit has cooled.<br />
1. While holding the ring behind the collar of the<br />
Chuck with one h<strong>and</strong>, rotate the collar of the<br />
Chuck counterclockwise until the jaws of the<br />
drill are opened enough to fit the drill bit.<br />
Workpiece <strong>and</strong> Work Area Set Up<br />
1. Designate a work area that is clean <strong>and</strong> well‐lit.<br />
The work area must not allow access by children<br />
or pets to prevent distraction <strong>and</strong> injury.<br />
2. Route the <strong>power</strong> cord along a safe route to reach<br />
the work area without creating a tripping hazard or<br />
exposing the <strong>power</strong> cord to possible damage. The<br />
<strong>power</strong> cord must reach the work area with enough<br />
extra length to allow free movement while working.<br />
General Operating Instructions<br />
1. Make sure that the Trigger is in the<br />
off‐position, then plug in the <strong>tool</strong>.<br />
2. Use the Forward/Reverse Switch above the Trigger<br />
to determine the rotation direction of the Chuck. Slide<br />
it to the right side for reverse Chuck rotation. Slide to<br />
the left side for forward Chuck rotation. See Figure A.<br />
3. CAUTION! Allow chuck to come to complete<br />
stop prior to changing its direction of rotation.<br />
Note: The Speed Limiter Dial can be adjusted<br />
to limit the travel of the Trigger. Turning the dial<br />
counterclockwise (-) will limit the Trigger movement<br />
to low speed settings. Turning the dial clockwise (+)<br />
will allow for full Trigger range <strong>and</strong> faster speeds.<br />
2. Place the desired drill bit into the drill<br />
between the Chuck Jaws.<br />
3. H<strong>and</strong> tighten the Chuck until the bit is held securely<br />
in place, centered between the Chuck Jaws.<br />
NOTICE: Use sharp bits. Dull, bent, or damaged<br />
bits will ca<strong>use</strong> stress on the drill <strong>and</strong>/or break.<br />
3. Secure loose workpieces using a vise or clamps<br />
(not included) to prevent movement while working.<br />
4. There must not be objects, such as utility lines,<br />
nearby that will present a hazard while working.<br />
4. Squeeze the Trigger to start the <strong>tool</strong>. The Trigger<br />
has a variable speed feature. Pressing it lightly<br />
will make the <strong>tool</strong> operate slowly; pressing<br />
more will ca<strong>use</strong> the <strong>tool</strong> to operate faster.<br />
5. To lock the Trigger in the ON position, squeeze<br />
the Trigger, press in the Lock ON button, <strong>and</strong> then<br />
release the Trigger. The <strong>tool</strong> will operate continuously.<br />
To stop the <strong>tool</strong>, squeeze <strong>and</strong> release the Trigger.<br />
6. To prevent accidents, turn off the <strong>tool</strong> <strong>and</strong><br />
disconnect from <strong>power</strong> source after <strong>use</strong>. Clean,<br />
then store the <strong>tool</strong> indoors out of children’s reach.<br />
Page 10 For technical questions, please call 1-800-444-3353. Item 60614
The Drilling Operation<br />
1. Use only well-sharpened bits that are in<br />
good condition <strong>and</strong> appropriate to task.<br />
2. Use firm pressure when drilling, but do not press<br />
too hard. Too much pressure will not help the<br />
process <strong>and</strong> will ca<strong>use</strong> bit to overheat, may<br />
ca<strong>use</strong> bit to bend or break, ca<strong>use</strong> undue strain<br />
on the <strong>tool</strong>, <strong>and</strong> may damage the bit or work<br />
piece. Pressing too hard may stall the motor.<br />
3. WARNING! If motor stalls, release Trigger<br />
immediately to prevent damage to the <strong>tool</strong>.<br />
4. Always drill in a straight line, using builtin<br />
level as a guide. Bending or twisting bit<br />
while drilling may ca<strong>use</strong> the bit to bend or<br />
break <strong>and</strong> may damage the work piece.<br />
5. Back off your pressure when you are<br />
about to penetrate the work piece.<br />
6. Keep the motor running when pulling the bit out of<br />
a completed hole to prevent the bit from jamming.<br />
Safety<br />
Metal Drilling<br />
1. Use high speed steel, carbide or<br />
specialty bits for metal drilling.<br />
2. Secure the work piece to keep it from<br />
moving during the drilling operation.<br />
3. Use a punch to create a dimple for the bit to start.<br />
4. Start by drilling slowly to keep bit from<br />
moving away from your starting point.<br />
Wood Drilling<br />
1. Use high carbon bits or bits specially<br />
designed for wood drilling, such as brad<br />
point, spade bits, forstner bits, etc.<br />
2. Secure the work piece to keep it from<br />
moving during the drilling operation.<br />
3. Start by drilling slowly to keep the bit from<br />
moving away from your starting point.<br />
Increase speed as the hole is established.<br />
5. As the hole is established, increase <strong>tool</strong> speed.<br />
Do not go so fast or <strong>use</strong> so much pressure that<br />
the bit heats up. This can damage the bit <strong>and</strong><br />
create an irregular hole. For hard metal or thick<br />
pieces, <strong>use</strong> cutting oil to keep the bit cool.<br />
6. Since drilling in metal is a slow operation, you<br />
may lock the Trigger in the ON position to<br />
maintain a constant speed <strong>and</strong> reduce fatigue.<br />
7. When drilling large holes in metal, start<br />
by drilling a smaller pilot hole, then using<br />
a larger bit for the final size hole.<br />
4. To prevent or reduce “break out” when the bit<br />
penetrates the work piece, clamp a piece of<br />
scrap material to the back of the work piece.<br />
5. Do not lock the Trigger in the ON position,<br />
as the bit can easily jam in wood <strong>and</strong><br />
the motor must be stopped quickly.<br />
Maintenance Operation<br />
Setup<br />
Item 60614<br />
For technical questions, please call 1-800-444-3353.<br />
Page 11
Maintenance <strong>and</strong> Servicing<br />
Procedures not specifically explained in this manual must<br />
be performed only by a qualified technician.<br />
Safety Setup<br />
Operation Maintenance<br />
TO PREVENT SERIOUS INJURY FROM ACCIDENTAL OPERATION:<br />
Make sure that the Trigger is in the off‐position <strong>and</strong> unplug the <strong>tool</strong> from its<br />
electrical outlet before performing any procedure in this section.<br />
TO PREVENT SERIOUS INJURY FROM TOOL FAILURE:<br />
Do not <strong>use</strong> damaged equipment. If abnormal noise or vibration<br />
occurs, have the problem corrected before further <strong>use</strong>.<br />
Cleaning, Maintenance, <strong>and</strong> Lubrication<br />
1. BEFORE EACH USE, inspect the general<br />
condition of the <strong>tool</strong>. Check for:<br />
• loose hardware,<br />
• misalignment or binding of moving parts,<br />
• damaged cord/electrical wiring,<br />
• cracked or broken parts, <strong>and</strong><br />
• any other condition that may<br />
affect its safe operation.<br />
2. AFTER USE, wipe external surfaces of the<br />
<strong>tool</strong> with clean cloth. Do not <strong>use</strong> solvents.<br />
3. Inspect the Chuck <strong>and</strong> remove any dirt or debris.<br />
4. WARNING! If the supply cord of this<br />
<strong>power</strong> <strong>tool</strong> is damaged, it must be replaced<br />
only by a qualified service technician.<br />
Page 12 For technical questions, please call 1-800-444-3353. Item 60614
Troubleshooting<br />
Problem Possible Ca<strong>use</strong>s Likely Solutions<br />
Tool will not start. 1. Cord not connected.<br />
1. Check that cord is plugged in.<br />
2. No <strong>power</strong> at outlet.<br />
3. Tool’s thermal reset breaker<br />
tripped (if equipped).<br />
4. Internal damage or wear.<br />
(Carbon brushes or<br />
Trigger, for example.)<br />
Tool operates slowly. 1. Forcing <strong>tool</strong> to work too fast.<br />
Performance<br />
decreases over time.<br />
Excessive noise<br />
or rattling.<br />
Overheating.<br />
2. Extension cord too long or cord<br />
diameter too small.<br />
1. Carbon brushes worn<br />
or damaged.<br />
2. Bit dull or damaged.<br />
Internal damage or wear. (Carbon<br />
brushes or bearings, for example.)<br />
1. Forcing <strong>tool</strong> to work too fast.<br />
2. Bit dull or damaged.<br />
3. Blocked motor housing vents.<br />
4. Motor being strained by long or<br />
small diameter extension cord.<br />
2. Check <strong>power</strong> at outlet. If outlet is un<strong>power</strong>ed,<br />
turn off <strong>tool</strong> <strong>and</strong> check circuit breaker.<br />
If breaker is tripped, make sure circuit is right<br />
capacity for <strong>tool</strong> <strong>and</strong> circuit has no other loads.<br />
3. Turn off <strong>tool</strong> <strong>and</strong> allow to cool.<br />
Press reset button on <strong>tool</strong>.<br />
4. Have technician service <strong>tool</strong>.<br />
1. Allow <strong>tool</strong> to work at its own rate.<br />
2. Eliminate <strong>use</strong> of extension cord. If an extension<br />
cord is needed, <strong>use</strong> one with the proper diameter<br />
for its length <strong>and</strong> load. See Extension Cords<br />
in Grounding section on page 6.<br />
1. Have qualified technician replace brushes.<br />
2. Keep bits sharp. Replace as needed.<br />
Have technician service <strong>tool</strong>.<br />
1. Allow <strong>tool</strong> to work at its own rate.<br />
2. Keep bits sharp. Replace as needed.<br />
3. Wear ANSI-approved safety goggles <strong>and</strong><br />
NIOSH‐approved dust mask/respirator while<br />
blowing dust out of motor using compressed air.<br />
4. Eliminate <strong>use</strong> of extension cord. If an extension<br />
cord is needed, <strong>use</strong> one with the proper diameter<br />
for its length <strong>and</strong> load. See Extension Cords<br />
in Grounding section on page 6.<br />
Follow all safety precautions whenever diagnosing or servicing the <strong>tool</strong>.<br />
Disconnect <strong>power</strong> supply before service.<br />
Safety<br />
Maintenance Operation<br />
Setup<br />
Item 60614<br />
For technical questions, please call 1-800-444-3353.<br />
Page 13
Parts List <strong>and</strong> Diagram<br />
PLEASE READ THE FOLLOWING CAREFULLY<br />
Safety Setup<br />
Operation Maintenance<br />
THE MANUFACTURER AND/OR DISTRIBUTOR HAS PROVIDED THE PARTS LIST AND ASSEMBLY DIAGRAM<br />
IN THIS MANUAL AS A REFERENCE TOOL ONLY. NEITHER THE MANUFACTURER OR DISTRIBUTOR<br />
MAKES ANY REPRESENTATION OR WARRANTY OF ANY KIND TO THE BUYER THAT HE OR SHE IS<br />
QUALIFIED TO MAKE ANY REPAIRS TO THE PRODUCT, OR THAT HE OR SHE IS QUALIFIED TO REPLACE<br />
ANY PARTS OF THE PRODUCT. IN FACT, THE MANUFACTURER AND/OR DISTRIBUTOR EXPRESSLY<br />
STATES THAT ALL REPAIRS AND PARTS REPLACEMENTS SHOULD BE UNDERTAKEN BY CERTIFIED AND<br />
LICENSED TECHNICIANS, AND NOT BY THE BUYER. THE BUYER ASSUMES ALL RISK AND LIABILITY<br />
ARISING OUT OF HIS OR HER REPAIRS TO THE ORIGINAL PRODUCT OR REPLACEMENT PARTS<br />
THERETO, OR ARISING OUT OF HIS OR HER INSTALLATION OF REPLACEMENT PARTS THERETO.<br />
Parts List<br />
Part Description Qty<br />
2 Left Motor Housing 1<br />
3 Flat Machine Screw (M5x22) 1<br />
4 Spring Washer 1<br />
5 Chuck 1<br />
6 Spindle 1<br />
7 Bearing (201) 1<br />
8 Half Circle Key 1<br />
9 Gear 1<br />
10 Fender Ring 1<br />
11 Brass Bushing 1<br />
12 Bearing 1<br />
13 Armature 1<br />
14 Carbon Brush 2<br />
15 Carbon Brush Holder 2<br />
16 Bearing 1<br />
17 Stator 1<br />
Record Product’s Serial Number Here:<br />
Note: If product has no serial number, record month <strong>and</strong> year of purchase instead.<br />
Part Description Qty<br />
18 Clip 1<br />
19 Self Tapping Screw (4x14) 2<br />
20 Cable Sheath 1<br />
21 Power Cord <strong>and</strong> Plug 1<br />
22 Switch Module 1<br />
23 Terminal 2<br />
24 Wire 2<br />
25 Terminal 2<br />
26 Right Motor Housing 1<br />
27 Screw (4x16) 2<br />
28 Screw (4x20) 6<br />
29 Lock Button 1<br />
30 Forward/Reverse Switch 1<br />
31 Speed Limiter Dial 1<br />
32 Trigger 1<br />
33 Level 1<br />
Note: Some parts are listed <strong>and</strong> shown for illustration purposes only,<br />
<strong>and</strong> are not available individually as replacement parts.<br />
Page 14 For technical questions, please call 1-800-444-3353. Item 60614
Assembly Diagram<br />
Maintenance Operation<br />
Setup<br />
Safety<br />
Item 60614<br />
For technical questions, please call 1-800-444-3353.<br />
Page 15
Limited 90 Day Warranty<br />
<strong>Harbor</strong> <strong>Freight</strong> <strong>Tools</strong> Co. makes every effort to assure that its products meet high quality <strong>and</strong> durability st<strong>and</strong>ards,<br />
<strong>and</strong> warrants to the original purchaser that this product is free from defects in materials <strong>and</strong> workmanship for the<br />
period of 90 days from the date of purchase. This warranty does not apply to damage due directly or indirectly,<br />
to mis<strong>use</strong>, ab<strong>use</strong>, negligence or accidents, repairs or alterations outside our facilities, criminal activity, improper<br />
installation, normal wear <strong>and</strong> tear, or to lack of maintenance. We shall in no event be liable for death, injuries<br />
to persons or property, or for incidental, contingent, special or consequential damages arising from the <strong>use</strong> of<br />
our product. Some states do not allow the exclusion or limitation of incidental or consequential damages, so the<br />
above limitation of exclusion may not apply to you. THIS WARRANTY IS EXPRESSLY IN LIEU OF ALL OTHER<br />
WARRANTIES, EXPRESS OR IMPLIED, INCLUDING THE WARRANTIES OF MERCHANTABILITY AND FITNESS.<br />
To take advantage of this warranty, the product or part must be returned to us with transportation charges<br />
prepaid. Proof of purchase date <strong>and</strong> an explanation of the complaint must accompany the merch<strong>and</strong>ise.<br />
If our inspection verifies the defect, we will either repair or replace the product at our election or we may<br />
elect to refund the purchase price if we cannot readily <strong>and</strong> quickly provide you with a replacement. We will<br />
return repaired products at our expense, but if we determine there is no defect, or that the defect resulted<br />
from ca<strong>use</strong>s not within the scope of our warranty, then you must bear the cost of returning the product.<br />
This warranty gives you specific legal rights <strong>and</strong> you may also have other rights which vary from state to state.<br />
3491 Mission Oaks Blvd. • PO Box 6009 • Camarillo, CA 93011 • (800) 444-3353


