Stealth Cam Unit Ops Owner's Manual - Trail Camera
Stealth Cam Unit Ops Owner's Manual - Trail Camera
Stealth Cam Unit Ops Owner's Manual - Trail Camera

You also want an ePaper? Increase the reach of your titles
YUMPU automatically turns print PDFs into web optimized ePapers that Google loves.
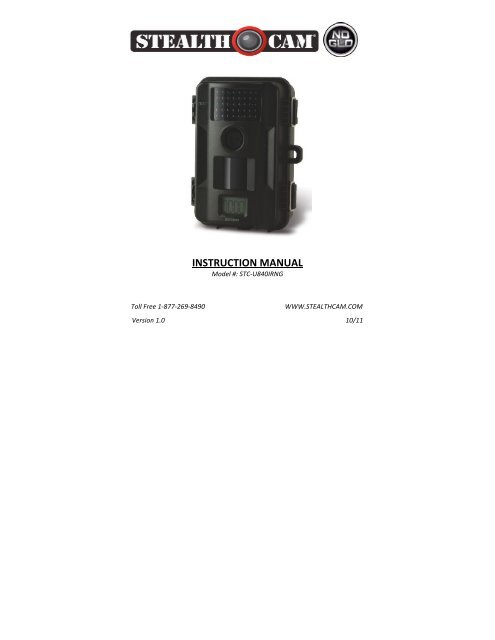
INSTRUCTION MANUAL <br />
Model #: STC-‐U840IRNG <br />
Toll Free 1-‐877-‐269-‐8490 <br />
Version 1.0 <br />
WWW.STEALTHCAM.COM <br />
10/11
** IMPORTANT NOTE ** <br />
First, congratulations on purchasing one of the finest scouting cameras on <br />
the market today. We appreciate your business and want to prove to you we <br />
are committed to providing you the best product and support in the field. <br />
By giving our customers a new state of the art web interface, which provides <br />
you with video tutorials and instruction on how to use the product in the <br />
most effective way. <br />
TECHNICAL SUPPORT <br />
EMAIL: stealthcam@gsmorg.com <br />
Please allow 48hrs for response. <br />
<strong>Stealth</strong> <strong>Cam</strong>, LLC <br />
P.O. Box 539504 <br />
Grand Prairie, TX 75053-‐9504 <br />
CUSTOMER SERVICE <br />
CONTACT & HOURS <br />
Toll Free: 1-‐877-‐269-‐8490 <br />
Call Center Hours: <br />
Mon -‐ Fri / 8 AM – 6 PM (CST) <br />
www.stealthcam.com <br />
<strong>Stealth</strong> <strong>Cam</strong> Limited Warranty <br />
Your <strong>Stealth</strong> <strong>Cam</strong> scouting camera is covered by a One Year Limited Warranty on parts <br />
and labor from the date of original purchase, and purchases must be made through an <br />
authorized dealer. The warranty covers defects in workmanship and materials. The <br />
warranty does not apply to units, which have been damaged or abused intentionally or <br />
unintentionally. A purchase from individuals or unauthorized Internet sites such as eBay <br />
voids the warranty. <br />
Tampering with or altering the unit will void the warranty. Any unauthorized service will <br />
void warranty. A copy of your original sales receipt must be produced for any warranty <br />
service and a Return Authorization (RA) number must be obtained from customer <br />
service at 877-‐269-‐8490 prior to returning product. <br />
WWW.STEALTHCAM.COM<br />
Toll Free 877-269-8490<br />
2
** IMPORTANT NOTE ** <br />
TRIAD equipped cameras include FREE Image Scan Software<br />
download at: www.stealthcam.net/sc_image_scan.html<br />
<strong>Stealth</strong> <strong>Cam</strong> Image Scan provides sophisticated motion<br />
searches based on targeted zones within a selected series of<br />
time-lapse images. Additional features include:<br />
• Watch days of video in minutes with variable speed playback<br />
• Import Time Lapse Photo sets from SD card to your<br />
computer<br />
• Open existing Time Lapse Photo sets on your computer<br />
• Process Photo Sets into high speed motion video<br />
• Quickly jog through the time lapse frames, forwards and<br />
backwards<br />
• Step frame forwards and backwards<br />
• Create videos that you can watch, email or upload<br />
To ensure optimum performance; your <strong>Stealth</strong> <strong>Cam</strong> (Wildview) <br />
camera may be eligible for periodical free software updates. <br />
Please check http://stealthcam.net/sc_downloads_d.html for the <br />
latest firmware downloads & sign up for our weekly newsletter to stay <br />
informed on updates & new product news. <br />
WWW.STEALTHCAM.COM<br />
Toll Free 877-269-8490<br />
3
TABLE OF CONTENTS <br />
<strong>Cam</strong>era overview <br />
<strong>Cam</strong>era Kit contents <br />
General Information <br />
Quick Start Guide <br />
Battery and Memory Installation <br />
Setup and Programming <br />
Using the <strong>Cam</strong>era <br />
Viewing & Deleting Files <br />
Memory Compatibility chart <br />
Technical Specifications <br />
Image Capacity chart <br />
Moon Phase chart <br />
Frequently Asked Questions (FAQs) <br />
FCC Compliance <br />
5 <br />
8 <br />
9 <br />
10 <br />
11 <br />
14 <br />
27 <br />
31 <br />
38 <br />
39 <br />
41 <br />
42 <br />
43 <br />
45 <br />
WWW.STEALTHCAM.COM<br />
Toll Free 877-269-8490<br />
4
CAMERA OVERVIEW <br />
Front View <br />
WWW.STEALTHCAM.COM<br />
Toll Free 877-269-8490<br />
5
Inside View <br />
WWW.STEALTHCAM.COM<br />
Toll Free 877-269-8490<br />
6
Side & Bottom view <br />
WWW.STEALTHCAM.COM<br />
Toll Free 877-269-8490<br />
7
CAMERA KIT CONTENT <br />
• Model STC-‐U840IRNG Digital Scouting <strong>Cam</strong>era <br />
• User manual <br />
• Strap <br />
WWW.STEALTHCAM.COM<br />
Toll Free 877-269-8490<br />
8
GENERAL INFORMATION <br />
Storing conditions <br />
• Operating Environment: 14 to 104 deg F (-‐10 to 40 deg C). 20-‐85% <br />
relative humidity, non-‐condensing. <br />
Special care instructions!! <br />
• The camera is designed to be weather resistant. Never attempt to <br />
immerse the unit in water or any other liquid. This will damage <br />
the unit and void the warranty. <br />
• Use a soft lens cloth for cleaning lens. Avoid touching lens with <br />
fingers. <br />
• Remove dirt or stains with a soft cloth dampened with water or <br />
neutral detergent. Keep your camera in a dry and cool dust-‐free <br />
environment or container when it is NOT used. <br />
• Take the batteries out, when camera is NOT to be used over an <br />
extended period of time. <br />
• Avoid dropping your camera on to a hard surface. <br />
• Do not disassemble your camera. <br />
• Do not mix new and old batteries. <br />
• Do not open the camera for unauthorized service. This could <br />
cause serious damage to the unit and WILL void the warranty. <br />
NOTE: This camera is a precision electronic device. Do not attempt to <br />
service this camera yourself, as opening or removing covers may <br />
expose you to dangerous voltage points or other risks. <br />
WWW.STEALTHCAM.COM<br />
Toll Free 877-269-8490<br />
9
QUICK START GUIDE <br />
This guide is designed to get you up and running in a matter of moments. To <br />
get the most out of this advanced scouting tools, please read the manual <br />
thoroughly before operating the camera. If you would like to modify any of <br />
the factory Default Settings, except for the Time & Date, please see manual for <br />
instructions. <br />
FACTORY DEFAULT SETTINGS: <br />
Time Out: 30 Sec <br />
Burst Mode: 1 Still Image (1.3Mp Resolution) <br />
Operation Mode: PIR Video Mode: 10 Seconds (VGA Resolution) <br />
Time lapse setting: 18:00-‐8:00 Next day <br />
CAMERA SETUP: <br />
1. Install 8 “AA” cell batteries in correct polarity (+/-‐) as indicated in battery <br />
compartment. <br />
2. Insert SD card into the camera. <br />
3. Turn power on to adjust Time and Date. <br />
SET TIME AND DATE: <br />
1. Switch the camera to the ON position. <br />
2. Press the [MENU] button to enter menu settings screen. <br />
3. Press the [UP] or [DN] button until the word PIR blinking. <br />
4. Press the [OK] button to confirm. <br />
5. Press the [UP] or [DN] button to scroll through different setting modes <br />
until the word TIME blinking. <br />
6. Press the [OK] button to choose the Time settings. <br />
7. Press the [UP] or [DN] button to adjust the Minute setting and press [OK] <br />
to confirm and move to the Hour setting. <br />
8. Repeat to set Hour and then press [OK] to confirm and move to Date. <br />
9. Adjust the Month, Day and Year by using [UP] or [DN] button. Each time <br />
you finish an adjustment you must press the [OK] button to confirm and <br />
move to the next field for adjustment. <br />
10.Once done, the word -‐ dEL – will be blinking. <br />
11. Press the [MENU] button to exit and start using. <br />
WWW.STEALTHCAM.COM<br />
Toll Free 877-269-8490<br />
10
BATTERY AND MEMORY INSTALLATION <br />
WARNING: Do not use different Voltage lead acid battery other than<br />
the one specified in this section. Doing so will damage the camera<br />
and will void the warranty.<br />
WARNING: ALWAYS have the camera in the OFF position when<br />
installing or removing batteries and memory card. Removing batteries<br />
or memory card while the camera is ON may damage the camera.<br />
Your <strong>Stealth</strong> <strong>Cam</strong> Advanced Digital Scouting <strong>Cam</strong>era is designed to <br />
operate using two different types of battery power options. <br />
Batteries “AA” cell <br />
The internal battery compartment accepts 8 “AA” cell batteries. Be <br />
sure to use high quality brand name alkaline batteries. Install <br />
batteries with correct polarity (+/-‐) as noted inside the battery <br />
compartment. <br />
12V Lead Acid external battery <br />
The camera is equipped with an external power jack designed to <br />
accept a barrel plug cable attached to a sealed lead acid battery. (Sold <br />
separately). Battery cable and complete 12V Lead Acid battery kits are <br />
available wherever <strong>Stealth</strong> <strong>Cam</strong> scouting cameras are sold or call toll <br />
free 877-‐269-‐8490. Only <strong>Stealth</strong> <strong>Cam</strong> external battery accessories are <br />
recommended. <br />
WWW.STEALTHCAM.COM<br />
Toll Free 877-269-8490<br />
11
• Make sure camera is in the OFF position. <br />
• Insert the external battery barrel plug into the DC 12V jack on the <br />
bottom of camera housing. <br />
• Turn the camera power on. <br />
NOTE: Please make sure the voltage and polarity (+/-‐) are correct <br />
before connection. Incorrect voltage or polarity (+/-‐) will damage the <br />
camera. When both internal and external batteries are connected, <br />
the camera will draw power from the higher voltage source first. <br />
Memory Options <br />
The camera is also equipped with an expandable media card slot <br />
capable of accepting up to 16GB SD card with Class 6 or below speed <br />
rating (sold separately). The front counter display will show the <br />
number of images stored on the SD card. If no SD card is inserted the <br />
front counter display will show “NOSd”. <br />
WARNING: The above camera will not accept Class 10 or above<br />
speed rating SD memory cards.<br />
WWW.STEALTHCAM.COM<br />
Toll Free 877-269-8490<br />
12
Inserting SD memory card <br />
NOTE: Make sure camera is in the OFF position whenever adding or <br />
removing memory. <br />
• Insert SD memory card in to the SD card slot completely and in <br />
the correct direction as shown by the sticker located at the side of <br />
the housing. <br />
• To remove the SD memory card, depress the SD card and pull out <br />
the card gently. <br />
• SD cards must be clean (no images from other sources). If you are <br />
using the SD card from other cameras, please make sure to format <br />
the SD card in your computer prior to use in your camera. New <br />
cards are good to use straight from the package. <br />
FORMAT – Definition: When you format a SD memory card, the <br />
operating system erases all information and files on the card. Then it <br />
creates an internal address tables that it later uses to locate <br />
information and files. Formatting also removes all Hidden System files <br />
as well. Basically it cleans your SD memory card just like if it was brand <br />
new. Please make sure to follow the guidelines listed below: <br />
SD Card size: 2Gb or below, format using File System type “FAT”. <br />
SD Card size: 4GB or above, format using File System type “FAT32”. <br />
Do not use File System type “NTFS” or “exFAT”, these formats are not <br />
supported. <br />
WWW.STEALTHCAM.COM<br />
Toll Free 877-269-8490<br />
13
SETUP AND PROGRAMMING <br />
When the camera is first turned on, the internal LCD screen displays <br />
the camera status. The following information is present on this screen. <br />
( PIR MODE) ( TIME LAPSE MODE) <br />
If no buttons are pressed after 30 seconds the LCD screen will power <br />
down to conserve battery life and enter 1 minute count down to enter <br />
PIR detection mode. To re-‐power the display screen, press and hold <br />
the UP or DOWN button until you see the status screen. <br />
Definition <br />
• Day and Time: Displays the date and time that you have set. <br />
• Operation mode: <br />
Ø PIR: <strong>Cam</strong>era takes Image/Video per PIR trigger. <br />
Ø Time Lapse (tLS): <strong>Cam</strong>era takes the still image per preset time. <br />
• Capturing Sequence mode: <br />
Ø 1P -‐ 9P: 1 to 9 burst mode image capturing per PIR trigger. <br />
Ø Video: 10 to 180 seconds’ adjustable video per PIR trigger. <br />
• Resolution for Images: Color Daytime / Black & White Nighttime <br />
Ø 3 Stars (8Mp): Select this option to capture a 8.0M <br />
pixels image. (High image quality interpolated <br />
from 5M Sensor) <br />
WWW.STEALTHCAM.COM<br />
Toll Free 877-269-8490<br />
14
Ø 2 Stars (3Mp): Select this option to capture a <br />
3.0M pixels image. (Low image quality) <br />
Ø 1 Star (1.3Mp): Select this option to capture a <br />
1.3M pixels image. (Base image quality) (Default) <br />
• Resolution for Video: Color Daytime / Black & White Nighttime <br />
Ø VGA: 640x480 *ONLY resolution* <br />
• Time out: To set the amount of time in seconds and minutes the <br />
camera will sleep between PIR triggering. <br />
• Moon phase: Displays the moon phases. <br />
• Temp stamp: Temperature stamp will display on still images and <br />
first frame only on video files. <br />
• Zoom: Digital enhancements to different zoom level. <br />
Ø 1X: Normal – the word “ZOOM” will not display. <br />
Ø 2X: Two times zoom – the word “ZOOM” will display. <br />
Ø 4X: Four times zoom – The word “ZOOM” will blink. <br />
• Battery Status: Shows the battery status. <br />
Ø Full: The battery is full. <br />
Ø Low: The battery is low. <br />
WWW.STEALTHCAM.COM<br />
Toll Free 877-269-8490<br />
15
NOTE: When the camera detects low batteries, the camera unit will <br />
power off within 30 seconds automatically. Please replace with new <br />
batteries; otherwise the camera may not work properly. <br />
Setting the <strong>Cam</strong>era’s Operation Mode: <br />
Your <strong>Stealth</strong> <strong>Cam</strong> can be programmed to operation either in PIR <br />
Detection mode or Time Lapse mode. <br />
• Switch the camera to the ON position. <br />
Ø LCD screen will display the camera status screen. <br />
• Press the [MENU] button once within 30 seconds to enter the <br />
programming mode, the word PIR or tLS will be blinking. <br />
• Press the [UP] or [DN] button to select the PIR or tLS. <br />
• Press [OK] to save your selection. <br />
• Press [MENU] button to exit. <br />
WWW.STEALTHCAM.COM<br />
Toll Free 877-269-8490<br />
16
Setting the <strong>Cam</strong>era’s Resolution in PIR operation mode: <br />
Your <strong>Stealth</strong> <strong>Cam</strong> can be programmed to 3 different resolutions, <br />
High (3 Stars-‐8Mp), Low (2 Stars–3Mp), Base (1 Star–1.3Mp). <br />
• Switch the camera to the ON position. <br />
Ø LCD screen will display the camera status screen. <br />
• Press the [MENU] button once within 30 seconds to enter the <br />
programming mode. <br />
• The word PIR will be blinking, press OK to confirm the camera <br />
operation by PIR detection. <br />
• The word CAMERA and the STARS will be blinking. <br />
• Press the [OK] button ONCE to choose the selection. <br />
• Press the [UP] or [DN] button to select the desired resolution. <br />
• Press [OK] to save your selection. <br />
• Press [MENU] button to exit. <br />
WWW.STEALTHCAM.COM<br />
Toll Free 877-269-8490<br />
17
Setting the Capturing Sequence in PIR operation mode: <br />
Your <strong>Stealth</strong> <strong>Cam</strong> can be programmed to shoot 1-‐9 pictures per <br />
triggering. <br />
• Switch the camera to the ON position. <br />
Ø LCD screen will display the camera status screen. <br />
• Press the [MENU] button once within 30 seconds to enter the <br />
programming mode. <br />
• The word PIR will be blinking, press OK to confirm the camera <br />
operation by PIR detection. <br />
• Press the [UP] button ONE time to enter the Capturing Sequence <br />
setting mode. <br />
• The word CAMERA will be blinking. <br />
• Press [OK] button and the current number of burst mode images <br />
will blink. <br />
• Press the [UP] or [DN] button to select the desired burst mode <br />
setting or number of pictures per triggering. <br />
• Press [OK] to save your selection. <br />
• Press [MENU] button to exit. <br />
WWW.STEALTHCAM.COM<br />
Toll Free 877-269-8490<br />
18
Setting the Video Mode in PIR operation mode: <br />
Your <strong>Stealth</strong> <strong>Cam</strong> can be programmed to record 10-‐180 seconds of <br />
video per triggering. The Video mode is only workable under PIR <br />
mode. <br />
• Switch the camera to the ON position. <br />
Ø LCD screen will display the camera status screen. <br />
• Press the [MENU] button once within 30 seconds to enter the <br />
programming mode. <br />
• The word PIR will be blinking, press OK to confirm the camera <br />
operation by PIR detection. <br />
• Press [UP] button TWO times to enter Video setting mode. <br />
• The word VIDEO will be blinking. <br />
• Press [OK] button and the video length in seconds will be blinking. <br />
• Press [UP] or [DN] button to select the desired video length from <br />
10 to 180 seconds in 5-‐second increments. <br />
• Press [OK] to save your selection. <br />
• Press [MENU] button to exit. <br />
WWW.STEALTHCAM.COM<br />
Toll Free 877-269-8490<br />
19
Set the Digital Zoom in PIR operation mode: <br />
Your <strong>Stealth</strong> <strong>Cam</strong> can be programmed to have 3 different zoom levels. <br />
• Switch the camera to the ON position. <br />
Ø LCD screen will display the camera status screen. <br />
• Press the [MENU] button once within 30 seconds to enter the <br />
programming mode. <br />
• The word PIR will be blinking, press OK to confirm the camera <br />
operation by PIR detection. <br />
• Press [UP] button THREE times to enter Zoom setting mode. <br />
• The word ZOOM will be blinking. <br />
• Press [OK] button and the zoom level number will now blink. <br />
• Press the [UP] or [DN] button to select the desired zoom level <br />
setting 1 (1X Normal) / 2 (2X Zoom) / 4 (4X Zoom). <br />
• Press [OK] to confirm your selection <br />
• Press [MENU] button to exit. <br />
NOTE: The use of the digital zoom feature may degrade image & <br />
video quality, as this tells the camera to focus on a specific are of the <br />
image and increase its size. This will cause dithering of the image. <br />
WWW.STEALTHCAM.COM<br />
Toll Free 877-269-8490<br />
20
Setting the Time Out Mode in PIR operation mode: <br />
Your <strong>Stealth</strong> <strong>Cam</strong> can be programmed to set the amount of time in <br />
seconds or minutes the camera will sleep between PIR triggers. <br />
• Switch the camera to the ON position. <br />
Ø LCD screen will display the camera status screen. <br />
• Press the [MENU] button once within 30 seconds to enter the <br />
programming mode. <br />
• The word PIR will be blinking, press [OK] to confirm the camera <br />
operation by PIR detection. <br />
• Press [UP] button FOUR times to enter Time Out setting mode. <br />
• The word TIME OUT will be blinking. <br />
• Press [OK] button and the SECONDS digits will be blinking. <br />
• Press [UP] or [DN] button to increase or decrease the time value <br />
in seconds from 0 to 59 seconds in 1-‐second increments. <br />
• Press [OK] to save the seconds setting and the MINUTES digits will <br />
be blinking. <br />
• Press [UP] or [DN] button to increase or decrease the time value <br />
in minutes from 0 to 59 minutes in 1-‐minute increments. <br />
• Press [OK] to save the minutes setting. <br />
• You’ll then see the word -‐ TIME -‐ blinking. <br />
• Press [MENU] button to exit. <br />
WWW.STEALTHCAM.COM<br />
Toll Free 877-269-8490<br />
21
Setting the Time and Date in PIR operation mode: <br />
Your <strong>Stealth</strong> <strong>Cam</strong> uses the 24hr military time format. <br />
• Switch the camera to the ON position. <br />
Ø LCD screen will display the camera status screen. <br />
• Press the [MENU] button within 30 seconds to enter the <br />
programming mode. <br />
• The word PIR will be blinking, press OK to confirm the camera <br />
operation by PIR detection. <br />
• Press [DOWN] button TWO times to enter Time and Date mode. <br />
• The word TIME will be blinking. <br />
• Press [OK] to enter Minute setting first. <br />
• The MINUTE digits will be blinking. <br />
• Press [UP] or [DN] to increase or decrease the minute value <br />
(00 – 59). <br />
• Press [OK] to save your selection and enter Hour setting. <br />
• The HOUR digits will be blinking. <br />
• Press [UP] or [DN] to increase or decrease the hour value <br />
(00 – 23). <br />
• Press [OK] to save your selection and enter Month setting. <br />
• The Month digits will be blinking. <br />
• Press [UP] or [DN] to increase or decrease the Month value. <br />
(1 -‐ 12). <br />
WWW.STEALTHCAM.COM<br />
Toll Free 877-269-8490<br />
22
• Press [OK] to save your selection and enter Day setting. <br />
• The Day digits will be blinking. <br />
• Press [UP] or [DN] to increase or decrease the Day value. <br />
(01 – 31). <br />
• Press [OK] to confirm the Date setting and enter Year setting. <br />
• The YEAR digits will be blinking. <br />
• Press [UP] or [DN] to increase or decrease the Year value. <br />
(01 – 99). <br />
• Once this is all done, press [OK]. <br />
• You’ll then see the word -‐ dEL -‐ blinking. <br />
• Press [MENU] button to exit the program setting and back to the <br />
status screen. <br />
WWW.STEALTHCAM.COM<br />
Toll Free 877-269-8490<br />
23
Setting the Time Lapse Mode: <br />
The Time Lapse Default setting value is from 18:00 to 8:00 the next <br />
day. When the camera is set to time-‐lapse mode, the program setting <br />
will bypass any PIR activation. Instead, the user can set the program <br />
for a pre-‐determined time period [such as 6:00 to 18:00]. The user <br />
then sets the frequency of pictures only (NOT videos) during this time <br />
period [such as one picture every 10 seconds]. The camera will remain <br />
in Time Lapse mode until the user has changed the program setting. <br />
• Switch the camera to the ON position. <br />
Ø LCD screen will display the camera status screen. <br />
• Press the [MENU] button once within 30 seconds to enter the <br />
programming mode. <br />
• Press [UP] button until you see the <br />
word tLS blinking. <br />
• Press [OK] to confirm and go into TLS <br />
Mode "Start Time" setting. <br />
• The display will show TIME + S 88:88 <br />
(S = Start, 88:88 = time in HH:MM) <br />
• Press [OK] to set the “Start Time” <br />
setting. At this point you can adjust the <br />
time from 00:00 to 23:59. <br />
WWW.STEALTHCAM.COM<br />
Toll Free 877-269-8490<br />
24
• The MINUTE digits will be blinking. <br />
• Press [UP] or [DN] to increase or decrease the minute value <br />
(00 – 59). <br />
• Press [OK] to save your selection and enter Hour setting. <br />
• The HOUR digits will be blinking. <br />
• Press [UP] or [DN] to increase or decrease the hour value <br />
(00 – 23). <br />
• Press [OK] to save the “Start Time” setting and move to the “End <br />
Time” setting. <br />
• After completing the start time setting, <br />
camera will go into TLS Mode "End Time" <br />
setting. <br />
• The display will show TIME + E 88:88 <br />
(E = End, 88:88 = time in HH:MM) <br />
• At this point you can adjust the time from 00:00 to 23:59 by <br />
pressing the [UP/DN/OK] buttons same as Start Time settings. <br />
• Press [OK] to save the “End Time” settings and move directly to <br />
the TIME OUT setting. <br />
• Please complete the TIME OUT, Still image resolution, Burst Mode, <br />
Zoom settings like the settings on the PIR operation mode. <br />
• Then press [MENU] button to exit. <br />
WWW.STEALTHCAM.COM<br />
Toll Free 877-269-8490<br />
25
EXAMPLE: <br />
#1: If a user selected the Time Lapse mode, and set the start time from <br />
08:00 and end time at 20:30, and then selected the timeout to be <br />
00:05 with a burst shot of 3P, this means the camera will keep taking <br />
burst shots of 3 pictures for every 5 seconds within time interval of <br />
8AM to 8:30PM. Out of the time lapse time, said 20:30 to 08:00, the <br />
camera will sleep no matter of activity level. NO capture at all. <br />
If a user selected the Time lapse mode, and set the start time from <br />
00:00 and end time at 00:00, and then selected the timeout to be <br />
05:00 with a burst shot of 3P, this means the camera will keep taking <br />
burst shot of 3 pictures for every 5 min, 24 hours non-‐stop. <br />
TIME LAPSE SETUP RECOMMENDATIONS: <br />
We recommend that if your using the Time Lapse feature and what to <br />
extend your battery life and get the most pictures possible, use the <br />
following settings: <br />
Batteries: Energizer Lithium Batteries <br />
Resolution: Base (1 Star–1.3Mp) <br />
Time Out: 15 seconds <br />
WWW.STEALTHCAM.COM<br />
Toll Free 877-269-8490<br />
26
USING THE CAMERA <br />
Once all program settings have been setup properly, your <strong>Stealth</strong> <strong>Cam</strong> <br />
is ready for field use. <br />
Getting started <br />
Listed below are some helpful pointers on how to use your camera to <br />
get the best results. <br />
• Mount the camera about 4-‐5 feet high with the camera pointed at <br />
a slight downward angle. <br />
• Mount the camera facing north or south NOT east or west due to <br />
the rising and setting of the sun could produce false triggers and <br />
overexposed images. <br />
• If you’re covering a trail, face the camera down or up the trail. <br />
Most commercial cameras take 1-‐3 seconds to sense motion/heat <br />
and take a picture. <br />
• Clear out any brush or weeds in front of camera. This will cause <br />
false pictures caused wind or high temperature days. <br />
• Double check battery before turning on the camera for use. <br />
• Make sure to insert the memory card after setting up the game <br />
camera. <br />
• Make sure to turn the camera ON (or take out of Test Mode) <br />
before you leave. <br />
• Verify time and date is correct. <br />
WWW.STEALTHCAM.COM<br />
Toll Free 877-269-8490<br />
27
(Example: Mounting) <br />
(Example: <strong>Trail</strong> Setup) <br />
WWW.STEALTHCAM.COM<br />
Toll Free 877-269-8490<br />
28
Using the camera in PIR detection mode <br />
• Mount the camera to the tree or other sturdy object using either <br />
a tree screw (optional accessory) or supplied mounting strap. <br />
• Open the front housing and move the switch to the ON position. <br />
At this point, you have 30 seconds to start making any program <br />
changes. <br />
To Capture Videos, make sure display reads VIDEO: <br />
• If display does not read VIDEO then, <br />
Ø Press the [MENU] button once. <br />
Ø The word CAMERA will blink. <br />
Ø Press the [UP] button TWO times to toggle to Video mode. <br />
Ø Press the [OK] button TWO times. <br />
Ø Press the [MENU] button once to exit. <br />
To Capture Images, make sure display reads CAMERA: <br />
• If display does not read CAMERA then, <br />
Ø Press the [MENU] button once. <br />
Ø The word CAMERA will blink. <br />
Ø Press the [UP] button ONE time to toggle to <strong>Cam</strong>era mode. <br />
Ø Press the [OK] button TWO times. <br />
Ø Press the [MENU] button once to exit. <br />
WWW.STEALTHCAM.COM<br />
Toll Free 877-269-8490<br />
29
• 30 seconds after you’ve made your adjustments, the camera’s <br />
green LED light will begin blinking and enter count down mode. <br />
This is your indication to leave the coverage area within one <br />
minute. <br />
• After one minute, the camera will enter either image burst mode <br />
or adjustable video mode based on your program setting. The <br />
camera will then time out between 0-‐59 seconds or 0-‐59 minutes, <br />
depending on your program setting. <br />
NOTE: The time between motion detection and the camera taking <br />
the pictures may vary due to lighting conditions, program settings, <br />
and battery power level. The IR Emitter will only activate in low light <br />
conditions. <br />
WWW.STEALTHCAM.COM<br />
Toll Free 877-269-8490<br />
30
VIEWING AND DELETING FILES <br />
The STC-‐U840IRNG cam offers the user different options for viewing <br />
their images. You can view images or videos through either a <br />
handheld LCD monitor or your home TV that is equipped with and RCA <br />
Input jack. The external LCD display on the front of the housing will <br />
show the number of images in memory. <br />
NOTE: The instructions below are based on starting with a camera <br />
that’s power is turned off. <br />
For viewing on handheld LCD monitor: <br />
• Attach the appropriate cable to the TV port on the side of the <br />
camera. <br />
• Insert the other end into the VIDEO IN jack on the handheld LCD <br />
video monitor. <br />
• Turn on both the camera and the monitor. <br />
• You will see a series of thumbnail images on your monitor. <br />
• Press the [UP] or [DN] button to navigate though your thumbnail <br />
images. <br />
• On the upper left hand corner of your TV monitor, it will either <br />
display the image OR the image with a video icon which <br />
indicates it’s a video clip. <br />
To view in full screen, press the [OK] button. <br />
• Press the [OK] button again, it will return to the thumbnail view <br />
from the full screen image. <br />
WWW.STEALTHCAM.COM<br />
Toll Free 877-269-8490<br />
31
For viewing on your home TV monitor: <br />
• Attach the appropriate cable to the TV port on the side of the <br />
camera. <br />
• Insert the other end into the RCA VIDEO IN jacks on the TV. <br />
• Turn on both the camera and the TV monitor. <br />
• Make sure to switch to AUX / VIDEO IN mode on your TV. <br />
Ø (See your TV owner’s manual for directions). <br />
• The camera’s TV OUT is set to NTSC by default. (NTSC – Standard <br />
North American TV format) <br />
Ø If the TV monitor doesn’t flicker, then you do not need to <br />
change your camera’s TV OUT setting. Proceed to the next <br />
section called Thumbnail Images. <br />
Ø If the TV monitor does flicker, then you will need to proceed <br />
to the next step to change your camera’s TV OUT from NTSC <br />
to PAL (Standard European TV format). <br />
• Press the [MENU] button once. <br />
• The word “ tu ” on the camera’s internal screen will be blinking. <br />
• Press the [OK] once and now you’ll see “ tu – n “ blinking. <br />
WWW.STEALTHCAM.COM<br />
Toll Free 877-269-8490<br />
32
• Press the [DN] button to set the camera’s TV OUT to PAL. <br />
• The word “ tu – P ” will now be blinking. <br />
• Press the [OK] to confirm this setting. <br />
• The word “ tu -‐ P “ will be blinking and then stops. <br />
• Once the blinking stops, power off the camera. Wait for 5 seconds <br />
and then power up your camera again. <br />
Thumbnail Images <br />
• You will see a series of thumbnail images on your monitor. <br />
• Press the [UP] or [DN] button to navigate though your thumbnail <br />
images. <br />
• On the upper left hand corner of your TV monitor, it will either <br />
display the image icon or video icon to show you whether that <br />
image is a still image or video clip. <br />
• To view image in full screen, press the [OK] button. <br />
• Press the [OK] button again it will return to the thumbnail view <br />
from the full size image. <br />
WWW.STEALTHCAM.COM<br />
Toll Free 877-269-8490<br />
33
Viewing Video Clips on handheld LCD monitor or home <br />
TV monitor <br />
• Follow the cable attaching instruction listed in previous section. <br />
• You will see a series of thumbnail images on your monitor. <br />
• Press the [UP] or [DN] button to choose the video clip you want <br />
to watch. <br />
• Press the [OK] button to play the video clip. <br />
• You may pause the video clip by pressing the [OK] button during <br />
the playback. Press [OK] button to resume playing. <br />
• At the end of the video clip, press the [UP] or [DN] button to <br />
proceed to the next video or image. If it is a video clip file, then it <br />
will automatically start to play. If it is still image file then it will <br />
show the image in full screen. <br />
• When you view still images in full screen, you can return to <br />
thumbnail image selection view by pressing the [OK] button. <br />
NOTE: All videos are recorded with audio but only has sound when <br />
viewing playback on a PC. <br />
WWW.STEALTHCAM.COM<br />
Toll Free 877-269-8490<br />
34
Viewing files by computer <br />
Your <strong>Stealth</strong> <strong>Cam</strong> Digital Scouting <strong>Cam</strong>era is a plug and play USB <br />
storage device for users of Windows 2000 / ME / XP / Vista / Windows <br />
7 operating systems. This camera is not MAC compatible. <br />
Viewing files on your computer via USB connection. <br />
• Make sure the camera’s power switch is in the OFF position. <br />
• Plug the larger end of the USB cable into an available USB port on <br />
your computer. <br />
• Plug the smaller end of USB cable into the camera’s side panel. <br />
• The camera will automatically power ON and <br />
display the word USb on the display screen. <br />
• At the same time, your computer will recognize the camera as a <br />
Removable Storage device. You will find it under MY COMPUTER. <br />
WWW.STEALTHCAM.COM<br />
Toll Free 877-269-8490<br />
35
• At this point you have several options: <br />
Ø To view your images or play your videos: Click on the <br />
Removable Storage device and then drill down to the file you <br />
want to see and double click on the file name. <br />
Ø To save your images and videos: Highlight the file or files you <br />
want to save and drag them to your hard drive. <br />
Ø To delete your images and videos: Highlight the files or files <br />
you want to delete and press the [DELETE] button. <br />
Ø To erase all files and reformat you SD memory card: Right <br />
click on the Removable Storage device under My Computer <br />
and select FORMAT then click START. You will receive a <br />
Warning message press [OK]. Then CLOSE to exit. <br />
NOTE: Make sure before you FORMAT you are certain it is the <br />
Removable Storage device for the camera. <br />
• Once you’re done, simply unplug the cable from both your <br />
computer and the camera. The camera will turn OFF automatically. <br />
WWW.STEALTHCAM.COM<br />
Toll Free 877-269-8490<br />
36
Deleting files in the field <br />
• Switch the camera to the ON position. <br />
Ø LCD screen will display the camera status screen. <br />
• Press the [MENU] button within 30 seconds to enter the <br />
programming mode showing either PIR or tLS. <br />
• Press the [UP] or [DN] button to enter PIR mode, then press [OK]. <br />
• Press the [DN] button ONCE to enter the delete mode. <br />
• You’ll see the word -‐ dEL -‐ blinking. <br />
• Press [OK] button to enter the DELETE & FORMAT menu. <br />
• Press [UP] or [DN] button to select the desired function. <br />
Ø NO-‐dL (No Delete) -‐ No images get deleted. <br />
Ø d-‐ONE (Delete One) -‐ Only the last file will get deleted. <br />
Ø d-‐ALL (Delete ALL) -‐ Deletes ALL images on the SD card. <br />
Ø Ft (Format) -‐ Deletes all files and reformats the SD card. <br />
• Press [OK] to confirm your selection. <br />
• Press [MENU] button to exit the program setting and back to the <br />
status screen. <br />
WWW.STEALTHCAM.COM<br />
Toll Free 877-269-8490<br />
37
MEMORY COMPATIBILITY CHART <br />
The following cards have been tested and approved for use with the <br />
STC-‐U840IRNG model. <br />
Kingmax <br />
Sandisk <br />
Toshiba <br />
PNY <br />
Kingston <br />
First Champion <br />
Digilux <br />
Lexar <br />
DANE-‐ELEC <br />
Kodak <br />
2G <br />
2G, 4G, 8G, 16G <br />
2G <br />
2G, 4G, 8G, 16G <br />
2G, 4G, 8G, 16G <br />
1G, 2G, 4G, 8G, 16G <br />
1G, 2G <br />
4G, 8G, 16G <br />
4G, 8G, 16G <br />
16G <br />
NOTE: Proper camera operation cannot be guaranteed when using <br />
memory cards NOT listed above. <br />
WWW.STEALTHCAM.COM<br />
Toll Free 877-269-8490<br />
38
TECHNICAL SPECIFICATIONS <br />
System Requirements and Compatibility <br />
• Windows Me/2000/XP/Vista/Windows 7 <br />
• Pentium 4, 2GHz or above <br />
• 1GB RAM (2GB recommended) <br />
• 32 bits color, Resolution 800x600 or above w/ 256MB <br />
• 2GB free hard disc space <br />
• An available USB 1.1 port (USB 2.0 recommended) <br />
• Direct X 9.0 or above – Should come with your operating system <br />
already. <br />
• Optional: Windows compatible sound card and speaker. <br />
NOTE: If you have any questions regarding your PC specifications <br />
please contact your PC manufacturer. <br />
WWW.STEALTHCAM.COM<br />
Toll Free 877-269-8490<br />
39
<strong>Cam</strong>era Features and Specification <br />
• High precision multi-‐layer glass lens with coating. <br />
• Built in 1.85” B&W LCD display. <br />
• External memory support: SD memory card up to 16GB. <br />
• Resolution Options: 8.0Mp, 3.0Mp, 1.3Mp. <br />
• Image interpolated from 5M Sensor <br />
• Capturing Options: 1 -‐ 9 image burst mode or video recording <br />
with audio. <br />
• Image format: Standard JPEG <br />
• Auto white balance and auto expose. <br />
• Auto IR emitter light control. <br />
Ø Effective Range for Still picture (up to 50 ft). <br />
Ø Effective Range for Video clip (up to 50 ft). <br />
• Real time clock for date and time stamping. <br />
• 4 digits LCD Image counter. <br />
• Green TEST LED indicator. <br />
• Focusing: 5 ft to infinity. <br />
• Effective viewing angle: 50 degrees <br />
• PIR detection angle: 48 degrees <br />
• Interface type: USB 1.1 <br />
• Power: AA size alkaline or lithium Batteries x 8 <br />
• External power: 12 volts battery pack <br />
WWW.STEALTHCAM.COM<br />
Toll Free 877-269-8490<br />
40
IMAGE CAPACITY CHART <br />
SD card<br />
High<br />
Color<br />
High<br />
B&W<br />
Low<br />
Color<br />
Low<br />
B&W<br />
Base<br />
Color<br />
Base<br />
B&W<br />
AVI<br />
Color<br />
AVI<br />
B&W<br />
Based on<br />
File size of<br />
5MB 3MB 2.0MB 1MB 1MB 0.5MB<br />
70MB<br />
(30sec.)<br />
30MB<br />
(30sec.)<br />
1GB 204 340 512 1024 1024 2048 14 34<br />
2GB 408 680 1024 2048 2048 4096 28 68<br />
4GB 816 1360 2048 4096 4096 8192 56 136<br />
8GB 1632 2720 4096 8192 8192 16384 112 272<br />
16GB 3264 5440 8192 16384 16384 32768 224 544<br />
**Subject to card compatibility under different brands. <br />
NOTE: Image Capacity Chart provides approximate number of images <br />
or AVI movies based on resolution settings and the size of the <br />
memory card. These figures may vary depending on the amount of <br />
detail in the image. <br />
When the SD card is NOT FULL, but camera's front counter already <br />
reaches 9999, the camera will create a new folder to save the next <br />
data. <strong>Cam</strong>era's front counter will reset to 0000. On the other hand, <br />
when SD card is full, camera's counter will then change the display to <br />
read "FULL". Images and Videos under each folder will be named from <br />
0001 up to 9999. <br />
WWW.STEALTHCAM.COM<br />
Toll Free 877-269-8490<br />
41
SD Card Capacity and Compatibility <br />
Due to the rapidly changing memory card market please consult <br />
www.stealthcam.com for the most up to date information regarding <br />
memory cards. <br />
MOON PHASE SYMBOL CHART <br />
WWW.STEALTHCAM.COM<br />
Toll Free 877-269-8490<br />
42
FREQUENTLY ASKED QUESTIONS <br />
Q: What does it mean when I have all 8’s on my LCD screen? <br />
A: This usually refers to an incompatible memory card or memory card <br />
damaged. Make sure your card has been properly formatted. <br />
Q: Is the infrared flash invisible? <br />
A: The No Glo infrared flash is invisible to the naked eye. <br />
Q: Is my game camera Mac compatible? <br />
A: This camera model is not compatible with Mac computers. <br />
Q: Can I use rechargeable batteries in the camera? <br />
A: Rechargeable batteries are fine for the unit, regular alkaline <br />
batteries designed for digital electronics are recommended for best <br />
performance. <br />
Q: When I use a memory card can I view the pictures on my personal <br />
digital camera? <br />
A: We do not recommend viewing memory card images taken in your <br />
game camera on any other digital camera, you may experience <br />
compatibility issues. <br />
Q: Will I lose my images and setting when the batteries die? <br />
A: The images are stored on your external SD memory card so your <br />
images will be intact only on your card. However you will need to reset <br />
your settings. <br />
WWW.STEALTHCAM.COM<br />
Toll Free 877-269-8490<br />
43
Q: What are my options if my camera is past it warranty? <br />
A: We have an out of warranty program in which you may purchase a <br />
refurbished/reconditioned replacement unit for 50% or more off (based <br />
on retail price of unit) discount exchange of your old unit. <br />
Q: Can I use my game camera through a window or glass door? <br />
A: Glass may disrupt your sensor beam we don’t advise using the <br />
camera in this fashion. <br />
Q: Do I need to recharge my 12V Battery Kit during the seasons it’s not <br />
in use? <br />
A: The 12V Battery Kit should be recharge at least every 3 months, <br />
regardless if it is being used or not, in order to preserve the working <br />
condition of the battery inside the unit. <br />
NOTE: For the latest updates and information please check our <br />
website regularly. <br />
WWW.STEALTHCAM.COM<br />
Toll Free 877-269-8490<br />
44
WARNING: Modification not approved by the party responsible for<br />
compliance could void user’s authority to operate.<br />
FCC Compliance <br />
This equipment has been tested and found to comply with the limits for Class <br />
B digital device, pursuant to part 15 of the FCC Rules. These limits are <br />
designed to provide reasonable protection against harmful interference in a <br />
residential installation. This equipment generates uses and can radiate radio <br />
frequency energy and, if not installed and used in accordance with the <br />
instructions, may cause harmful interference to radio or television receptions, <br />
which can be determined by turning the equipment off and on, the user is <br />
encouraged to try to correct the interference by one or more of the following <br />
measure: <br />
Ø<br />
Ø<br />
Ø<br />
Ø<br />
Reorient or relocate the receiving antenna. <br />
Increase the separation between the equipment and the receiver. <br />
Connect the equipment into an outlet on a circuit different from that to <br />
which the receiver is connected. <br />
Consult the dealer or an experienced radio/TV technician for help. <br />
This device complies with part 15 of the FCC Rules. Operation is subject to the <br />
following two conditions: (1) This device may not cause harmful interference, <br />
and (2) this device must accept any interference received, including <br />
interference that may cause undesired operation. <br />
Product specifications are subject to change. <strong>Stealth</strong> <strong>Cam</strong> is not responsible for any <br />
photographic or typographical errors.<br />
May be protected by one or more U.S. Patent numbers: 6,735,387 / 6,768,868 / <br />
6,834,162 / 7,149,422 / 7,308,196 / 7,593,632 / 7,710,457 / 7,873,266 <br />
WWW.STEALTHCAM.COM<br />
Toll Free 877-269-8490<br />
45