Uway Nighttrakker NT50 - Trail Camera
Uway Nighttrakker NT50 - Trail Camera
Uway Nighttrakker NT50 - Trail Camera

Create successful ePaper yourself
Turn your PDF publications into a flip-book with our unique Google optimized e-Paper software.
GETTING STARTED:<br />
<strong>Uway</strong> NightTrakker <strong>NT50</strong>/<strong>NT50</strong>B<br />
Quick Start<br />
** TURN REMOTE ON BEFORE TURNING CAMERA ON. PLEASE<br />
CHARGE THE REMOTE BEFORE USE.<br />
INSTALL SD CARD: The camera supports SD card up to 16GB. The<br />
camera does not have any internal memory. Insert SD card with<br />
unmarked side facing front of camera. Ensure SD card slider is<br />
NOT in locked position.<br />
CONNECT POWER: This camera is designed for Alkaline or Nickel<br />
Metal-Hydride (Ni-MH) C type batteries. Ni-MH batteries are<br />
preferred. A 6V AC to DC power cord (sold separately) can also<br />
be used with or without batteries connected. Insert 4 C batteries<br />
while ensuring polarity (+ -) is correctly orientated. To remove<br />
batteries, push finger through hole under battery compartment<br />
to lift batteries. Solar panels DO NOT charge batteries located in<br />
the camera.<br />
CHECKING BATTERY LEVEL: Connect remote and camera. Turn<br />
remote ON. Turn camera ON. See camera battery level in bottom<br />
left corner and remote battery level in bottom right corner of<br />
LCD display<br />
**It is strongly recommended using NiMH rechargeable batteries<br />
for best performance ON <strong>NT50</strong>B. Due to the nature of black flash<br />
LEDs consuming more power, it is strongly recommended to set<br />
the video length to a maximum of 30s for optimal performance<br />
and higher video quality. Battery life can be extended using<br />
smaller video segments.<br />
TESTING AND WORKING MODES:<br />
The camera has two modes: testing mode and working mode.<br />
When the camera is turned ON without being connected to the<br />
remote controller, it will go into the working mode automatically<br />
using the latest settings. The red LED will blink for 10 seconds<br />
before the camera is capable of being triggered by motion.<br />
**If the camera beeps, it means either no SD card is inserted or<br />
the SD card is not inserted properly or not compatible.<br />
When the camera is turned ON with the remote controller<br />
connected and also powered ON, (Note: if the remote controller<br />
is not powered ON, the camera will not detect it) the camera will<br />
go into the testing mode, allowing you to change the settings,<br />
view the photos/videos, set up your camera, etc. If at any time,<br />
the camera and remote are disconnected while the camera<br />
power is ON, the camera will automatically switch into working<br />
mode.<br />
** Turn the remote OFF after each use. A red LED located on the<br />
bottom beside the USB battery charge port indicates the remote<br />
is ON.<br />
** The remote enters sleep mode after 1 min of no activity. Push<br />
any key to wake it when it connects to the camera.<br />
MENU OPERATIONS AND SETTINGS:<br />
LIVE PREVIEW<br />
This option allows the user to view in real time what the camera<br />
is capturing. Pictures/videos can also be taken using the “SHOT”<br />
button while in this mode. Enter preview by highlight “Live<br />
Preview” and push OK button or right arrow button.<br />
In Live preview mode, push photo or video icon on remote to<br />
enter photo or video mode preview. Push UP Arrow for Day Color<br />
Mode. Push DOWN Arrow for Night IR Mode (picture will be<br />
black and white; 28 LED will be ON continuously while in this<br />
mode). Push SHOT button to capture picture or video. Push<br />
MENU button to return to menu<br />
PHOTO / VIDEO PLAYBACK<br />
This feature allows you to view pictures and video stored on the<br />
SD card. Users can ZOOM into pictures and PAN around for<br />
greater detail. Video playback includes sound through an<br />
earphone port on top of the remote; user can pause, stop,<br />
rewind, and fast forward video. Enter Playback mode by highlight<br />
“Photo / Video Playback” and push OK button or right arrow<br />
button. Scroll through pictures and video using LEFT and RIGHT<br />
ARROW buttons.<br />
PLAY VIDEO: Video files have a “play symbol” on the bottom left<br />
corner of the picture. Push OK button to play video. Push UP or<br />
DOWN arrow to adjust volume. Push OK button to pause video.<br />
Push RIGHT arrow to fast forward or LEFT arrow to rewind. Push<br />
MENU to go back<br />
ZOOM PICTURES: Push bottom “+” button to zoom in. Push<br />
bottom “-“button to zoom out. Push ARROWS to PAN around on<br />
picture. Push MENU to go back.<br />
DELETING PICTURES / VIDEO: Push DEL button. Select ONE or ALL<br />
pictures / videos. Push OK to delete. Push MENU button to<br />
return to menu.<br />
CAMERA MODE<br />
This camera can be set to capture still pictures OR video.<br />
Highlight “<strong>Camera</strong> Mode” and push OK or right arrow button.<br />
Select VIDEO or PHOTO by using UP or DOWN arrow and Push OK<br />
to SAVE.<br />
VIDEO LENGTH (only displayed if VIDEO mode is selected above)<br />
Video length can be set in 10 sec increments from (10s – 1min).<br />
Highlight “VIDEO LENGTH” and push OK or right arrow button.<br />
Select desired video length and push OK to SAVE.<br />
PHOTO RESOLUTION (only displayed if PHOTO mode is selected<br />
above)<br />
Photo resolution can be set at 8MP, 5MP, 3MP, 1.3MP, 0.8MP,<br />
0.3MP. Highlight “PHOTO RESOLUTION” and Push OK or right<br />
arrow button. Select desired photo resolution and push OK to<br />
SAVE.<br />
PHOTO BURST (only displayed if PHOTO mode is selected above)<br />
This feature allows the camera to take from 1-9 photos in rapid<br />
succession following each trigger. Highlight “PHOTO BURST” and<br />
push OK or right arrow button. Select desired number of photos<br />
per trigger and push OK to SAVE setting.
VIDEO SOUND (only displayed if VIDEO mode is selected above)<br />
Video sound recording can be turned ON or OFF. Highlight<br />
“VIDEO SOUND” and push OK or right arrow button. Select ON or<br />
OFF and push OK to SAVE. (Sound recording may be illegal to<br />
publish with human activity in some jurisdictions.)<br />
QUIET TIME<br />
This feature puts the camera to sleep for the selected period of<br />
time before it can be re-activated by motion. Times include 5s,<br />
10s, 20s, 30s, 1min, 5min, 10min, 30min, 60min. Highlight<br />
“QUIET TIME” and push OK or right arrow button. Select desired<br />
‘quiet time’ push OK to SAVE.<br />
ILLUMINATION<br />
This feature controls the number of IR light output during night<br />
photos and video. Highlight “ILLUMINATION” and push OK or<br />
right arrow button. Select desired ‘illumination’ mode and push<br />
OK to SAVE. This setting is only available on <strong>NT50</strong>.<br />
TEMPERATURE<br />
Allows user to select either Fahrenheit or Celsius temperature<br />
settings. Highlight “TEMPERATURE” and push OK or right arrow<br />
button. Select Fahrenheit or Celsius and push OK to SAVE.<br />
DATE / TIME STAMP<br />
This allows user to have the date, time, and temperature<br />
stamped onto each photo or video. Highlight “Date / Time<br />
Stamp” and push OK or right arrow button. Select ON or OFF and<br />
push OK to SAVE.<br />
SCREEN BRIGHTNESS<br />
This setting adjusts the brightness of the remote<br />
controller/viewer. Highlight “Screen Brightness” and push OK or<br />
right arrow button. Push UP or DOWN arrow to select desired<br />
brightness and push OK to SAVE.<br />
SET DATE / TIME<br />
This feature allows the user to set the display format of date /<br />
time and set the current date and time. Highlight “Set Date /<br />
Time” and push OK or right arrow button. Select one of three<br />
menu options below:<br />
DATE FORMAT: Select the desired Date Format and push OK to<br />
SAVE.<br />
TIME FORMAT: Select desired Time Format and push OK to SAVE<br />
SET DATE / TIME: Set using UP, DOWN, RIGHT, and LEFT arrow<br />
and push OK to SAVE.<br />
Push MENU button to return to menu<br />
SET DUTY TIME<br />
This feature allows the user to program the camera to turn ON<br />
and OFF at a specified time. Highlight “Set Duty Time” and push<br />
OK or right arrow button.<br />
SET START TIME: Set camera START time using ARROWS and push<br />
OK to SAVE.<br />
SET STOP TIME: Set camera STOP time using ARROWS and push<br />
OK to SAVE.<br />
Push MENU button to return to menu<br />
ACCESS CONTROL<br />
This feature allows the user to set a 4-digit password to deter<br />
theft and render the camera unusable without the password.<br />
Highlight “Access Control” and push OK or right arrow button.<br />
SET PASSWORD: Select desired password using ARROWS and<br />
push OK to SAVE.<br />
DISABLE PASSWORD: Select and push OK to disable password.<br />
BATTERY TYPE<br />
This camera is a precisely tuned instrument. It is recommended<br />
to use high quality alkaline or NiMH batteries. Programming<br />
which batteries are present will maximize the cameras potential.<br />
Highlight “Battery Type” and push OK or right arrow button.<br />
Select ALKALINE or Ni-MH batteries and push OK to save setting.<br />
FORMATTING SD CARD<br />
Formatting the SD card removes all files on the memory card and<br />
prepares it for use in the camera. Highlight “Format SD Card” and<br />
push OK or right arrow button. Select YES to format SD card and<br />
push OK to proceed with formatting SD card.<br />
CAMERA INFORMATION<br />
Highlight “<strong>Camera</strong> Information” and push OK or right arrow<br />
button for the following information: FILES COUNT, STORAGE<br />
and FIRMWARE VERSION<br />
TRANSFERING PICTURES AND VIDEO TO A COMPUTER:<br />
Pictures and video can be removed in one of two ways:<br />
- SD memory card can be removed from camera (ALWAYS ensure<br />
camera is OFF before removing SD card) and transferred to<br />
another computer or SD card reader.<br />
- Connect camera to computer using supplied USB cable. Connect<br />
camera to computer with USB cable. Turn camera ON. Computer<br />
will recognize camera and prompt you to open file or save<br />
pictures<br />
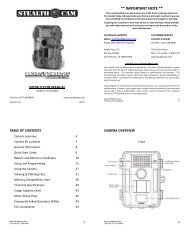
Package Contents:<br />
• <strong>Camera</strong><br />
• Remote controller/viewer<br />
• Remote to <strong>Camera</strong> Cable<br />
• USB cable<br />
• Video cable<br />
• Nylon mounting strap