
Create successful ePaper yourself
Turn your PDF publications into a flip-book with our unique Google optimized e-Paper software.
5.2.3 Electrical safety<br />
a) Before beginning work, check the working area<br />
(e.g. using a metal detector) to ensure that no<br />
concealed electric cables or gas and water pipes<br />
are present. External metal parts of the power tool<br />
may become live, for example, when an electric<br />
cable is damaged accidentally. This presents a<br />
serious risk of electric shock.<br />
b) Check the power tool’s supply cord at regular<br />
intervals and have it replaced by a qualified<br />
specialist if found to be damaged. Check extension<br />
cords at regular intervals and replace<br />
them if found to be damaged. Do not touch the<br />
supply cord or extension cord if it is damaged<br />
while working. Disconnect the supply cord plug<br />
from the power outlet. Damaged supply cords or<br />
extension cords present a risk of electric shock.<br />
c) Dirty or dusty power tools which have been<br />
used frequently for work on conductive materials<br />
should be checked at regular intervals at a<br />
Hilti Service Center. Under unfavorable circumstances,<br />
dampness or dust adhering to the surface<br />
of the power tool, especially dust from conductive<br />
materials, may present a risk of electric shock.<br />
d) When working outdoors with an electric tool<br />
check to ensure that the tool is connected to the<br />
electric supply by way of a ground fault circuit<br />
interrupter (RCD) with a rating of max. 30 mA<br />
(tripping current). Use of a ground fault circuit<br />
interrupter reduces the risk of electric shock.<br />
e) Use of a ground fault circuit interrupter (RCD<br />
residual current device) with a maximum tripping<br />
current of 30 mA is recommended.<br />
5.2.4 Work area<br />
a) Ensure that the workplace is well ventilated.<br />
Exposure to dust at a poorly ventilated workplace<br />
may result in damage to the health.<br />
b) If the work involves breaking right through, take<br />
the appropriate safety measures at the opposite<br />
side. Parts breaking away could fall out and / or<br />
fall down and injure other persons.<br />
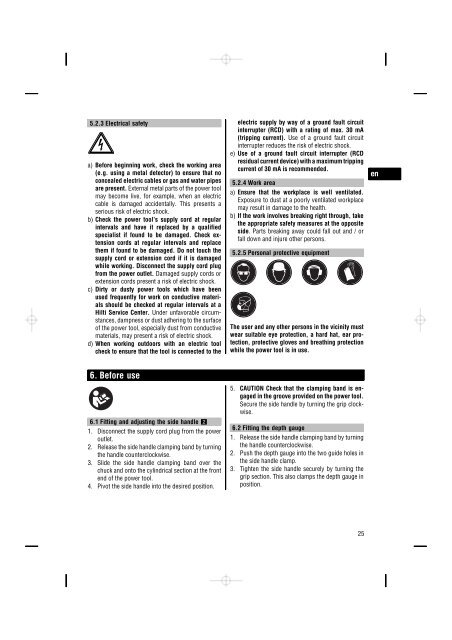
5.2.5 Personal protective equipment<br />
The user and any other persons in the vicinity must<br />
wear suitable eye protection, a hard hat, ear protection,<br />
protective gloves and breathing protection<br />
while the power tool is in use.<br />
en<br />
6. Before use<br />
6.1 Fitting and adjusting the side handle 2<br />
1. Disconnect the supply cord plug from the power<br />
outlet.<br />
2. Release the side handle clamping band by turning<br />
the handle counterclockwise.<br />
3. Slide the side handle clamping band over the<br />
chuck and onto the cylindrical section at the front<br />
end of the power tool.<br />
4. Pivot the side handle into the desired position.<br />
5. CAUTION Check that the clamping band is engaged<br />
in the groove provided on the power tool.<br />
Secure the side handle by turning the grip clockwise.<br />
6.2 Fitting the depth gauge<br />
1. Release the side handle clamping band by turning<br />
the handle counterclockwise.<br />
2. Push the depth gauge into the two guide holes in<br />
the side handle clamp.<br />
3. Tighten the side handle securely by turning the<br />
grip section. This also clamps the depth gauge in<br />
position.<br />
25