Husqvarna - AR19 - JW Hire & Sales Ltd
Husqvarna - AR19 - JW Hire & Sales Ltd
Husqvarna - AR19 - JW Hire & Sales Ltd

You also want an ePaper? Increase the reach of your titles
YUMPU automatically turns print PDFs into web optimized ePapers that Google loves.
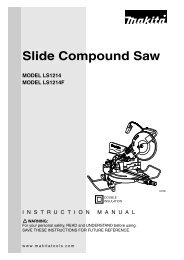
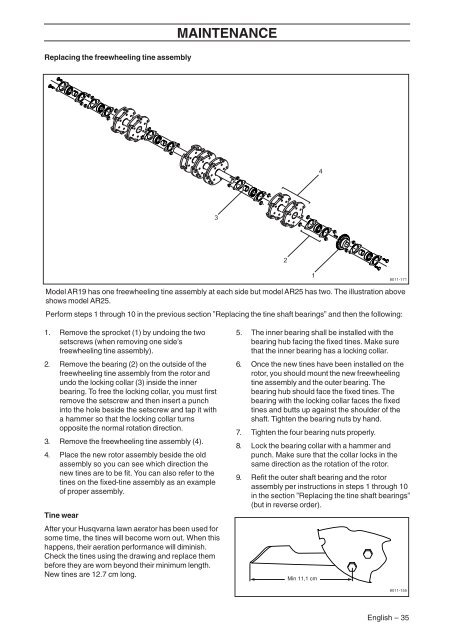
Replacing the freewheeling tine assembly<br />
MAINTENANCE<br />
Model <strong>AR19</strong> has one freewheeling tine assembly at each side but model AR25 has two. The illustration above<br />
shows model AR25.<br />
Perform steps 1 through 10 in the previous section ”Replacing the tine shaft bearings” and then the following:<br />
8011-171<br />
1. Remove the sprocket (1) by undoing the two<br />
setscrews (when removing one side’s<br />
freewheeling tine assembly).<br />
2. Remove the bearing (2) on the outside of the<br />
freewheeling tine assembly from the rotor and<br />
undo the locking collar (3) inside the inner<br />
bearing. To free the locking collar, you must first<br />
remove the setscrew and then insert a punch<br />
into the hole beside the setscrew and tap it with<br />
a hammer so that the locking collar turns<br />
opposite the normal rotation direction.<br />
3. Remove the freewheeling tine assembly (4).<br />
4. Place the new rotor assembly beside the old<br />
assembly so you can see which direction the<br />
new tines are to be fit. You can also refer to the<br />
tines on the fixed-tine assembly as an example<br />
of proper assembly.<br />
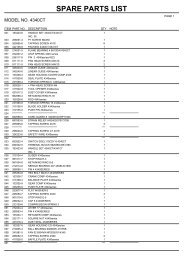
Tine wear<br />
After your <strong>Husqvarna</strong> lawn aerator has been used for<br />
some time, the tines will become worn out. When this<br />
happens, their aeration performance will diminish.<br />
Check the tines using the drawing and replace them<br />
before they are worn beyond their minimum length.<br />
New tines are 12.7 cm long.<br />
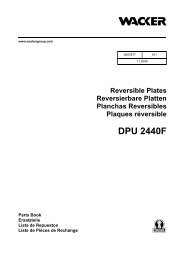
5. The inner bearing shall be installed with the<br />
bearing hub facing the fixed tines. Make sure<br />
that the inner bearing has a locking collar.<br />
6. Once the new tines have been installed on the<br />
rotor, you should mount the new freewheeling<br />
tine assembly and the outer bearing. The<br />
bearing hub should face the fixed tines. The<br />
bearing with the locking collar faces the fixed<br />
tines and butts up against the shoulder of the<br />
shaft. Tighten the bearing nuts by hand.<br />
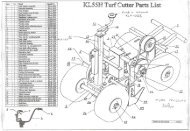
7. Tighten the four bearing nuts properly.<br />
8. Lock the bearing collar with a hammer and<br />
punch. Make sure that the collar locks in the<br />
same direction as the rotation of the rotor.<br />
9. Refit the outer shaft bearing and the rotor<br />
assembly per instructions in steps 1 through 10<br />
in the section ”Replacing the tine shaft bearings”<br />
(but in reverse order).<br />
8011-155<br />
English – 35