Introduction and TMC-1 - TSL
Introduction and TMC-1 - TSL
Introduction and TMC-1 - TSL

You also want an ePaper? Increase the reach of your titles
YUMPU automatically turns print PDFs into web optimized ePapers that Google loves.
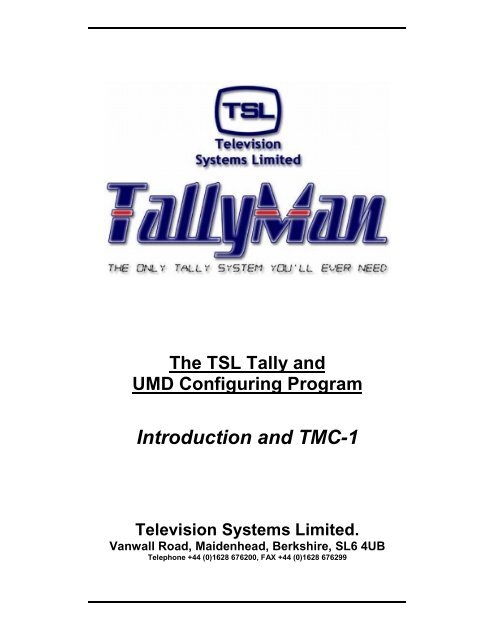
The <strong>TSL</strong> Tally <strong>and</strong><br />
UMD Configuring Program<br />
<strong>Introduction</strong> <strong>and</strong> <strong>TMC</strong>-1<br />
Television Systems Limited.<br />
Vanwall Road, Maidenhead, Berkshire, SL6 4UB<br />
Telephone +44 (0)1628 676200, FAX +44 (0)1628 676299
This Page is Blank<br />
<strong>Introduction</strong> <strong>and</strong> <strong>TMC</strong>-1 2 V2.1
Contents<br />
Features<br />
Section A<br />
The <strong>TMC</strong>-1<br />
1.0 Installation<br />
2.0 <strong>Introduction</strong><br />
3.0 Comms Connections<br />
Section B<br />
The TallyMan Program – Getting Started<br />
1.0 <strong>Introduction</strong><br />
2.0 Possible Configurations<br />
3.0 The Opening TallyMan Screen.<br />
4.0 Connecting to the TallyMan System<br />
5.0 Writing a file to the system.<br />
6.0 Saving Routines<br />
7.0 Setting up <strong>and</strong> entering the modules in the system<br />
8.0 Tally Channels <strong>and</strong> System Tallies.<br />
9.0 Notes<br />
It is strongly recommended that this entire section is read before<br />
using the <strong>TMC</strong>-1 <strong>and</strong> TallyMan.<br />
V2.1 3 <strong>Introduction</strong> <strong>and</strong> <strong>TMC</strong>-1
This Page is Blank<br />
<strong>Introduction</strong> <strong>and</strong> <strong>TMC</strong>-1 4 V2.1
Features<br />
TallyMan offers a very flexible method of controlling tally <strong>and</strong> mnemonic data to be shown on<br />
a monitor wall or on plasma displays, via a multiviewers such as those used in a control room<br />
facility.<br />
Interfacing.<br />
TallyMan interfaces to all known switchers, routers <strong>and</strong> multiviewers. TallyMan can read tally<br />
<strong>and</strong> router crosspoint status data from a wide range of equipments.<br />
The following list of manufacturers is not definitive. The right h<strong>and</strong> column list the protocol<br />
type in use.<br />
ProBel<br />
Grass Valley<br />
Thomson<br />
Leitch<br />
Network<br />
Pesa<br />
ProVideo<br />
SWP02<br />
SWP08<br />
Native (SMS7000)<br />
GVG200<br />
GVG2100<br />
GVG4000<br />
Kalypso<br />
Zodiac<br />
BTS ASCII<br />
Saturn<br />
9000 series<br />
SWP62<br />
DD10/20/30<br />
DD35 MPK<br />
DD35 ACOS<br />
DD35 Native<br />
DD35 ident_xbar<br />
X-Y bus<br />
Router Protocol<br />
USP<br />
RS1616<br />
Quartz Type 1<br />
SAV<br />
Snell & Wilcox<br />
Sierra<br />
Sony<br />
Telecast<br />
Vistek<br />
Utah<br />
GC88/PCS<br />
Tally Prtcl<br />
Serial Xpt<br />
Serial Tally<br />
Router RS422<br />
ProSan<br />
Array<br />
AVS1/2<br />
TallyMan will interface to <strong>TSL</strong> legacy equipment (with an EPROM change) thereby offering a<br />
cost-effective expansion of existing systems.<br />
Parallel I/O modules are available, connected via TCP/IP, offering convenient physical<br />
location <strong>and</strong> cabling.<br />
V2.1 5 <strong>Introduction</strong> <strong>and</strong> <strong>TMC</strong>-1
Programming Facilities<br />
Tally Control<br />
• Sixteen tally channels or “tally families” allow easy <strong>and</strong> logical tally assignments to<br />
UMDs, router destination/sources <strong>and</strong> output pins for the cameras.<br />
• Provision for System Tallies consisting of internal “Boolean” tallies. These are<br />
defined combinations of other ordinary tallies (in or out)<br />
• Ability to use independent three colour control of the <strong>TSL</strong> UMDs<br />
• Ability to inhibit the left or right tally on any UMD.<br />
• Ability to map tallies to router sources.<br />
• Ability to map tallied router sources to a tally o/p pins for the cameras.<br />
• Ability to map tallies to router buses.<br />
• Ability to map tallied router buses to a tally o/p pins for cameras or other external tally<br />
lights etc.<br />
• Option of opto-isolated inputs for the parallel tally inputs.<br />
• Option of isolated relay-contacts for the parallel tally outputs.<br />
Mnemonic Control<br />
• All mnemonics can be of variable length.<br />
• Easy mnemonic control of the dynamic UMDs.<br />
• Drag <strong>and</strong> drop from mnemonic lists.<br />
• Ability to import mnemonics lists (e.g. from Excel) for router sources <strong>and</strong> destinations<br />
(buses).<br />
• Provides individual display control over tie-line recursion depth where routers are<br />
cascaded.<br />
• Control of individual UMD mnemonic <strong>and</strong> tally LED colour <strong>and</strong> mnemonic justification,<br />
either singly of as groups.<br />
• Ability to map cascaded routers so the o/p UMD shows the correct source mnemonic.<br />
• Router source to source <strong>and</strong> source to bus mapping possible.<br />
• Multiviewer support.<br />
• External router control from TallyMan.<br />
• Snapshot of router status may be taken <strong>and</strong> saved in a file<br />
• Downloading the names lists from some routers into TallyMan for display on the<br />
UMDs - where supported by the router manufacturer.<br />
• Uploading of UMD mnemonics from TallyMan into the router’s names lists – where<br />
supported by the router manufacturer.<br />
• Uploading of mnemonics from TallyMan into the switcher’s / mixer’s panel – where<br />
supported by the mixer manufacturer.<br />
General<br />
• Password control is offered allowing the configuring engineer to offer a fine level of<br />
control to less experienced users on a day to day basis.<br />
• Distant, remote setup of the system is possible via a TCP/IP connection to the<br />
TallyMan Controller.<br />
• TallyMan may be configured by a st<strong>and</strong>ard PC running Windows 95, 98, NT4, 2000<br />
or XP,<br />
• Direct, local connection (KVM) to the TallyMan Controller is possible.<br />
• Configuration of system components can be done “live” on the system.<br />
• Router sources <strong>and</strong> destinations may be sorted according to type (OS lines,<br />
Cameras, VTRs etc)<br />
• All current interfaces for various routers, mixers etc. will be available <strong>and</strong> updateable<br />
via DLL (Windows platform) or flash update (<strong>TSL</strong> System Controller).<br />
<strong>Introduction</strong> <strong>and</strong> <strong>TMC</strong>-1 6 V2.1
• All system objects can be named for easy reference.<br />
• GUI on the computer monitor gives a representation of the actual monitor stack or<br />
wall.<br />
• There is the ability to save <strong>and</strong> open different configurations (Tally, Mnemonics <strong>and</strong><br />
router mapping details). All parameters are saved in one file.<br />
• Names lists may be entered for tallies, routers <strong>and</strong> Controllers as “aide-memoirs”.<br />
The program is provided on a CD ROM <strong>and</strong> is designed to run on an IBM compatible PC.<br />
About 4.5 Mb of hard disk space is required.<br />
V2.1 7 <strong>Introduction</strong> <strong>and</strong> <strong>TMC</strong>-1
This Page is Blank<br />
<strong>Introduction</strong> <strong>and</strong> <strong>TMC</strong>-1 8 V2.1
Overview of the <strong>TSL</strong> TallyMan System<br />
Parallel I/O<br />
Cameras<br />
Router<br />
UMD Wall<br />
TallyMan Controller<br />
PSU-22<br />
Vision Mixer<br />
Serial Data paths<br />
V2.1 9 <strong>Introduction</strong> <strong>and</strong> <strong>TMC</strong>-1
This Page is Blank<br />
<strong>Introduction</strong> <strong>and</strong> <strong>TMC</strong>-1 10 V2.1
Section A<br />
The TallyMan Controller <strong>TMC</strong>-1<br />
Front View<br />
Rear View<br />
The RS422 connections are on the left <strong>and</strong> the RS232 connections are in the centre.<br />
V2.1 11 <strong>Introduction</strong> <strong>and</strong> <strong>TMC</strong>-1
This Page is Blank<br />
<strong>Introduction</strong> <strong>and</strong> <strong>TMC</strong>-1 12 V2.1
1.0 Installation<br />
Unless otherwise stated <strong>TSL</strong> equipment may be installed at any angle or position within an<br />
operating temperature range of 5° ~ 25° C .<br />
All <strong>TSL</strong> equipment conforms to the EC Low Voltage Directive:<br />
EC Low Voltage Directive (73/23/EEC)(OJ L76 26.3.73)(LVD).<br />
Amendment: (103/68/EEC) (OJ L220 30.8.103).<br />
Earthing/Grounding<br />
In all cases, the frame of the equipment must be earthed on installation. Connection to an<br />
earthed strip running the length of the frame is ideal.<br />
The earth pin on the IEC mains inlet connector is connected to the metal frame of the<br />
equipment, to 0 volts on the internal DC PSU <strong>and</strong> to signal ground, unless otherwise stated.<br />
All metal panels are bonded together. Rack mounted equipment must be earthed (grounded).<br />
Mounting<br />
Careful consideration of the equipment location <strong>and</strong> mounting in racks must be made. In<br />
particular, consideration must be given to the stability of free-st<strong>and</strong>ing racks by mounting<br />
heavy equipment low in the rack. The rear of the unit must be supported in the rack.<br />
Power<br />
For pluggable equipment, the socket outlet shall be installed near the equipment <strong>and</strong> shall be<br />
easily accessible.<br />
Consideration must be given to the supply circuit loading <strong>and</strong> switch on/fault surges that will<br />
affect overcurrent protection trips <strong>and</strong> switches etc.<br />
Check that the fuse rating is correct for the local power (mains) supply. Replacement fuses<br />
must be of the same rating <strong>and</strong> type for continued protection against fire risk.<br />
The equipment rating is shown on the rear panel.<br />
Power supply cords may not be provided with this equipment.<br />
Do not switch on until all connections are made.<br />
Ventilation<br />
Due consideration for cooling requirements must be given when mounting the equipment.<br />
Ideally 1RU of rack space should be left above <strong>and</strong> below the unit.<br />
If the equipment is installed in a closed unit, consideration must be given to providing forced<br />
air cooling in order that the maximum recommended temperature is not exceeded.<br />
V2.1 13 <strong>Introduction</strong> <strong>and</strong> <strong>TMC</strong>-1
Warranty, Maintenance <strong>and</strong> Repair<br />
All <strong>TSL</strong> equipment is guaranteed for one year from the date of delivery to the customer’s<br />
premises. If the equipment is to be stored for a significant period, please contact <strong>TSL</strong><br />
concerning a possible extended warranty period.<br />
Failure during warranty<br />
If any <strong>TSL</strong> product should fail or become faulty within the warranty period, first please check<br />
the PSU fuses.<br />
All maintenance work must be carried out by trained <strong>and</strong> competent personnel.<br />
Disconnect power before<br />
removing the covers<br />
There are no user<br />
adjustable parts inside the<br />
unit<br />
<strong>Introduction</strong> <strong>and</strong> <strong>TMC</strong>-1 14 V2.1
Technical support information<br />
E-Mail address: support@televisionsystems.ltd.uk<br />
Telephone Support Number for the UK <strong>and</strong> Europe: +44 (0) 1628 676200<br />
Telephone Support Number for the USA only: 1 877 5101 2108<br />
If equipment has to be returned to <strong>TSL</strong> for repair please observe the following:<br />
<strong>TSL</strong> Returns Procedure<br />
Please telephone +44 (0)1628 676200 (Fax: +44 (0)1628 676299) <strong>and</strong> ask for Sales who will<br />
provide a Returns Number. This will enable us to track the unit effectively <strong>and</strong> will provide<br />
some information prior to the unit arriving.<br />
For each item, this unique Returns Number must be included with the Fault Report sent with<br />
the unit.<br />
A contact name <strong>and</strong> telephone number are also required with the Fault Report sent with the<br />
unit.<br />
Fault report details required.<br />
• Company:<br />
• Name:<br />
• Address:<br />
• Contact Name:<br />
• Telephone No:<br />
• Returns Number:<br />
• Symptoms of the fault (to include switch setting positions, input signals etc):<br />
Packing<br />
Please ensure that the unit is well packed as all mechanical damage is chargeable. <strong>TSL</strong><br />
recommends that you insure your equipment for transit damage.<br />
The original packaging, when available, should always be used when returning equipment..<br />
If returned equipment is received in a damaged condition, the damage should be<br />
reported both to <strong>TSL</strong> <strong>and</strong> the carrier immediately.<br />
Year 2000 Conformity Requirements<br />
This product conforms to the following rules:<br />
Rule 1<br />
Rule 2<br />
Rule 3<br />
Rule 4<br />
No value for the current date will cause any interruption in operation.<br />
Date based functionality will behave consistently for dates prior to, during <strong>and</strong><br />
after the Year 2000.<br />
In all interfaces <strong>and</strong> data storage, the century in any date is specified either<br />
explicitly or by unambiguous algorithms or by inferencing rules.<br />
The Year 2000 is recognised as a leap year.<br />
V2.1 15 <strong>Introduction</strong> <strong>and</strong> <strong>TMC</strong>-1
2.0 <strong>Introduction</strong><br />
The TallyMan Controller is based on a customised commercially obtained 1RU computer. The<br />
machine runs Microsoft Windows XP Professional as its operating system.<br />
A st<strong>and</strong>ard mouse, keyboard <strong>and</strong> VDU may be attached to the machine or the Remote<br />
Desktop facility available in Windows XP may be use for remote access by another computer,<br />
also running Windows XP.<br />
The <strong>TMC</strong>-1 is pre-loaded with the TallyMan program, complete with activation from the<br />
factory.<br />
On starting Windows XP:<br />
User Name:<br />
Password:<br />
<strong>TSL</strong><br />
tsl<br />
3.0 Comms Connections<br />
Com 3<br />
Com 4<br />
Com 2<br />
Com 5<br />
RS422<br />
Com 6<br />
VDU<br />
Com 1<br />
RS232<br />
Power i/p<br />
Mouse +<br />
Keyboard<br />
Network<br />
Connector<br />
RS 422 CONNECTORS<br />
D9 PLUGS ON HARDWARE<br />
1 TX- 6 RTS-<br />
2 TX+ 7 RTS+<br />
3 RX+ 8 CTS+<br />
4 RX- 9 CTS-<br />
5 0v<br />
RS 232 CONNECTORS<br />
D9 PLUG ON HARDWARE<br />
1 - 6 -<br />
2 RX 7 RTS<br />
3 TX 8 CTS<br />
4 DTR 9 -<br />
5 0v<br />
<strong>Introduction</strong> <strong>and</strong> <strong>TMC</strong>-1 16 V2.1
Connection required to connect the <strong>TMC</strong>-1 to the <strong>TSL</strong> power supply unit, PSU-22.<br />
TALLYMAN<br />
CONTROLLER RS-422<br />
FUNCTION<br />
PSU-22<br />
RJ45<br />
D9 SKT CAT 5<br />
FUNCTION<br />
3 RX+ 6 TX+<br />
4 RX- 3 TX-<br />
5 0V SCN 1 0V<br />
2 TX+ 4 RX+<br />
1 TX- 5 RX-<br />
6 0V SCN 2 0V<br />
Notes<br />
The TallyMan program will start automatically when the <strong>TMC</strong>-1 computer is turned on as the<br />
computer has the program set into its “Schedule Tasks” list with the Schedule Task set as “At<br />
System Startup” with some additional customisation.<br />
Remote Desktop<br />
With Windows XP it is possible to use another computer running Windows XP to view the<br />
remote computer via the Remote Desktop facility. The host computer must have the subnet<br />
mask etc. correctly set to “see” the TallyMan Controller.<br />
The <strong>TMC</strong>-1 comes initially configured for this with the following default parameters:<br />
IP Address: 192.168.100.220<br />
Subnet Mask: 255.255.255.0<br />
User Name:<br />
<strong>TSL</strong><br />
Password:<br />
tsl<br />
Workgroup (if required): ---<br />
Auto power on.<br />
No provision is made in the BIOS for auto power on. This is achieved by fitting/closing the<br />
link JP14 on the motherboard, near the processor <strong>and</strong> towards the edge of the card, fairly well<br />
hidden under cables.<br />
V2.1 17 <strong>Introduction</strong> <strong>and</strong> <strong>TMC</strong>-1
This Page is Blank<br />
<strong>Introduction</strong> <strong>and</strong> <strong>TMC</strong>-1 18 V2.1
Section B<br />
The TallyMan Program<br />
1.0 <strong>Introduction</strong><br />
TallyMan is <strong>TSL</strong>’s new generation of tally <strong>and</strong> UMD control system.<br />
TallyMan offers the ultimate in flexibility for engineering <strong>and</strong> user configuration. The Engineer<br />
sets up all the interfaces <strong>and</strong> decides on the level of User Access by checking an Allow User<br />
Configuration box on each main dialog screen.<br />
<strong>TSL</strong>’s full library of interfaces is available for any system components (mixers, routers,<br />
multiviewers) required.<br />
Using TallyMan’s graphic configuration, initial set-up <strong>and</strong> subsequent updates are as easy as<br />
changing a mnemonic.<br />
In addition to controlling <strong>TSL</strong>’s industry-st<strong>and</strong>ard range of UMD’s, TallyMan knows all about<br />
other products with name/tally display, including all the increasingly popular multiviewer<br />
devices etc.<br />
The system may be operated in one of two main ways.<br />
1. Where the TallyMan Controller is used for the actual running of TallyMan <strong>and</strong><br />
another, local/remote PC, is used for the configuration <strong>and</strong> changes to the system.<br />
2. Where the TallyMan Controller is the same for both configuration <strong>and</strong> the actual<br />
running of TallyMan.<br />
The screen shots for this manual were taken from a Windows XP machine. The System<br />
Components may vary across some sections in the manual, however this is only due to the<br />
way <strong>and</strong> the order that the various sections were written.<br />
Note that the program is pre-installed on the <strong>TMC</strong>-1.<br />
Log on to the <strong>TMC</strong>-1 (not the TallyMan Program) using the password tsl<br />
If using a remote PC for the configuration, place the CD in the tray <strong>and</strong> search for the<br />
TallyMan program files. Copy all these to a new directory, e.g. tsl\tallyman.<br />
Where a PC is used for configuration only with the TallyMan Controller, the Key will not<br />
need to be input.<br />
V2.1 19 <strong>Introduction</strong> <strong>and</strong> <strong>TMC</strong>-1
2.0 Possible Configurations<br />
Option 1<br />
A PC<br />
Connect via TCP/IP<br />
Configuration only<br />
No Key Required<br />
TallyMan Controller<br />
Local System<br />
Running the System<br />
Key Enabled<br />
Option 2<br />
Data I/p<br />
TallyMan Controller<br />
Local System<br />
Configuration <strong>and</strong><br />
running the System<br />
To UMDs, Cameras etc <strong>and</strong> other interfaces<br />
Key Enabled<br />
Data I/p<br />
Simple overview of the <strong>TMC</strong>-1.<br />
Diagrammatic view of a <strong>TMC</strong>-1 used as a Local System.<br />
<strong>TMC</strong>-1<br />
Configuring<br />
Screen <strong>and</strong><br />
TallyMan file<br />
lists<br />
Area of<br />
computer<br />
running<br />
TallyMan<br />
System<br />
UMD- Monitor Stack<br />
Parallel I/O unit<br />
<strong>TSL</strong><br />
System Controller<br />
Comms Ports<br />
Mixer<br />
Router<br />
<strong>Introduction</strong> <strong>and</strong> <strong>TMC</strong>-1 20 V2.1
Option 1 Using a remote configuring computer <strong>and</strong> installing the TallyMan program.<br />
Find the TallyMan directory on the supplied CD-ROM <strong>and</strong> copy the files to a new directory:<br />
C:\<strong>TSL</strong>\Tallyman is recommended.<br />
Make a shortcut from the tallyman.exe file on the desktop.<br />
Double click to run the program. Allow any firewall to have access.<br />
Select the Configuration button.<br />
Select Configuration.<br />
User will allow access to<br />
only those areas of the<br />
set –up that have been<br />
allowed by the configuring<br />
engineer.<br />
Exit System will close the<br />
entire application –<br />
TallyMan configuration<br />
<strong>and</strong> the operating<br />
System.<br />
When TallyMan is run each time this start up screen will be shown. If no action is taken the<br />
screen will minimize to the Task Bar<br />
Exit System<br />
Selecting Yes will close<br />
the entire application –<br />
TallyMan configuration<br />
<strong>and</strong> the operating<br />
System.<br />
Beware: Yes closes the program.<br />
For the User screens see User Section. The User button will allow access to the screens<br />
<strong>and</strong> dialog boxes allowed by the Configurator. It will be seen that most dialog screens allow<br />
the Configurator to decide whether or not the User has access to the screen.<br />
Select the Configuration button.<br />
The Configuration access will require a Password to be entered once one has been set.<br />
No password is set at the factory.<br />
V2.1 21 <strong>Introduction</strong> <strong>and</strong> <strong>TMC</strong>-1
The password is blank<br />
but may be set to<br />
anything the Configurator<br />
wishes. In this case<br />
clicking on OK will open<br />
the next dialog box.<br />
If the password is lost<br />
*<strong>TSL</strong>ENG* will unlock the<br />
system allowing a new<br />
password to be set.<br />
Press the OK button.<br />
3.0 The Opening TallyMan Screen.<br />
This screen is seen on selecting Configuration <strong>and</strong> OK on the Confirm Authentication<br />
screen. Single click on New System.<br />
The System is<br />
given a Name.<br />
This shows the<br />
platform that is<br />
in use.<br />
The System<br />
Interface<br />
parameters are<br />
set here.<br />
Components<br />
may be added<br />
to the System.<br />
Components may<br />
be deleted from<br />
the System.<br />
The sixteen<br />
tally channels<br />
may be named.<br />
System Tallies<br />
are set here.<br />
System Tallies<br />
are tallies<br />
derived from<br />
other tallies.<br />
See the Tallies<br />
Section.<br />
<strong>Introduction</strong> <strong>and</strong> <strong>TMC</strong>-1 22 V2.1
Various<br />
Components such<br />
as:<br />
• Mixer,<br />
• Router<br />
• Umds<br />
• System<br />
Controllers<br />
may now be<br />
added to the new<br />
system.<br />
4.0 Connecting to the TallyMan System<br />
The System Interfaces<br />
Option 1. .<br />
How to set up the system when a local PC is used to communicate with the remote TallyMan<br />
Controller.<br />
If a local PC is used to communicate with a remote <strong>TMC</strong>-1 which is running the TallyMan<br />
system, the communications are set here. Effectively the two computer-based units must be<br />
networked together. The TallyMan program must be installed the configuring PC. The<br />
configuring PC does not need an unlock key.<br />
Connect a cross coupled CAT 5 cable between the Ethernet port on that PC (or go via the<br />
usual hub linking arrangements) <strong>and</strong> the Ethernet port on the <strong>TMC</strong>-1.<br />
Find the TallyMan.exe file <strong>and</strong> double click.<br />
Select Configuration<br />
V2.1 23 <strong>Introduction</strong> <strong>and</strong> <strong>TMC</strong>-1
Note: Most laptops are set up for DHCP; they will not have a fixed IP address.<br />
You must set a fixed address such as 192.168.100.200, with a sub net mask of<br />
255.255.255.0 before the LAN port will operate <strong>and</strong> communicate with the <strong>TMC</strong>-1 under these<br />
conditions.<br />
Look at the Local Area Connection <strong>and</strong> Properties box via Control Panel > Network<br />
Connections.<br />
Click on the Internet Protocol (TCP/IP) line <strong>and</strong> observe Properties.<br />
The IP address may be set via the Alternate Configuration tab, thereby keeping the basic<br />
DHCP configuration. Select User Configured <strong>and</strong> enter the numbers.<br />
If you are in any doubt, seek the services of your IT Network Administrator.<br />
<strong>Introduction</strong> <strong>and</strong> <strong>TMC</strong>-1 24 V2.1
Click on OK – you do not<br />
need to set a password at<br />
this time.<br />
• Highlight Default System Interface<br />
• Click on Configure<br />
The default IP address for the <strong>TMC</strong>-1 is 192.168.100.220<br />
Give the communications link a brief Description as an aide memoir <strong>and</strong> set the IP Address<br />
to 192.168.100.220<br />
Check that the TCP/IP address is as shown.<br />
Press OK.<br />
V2.1 25 <strong>Introduction</strong> <strong>and</strong> <strong>TMC</strong>-1
• Go to Comms, select Connect to System<br />
• Select No<br />
• Highlight Default System Interface<br />
• Press Connect<br />
The configuring PC will go on line to the <strong>TMC</strong>-1 using the IP address that you have set.<br />
<strong>Introduction</strong> <strong>and</strong> <strong>TMC</strong>-1 26 V2.1
The Connecting Options.<br />
Used when the<br />
computer that is<br />
running the system<br />
is also the<br />
configuring<br />
computer.<br />
Used when the<br />
computer that is<br />
running the system<br />
<strong>and</strong> the configuring<br />
computer are<br />
different.<br />
Both options connect to the TallyMan system, depending on the configuration, <strong>and</strong> show you<br />
the system, not any offline file which is being edited. The TallyMan system may be regarded<br />
as having two separate parts. There is the part which contains the files <strong>and</strong> the set up<br />
configurations <strong>and</strong> there is the part which is actually running the TallyMan system.<br />
Remote Desktop<br />
With Windows XP it is possible to use another computer running Windows XP to view the<br />
remote computer via the Remote Desktop facility. The host computer must have the subnet<br />
mask etc. correctly set to “see” the TallyMan Controller.<br />
The <strong>TMC</strong>-1 comes initially configured for this with the following default parameters:<br />
IP Address: 192.168.100.220<br />
Subnet Mask: 255.255.255.0<br />
User Name:<br />
<strong>TSL</strong><br />
Password:<br />
tsl<br />
V2.1 27 <strong>Introduction</strong> <strong>and</strong> <strong>TMC</strong>-1
Option 2<br />
Local Connection to the TallyMan Controller where KVM is used.<br />
Connect a keyboard, mouse <strong>and</strong> VDU <strong>and</strong> treat the <strong>TMC</strong>-1 exactly like a computer, logging<br />
on to Windows using tsl <strong>and</strong> then double clicking the TallyMan icon. This will open the<br />
program.<br />
To go online, select Comms > Connect to System. NO to Save current file <strong>and</strong> Connect<br />
to Local System.<br />
However, if a file has been set up, opt to save it.<br />
Pressing Yes will show this dialog screen<br />
Press Connect to<br />
Local System<br />
<strong>Introduction</strong> <strong>and</strong> <strong>TMC</strong>-1 28 V2.1
When on-line:<br />
A green dot indicates<br />
that the component<br />
has been recognised<br />
by the system.<br />
A red dot means that<br />
the component has not<br />
been recognised by the<br />
system.<br />
Summary<br />
Option 1<br />
Default System Interface. Use this when you are using a remote PC to connect to the<br />
<strong>TMC</strong>-1.<br />
The connection info in the current offline file will determine which TallyMan system (there<br />
could be more than one in a large facility) you want to connect to <strong>and</strong> how (i.e. serial, TCP/IP<br />
etc<br />
As soon as we are connected, we are looking at the TallyMan system, not a file. The file title<br />
in the main tree is derived from the name of the system to which we are connected.<br />
It will be seen that when the TallyMan system is online, the components that are recognised<br />
by the system will have a green dot in the directory tree.<br />
Option 2<br />
Connect to Local System . Use this when you are using a keyboard, monitor <strong>and</strong> mouse on<br />
the <strong>TMC</strong>-1.<br />
This connects you to the system regardless of the current offline file<br />
V2.1 29 <strong>Introduction</strong> <strong>and</strong> <strong>TMC</strong>-1
5.0 Writing a file to the system.<br />
To update the active system the file must be written to the TallyMan Controller.<br />
This is shown under Comms > Write Configuration.<br />
Click on Yes.<br />
Then on Download <strong>and</strong> Restart. The desktop file is now written to the system.<br />
The system will be off-line following this action.<br />
On connecting to the system, the operator will be prompted to save the desktop file as it may<br />
have been edited <strong>and</strong> the act of going on-line will overwrite the currently open file.<br />
<strong>Introduction</strong> <strong>and</strong> <strong>TMC</strong>-1 30 V2.1
Pressing Yes will save the desktop to disc under the file name indicated at the top of the<br />
dialog box.<br />
6.0 Saving Routines<br />
Important Information concerning the saving routines.<br />
If a test file is loaded <strong>and</strong> the system is then written to, the system on the<br />
configuring screen will be shown as off-line<br />
Although the (disk file) has been written to the system, when the TallyMan set<br />
up screen is connected to the system there is no link with file at all. You are<br />
looking at the file in the operating part of the <strong>TMC</strong>-1.<br />
Imagine there are three common set-ups for MySystem. Name the files as MS1, MS2, MS3.<br />
When MS1 is written to the system <strong>and</strong> the system is put on-line, MySystem will be shown as<br />
the active “file” on the screen in the system tree view.<br />
should be reserved for the current actual system - this way, nothing gets<br />
accidentally overwritten <strong>and</strong> the current state is always defined.<br />
7.0 Setting up <strong>and</strong> entering the modules in the system<br />
This may be done off line <strong>and</strong> then written to the system.<br />
The system is built up entirely by the user. Select Add New Components.<br />
With the configuring program off-line, Components may be added or deleted from the System.<br />
Every time a component is added the user will be asked for a Name <strong>and</strong> will have to configure<br />
various options in the dialog screens.<br />
Mixers, routers, multi-viewers <strong>and</strong> UMDs can be added to the system. Parallel I/O modules<br />
are added by using a legacy System Controller, a CTD-1S/CTD-1Si or an ESP-1 unit.<br />
Where legacy System Controllers are used the various modules within that Controller will<br />
automatically be added to the system tree once TallyMan goes on-line <strong>and</strong> recognises the<br />
System Controller.<br />
V2.1 31 <strong>Introduction</strong> <strong>and</strong> <strong>TMC</strong>-1
When a new<br />
component is<br />
added to the<br />
system it must be<br />
given a Name<br />
before the OK<br />
button becomes<br />
active.<br />
Highlight <strong>and</strong> select<br />
the modules that are<br />
to be added to the<br />
system.<br />
Give the module a<br />
Name.<br />
It is suggested (but is not essential) that the items are added to the System in the following<br />
order, as necessary:<br />
• Router(s)<br />
• Vision Mixer<br />
• UMD interface<br />
• System Controllers - Parallel I/O<br />
• System Tallies<br />
• Control Panels<br />
• Tallies – mapping <strong>and</strong> assignments<br />
Enter all mnemonics <strong>and</strong> names <strong>and</strong> then carry out all assignments for the UMDs <strong>and</strong> Tallies.<br />
It will be seen that each dialog screen contains all the assignment mapping requirements to<br />
do with the selected item. For example, a router source screen will allow the mnemonics,<br />
names tallies as assignments to the destinations or sources as required all from the one<br />
screen.<br />
<strong>Introduction</strong> <strong>and</strong> <strong>TMC</strong>-1 32 V2.1
8.0 Tally Channels <strong>and</strong> System Tallies.<br />
Tally Channels<br />
This program has 16 tally channels. Actual tallies from an I/O interface <strong>and</strong> System Tallies<br />
(see the Tallies Section) must be flagged as belonging to a particular tally channel. This may<br />
be seen as giving the tallies a “family” identity. This is an extension of red <strong>and</strong> green tally<br />
channels found in other UMD systems.<br />
The Name tally channels button allows these channels to be given a user-defined name.<br />
System Tallies<br />
System Tallies may be tallies derived from external incoming tallies from an I/O interface or<br />
from any object in TallyMan that can have a tally set to it.<br />
A System Tally may be regarded as a “multicore cable” in that a System Tally may carry<br />
several active different tally channels (the “cable cores”) for further processing or use.<br />
9.0 Notes<br />
Auto updating<br />
If a newer version of TallyMan is released on the <strong>TSL</strong> web site (www.televisionsystems.ltd.uk)<br />
<strong>and</strong> installed on a configuring PC, when that configuring PC goes on line to the <strong>TMC</strong>-1 a<br />
dialog screen will open that will ask if you wish to upgrade the <strong>TMC</strong>-1 via the configuring PC.<br />
Just follow the on screen instructions.<br />
V2.1 33 <strong>Introduction</strong> <strong>and</strong> <strong>TMC</strong>-1