Press the - Pentax
Press the - Pentax
Press the - Pentax

Create successful ePaper yourself
Turn your PDF publications into a flip-book with our unique Google optimized e-Paper software.
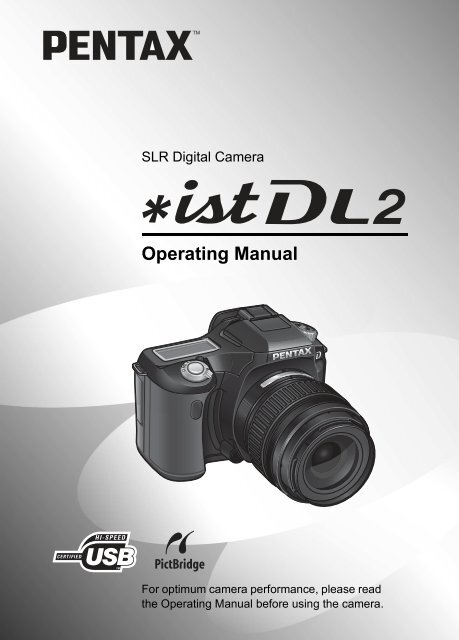
SLR Digital Camera<br />
Operating Manual<br />
For optimum camera performance, please read<br />
<strong>the</strong> Operating Manual before using <strong>the</strong> camera.
Thank you for purchasing <strong>the</strong> PENTAX F Digital Camera. Please<br />
read this manual before using <strong>the</strong> camera in order to get <strong>the</strong> most out of all <strong>the</strong><br />
features and functions. Keep this manual safe, as it can be a valuable tool in<br />
helping you to understand all <strong>the</strong> camera’s capabilities.<br />
Lenses you can use<br />
In general, lenses that can be used with this camera are DA, D FA and FA J lenses and<br />
lenses that have an Aperture s (Auto) position.<br />
To use any o<strong>the</strong>r lens or accessory, see p.37 and p.184.<br />
Regarding copyrights<br />
Images taken using <strong>the</strong> F that are for anything o<strong>the</strong>r than personal enjoyment<br />
cannot be used without permission according to <strong>the</strong> rights as specified in <strong>the</strong> Copyright<br />
Act. Please take care, as <strong>the</strong>re are even cases where limitations are placed on taking<br />
pictures even for personal enjoyment during demonstrations, performances or of items<br />
on display. Images taken with <strong>the</strong> purpose of obtaining copyrights also cannot be used<br />
outside <strong>the</strong> scope of use of <strong>the</strong> copyright as laid out in <strong>the</strong> Copyright Act, and care<br />
should be taken here also.<br />
Regarding trademarks<br />
• PENTAX and smc PENTAX are trademarks of PENTAX Corporation.<br />
• The SD logo is a trademark.<br />
• All o<strong>the</strong>r brands or product names are trademarks or registered trademarks of <strong>the</strong>ir<br />
respective owners.<br />
To users of this camera<br />
• There is a possibility that recorded data may be erased or that <strong>the</strong> camera may not<br />
function correctly when used in surroundings such as installations generating strong<br />
electromagnetic radiation or magnetic fields.<br />
• The liquid crystal panel used in <strong>the</strong> LCD display is manufactured using extremely high<br />
precision technology. Although <strong>the</strong> level of functioning pixels is 99.99% or better, you<br />
should be aware that 0.01% or fewer of <strong>the</strong> pixels may not illuminate or may illuminate<br />
when <strong>the</strong>y should not. However, this has no effect on <strong>the</strong> recorded image.<br />
This product supports PRINT Image Matching III. PRINT Image Matching enabled<br />
digital still cameras, printers and software help photographers to produce images more<br />
faithful to <strong>the</strong>ir intentions. Some functions are not available on printers that are not<br />
PRINT Image Matching III compliant.<br />
Copyright 2001 Seiko Epson Corporation. All Rights Reserved.<br />
PRINT Image Matching is a trademark of Seiko Epson Corporation.<br />
The PRINT Image Matching logo is a trademark of Seiko Epson Corporation.<br />
Regarding PictBridge<br />
PictBridge allows <strong>the</strong> user to connect <strong>the</strong> printer and digital camera directly, using <strong>the</strong><br />
unified standard for <strong>the</strong> direct printout of images. You can print images directly from <strong>the</strong><br />
camera through a few simple operations.<br />
• There is a possibility that <strong>the</strong> illustrations and <strong>the</strong> display screen of <strong>the</strong> LCD monitor<br />
in this manual are different from <strong>the</strong> actual product.
FOR SAFE USE OF YOUR CAMERA<br />
1<br />
We have paid close attention to <strong>the</strong> safety of this product. When using this<br />
product, we request your special attention regarding items marked with <strong>the</strong><br />
following symbols.<br />
Warning<br />
Caution<br />
This symbol indicates that violating this item could cause<br />
serious personal injury.<br />
This symbol indicates that violating this item could cause<br />
minor or medium personal injury, or material loss.<br />
ABOUT THE CAMERA<br />
Warning<br />
• Do not disassemble or modify <strong>the</strong> camera. High voltage areas are present<br />
inside <strong>the</strong> camera, with <strong>the</strong> risk of electric shock.<br />
• If <strong>the</strong> camera interior is exposed due to dropping or o<strong>the</strong>rwise damaging <strong>the</strong><br />
camera, never touch <strong>the</strong> exposed portion. There is <strong>the</strong> risk of electric shock.<br />
• To avoid <strong>the</strong> risk of it being swallowed by mistake, keep <strong>the</strong> SD Memory<br />
Card out of <strong>the</strong> reach of small children. Seek medical attention immediately<br />
if a memory card is accidentally swallowed.<br />
• Wrapping <strong>the</strong> strap around your neck is dangerous. Take care that small<br />
children do not hang <strong>the</strong> strap over <strong>the</strong>ir necks.<br />
• Do not look directly at <strong>the</strong> sun through <strong>the</strong> camera with <strong>the</strong> telephoto lens<br />
attached, as viewing <strong>the</strong> sun may damage your eyes. Viewing <strong>the</strong> sun<br />
directly with <strong>the</strong> telephoto lens may lead to a loss of eyesight.<br />
• Be sure to store batteries out of <strong>the</strong> reach of children. Seek medical<br />
assistance immediately if a battery is accidentally swallowed.<br />
• Always use <strong>the</strong> AC adapter exclusively developed for this product, with <strong>the</strong><br />
specified power and voltage. Using an AC adapter not exclusive to this<br />
product, or using <strong>the</strong> exclusive AC adapter with an unspecified power or<br />
voltage can cause a fire, electric shock, or camera breakdown.<br />
• If any irregularities occur during use, such as smoke or a strange odor, stop<br />
use immediately, remove <strong>the</strong> batteries or <strong>the</strong> AC adapter, and contact your<br />
nearest PENTAX service center. Continued use could cause a fire or electric<br />
shock.<br />
• During thunderstorms, unplug and discontinue use of <strong>the</strong> AC adapter.<br />
Continued use could cause equipment failure, a fire, or electric shock.
2<br />
Caution<br />
• Do not short <strong>the</strong> batteries or dispose of <strong>the</strong> batteries in fire. Do not<br />
disassemble <strong>the</strong> batteries. The batteries could explode or catch fire.<br />
• Do not charge any batteries o<strong>the</strong>r than rechargeable Ni-MH batteries. The<br />
batteries could explode or catch fire. Of <strong>the</strong> batteries that can be used in this<br />
camera, only <strong>the</strong> Ni-MH batteries can be recharged.<br />
• Remove <strong>the</strong> batteries from <strong>the</strong> camera immediately if <strong>the</strong>y become hot or<br />
begin to smoke. Be careful not to burn yourself during removal.<br />
• Some portions of <strong>the</strong> camera heat up during use. There is <strong>the</strong> risk of low<br />
temperature burns when holding such portions for long periods.<br />
• Do not place your finger over or cover <strong>the</strong> flash with clothing when<br />
discharging <strong>the</strong> flash. Fingers or clothing may be burned.<br />
PRECAUTIONS FOR BATTERY USAGE<br />
• Only use specified batteries with this camera. Use of o<strong>the</strong>r batteries can<br />
cause a fire or explosion.<br />
• Replace <strong>the</strong> batteries at <strong>the</strong> same time. Do not mix battery brands, type or<br />
an old battery with a new one. It may cause explosion or a fire.<br />
• The batteries should be inserted correctly with regard to polarity (+ and –)<br />
marked on <strong>the</strong> batteries and <strong>the</strong> camera. Not inserting batteries correctly<br />
may cause explosion or a fire.<br />
• AA lithium batteries, AA alkaline batteries and disposable CR-V3 are not<br />
rechargeable. Do not disassemble <strong>the</strong> batteries. Recharging and<br />
disassembling can cause explosion or leakage.<br />
Care to be Taken During Handling<br />
• Take <strong>the</strong> Worldwide Service Network that is included in <strong>the</strong> package. This<br />
will be useful if you experience problems abroad.<br />
• When <strong>the</strong> camera has not been used for a long time, confirm that it is still<br />
working properly, particularly prior to taking important pictures (such as at a<br />
wedding or during traveling). Pictures cannot be guaranteed if recording,<br />
playback or transferring your data to a computer, etc. is not possible due to<br />
a malfunction of your camera or recording media (SD Memory Card), etc.<br />
• Do not clean <strong>the</strong> product with organic solvents such as thinner or alcohol<br />
benzene.<br />
• Do not subject to high temperatures or high humidity. Do not leave <strong>the</strong><br />
camera in a vehicle, as <strong>the</strong> temperature can get very high.
• Do not store <strong>the</strong> camera with preservatives and chemicals. Storage in high<br />
temperatures and high humidity can cause molding. Remove from case and<br />
store in a dry and well-ventilated location.<br />
• This camera is not waterproof, and should not be used in <strong>the</strong> rain or where<br />
<strong>the</strong> camera could get wet.<br />
• Do not subject <strong>the</strong> camera to strong vibrations, shocks, or pressure. Use a<br />
cushion to protect <strong>the</strong> camera from vibrations of motorcycles, automobiles,<br />
or ships.<br />
• The temperature range for camera use is 0°C to 40°C (32°F to 104°F).<br />
• The LCD display may appear black under high temperatures, but will return<br />
to normal as temperatures normalize.<br />
• The LCD display may respond more slowly at low temperatures. This is due<br />
to liquid crystal properties, and is not a fault.<br />
• Periodic inspections are recommended every one to two years to maintain<br />
high performance.<br />
• Sudden temperature changes will cause condensation on <strong>the</strong> inside and<br />
outside of <strong>the</strong> camera. Place <strong>the</strong> camera in your bag or a plastic bag,<br />
removing <strong>the</strong> camera after temperature of <strong>the</strong> camera and surroundings are<br />
equalized.<br />
• Avoid contact with garbage, mud, sand, dust, water, toxic gases, or salts.<br />
These could cause a camera breakdown. Wipe dry any rain or water drops<br />
on <strong>the</strong> camera.<br />
• Refer to “Precautions When Using <strong>the</strong> SD Memory Card” (p.30) regarding<br />
<strong>the</strong> SD Memory Card.<br />
• Use a lens brush to remove dust accumulated on <strong>the</strong> lens or viewfinder.<br />
Never use a spray blower for cleaning as it may damage <strong>the</strong> lens.<br />
• Please do not press forcefully on <strong>the</strong> LCD monitor. This could cause<br />
breakage or malfunction.<br />
3<br />
Regarding Product Registration<br />
In order to better service you, we request that you complete <strong>the</strong> product registration,<br />
which can be found on <strong>the</strong> CD-ROM supplied with <strong>the</strong> camera or <strong>the</strong> PENTAX<br />
website. Thank you for your cooperation.<br />
Refer to <strong>the</strong> PENTAX PHOTO Browser 2.1/PENTAX PHOTO Laboratory 2.1<br />
Operating Manual (Windows users: p.10, Mac OS users: p.12) for more information.
4<br />
Contents<br />
FOR SAFE USE OF YOUR CAMERA..................................................1<br />
ABOUT THE CAMERA.........................................................................1<br />
PRECAUTIONS FOR BATTERY USAGE ............................................2<br />
Care to be Taken During Handling .......................................................2<br />
Contents ...............................................................................................4<br />
Composition of <strong>the</strong> Operating Manual ..................................................9<br />
Before Using Your Camera 11<br />
F Camera Characteristics............................................ 12<br />
Checking <strong>the</strong> Contents of <strong>the</strong> Package...................................... 13<br />
Names of Working Parts ............................................................. 14<br />
Camera...............................................................................................14<br />
LCD Monitor Indications .....................................................................16<br />
Viewfinder Indications.........................................................................20<br />
LCD Panel Indications ........................................................................22<br />
Getting Started 23<br />
Attaching <strong>the</strong> Strap...................................................................... 24<br />
Inserting <strong>the</strong> Batteries ................................................................. 25<br />
Batteries..............................................................................................26<br />
Battery Level Indicator ........................................................................27<br />
Approximate Image Storage Capacity and Playback Time<br />
(new batteries)....................................................................................27<br />
Using <strong>the</strong> AC Adapter (Optional) ........................................................28<br />
Inserting/Removing <strong>the</strong> SD Memory Card ................................. 29<br />
Recorded Pixels and Quality Level.....................................................31<br />
Turning <strong>the</strong> Camera On and Off.................................................. 32<br />
Initial Settings .............................................................................. 33<br />
Setting <strong>the</strong> Display Language.............................................................33<br />
Setting <strong>the</strong> Date and Time..................................................................35<br />
Attaching <strong>the</strong> Lens....................................................................... 37<br />
Adjusting <strong>the</strong> Viewfinder Diopter ............................................... 39
Basic Operations 41<br />
5<br />
Basic Shooting Operation........................................................... 42<br />
Holding <strong>the</strong> Camera............................................................................42<br />
Letting <strong>the</strong> Camera Choose <strong>the</strong> Optimal Settings ..............................43<br />
Selecting <strong>the</strong> Appropriate Capturing Mode for Scenes............ 47<br />
Selecting <strong>the</strong> Shooting Scene.............................................................48<br />
Using <strong>the</strong> Zoom Lens .................................................................. 50<br />
Using <strong>the</strong> Built-in Flash............................................................... 51<br />
O<strong>the</strong>r Shooting Modes................................................................. 55<br />
Continuous Shooting ..........................................................................55<br />
Self-Timer Shooting............................................................................57<br />
Remote Control Shooting (Remote Control F: Sold Separately) ........61<br />
Using Mirror Lock Up Function to Prevent Camera Shake.................64<br />
Playing Back Still Pictures.......................................................... 65<br />
Playing Back Images ..........................................................................65<br />
Enlarging Playback Images ................................................................67<br />
Nine-Image Display ............................................................................68<br />
Slideshow ...........................................................................................70<br />
Connecting <strong>the</strong> Camera to AV Equipment................................. 72<br />
Processing Images with Filters .................................................. 73<br />
Deleting Images ........................................................................... 75<br />
Deleting a Single Image......................................................................75<br />
Deleting All Images.............................................................................76<br />
Deleting Selected Images (from Nine-Image Display)........................77<br />
Protecting Images from Deletion (Protect)..........................................79<br />
Setting <strong>the</strong> Printing Service (DPOF)........................................... 81<br />
Printing Single Images........................................................................81<br />
Settings for All Images........................................................................82<br />
Printing Using PictBridge............................................................ 84<br />
Setting [Transfer Mode] ......................................................................85<br />
Connecting <strong>the</strong> Camera to <strong>the</strong> Printer ................................................86<br />
Printing Single Images........................................................................87<br />
Printing All Images..............................................................................89<br />
Printing Images Using <strong>the</strong> DPOF Settings..........................................91<br />
Disconnecting <strong>the</strong> Cable from <strong>the</strong> Printer ...........................................91
6<br />
Menu Reference 93<br />
Using <strong>the</strong> Button Functions........................................................ 94<br />
Capture Mode.....................................................................................94<br />
Playback Mode ...................................................................................96<br />
Using <strong>the</strong> Menu ............................................................................ 98<br />
How to Operate <strong>the</strong> Menu...................................................................98<br />
[A Rec. Mode] Menu Setting Items .................................................100<br />
[Q Playback] Menu Setting Items...................................................100<br />
[H Set-up] Menu Setting Items ........................................................101<br />
[A Custom Setting] menu Setting Items...........................................102<br />
Using <strong>the</strong> Fn Menu..................................................................... 104<br />
Capture Mode...................................................................................104<br />
Playback Mode .................................................................................105<br />
Using <strong>the</strong> Mode Dial................................................................... 106<br />
Function Reference 109<br />
Setting <strong>the</strong> Recorded Pixels and Quality Level....................... 110<br />
Setting <strong>the</strong> Image Tone ....................................................................110<br />
Setting <strong>the</strong> Recorded Pixels .............................................................111<br />
Setting <strong>the</strong> Quality Level...................................................................112<br />
Setting <strong>the</strong> Saturation/Sharpness/Contrast ......................................113<br />
Setting <strong>the</strong> White Balance ................................................................114<br />
Setting <strong>the</strong> Sensitivity .......................................................................117<br />
Setting <strong>the</strong> Color Space....................................................................119<br />
Focusing ..................................................................................... 120<br />
Using <strong>the</strong> Autofocus..........................................................................120<br />
Setting <strong>the</strong> Focusing Area ................................................................123<br />
Setting <strong>the</strong> AF Mode.........................................................................124<br />
Fixing <strong>the</strong> Focus (Focus Lock)..........................................................125<br />
Adjusting <strong>the</strong> Focus Manually (Manual Focus).................................127<br />
Setting <strong>the</strong> Exposure ................................................................. 129<br />
Effect of Aperture and Shutter Speed...............................................129<br />
Selecting <strong>the</strong> Metering Method.........................................................131<br />
Changing <strong>the</strong> Exposure Mode ..........................................................133<br />
Setting <strong>the</strong> Exposure ........................................................................142<br />
Changing <strong>the</strong> Exposure and Shooting<br />
(Auto Bracket)...................................................................................144
Checking <strong>the</strong> Composition, Exposure and Focus Before<br />
Shooting ..................................................................................... 147<br />
Displaying <strong>the</strong> Preview .....................................................................147<br />
Selecting <strong>the</strong> Preview Method ..........................................................148<br />
Using <strong>the</strong> Built-in Flash............................................................. 149<br />
Compensating Flash Output.............................................................149<br />
Allowing Shooting while Charging Flash...........................................150<br />
Flash Characteristics in Each Exposure Mode.................................150<br />
Distance and Aperture when Using <strong>the</strong> Built-in Flash ......................151<br />
DA, D FA , FA J, FA and F Lens Compatibility<br />
with <strong>the</strong> Built-in Flash........................................................................153<br />
Using an External Flash (Optional)...................................................155<br />
Settings During Playback.......................................................... 162<br />
Changing Playback Display Method ................................................162<br />
Setting <strong>the</strong> Slideshow Display Interval..............................................163<br />
Camera Settings......................................................................... 164<br />
Formatting <strong>the</strong> SD Memory Card......................................................164<br />
Turning <strong>the</strong> Beep On and Off............................................................165<br />
Changing <strong>the</strong> Date and Time and <strong>the</strong> Display Style .........................165<br />
Setting <strong>the</strong> World Time .....................................................................166<br />
Setting <strong>the</strong> Display Language...........................................................169<br />
Turning <strong>the</strong> Guide Display On and Off..............................................169<br />
Adjusting <strong>the</strong> Brightness of <strong>the</strong> LCD Monitor....................................170<br />
Selecting <strong>the</strong> Video Output Format...................................................170<br />
Setting Auto Power Off .....................................................................171<br />
Selecting <strong>the</strong> Folder Name ...............................................................171<br />
Resetting <strong>the</strong> File Number ................................................................172<br />
Setting <strong>the</strong> Display Instant Review and Digital Preview ...................172<br />
Resetting to Default Settings.................................................... 174<br />
Resetting Rec. Mode/Playback/Set-up Menu ...................................174<br />
Resetting <strong>the</strong> Custom Function Menu ..............................................175<br />
7
8<br />
Appendix 177<br />
Default Settings.......................................................................... 178<br />
Functions Available with Various Lens Combinations .......... 182<br />
Notes on [Using Aperture Ring] ............................................... 184<br />
Cleaning <strong>the</strong> CCD....................................................................... 185<br />
Optional Accessories ................................................................ 187<br />
Error Messages .......................................................................... 190<br />
Troubleshooting......................................................................... 192<br />
Main Specifications ................................................................... 194<br />
Specifications for Remote Control F (Optional) ................................196<br />
Glossary...................................................................................... 197<br />
Index............................................................................................ 202<br />
WARRANTY POLICY.................................................................. 206
Composition of <strong>the</strong> Operating Manual<br />
9<br />
This operating manual contains <strong>the</strong> following chapters.<br />
1 Before Using Your Camera<br />
Explains camera characteristics, accessories and <strong>the</strong> names of various<br />
parts.<br />
2 Getting Started<br />
Explains your first steps from purchasing <strong>the</strong> camera to taking pictures. Be<br />
sure to read it and follow <strong>the</strong> instructions.<br />
3 Basic Operations<br />
Explains <strong>the</strong> procedures for taking, playing back, and printing still pictures.<br />
Read it to learn all of <strong>the</strong> basic operations about capturing, playing back,<br />
and printing.<br />
4 Menu Reference<br />
Explains <strong>the</strong> functions of F by buttons and menus.<br />
1<br />
2<br />
3<br />
4<br />
5<br />
6<br />
5 Function Reference<br />
Introduces functions to fur<strong>the</strong>r enhance your F experience.<br />
6 Appendix<br />
Explains troubleshooting, introduces optional accessories and provides<br />
various resources.<br />
The symbols used in this operating manual are explained below.<br />
1<br />
Shows reference page number explaining a related operation.<br />
Shows useful information.<br />
Shows precautions to take when operating <strong>the</strong> camera.
10<br />
Memo
1 Before Using Your<br />
Camera<br />
Check <strong>the</strong> package contents and names of working parts<br />
before use.<br />
F Camera Characteristics ....................12<br />
Checking <strong>the</strong> Contents of <strong>the</strong> Package ..............13<br />
Names of Working Parts ......................................14
12<br />
F Camera Characteristics<br />
1<br />
Before Using Your Camera<br />
• Features a 23.5×15.7 mm CCD with 6.1 million effective pixels for high<br />
precision and a wide dynamic range.<br />
• Uses CR-V3, AA lithium batteries, rechargeable AA Ni-MH batteries or<br />
AA alkaline batteries.<br />
• Features a large 2.5-inch LCD monitor with 210,000 pixels and a<br />
brightness adjusting function for high-precision viewing performance.<br />
• Features a Digital Preview function for checking <strong>the</strong> image to ensure that<br />
<strong>the</strong> desired result is achieved.<br />
• A user-friendly design has been implemented in various parts of <strong>the</strong><br />
camera. The large, high-resolution LCD monitor and easy-to-use menus<br />
make <strong>the</strong> camera easier to operate.<br />
The captured area (view angle) will differ between <strong>the</strong> F and 35 mm<br />
SLR cameras even if <strong>the</strong> same lens is used because <strong>the</strong> format size for 35 mm<br />
film and CCD are different.<br />
Sizes for 35 mm film and CCD<br />
35 mm film : 36×24 mm<br />
F CCD : 23.5×15.7 mm<br />
Angles of view being equal, <strong>the</strong> focal length of a lens used with a 35 mm camera<br />
must be approximately 1.5 times longer than that of F. To obtain a<br />
focal length framing <strong>the</strong> same area, divide <strong>the</strong> focal length of <strong>the</strong> 35 mm lens by<br />
1.5.<br />
Example) To capture <strong>the</strong> same image as a 150 mm lens attached to a 35 mm<br />
camera<br />
150÷1.5=100<br />
Use a 100 mm lens with <strong>the</strong> F.<br />
Inversely, multiply <strong>the</strong> focal length of <strong>the</strong> lens used with F by 1.5 to<br />
determine <strong>the</strong> focal length for 35 mm cameras.<br />
Example) If 300 mm lens is used with F<br />
300×1.5=450<br />
Focal length is equivalent to 450 mm lens on a 35 mm camera.
Checking <strong>the</strong> Contents of <strong>the</strong> Package<br />
13<br />
The following accessories are packaged with your camera.<br />
Check that all accessories are included.<br />
1<br />
Hot shoe cover FK<br />
(Installed on camera)<br />
Eyecup FN<br />
(Installed on camera)<br />
ME Viewfinder cap<br />
Before Using Your Camera<br />
Body mount cover<br />
(Installed on camera)<br />
USB cable<br />
I-USB17<br />
Video cable<br />
I-VC28<br />
Software (CD-ROM)<br />
S-SW43<br />
Strap<br />
O-ST10<br />
AA Alkaline batteries*<br />
(four)<br />
Operating Manual<br />
(this manual)<br />
PENTAX PHOTO Browser 2.1/<br />
PENTAX PHOTO Laboratory 2.1<br />
Operating Manual<br />
* The batteries packaged with <strong>the</strong> camera are for checking <strong>the</strong> camera's<br />
functionality.
14<br />
Names of Working Parts<br />
1<br />
Camera<br />
Before Using Your Camera<br />
Lens mount index<br />
Shutter release<br />
button<br />
Main switch<br />
Self-Timer lamp/<br />
Remote control receiver<br />
Mirror<br />
AF coupler<br />
Focus<br />
mode lever<br />
Lens unlock button<br />
Lens information<br />
contacts<br />
3 button<br />
i button<br />
M button<br />
Q button<br />
e-dial<br />
L/Z<br />
button<br />
Four-way<br />
controller<br />
4 button<br />
{ button<br />
Battery cover<br />
Tripod socket
15<br />
K button<br />
Mode dial<br />
Strap lug<br />
Cable switch<br />
terminal<br />
USB/Video terminal<br />
DC input terminal<br />
Terminal cover<br />
LCD monitor<br />
Built-in flash<br />
Hot shoe<br />
mc button<br />
LCD panel<br />
Diopter<br />
adjustment lever<br />
Card cover<br />
Card cover<br />
unlock lever<br />
Card access<br />
lamp<br />
Viewfinder<br />
1<br />
Before Using Your Camera
16<br />
1<br />
LCD Monitor Indications<br />
The following indicators appear on <strong>the</strong><br />
LCD monitor depending on <strong>the</strong> status of<br />
<strong>the</strong> camera.<br />
Before Using Your Camera<br />
LCD monitor<br />
While Power is On or Operating Mode Dial<br />
Guides appear on <strong>the</strong> LCD monitor for 3 seconds when powered on or<br />
setting dial mode.<br />
Select Off for [Guide display] in [H Set-up] to not show indicators. (p.101)<br />
8<br />
1<br />
9<br />
2 3 4 5 6 7<br />
AF-S<br />
Night Scene<br />
01 /<br />
25 /<br />
2006<br />
14 :<br />
25<br />
10<br />
1600<br />
1 Flash mode<br />
(Active mode appears) (p.51)<br />
2 Drive mode (p.104)<br />
3* AE metering (p.131)<br />
4 AF mode (p.124)<br />
5* Focusing area (p.123)<br />
6* White balance (p.114)<br />
7* Sensitivity (p.117)<br />
8 Shooting mode, Scene mode<br />
(p.106)<br />
9* World time warning display (p.166)<br />
10 Date and time (p.165)<br />
* Indicators 3, 5, 6 and 7 only appear<br />
when <strong>the</strong> setting o<strong>the</strong>r than <strong>the</strong><br />
default setting is selected. 9 only<br />
appears when World Time is On.
Capture Mode<br />
17<br />
<strong>Press</strong> <strong>the</strong> M button in Capture mode to display <strong>the</strong> capture function<br />
settings on <strong>the</strong> LCD monitor for 15 seconds.<br />
Detailed Information<br />
Detailed Info<br />
AF-S<br />
ISO 800<br />
sRGB<br />
40mm<br />
01 /<br />
25 /<br />
2006<br />
14 : 25<br />
Detailed Info<br />
4 5<br />
8<br />
11<br />
1 AF mode (p.124) 11 Color space (p.119)<br />
2 Mode dial position (p.106) 12 White balance (p.114)<br />
3 AE metering (p.131) 13 Date and time (p.165)<br />
4 Flash mode (p.51) 14 Focusing area (p.123)<br />
5 Drive mode (p.104) 15 Saturation (p.113)<br />
6 Auto bracket (p.146) 16 Sharpness (p.113)<br />
7 ISO sensitivity (p.117) 17 Contrast (p.113)<br />
8 Image tone (p.110) 18 Lens focal length<br />
9 Quality level (p.112) 19* Scene mode (p.47)<br />
10 Recorded pixels (p.111)<br />
19<br />
2 3<br />
7<br />
9 10<br />
12<br />
6<br />
13<br />
1<br />
14<br />
15<br />
16<br />
17<br />
18<br />
1<br />
Before Using Your Camera<br />
* Only displayed in Scene mode.<br />
<strong>Press</strong> <strong>the</strong> four-way controller (5) to view explanation of set Shooting mode.<br />
Explanation of Set Shooting Mode<br />
Detailed Info<br />
Night Scene<br />
Used for night scenes.<br />
Use a tripod, etc. to<br />
prevent shaking.
18<br />
Playback Mode<br />
The camera switches screen displays every time you press <strong>the</strong> M<br />
button during playback.<br />
1<br />
Before Using Your Camera<br />
You can change <strong>the</strong> information initially displayed by pressing <strong>the</strong> Q button.<br />
(p.162)<br />
Detailed Information<br />
1/ 2000 F2 .<br />
8<br />
AF-S<br />
+<br />
1 .<br />
5<br />
EV<br />
100-0001<br />
ISO 800<br />
sRGB<br />
40mm<br />
01 /<br />
25 /<br />
2006<br />
14 : 25<br />
1<br />
2<br />
26<br />
5<br />
7 8 9<br />
11 12 13 14 15<br />
17 18<br />
20 21 22<br />
24<br />
25<br />
3<br />
4<br />
6<br />
10<br />
16<br />
19<br />
23<br />
1 Captured image 14 Drive mode (p.104)<br />
2 Rotate icon (p.66) 15 Auto bracket (p.146)<br />
3 Image folder number and file 16 Sharpness (p.113)<br />
number (p.171, 172)<br />
17 ISO sensitivity (p.117)<br />
4 Protect icon (p.79) 18 Image tone (p.110)<br />
5 AF mode (p.124) 19 Contrast (p.113)<br />
6 Focusing area (p.123) 20 Quality level (p.112)<br />
7 Shutter speed (p.135) 21 Recorded pixels (p.111)<br />
8 Aperture (p.137) 22 Color space (p.119)<br />
9 EV compensation (p.142) 23 Lens focal length<br />
10 Saturation (p.113) 24 White balance (p.114)<br />
11 Mode dial position (p.106) 25 Captured date and time (p.165)<br />
12 AE metering (p.131) 26* Scene mode (p.47)<br />
13 Flash mode (p.51)<br />
* Only displayed in Scene mode.
Histogram Display<br />
19<br />
1 2<br />
100-0046<br />
3<br />
1<br />
1 Capture quality (Image file type)<br />
2 Image folder number and file number (p.171, p.172)<br />
3 Protect icon (p.79)<br />
4 Histogram (p.162)<br />
4<br />
Before Using Your Camera<br />
• Areas where blooming occurred blink if [Bright Portion] warning is set to On<br />
in [Plybk dsply mthd] in <strong>the</strong> [Q Playback] menu. (p.162)<br />
• <strong>Press</strong> <strong>the</strong> four-way controller (23) in <strong>the</strong> histogram display to move <strong>the</strong><br />
histogram display position up or down.
20<br />
Viewfinder Indications<br />
2<br />
1<br />
Before Using Your Camera<br />
3 4 5<br />
1<br />
1<br />
6 7 8 9 10 11<br />
12 13 14<br />
1 AF frame (p.39)<br />
2 Spot metering frame (p.131)<br />
3 Flash status (p.51)<br />
Appears when flash is available and blinks when flash is recommended but<br />
not set.<br />
4 ISO sensitivity warning (p.118)<br />
Appears when warning value is exceeded.<br />
5 Continuous mode (p.124)<br />
Appears when [AF Mode] in <strong>the</strong> [A Rec. Mode] is set to k (Continuous<br />
mode).<br />
6 Picture mode icon (p.47)<br />
Icon for Picture mode in use appears.<br />
\ (Moving Object), q (Macro), = (Portrait), U (Normal mode in I),<br />
. (Night Scene Portrait), s (Landscape)<br />
7 Focus indicator (p.44)<br />
Appears when image is focused.<br />
8 Shutter speed (p.135)<br />
Shutter speed when capturing or adjusting (underlined when shutter speed<br />
can be adjusted with e-dial).<br />
9 Aperture (p.137)<br />
Aperture when capturing or adjusting (underlined when aperture can be<br />
adjusted with e-dial).
10 EV compensation (p.142)<br />
Appears when EV compensation is available or in use.<br />
Blinks slowly when compensating flash output.<br />
Blinks quickly when compensating exposure and flash output.<br />
Adjusted value appears where number of recordable images is shown.<br />
11 Number of recordable images/EV compensation<br />
Show <strong>the</strong> number of recordable images with current quality and recorded<br />
pixel setting.<br />
Show <strong>the</strong> number of continuous shooting recordable images. (p.102)<br />
EV compensation value appears when EV compensation is being adjusted.<br />
(p.134)<br />
The difference with <strong>the</strong> appropriate exposure value appears if exposure<br />
mode is a. (p.139)<br />
12 Manual focus (p.127)<br />
Appears when focus mode is \.<br />
13 Scene mode icon (p.47)<br />
Appears when taking pictures in Scene mode.<br />
14 AE lock indicator (p.143)<br />
Appears during AE lock.<br />
21<br />
1<br />
Before Using Your Camera
22<br />
LCD Panel Indications<br />
The following information appears in <strong>the</strong> LCD panel on top of <strong>the</strong> camera.<br />
1<br />
Before Using Your Camera<br />
1<br />
7<br />
2<br />
3<br />
4<br />
8<br />
9<br />
5 610<br />
11<br />
1 Shutter speed (p.135) 5 Focusing area (p.123)<br />
2 Aperture (p.137) No indicator: Wide<br />
3 Flash mode (p.51) M : Spot<br />
b<br />
: Built-in flash is ready<br />
(when blinking, flash should<br />
be used or incompatible<br />
lens is being used)<br />
6 AE metering (p.131)<br />
No indicator: Multi-segment<br />
metering<br />
a :Flash off M : Center-weighted<br />
metering<br />
E : Auto discharge N : Spot metering<br />
> : Red-eye reduction flash on 7 Auto bracketing (p.146)<br />
4 Drive mode (p.104) 8 White balance (p.114)<br />
9 : Single frame shooting<br />
(Not displayed when set to Auto)<br />
j : Continuous shooting 9 Battery level<br />
g : Self-Timer shooting 10 EV compensation (p.142)<br />
h : Remote control shooting 11 Number of recordable images/<br />
EV compensation value/PC (Pb)<br />
(PC=Personal Computer (mass<br />
storage), Pb=PictBridge)
2 Getting Started<br />
This chapter explains your first steps from purchasing <strong>the</strong><br />
camera to taking pictures. Be sure to read it and follow <strong>the</strong><br />
instructions.<br />
Attaching <strong>the</strong> Strap ..............................................24<br />
Inserting <strong>the</strong> Batteries .........................................25<br />
Inserting/Removing <strong>the</strong> SD Memory Card .........29<br />
Turning <strong>the</strong> Camera On and Off ..........................32<br />
Initial Settings .......................................................33<br />
Attaching <strong>the</strong> Lens ...............................................37<br />
Adjusting <strong>the</strong> Viewfinder Diopter ........................39
24<br />
Attaching <strong>the</strong> Strap<br />
2<br />
1 Pass <strong>the</strong> end of <strong>the</strong> strap<br />
through <strong>the</strong> strap lug, <strong>the</strong>n<br />
secure on <strong>the</strong> inside of <strong>the</strong><br />
clasp.<br />
Getting Started<br />
2 Pass <strong>the</strong> o<strong>the</strong>r end of <strong>the</strong> strap<br />
through <strong>the</strong> o<strong>the</strong>r strap lug on<br />
<strong>the</strong> camera, <strong>the</strong>n secure on <strong>the</strong><br />
inside of <strong>the</strong> clasp.
Inserting <strong>the</strong> Batteries<br />
25<br />
Insert batteries into <strong>the</strong> camera. Use two CR-V3 or four AA Ni-MH<br />
batteries, AA lithium batteries, or AA alkaline batteries.<br />
This camera is packaged with AA alkaline batteries for checking <strong>the</strong> camera’s<br />
functionality but some o<strong>the</strong>r kinds of batteries are also compatible. Refer to<br />
“Batteries” (p.26) for details on compatible batteries and when to use <strong>the</strong>m.<br />
2<br />
• CR-V3, AA lithium batteries and AA alkaline batteries are not rechargeable.<br />
• Do not open <strong>the</strong> battery cover or remove <strong>the</strong> batteries while <strong>the</strong> power is on.<br />
• Remove <strong>the</strong> batteries when you will not use <strong>the</strong> camera for a long while. The<br />
batteries may leak.<br />
• If <strong>the</strong> date and time settings have been reset when you insert new batteries<br />
after a long while, follow <strong>the</strong> procedure for “Setting <strong>the</strong> Date and Time”. (p.35)<br />
• Insert batteries correctly. Batteries inserted incorrectly may cause a camera<br />
breakdown. Wipe <strong>the</strong> electrodes of <strong>the</strong> batteries before inserting.<br />
• Replace all <strong>the</strong> batteries at <strong>the</strong> same time. Do not mix battery type, brands or<br />
an old battery with a new one.<br />
Getting Started<br />
1 Push and hold <strong>the</strong> battery<br />
cover unlock lever as shown in<br />
<strong>the</strong> illustration ( 1 ), and slide<br />
<strong>the</strong> battery cover toward <strong>the</strong><br />
lens ( 2 ), and <strong>the</strong>n flip open.<br />
1<br />
2<br />
2 Insert <strong>the</strong> batteries according<br />
to <strong>the</strong> +/– indicators in <strong>the</strong><br />
battery chamber.
26<br />
3 <strong>Press</strong> down on <strong>the</strong> batteries<br />
with <strong>the</strong> battery cover ( 1 ) and<br />
slide it as shown in <strong>the</strong><br />
illustration ( 2 ) to close.<br />
1<br />
2<br />
2<br />
Getting Started<br />
• Use <strong>the</strong> AC adapter (optional) when using <strong>the</strong> camera for a prolonged period.<br />
(p.28)<br />
• Check <strong>the</strong> battery orientation if <strong>the</strong> camera does not operate properly after<br />
replacing <strong>the</strong> batteries.<br />
Batteries<br />
You can use four kinds of batteries with your camera. Battery performance<br />
differs by type. Please choose <strong>the</strong> type that best suits your purpose.<br />
CR-V3<br />
AA Ni-MH<br />
rechargeable<br />
batteries<br />
AA lithium batteries<br />
AA alkaline batteries<br />
The CR-V3 is a long-life battery and is convenient when<br />
traveling.<br />
These are rechargeable and are economical.<br />
A commercially available battery charger that is<br />
compatible with <strong>the</strong> batteries is required.<br />
Recommended in cold climates.<br />
Provided with <strong>the</strong> camera. These are easily obtainable<br />
when your usual batteries run out but <strong>the</strong>y may not support<br />
all <strong>the</strong> camera functions under certain conditions. We do<br />
not recommend <strong>the</strong>ir use except in emergencies and<br />
checking <strong>the</strong> camera's functionality.<br />
Oxyride batteries and rechargeable CR-V3 batteries may cause malfunctions<br />
due to <strong>the</strong>ir voltage characteristics so <strong>the</strong>ir use is not recommended.
Battery Level Indicator<br />
27<br />
You can confirm remaining battery level by checking <strong>the</strong> { displayed on<br />
<strong>the</strong> LCD panel.<br />
{ lit : Battery is full.<br />
<br />
} lit : Battery is running low.<br />
<br />
? lit : Battery is almost empty.<br />
<br />
? blink : The camera turns off after displaying a message.<br />
Approximate Image Storage Capacity and<br />
Playback Time (new batteries)<br />
2<br />
Getting Started<br />
Batteries<br />
CR-V3<br />
AA lithium<br />
batteries<br />
Normal Flash photography Playback<br />
recording 50% use 100% use time<br />
(23°C) 850 750 650 700 minutes<br />
( 0°C) 560 500 410 470 minutes<br />
(23°C) 750 650 550 470 minutes<br />
( 0°C) 670 570 470 400 minutes<br />
(Temperature)<br />
AA rechargeable (23°C) 560 500 440 350 minutes<br />
batteries<br />
(NiMH 2500mAh) ( 0°C) 500 440 380 300 minutes<br />
(23°C) 90 70 50 140 minutes<br />
AA Alkaline<br />
Batteries<br />
Not Not Not<br />
(0°C)<br />
70 minutes<br />
applicable applicable applicable<br />
The still picture storage capacity is based on measuring conditions in accordance<br />
with CIPA standards and <strong>the</strong> playback time is based on PENTAX measuring<br />
conditions. Some deviation from <strong>the</strong> above figures may occur in actual use<br />
depending on shooting mode and shooting conditions.<br />
• Battery performance temporarily decreases as <strong>the</strong> temperature decreases.<br />
When using <strong>the</strong> camera in cold climates, have extra batteries on hand and<br />
keep <strong>the</strong>m warm in your pocket. Battery performance will return to normal<br />
when returned to room temperature.<br />
• AA alkaline batteries may not support all <strong>the</strong> camera functions. We do not<br />
recommend <strong>the</strong>ir use except in emergencies and checking <strong>the</strong> camera's<br />
functionality.<br />
• Have extra batteries ready when traveling overseas, taking pictures in cold<br />
climates, or when you will be taking a lot of pictures.
28<br />
Using <strong>the</strong> AC Adapter (Optional)<br />
2<br />
2<br />
1<br />
4<br />
Getting Started<br />
3<br />
We recommend using <strong>the</strong> AC adapter D-AC10 (optional) when using <strong>the</strong><br />
LCD monitor for a long time or when connecting to your PC.<br />
1 Make sure <strong>the</strong> camera is turned off before opening <strong>the</strong><br />
terminal cover.<br />
2 Connect <strong>the</strong> DC terminal on <strong>the</strong> AC adapter to <strong>the</strong> DC input<br />
terminal on <strong>the</strong> camera.<br />
3 Connect <strong>the</strong> AC plug cord to <strong>the</strong> AC adapter.<br />
4 Plug <strong>the</strong> AC cord into <strong>the</strong> power outlet.<br />
• Make sure <strong>the</strong> camera is turned off before connecting or disconnecting <strong>the</strong><br />
AC adapter.<br />
• Make sure connections are secure between <strong>the</strong> camera, AC adapter, AC<br />
plug cord terminal and <strong>the</strong> power outlet. SD Memory Card and data will be<br />
corrupted if disconnected while camera is recording or reading data.<br />
• Be sure to read <strong>the</strong> AC adapter D-AC10 operating manual when using <strong>the</strong><br />
AC adapter.<br />
• The rechargeable batteries in your camera will not charge when connected<br />
to <strong>the</strong> AC adapter.
Inserting/Removing <strong>the</strong> SD Memory<br />
Card<br />
29<br />
Captured images are recorded on <strong>the</strong> SD Memory Card. Make sure <strong>the</strong><br />
camera is turned off before inserting or removing <strong>the</strong> SD Memory Card<br />
(market product).<br />
• Do not remove <strong>the</strong> SD Memory Card while card access lamp is lit.<br />
• Format new SD Memory Card. Also format SD Memory Card used with o<strong>the</strong>r<br />
cameras. Refer to “Formatting <strong>the</strong> SD Memory Card” (p.164) for details on<br />
formatting.<br />
2<br />
1 <strong>Press</strong> <strong>the</strong> card cover unlock<br />
lever in <strong>the</strong> indicated direction.<br />
Card cover opens.<br />
Getting Started<br />
2 Insert <strong>the</strong> card all <strong>the</strong> way with<br />
<strong>the</strong> SD Memory Card label<br />
toward <strong>the</strong> LCD monitor.<br />
3 Close <strong>the</strong> card cover.<br />
Push <strong>the</strong> SD Memory Card in once to<br />
remove.
30<br />
2<br />
Getting Started<br />
Precautions When Using <strong>the</strong> SD Memory Card<br />
• The SD Memory Card is equipped with a<br />
write-protect switch. Setting <strong>the</strong> switch to<br />
LOCK protects <strong>the</strong> existing data by<br />
prohibiting recording of new data, deletion<br />
of existing data or formatting of <strong>the</strong> card.<br />
Write-protect<br />
switch<br />
• Care should be taken when removing <strong>the</strong> SD Memory Card immediately after<br />
using <strong>the</strong> camera because <strong>the</strong> card may be hot.<br />
• Do not remove <strong>the</strong> SD Memory Card or turn <strong>the</strong> camera off while data is being<br />
saved to <strong>the</strong> card, images are being played back, or <strong>the</strong> camera is connected<br />
to a computer with <strong>the</strong> USB cable. This may cause <strong>the</strong> data to be lost or <strong>the</strong><br />
card to be damaged.<br />
• Do not bend <strong>the</strong> SD Memory Card or subject it to violent impact. Keep it away<br />
from water and store away from high temperatures.<br />
• Do not remove <strong>the</strong> SD Memory Card during formatting. The card may be<br />
damaged beyond use.<br />
• Data on <strong>the</strong> SD Memory Card may be deleted in <strong>the</strong> following circumstances.<br />
PENTAX does not accept any liability for data that is deleted if<br />
(1) <strong>the</strong> SD Memory Card is mishandled by <strong>the</strong> user.<br />
(2) <strong>the</strong> SD Memory Card is exposed to static electricity or electrical<br />
interference.<br />
(3) <strong>the</strong> card has not been used for a long time.<br />
(4) <strong>the</strong> card is ejected or <strong>the</strong> battery is removed while <strong>the</strong> data on <strong>the</strong> card is<br />
being recorded or accessed.<br />
• The SD Memory Card has a limited service life. If it is not used for a long time,<br />
<strong>the</strong> data on <strong>the</strong> card may become unreadable. Be sure to regularly make a<br />
backup of important data on a computer.<br />
• Avoid using or storing <strong>the</strong> card where it may be exposed to static electricity or<br />
electrical interference.<br />
• Avoid using or storing <strong>the</strong> card in direct sunlight or where it may be exposed to<br />
rapid changes in temperature or to condensation.<br />
• For information on compatible SD Memory Card, visit <strong>the</strong> PENTAX website or<br />
contact your nearest PENTAX customer service center.<br />
• Format new SD Memory Cards. Also format SD Memory Card used with o<strong>the</strong>r<br />
cameras. 1Formatting <strong>the</strong> SD Memory Card (p.164)<br />
• If you are going to discard, give away or sell your SD memory card you should<br />
ensure that <strong>the</strong> data on <strong>the</strong> card is completely deleted or <strong>the</strong> card itself is<br />
destroyed if it contains any personal or sensitive information. Please note that<br />
formatting <strong>the</strong> SD card will not necessarily delete <strong>the</strong> data so that it cannot be<br />
recovered using off <strong>the</strong> shelf data recovery software. There are off <strong>the</strong> shelf<br />
secure data deletion software programs available that will completely delete<br />
<strong>the</strong> data. In any case <strong>the</strong> data on your SD memory card should be managed at<br />
your own risk.
Recorded Pixels and Quality Level<br />
Choose <strong>the</strong> number of pixels (size) and quality level (data compression<br />
rate) of pictures according to how you intend to use <strong>the</strong> pictures you have<br />
taken.<br />
Pictures with larger recorded size or <strong>the</strong> more E are clearer when printed.<br />
The number of pictures that can be taken (<strong>the</strong> number of pictures that can<br />
be recorded on an SD Memory Card) becomes less with larger file sizes.<br />
The quality of <strong>the</strong> captured photo or printed picture depends on <strong>the</strong> quality<br />
level, exposure control, resolution of <strong>the</strong> printer and a variety of o<strong>the</strong>r<br />
factors so you do not need to select more than <strong>the</strong> required number of<br />
pixels. For example, to print in postcard size, R (1536×1024) is<br />
adequate. Set <strong>the</strong> appropriate recorded size and quality level depending<br />
on purpose.<br />
31<br />
2<br />
Getting Started<br />
Choose <strong>the</strong> appropriate number of recorded pixels and quality level for<br />
images on <strong>the</strong> [A Rec. Mode] menu.<br />
1 Setting <strong>the</strong> Recorded Pixels (p.111)<br />
1 Setting <strong>the</strong> Quality Level (p.112)<br />
Recorded Pixels, Quality Level and Approximate Image Storage<br />
Capacity<br />
Quality Level<br />
Recorded Pixels<br />
| C Best<br />
D<br />
Better<br />
E<br />
Good<br />
P<br />
(3008×2008) 11 — — —<br />
(3008×2000) — 34 70 117<br />
Q (2400×1600) — 51 96 161<br />
R (1536×1024) — 106 173 271<br />
• The above table shows <strong>the</strong> approximate image storage capacity and recording<br />
time when using a 128 MB SD Memory Card.<br />
• The above figures may vary depending on <strong>the</strong> subject, shooting conditions,<br />
shooting mode and SD Memory Card, etc.
32<br />
Turning <strong>the</strong> Camera On and Off<br />
1 Move <strong>the</strong> main switch to [ON]<br />
position.<br />
2<br />
Getting Started<br />
The camera will turn on.<br />
Move <strong>the</strong> main switch to [OFF] position<br />
to turn off <strong>the</strong> camera.<br />
• Always turn <strong>the</strong> camera off when not in use.<br />
• The power will automatically turn off when you do not perform any operations<br />
within a set period of time. (Default setting is 1 minute) (p.171)
Initial Settings<br />
33<br />
The first time <strong>the</strong> camera is turned on after purchasing, <strong>the</strong> Initial Settings<br />
screen appears on <strong>the</strong> LCD monitor. Follow <strong>the</strong> procedure below to set <strong>the</strong><br />
language displayed on <strong>the</strong> LCD monitor and <strong>the</strong> current date and time.<br />
Once setting is done, <strong>the</strong>se will not need to be set again when turning your<br />
camera on.<br />
2<br />
Setting <strong>the</strong> Display Language<br />
You can choose <strong>the</strong> language in which <strong>the</strong> menus, error messages, etc.<br />
are displayed from <strong>the</strong> following: English, French, German, Spanish,<br />
Italian, Swedish, Dutch, Russian, Korean, Chinese (traditional/simplified)<br />
and Japanese.<br />
Getting Started<br />
1 <strong>Press</strong> <strong>the</strong> four-way controller<br />
(5).<br />
Initial Settings<br />
English<br />
DST<br />
New York<br />
Cancel<br />
OK OK<br />
2 Use <strong>the</strong> four-way controller<br />
(2345) to select your<br />
applicable language.<br />
The default setting is English.<br />
English<br />
Français<br />
Deutsch<br />
Español<br />
Italiano<br />
Svenska<br />
Nederlands<br />
OK OK<br />
3 <strong>Press</strong> <strong>the</strong> 4 button.
34<br />
4 <strong>Press</strong> <strong>the</strong> four-way controller (3).<br />
The cursor moves to [W].<br />
5 <strong>Press</strong> <strong>the</strong> four-way controller (45) to select <strong>the</strong> city.<br />
2<br />
Getting Started<br />
6 <strong>Press</strong> <strong>the</strong> four-way controller (3).<br />
The cursor moves to DST (daylight saving time).<br />
7 Use <strong>the</strong> four-way controller (45) to select O (On) or P<br />
(Off).<br />
8 <strong>Press</strong> <strong>the</strong> 4 button.<br />
The screen for setting <strong>the</strong> date and time will be displayed.<br />
When an Incorrect Language is Set<br />
Follow <strong>the</strong> procedure below to display <strong>the</strong> screen for setting <strong>the</strong> language, and<br />
go to Step 2 on p.33 to set <strong>the</strong> language again.<br />
1 Turn <strong>the</strong> camera off and turn it on again.<br />
2 <strong>Press</strong> <strong>the</strong> 3 button.<br />
3 <strong>Press</strong> <strong>the</strong> four-way controller (5) twice.<br />
4 <strong>Press</strong> <strong>the</strong> four-way controller (3) five times.<br />
5 <strong>Press</strong> <strong>the</strong> four-way controller (5) once.<br />
The screen for setting <strong>the</strong> language will be displayed.
Setting <strong>the</strong> Date and Time<br />
35<br />
Set <strong>the</strong> current date and time and <strong>the</strong> display style.<br />
1 <strong>Press</strong> <strong>the</strong> four-way controller<br />
(5).<br />
The frame moves to [mm/dd/yy].<br />
Date Adjust<br />
Date Style<br />
mm/dd/yy24h<br />
2<br />
2 Use <strong>the</strong> four-way controller (23) to choose <strong>the</strong> date style.<br />
Date<br />
Time<br />
Cancel<br />
01 / 01 / 2006<br />
00 : 00<br />
OK OK<br />
Getting Started<br />
3 <strong>Press</strong> <strong>the</strong> four-way controller<br />
(5).<br />
The frame moves to [24h].<br />
Date Adjust<br />
Date Style<br />
Date<br />
mm/dd/yy24h<br />
01 / 01 / 2006<br />
Time<br />
Cancel<br />
00 : 00<br />
OK OK<br />
4 Use <strong>the</strong> four-way controller (23) to select 24h (24-hour<br />
display) or 12h (12-hour display).<br />
5 <strong>Press</strong> <strong>the</strong> four-way controller (5).<br />
The frame returns to [Date Style].<br />
6 <strong>Press</strong> <strong>the</strong> four-way controller (3).<br />
The frame moves to [Date].
36<br />
7 <strong>Press</strong> <strong>the</strong> four-way controller<br />
(5).<br />
The frame moves to <strong>the</strong> month.<br />
Date Adjust<br />
Date Style<br />
Date<br />
mm/dd/yy24h<br />
01 / 01 / 2006<br />
2<br />
Time<br />
Cancel<br />
00 : 00<br />
OK OK<br />
Getting Started<br />
8 Use <strong>the</strong> four-way controller (23) to set <strong>the</strong> month.<br />
Set <strong>the</strong> day and year in <strong>the</strong> same manner.<br />
Next, set <strong>the</strong> time.<br />
If you select [12h] in Step 4, <strong>the</strong> setting switches between am and pm<br />
depending on <strong>the</strong> time.<br />
9 <strong>Press</strong> <strong>the</strong> 4 button.<br />
The camera is ready to take pictures. If you set <strong>the</strong> date and time with<br />
<strong>the</strong> menu operations, <strong>the</strong> screen will return to <strong>the</strong> [H Set-up] menu.<br />
<strong>Press</strong> <strong>the</strong> 4 button again.<br />
You can cancel <strong>the</strong> setting operation and switch to Capture mode during initial<br />
settings by pressing <strong>the</strong> 3 button. In this case, <strong>the</strong> Initial Settings screen<br />
will appear again <strong>the</strong> next time you turn <strong>the</strong> camera on.<br />
• When you finish <strong>the</strong> settings and press <strong>the</strong> 4 button, <strong>the</strong> camera clock is<br />
reset to 00 seconds. To set <strong>the</strong> exact time, press <strong>the</strong> 4 button when <strong>the</strong><br />
time signal (on <strong>the</strong> TV, radio, etc.) reaches 00 seconds.<br />
• You can change <strong>the</strong> language and date and time settings with <strong>the</strong> menu<br />
operations. (p.165, p.169)
Attaching <strong>the</strong> Lens<br />
37<br />
All camera exposure modes are available when using DA, D FA, FA J or<br />
o<strong>the</strong>r lenses with Aperture s (Auto) position. Some functions are<br />
restricted when lenses are not set to Aperture s (Auto). Also see “Notes<br />
on [Using Aperture Ring]” (p.184). O<strong>the</strong>r lenses and accessories will not<br />
be available with factory default settings. To allow shutter release with<br />
lenses or accessories not listed above, set [Using aperture ring] in custom<br />
function settings. (p.103)<br />
Turn <strong>the</strong> camera off before attaching or removing <strong>the</strong> lens to prevent<br />
unexpected lens movement.<br />
1 Check that <strong>the</strong> camera is off.<br />
2<br />
Getting Started<br />
2 Remove <strong>the</strong> body mount cover<br />
( 1 ) and lens mount cover ( 2 ).<br />
Be sure to put <strong>the</strong> lens down with <strong>the</strong><br />
lens mount side facing upward to<br />
protect from damage to <strong>the</strong> area<br />
around <strong>the</strong> lens mount after removal.<br />
1<br />
2<br />
3 Align <strong>the</strong> red dots on <strong>the</strong><br />
camera and <strong>the</strong> lens, and<br />
secure by turning <strong>the</strong> lens<br />
clockwise until it clicks.<br />
After attaching, check that <strong>the</strong> lens is<br />
secured. Also check that <strong>the</strong> red dots<br />
of <strong>the</strong> lens are on top and attachment<br />
portion does not move sideways.
38<br />
4 Remove <strong>the</strong> front lens cap by<br />
pushing <strong>the</strong> indicated portions<br />
inward.<br />
2<br />
Getting Started<br />
To detach <strong>the</strong> lens, hold down <strong>the</strong> lens<br />
unlock button ( 3 ) and turn <strong>the</strong> lens<br />
counterclockwise.<br />
3<br />
• The body mount cover ( 1 ) is a cover to prevent scratches and block dust<br />
when shipped. Body Mount Cap K is sold separately and has a lock function.<br />
• We assume no responsibility nor liability for accidents, damages and<br />
malfunctions resulting from <strong>the</strong> use of lenses made by o<strong>the</strong>r manufacturers.<br />
• The camera body and lens mount incorporate lens information contacts and<br />
an AF coupler. Dirt, dust, or corrosion may damage <strong>the</strong> electrical system.<br />
Clean <strong>the</strong> contacts with a soft dry cloth.
Adjusting <strong>the</strong> Viewfinder Diopter<br />
39<br />
Adjust <strong>the</strong> viewfinder to suit your eyesight.<br />
If it is difficult to see <strong>the</strong> viewfinder image clearly, slide <strong>the</strong> diopter<br />
adjustment lever sideways.<br />
You can slide <strong>the</strong> diopter from –2.5m -1 to +1.5m -1 .<br />
1 Look through <strong>the</strong> viewfinder<br />
and point <strong>the</strong> camera at a welllit<br />
scene. Slide <strong>the</strong> diopter<br />
adjustment lever left or right.<br />
Adjust <strong>the</strong> lever until <strong>the</strong> AF frame in<br />
<strong>the</strong> viewfinder is focused.<br />
2<br />
Getting Started<br />
AF Frame<br />
• Eyecup is attached to <strong>the</strong> viewfinder<br />
portion when camera leaves <strong>the</strong> factory.<br />
Diopter adjustment is available with <strong>the</strong><br />
eyecup attached. However, adjustment is<br />
easier with <strong>the</strong> eyecup removed as shown<br />
above. To remove <strong>the</strong> eyecup, pull one<br />
side of <strong>the</strong> Eyecup FN out and toward you<br />
as shown on <strong>the</strong> right.<br />
• If it is difficult to see <strong>the</strong> viewfinder image<br />
clearly even if you set <strong>the</strong> diopter<br />
adjustment lever, use <strong>the</strong> diopter correction lens adapter M. However, <strong>the</strong><br />
eyecup must be removed to use this adapter. (p.188)
40<br />
Memo
3 Basic Operations<br />
This chapter explains basic operations for shooting by<br />
setting mode dial to Picture mode (Auto Picture or Portrait<br />
mode - Flash OFF mode) and Scene mode to ensure<br />
successful capturing.<br />
For information about advanced functions and settings for<br />
taking pictures, refer to chapter 4 and onward.<br />
Basic Shooting Operation ...................................42<br />
Selecting <strong>the</strong> Appropriate Capturing Mode for<br />
Scenes ...................................................................47<br />
Using <strong>the</strong> Zoom Lens ...........................................50<br />
Using <strong>the</strong> Built-in Flash .......................................51<br />
O<strong>the</strong>r Shooting Modes .........................................55<br />
Playing Back Still Pictures ..................................65<br />
Connecting <strong>the</strong> Camera to AV Equipment .........72<br />
Processing Images with Filters ...........................73<br />
Deleting Images ....................................................75<br />
Setting <strong>the</strong> Printing Service (DPOF) ...................81<br />
Printing Using PictBridge ....................................84
42<br />
Basic Shooting Operation<br />
Holding <strong>the</strong> Camera<br />
How you hold <strong>the</strong> camera is important when taking pictures.<br />
• Hold <strong>the</strong> camera firmly with both hands.<br />
• <strong>Press</strong> <strong>the</strong> shutter release button gently when taking a picture.<br />
3<br />
Basic Operations<br />
Horizontal position<br />
Vertical position<br />
• To reduce camera shake, support your body or <strong>the</strong> camera on a solid object<br />
such as a table, tree, or wall.<br />
• Although <strong>the</strong>re are individual differences among photographers, <strong>the</strong> shutter<br />
speed for a handheld camera is generally 1/(focal length ×1.5). For example,<br />
it is 1/75 of a second for a focal length of 50 mm and 1/150 of a second for<br />
100 mm. A tripod should be used for shutter speeds slower than this.<br />
• When using a telephoto lens, a tripod that is heavier than <strong>the</strong> total weight of<br />
<strong>the</strong> camera and lens is recommended to avoid camera shake.
43<br />
Letting <strong>the</strong> Camera Choose <strong>the</strong> Optimal<br />
Settings<br />
How to set <strong>the</strong> camera so it will choose <strong>the</strong> optimum settings based on <strong>the</strong><br />
subject lighting, distance and motion.<br />
1 Set <strong>the</strong> mode dial to I.<br />
The camera will select <strong>the</strong> optimal<br />
capturing mode for <strong>the</strong> subject.<br />
1 Selecting <strong>the</strong> Appropriate Capturing<br />
Mode for Scenes (p.47)<br />
3<br />
Basic Operations<br />
2 Set <strong>the</strong> focus mode lever to<br />
=.<br />
Autofocus mode is set. (p.120)
44<br />
3 Turn <strong>the</strong> zoom ring to<br />
determine <strong>the</strong> size of <strong>the</strong><br />
subject.<br />
Determine <strong>the</strong> size of <strong>the</strong> subject.<br />
1 Using <strong>the</strong> Zoom Lens (p.50)<br />
3<br />
Basic Operations<br />
4 Position <strong>the</strong> subject inside <strong>the</strong><br />
AF frame and press <strong>the</strong> shutter<br />
release button halfway.<br />
The autofocus system operates. The<br />
focus indicator ] appears in <strong>the</strong><br />
viewfinder when <strong>the</strong> subject is in focus.<br />
The flash pops up automatically when<br />
necessary (manually lift <strong>the</strong> flash when<br />
Flash mode is not set to [Auto]).<br />
1 Operating <strong>the</strong> shutter release button<br />
(p.45)<br />
1 Hard-to-Autofocus Subjects (p.46)<br />
1 Using <strong>the</strong> Built-in Flash (p.51)<br />
Focus indicator<br />
You can preview <strong>the</strong> image in <strong>the</strong> LCD monitor and check <strong>the</strong> composition,<br />
exposure, and focus before taking <strong>the</strong> picture. (p.147)<br />
5 <strong>Press</strong> <strong>the</strong> shutter release<br />
button fully.<br />
The picture is taken.
45<br />
6 Review captured images on <strong>the</strong><br />
LCD monitor.<br />
Image displays for 1 second on <strong>the</strong><br />
LCD monitor after capturing (Instant<br />
Review).<br />
You can delete <strong>the</strong> image during<br />
Instant Review by pressing <strong>the</strong> i<br />
button.<br />
1 Setting <strong>the</strong> Display Time of <strong>the</strong><br />
Instant Review (p.172)<br />
1 Deleting Images (p.75)<br />
1 Displaying Bright Portion (p.173)<br />
1 Histogram Display (p.173)<br />
Operating <strong>the</strong> shutter release button<br />
The shutter release button has two positions.<br />
Delete<br />
3<br />
Basic Operations<br />
Not pressed<br />
<strong>Press</strong>ed halfway<br />
(first position)<br />
<strong>Press</strong>ed fully<br />
(second position)<br />
<strong>Press</strong>ing it down halfway (first position) turns on <strong>the</strong> viewfinder and<br />
LCD panel indicators and <strong>the</strong> autofocus system operates. <strong>Press</strong>ing it<br />
fully (second position) takes <strong>the</strong> picture.<br />
• <strong>Press</strong> <strong>the</strong> shutter release button gently when taking a picture to prevent<br />
camera shake.<br />
• Practice pressing <strong>the</strong> shutter release button halfway to learn where <strong>the</strong><br />
first position is.<br />
• The viewfinder indicators stay on while shutter release button is<br />
pressed. The indications stay on for about 10 seconds (default setting)<br />
after <strong>the</strong> button is released. (p.20)
46<br />
Hard-to-Autofocus Subjects<br />
The autofocus mechanism is not perfect. Focusing may be difficult when<br />
taking pictures under <strong>the</strong> following conditions ((a) to (f) below). These also<br />
apply to manual focusing using <strong>the</strong> focus indicator ] in <strong>the</strong> viewfinder.<br />
If <strong>the</strong> subject cannot be focused automatically, set <strong>the</strong> focus mode lever to<br />
\ and use <strong>the</strong> manual focus mode to focus on <strong>the</strong> subject with <strong>the</strong> aid<br />
of <strong>the</strong> matte field in <strong>the</strong> viewfinder. (p.128)<br />
3<br />
Basic Operations<br />
(a) Extremely low-contrast subjects such as a white wall in <strong>the</strong><br />
focusing area.<br />
(b) Subjects which do not reflect much light within <strong>the</strong> focusing area.<br />
(c) Fast moving objects.<br />
(d) Strongly reflected light or strong backlighting (bright background).<br />
(e) If vertical or horizontal line patterns appear within <strong>the</strong> focusing<br />
area.<br />
(f) Multiple subjects in <strong>the</strong> foreground and background within <strong>the</strong><br />
focusing area.<br />
Subject may not be focused even when ] (focus indicator) is displayed when<br />
(f) above applies.
Selecting <strong>the</strong> Appropriate Capturing<br />
Mode for Scenes<br />
47<br />
The camera selects and sets <strong>the</strong> optimum mode when I (Auto Picture)<br />
on <strong>the</strong> mode dial is set to <strong>the</strong> dial indicator.<br />
3<br />
Dial indicator<br />
Basic Operations<br />
Select = (Portrait), s (Landscape), q (Macro), \ (Moving Object),<br />
. (Night Scene Portrait), a (Flash OFF), H (Scene) with <strong>the</strong> mode dial<br />
if desired image is not captured in Auto Picture mode.<br />
The modes are as follows.<br />
Selects automatically from Portrait, Landscape,<br />
Macro, and Moving Object modes.<br />
I (Auto Picture)<br />
Lets you take pictures with standard settings (Normal<br />
mode) when <strong>the</strong>re is no optimal shooting mode.<br />
= (Portrait) Optimal for capturing portraits.<br />
Deepens <strong>the</strong> focus range, emphasizes contour and<br />
s (Landscape)<br />
saturation of trees and <strong>the</strong> sky, and produces a bright image.<br />
q (Macro)<br />
Lets you take vibrant pictures of flowers and o<strong>the</strong>r<br />
small subjects at short distances.<br />
Lets you take sharp pictures of a quickly moving<br />
\ (Moving Object)<br />
subject, such as at a sporting event.<br />
. (Night Scene Portrait) Lets you capture people against a night view or dusk.<br />
The built-in flash is deactivated. O<strong>the</strong>r settings are <strong>the</strong><br />
a (Flash OFF)<br />
same as <strong>the</strong> Normal mode in I.<br />
H (Scene)<br />
Lets you select from 8 shooting scenes depending on<br />
<strong>the</strong> shooting conditions.<br />
For . (Night Scene Portrait), <strong>the</strong> shutter speed becomes slower in dark<br />
places, even if <strong>the</strong> built-in flash is used. Use a tripod to avoid camera shake.
48<br />
Selecting <strong>the</strong> Shooting Scene<br />
By setting <strong>the</strong> H (Scene) icon to <strong>the</strong> dial indicator, you can choose from<br />
<strong>the</strong> following 8 shooting scenes.<br />
3<br />
Basic Operations<br />
A (Night Scene)<br />
i (Surf & Snow)<br />
B (Text)<br />
K (Sunset)<br />
C (Kids)<br />
E (Pet)<br />
D (Candlelight)<br />
E (Museum)<br />
Used for night scenes. Use a tripod, etc. to prevent<br />
shaking.<br />
For capturing images of dazzling backgrounds, such as<br />
snowy mountains.<br />
Lets you take clear pictures of text or writing.<br />
For capturing <strong>the</strong> sunrise or sunset in beautiful colors.<br />
For capturing moving kids.<br />
Reproduces healthy and bright skin tone.<br />
For capturing moving pets.<br />
For capturing scenes in candlelight.<br />
For capturing images in places where a flash is<br />
prohibited.<br />
The flash is deactivated in A (Night Scene), K (Sunset), D (Candlelight)<br />
and E (Museum) modes. Use a tripod to avoid camera shake.<br />
How to Select a Shooting Scene<br />
1 Set <strong>the</strong> mode dial to H (Scene).<br />
2 <strong>Press</strong> <strong>the</strong> { button.<br />
The Fn menu appears. The icon for <strong>the</strong><br />
currently selected shooting scene<br />
appears in <strong>the</strong> Fn menu screen in<br />
H (Scene) mode.<br />
Fn<br />
OK<br />
AUTO<br />
Fn<br />
Exit
49<br />
3 <strong>Press</strong> <strong>the</strong> 4 button.<br />
The mode palette appears.<br />
Night Scene<br />
Used for night scenes.<br />
Use a tripod, etc. to<br />
prevent shaking.<br />
OK<br />
OK<br />
4 Use <strong>the</strong> four-way controller<br />
(2345) to choose a Scene<br />
mode.<br />
If Pet mode is selected, you can turn<br />
<strong>the</strong> e-dial to choose a dog or a cat<br />
icon.The function is <strong>the</strong> same,<br />
regardless of which icon you choose.<br />
Pet<br />
For capturing moving<br />
pets<br />
OK<br />
OK<br />
3<br />
Basic Operations<br />
5 <strong>Press</strong> <strong>the</strong> 4 button.<br />
The screen returns to <strong>the</strong> Fn menu.<br />
6 <strong>Press</strong> <strong>the</strong> { button.<br />
The camera is ready to take a picture.
50<br />
Using <strong>the</strong> Zoom Lens<br />
Enlarge <strong>the</strong> subject (telephoto) or capture a wider area (wide angle) with<br />
a zoom lens. Adjust it to <strong>the</strong> desired size and take <strong>the</strong> picture.<br />
1 Turn <strong>the</strong> zoom ring to <strong>the</strong> right<br />
or left.<br />
3<br />
Basic Operations<br />
Turn <strong>the</strong> zoom ring clockwise for<br />
telephoto and counterclockwise for<br />
wide angle.<br />
• The smaller <strong>the</strong> number of <strong>the</strong> displayed focal length, <strong>the</strong> wider <strong>the</strong> angle.<br />
The larger <strong>the</strong> number, <strong>the</strong> more magnified <strong>the</strong> image appears.<br />
• Power Zoom functions (Image Size Tracking, Zoom Clip, and Auto Zoom<br />
Effect) are not compatible with this camera.<br />
Wide Angle<br />
Telephoto
Using <strong>the</strong> Built-in Flash<br />
51<br />
Use <strong>the</strong> following procedures to take a picture in low light or backlit<br />
conditions or when you want to manually use <strong>the</strong> built-in flash.<br />
The built-in flash is optimum at about 0.7 m to 4 m from <strong>the</strong> subject.<br />
Exposure will not be properly controlled and vignetting may occur when<br />
used at a distance closer than 0.7 m (this distance varies slightly<br />
depending on <strong>the</strong> lens being used and set sensitivity (p.151)).<br />
Compatibility of built-in flash and lens<br />
Vignetting (darkening of <strong>the</strong> corners of <strong>the</strong> image due to a lack of light) may<br />
occur depending on <strong>the</strong> lens being used and <strong>the</strong> capture conditions. We<br />
recommend taking a test shot to confirm this.<br />
1 DA, D FA , FA J, FA and F Lens Compatibility with <strong>the</strong> Built-in Flash (p.153)<br />
• When using <strong>the</strong> built-in flash, remove <strong>the</strong> lens hood before shooting.<br />
• The built-in flash fully discharges for lenses without a function to set<br />
aperture lens ring to s (Auto).<br />
3<br />
Basic Operations<br />
B<br />
b<br />
C<br />
D<br />
Auto discharge<br />
Camera<br />
Manual discharge<br />
Discharges<br />
Auto flash+Redeye<br />
reduct<br />
Manl flash+Redeye<br />
reduct<br />
automatically determines surrounding light<br />
and built-in flash pops up and discharges<br />
automatically when necessary (flash does not<br />
discharge even if it is popped up when not necessary).<br />
flash manually. Flash discharges when<br />
popped up, does not discharge when retracted.<br />
Lights a red-eye reduction light before automatic flash.<br />
Discharges flash manually. Lights a red-eye reduction<br />
light before manual flash.<br />
Manual discharge mode (Flash ON) is used regardless of flash mode settings<br />
if <strong>the</strong> K button is pressed to pop up <strong>the</strong> flash manually.<br />
Selecting Flash Mode<br />
1 <strong>Press</strong> <strong>the</strong> { button.<br />
The Fn menu appears.<br />
Fn<br />
OK<br />
AUTO<br />
Fn<br />
Exit
52<br />
2 <strong>Press</strong> <strong>the</strong> four-way controller<br />
(3).<br />
The Flash options screen appears.<br />
Flash Mode<br />
Auto discharge<br />
When <strong>the</strong> mode dial is set to e, b, c,<br />
a or p, B and C appear gray and<br />
cannot be selected.<br />
OK OK<br />
3<br />
Basic Operations<br />
3 Use <strong>the</strong> four-way controller (45) to choose a flash mode.<br />
4 <strong>Press</strong> <strong>the</strong> 4 button.<br />
The camera returns to <strong>the</strong> Fn menu screen.<br />
5 <strong>Press</strong> <strong>the</strong> { button.<br />
The camera is ready to take a picture.<br />
Using Auto Discharge B, C (Automatic Flash Popup)<br />
1 Set <strong>the</strong> mode dial to H, I, =, q, or ..<br />
The flash is deactivated when A (Night Scene), K (Sunset),<br />
D (Candlelight) or E (Museum) is selected in H (Scene) mode.<br />
2 <strong>Press</strong> <strong>the</strong> shutter release<br />
button halfway.<br />
The built-in flash pops up if necessary<br />
and begins charging. When <strong>the</strong> flash is<br />
fully charged, b appears in <strong>the</strong> LCD<br />
panel and viewfinder. (p.17, p.20, p.22)<br />
Switch between Auto discharge mode and Manual discharge mode (Flash ON)<br />
by pressing <strong>the</strong> K button while <strong>the</strong> built-in flash is popped up. If Auto<br />
discharge is set, E appears on <strong>the</strong> LCD panel.
53<br />
3 <strong>Press</strong> <strong>the</strong> shutter release button fully.<br />
The picture is taken.<br />
4 Push down on <strong>the</strong> portion<br />
indicated in <strong>the</strong> illustration to<br />
retract <strong>the</strong> flash.<br />
3<br />
Using Manual Discharge (Flash ON) b, D<br />
1 <strong>Press</strong> <strong>the</strong> K button.<br />
The built-in flash pops up and begins<br />
charging. Manual discharge mode<br />
(Flash ON) is used regardless of flash<br />
mode settings. When <strong>the</strong> flash is fully<br />
charged, b appears in <strong>the</strong> LCD panel<br />
and viewfinder. (p.17, p.20, p.22)<br />
Basic Operations<br />
When Flash mode is set to B or C and<br />
you pop up <strong>the</strong> built-in flash, you can<br />
switch between Auto discharge mode<br />
and Manual discharge mode (Flash ON)<br />
by pressing <strong>the</strong> K button under <strong>the</strong><br />
following conditions.<br />
• Shooting mode is set to I, =, s,<br />
q, \, or ..<br />
• H mode is set to i, B, C, or E.<br />
2 <strong>Press</strong> <strong>the</strong> shutter release button fully.<br />
The flash discharges and <strong>the</strong> picture is taken.<br />
3 Push <strong>the</strong> flash down to retract.
54<br />
3<br />
Basic Operations<br />
Using Red-eye Reduction Flash<br />
“Red-eye” is <strong>the</strong> phenomenon where eyes look reddish in photographs<br />
taken in dark environments with a flash. This is caused by <strong>the</strong> reflection of<br />
<strong>the</strong> electronic flash in <strong>the</strong> retina of <strong>the</strong> eye. Red-eye occurs because pupils<br />
are dilated in dark environments.<br />
This phenomenon cannot be averted but <strong>the</strong> following measures can be<br />
used to combat it.<br />
• Brighten <strong>the</strong> surroundings when shooting.<br />
• Set to wide angle and shoot from closer if a zoom lens is in use.<br />
• Use a flash that supports red-eye reduction.<br />
• Position <strong>the</strong> flash as far away from <strong>the</strong> camera as possible when using<br />
an external flash.<br />
The red-eye reduction function on this camera reduces red-eye by<br />
discharging <strong>the</strong> flash twice. With <strong>the</strong> red-eye reduction function, <strong>the</strong><br />
pre-flash is discharged just before <strong>the</strong> shutter is released. This reduces<br />
pupil dilation. The main flash is <strong>the</strong>n discharged while <strong>the</strong> pupils are<br />
smaller, reducing <strong>the</strong> red-eye effect. To use <strong>the</strong> red-eye reduction<br />
function, set C (Red-eye reduction auto flash) in Picture mode or D<br />
(Red-eye reduction manual flash) in o<strong>the</strong>r modes for Flash mode.<br />
Daylight-Sync Shooting<br />
In daylight conditions, <strong>the</strong> flash will eliminate shadows when a portrait<br />
picture is taken with a person’s face cast in shadow. Use of <strong>the</strong> flash in this<br />
way is called Daylight-Sync Shooting. Flash is discharged manually when<br />
shooting with Daylight-Sync Shooting.<br />
Taking pictures (Auto Picture)<br />
1 Confirm that <strong>the</strong> flash has popped up and <strong>the</strong> flash mode is set to b<br />
(Manual discharge). (p.53)<br />
2 Confirm that <strong>the</strong> flash is fully charged.<br />
3 Take <strong>the</strong> picture.<br />
The picture may be overexposed if <strong>the</strong> background is too bright.<br />
Without Daylight-Sync<br />
With Daylight-Sync
O<strong>the</strong>r Shooting Modes<br />
55<br />
Continuous Shooting<br />
Pictures can be taken continuously while <strong>the</strong> shutter release button is held<br />
down.<br />
1 <strong>Press</strong> <strong>the</strong> { button.<br />
3<br />
Basic Operations<br />
The Fn menu appears.<br />
Fn<br />
OK<br />
AUTO<br />
Fn<br />
Exit
56<br />
2 <strong>Press</strong> <strong>the</strong> four-way controller<br />
(2).<br />
3<br />
Basic Operations<br />
The Drive Mode options screen<br />
appears.<br />
3 Use <strong>the</strong> four-way controller<br />
(45) to select j.<br />
Drive Mode<br />
Single frame shooting<br />
OK OK<br />
Drive Mode<br />
Continuous shooting<br />
OK OK<br />
4 <strong>Press</strong> <strong>the</strong> 4 button.<br />
The camera returns to <strong>the</strong> Fn menu<br />
screen.<br />
5 <strong>Press</strong> <strong>the</strong> { button.<br />
The camera is ready to take pictures.<br />
6 <strong>Press</strong> <strong>the</strong> shutter release button halfway.<br />
The autofocus system operates. The focus indicator ] appears in <strong>the</strong><br />
viewfinder when <strong>the</strong> subject is in focus.
57<br />
Set [No. cnt shtng rcd im] in [Recordable Image No.] of <strong>the</strong> [A Custom Setting]<br />
menu. The number of continuously recordable images (buffer space) appears<br />
when shutter is pressed halfway. (p.102)<br />
7 <strong>Press</strong> <strong>the</strong> shutter release button fully.<br />
Pictures are taken continuously while <strong>the</strong> shutter release button is fully<br />
pressed. Take your finger off <strong>the</strong> shutter release button to stop.<br />
Continuous shooting settings are retained when <strong>the</strong> power is turned off.<br />
Display <strong>the</strong> Fn menu again and set to 9 (Single frame shooting) to stop<br />
Continuous shooting.<br />
3<br />
• The focus is adjusted each time <strong>the</strong> shutter is released if <strong>the</strong> [AF Mode] in <strong>the</strong><br />
[A Rec. Mode] is set to l (Single mode). (p.124)<br />
• Focusing is continuously active when <strong>the</strong> mode dial is set to e, b, c or a<br />
and [AF Mode] in <strong>the</strong> [A Rec. Mode] is set to k (Continuous mode), when<br />
Picture mode is set to \ (Moving Object) or H mode is set to C (Kids) or<br />
E (Pet). Note that <strong>the</strong> shutter will release even if <strong>the</strong> focusing is not complete.<br />
• The shutter cannot be released until charging is complete when using <strong>the</strong><br />
built-in flash. Use a custom function to enable shutter release before <strong>the</strong> builtin<br />
flash is ready. (p.150)<br />
Basic Operations<br />
Self-Timer Shooting<br />
This camera has two types of self-timers: g and Z.<br />
g<br />
Z<br />
Shutter will be released after about 12 seconds. Use this mode to<br />
include <strong>the</strong> photographer in <strong>the</strong> picture.<br />
A mirror pops up immediately after shutter release button is pressed.<br />
Shutter is released after about 2 seconds. Use this mode to avoid<br />
camera shake when <strong>the</strong> shutter release button is pressed.<br />
1 Mount <strong>the</strong> camera onto a<br />
tripod.
58<br />
2 <strong>Press</strong> <strong>the</strong> { button.<br />
3<br />
Basic Operations<br />
The Fn menu appears.<br />
Fn<br />
OK<br />
AUTO<br />
Fn<br />
Exit<br />
3 <strong>Press</strong> <strong>the</strong> four-way controller<br />
(2).<br />
The Drive Mode options screen<br />
appears.<br />
Drive Mode<br />
Single frame shooting<br />
OK OK
59<br />
4 Use <strong>the</strong> four-way controller<br />
(45) to select g or Z.<br />
Drive Mode<br />
Self-Timer (12 secs)<br />
OK OK<br />
5 <strong>Press</strong> <strong>the</strong> 4 button.<br />
The camera returns to <strong>the</strong> Fn menu<br />
screen.<br />
3<br />
Basic Operations<br />
6 <strong>Press</strong> <strong>the</strong> { button.<br />
The camera is ready to take pictures.<br />
7 Confirm in <strong>the</strong> viewfinder that<br />
<strong>the</strong> subject you wish to shoot<br />
is in <strong>the</strong> display and press <strong>the</strong><br />
shutter release button halfway.<br />
The focus indicator ] appears when<br />
<strong>the</strong> subject is in focus.
60<br />
8 <strong>Press</strong> <strong>the</strong> shutter release<br />
button fully.<br />
3<br />
Basic Operations<br />
For g, <strong>the</strong> self-timer lamp starts<br />
blinking slowly and blinks rapidly 2<br />
seconds before <strong>the</strong> shutter is released.<br />
The beep is heard and <strong>the</strong> rate<br />
increases. The shutter will be released<br />
about 12 seconds after <strong>the</strong> shutter<br />
release button is pressed fully.<br />
For Z, <strong>the</strong> shutter will be released about 2 seconds after <strong>the</strong> shutter<br />
release button is pressed fully.<br />
• The beep can be turned off (p.165).<br />
• Exposure may be affected if light enters <strong>the</strong> viewfinder. Attach <strong>the</strong> provided<br />
ME viewfinder cap or use <strong>the</strong> AE lock function (p.143). (Ignore <strong>the</strong> light<br />
entering <strong>the</strong> viewfinder when <strong>the</strong> exposure mode is set to a (Manual)<br />
(p.139).)<br />
• Remove <strong>the</strong> Eyecup FN by pulling one side out and toward you when using<br />
accessories such as <strong>the</strong> ME viewfinder cap.<br />
Removing <strong>the</strong> Eyecup FN<br />
Attaching <strong>the</strong> ME Viewfinder cap<br />
9 Turn <strong>the</strong> camera off after<br />
shooting.<br />
The next time <strong>the</strong> power is turned on,<br />
self-timer shooting is canceled and<br />
returns to single frame shooting.
Remote Control Shooting<br />
(Remote Control F: Sold Separately)<br />
61<br />
The shutter can be released with <strong>the</strong> optional remote control unit. You can<br />
select from h (remote control) and i (three-second delay) for remote<br />
control shooting.<br />
h<br />
i<br />
The shutter will be released immediately after <strong>the</strong> shutter release button<br />
on <strong>the</strong> remote control unit is pressed.<br />
The shutter will be released 3 seconds after <strong>the</strong> shutter release button on<br />
<strong>the</strong> remote control unit is pressed.<br />
3<br />
1 Mount <strong>the</strong> camera onto a<br />
tripod.<br />
Basic Operations<br />
2 <strong>Press</strong> <strong>the</strong> { button.<br />
The Fn menu appears.<br />
Fn<br />
OK<br />
AUTO<br />
Fn<br />
Exit
62<br />
3 <strong>Press</strong> <strong>the</strong> four-way controller<br />
(2).<br />
The Drive Mode options screen<br />
appears.<br />
3<br />
Basic Operations<br />
4 Use <strong>the</strong> four-way controller<br />
(45) to select h or i.<br />
The self-timer lamp will blink to let you<br />
know that <strong>the</strong> camera is in remote<br />
control wait status.<br />
5 <strong>Press</strong> <strong>the</strong> 4 button.<br />
The camera returns to <strong>the</strong> Fn menu screen.<br />
6 <strong>Press</strong> <strong>the</strong> { button.<br />
The camera is ready to take pictures.<br />
Drive Mode<br />
Remote Control Unit<br />
OK OK<br />
7 <strong>Press</strong> <strong>the</strong> shutter release button halfway.<br />
The autofocus system operates. The focus indicator ] appears in <strong>the</strong><br />
viewfinder when <strong>the</strong> subject is in focus.<br />
• You cannot focus with <strong>the</strong> remote control unit in default settings. Focus on<br />
<strong>the</strong> subject first before operating with <strong>the</strong> remote control. You can set [AF in<br />
remote control] to [On] in <strong>the</strong> custom function. (p.102)<br />
• When using <strong>the</strong> Remote Control Unit, flash does not pop up automatically<br />
even when set to B (Auto discharge). Pop up <strong>the</strong> flash manually<br />
beforehand. (p.53)
63<br />
8 Point <strong>the</strong> remote control unit<br />
towards <strong>the</strong> front of <strong>the</strong> camera<br />
and press <strong>the</strong> shutter release<br />
button on <strong>the</strong> remote control.<br />
5m<br />
The operating distance of <strong>the</strong> remote<br />
control unit is about 5 m from <strong>the</strong> front<br />
of <strong>the</strong> camera. The shutter will be<br />
released immediately or approximately<br />
3 seconds after <strong>the</strong> shutter release button on <strong>the</strong> remote control unit is<br />
pressed depending on <strong>the</strong> drive mode selected.<br />
When <strong>the</strong> picture is taken, <strong>the</strong> self-timer lamp lights for 2 seconds and<br />
will <strong>the</strong>n resume blinking.<br />
• Exposure may be affected if light enters <strong>the</strong> viewfinder. Attach <strong>the</strong> provided<br />
ME viewfinder cap or use <strong>the</strong> AE lock function (p.143) (ignore <strong>the</strong> light<br />
entering <strong>the</strong> viewfinder when <strong>the</strong> exposure mode is set to a (manual)<br />
(p.139)).<br />
• Remove <strong>the</strong> Eyecup FN by pulling one side out and toward you when using<br />
accessories such as <strong>the</strong> ME viewfinder cap.<br />
3<br />
Basic Operations<br />
Removing <strong>the</strong> Eyecup FN<br />
Attaching <strong>the</strong> ME Viewfinder cap<br />
• Turn <strong>the</strong> power off to stop <strong>the</strong> remote control operation after it has been<br />
activated.<br />
• The remote control may not operate in backlit conditions.<br />
• The remote control does not work while <strong>the</strong> flash is being charged.<br />
• When using <strong>the</strong> built-in flash, raise <strong>the</strong> flash into position first.<br />
• The camera automatically returns to single frame shooting after <strong>the</strong> remote<br />
control shooting mode is left unused for 5 minutes.<br />
• The remote control unit battery can send a remote control signal about<br />
30,000 times. Contact PENTAX service center to replace <strong>the</strong> battery (this will<br />
involve a fee).
64<br />
3<br />
Basic Operations<br />
Using Mirror Lock Up Function to Prevent<br />
Camera Shake<br />
Use <strong>the</strong> Mirror Lock Up function if camera shake is evident even when<br />
Cable Switch (optional) or Remote Control Unit (optional) is used.<br />
When shutter release button is pressed, mirror pops up and shutter is<br />
released 2 seconds later if 2 sec. Self-Timer is used. Avoid camera shake<br />
when mirror pops up by using this method.<br />
Follow <strong>the</strong> procedure below to take a picture with <strong>the</strong> mirror lock up.<br />
1 Mount <strong>the</strong> camera onto a tripod.<br />
2 Use <strong>the</strong> { button and <strong>the</strong> four-way controller (2) to select<br />
Z (2 sec. Self-Timer).<br />
1 Self-Timer Shooting (p.57)<br />
3 Focus on <strong>the</strong> subject.<br />
4 <strong>Press</strong> <strong>the</strong> shutter release button fully.<br />
The mirror pops up and <strong>the</strong> picture is taken 2 seconds later. AE lock is<br />
enabled with <strong>the</strong> exposure value set immediately before <strong>the</strong> mirror goes<br />
up.
Playing Back Still Pictures<br />
65<br />
Playing Back Images<br />
You can play back captured still pictures with <strong>the</strong> camera.<br />
Use <strong>the</strong> included “PENTAX PHOTO Browser 2.1” software to play back using<br />
a PC. Refer to <strong>the</strong> “PENTAX PHOTO Browser 2.1/PENTAX PHOTO<br />
Laboratory 2.1 Operating Manual” for details.<br />
3<br />
1 <strong>Press</strong> <strong>the</strong> Q button after<br />
taking a picture.<br />
The most recently captured image<br />
(image with <strong>the</strong> largest file number) is<br />
displayed on <strong>the</strong> LCD monitor.<br />
Basic Operations<br />
100-0046
66<br />
2 <strong>Press</strong> <strong>the</strong> four-way controller<br />
(45).<br />
4 : The previous image appears.<br />
5 : The next image appears.<br />
3<br />
Basic Operations<br />
Rotating Images<br />
You can rotate images 90° counterclockwise at a time. Make images shot<br />
vertically easier to view.<br />
100-0001<br />
100-0001<br />
100-0001<br />
OK OK<br />
OK OK<br />
1 <strong>Press</strong> <strong>the</strong> Q button after<br />
taking a picture.<br />
The most recently captured image<br />
(image with <strong>the</strong> largest file number) is<br />
displayed on <strong>the</strong> LCD monitor.<br />
2 <strong>Press</strong> <strong>the</strong> four-way controller<br />
(3).<br />
The image is rotated 90°<br />
counterclockwise each time <strong>the</strong> button<br />
is pressed.
67<br />
3 <strong>Press</strong> <strong>the</strong> 4 button.<br />
Image rotation information is saved.<br />
Enlarging Playback Images<br />
3<br />
You can magnify images up to 12 times when displaying.<br />
Basic Operations<br />
1 <strong>Press</strong> <strong>the</strong> Q button and use<br />
<strong>the</strong> four-way controller (45)<br />
to select an image.<br />
100-0046<br />
The most recently captured image<br />
(image with <strong>the</strong> largest file number) is<br />
displayed first on <strong>the</strong> LCD monitor.
68<br />
2 Turn <strong>the</strong> e-dial to <strong>the</strong> right<br />
(toward y).<br />
×2 .<br />
0<br />
3<br />
Image enlarges at each calibration and<br />
can be enlarged to 12 times <strong>the</strong><br />
original. Turn to <strong>the</strong> left (toward f) to<br />
return.<br />
<strong>Press</strong> <strong>the</strong> 4 button to return to <strong>the</strong><br />
original size.<br />
<strong>Press</strong> <strong>the</strong> four-way controller<br />
(2345) in zoom display to change <strong>the</strong> display area.<br />
Basic Operations<br />
The first calibration on <strong>the</strong> e-dial is 1.2 times. You can change this in [Mag to<br />
Strt Zm Plybk] in [A Custom Setting] menu. (p.103)<br />
Nine-Image Display<br />
You can display nine images on <strong>the</strong> LCD monitor at <strong>the</strong> same time.
69<br />
1 <strong>Press</strong> <strong>the</strong> Q button.<br />
The most recently captured image<br />
(image with <strong>the</strong> largest file number) is<br />
displayed on <strong>the</strong> LCD monitor.<br />
100-0046<br />
2 Turn <strong>the</strong> e-dial to <strong>the</strong> left<br />
(toward f).<br />
Frame<br />
3<br />
Up to nine thumbnail images will be<br />
displayed at once. Use <strong>the</strong> four-way<br />
controller (2345) to select an<br />
image. A scroll bar appears at <strong>the</strong> right<br />
of <strong>the</strong> screen. With an image selected<br />
in <strong>the</strong> bottom row, pressing <strong>the</strong> fourway<br />
controller (3) displays <strong>the</strong> next<br />
nine images.<br />
[?] appears for an image that cannot be<br />
displayed.<br />
Select&Delete 100-0046<br />
Scroll bar<br />
Basic Operations<br />
3 Turn <strong>the</strong> e-dial to <strong>the</strong> right<br />
(towards y) or press <strong>the</strong> 4<br />
button.<br />
A full screen display of <strong>the</strong> selected<br />
image appears.<br />
100-0046
70<br />
Slideshow<br />
You can play back all images recorded on your SD Memory Card<br />
successively. To start continuous playback, use <strong>the</strong> menu screen<br />
displayed on <strong>the</strong> LCD monitor.<br />
3<br />
Basic Operations<br />
1 <strong>Press</strong> <strong>the</strong> Q button and use<br />
<strong>the</strong> four-way controller (45)<br />
to select an image to be<br />
displayed first.<br />
100-0046<br />
The most recently captured image<br />
(image with <strong>the</strong> largest file number) is<br />
displayed first on <strong>the</strong> LCD monitor.<br />
2 <strong>Press</strong> <strong>the</strong> { button.<br />
The Fn menu appears.<br />
Fn<br />
OK<br />
Fn<br />
Exit
71<br />
3 <strong>Press</strong> <strong>the</strong> four-way controller<br />
(5).<br />
Start screen is displayed and<br />
slideshow begins.<br />
Start<br />
<strong>Press</strong> any button to end slideshow.<br />
<strong>Press</strong> <strong>the</strong> shutter release button or <strong>the</strong><br />
Q button, slide <strong>the</strong> main switch to <strong>the</strong><br />
preview position (|) or turn <strong>the</strong> mode<br />
dial to change to Capture mode.<br />
3<br />
Set <strong>the</strong> display time for slideshow in <strong>the</strong> [Q Playback] menu. Alternatively,<br />
start <strong>the</strong> slideshow from <strong>the</strong> [Q Playback] menu. (p.163)<br />
Basic Operations
72<br />
Connecting <strong>the</strong> Camera to AV<br />
Equipment<br />
By using <strong>the</strong> video cable, you can play back images using a TV or o<strong>the</strong>r<br />
device with a video IN jack as your monitor. Make sure that both <strong>the</strong> TV<br />
and <strong>the</strong> camera are turned off before connecting <strong>the</strong> cable.<br />
1 Selecting <strong>the</strong> Video Output Format (p.170)<br />
3<br />
Basic Operations<br />
1 Open <strong>the</strong> terminal cover and connect <strong>the</strong> video cable to<br />
<strong>the</strong> USB/Video terminal.<br />
2 Connect <strong>the</strong> o<strong>the</strong>r end of <strong>the</strong> video cable to <strong>the</strong> video IN<br />
jack on <strong>the</strong> AV device.<br />
3 Turn <strong>the</strong> AV device and camera on.<br />
• If you intend to use <strong>the</strong> camera continuously for a long period, use of <strong>the</strong> AC<br />
adapter (optional) is recommended. (p.28)<br />
• For AV equipment with multiple video IN jacks (such as TVs), check <strong>the</strong><br />
operating manual of <strong>the</strong> AV device, and select <strong>the</strong> video IN jack to which <strong>the</strong><br />
camera is connected.<br />
• Depending on <strong>the</strong> country or region, images may fail to be played back if <strong>the</strong><br />
video output format is set different from <strong>the</strong> one in use <strong>the</strong>re. If this happens,<br />
change <strong>the</strong> video output format setting. (p.170)<br />
• The camera LCD monitor turns off while <strong>the</strong> camera is connected to <strong>the</strong> AV<br />
device.
Processing Images with Filters<br />
73<br />
You can edit shot images using digital filters. Processed images are saved<br />
under a different name.<br />
• RAW images cannot be processed using <strong>the</strong> digital filter.<br />
• Additionally, set digital filters from <strong>the</strong> [Q Playback] menu.<br />
3<br />
Basic Operations<br />
Digital Filter<br />
B&W<br />
Sepia<br />
Soft<br />
Slim<br />
Brightness<br />
Convert to a black and white image.<br />
Add a vintage touch to photos by converting <strong>the</strong>m to sepia color.<br />
Create a soft image by lightly fading <strong>the</strong> entire image. Select<br />
from three levels.<br />
Change <strong>the</strong> horizontal and vertical ratio of images. Adjust<br />
height or width up to two times <strong>the</strong> original size.<br />
Change <strong>the</strong> brightness of images. Adjust in a range of ±8 levels.<br />
1 <strong>Press</strong> <strong>the</strong> { button in<br />
Playback mode.<br />
Fn<br />
The Fn menu appears.<br />
OK<br />
Fn<br />
Exit
74<br />
2 <strong>Press</strong> <strong>the</strong> four-way controller<br />
(4).<br />
The screen for selecting <strong>the</strong> filter<br />
appears.<br />
B&W<br />
3 Use <strong>the</strong> four-way controller (45) to select an image.<br />
OK<br />
OK<br />
3<br />
Basic Operations<br />
4 Use <strong>the</strong> four-way controller (23) to select a filter.<br />
Select a filter and preview <strong>the</strong> effects on <strong>the</strong> image. Proceed to Step 6 if<br />
[B&W] or [Sepia] is selected.<br />
5 Adjust with e-dial if slim filter,<br />
soft filter or brightness filter is<br />
selected.<br />
Turn counterclockwise for wider and<br />
clockwise for slimmer if slim filter is<br />
selected. Turn counterclockwise to darken<br />
and clockwise to brighten if brightness<br />
filter is selected. Select softness from<br />
three levels if soft filter is selected.<br />
Use <strong>the</strong> four-way controller (45) to<br />
Slim<br />
OK<br />
OK<br />
select an image. The image appears in <strong>the</strong> set slimness or softness.<br />
6 <strong>Press</strong> <strong>the</strong> 4 button.<br />
The save confirmation screen appears.<br />
7 Use <strong>the</strong> four-way controller (2)<br />
to select [Save as].<br />
Save image as a new file<br />
Save as<br />
Cancel<br />
OK OK<br />
8 <strong>Press</strong> <strong>the</strong> 4 button.<br />
The filtered image is saved under a different name.
Deleting Images<br />
75<br />
Deleting a Single Image<br />
You can delete one image at a time.<br />
• Deleted images cannot be restored.<br />
• Protected images cannot be deleted.<br />
1 <strong>Press</strong> <strong>the</strong> Q button and use<br />
<strong>the</strong> four-way controller (45)<br />
to select an image to delete.<br />
100-0046<br />
3<br />
Basic Operations<br />
2 <strong>Press</strong> <strong>the</strong> i button.<br />
The Delete screen appears.<br />
3 Use <strong>the</strong> four-way controller (2)<br />
to select [Delete].<br />
100-0046<br />
Delete<br />
Cancel<br />
All images<br />
OK OK<br />
4 <strong>Press</strong> <strong>the</strong> 4 button.<br />
The image is deleted.
76<br />
Deleting All Images<br />
You can delete all saved images at once.<br />
• Deleted images cannot be restored.<br />
• Protected images cannot be deleted.<br />
3<br />
Basic Operations<br />
1 <strong>Press</strong> <strong>the</strong> Q button.<br />
2 <strong>Press</strong> <strong>the</strong> i button twice.<br />
The Delete All screen appears.<br />
3 Use <strong>the</strong> four-way controller (2)<br />
to select [Delete All].<br />
Delete all images<br />
on memory card?<br />
Delete All<br />
Cancel<br />
OK OK<br />
4 <strong>Press</strong> <strong>the</strong> 4 button.<br />
All images are deleted.
Deleting Selected Images<br />
(from Nine-Image Display)<br />
77<br />
You can delete multiple images from <strong>the</strong> nine-image display at once.<br />
• Deleted images cannot be restored.<br />
• Protected images cannot be deleted.<br />
• Only files in <strong>the</strong> same folder can be selected at once.<br />
1 <strong>Press</strong> <strong>the</strong> Q button.<br />
The most recently captured image<br />
(image with <strong>the</strong> largest file number) is<br />
displayed first on <strong>the</strong> LCD monitor.<br />
100-0046<br />
3<br />
Basic Operations<br />
2 Turn <strong>the</strong> e-dial to <strong>the</strong> left<br />
(toward f).<br />
Nine thumbnail images appear.<br />
Select&Delete<br />
100-0046
78<br />
3 <strong>Press</strong> <strong>the</strong> i button.<br />
9 appears above <strong>the</strong> images.<br />
3<br />
Basic Operations<br />
4 Use <strong>the</strong> four-way controller<br />
(2345) to move to <strong>the</strong><br />
images to delete and press <strong>the</strong><br />
4 button.<br />
Image is selected and O appears.<br />
<strong>Press</strong> { button to select all images<br />
(<strong>the</strong> selection of images may take time<br />
to complete depending on <strong>the</strong> number<br />
of images).<br />
Delete<br />
OK<br />
5 <strong>Press</strong> <strong>the</strong> i button.<br />
The Delete confirmation screen appears.<br />
6 Use <strong>the</strong> four-way controller (2)<br />
to select [Select&Delete].<br />
All selected<br />
images are deleted<br />
Select&Delete<br />
Cancel<br />
OK OK<br />
7 <strong>Press</strong> <strong>the</strong> 4 button.<br />
The selected images are deleted.
Protecting Images from Deletion (Protect)<br />
79<br />
You can protect images from being accidentally deleted.<br />
Even protected images are deleted if <strong>the</strong> SD Memory Card is formatted.<br />
1 <strong>Press</strong> <strong>the</strong> Q button and use<br />
<strong>the</strong> four-way controller (45)<br />
to select an image.<br />
100-0046<br />
3<br />
The most recently captured images<br />
(image with <strong>the</strong> largest file number) are<br />
displayed first on <strong>the</strong> LCD monitor.<br />
2 <strong>Press</strong> <strong>the</strong> Z button.<br />
The Protect screen appears.<br />
Basic Operations<br />
3 Use <strong>the</strong> four-way controller (2)<br />
to select [Protect].<br />
100-0046<br />
Protect<br />
Unprotect<br />
All images<br />
OK OK<br />
4 <strong>Press</strong> <strong>the</strong> 4 button.<br />
The selected image is protected.<br />
• Select [Unprotect] in Step 3 to cancel <strong>the</strong> Protect setting.<br />
•The Y symbol is displayed when playing back protected images. (p.19)
80<br />
Protecting All Images<br />
1 <strong>Press</strong> <strong>the</strong> Q button.<br />
2 <strong>Press</strong> <strong>the</strong> Z button twice.<br />
The Protect all images screen<br />
appears.<br />
3<br />
Basic Operations<br />
3 <strong>Press</strong> <strong>the</strong> four-way controller<br />
(2) to select [Protect] and<br />
press <strong>the</strong> 4 button.<br />
All images saved in <strong>the</strong> SD Memory<br />
Card are protected.<br />
Protect all images<br />
Protect<br />
Unprotect<br />
OK OK<br />
Select [Unprotect] in Step 3 to cancel <strong>the</strong> Protect setting on all of <strong>the</strong> images.
Setting <strong>the</strong> Printing Service (DPOF)<br />
81<br />
You can order conventional photograph prints by taking <strong>the</strong> SD Memory<br />
Card with recorded images to a store for a printing service.<br />
DPOF (Digital Print Order Format) settings allow you to specify <strong>the</strong><br />
number of copies or to imprint <strong>the</strong> date.<br />
DPOF settings cannot be applied to RAW images.<br />
3<br />
Printing Single Images<br />
Set <strong>the</strong> following items for each image.<br />
Copies Selects <strong>the</strong> number of copies. You can print up to 99 copies.<br />
Date Specifies whe<strong>the</strong>r you want <strong>the</strong> date inserted on <strong>the</strong> print or not.<br />
Basic Operations<br />
1 <strong>Press</strong> <strong>the</strong> Q button and use <strong>the</strong> four-way controller (45)<br />
to select an image.<br />
2 <strong>Press</strong> <strong>the</strong> { button.<br />
The Fn menu appears.<br />
Fn<br />
OK<br />
Fn<br />
Exit<br />
3 <strong>Press</strong> <strong>the</strong> four-way controller<br />
(2).<br />
The DPOF screen appears.<br />
If DPOF settings have already been<br />
made for an image, <strong>the</strong> previous<br />
number of prints and date setting<br />
(O (on) or P (off)) will be displayed.<br />
Copies<br />
Date<br />
Fn All images<br />
100-0046<br />
00<br />
OK OK
82<br />
4 Use <strong>the</strong> four-way controller (45) to choose <strong>the</strong> number of<br />
copies and press <strong>the</strong> four-way controller (3).<br />
The frame moves to [Date].<br />
5 Use <strong>the</strong> four-way controller<br />
(45) to choose whe<strong>the</strong>r to<br />
insert <strong>the</strong> date (O) or not (P).<br />
100-0046<br />
3<br />
Basic Operations<br />
O : The date will be imprinted.<br />
P : The date will not be imprinted.<br />
6 <strong>Press</strong> <strong>the</strong> 4 button.<br />
Copies<br />
Date<br />
All images<br />
The DPOF settings are saved and <strong>the</strong> camera returns to playback status.<br />
Fn<br />
01<br />
OK<br />
OK<br />
Depending on <strong>the</strong> printer or printing equipment at <strong>the</strong> photo processing lab, <strong>the</strong><br />
date may not be imprinted on <strong>the</strong> pictures even if <strong>the</strong> DPOF setting was made.<br />
To cancel DPOF settings, set <strong>the</strong> number of copies to [00] in Step 4 and press<br />
<strong>the</strong> 4 button.<br />
Settings for All Images<br />
1 <strong>Press</strong> <strong>the</strong> { button in<br />
Playback mode.<br />
Fn<br />
The Fn menu appears.<br />
OK<br />
Fn<br />
Exit
83<br />
2 <strong>Press</strong> <strong>the</strong> four-way controller<br />
(2).<br />
100-0046<br />
The DPOF screen appears.<br />
Copies<br />
Date<br />
Fn All images<br />
00<br />
OK OK<br />
3 <strong>Press</strong> <strong>the</strong> { button.<br />
The screen for making DPOF settings<br />
for all images appears.<br />
DPOF setting for all<br />
images<br />
Copies<br />
Date<br />
00<br />
OK OK<br />
3<br />
Basic Operations<br />
4 Use <strong>the</strong> four-way controller (45) to choose <strong>the</strong> number of<br />
copies and whe<strong>the</strong>r to insert <strong>the</strong> date (O) or not (P).<br />
Refer to Steps 4 and 5 of “Printing Single Images” (p.82) for details of<br />
how to make <strong>the</strong> settings.<br />
5 <strong>Press</strong> <strong>the</strong> 4 button.<br />
The DPOF settings for all <strong>the</strong> images are saved and <strong>the</strong> camera returns<br />
to playback status.<br />
The number of copies specified in settings for all images applies to all <strong>the</strong><br />
images. Before printing, check that <strong>the</strong> number is correct.<br />
Settings for single images are canceled when settings are made for all images.
84<br />
Printing Using PictBridge<br />
This function lets you print images directly from <strong>the</strong> camera without using<br />
a PC (direct printing).<br />
Connect <strong>the</strong> camera and PictBridge compatible printer with <strong>the</strong> included<br />
USB cable (I-USB17) to print directly.<br />
Select <strong>the</strong> images you want to print, <strong>the</strong> number of copies and whe<strong>the</strong>r to<br />
insert <strong>the</strong> date or not on <strong>the</strong> camera after connecting to <strong>the</strong> printer.<br />
Direct printing is performed in <strong>the</strong> following steps.<br />
3<br />
Basic Operations<br />
Set [Transfer Mode] on camera to [PictBridge] (p.85)<br />
<br />
Connect <strong>the</strong> camera to <strong>the</strong> printer (p.86)<br />
<br />
Set <strong>the</strong> printing options (p.81)<br />
Print single images (p.87)<br />
Print all images (p.89)<br />
Print with DPOF settings (p.91)<br />
<br />
Disconnect <strong>the</strong> camera from <strong>the</strong> printer (p.91)<br />
• Use of <strong>the</strong> AC adapter is recommended when connecting <strong>the</strong> camera to a<br />
printer. The printer may not work properly or <strong>the</strong> image data may be lost if <strong>the</strong><br />
batteries run out of power while <strong>the</strong> camera is connected to <strong>the</strong> printer.<br />
• Do not disconnect <strong>the</strong> USB cable during data transfer.<br />
• Depending on <strong>the</strong> type of printer, not all <strong>the</strong> settings made on <strong>the</strong> camera<br />
(such as print settings and DPOF settings) may be valid.<br />
• A printing error may occur if <strong>the</strong> selected number of copies exceeds 500.<br />
• You cannot use <strong>the</strong> camera to select multiple images for printing on a single<br />
sheet. Make <strong>the</strong> settings on <strong>the</strong> printer. For details, refer to <strong>the</strong> operating<br />
manual for your printer.<br />
• RAW images cannot be printed directly. Use a PC to print RAW images.<br />
• See <strong>the</strong> “PENTAX PHOTO Browser 2.1/PENTAX PHOTO Laboratory 2.1<br />
Operating Manual” when connecting to a PC.
Setting [Transfer Mode]<br />
85<br />
1 <strong>Press</strong> <strong>the</strong> 3 button.<br />
The [A Rec. Mode] menu appears.<br />
3<br />
Basic Operations<br />
2 Use <strong>the</strong> four-way controller<br />
(45) to select <strong>the</strong> [H Set-up]<br />
menu.<br />
Set-up<br />
Format<br />
Beep<br />
Date Adjust<br />
World Time<br />
Guide display<br />
Exit<br />
English<br />
3 Use <strong>the</strong> four-way controller (23) to select [Transfer<br />
Mode].<br />
4 <strong>Press</strong> <strong>the</strong> four-way controller (5).<br />
A pop-up menu appears.
86<br />
5 Use <strong>the</strong> four-way controller<br />
(23) to select [PictBridge].<br />
Brightness Level<br />
Video Out<br />
Transfer Mode<br />
Auto Power Off<br />
Folder Name<br />
File #<br />
Cancel<br />
Set-up<br />
0<br />
NTSC<br />
PC<br />
PictBridge<br />
PC-F<br />
OK OK<br />
3<br />
Basic Operations<br />
6 <strong>Press</strong> <strong>the</strong> 4 button.<br />
The setting is changed.<br />
7 <strong>Press</strong> <strong>the</strong> 3 button.<br />
Connecting <strong>the</strong> Camera to <strong>the</strong> Printer<br />
1 Turn <strong>the</strong> camera off.<br />
2 Connect <strong>the</strong> camera and PictBridge compatible printer<br />
using <strong>the</strong> USB cable supplied with <strong>the</strong> camera.<br />
The PictBridge logo is displayed on PictBridge compatible printers.
87<br />
3 Turn <strong>the</strong> printer on.<br />
4 After printer start-up is<br />
complete, turn <strong>the</strong> camera on.<br />
The PictBridge menu appears.<br />
Select printing mode<br />
Print One<br />
Print All<br />
DPOF AUTOPRINT<br />
OK OK<br />
3<br />
PictBridge menu is not displayed if [Transfer Mode] is set to [PC] or [PC-F].<br />
Printing Single Images<br />
Basic Operations<br />
1 Use <strong>the</strong> four-way controller<br />
(23) to select [Print One] on<br />
<strong>the</strong> PictBridge menu.<br />
Select printing mode<br />
Print One<br />
Print All<br />
DPOF AUTOPRINT<br />
OK OK<br />
2 <strong>Press</strong> <strong>the</strong> 4 button.<br />
The Print One screen appears.<br />
3 Use <strong>the</strong> four-way controller<br />
(45) to choose an image to<br />
print.<br />
Print this image<br />
100-0046<br />
Copies<br />
1<br />
Date<br />
Fn<br />
Date<br />
OK<br />
88<br />
4 Use <strong>the</strong> four-way controller (23) to choose <strong>the</strong> number of<br />
copies.<br />
You can print up to 99 copies.<br />
5 Use <strong>the</strong> { button to choose whe<strong>the</strong>r to insert <strong>the</strong> date (O)<br />
or not (P).<br />
O : The date will be printed.<br />
P : The date will not be printed.<br />
3<br />
Basic Operations<br />
6 <strong>Press</strong> <strong>the</strong> 4 button.<br />
The print settings confirmation screen<br />
appears.<br />
Proceed to Step 12 to print <strong>the</strong> images<br />
by default.<br />
To change <strong>the</strong> print settings, go to Step<br />
7.<br />
Print according<br />
to settings?<br />
Paper Size<br />
Standard<br />
Paper Type<br />
Std.<br />
Quality<br />
Std.<br />
Border Status<br />
Std.<br />
Fn Change Setting<br />
OK Print<br />
7 <strong>Press</strong> <strong>the</strong> { button.<br />
The screen for changing print settings<br />
appears.<br />
PictBridge<br />
Paper Size<br />
Paper Type<br />
Quality<br />
Border Status<br />
Standard<br />
Std.<br />
Std.<br />
Std.<br />
Cancel<br />
OK OK<br />
8 Select [Paper Size] and press <strong>the</strong> four-way controller (5).<br />
The Paper Size screen appears.<br />
9 Use <strong>the</strong> four-way controller<br />
(2345) to choose <strong>the</strong> paper<br />
size.<br />
You can only choose a size that is<br />
supported by your printer.<br />
When <strong>the</strong> [Paper Size] is set to<br />
[Standard], images are printed<br />
according to <strong>the</strong> printer settings.<br />
Paper Size<br />
Standard 2L<br />
Card 8”×10”<br />
L<br />
A4<br />
100×150 Letter<br />
Postcard 11”×17”<br />
4”×6” A3<br />
Cancel<br />
OK OK
89<br />
10 <strong>Press</strong> <strong>the</strong> 4 button.<br />
11 Repeat Steps 8 to 10 to set [Paper Type], [Quality] and<br />
[Border Status].<br />
The print settings change screen appears after each item has been set.<br />
When <strong>the</strong> [Paper Size] is set to [Standard], images are printed according<br />
to <strong>the</strong> printer settings.<br />
[Paper Type] with more E supports higher quality paper.<br />
[Quality] with more E indicates higher print quality.<br />
3<br />
12 <strong>Press</strong> <strong>the</strong> 4 button twice.<br />
The image is printed according to <strong>the</strong> settings.<br />
<strong>Press</strong> <strong>the</strong> 3 button to cancel printing.<br />
Printing All Images<br />
Basic Operations<br />
1 Use <strong>the</strong> four-way controller<br />
(23) to select [Print All] on <strong>the</strong><br />
PictBridge menu.<br />
Select printing mode<br />
Print One<br />
Print All<br />
DPOF AUTOPRINT<br />
OK OK<br />
2 <strong>Press</strong> <strong>the</strong> 4 button.<br />
The Print all images screen appears.
90<br />
3 Choose <strong>the</strong> number of copies<br />
and whe<strong>the</strong>r to imprint <strong>the</strong> date<br />
or not.<br />
Print all images<br />
100-0046<br />
3<br />
Basic Operations<br />
The number of copies and <strong>the</strong> date<br />
setting that you choose apply to all of<br />
<strong>the</strong> images.<br />
Refer to Steps 4 and 5 of “Printing<br />
Single Images” (p.88) for details on<br />
how to make <strong>the</strong> settings.<br />
4 <strong>Press</strong> <strong>the</strong> 4 button.<br />
Copies<br />
Total<br />
The print settings confirmation screen appears.<br />
Refer to Steps 7 and 11 of “Printing Single Images” (p.88 and 89) for<br />
details on how to change <strong>the</strong> settings.<br />
5 <strong>Press</strong> <strong>the</strong> 4 button on <strong>the</strong> print settings confirmation<br />
screen.<br />
All <strong>the</strong> images are printed according to <strong>the</strong> settings.<br />
<strong>Press</strong> <strong>the</strong> 3 button to cancel printing.<br />
1<br />
28<br />
Date<br />
Fn Date<br />
OK<br />
Printing Images Using <strong>the</strong> DPOF Settings<br />
91<br />
1 Use <strong>the</strong> four-way controller (23) to select [DPOF<br />
AUTOPRINT] on <strong>the</strong> PictBridge menu.<br />
2 <strong>Press</strong> <strong>the</strong> 4 button.<br />
The Print w/DPOF settings screen<br />
appears. Use <strong>the</strong> four-way controller<br />
(45) to check <strong>the</strong> number of copies<br />
for each image, whe<strong>the</strong>r <strong>the</strong> date is<br />
imprinted or not, and total number of<br />
copies. Print settings are set with <strong>the</strong><br />
Print Service. (p.81)<br />
3 <strong>Press</strong> <strong>the</strong> 4 button.<br />
Print w/DPOF settings<br />
Copies<br />
Total<br />
The print settings confirmation screen appears.<br />
Refer to Steps 7 and 11 of “Printing Single Images” (p.88 and 89) for<br />
details on how to change <strong>the</strong> settings.<br />
1<br />
10<br />
Date<br />
OK<br />
Print<br />
3<br />
Basic Operations<br />
4 <strong>Press</strong> <strong>the</strong> 4 button on <strong>the</strong> print settings confirmation<br />
screen.<br />
The images are printed according to <strong>the</strong> settings.<br />
<strong>Press</strong> <strong>the</strong> 3 button to cancel printing.<br />
Disconnecting <strong>the</strong> Cable from <strong>the</strong> Printer<br />
Disconnect <strong>the</strong> cable from <strong>the</strong> printer when you have finished printing.<br />
1 Turn off <strong>the</strong> camera.<br />
2 Disconnect <strong>the</strong> USB cable from <strong>the</strong> camera and printer.
92<br />
Memo
4 Menu Reference<br />
Explains <strong>the</strong> functions of F by buttons and<br />
menus.<br />
Using <strong>the</strong> Button Functions ................................94<br />
Using <strong>the</strong> Menu .....................................................98<br />
Using <strong>the</strong> Fn Menu .............................................104<br />
Using <strong>the</strong> Mode Dial ...........................................106<br />
When using menus and Fn menu, items which cannot be changed due<br />
to camera settings appear gray and cannot be selected.
94<br />
Using <strong>the</strong> Button Functions<br />
Capture Mode<br />
Functions of buttons used during shooting are noted.<br />
1<br />
4<br />
2<br />
Menu Reference<br />
3<br />
4<br />
5<br />
6<br />
7<br />
8<br />
9<br />
10<br />
11<br />
12<br />
13<br />
14<br />
15<br />
1<br />
2<br />
3<br />
Shutter release button<br />
<strong>Press</strong> to capture images. (p.45)<br />
Main switch<br />
Move to turn <strong>the</strong> power on/off (p.32) or to preview (p.147).<br />
Lens unlock button<br />
<strong>Press</strong> to detach lens. (p.38)
4<br />
5<br />
6<br />
7<br />
8<br />
9<br />
10<br />
11<br />
12<br />
13<br />
14<br />
15<br />
Focus mode lever<br />
Switches between autofocus mode (p.120) and manual focus mode<br />
(p.127).<br />
Mode dial<br />
Changes <strong>the</strong> Shooting mode. (p.106)<br />
K button<br />
<strong>Press</strong> to pop up <strong>the</strong> built-in flash. (p.51)<br />
3 button<br />
Displays <strong>the</strong> [A Rec. Mode] menu (p.100). Next, press <strong>the</strong> four-way<br />
controller (5) to display [Q Playback] menu (p.100), [H Set-up] menu<br />
(p.101) and [A Custom Setting] menu. (p.102)<br />
M button<br />
<strong>Press</strong> to show shooting information on <strong>the</strong> LCD monitor. (p.17)<br />
Q button<br />
Switches to <strong>the</strong> Playback mode. (p.65)<br />
mc button<br />
<strong>Press</strong> to set aperture and EV compensation values. (p.137, p.142)<br />
L button<br />
Locks <strong>the</strong> exposure before shooting. (p.143)<br />
Automatically adjusts <strong>the</strong> appropriate exposure in a (Manual) mode.<br />
(p.141)<br />
e-dial<br />
Sets shutter speed, aperture, and EV compensation values.<br />
(p.135, p.137, p.142)<br />
4 button<br />
Saves <strong>the</strong> setting you selected in <strong>the</strong> menu.<br />
Four-way controller (2345)<br />
Use it to move cursor or change items in menus and Fn menu.<br />
{ button<br />
<strong>Press</strong> to display <strong>the</strong> Fn menu. <strong>Press</strong> <strong>the</strong> four-way controller (2345)<br />
to determine <strong>the</strong> following operation. (p.104)<br />
95<br />
4<br />
Menu Reference
96<br />
Playback Mode<br />
Functions of buttons used during playback are noted.<br />
1<br />
2<br />
4<br />
Menu Reference<br />
3<br />
4<br />
5<br />
6<br />
7<br />
8<br />
9<br />
10<br />
11<br />
1<br />
2<br />
3<br />
4<br />
Shutter release button<br />
<strong>Press</strong> to switch to Capture mode.<br />
Main switch<br />
Move to turn <strong>the</strong> camera on and off. (p.32)<br />
3 button<br />
<strong>Press</strong> to display <strong>the</strong> [Q Playback] menu (p.100). Next, press <strong>the</strong> fourway<br />
controller (45) to display [H Set-up] menu (p.101), [A Custom<br />
Setting] menu (p.102) and [A Rec. Mode] menu (p.100).<br />
i button<br />
<strong>Press</strong> to delete images. (p.75)
5<br />
6<br />
7<br />
8<br />
9<br />
10<br />
11<br />
M button<br />
<strong>Press</strong> to show shooting information on <strong>the</strong> LCD monitor. (p.18)<br />
Q button<br />
<strong>Press</strong> to switch to Capture mode.<br />
Z button<br />
<strong>Press</strong> to protect images from being accidentally erased. (p.79)<br />
e-dial<br />
Use it to enlarge an image (p.67) or display nine images at <strong>the</strong> same time<br />
(p.68).<br />
4 button<br />
Saves <strong>the</strong> setting you selected in <strong>the</strong> menu or playback screen.<br />
Four-way controller (2345)<br />
Use it to move cursor or change items in menus, Fn menu and playback<br />
screen.<br />
{ button<br />
<strong>Press</strong> to display <strong>the</strong> Fn menu. <strong>Press</strong> <strong>the</strong> four-way controller (245) to<br />
determine <strong>the</strong> following operation. (p.104)<br />
97<br />
4<br />
Menu Reference
98<br />
Using <strong>the</strong> Menu<br />
How to Operate <strong>the</strong> Menu<br />
This section explains operation methods for [A Rec. Mode] menu,<br />
[Q Playback] menu, [H Set-up] menu and [A Custom Setting] menu.<br />
Displaying <strong>the</strong> Menu screen<br />
4<br />
Menu Reference<br />
1 <strong>Press</strong> <strong>the</strong> 3 button in<br />
Capture mode.<br />
The [A Rec. Mode] menu appears on<br />
<strong>the</strong> LCD monitor.<br />
Rec. Mode<br />
Image Tone<br />
Recorded Pixels<br />
Quality Level<br />
Saturation<br />
Sharpness<br />
Contrast<br />
Exit<br />
2 <strong>Press</strong> <strong>the</strong> four-way controller<br />
(5).<br />
[Q Playback] menu, [H Set-up]<br />
menu and [A Custom Setting] menu<br />
appear in order each time <strong>the</strong> four-way<br />
controller is pressed.<br />
Set-up<br />
Format<br />
Beep<br />
Date Adjust<br />
World Time<br />
Guide display<br />
Exit<br />
English
Select a menu item and set<br />
99<br />
Procedure to set <strong>the</strong> [Quality Level] on <strong>the</strong> [A Rec. Mode] menu is<br />
explained as an example.<br />
3 Use <strong>the</strong> four-way controller<br />
(23) to choose an item.<br />
Rec. Mode<br />
Image Tone<br />
Recorded Pixels<br />
Quality Level<br />
Saturation<br />
Sharpness<br />
Contrast<br />
Exit<br />
4 <strong>Press</strong> <strong>the</strong> four-way controller<br />
(5).<br />
Available [Quality Level] options<br />
appear.<br />
<strong>Press</strong> <strong>the</strong> four-way controller (5) to<br />
move to <strong>the</strong> pop-up menu if <strong>the</strong>re is<br />
one.<br />
Rec. Mode<br />
Image Tone<br />
Recorded Pixels<br />
Quality Level<br />
Saturation<br />
Sharpness<br />
Contrast<br />
Cancel<br />
OK OK<br />
4<br />
Menu Reference<br />
5 Use <strong>the</strong> four-way controller (23) to select a setting.<br />
6 <strong>Press</strong> <strong>the</strong> 4 button.<br />
The camera returns to <strong>the</strong> menu screen. Next, set o<strong>the</strong>r items.<br />
<strong>Press</strong> <strong>the</strong> 3 button to return to Capture or Playback mode.<br />
Even after you press <strong>the</strong> 3 button and close <strong>the</strong> menu screen, your<br />
settings will not be saved if <strong>the</strong> camera is turned off improperly (such as by<br />
removing <strong>the</strong> batteries while <strong>the</strong> camera is on).<br />
• You can use <strong>the</strong> e-dial to switch among <strong>the</strong> [A Rec. Mode] menu, <strong>the</strong> [Q<br />
Playback] menu, [H Set-up] menu, and [A Custom Setting] menu when no<br />
pop-up menu is displayed.<br />
• If <strong>the</strong> 3 button is pressed in Capture mode, <strong>the</strong> [A Rec. Mode] menu<br />
appears. If <strong>the</strong> 3 button is pressed in Playback mode, <strong>the</strong> [Q<br />
Playback] menu appears.
100<br />
[A Rec. Mode] Menu Setting Items<br />
Perform settings related to capturing in <strong>the</strong> [A Rec. Mode] menu.<br />
4<br />
Menu Reference<br />
Item Function Page<br />
Image Tone Sets <strong>the</strong> color tone of pictures. p.110<br />
Recorded Pixels Sets <strong>the</strong> recording size of images. p.111<br />
Quality Level Sets <strong>the</strong> image quality. p.112<br />
Saturation Sets <strong>the</strong> color saturation. p.113<br />
Sharpness Makes <strong>the</strong> image outlines sharp or soft. p.113<br />
Contrast Sets <strong>the</strong> image contrast. p.113<br />
Auto Bracket Sets Auto Bracket shooting. p.146<br />
AE Metering<br />
Selects <strong>the</strong> part of <strong>the</strong> screen to use for measuring<br />
brightness and determining exposure.<br />
p.131<br />
Focusing Area Selects <strong>the</strong> area on which <strong>the</strong> autofocus focuses. p.123<br />
AF Mode Selects <strong>the</strong> autofocus mode. p.124<br />
Flash Exp. Comp.<br />
Adjusts <strong>the</strong> flash exposure to brighten or darken<br />
<strong>the</strong> image.<br />
p.149<br />
[Q Playback] Menu Setting Items<br />
Perform settings related to playback and editing images in <strong>the</strong><br />
[Q Playback] menu.<br />
Item Function Page<br />
Plybk dsply mthd<br />
Sets shooting information to show during playback<br />
and whe<strong>the</strong>r to display overexposed area warning.<br />
p.162<br />
Instant Review Sets <strong>the</strong> Instant Review time. p.172<br />
Preview Display<br />
Sets to display overexposed area warning or<br />
histogram during Instant Review or Digital<br />
Preview.<br />
p.173<br />
Digital Filter<br />
Edits captured images to black and white or sepia<br />
tint, adds softening and slimming effects, or p.73<br />
adjusts <strong>the</strong> brightness.<br />
Slideshow Plays back recorded images one after ano<strong>the</strong>r. p.70
[H Set-up] Menu Setting Items<br />
101<br />
Perform various settings related to <strong>the</strong> camera in <strong>the</strong> [H Set-up] menu.<br />
Item Function Page<br />
Format Formats <strong>the</strong> SD Memory Card. p.164<br />
Beep Switches <strong>the</strong> beep tone on/off. p.165<br />
Date Adjust Sets <strong>the</strong> date format and time. p.165<br />
World Time Sets display of local time when traveling abroad. p.166<br />
Language/<br />
Changes <strong>the</strong> language in which menus and<br />
messages appear.<br />
p.169<br />
Guide display Sets to display indicators in LCD monitor. p.169<br />
Brightness Level Changes <strong>the</strong> brightness of <strong>the</strong> LCD monitor. p.170<br />
Video Out Sets <strong>the</strong> output format to <strong>the</strong> TV monitor. p.170<br />
Transfer Mode* Sets <strong>the</strong> USB cable connection (PC or printer). p.85<br />
Auto Power Off Sets <strong>the</strong> time to turn off automatically. p.171<br />
Folder Name<br />
Sets <strong>the</strong> method used to assign folder names for<br />
storing images.<br />
p.171<br />
File # Sets <strong>the</strong> method used to add file numbers. p.172<br />
Sensor Cleaning<br />
Reset<br />
Locks <strong>the</strong> mirror in <strong>the</strong> up position for cleaning <strong>the</strong><br />
CCD.<br />
Resets all settings o<strong>the</strong>r than Date Adjust,<br />
Language, Video Out and World Time.<br />
p.185<br />
p.174<br />
* Refer to p.13 of <strong>the</strong> “PENTAX PHOTO Browser 2.1/PENTAX PHOTO<br />
Laboratory 2.1 Operating Manual” for details on connecting <strong>the</strong> camera to a<br />
PC.<br />
4<br />
Menu Reference
102<br />
[A Custom Setting] menu Setting Items<br />
Set custom functions to fully use <strong>the</strong> functions of a SLR camera with <strong>the</strong><br />
Custom Function Menu. The default setting does not use Custom<br />
Function.<br />
[A Custom Setting] menu settings are activated when [Setting], <strong>the</strong> first<br />
item, is O (on).<br />
4<br />
Menu Reference<br />
Item Function Page<br />
Setting Sets to use <strong>the</strong> Custom Function Menu. —<br />
Noise Reduction<br />
Sets to use Noise Reduction in slow speed<br />
shooting.<br />
—<br />
Expsr Setting Steps Sets <strong>the</strong> adjustment steps for exposure. p.143<br />
ISO Corction in<br />
AUTO<br />
ISO Snstvty Wrn<br />
Dspl<br />
Automatically corrects sensitivity range when<br />
Sensitivity is set to [AUTO].<br />
Sets <strong>the</strong> maximum sensitivity level. ISO<br />
Sensitivity Warning Display appears when<br />
exceeded.<br />
p.117<br />
p.118<br />
Sets to adjust AE and Focusing Area in multisegment<br />
metering based on AF point.<br />
Link AF Point and AE p.132<br />
Meter Operating<br />
Time<br />
Sets <strong>the</strong> exposure metering time. p.132<br />
AE-L with AF locked Sets to fix exposure value when focus is locked. p.126<br />
Recordable Image<br />
No.<br />
OK btn when<br />
shooting<br />
AE-L bttn on M expsr<br />
AF in remote control<br />
Sets to switch number of recordable images in<br />
<strong>the</strong> LCD panel and viewfinder to number of<br />
continuous shooting recordable images when<br />
shutter release button is pressed halfway.<br />
Sets <strong>the</strong> action for <strong>the</strong> 4 button when pressed<br />
during shooting.<br />
Selects <strong>the</strong> exposure adjustment method when<br />
<strong>the</strong> L button is pressed in a (Manual) mode.<br />
Sets to use Autofocus when shooting with<br />
remote control.<br />
Shutter releases after AF activates if shutter is<br />
released from remote control when [On]. Shutter<br />
cannot be released until in focus.<br />
AF does not activate at shutter release from<br />
remote control when [Off].<br />
—<br />
p.122,<br />
p.123<br />
p.141<br />
—
FI with S lens used<br />
Using aperture ring<br />
Release when<br />
Chrging<br />
Preview Method<br />
Mag to Strt Zm Plybk<br />
Man. WB<br />
Measurement<br />
Sets to enable focus indicator when screw mount<br />
lens is in use.<br />
Lens is recognized even when lens is not<br />
attached to <strong>the</strong> camera when enabled.<br />
Sets to enable shutter release when lens<br />
aperture ring is set at o<strong>the</strong>r than s.<br />
Sets to release shutter while <strong>the</strong> built-in flash is<br />
charging.<br />
Selects Digital Preview or Optical Preview when<br />
<strong>the</strong> main switch is in <strong>the</strong> preview position (|).<br />
Digital Preview lets you check <strong>the</strong> composition,<br />
exposure and focus on <strong>the</strong> LCD monitor before<br />
taking <strong>the</strong> picture. Optical Preview lets you check<br />
<strong>the</strong> depth of field with <strong>the</strong> viewfinder.<br />
Sets <strong>the</strong> initial magnification of <strong>the</strong> zoom<br />
playback.<br />
Choose from [1.2 times], [2 times], [4 times],<br />
[8 times] and [12 times]. The default setting is<br />
[1.2 times].<br />
Sets to meter entire screen or Spot area when<br />
setting white balance to manual.<br />
—<br />
p.184<br />
p.150<br />
p.148<br />
—<br />
p.115<br />
Color Space Sets <strong>the</strong> color space to use. p.119<br />
Reset Custom<br />
Fnction<br />
Item Function Page<br />
Resets all <strong>the</strong> settings in <strong>the</strong> Custom Function<br />
menu to <strong>the</strong> defaults.<br />
p.175<br />
103<br />
4<br />
Menu Reference
104<br />
Using <strong>the</strong> Fn Menu<br />
4<br />
Menu Reference<br />
Capture Mode<br />
<strong>Press</strong> <strong>the</strong> { button while taking a picture.<br />
The Fn menu appears.<br />
Fn<br />
OK<br />
AUTO<br />
Fn<br />
Exit<br />
<strong>Press</strong> <strong>the</strong> four-way controller (2345) to set <strong>the</strong> operation.<br />
Four-way<br />
controller<br />
2 Drive Mode<br />
Item Function Page<br />
Selects Continuous shooting, Self-<br />
Timer, Remote control or Auto bracket.<br />
p.55,<br />
p.57,<br />
p.61,<br />
p.144<br />
3 Flash Mode Adjusts <strong>the</strong> method of flash discharge. p.51<br />
4 White Balance<br />
Adjusts <strong>the</strong> color for <strong>the</strong> color of <strong>the</strong> light<br />
source illuminating <strong>the</strong> subject.<br />
p.114<br />
5 Sensitivity Sets <strong>the</strong> sensitivity. p.117
Playback Mode<br />
105<br />
<strong>Press</strong> <strong>the</strong> { button during playback. The Fn<br />
menu appears.<br />
Fn<br />
OK<br />
Fn<br />
Exit<br />
<strong>Press</strong> <strong>the</strong> four-way controller (245) to set <strong>the</strong> operation.<br />
Four-way<br />
controller<br />
Item Function Page<br />
2 DPOF Settings Sets <strong>the</strong> DPOF settings. p.81<br />
4 Digital Filter<br />
5 Slideshow<br />
Edits captured images to black and<br />
white or sepia tint, adds softening and<br />
slimming effects, or adjusts brightness.<br />
Plays back recorded images one after<br />
ano<strong>the</strong>r.<br />
p.73<br />
p.70<br />
4<br />
Menu Reference
106<br />
Using <strong>the</strong> Mode Dial<br />
4<br />
Menu Reference<br />
Dial indicator<br />
You can switch <strong>the</strong> Shooting mode by setting <strong>the</strong> icons on <strong>the</strong> mode dial<br />
to <strong>the</strong> dial indicator.<br />
Item Function Page<br />
I (Auto Picture)<br />
= (Portrait)<br />
Selects automatically from Portrait,<br />
Landscape, Macro, and Moving Object<br />
Modes. Lets you take pictures with standard<br />
settings (Normal mode) when <strong>the</strong>re is no<br />
optimal shooting mode.<br />
Optimal for capturing portraits.<br />
s (Landscape)<br />
Deepens <strong>the</strong> focus range, emphasizes<br />
contour and saturation of trees and <strong>the</strong> sky,<br />
and produces a bright image.<br />
Lets you take vibrant pictures of flowers or<br />
q (Macro)<br />
o<strong>the</strong>r small subjects at short distances.<br />
p.47<br />
Lets you take sharp pictures of a quickly<br />
\ (Moving Object)<br />
moving subject, such as a sporting event.<br />
Lets you capture people against a night view<br />
. (Night Scene Portrait)<br />
or dusk.<br />
The built-in flash is deactivated. O<strong>the</strong>r settings<br />
a (Flash OFF)<br />
are <strong>the</strong> same as <strong>the</strong> Normal mode in I.<br />
H (Scene)<br />
Selects from 8 situations depending on <strong>the</strong><br />
shooting conditions.<br />
For . (Night Scene Portrait), <strong>the</strong> shutter speed becomes slower in dark<br />
places, even if <strong>the</strong> built-in flash is used. Use a tripod to avoid camera shake.
Item Function Page<br />
e (Program)<br />
Automatically sets shutter speed and aperture<br />
to <strong>the</strong> proper exposure when taking pictures.<br />
p.134<br />
b (Shutter Priority)<br />
c (Aperture Priority)<br />
a (Manual)<br />
p (Bulb)<br />
Lets you set <strong>the</strong> desired shutter speed for<br />
expressing <strong>the</strong> motion of moving subjects.<br />
Take pictures of fast moving subjects that look<br />
still or subjects that give a sense of movement.<br />
Lets you set <strong>the</strong> desired aperture for controlling<br />
<strong>the</strong> depth of field. Use it to blur or focus on <strong>the</strong><br />
background.<br />
Lets you create <strong>the</strong> picture you have in mind by<br />
combining set shutter speed and aperture.<br />
Lets you capture images that require slow<br />
shutter speeds such as fireworks and night<br />
scenes.<br />
p.135<br />
p.137<br />
p.139<br />
p.141<br />
107<br />
4<br />
Menu Reference
108<br />
Memo
5 Function Reference<br />
Introduces functions to fur<strong>the</strong>r enhance your F<br />
experience.<br />
Setting <strong>the</strong> Recorded Pixels and Quality Level<br />
..............................................................................110<br />
Focusing .............................................................120<br />
Setting <strong>the</strong> Exposure .........................................129<br />
Checking <strong>the</strong> Composition, Exposure and Focus<br />
Before Shooting .................................................147<br />
Using <strong>the</strong> Built-in Flash .....................................149<br />
Settings During Playback ..................................162<br />
Camera Settings .................................................164<br />
Resetting to Default Settings ............................174
110<br />
Setting <strong>the</strong> Recorded Pixels and<br />
Quality Level<br />
Setting <strong>the</strong> Image Tone<br />
Set <strong>the</strong> basic color tone of pictures. The default setting is F (Bright).<br />
F<br />
G<br />
Bright<br />
Natural<br />
Images are finished brightly, with high contrast and<br />
sharp.<br />
Images are finished naturally and suitable for<br />
retouching.<br />
Set in [Image Tone] in <strong>the</strong> [A Rec. Mode] menu. (p.100)<br />
5<br />
Function Reference<br />
Rec. Mode<br />
Image Tone<br />
Recorded Pixels<br />
Quality Level<br />
Saturation<br />
Sharpness<br />
Contrast<br />
Cancel<br />
OK OK<br />
Settings cannot be changed in Picture mode and H mode (p.47). Setting is<br />
fixed to F (bright).
Setting <strong>the</strong> Recorded Pixels<br />
111<br />
You can select <strong>the</strong> number of recorded pixels from P, Q and R. The<br />
more pixels <strong>the</strong>re are, <strong>the</strong> larger <strong>the</strong> picture and <strong>the</strong> bigger <strong>the</strong> file size.<br />
The file size will also differ according to quality level settings. The default<br />
setting is P 3008×2000 (JPEG).<br />
P<br />
3008×2008 (RAW)<br />
3008×2000 (JPEG)<br />
Suited for printing on A3 paper.<br />
Q 2400×1600 Suited for printing on A4 paper.<br />
R 1536×1024 Suited for printing on A5 paper.<br />
Set in [Recorded Pixels] in <strong>the</strong> [A Rec. Mode] menu. (p.100)<br />
Rec. Mode<br />
Image Tone<br />
Recorded Pixels<br />
Quality Level<br />
Saturation<br />
Sharpness<br />
Contrast<br />
Cancel<br />
OK OK<br />
[Recorded Pixels] cannot be selected if <strong>the</strong> [Quality Level] is set to |. (Fixed<br />
at 3008×2008)<br />
5<br />
Function Reference
112<br />
Setting <strong>the</strong> Quality Level<br />
You can set <strong>the</strong> image quality level. The file size will also differ according<br />
to <strong>the</strong> Recorded Pixels settings. The default setting is C (Best).<br />
5<br />
Function Reference<br />
| RAW<br />
C<br />
D<br />
E<br />
Best<br />
Better<br />
Good<br />
RAW data is CCD output data saved without processing.<br />
Effects such as White Balance, Contrast, Saturation and<br />
Sharpness are not applied to <strong>the</strong> image but such<br />
information is saved. Transfer to a PC, apply effects with<br />
<strong>the</strong> enclosed PENTAX PHOTO Laboratory 2.1 and create<br />
JPEG and TIFF images.<br />
Lowest compression rate, suited for printing large pictures<br />
such as A4 size. Image is saved in JPEG format.<br />
Standard compression rate, suited for viewing as<br />
photographs or on your computer screen. Image is saved<br />
in JPEG format.<br />
Highest compression rate, suitable for attaching to e-mail<br />
or posting on websites. Image is saved in JPEG format.<br />
Set in [Quality Level] in <strong>the</strong> [A Rec. Mode] menu. (p.100)<br />
Rec. Mode<br />
Image Tone<br />
Recorded Pixels<br />
Quality Level<br />
Saturation<br />
Sharpness<br />
Contrast<br />
Cancel<br />
OK OK
Setting <strong>the</strong> Saturation/Sharpness/Contrast<br />
113<br />
Select from five levels of Saturation, Sharpness and Contrast. The default<br />
setting is [0 (Standard)] for all.<br />
Saturation<br />
Sharpness<br />
Contrast<br />
Sets <strong>the</strong> color saturation.<br />
Makes <strong>the</strong> image outlines sharp or soft.<br />
Sets <strong>the</strong> image contrast.<br />
Set [Saturation], [Sharpness] and [Contrast] in <strong>the</strong> [A Rec. Mode] menu.<br />
(p.100)<br />
Settings cannot be changed in Picture mode and H mode (p.47).<br />
Rec. Mode<br />
Image Tone<br />
Recorded Pixels<br />
Quality Level<br />
Saturation<br />
Sharpness<br />
Contrast<br />
Exit<br />
Rec. Mode<br />
Image Tone<br />
Recorded Pixels<br />
Quality Level<br />
Saturation<br />
Sharpness<br />
Contrast<br />
Exit<br />
Towards + : Higher saturation<br />
Towards – : Lower saturation<br />
Towards + : Higher sharpness<br />
Towards – : Lower sharpness<br />
5<br />
Function Reference<br />
Rec. Mode<br />
Image Tone<br />
Recorded Pixels<br />
Quality Level<br />
Saturation<br />
Sharpness<br />
Contrast<br />
Exit<br />
Towards + : Higher contrast<br />
Towards – : Lower contrast
114<br />
Setting <strong>the</strong> White Balance<br />
The color of <strong>the</strong> subject changes with <strong>the</strong> light source. For example, <strong>the</strong><br />
same white object will be a different shade of white in daylight than under<br />
a light bulb. In cameras using film, this is adjusted by changing <strong>the</strong> film or<br />
using filters. In digital cameras, <strong>the</strong> whiteness is adjusted using white<br />
balance. The default setting is F (Auto).<br />
5<br />
Function Reference<br />
F Auto<br />
Automatically adjusts <strong>the</strong> white balance. (About 4000 to<br />
8000K)<br />
G Daylight For use when taking pictures in sunlight. (About 5200K)<br />
H Shade For use when taking pictures in <strong>the</strong> shade. (About 8000K)<br />
^<br />
J<br />
I<br />
Cloudy<br />
Fluorescent<br />
Light<br />
Tungsten<br />
Light<br />
b Flash<br />
K<br />
Manual<br />
For use when taking pictures on cloudy days. (About<br />
6000K)<br />
For use when taking pictures under fluorescent lighting.<br />
Select <strong>the</strong> type of fluorescent light, from W (white) (About<br />
4200K), N (neutral white) (About 5000K), and D (daylight)<br />
(About 6500K).<br />
For use when taking pictures under light bulb or o<strong>the</strong>r<br />
tungsten light. (About 2850K)<br />
For use when taking pictures using <strong>the</strong> built-in flash.<br />
(About 5400K)<br />
For use when taking pictures by manually adjusting <strong>the</strong><br />
white balance.<br />
* The color temperature (K) is an estimate. This does not indicate precise colors.<br />
* The white balance is adjusted based on preset values provided in <strong>the</strong> camera when<br />
set to G (Daylight), H (Shade), ^ (Cloudy), J (Fluorescent Light), I (Tungsten<br />
Light), or b (Flash).<br />
Set [White Balance] in <strong>the</strong> Fn menu. (p.104)<br />
White Balance<br />
Auto<br />
OK OK<br />
• Refer to p.115 for manual adjustment method.<br />
• White balance cannot be adjusted in Picture mode and H mode (p.47).
115<br />
Color Temperature<br />
The color of light shifts towards blue as <strong>the</strong> color temperature rises, and<br />
towards red as <strong>the</strong> color temperature falls. Color temperature describes<br />
this change in light color in terms of absolute temperature (K: Kelvin).<br />
This camera is capable of setting <strong>the</strong> white balance to enable taking<br />
pictures with natural coloring under a variety of lighting conditions.<br />
Red tint<br />
Blue tint<br />
2000 3000 4000 5000 6000 8000 10000 12000 [ K ]<br />
Candle flame<br />
Oil lamp<br />
Tungsten light<br />
Halogen light bulb<br />
White (Fluorescent light)<br />
Daylight Flash<br />
Neutral white (Fluorescent light)<br />
Cloudy<br />
Daylight (Fluorescent light)<br />
Shade<br />
Clear sky<br />
5<br />
Function Reference<br />
Adjusting <strong>the</strong> White Balance Manually<br />
You can adjust <strong>the</strong> white balance depending on <strong>the</strong> light source when<br />
taking pictures. With Manual White Balance, <strong>the</strong> camera can store delicate<br />
shades that cannot be precisely adjusted with <strong>the</strong> white balance preset<br />
values provided in <strong>the</strong> camera (p.114). This provides <strong>the</strong> optimum white<br />
balance for your surroundings.<br />
1 Set <strong>the</strong> mode dial to e, b, c, or a.<br />
2 <strong>Press</strong> <strong>the</strong> { button.<br />
The Fn menu appears.<br />
3 <strong>Press</strong> <strong>the</strong> four-way controller (4).<br />
The White Balance screen appears.
116<br />
4 Use <strong>the</strong> four-way controller (3)<br />
to select K (Manual).<br />
White Balance<br />
Manual<br />
Adjust<br />
OK OK<br />
5<br />
5 <strong>Press</strong> <strong>the</strong> four-way controller<br />
(5).<br />
The message screen appears.<br />
Manual<br />
White Balance<br />
Point camera at subject<br />
<strong>Press</strong> <strong>the</strong> shutter<br />
release button<br />
Function Reference<br />
6 Fully display a white or gray sheet of paper in <strong>the</strong><br />
viewfinder under <strong>the</strong> light to adjust white balance.<br />
7 <strong>Press</strong> <strong>the</strong> shutter release button fully.<br />
Slide <strong>the</strong> focus mode lever to \ when <strong>the</strong> shutter cannot be released.<br />
[OK] appears on <strong>the</strong> LCD monitor when setting is completed.<br />
[NG] appears when setting is not completed successfully.<br />
8 <strong>Press</strong> <strong>the</strong> 4 button.<br />
• No image is recorded when <strong>the</strong> shutter release button is pressed to adjust<br />
<strong>the</strong> white balance.<br />
• <strong>Press</strong> <strong>the</strong> { button when adjustment is unsuccessful to set again.<br />
• You can use [Man. WB Measurement] in <strong>the</strong> [A Custom Setting] menu<br />
(p.103) to set <strong>the</strong> area to measure for white balance when setting manually.<br />
Even if [Entire screen] is selected, white balance of <strong>the</strong> entire screen is<br />
measured normally but <strong>the</strong> exposure metering is measured according to <strong>the</strong><br />
[AE Metering] setting in <strong>the</strong> [A Rec. Mode] menu. White Balance is only<br />
adjusted in <strong>the</strong> spot metering area (p.132) if [Spot metering area] is selected.<br />
• If picture is extremely overexposed or underexposed, white balance may not be<br />
adjusted. In this case, adjust appropriate exposure and adjust <strong>the</strong> white balance.
Setting <strong>the</strong> Sensitivity<br />
117<br />
You can set <strong>the</strong> sensitivity to suit <strong>the</strong> brightness of <strong>the</strong> surroundings.<br />
The sensitivity can be set to [AUTO] or within a sensitivity range equivalent<br />
to ISO 200 to 3200. The default setting is [AUTO].<br />
Set [Sensitivity] in <strong>the</strong> Fn menu. (p.104)<br />
Sensitivity<br />
AUTO<br />
200<br />
400<br />
800<br />
1600<br />
3200<br />
OK OK<br />
Captured images can show more noise if higher Sensitivity is set.<br />
5<br />
Setting <strong>the</strong> Range of Automatic Correction in AUTO<br />
Set range to automatically correct sensitivity when Sensitivity is set to<br />
[AUTO]. The sensitivity is automatically corrected in <strong>the</strong> range of [ISO 200-<br />
800] by default.<br />
1 ISO 200-800<br />
2 ISO 200-400<br />
3 ISO 200-1600<br />
4 ISO 200-3200<br />
Corrects sensitivity automatically in <strong>the</strong> range of ISO<br />
200 to 800.<br />
Corrects sensitivity automatically in <strong>the</strong> range of ISO<br />
200 to 400.<br />
Corrects sensitivity automatically in <strong>the</strong> range of ISO<br />
200 to 1600.<br />
Corrects sensitivity automatically in <strong>the</strong> range of ISO<br />
200 to 3200.<br />
Set in [ISO Corction in AUTO] in <strong>the</strong> [A Custom Setting] menu. (p.102)<br />
Function Reference<br />
ISO Corction in AUTO<br />
ISO 200-800<br />
ISO 200-400<br />
ISO 200-1600<br />
ISO 200-3200<br />
Corrects sensitivity<br />
automatically in <strong>the</strong><br />
range of ISO 200 to 800
118<br />
Sensitivity is not corrected in <strong>the</strong> following.<br />
• Exposure mode is a (Manual) or p (Bulb) mode<br />
• Flash is discharged<br />
• Auto bracketing<br />
• EV Compensation<br />
ISO Sensitivity Warning Display<br />
ISO Sensitivity Warning appears in <strong>the</strong> viewfinder when a sensitivity value<br />
of your choice is reached or exceeded. Set a sensitivity that is not regularly<br />
used to avoid forgetting to reset when sensitivity is raised. ISO Sensitivity<br />
Warning is not displayed by default.<br />
5<br />
Function Reference<br />
1 Off ISO Sensitivity Warning is not displayed.<br />
2 ISO 400<br />
3 ISO 800<br />
4 ISO 1600<br />
5 ISO 3200<br />
ISO Sensitivity Warning is displayed when ISO 400 is<br />
set or exceeded.<br />
ISO Sensitivity Warning is displayed when ISO 800 is<br />
set or exceeded.<br />
ISO Sensitivity Warning is displayed when ISO 1600 is<br />
set or exceeded.<br />
ISO Sensitivity Warning is displayed when ISO 3200 is<br />
set.<br />
Set in [ISO Snstvty Wrn Dspl] in <strong>the</strong> [A Custom Setting] menu. (p.102)<br />
ISO Snstvty Wrn Dspl<br />
Off<br />
ISO 400<br />
ISO 800<br />
ISO 1600<br />
ISO 3200<br />
ISO sensitvty wrning not<br />
displayed in vewfnder<br />
o (ISO Sensitivity Warning) appears in <strong>the</strong> viewfinder when <strong>the</strong> set<br />
sensitivity is set or exceeded.<br />
ISO Sensitivity Warning is not displayed if sensitivity is automatically corrected<br />
(p.117).
Setting <strong>the</strong> Color Space<br />
119<br />
You can set <strong>the</strong> color space to use. The default setting is [sRGB].<br />
1 sRGB Sets to sRGB color space.<br />
2 AdobeRGB Sets to AdobeRGB color space.<br />
Set in [Color Space] in <strong>the</strong> [A Custom Setting] menu. (p.103)<br />
Color Space<br />
sRGB<br />
AdobeRGB<br />
Sets to sRGB color space<br />
5<br />
File names differ depending on <strong>the</strong> color space setting as shown below.<br />
For sRGB : IMGPxxxx.JPG<br />
For AdobeRGB : _IGPxxxx.JPG<br />
[xxxx] is <strong>the</strong> file number and numbering continues from <strong>the</strong> last stored file<br />
number.<br />
Function Reference<br />
Color Space<br />
Color ranges for various input/output devices, such as digital<br />
cameras, monitors, and printers, differ.<br />
This color range is called <strong>the</strong> Color Space.<br />
To recreate different color spaces in different devices, standard color<br />
spaces have been proposed. This camera supports sRGB and<br />
AdobeRGB.<br />
sRGB is mainly used for devices such as a PC.<br />
AdobeRGB covers a wider area than sRGB and is used for<br />
occupational uses such as industrial printing.<br />
An image created in AdobeRGB may appear lighter than an image<br />
created in sRGB when output from a sRGB compatible device.
120<br />
Focusing<br />
You can focus with <strong>the</strong> following methods.<br />
= Autofocus<br />
The camera is focused when <strong>the</strong> shutter release<br />
button is pressed halfway.<br />
\ Manual focus Manually adjust <strong>the</strong> focus.<br />
Using <strong>the</strong> Autofocus<br />
5<br />
Function Reference<br />
You can choose <strong>the</strong> autofocus area from [Wide] and [Spot]. (p.123)<br />
You can also choose <strong>the</strong> autofocus mode from l (Single mode) where<br />
<strong>the</strong> shutter release button is pressed halfway to focus on <strong>the</strong> subject and<br />
<strong>the</strong> focus is locked at that position, and k (Continuous mode) where<br />
<strong>the</strong> subject is kept in focus by continuous adjustment while <strong>the</strong> shutter<br />
release button is pressed halfway. (p.124)<br />
1 Set <strong>the</strong> focus mode lever to<br />
=.
121<br />
2 Look through <strong>the</strong> viewfinder<br />
and press <strong>the</strong> shutter release<br />
button halfway.<br />
The focus indicator ] appears in <strong>the</strong><br />
viewfinder when focused (if it is<br />
blinking, <strong>the</strong> subject is not in focus).<br />
1 Hard-to-Autofocus Subjects (p.46)<br />
Focus indicator<br />
•In l (Single mode), <strong>the</strong> focus is locked (focus lock) while ] is lit. To focus<br />
on ano<strong>the</strong>r subject, take your finger off <strong>the</strong> shutter release button first.<br />
• During \ (Moving Object) mode, when <strong>the</strong> H mode is set to C (Kids) or<br />
E (Pet) or when <strong>the</strong> [AF Mode] in <strong>the</strong> [A Rec. Mode] is set to k<br />
(Continuous mode) (p.124), focus is adjusted continuously, tracking <strong>the</strong><br />
moving object as long as <strong>the</strong> shutter release button is kept pressed halfway.<br />
• The shutter cannot be released until <strong>the</strong> subject is in focus in l (Single<br />
mode) (p.124). If <strong>the</strong> subject is too close to <strong>the</strong> camera, move back and take<br />
<strong>the</strong> picture. Adjust <strong>the</strong> focus manually if <strong>the</strong> subject is difficult to focus (p.46).<br />
(p.127)<br />
•In l (Single mode), press <strong>the</strong> shutter release button halfway. The built-in<br />
flash will discharge automatically several times, enabling <strong>the</strong> autofocus to<br />
focus on <strong>the</strong> subject easier if <strong>the</strong> subject is in a dark area and <strong>the</strong> built-in flash<br />
is available.<br />
• Regardless if <strong>the</strong> camera is set to l (Single mode) or k (Continuous<br />
mode), <strong>the</strong> camera automatically tracks <strong>the</strong> subject if it is determined to be a<br />
moving object.<br />
5<br />
Function Reference
122<br />
Use <strong>the</strong> 4 Button to Focus on <strong>the</strong> Subject<br />
You can set <strong>the</strong> camera so that <strong>the</strong> focusing is not performed when <strong>the</strong><br />
shutter release button is pressed halfway and is performed when <strong>the</strong> 4<br />
button is pressed. This is useful when you wish to temporarily use<br />
autofocus while using manual focus.<br />
Set [Enable AF] in [OK btn when shooting] in <strong>the</strong> [A Custom Setting]<br />
menu. (p.102)<br />
5<br />
OK btn when shooting<br />
Off<br />
Spot AF<br />
Enable AF<br />
Cancel AF<br />
AF with shutter release<br />
button disabled so AF<br />
performed with OK button<br />
Function Reference<br />
Only use this function with lenses that are compatible with Quick Shift Focus.<br />
• Select [Cancel AF]. \ appears in <strong>the</strong> viewfinder while <strong>the</strong> 4 button is<br />
pressed. Autofocus does not activate when <strong>the</strong> shutter release button is<br />
pressed. This is useful when you wish to temporarily use manual focus while<br />
using autofocus.<br />
• You can focus using <strong>the</strong> focus ring and release <strong>the</strong> shutter while <strong>the</strong> 4<br />
button is pressed when using a lens compatible with Quick Shift Focus (take<br />
your finger off <strong>the</strong> 4 button to immediately return to AF mode).
Setting <strong>the</strong> Focusing Area<br />
123<br />
You can choose <strong>the</strong> area on which <strong>the</strong> autofocus focuses. The default<br />
setting is G (Wide).<br />
G<br />
Wide<br />
6 Spot<br />
The camera targets <strong>the</strong> wide area in <strong>the</strong> center of <strong>the</strong><br />
screen (within <strong>the</strong> focusing area) and focuses on <strong>the</strong><br />
nearest object.<br />
The camera narrows <strong>the</strong> focusing area to facilitate focusing<br />
on a specific subject.<br />
Set in [Focusing Area] in <strong>the</strong> [A Rec. Mode] menu (p.100).<br />
Rec. Mode<br />
Auto Bracket<br />
AE Metering<br />
Focusing Area<br />
AF Mode<br />
Flash Exp. Comp.<br />
Cancel<br />
0.0<br />
OK OK<br />
If [Spot AF] is selected for [OK btn when shooting] (p.122) in <strong>the</strong> [A Custom<br />
Setting] menu, <strong>the</strong> camera switches to 6 (Spot) for as long as <strong>the</strong> 4 button<br />
is held down when <strong>the</strong> focusing area is set to G (Wide).<br />
5<br />
Function Reference
124<br />
Setting <strong>the</strong> AF Mode<br />
You can choose from <strong>the</strong> following two autofocus modes. The default<br />
setting is l (Single mode).<br />
l<br />
k<br />
Single mode<br />
Continuous<br />
mode<br />
When <strong>the</strong> shutter release button is pressed halfway to<br />
focus on <strong>the</strong> subject, <strong>the</strong> focus is locked at that position.<br />
The subject is kept in focus by continuous adjustment<br />
while <strong>the</strong> shutter release button is pressed halfway.<br />
Set [AF Mode] in <strong>the</strong> [A Rec. Mode] menu (p.100).<br />
5<br />
Function Reference<br />
Rec. Mode<br />
Auto Bracket<br />
AE Metering<br />
Focusing Area<br />
AF Mode<br />
Flash Exp. Comp.<br />
Cancel<br />
AF.S<br />
AF.C<br />
OK OK<br />
• Settings cannot be changed in Picture mode and H mode (p.47).<br />
• k (Continuous mode) can be set when <strong>the</strong> mode dial is set to e, b, c,<br />
a or p. The autofocus mode is set to k in \ (Moving Object) of Picture<br />
mode or C (Kids) or E (Pet) of H mode.
Fixing <strong>the</strong> Focus (Focus Lock)<br />
125<br />
If <strong>the</strong> subject is outside <strong>the</strong> range of <strong>the</strong> focusing area, <strong>the</strong> camera cannot<br />
automatically focus on <strong>the</strong> subject. In this situation, you can aim <strong>the</strong><br />
focusing area toward <strong>the</strong> subject, use focus lock and recompose <strong>the</strong><br />
picture.<br />
1 Frame <strong>the</strong> desired composition<br />
for your picture in <strong>the</strong><br />
viewfinder.<br />
Use focus lock function when <strong>the</strong><br />
subject you wish to focus on is not<br />
inside <strong>the</strong> focusing area.<br />
2 Center <strong>the</strong> subject to focus in<br />
<strong>the</strong> viewfinder and press <strong>the</strong><br />
shutter release button halfway.<br />
The focus indicator ] appears and<br />
you will hear a beep when <strong>the</strong> subject<br />
comes into focus (if it is blinking, <strong>the</strong><br />
subject is not in focus).<br />
(Example)<br />
The person is out of focus<br />
and <strong>the</strong> background is<br />
focused instead.<br />
5<br />
Function Reference<br />
3 Lock <strong>the</strong> focus.<br />
Keep <strong>the</strong> shutter release button pressed halfway. The focus will remain<br />
locked.
126<br />
4 Re-compose <strong>the</strong> picture while<br />
keeping <strong>the</strong> shutter release<br />
button pressed halfway.<br />
5<br />
Function Reference<br />
• The focus is locked while <strong>the</strong> focus indicator ] is lit.<br />
• Turning <strong>the</strong> zooming ring in focus lock mode may cause <strong>the</strong> subject to be out<br />
of focus.<br />
• The beep can be turned off. (p.165)<br />
• You cannot set focus lock when <strong>the</strong> [AF Mode] in <strong>the</strong> [A Rec. Mode] is set<br />
to k (Continuous mode), <strong>the</strong> Capture mode is set to \ (Moving Object)<br />
or H mode is set to C (Kids) or E (Pet). In k (Continuous mode), \<br />
(Moving Object) mode or C (Kids) or E (Pet) of H mode, <strong>the</strong> autofocus<br />
continues to focus on <strong>the</strong> subject until <strong>the</strong> shutter is released. (Continuous<br />
Autofocus)<br />
Fixing Exposure when Focus is Locked<br />
Set [AE-L with AF locked] in <strong>the</strong> [A Custom Setting] menu (p.102) to fix<br />
<strong>the</strong> exposure value while focus is locked. Exposure is not fixed by default<br />
during focus lock.<br />
1 Off Exposure is not fixed when focus is locked.<br />
2 On Exposure is fixed when focus is locked.<br />
AE-L with AF locked<br />
Off<br />
On<br />
AE is not locked<br />
when <strong>the</strong> focus<br />
is locked
Adjusting <strong>the</strong> Focus Manually (Manual Focus)<br />
127<br />
When you adjust <strong>the</strong> focus manually, you can ei<strong>the</strong>r check with <strong>the</strong> focus<br />
indicator in <strong>the</strong> viewfinder or use <strong>the</strong> viewfinder matte field to adjust focus.<br />
Using <strong>the</strong> Focus Indicator<br />
You can manually adjust <strong>the</strong> focus using <strong>the</strong> focus indicator ].<br />
1 Set <strong>the</strong> focus mode lever to<br />
\.<br />
5<br />
2 Look through <strong>the</strong> viewfinder,<br />
press <strong>the</strong> shutter release<br />
button halfway and turn <strong>the</strong><br />
focusing ring.<br />
Function Reference<br />
The focus indicator ] appears and<br />
you will hear a beep when <strong>the</strong> subject<br />
comes into focus.<br />
Focus indicator
128<br />
• Use <strong>the</strong> matte field in <strong>the</strong> viewfinder when <strong>the</strong> subject is difficult to focus<br />
(p.46) and <strong>the</strong> focus indicator will not stay lit.<br />
• The beep can be turned off. (p.165)<br />
Using <strong>the</strong> Viewfinder Matte Field<br />
You can manually adjust <strong>the</strong> focus using <strong>the</strong> viewfinder matte field.<br />
1 Set <strong>the</strong> focus mode lever to<br />
\.<br />
5<br />
Function Reference<br />
2 Look through <strong>the</strong> viewfinder<br />
and turn <strong>the</strong> focusing ring until<br />
<strong>the</strong> subject looks sharp on <strong>the</strong><br />
screen.
Setting <strong>the</strong> Exposure<br />
129<br />
Effect of Aperture and Shutter Speed<br />
Correct exposure of <strong>the</strong> subject is determined by <strong>the</strong> combination of<br />
shutter speed and aperture setting. There are many correct combinations<br />
of shutter speed and aperture for a particular subject. Different<br />
combinations produce different effects.<br />
Effect of Shutter Speed<br />
The shutter speed determines <strong>the</strong> length of time that light is allowed to<br />
strike <strong>the</strong> CCD. Adjust <strong>the</strong> amount of light striking <strong>the</strong> CCD.<br />
Using slower shutter speed<br />
If <strong>the</strong> subject is moving, <strong>the</strong> image will be<br />
blurred because <strong>the</strong> shutter is open<br />
longer.<br />
It is possible to enhance <strong>the</strong> effect of<br />
motion (rivers, waterfalls, waves, etc.) by<br />
intentionally using a slower shutter speed.<br />
Using faster shutter speed<br />
Choosing a faster shutter speed will allow<br />
freezing <strong>the</strong> action of a moving subject.<br />
A faster shutter speed also helps<br />
preventing camera shake.<br />
5<br />
Function Reference
130<br />
Effect of Aperture<br />
Adjust <strong>the</strong> amount of light hitting <strong>the</strong> CCD by changing <strong>the</strong> aperture.<br />
Opening <strong>the</strong> aperture (reduce <strong>the</strong> aperture value)<br />
Objects closer and far<strong>the</strong>r than <strong>the</strong> focused<br />
subject will be more out of focus. For<br />
instance, if you take a picture of flower<br />
against a landscape with <strong>the</strong> aperture open,<br />
<strong>the</strong> landscape in front and behind <strong>the</strong> flower<br />
will be blurred, emphasizing only <strong>the</strong> flower.<br />
5<br />
Closing <strong>the</strong> aperture (increase <strong>the</strong> aperture value)<br />
The range in focus expands forward and<br />
backward. For instance, if you take a picture<br />
of flower against a landscape with <strong>the</strong><br />
aperture narrowed, <strong>the</strong> landscape in front<br />
and behind <strong>the</strong> flower will be in focus.<br />
Function Reference<br />
Depth of Field<br />
When you focus on a portion of <strong>the</strong> subject, <strong>the</strong>re is a range in which<br />
object closer and far<strong>the</strong>r will also be in focus. This focused range is<br />
called <strong>the</strong> depth of field.<br />
• The depth of field for <strong>the</strong> F differs depending on <strong>the</strong> lens<br />
but compared to a 35 mm camera, <strong>the</strong> value is roughly one aperture<br />
setting lower (<strong>the</strong> focused range becomes narrower).<br />
• The wider <strong>the</strong> wide-angle lens, and <strong>the</strong> far<strong>the</strong>r away <strong>the</strong> subject, <strong>the</strong><br />
wider <strong>the</strong> depth of field is (some zoom lenses do not have a scale<br />
for depth of field because of <strong>the</strong>ir structure).<br />
Depth of field Shallow Deep<br />
Area of focus Narrow Wide<br />
Aperture<br />
Open<br />
Close<br />
(Smaller value) (Larger value)<br />
Longer<br />
Shorter<br />
Lens focal length<br />
(Telephoto)<br />
(Wider)<br />
Distance to <strong>the</strong> subject Near Far
Selecting <strong>the</strong> Metering Method<br />
131<br />
Choose <strong>the</strong> part of <strong>the</strong> screen to use for measuring brightness and<br />
determining exposure. L (Multi-segment metering), M (Center-weighted<br />
metering) or N (Spot metering) mode can be selected. The default setting<br />
is L (Multi-segment metering).<br />
L<br />
M<br />
Multi-segment<br />
metering<br />
Centerweighted<br />
metering<br />
N Spot metering<br />
Segment <strong>the</strong> screen in 16 parts, meter each portion and<br />
determine <strong>the</strong> appropriate exposure.<br />
Measure <strong>the</strong> entire screen with an emphasis on <strong>the</strong><br />
center and determine <strong>the</strong> exposure.<br />
Measure only <strong>the</strong> center of <strong>the</strong> screen and determine<br />
exposure.<br />
Set in [AE Metering] in <strong>the</strong> [A Rec. Mode] menu. (p.100)<br />
5<br />
Rec. Mode<br />
Auto Bracket<br />
AE Metering<br />
Focusing Area<br />
AF Mode<br />
Flash Exp. Comp.<br />
Cancel<br />
0.0<br />
OK OK<br />
Function Reference<br />
Using <strong>the</strong> Multi-Segment Metering<br />
The scene in <strong>the</strong> viewfinder is metered in<br />
16 different zones as shown in <strong>the</strong><br />
illustration when using <strong>the</strong> multi-segment<br />
metering. This mode automatically<br />
determines what level of brightness is in<br />
which portion.<br />
The center-weighted metering mode is automatically set even if you select <strong>the</strong><br />
multi-segment metering mode when using a lens o<strong>the</strong>r than a DA, D FA, FA J,<br />
FA, F or A lens (can only be used if permission is set in [Using aperture ring] in<br />
<strong>the</strong> [A Custom Setting] menu (p.103)).
132<br />
Linking AF Point and AE During Multi-Segmented<br />
Metering<br />
In [Link AF Point and AE] (p.102) of <strong>the</strong> [A Custom Setting] menu,<br />
you can link <strong>the</strong> exposure and focus point in <strong>the</strong> focusing area during<br />
multi-segment metering. The default setting is [Off].<br />
1 Off Exposure is set separately from focus point.<br />
2 On Exposure is set in accordance with focus point.<br />
Using <strong>the</strong> Center-Weighted Metering<br />
5<br />
Function Reference<br />
Metering is weighted at <strong>the</strong> center of <strong>the</strong><br />
screen. Use this metering when you want<br />
to compensate <strong>the</strong> exposure by<br />
experience, instead of leaving it to <strong>the</strong><br />
camera. The illustration shows that<br />
sensitivity increases as <strong>the</strong> pattern height<br />
increases (center). This mode does not<br />
automatically compensate for backlit scenes.<br />
Using <strong>the</strong> Spot Metering<br />
With spot metering, brightness is<br />
measured only within a limited area at <strong>the</strong><br />
center of <strong>the</strong> screen as shown in <strong>the</strong><br />
illustration. You can use this in<br />
combination with <strong>the</strong> AE lock (p.143)<br />
when <strong>the</strong> subject is extremely small and<br />
proper exposure is difficult to obtain.<br />
Setting <strong>the</strong> Meter Operating Time<br />
Sets <strong>the</strong> exposure metering time in [Meter Operating Time] in <strong>the</strong><br />
[A Custom Setting] menu (p.102). The default setting is [10sec].<br />
1 10sec Sets exposure metering timer to 10 seconds.<br />
2 3sec Sets exposure metering timer to 3 seconds.<br />
3 30sec Sets exposure metering timer to 30 seconds.
Changing <strong>the</strong> Exposure Mode<br />
133<br />
This camera features five exposure modes along with <strong>the</strong> picture modes.<br />
Use <strong>the</strong> mode dial (p.106) to change <strong>the</strong> exposure mode.<br />
Exposure<br />
Mode<br />
e<br />
(Program)<br />
b (Shutter<br />
Priority)<br />
c<br />
(Aperture<br />
Priority)<br />
a (Manual)<br />
p (Bulb)<br />
Description<br />
Automatically sets shutter speed<br />
and aperture for taking pictures at<br />
<strong>the</strong> proper exposure.<br />
Lets you set <strong>the</strong> desired shutter<br />
speed for expressing moving<br />
subjects. Take pictures of fast<br />
moving subjects that look still or<br />
subjects that show movement.<br />
Lets you set <strong>the</strong> desired aperture<br />
for controlling <strong>the</strong> depth of field.<br />
Use to blur <strong>the</strong> background or be<br />
sharp from front to back.<br />
Lets you set shutter speed and<br />
aperture to create <strong>the</strong> picture you<br />
have in mind.<br />
Lets you capture images that<br />
require slow shutter speeds such<br />
as fireworks and night scenes.<br />
Exposure<br />
Compensation<br />
Change<br />
Shutter<br />
Speed<br />
Change<br />
Aperture<br />
Yes No No<br />
Yes Yes No<br />
Yes No Yes<br />
No Yes Yes<br />
No No Yes<br />
5<br />
Function Reference
134<br />
Using <strong>the</strong> e (Program) Mode<br />
Shutter speed and aperture value are automatically set for taking pictures<br />
at <strong>the</strong> proper exposure.<br />
Perform <strong>the</strong> following to adjust <strong>the</strong> exposure.<br />
1 Set <strong>the</strong> mode dial to e.<br />
5<br />
Function Reference<br />
2 Turn <strong>the</strong> e-dial while pressing<br />
<strong>the</strong> mc button and adjust <strong>the</strong><br />
exposure.<br />
The EV Compensation is displayed in<br />
<strong>the</strong> viewfinder and on <strong>the</strong> LCD panel.<br />
The shutter speed and aperture value<br />
are also displayed while adjusting <strong>the</strong><br />
exposure.<br />
EV Compensation<br />
• Set EV Compensation in increments of 1/2 EV or 1/3 EV. Set exposure setting<br />
steps in [Expsr Setting Steps] in <strong>the</strong> [A Custom Setting] menu. (p.143)<br />
• You can automatically correct <strong>the</strong><br />
sensitivity if appropriate exposure cannot<br />
be set with <strong>the</strong> set criteria. Set [Sensitivity]<br />
to [AUTO] in <strong>the</strong> Fn menu.(p.117)<br />
• Set <strong>the</strong> aperture to <strong>the</strong> s position while<br />
holding down <strong>the</strong> auto-lock button when<br />
using a lens with an aperture ring.
Using <strong>the</strong> b (Shutter Priority) Mode<br />
135<br />
Set <strong>the</strong> shutter speed faster and capture fast moving subjects as if <strong>the</strong>y are<br />
still or slow down <strong>the</strong> shutter speed and capture images emphasizing<br />
subject movement.<br />
Aperture value is automatically set to appropriate exposure depending on<br />
<strong>the</strong> shutter speed.<br />
1 Effect of Aperture and Shutter Speed (p.129)<br />
1 Set <strong>the</strong> mode dial to b.<br />
5<br />
2 Turn <strong>the</strong> e-dial and adjust <strong>the</strong><br />
shutter speed.<br />
Function Reference<br />
The shutter speed and aperture value<br />
are displayed in <strong>the</strong> viewfinder and on <strong>the</strong><br />
LCD panel.
136<br />
• Turn <strong>the</strong> e-dial while pressing <strong>the</strong> mc button and change <strong>the</strong> EV<br />
Compensation value. (p.142)<br />
• Set <strong>the</strong> shutter speed in increments of 1/2 EV or 1/3 EV. Set in [Expsr Setting<br />
Steps] in <strong>the</strong> [A Custom Setting] menu. (p.143)<br />
• You can automatically correct <strong>the</strong> sensitivity if appropriate exposure cannot<br />
be set with <strong>the</strong> set criteria. Set [Sensitivity] to [AUTO] in <strong>the</strong> Fn menu. (p.117)<br />
• Set <strong>the</strong> aperture to <strong>the</strong> s position while<br />
holding down <strong>the</strong> auto-lock button when<br />
using a lens with an aperture ring.<br />
5<br />
Function Reference<br />
Exposure Warning<br />
If <strong>the</strong> subject is too bright or too dark,<br />
<strong>the</strong> aperture value will blink in <strong>the</strong><br />
viewfinder and on <strong>the</strong> LCD panel. If <strong>the</strong><br />
subject is too bright, choose a faster<br />
shutter speed. If it is too dark, choose a slower shutter speed. When<br />
<strong>the</strong> aperture value indication stops blinking, you can take <strong>the</strong> picture<br />
with proper exposure.<br />
If both <strong>the</strong> shutter speed and aperture value are blinking, this<br />
indicates being out of metering range and <strong>the</strong> proper exposure<br />
cannot be obtaind even if <strong>the</strong> shutter speed is adjusted.<br />
Use an ND (Neutral Density) filter if <strong>the</strong> subject is too bright.<br />
Use a flash if it is too dark.
Using <strong>the</strong> c (Aperture Priority) Mode<br />
137<br />
Set aperture for controlling <strong>the</strong> depth of field. The depth of field is deeper<br />
and <strong>the</strong> front and back of <strong>the</strong> focused object is clear when aperture is set<br />
to a large value. The depth of field is shallower and <strong>the</strong> front and back of<br />
<strong>the</strong> focused object is blurred when aperture is set to a small value.<br />
Shutter speed is automatically set to appropriate exposure depending on<br />
<strong>the</strong> aperture value.<br />
1 Effect of Aperture and Shutter Speed (p.129)<br />
1 Set <strong>the</strong> mode dial to c.<br />
5<br />
2 Turn <strong>the</strong> e-dial and adjust <strong>the</strong><br />
aperture value.<br />
Function Reference<br />
The shutter speed and aperture value<br />
are displayed in <strong>the</strong> viewfinder and on<br />
<strong>the</strong> LCD panel.
138<br />
• Turn <strong>the</strong> e-dial while pressing <strong>the</strong> mc button and change <strong>the</strong> EV<br />
Compensation value. (p.142)<br />
• Set <strong>the</strong> aperture value in increments of 1/2 EV or 1/3 EV. Set in [Expsr Setting<br />
Steps] in <strong>the</strong> [A Custom Setting] menu. (p.143)<br />
• You can automatically correct <strong>the</strong> sensitivity if appropriate exposure cannot<br />
be set with <strong>the</strong> set criteria. Set [Sensitivity] to [AUTO] in <strong>the</strong> Fn menu. (p.117)<br />
• Set <strong>the</strong> aperture to <strong>the</strong> s position while<br />
holding down <strong>the</strong> auto-lock button when<br />
using a lens with an aperture ring.<br />
5<br />
Function Reference<br />
Exposure Warning<br />
If <strong>the</strong> subject is too bright or too dark,<br />
<strong>the</strong> shutter speed will blink in <strong>the</strong><br />
viewfinder and on <strong>the</strong> LCD panel. If <strong>the</strong><br />
subject is too bright, set <strong>the</strong> aperture<br />
smaller (larger number), and when too dark, open <strong>the</strong> aperture fur<strong>the</strong>r<br />
(smaller number). Once blinking stops, you can take <strong>the</strong> picture.<br />
If both <strong>the</strong> shutter speed and aperture value are blinking, this<br />
indicates being out of metering range and <strong>the</strong> proper exposure<br />
cannot be obtained even if <strong>the</strong> aperture is adjusted.<br />
Use an ND (Neutral Density) filter if <strong>the</strong> subject is too bright.<br />
Use a flash if it is too dark.
Using a (Manual) Mode<br />
139<br />
You can set <strong>the</strong> shutter speed and aperture value. This mode is suitable<br />
to take pictures of your choice by combining <strong>the</strong>m. This mode is<br />
convenient for taking pictures using <strong>the</strong> same shutter speed and aperture<br />
setting combination or taking intentionally underexposed (darker) or overexposed<br />
(brighter) photographs.<br />
1 Effect of Aperture and Shutter Speed (p.129)<br />
1 Set <strong>the</strong> mode dial to a.<br />
5<br />
2 Turn <strong>the</strong> e-dial and adjust <strong>the</strong><br />
shutter speed.<br />
Function Reference<br />
3 Turn <strong>the</strong> e-dial while pressing<br />
<strong>the</strong> mc button and adjust <strong>the</strong><br />
aperture.
140<br />
The shutter speed and aperture value<br />
are displayed in <strong>the</strong> viewfinder and on<br />
<strong>the</strong> LCD panel. Of <strong>the</strong> shutter speed<br />
and aperture, <strong>the</strong> value being adjusted<br />
Difference from <strong>the</strong><br />
appropriate exposure<br />
is underlined in <strong>the</strong> viewfinder. While<br />
adjusting <strong>the</strong> shutter speed or aperture<br />
value, <strong>the</strong> difference with <strong>the</strong><br />
appropriate exposure (EV value) appears at <strong>the</strong> bottom right of <strong>the</strong><br />
viewfinder. The appropriate exposure is set when [0.0] is displayed.<br />
5<br />
• When in a (Manual) mode, <strong>the</strong> sensitivity is equivalent to ISO 200 when<br />
sensitivity is set to [AUTO].<br />
• Blinks when <strong>the</strong> difference with appropriate exposure is over ±3.0.<br />
• Set <strong>the</strong> shutter speed and aperture values in increments of 1/2 EV or 1/3 EV.<br />
Set in [Expsr Setting Steps] in <strong>the</strong> [A Custom Setting] menu. (p.143)<br />
• Set <strong>the</strong> aperture to <strong>the</strong> s position while<br />
holding down <strong>the</strong> auto-lock button when<br />
using a lens with an aperture ring.<br />
Function Reference<br />
Exposure Warning<br />
You are out of <strong>the</strong> measuring area if <strong>the</strong><br />
shutter speed and aperture blink.<br />
Use an ND (Neutral Density) filter if <strong>the</strong><br />
subject is too bright.<br />
Use a flash if it is too dark.
141<br />
About <strong>the</strong> L Button<br />
The aperture and shutter speed are automatically adjusted to <strong>the</strong><br />
appropriate exposure at that moment if <strong>the</strong> L button is pressed in<br />
a (Manual) mode. You can choose from <strong>the</strong> following three adjustment<br />
methods in [AE-L bttn on M expsr] in <strong>the</strong> [A Custom Setting] menu.<br />
1 Program Line The aperture and shutter speed are adjusted automatically.<br />
2 Tv Shift<br />
3 Av Shift<br />
The aperture is locked and <strong>the</strong> shutter speed is adjusted<br />
automatically.<br />
The shutter speed is locked and <strong>the</strong> aperture is adjusted<br />
automatically.<br />
Shutter speed is adjusted to appropriate exposure according to lens<br />
aperture when lens aperture is not set to s position.<br />
1 Notes on [Using Aperture Ring] (p.184)<br />
Using <strong>the</strong> p (Bulb) Mode<br />
This mode is useful for <strong>the</strong> long exposures required for shooting night<br />
scenes and fireworks.<br />
The shutter remains open as long as <strong>the</strong> shutter release button is kept pressed.<br />
1 Set <strong>the</strong> mode dial to p.<br />
5<br />
Function Reference<br />
• Turn <strong>the</strong> e-dial to adjust <strong>the</strong> aperture value.<br />
• Set <strong>the</strong> aperture value in increments of 1/2 EV or 1/3 EV. Set in [Expsr Setting<br />
Steps] in <strong>the</strong> [A Custom Setting] menu. (p.143)<br />
• Use a sturdy tripod and <strong>the</strong> cable switch CS-205 (optional) to prevent camera<br />
shake when using p (Bulb) mode. Connect <strong>the</strong> cable switch to <strong>the</strong> cable<br />
switch terminal (p.15).<br />
• Bulb shooting is available when using <strong>the</strong> remote control shooting mode<br />
(p.61). The shutter remains open as long as <strong>the</strong> optional remote control’s<br />
shutter release button is held down.<br />
• Noise reduction is a process to reduce noise (image roughness or<br />
unevenness) caused by low shutter speed. Set in [Noise Reduction] in <strong>the</strong><br />
[A Custom Setting] menu. (p.102)<br />
• When in p (Bulb) mode, <strong>the</strong> sensitivity is equivalent to ISO 200 when<br />
sensitivity is set to [AUTO].
142<br />
Setting <strong>the</strong> Exposure<br />
This allows you to deliberately overexpose (brighten) or under-expose<br />
(darken) your picture. You can adjust <strong>the</strong> EV Compensation from –2 to +2<br />
(EV) in increments of 1/2 EV or 1/3 EV.<br />
Set in [Expsr Setting Steps] in <strong>the</strong> [A Custom Setting] menu. (p.143)<br />
1 Set <strong>the</strong> compensation with <strong>the</strong><br />
e-dial while <strong>the</strong> mc button is<br />
pressed.<br />
mc button<br />
5<br />
Function Reference<br />
2 Confirm <strong>the</strong> compensation<br />
value in <strong>the</strong> viewfinder.<br />
m is displayed during compensation.<br />
m blinks when <strong>the</strong> flash is popped up if<br />
<strong>the</strong> flash compensation is set.<br />
Compensation value<br />
Exposure compensation is not available when <strong>the</strong> exposure mode is set to a<br />
(Manual) or p (Bulb) mode.<br />
The exposure compensation cannot be canceled by turning <strong>the</strong> camera off or<br />
by setting any o<strong>the</strong>r exposure mode.
Changing <strong>the</strong> Exposure Setting Steps<br />
143<br />
Set Exposure Setting Steps in [Expsr Setting Steps] in [A Custom Setting]<br />
to increments of 1/2 EV or 1/3 EV.<br />
Expsr Setting Steps<br />
1/2 EV Steps<br />
1/3 EV Steps<br />
Exposure setting steps<br />
are set to 1/2 EV<br />
Recording <strong>the</strong> Exposure Before Shooting (AE Lock)<br />
AE Lock is a function that memorizes <strong>the</strong> exposure prior to taking <strong>the</strong><br />
picture. Use this when <strong>the</strong> subject is too small or backlit and a proper<br />
exposure setting cannot be obtained.<br />
5<br />
1 <strong>Press</strong> <strong>the</strong> L button.<br />
The camera memorizes <strong>the</strong> exposure<br />
(brightness) at that instant.<br />
<strong>Press</strong> it again to unlock.<br />
Function Reference<br />
• @ is displayed in <strong>the</strong> viewfinder while <strong>the</strong> AE lock is engaged. (p.20)<br />
• The exposure remains in memory for twice as much time as <strong>the</strong> metering<br />
timer after releasing <strong>the</strong> L button. The exposure remains locked as long<br />
as <strong>the</strong> L button is kept pressed or <strong>the</strong> shutter release button is kept<br />
pressed halfway.<br />
• You will hear a beep when <strong>the</strong> L button is pressed. The beep can be<br />
turned off. (p.165)<br />
• AE lock is not available when <strong>the</strong> exposure mode is a (Manual) or p (Bulb) mode.<br />
• The combination of shutter speed and aperture value changes depending on<br />
<strong>the</strong> zooming position even while <strong>the</strong> AE lock is engaged when using a zoom<br />
lens for which maximum aperture varies depending on <strong>the</strong> focal length.<br />
However, <strong>the</strong> exposure value does not change and <strong>the</strong> picture is taken at <strong>the</strong><br />
brightness level set by <strong>the</strong> AE lock.<br />
• If <strong>the</strong> exposure mode is a (Manual), <strong>the</strong> aperture and/or shutter speed are<br />
automatically adjusted to set <strong>the</strong> appropriate exposure when <strong>the</strong> L<br />
button is pressed. (p.141)<br />
• Exposure can be fixed when focus is locked. Set in [AE-L with AF locked] in<br />
<strong>the</strong> [A Custom Setting] menu. (p.126)
144<br />
Changing <strong>the</strong> Exposure and Shooting<br />
(Auto Bracket)<br />
You can take continuous pictures with different exposure when <strong>the</strong> shutter<br />
release button is pressed. The first frame is exposed with no<br />
compensation, <strong>the</strong> second frame is underexposed (negative<br />
compensation) and <strong>the</strong> third is overexposed (positive compensation).<br />
5<br />
Function Reference<br />
Normal exposure Underexposure Overexposure<br />
1 <strong>Press</strong> <strong>the</strong> { button in Capture<br />
mode.<br />
The Fn menu appears.<br />
Fn<br />
OK<br />
AUTO<br />
Fn<br />
Exit<br />
2 <strong>Press</strong> <strong>the</strong> four-way controller (2).<br />
The Drive Mode options screen appears.<br />
3 Use <strong>the</strong> four-way controller (5)<br />
to select V (Auto Bracket).<br />
Drive Mode<br />
Auto Bracket<br />
OK OK
145<br />
4 <strong>Press</strong> <strong>the</strong> 4 button.<br />
The camera returns to <strong>the</strong> Fn menu<br />
screen.<br />
5 <strong>Press</strong> <strong>the</strong> { button.<br />
Shooting is ready and ] is displayed on <strong>the</strong> LCD panel.<br />
6 <strong>Press</strong> <strong>the</strong> shutter release button halfway.<br />
Focus indicator ] appears in <strong>the</strong> viewfinder when focused.<br />
7 <strong>Press</strong> <strong>the</strong> shutter release button fully.<br />
Three continuous pictures will be taken, <strong>the</strong> first with no compensation,<br />
<strong>the</strong> second with negative compensation, and <strong>the</strong> third with positive<br />
compensation.<br />
• When <strong>the</strong> [AF Mode] in <strong>the</strong> [A Rec. Mode] is set to l (Single mode), <strong>the</strong><br />
focus is locked in <strong>the</strong> first frame position and used for subsequent continuous<br />
frames.<br />
• The auto bracketing exposure setting will remain effective for twice as much<br />
time as <strong>the</strong> exposure metering timer (default setting is 20 seconds) (p.132)<br />
when you release your finger from <strong>the</strong> shutter release button during auto<br />
bracketing, and you can take <strong>the</strong> next picture at <strong>the</strong> next compensation value.<br />
In this case, auto focusing works for each frame. After about twice as much<br />
time as <strong>the</strong> exposure metering timer (default setting is 20 seconds), <strong>the</strong><br />
camera returns to settings for taking <strong>the</strong> first picture.<br />
• You can combine Auto Bracket with <strong>the</strong> built-in flash or external flash (P-TTL<br />
auto only) to change only <strong>the</strong> flash output continuously. However, when using<br />
an external flash, holding <strong>the</strong> shutter release button down to take three<br />
continuous frames may cause <strong>the</strong> second and third frame to be taken before<br />
<strong>the</strong> flash is fully recharged. Always take one frame at a time after confirming<br />
that charging is complete.<br />
• Auto Bracket is not available when <strong>the</strong> exposure mode is set to p (Bulb)<br />
mode.<br />
5<br />
Function Reference
146<br />
Setting Auto Bracket<br />
Change <strong>the</strong> shooting order and steps of Auto Bracket.<br />
Bracketng amount 1/2 EV ±0.5, ±1.0, ±1.5, ±2.0<br />
(Step interval) 1/3 EV ±0.3, ±0.7, ±1.0, ±1.3, ±1.7, ±2.0<br />
Shooting images 0 – +, – 0 +, + 0 –<br />
* Set interval of steps in [Expsr Setting Steps] in <strong>the</strong> [A Custom Setting] menu.<br />
(p.143)<br />
Set in [Auto Bracket] in <strong>the</strong> [A Rec. Mode] menu. (p.100)<br />
Auto Bracket<br />
Bracketng amount 0.5<br />
Shooting images 0<br />
5<br />
Function Reference<br />
Taking Only Overexposed or Underexposed Pictures<br />
You can use <strong>the</strong> auto bracketing mode for only underexposure or<br />
overexposure shots by combining <strong>the</strong> operation with exposure<br />
compensation (p.142). The auto bracketing is performed in both<br />
cases on <strong>the</strong> basis of <strong>the</strong> specified exposure compensation value.
Checking <strong>the</strong> Composition, Exposure<br />
and Focus Before Shooting<br />
147<br />
You can use <strong>the</strong> preview function to check <strong>the</strong> depth of field, composition,<br />
exposure and focus before taking a picture. There are 2 preview methods.<br />
Digital Preview<br />
Optical Preview<br />
For checking <strong>the</strong> composition, exposure and focus in <strong>the</strong><br />
LCD monitor.<br />
For checking <strong>the</strong> depth of field with <strong>the</strong> viewfinder.<br />
Select <strong>the</strong> preview method in [Preview Method] in <strong>the</strong> [A Custom Setting]<br />
menu (p.103). The default setting is Digital Preview.<br />
Displaying <strong>the</strong> Preview<br />
Display <strong>the</strong> digital preview or optical preview.<br />
5<br />
Displaying <strong>the</strong> Digital Preview<br />
1 Focus on <strong>the</strong> subject, <strong>the</strong>n<br />
compose <strong>the</strong> picture in <strong>the</strong><br />
viewfinder and move <strong>the</strong> main<br />
switch to |.<br />
Function Reference<br />
The (|) icon appears in <strong>the</strong> LCD monitor<br />
during preview and you can check <strong>the</strong><br />
composition, exposure and focus.<br />
<strong>Press</strong> <strong>the</strong> shutter release button halfway to end Digital Preview and start<br />
focusing. The image displayed in Digital Preview is not saved.<br />
• You can display <strong>the</strong> overexposed area warning or histogram in Digital<br />
Preview. Set in [Preview Display] (p.173) in <strong>the</strong> [Q Playback] menu.<br />
• The maximum display time for Digital Preview is 60 seconds.
148<br />
Displaying <strong>the</strong> Optical Preview<br />
1 Position <strong>the</strong> subject inside <strong>the</strong> AF<br />
frame and press <strong>the</strong> shutter<br />
release button halfway.<br />
2 Turn <strong>the</strong> main switch to | while<br />
looking through <strong>the</strong> viewfinder.<br />
5<br />
You can check <strong>the</strong> depth of field in <strong>the</strong><br />
viewfinder while <strong>the</strong> main switch is on |.<br />
Function Reference<br />
• No shooting information is displayed in <strong>the</strong> viewfinder, and <strong>the</strong> shutter cannot<br />
be released while <strong>the</strong> main switch is in <strong>the</strong> preview position (|).<br />
• You can check <strong>the</strong> depth of field in all exposure modes.<br />
Selecting <strong>the</strong> Preview Method<br />
Choose <strong>the</strong> preview method to use when <strong>the</strong> main switch is turned to <strong>the</strong><br />
preview position (|). The default setting is Digital Preview.<br />
Digital Preview<br />
Optical Preview<br />
For checking <strong>the</strong> composition, exposure and focus in <strong>the</strong><br />
LCD monitor before taking a picture.<br />
For checking <strong>the</strong> depth of field with <strong>the</strong> viewfinder.<br />
Set in [Preview Method] in <strong>the</strong> [A Custom Setting] menu. (p.103)<br />
Preview Method<br />
Digital Preview<br />
Optical Preview<br />
For checking exposure,<br />
composition and focus<br />
w/LCD before shooting
Using <strong>the</strong> Built-in Flash<br />
149<br />
Compensating Flash Output<br />
You can change <strong>the</strong> flash output in a range of –2.0 to +1.0. The Flash<br />
Compensation values are as follows for 1/2 EV and 1/3 EV.<br />
Step interval<br />
Flash Compensation<br />
1/2 EV –2.0, –1.5, –1.0, –0.5, 0.0, +0.5, +1.0<br />
1/3 EV –2.0, –1.7, –1.3, –1.0, –0.7, –0.3, 0.0, +0.3, +0.7, +1.0<br />
* Set interval of steps in [Expsr Setting Steps] in <strong>the</strong> [A Custom Setting] menu.<br />
(p.143)<br />
Set in [Flash Exp. Comp.] in <strong>the</strong> [A Rec. Mode] menu. (p.100)<br />
5<br />
Rec. Mode<br />
Auto Bracket<br />
AE Metering<br />
Focusing Area<br />
AF Mode<br />
Flash Exp. Comp.<br />
Cancel<br />
1.0<br />
0.5<br />
0.0<br />
0.5<br />
OK OK<br />
Function Reference<br />
• m blinks in <strong>the</strong> viewfinder when <strong>the</strong> flash pops up during Flash<br />
Compensation. (p.20)<br />
• If <strong>the</strong> maximum flash output is exceeded when corrected to <strong>the</strong> plus (+) side,<br />
no compensation will be effective.<br />
• Compensating to <strong>the</strong> minus (–) side may not effect <strong>the</strong> image if <strong>the</strong> subject is<br />
too close, aperture is low or sensitivity is high.<br />
• This flash compensation is also effective for external flash units which<br />
support P-TTL auto flash mode.
150<br />
Allowing Shooting while Charging Flash<br />
You can set to enable shooting while flash is being charged.<br />
Set [On] for [Release when Chrging] in <strong>the</strong> [A Custom Setting] menu<br />
(p.103). Pictures cannot be taken while <strong>the</strong> flash is charging by default.<br />
Release when Chrging<br />
Off<br />
On<br />
Enables shutter release<br />
while <strong>the</strong> built-in<br />
flash is charging<br />
5<br />
Function Reference<br />
Flash Characteristics in Each Exposure Mode<br />
Using <strong>the</strong> Flash in b (Shutter Priority) Mode<br />
• When taking a moving subject, you can use <strong>the</strong> flash to change <strong>the</strong> blur<br />
effect.<br />
• Any desired shutter speed 1/180 sec. or slower can be set for taking a<br />
flash photograph.<br />
• The aperture value automatically changes according to <strong>the</strong> ambient<br />
brightness.<br />
• The shutter speed is fixed at 1/180 sec. when lens o<strong>the</strong>r than DA,<br />
D FA, FA J, FA, F or A is used.<br />
Using <strong>the</strong> Flash in Av (Aperture Priority) Mode<br />
• You can set <strong>the</strong> desired aperture to take a flash photograph when you<br />
want to change <strong>the</strong> depth of field or shoot a subject far<strong>the</strong>r away.<br />
• The shutter speed automatically changes with <strong>the</strong> ambient brightness.<br />
• The shutter speed shifts automatically anywhere from 1/180 sec. to a<br />
slow shutter speed (p.42) that reduces camera shake. The slowest<br />
shutter speed depends on <strong>the</strong> focal length of <strong>the</strong> lens in use.<br />
• The shutter speed is fixed at 1/180 sec. when lens o<strong>the</strong>r than DA,<br />
D FA, FA J, FA or F is used.
Using Slow-Speed-Sync<br />
151<br />
You can use slow-speed-sync when shooting portraits with <strong>the</strong> sunset in <strong>the</strong><br />
background. Both <strong>the</strong> portrait and <strong>the</strong> background are captured beautifully.<br />
• Slow-speed-sync slows <strong>the</strong> shutter speed. Use a tripod to avoid camera<br />
shake. The picture will also blur if <strong>the</strong> subject moves.<br />
• Slow-speed-sync shooting can also be performed with an external flash.<br />
Using b (Shutter Priority) Mode<br />
1 Set <strong>the</strong> mode dial to b.<br />
b (Shutter Priority) mode is set.<br />
2 Use <strong>the</strong> e-dial to set <strong>the</strong> desired shutter speed.<br />
The background is not properly corrected if aperture value is flashing<br />
when shutter speed is set. Set <strong>the</strong> shutter speed so that aperture does<br />
not flash.<br />
3 <strong>Press</strong> <strong>the</strong> K button.<br />
The flash pops up.<br />
4 Take <strong>the</strong> picture.<br />
Using a (Manual) Mode<br />
1 Set <strong>the</strong> mode dial to a.<br />
a (Manual) mode is set.<br />
2 Set <strong>the</strong> shutter speed (under 1/180 sec.) and aperture value to obtain<br />
correct exposure.<br />
3 <strong>Press</strong> <strong>the</strong> K button.<br />
The flash pops up.<br />
In a (Manual) mode, pop up <strong>the</strong> flash at any time.<br />
4 Take <strong>the</strong> picture.<br />
5<br />
Function Reference<br />
Distance and Aperture when Using <strong>the</strong> Built-in Flash<br />
A set criteria is necessary between <strong>the</strong> guide number, aperture and<br />
distance when shooting with <strong>the</strong> flash.<br />
Calculate and adjust <strong>the</strong> shooting conditions if flash is not sufficient.<br />
Built-in flash guide number<br />
Sensitivity Built-in flash guide number<br />
ISO 200 15.6<br />
ISO 400 22<br />
ISO 800 31<br />
ISO 1600 44<br />
ISO 3200 62
152<br />
5<br />
Calculating Shooting Distance from Aperture Value<br />
The following equation calculates <strong>the</strong> distance of <strong>the</strong> flash for aperture<br />
values.<br />
Maximum flash distance L1 = Guide number ÷ Selected aperture<br />
Minimum flash distance L2 = Maximum flash distance ÷ 5*<br />
* The value 5 used in <strong>the</strong> formula above is a fixed value<br />
which applies only when using <strong>the</strong> built-in flash alone.<br />
Example<br />
When sensitivity is [ISO 200] and aperture value is F4<br />
L1 = 15.6 ÷ 4 = approx. 3.9 (m)<br />
L2 = 3.9 ÷ 5 = approx. 0.8 (m)<br />
Therefore, <strong>the</strong> flash can be used in a range of about 0.8 m to 3.9 m.<br />
The flash cannot be used when <strong>the</strong> distance is less than 0.7 m. When<br />
<strong>the</strong> flash is used at closer than 0.7 m, it causes vignetting in <strong>the</strong> picture<br />
corners, light is distributed unevenly and <strong>the</strong> picture may be overexposed.<br />
Function Reference<br />
Calculating Aperture Value from Shooting Distance<br />
The following equation calculates <strong>the</strong> aperture value for shooting<br />
distances.<br />
Aperture Value Used F = Guide number ÷ Shooting distance<br />
When sensitivity is [ISO 200] and shooting distance is 5.2 m, aperture<br />
value is:<br />
F = 15.6 ÷ 5.2 = 3<br />
If <strong>the</strong> resulting number (3, in <strong>the</strong> above example) is not available as a<br />
lens aperture, <strong>the</strong> smaller number that is closest (2.8, in <strong>the</strong> above<br />
example) is generally used.
DA, D FA , FA J, FA and F Lens Compatibility<br />
with <strong>the</strong> Built-in Flash<br />
153<br />
When using DA, D FA, FA J, FA and F lenses with <strong>the</strong> F without<br />
<strong>the</strong> hood, built-in flash compatibility is shown below.<br />
Yes : Available<br />
# : Available depending on o<strong>the</strong>r factors<br />
No : Unavailable due to vignetting<br />
Following are evaluated without a hood.<br />
Lens Name<br />
DA Fish-eye<br />
10-17 mm F3.5-4.5ED (IF)<br />
F Fish-eye<br />
17-28 mm F3.5-4.5<br />
DA12-24 mm F4ED AL<br />
DA16-45 mm F4ED AL #<br />
FA J18-35 mm F4-5.6AL #<br />
DA18-55 mm F3.5-5.6AL<br />
FA20-35 mm F4AL<br />
FA24-90 mm F3.5-4.5AL (IF)<br />
FA28-70 mm F4AL<br />
FA 28-70 mm F2.8AL #<br />
FA J28-80 mm F3.5-5.6<br />
FA28-80 mm F3.5-5.6<br />
FA28-90 mm F3.5-5.6<br />
FA28-105 mm F4-5.6<br />
FA28-105 mm F4-5.6 (IF)<br />
FA28-105 mm F3.2-4.5AL (IF)<br />
FA28-200 mm F3.8-5.6AL (IF)<br />
FA35-80 mm F4-5.6<br />
DA50-200 mm F4-5.6ED<br />
No<br />
#<br />
No<br />
Yes<br />
Yes<br />
Yes<br />
Yes<br />
Yes<br />
Yes<br />
Yes<br />
Yes<br />
Yes<br />
Yes<br />
Yes<br />
Yes<br />
Yes<br />
Compatibility<br />
Vignetting may occur if focal length<br />
is less than 20 mm.<br />
When <strong>the</strong> focal length is less than 28<br />
mm or when <strong>the</strong> focal length is 28<br />
mm and <strong>the</strong> shooting distance is<br />
less than 1 m, vignetting may occur.<br />
Vignetting may occur if focal length<br />
is 18 mm and <strong>the</strong> shooting distance<br />
is less than 1 m.<br />
Vignetting may occur if focal length<br />
is between 28 and 35 mm and <strong>the</strong><br />
shooting distance is less than 1 m.<br />
5<br />
Function Reference
154<br />
5<br />
Function Reference<br />
Lens Name<br />
Compatibility<br />
FA70-200 mm F4-5.6<br />
Yes<br />
FA J75-300 mm F4.5-5.8AL<br />
Yes<br />
FA 80-200 mm F2.8ED (IF)<br />
Yes<br />
FA80-320 mm F4.5-5.6<br />
Yes<br />
FA80-200 mm F4.7-5.6<br />
Yes<br />
FA100-300 mm F4.7-5.8<br />
Yes<br />
FA 250-600 mm F5.6ED (IF)<br />
No<br />
DA14 mm F2.8ED (IF)<br />
No<br />
FA20 mm F2.8<br />
Yes<br />
FA 24 mm F2AL (IF)<br />
Yes<br />
FA28 mm F2.8AL<br />
Yes<br />
FA31 mm F1.8AL Limited<br />
Yes<br />
FA35 mm F2AL<br />
Yes<br />
DA40 mm F2.8 Limited<br />
Yes<br />
FA43 mm F1.9 Limited<br />
Yes<br />
FA50 mm F1.4<br />
Yes<br />
FA50 mm F1.7<br />
Yes<br />
FA77 mm F1.8 Limited<br />
Yes<br />
FA 85 mm F1.4 (IF)<br />
Yes<br />
FA135 mm F2.8 (IF)<br />
Yes<br />
FA 200 mm F2.8ED (IF)<br />
Yes<br />
FA 300 mm F2.8ED (IF)<br />
No<br />
FA 300 mm F4.5ED (IF)<br />
Yes<br />
FA 400 mm F5.6ED (IF)<br />
Yes<br />
FA 600 mm F4ED (IF)<br />
No<br />
D FA Macro 50 mm F2.8<br />
Yes<br />
D FA Macro 100 mm F2.8<br />
Yes<br />
FA Macro 50 mm F2.8<br />
Yes<br />
FA Macro 100 mm F2.8<br />
Yes<br />
FA Macro 100 mm F3.5<br />
Yes<br />
FA Macro 200 mm F4ED (IF) Yes<br />
FA Soft 28 mm F2.8 # Built-in flash always discharges fully.<br />
FA Soft 85 mm F2.8 # Built-in flash always discharges fully.
Using an External Flash (Optional)<br />
155<br />
Using <strong>the</strong> optional external flash AF360FGZ enables a variety of flash<br />
modes, such as P-TTL auto flash mode, high-speed flash sync mode, and<br />
wireless mode. See <strong>the</strong> chart below for details.<br />
(Yes: Available #: Restricted No: Not available)<br />
Camera Function<br />
Flash<br />
Built-in<br />
Flash<br />
AF360FGZ<br />
Red-eye reduction flash Yes Yes<br />
Automatic flash discharge Yes Yes<br />
After <strong>the</strong> flash is charged, <strong>the</strong> camera<br />
automatically switches to <strong>the</strong> flash sync<br />
Yes<br />
Yes<br />
speed.<br />
Aperture is automatically set in e (Program)<br />
mode and b (Shutter Priority) mode.<br />
Yes<br />
Yes<br />
Auto check in <strong>the</strong> viewfinder No No<br />
P-TTL auto flash (appropriate sensitivity:<br />
200 to 3200)<br />
Yes *1 Yes *1<br />
Slow-speed sync Yes Yes<br />
Flash Exposure Compensation Yes Yes<br />
AF illuminator Yes Yes<br />
Rear curtain sync flash *2 # *3 Yes<br />
Contrast-control-sync flash mode # *4 Yes<br />
Slave flash No Yes<br />
Multiple flash No No<br />
High-speed flash sync No Yes<br />
Wireless flash *5 No Yes<br />
*1 When using DA, D FA, FA J, FA, F or A lens.<br />
*2 Shutter speed of 1/90 sec. or slower.<br />
*3 Can be combined with AF360FGZ for rear curtain sync flash.<br />
*4 When combined with <strong>the</strong> AF360FGZ, 1/3 of <strong>the</strong> flash discharge can be output by <strong>the</strong> builtin<br />
flash and 2/3 can be output by <strong>the</strong> external flash.<br />
*5 Two or more AF360FGZ units are required.<br />
5<br />
Function Reference
156<br />
About <strong>the</strong> LCD Panel Display for AF360FGZ<br />
The AF360FGZ will automatically convert <strong>the</strong> field angle differential<br />
between 35 mm format and <strong>the</strong> F depending on <strong>the</strong> focal length<br />
of <strong>the</strong> lens you are using (when using DA, D FA, FA J, FA or F lenses).<br />
The conversion indicator appears and <strong>the</strong> format size indicator disappears<br />
when <strong>the</strong> exposure metering timer of <strong>the</strong> F is on (it returns to 35<br />
mm format display when <strong>the</strong> exposure metering timer is turned off).<br />
5<br />
Function Reference<br />
Lens focal length 85mm 77mm 50mm 35mm 28mm 24mm 20mm 18mm<br />
AF360FGZ<br />
LCD panel<br />
Exposure<br />
metering timer<br />
Off<br />
Exposure<br />
metering timer<br />
On<br />
Using P-TTL Auto Mode<br />
85mm 70mm 50mm 35mm 28mm 24mm*<br />
58mm 48mm 34mm 24mm 19mm 16mm*<br />
* Using wide adaptor<br />
Use this flash mode with <strong>the</strong> AF360FGZ flash unit. When flash mode is set<br />
to “P-TTL auto”, <strong>the</strong> flash pre-fires right before taking pictures using 16-<br />
segment metering and allows more precise control. P-TTL auto is<br />
available in wireless flash mode when two or more AF360FGZ units are<br />
used.<br />
1 Remove <strong>the</strong> cover of <strong>the</strong> hot shoe and attach <strong>the</strong> AF360FGZ.<br />
2 Turn on <strong>the</strong> AF360FGZ.<br />
3 Set <strong>the</strong> AF360FGZ flash mode to P-TTL auto.<br />
4 Confirm that <strong>the</strong> AF360FGZ is fully charged and <strong>the</strong>n take <strong>the</strong> picture.<br />
• P-TTL auto is only available with <strong>the</strong> AF360FGZ flash unit.<br />
•The b will light in <strong>the</strong> viewfinder when <strong>the</strong> flash is ready (fully charged).<br />
• For details such as operation method and effective distance, please read <strong>the</strong><br />
external flash manual.<br />
• The flash does not discharge when <strong>the</strong> subject is bright enough when Flash<br />
Mode is B or C. Therefore, it may not suitable for daylight-sync shooting.<br />
• Never press <strong>the</strong> flash pop up button when any external flash unit is attached<br />
to <strong>the</strong> camera. The built-in flash will hit <strong>the</strong> external flash. If you want to use<br />
both at once, see p.159 for <strong>the</strong> connection method.
Using High-Speed Flash Sync Mode<br />
157<br />
With <strong>the</strong> AF360FGZ, you can discharge <strong>the</strong> flash to take a picture at a<br />
shutter speed faster than 1/180 second. High-speed flash sync can be<br />
used with <strong>the</strong> flash attached to <strong>the</strong> camera, or wireless.<br />
Attaching and Using <strong>the</strong> AF360FGZ on <strong>the</strong> Camera<br />
1 Remove <strong>the</strong> hot shoe cover and attach <strong>the</strong> AF360FGZ.<br />
2 Turn <strong>the</strong> mode dial and set <strong>the</strong> exposure mode to b or a.<br />
3 Turn on <strong>the</strong> AF360FGZ.<br />
4 Set <strong>the</strong> AF360FGZ sync mode to HSb (high-speed flash sync.).<br />
5 Confirm that <strong>the</strong> AF360FGZ is fully charged and <strong>the</strong>n take <strong>the</strong> picture.<br />
•The b will light in <strong>the</strong> viewfinder when <strong>the</strong> flash is ready (fully charged).<br />
• High-speed flash sync is only available when <strong>the</strong> shutter speed is faster than<br />
1/180 sec.<br />
• High-speed flash sync is not available when <strong>the</strong> exposure mode is set to p<br />
(Bulb).<br />
Using in Wireless Mode<br />
Shoot using <strong>the</strong> flash without connecting <strong>the</strong> camera and flash with a cord<br />
by using two AF360FGZ units.The High-speed sync mode is also available<br />
in wireless mode.<br />
5<br />
Function Reference<br />
Be sure to set <strong>the</strong> two AF360FGZ units to <strong>the</strong> same channel. See <strong>the</strong><br />
AF360FGZ operating manual for details.
158<br />
Using in Wireless Mode<br />
1 Place <strong>the</strong> AF360FGZ at <strong>the</strong> desired location.<br />
2 Set <strong>the</strong> AF360FGZ power switch to [WIRELESS].<br />
3 Set <strong>the</strong> AF360FGZ wireless mode to S (Slave).<br />
4 Turn <strong>the</strong> camera mode dial and set <strong>the</strong> exposure mode to e, b, c or<br />
a mode.<br />
5 Set <strong>the</strong> AF360FGZ power switch on <strong>the</strong> camera to [WIRELESS].<br />
6 Set <strong>the</strong> AF360FGZ wireless mode on <strong>the</strong> camera to a (Master) or A<br />
(Control).<br />
• Wireless mode is not available for <strong>the</strong> built-in flash.<br />
• Set <strong>the</strong> AF360FGZ wireless slave mode to SLAVE1.<br />
5<br />
Function Reference<br />
Wireless Flash Control (P-TTL Flash Mode)<br />
The following information is exchanged between <strong>the</strong> two AF360FGZ<br />
flash units before <strong>the</strong> flash is discharged when <strong>the</strong> AF360FGZ is used<br />
for wireless flash.<br />
<strong>Press</strong> <strong>the</strong> shutter release button fully.<br />
1 The camera’s flash discharges a pre-flash (<strong>the</strong> camera’s flash<br />
mode is transmitted).<br />
2 The external flash unit discharges a pre-flash (<strong>the</strong> subject’s<br />
lighting condition is checked).<br />
3 The camera’s flash unit discharges a pre-flash (<strong>the</strong> required<br />
flash output is transmitted to <strong>the</strong> external flash).<br />
* The camera’s flash will discharge ano<strong>the</strong>r pre-flash to transmit <strong>the</strong><br />
flash duration in HSb (High-speed sync).<br />
4 The external flash discharges <strong>the</strong> main flash.<br />
Set <strong>the</strong> AF360FGZ wireless slave mode to SLAVE1.
Red-Eye Reduction<br />
159<br />
As with <strong>the</strong> built-in flash, red-eye reduction is available with an external<br />
flash. This may not be available on some flashes or may have restrictions<br />
for usage conditions. See <strong>the</strong> chart on p.155.<br />
• The red-eye reduction feature works even when only an external flash is<br />
used. (p.54)<br />
• If red-eye reduction is used when <strong>the</strong> AF360FGZ is set as <strong>the</strong> slave unit or<br />
with <strong>the</strong> wireless function, <strong>the</strong> preflash for red-eye reduction will trigger <strong>the</strong><br />
external flash. Do not use red-eye reduction when using a slave unit.<br />
Rear Curtain Sync Flash<br />
When using <strong>the</strong> built-in flash with AF360FGZ that is set to <strong>the</strong> rear curtain<br />
flash function, <strong>the</strong> internal flash will also use this mode. Confirm that both<br />
flash units are fully charged before shooting.<br />
Using <strong>the</strong> Built-in Flash with <strong>the</strong> External Flash<br />
As shown in <strong>the</strong> figure below, attach <strong>the</strong> hot shoe adapter FG (optional) to<br />
<strong>the</strong> camera hot shoe and an off-camera shoe adapter F (optional) to <strong>the</strong><br />
bottom of <strong>the</strong> external flash, and connect <strong>the</strong>se with <strong>the</strong> extension cord<br />
F5P (optional). The off camera shoe adapter F comes with a tripod screw<br />
for securing to your tripod.<br />
Only <strong>the</strong> P-TTL auto flash can be used in combination with <strong>the</strong> built-in<br />
flash.<br />
5<br />
Function Reference<br />
When combining with <strong>the</strong> built-in flash
160<br />
Discharging Multiple Flashes<br />
You can combine two or more AF360FGZ external flashes or you can use<br />
two or more AF360FGZ external flashes in combination with <strong>the</strong> built-in<br />
flash. Connect <strong>the</strong>m as shown in <strong>the</strong> figure below: Attach an off-camera<br />
shoe adapter F (optional) to <strong>the</strong> external flash and <strong>the</strong> hot shoe adapter F<br />
(optional) and connect <strong>the</strong> extension cord F5P (optional) to <strong>the</strong> off-camera<br />
shoe adapter F on <strong>the</strong> o<strong>the</strong>r external flash.<br />
• Do not combine with accessories that have a different number of contacts<br />
such as a Hot Shoe Grip. A malfunction may occur.<br />
• Combining with flashes from o<strong>the</strong>r manufacturers may cause equipment<br />
breakdown. We recommend using <strong>the</strong> AF360FGZ.<br />
When combining two or more external flashes<br />
5<br />
Function Reference<br />
When using multiple AF360FGZ units or an AF360FGZ unit with <strong>the</strong> built-in<br />
flash, P-TTL is used for flash control.
Contrast-Control-Sync Flash<br />
161<br />
Combining two or more AF360FGZ or using AF360FGZ in combination<br />
with <strong>the</strong> built-in flash allows twin flash photography (contrast-control-synch<br />
flash photography). This is based on <strong>the</strong> difference between <strong>the</strong> amounts<br />
of light discharged from two units.<br />
• Do not combine with accessories that have a different number of contacts<br />
such as a Hot Shoe Grip as a malfunction may occur.<br />
• Combining with flashes from o<strong>the</strong>r manufacturers may cause equipment<br />
breakdown. We recommend using <strong>the</strong> PENTAX dedicated automatic<br />
flashes.<br />
1 Connect <strong>the</strong> external flash to <strong>the</strong> camera indirectly. (p.159)<br />
2 Set <strong>the</strong> sync mode for AF360FGZ to <strong>the</strong> Contrast-Control-Synch mode.<br />
3 Turn <strong>the</strong> mode dial and set <strong>the</strong> exposure mode to e, b, c or a.<br />
4 Confirm that both <strong>the</strong> external flash and built-in flash are fully charged<br />
and <strong>the</strong>n take <strong>the</strong> picture.<br />
• When using two or more external flashes and <strong>the</strong> Contrast-Control-Synch<br />
mode is set on <strong>the</strong> external master flash unit, <strong>the</strong> flash output ratio is 2<br />
(master unit) : 1 (slave units). When external flash is used in combination<br />
with <strong>the</strong> built-in flash, <strong>the</strong> flash output ratio is 2 (external flash) : 1 (built-in<br />
flash).<br />
• When using two AF360FGZ units or an AF360FGZ unit with <strong>the</strong> built-in flash,<br />
P-TTL is used for flash control.<br />
• The fastest flash synchronization speed is 1/180 second in <strong>the</strong> Contrast-<br />
Control-Synch mode.<br />
5<br />
Function Reference
162<br />
Settings During Playback<br />
Changing Playback Display Method<br />
Sets <strong>the</strong> information to show first during playback and whe<strong>the</strong>r to display<br />
overexposed area warning.<br />
The camera switches display information when you press <strong>the</strong> M button.<br />
1 Select [Plybk dsply mthd] on <strong>the</strong> [Q Playback] menu.<br />
5<br />
Function Reference<br />
2 <strong>Press</strong> <strong>the</strong> four-way controller (5).<br />
The screen for setting <strong>the</strong> playback<br />
display method appears.<br />
Plybk dsply mthd<br />
Display Style<br />
Images only<br />
Bright Portion<br />
3 Use <strong>the</strong> four-way controller (5) to select [Display Style].<br />
4 Use <strong>the</strong> four-way controller (23) to select <strong>the</strong> information<br />
to show.<br />
Images only<br />
Histogram<br />
Detailed Info<br />
Last memory<br />
Only captured images are displayed.<br />
Images and histogram are displayed.<br />
Shooting information appears with a small image in <strong>the</strong><br />
upper left.<br />
Display settings are retained from previous session.<br />
Plybk dsply mthd<br />
Display Style<br />
Images only<br />
Histogram<br />
Bright Detailed Portion Info<br />
Last memory<br />
Cancel<br />
OK OK
163<br />
5 <strong>Press</strong> <strong>the</strong> OK button.<br />
The selected information setting is saved.<br />
6 Use <strong>the</strong> four-way controller (3) to select [Bright Portion].<br />
7 Use <strong>the</strong> four-way controller (45) to select O (On) or P<br />
(Off).<br />
8 <strong>Press</strong> <strong>the</strong> MENU button twice.<br />
The camera is ready to take a picture.<br />
Refer to p.18 for various display information details.<br />
5<br />
Setting <strong>the</strong> Slideshow Display Interval<br />
You can play back all images recorded on your SD Memory Card<br />
successively. (p.70)<br />
Set image display interval to [3 sec], [5 sec], [10 sec] or [30 sec]. The<br />
default setting is [3 sec].<br />
Set in [Slideshow] in <strong>the</strong> [Q Playback] menu (p.100).<br />
Function Reference<br />
Playback<br />
Plybk dsply mthd<br />
Instant Review<br />
Preview Display<br />
Digital Filter<br />
Slideshow<br />
Cancel<br />
3 sec<br />
5 sec<br />
10 sec<br />
30 sec<br />
OK OK<br />
After setting, press <strong>the</strong> 4 button to start slideshow.
164<br />
Camera Settings<br />
Formatting <strong>the</strong> SD Memory Card<br />
Be sure to format new SD Memory Card with <strong>the</strong> camera before using <strong>the</strong><br />
card.<br />
Formatting will delete all <strong>the</strong> data on <strong>the</strong> SD Memory Card.<br />
• Do not open <strong>the</strong> card cover while formatting SD Memory Card. The card may<br />
be damaged beyond use.<br />
• Formatting will delete protected data. Be aware.<br />
5<br />
Function Reference<br />
1 Select [Format] on <strong>the</strong> [H Set-up] menu (p.101).<br />
2 <strong>Press</strong> <strong>the</strong> four-way controller (5) to display <strong>the</strong> Format<br />
screen.<br />
3 Use <strong>the</strong> four-way controller (2)<br />
to select [Format].<br />
Format<br />
All data deleted<br />
Format<br />
Cancel<br />
OK OK<br />
4 <strong>Press</strong> <strong>the</strong> 4 button.<br />
Formatting starts. When formatting is completed, <strong>the</strong> camera is ready to<br />
take pictures.
Turning <strong>the</strong> Beep On and Off<br />
165<br />
You can turn <strong>the</strong> camera operation beep on or off. The default setting is<br />
O (On) .<br />
Set in [Beep] in <strong>the</strong> [H Set-up] menu. (p.101)<br />
Set-up<br />
Format<br />
Beep<br />
Date Adjust<br />
World Time<br />
Guide display<br />
Exit<br />
English<br />
Changing <strong>the</strong> Date and Time and <strong>the</strong> Display<br />
Style<br />
You can change <strong>the</strong> initial date and time settings. You can also set <strong>the</strong><br />
display style. Choose [mm/dd/yy], [dd/mm/yy] or [yy/mm/dd]. Choose<br />
[12h (12 hour)] or [24h (24 hour)] for time display method.<br />
1 Setting <strong>the</strong> Date and Time (p.35)<br />
5<br />
Function Reference<br />
Date Adjust<br />
Date Style<br />
Date<br />
mm/dd/yy24h<br />
01 / 01 / 2006<br />
Time<br />
Cancel<br />
00 : 00<br />
OK OK
166<br />
Setting <strong>the</strong> World Time<br />
The date and time selected in “Initial Settings” (p.33) serve as <strong>the</strong> date and<br />
time of your present location.<br />
Setting [World Time] enables you to display <strong>the</strong> local date and time on <strong>the</strong><br />
LCD monitor when traveling overseas.<br />
1 Select [World Time] on <strong>the</strong> [H Set-up] menu. (p.101)<br />
2 <strong>Press</strong> <strong>the</strong> four-way controller<br />
(5).<br />
World Time<br />
The World Time screen appears.<br />
5<br />
Function Reference<br />
3 Use <strong>the</strong> four-way controller (45) to select O (On) or P<br />
(Off).<br />
O<br />
P<br />
New York<br />
New York<br />
Applies time of city set in X (Destination)<br />
Applies time of city set in W (Hometown)<br />
00:25<br />
4 <strong>Press</strong> <strong>the</strong> four-way controller (3).<br />
The selection frame moves to X. The city with X blinks.<br />
5 <strong>Press</strong> <strong>the</strong> four-way controller (5).<br />
The screen for magnifying <strong>the</strong> Destination region appears.<br />
Use <strong>the</strong> four-way controller (45) to change <strong>the</strong> region to magnify.<br />
6 <strong>Press</strong> <strong>the</strong> four-way controller (3).<br />
The frame moves to city.
167<br />
7 Use <strong>the</strong> four-way controller<br />
(45) to select <strong>the</strong> Destination<br />
city.<br />
Destination<br />
The current time, location and time<br />
difference of <strong>the</strong> selected city appears.<br />
London<br />
DST<br />
Cancel<br />
OK OK<br />
+05:00<br />
05:25<br />
8 Use <strong>the</strong> four-way controller (3) to select [DST].<br />
9 Use <strong>the</strong> four-way controller (45) to select O (On) or P<br />
(Off).<br />
Select O (On) if <strong>the</strong> Destination city uses daylight saving time (DST).<br />
10 <strong>Press</strong> <strong>the</strong> 4 button.<br />
The World Time setting is saved.<br />
To continue with World Time setting<br />
operations, press <strong>the</strong> 4 button to<br />
return to <strong>the</strong> World Time screen.<br />
World Time<br />
London<br />
New York<br />
01:25<br />
5<br />
Function Reference<br />
11 <strong>Press</strong> <strong>the</strong> 3 button twice.<br />
The camera is ready to take pictures.<br />
• See “List of World Time Cities” (p.168) for cities that can be specified as a<br />
destination.<br />
• Select W in Step 4 to set <strong>the</strong> city and DST setting.<br />
• X appears on <strong>the</strong> guide display screen if World Time is On (O). (p.16)
168<br />
5<br />
Function Reference<br />
List of World Time Cities<br />
Region City Region City<br />
North Honolulu<br />
Africa/ Nairobi<br />
America Anchorage<br />
West Asia Jeddah<br />
Vancouver<br />
Tehran<br />
San Francisco<br />
Dubai<br />
Los Angeles<br />
Karachi<br />
Calgary<br />
Kabul<br />
Denver<br />
Male<br />
Chicago<br />
Delhi<br />
Miami<br />
Colombo<br />
Toronto<br />
Katmandu<br />
New York<br />
Dacca<br />
Halifax East Asia Yangon<br />
Central and Mexico City<br />
Bangkok<br />
South Lima<br />
Kuala Lumpur<br />
America Santiago<br />
Vientiane<br />
Caracas<br />
Singapore<br />
Buenos Aires<br />
Phnom Penh<br />
Sao Paulo<br />
Ho chi Minh<br />
Rio de Janeiro<br />
Jakarta<br />
Europe Madrid Hong Kong<br />
London<br />
Beijing<br />
Paris<br />
Shanghai<br />
Amsterdam<br />
Manila<br />
Milan<br />
Taipei<br />
Rome<br />
Seoul<br />
Berlin<br />
Tokyo<br />
Stockholm<br />
Guam<br />
A<strong>the</strong>ns Oceania Perth<br />
Helsinki<br />
Adelaide<br />
Moscow<br />
Sydney<br />
Africa/ Dakar<br />
Noumea<br />
West Asia Algiers<br />
Wellington<br />
Johannesburg<br />
Auckland<br />
Istanbul<br />
Pago Pago<br />
Cairo<br />
Jerusalem
Setting <strong>the</strong> Display Language<br />
169<br />
You can change <strong>the</strong> language in which <strong>the</strong> menus, error messages, etc.<br />
are displayed.<br />
Set in [Language/ ] in <strong>the</strong> [H Set-up] menu. (p.101)<br />
You can choose from eleven languages: English, French, German,<br />
Spanish, Italian, Swedish, Dutch, Russian, Korean, Chinese (Traditional/<br />
Simplified) and Japanese.<br />
1 Setting <strong>the</strong> Display Language (p.33)<br />
English<br />
Français<br />
Deutsch<br />
Español<br />
Italiano<br />
Svenska<br />
Nederlands<br />
OK OK<br />
Turning <strong>the</strong> Guide Display On and Off<br />
Set to display guides on <strong>the</strong> LCD monitor when main switch is on or<br />
exposure mode is changed. (p.16)<br />
5<br />
Function Reference<br />
O<br />
P<br />
Guide display on<br />
Guide display off<br />
Set in [Guide display] in <strong>the</strong> [H Set-up] menu. (p.101)<br />
Set-up<br />
Format<br />
Beep<br />
Date Adjust<br />
World Time<br />
Guide display<br />
Exit<br />
English
170<br />
Adjusting <strong>the</strong> Brightness of <strong>the</strong> LCD Monitor<br />
You can adjust <strong>the</strong> brightness of <strong>the</strong> LCD monitor. Adjust settings when<br />
<strong>the</strong> LCD monitor is hard to see.<br />
Set in [Brightness Level] in <strong>the</strong> [H Set-up] menu. (p.101)<br />
Set-up<br />
Brightness Level<br />
Video Out<br />
Transfer Mode<br />
Auto Power Off<br />
Folder Name<br />
File #<br />
0<br />
1 min<br />
Std.<br />
SerialNo<br />
OK OK<br />
5<br />
Function Reference<br />
Selecting <strong>the</strong> Video Output Format<br />
When you connect <strong>the</strong> camera to AV equipment such as a TV, choose <strong>the</strong><br />
appropriate video output format (NTSC or PAL) for playing back images.<br />
Set in [Video Out] in <strong>the</strong> [H Set-up] menu. (p.101)<br />
1 Connecting <strong>the</strong> Camera to AV Equipment (p.72)<br />
Set-up<br />
Brightness Level<br />
Video Out<br />
Transfer Mode<br />
Auto Power Off<br />
Folder Name<br />
File #<br />
Cancel<br />
0<br />
NTSC<br />
PAL<br />
1 min<br />
Std.<br />
SerialNo<br />
OK OK<br />
The video output format varies according to region. The video output format<br />
used in North America is NTSC.
Setting Auto Power Off<br />
171<br />
You can set <strong>the</strong> camera to turn off automatically if unused after a certain<br />
length of time. Select from [1 min], [3 min], [5 min], [10 min], [30 min] or<br />
[Off]. The default setting is [1 min].<br />
Set in [Auto Power Off] in <strong>the</strong> [H Set-up] menu. (p.101)<br />
Set-up<br />
Brightness Level<br />
Video Out<br />
Transfer Mode<br />
Auto Power Off<br />
Folder Name<br />
File #<br />
Cancel<br />
1 min<br />
3 min<br />
5 min<br />
10 min<br />
30 min<br />
Off<br />
OK OK<br />
Auto Power Off will not work during slideshow playback, a USB connection,<br />
remote control shooting or while displaying menu or Fn menu.<br />
5<br />
Selecting <strong>the</strong> Folder Name<br />
You can select <strong>the</strong> method for assigning <strong>the</strong> folder names for storing<br />
images. The default setting is [Std.].<br />
Std.<br />
Date<br />
The folder name is assigned in <strong>the</strong> form of [xxxPENTX].<br />
[xxx] is a sequential number from 100 to 900.<br />
(Example) 101PENTX<br />
The two digits of <strong>the</strong> [month] and [day] on which <strong>the</strong> picture<br />
was taken are assigned as <strong>the</strong> folder name in <strong>the</strong> form of<br />
[xxx_MMDD].<br />
(Example) 101_0125 : for folders with pictures taken on<br />
January 25th<br />
Set in [Folder Name] in <strong>the</strong> [H Set-up] menu. (p.101)<br />
Function Reference<br />
Set-up<br />
Brightness Level<br />
Video Out<br />
Transfer Mode<br />
Auto Power Off<br />
Folder Name<br />
File #<br />
Cancel<br />
0<br />
NTSC<br />
PC<br />
1 min<br />
Std.<br />
Date<br />
OK OK
172<br />
Resetting <strong>the</strong> File Number<br />
You can set <strong>the</strong> file number used for <strong>the</strong> images when inserting a new SD<br />
Memory Card. The default setting is [SerialNo].<br />
SerialNo<br />
Reset<br />
The file number for <strong>the</strong> most recently captured image is placed in<br />
memory and <strong>the</strong> file number will remain continuous after inserting<br />
<strong>the</strong> new SD Memory Card.<br />
Every time a new SD Memory Card is inserted, <strong>the</strong> file number is<br />
<strong>the</strong> smallest number. When an SD Memory Card with stored<br />
images is inserted, numbering continues from <strong>the</strong> last stored file<br />
number.<br />
Set in [File #] in <strong>the</strong> [H Set-up] menu. (p.101)<br />
5<br />
Function Reference<br />
Set-up<br />
Brightness Level<br />
Video Out<br />
Transfer Mode<br />
Auto Power Off<br />
Folder Name<br />
File #<br />
Cancel<br />
0<br />
NTSC<br />
PC<br />
1 min<br />
SerialNo<br />
Reset<br />
OK OK<br />
Setting <strong>the</strong> Display Instant Review and Digital<br />
Preview<br />
You can perform <strong>the</strong> settings related to Instant Review and Digital Preview.<br />
Setting <strong>the</strong> Display Time of <strong>the</strong> Instant Review<br />
Select from [1 sec], [3 sec], [5 sec] or [Off]. The default setting is [1 sec].<br />
Set in [Instant Review] in <strong>the</strong> [Q Playback] menu. (p.100)<br />
Playback<br />
Plybk dsply mthd<br />
Instant Review<br />
Preview Display<br />
Digital Filter<br />
Slideshow<br />
Cancel<br />
1 sec<br />
3 sec<br />
5 sec<br />
off<br />
OK OK
Displaying Histogram and Bright Portion<br />
173<br />
Set to display histogram and bright portion during Instant Review and<br />
Digital Preview.<br />
Set in [Preview Display] in <strong>the</strong> [Q Playback] menu. (p.100) In <strong>the</strong> default<br />
setting, <strong>the</strong> histogram and overexposed area warning do not appear.<br />
1 Select [Preview Display] in <strong>the</strong> [Q Playback] menu.<br />
2 <strong>Press</strong> <strong>the</strong> four-way controller (5).<br />
The screen for setting <strong>the</strong> Preview Display<br />
appears.<br />
Preview Display<br />
Histogram<br />
Bright Portion<br />
For setting displayed<br />
information in Instant<br />
Review/Digital Preview<br />
5<br />
3 Use <strong>the</strong> four-way controller (45) to select O (On) or P<br />
(Off) for [Histogram].<br />
O<br />
P<br />
The histogram is displayed in <strong>the</strong> Instant Review and Digital<br />
Preview screens.<br />
The histogram is not displayed.<br />
Function Reference<br />
4 Use <strong>the</strong> four-way controller (3) to select [Bright Portion].<br />
5 Use <strong>the</strong> four-way controller (45) to select O (On) or P<br />
(Off).<br />
O<br />
P<br />
The overexposed area warning is displayed in <strong>the</strong> Instant<br />
Review and Digital Preview screens.<br />
The overexposed area warning is not displayed.<br />
6 <strong>Press</strong> <strong>the</strong> MENU button twice.<br />
The camera is ready to take a picture.
174<br />
Resetting to Default Settings<br />
Resetting Rec. Mode/Playback/Set-up Menu<br />
Settings in [A Rec. Mode] menu, [Q Playback] menu and [H Set-up]<br />
menu are reset to default settings.<br />
However, Date Adjust, Language, Video Out and World Time are not<br />
reset.<br />
1 Select [Reset] on <strong>the</strong> [H Set-up] menu.<br />
5<br />
Function Reference<br />
2 <strong>Press</strong> <strong>the</strong> four-way controller (5) to display <strong>the</strong> [Reset]<br />
screen.<br />
3 Use <strong>the</strong> four-way controller (2)<br />
to select [Reset].<br />
Reset<br />
Back to initial settings<br />
Reset<br />
Cancel<br />
OK OK<br />
4 <strong>Press</strong> <strong>the</strong> 4 button.<br />
The camera is ready to take or play back images.
Resetting <strong>the</strong> Custom Function Menu<br />
175<br />
Reset settings in [A Custom Setting] menu to default settings.<br />
Settings in [A Rec. Mode] menu, [Q Playback] menu and [H Set-up]<br />
menu are not reset.<br />
1 Select [Reset] on <strong>the</strong> [A Custom Setting] menu.<br />
2 <strong>Press</strong> <strong>the</strong> four-way controller (5) and display <strong>the</strong> Reset<br />
Custom Fnction screen.<br />
3 Use <strong>the</strong> four-way controller (2)<br />
to select [Reset].<br />
4 <strong>Press</strong> <strong>the</strong> 4 button.<br />
The camera is ready to take or play back images.<br />
Reset Custom Fnction<br />
Returns <strong>the</strong> custom<br />
function settings<br />
to initial settings<br />
Reset<br />
Cancel<br />
OK OK<br />
5<br />
Function Reference
176<br />
Memo
6 Appendix<br />
Default Settings ..................................................178<br />
Functions Available with Various Lens<br />
Combinations .....................................................182<br />
Notes on [Using Aperture Ring] ........................184<br />
Cleaning <strong>the</strong> CCD ...............................................185<br />
Optional Accessories .........................................187<br />
Error Messages ..................................................190<br />
Troubleshooting .................................................192<br />
Main Specifications ............................................194<br />
Glossary ..............................................................197<br />
Index ....................................................................202<br />
WARRANTY POLICY ..........................................206
178<br />
Default Settings<br />
6<br />
Appendix<br />
The table below lists <strong>the</strong> factory default settings.<br />
Table notations are as follows.<br />
Last Memory Setting<br />
Yes : The current setting (last memory) is saved when <strong>the</strong> camera is turned off.<br />
No : The setting returns to <strong>the</strong> default setting when <strong>the</strong> camera is turned off.<br />
Reset Setting<br />
Yes : The setting returns to <strong>the</strong> default setting with <strong>the</strong> reset function (p.174).<br />
No : The setting is saved even after reset.<br />
[A Rec. Mode] Menu<br />
Item<br />
Default Setting<br />
Last<br />
Memory<br />
Setting<br />
Reset<br />
Setting<br />
Page<br />
Image Tone F (Bright) Yes Yes p.110<br />
Recorded Pixels P (3008×2000) Yes Yes p.111<br />
Quality Level C (Best) Yes Yes p.112<br />
Saturation (0) Yes Yes p.113<br />
Sharpness (0) Yes Yes p.113<br />
Contrast (0) Yes Yes p.113<br />
Auto Bracket ±0.5/0 – + Yes Yes p.146<br />
AE Metering L (Multi-segment) Yes Yes p.131<br />
Focusing Area G (Wide) Yes Yes p.123<br />
AF Mode<br />
l<br />
(Single mode)<br />
Yes Yes p.124<br />
Flash Exp. Comp. 0.0 Yes Yes p.149<br />
[Q Playback] Menu<br />
Item<br />
Default Setting<br />
Last<br />
Memory<br />
Setting<br />
Reset<br />
Setting<br />
Page<br />
Plybk Display Style Images only Yes Yes<br />
dsply<br />
p.162<br />
mthd Bright Portion P (Off) Yes Yes<br />
Instant Review 1sec Yes Yes p.172<br />
Preview Histogram P (Off) Yes Yes<br />
Display Bright Portion P (Off) Yes Yes<br />
p.173<br />
Digital Filter B&W Yes* Yes p.73<br />
Slideshow 3sec Yes Yes p.70<br />
* Only <strong>the</strong> slimness setting for <strong>the</strong> slim filter, <strong>the</strong> softness setting for <strong>the</strong> soft filter<br />
and <strong>the</strong> brightness setting for <strong>the</strong> brightness filter are saved.
[H Set-up] Menu<br />
Item<br />
Default Setting<br />
Last<br />
Memory<br />
Setting<br />
Reset<br />
Setting<br />
Page<br />
Format — — — p.164<br />
Beep O (On) Yes Yes p.165<br />
Date Adjust<br />
World<br />
Time<br />
World Time<br />
setting<br />
Hometown (City)<br />
Hometown<br />
(DST)<br />
Destination<br />
(City)<br />
Destination<br />
(DST)<br />
According to<br />
default setting<br />
Yes No p.165<br />
P (Off) Yes Yes<br />
According to<br />
default setting<br />
According to<br />
default setting<br />
Same as<br />
Hometown<br />
Same as<br />
Hometown<br />
Yes<br />
Yes<br />
Yes<br />
Yes<br />
No<br />
No<br />
No<br />
No<br />
p.166<br />
Language/<br />
According to<br />
default setting<br />
Yes No p.169<br />
Guide display O (On) Yes Yes p.169<br />
Brightness Level 0 Yes Yes p.170<br />
Video Out<br />
According to<br />
default setting<br />
Yes No p.170<br />
Transfer Mode PC Yes Yes p.85<br />
Auto Power Off 1min Yes Yes p.171<br />
Folder Name Std. Yes Yes p.171<br />
File # SerialNo Yes Yes p.172<br />
Sensor Cleaning — — — p.185<br />
Reset — — — p.174<br />
179<br />
6<br />
Appendix
180<br />
6<br />
Appendix<br />
[A Custom Setting] Menu<br />
Item<br />
Default Setting<br />
Last<br />
Memory<br />
Setting<br />
Reset<br />
Setting<br />
Page<br />
Settings P (Off) Yes Yes p.102<br />
Noise Reduction On Yes Yes p.141<br />
Expsr Setting Steps 1/2 EV Steps Yes Yes p.143<br />
ISO Corction in AUTO ISO 200-800 Yes Yes p.117<br />
ISO Snstvty Wrn Dspl Off Yes Yes p.118<br />
Link AF Point and AE Off Yes Yes p.132<br />
Meter Operating Time 10sec Yes Yes p.132<br />
AE-L with AF locked Off Yes Yes p.126<br />
Recordable Image No.<br />
Remaining image<br />
storage capacity<br />
Yes Yes p.102<br />
OK btn when shooting Off Yes Yes<br />
p.122,<br />
p.123<br />
AE-L bttn on M expsr Program Line Yes Yes p.141<br />
AF in remote control Off Yes Yes p.102<br />
FI with S lens used Not available Yes Yes p.103<br />
Using aperture ring Prohibited Yes Yes p.184<br />
Release when Chrging Off Yes Yes p.150<br />
Preview Method Digital Preview Yes Yes p.148<br />
Mag to Strt Zm Plybk 1.2times Yes Yes p.103<br />
Man. WB Measurement Entire screen Yes Yes p.115<br />
Color Space sRGB Yes Yes p.119<br />
Reset Custom Fnction* — — — p.175<br />
* Reset settings in [A Custom Setting] menu.
Fn Menu<br />
Drive Mode<br />
Item<br />
Default Setting<br />
9 (Single frame<br />
shooting)<br />
Last<br />
Memory<br />
Setting<br />
No *1<br />
Reset<br />
Setting<br />
Page<br />
*1 Only continuous shooting settings are saved.<br />
*2 Only <strong>the</strong> slimness setting for <strong>the</strong> slim filter, <strong>the</strong> softness setting for <strong>the</strong> soft filter<br />
and <strong>the</strong> brightness setting for <strong>the</strong> brightness filter are saved.<br />
Yes<br />
p.55,<br />
p.57,<br />
p.61,<br />
p.144<br />
Flash Mode B (Auto) Yes Yes p.51<br />
White Balance F (Auto) Yes Yes p.114<br />
ISO Sensitivity AUTO Yes Yes p.117<br />
Scene Mode Night Scene Yes Yes p.47<br />
DPOF Settings — Yes No p.81<br />
Digital Filter B&W Yes *2 Yes p.73<br />
Slideshow 3sec Yes Yes p.70<br />
181<br />
6<br />
Appendix
182<br />
Functions Available with Various<br />
Lens Combinations<br />
Lenses that can be used with this camera<br />
Only DA and FA J lenses and D FA/FA/F/A lenses having an s position<br />
on <strong>the</strong> aperture ring can be used with this camera. Refer to “Notes on<br />
[Using Aperture Ring]” (p.184) for o<strong>the</strong>r lenses and D FA/FA/F/A lenses<br />
with aperture ring set to a position o<strong>the</strong>r than s.<br />
6<br />
Appendix<br />
Lens [Mount type] DA/D FA/<br />
F lens A lens<br />
FA J/FA lens<br />
Function<br />
[KAF, KAF2] *3 [KAF] *3 [KA]<br />
Autofocus (Lens only) Yes Yes —<br />
(With AF adapter 1.7×) *1 — — Yes *5<br />
Manual focus<br />
(With <strong>the</strong> focus indicator) *2 Yes Yes Yes<br />
(With Matte field) Yes Yes Yes<br />
Switching focusing area (Wide/Spot) Yes Yes No *5<br />
Power zoom No — —<br />
Aperture Priority Auto Exposure Yes Yes Yes<br />
Shutter Priority Automatic Exposure Yes Yes Yes<br />
Manual Exposure Yes Yes Yes<br />
P-TTL Auto Flash *4 Yes Yes Yes<br />
Multi (16-segment) metering Yes Yes Yes<br />
Yes : Functions are available when <strong>the</strong> aperture ring is set to <strong>the</strong> s<br />
position.<br />
No : Functions are unavailable.<br />
*1 Lenses with a maximum aperture of f/2.8 or brighter. Only available at s position.<br />
*2 Lenses with a maximum aperture of f/5.6 or brighter.<br />
*3 To use an F/FA soft 85 mm f/2.8 lens or FA soft 28 mm f/2.8 lens, set [Using aperture ring]<br />
to [Permitted] in <strong>the</strong> [A Custom Setting] menu (p.102). Pictures can be taken with <strong>the</strong><br />
aperture you set, but only within manual aperture range.<br />
*4 When using <strong>the</strong> built-in flash and AF360FGZ.<br />
*5 Focusing Area is set to Spot.
Lens names and mount names<br />
FA prime lenses (non-zoom lenses) and DA, D FA, FA J and F lenses use<br />
<strong>the</strong> KAF mount. Of <strong>the</strong> FA zoom lenses, power zoom enabled lenses use<br />
<strong>the</strong> KAF2 mount. Lenses without power zoom use <strong>the</strong> KAF mount. See <strong>the</strong><br />
lens manual for details. This camera does not have a power zoom<br />
function.<br />
183<br />
Lenses and accessories that cannot be used with this camera<br />
When aperture ring is set at o<strong>the</strong>r than s (Auto) or a lens without a s<br />
(Auto) position or accessories such as an auto extension tube or auto<br />
bellows are used, camera does not operate unless [Using aperture ring] is<br />
set to [Permitted] in <strong>the</strong> [A Custom Setting] menu (p.103). Refer to “Notes<br />
on [Using Aperture Ring]” (p.184) for restriction that apply when [Using<br />
aperture ring] is set to [Permitted] in <strong>the</strong> [A Custom Setting] menu.<br />
All camera exposure modes are available when using DA/FA J or lenses<br />
with Aperture s (Auto) position set to that position.<br />
Lens and Built-in Flash<br />
The built-in flash cannot be regulated and fully fires when pre A lenses or<br />
soft lenses are used.<br />
Note that <strong>the</strong> built-in flash cannot be used as <strong>the</strong> Auto Flash.<br />
6<br />
Appendix
184<br />
Notes on [Using Aperture Ring]<br />
Aperture Ring Use<br />
When [Using aperture ring] is set to [Permitted] in [A Custom Setting]<br />
menu (p.103), <strong>the</strong> shutter can be released even if <strong>the</strong> aperture ring of <strong>the</strong><br />
D FA, FA, F or A lens is not set to <strong>the</strong> s position or a lens without a s<br />
position is attached. However, <strong>the</strong> features will be restricted as shown in<br />
<strong>the</strong> table below.<br />
The camera operates in c (Aperture Priority) mode even if <strong>the</strong> mode dial is at<br />
e or b when <strong>the</strong> aperture is set to a value o<strong>the</strong>r than s.<br />
6<br />
Appendix<br />
Lens used Exposure mode Restriction<br />
D FA, FA, F, A, M (lens<br />
only or with auto<br />
diaphragm<br />
accessories such as<br />
auto extension tube K)<br />
D FA, FA, F, A, M, S<br />
(with diaphragm<br />
accessories such as<br />
extension tube K)<br />
Manual diaphragm<br />
lens such as reflex<br />
lens (lens only)<br />
FA, F Soft 85mm FA<br />
Soft 28mm (lens only)<br />
All lenses<br />
c (Aperture<br />
Priority) mode<br />
c (Aperture<br />
Priority) mode<br />
c (Aperture<br />
Priority) mode<br />
c (Aperture<br />
Priority) mode<br />
a (Manual)<br />
mode<br />
The aperture remains open<br />
regardless of <strong>the</strong> aperture ring<br />
position. The shutter speed changes<br />
in relation to <strong>the</strong> open aperture but an<br />
exposure error may occur. In <strong>the</strong><br />
viewfinder, [F--] appears for <strong>the</strong><br />
aperture indicator.<br />
Pictures can be taken with <strong>the</strong><br />
specified aperture value but an<br />
exposure error may occur. In <strong>the</strong><br />
viewfinder, [F--] appears for <strong>the</strong><br />
aperture indicator.<br />
Pictures can be taken with <strong>the</strong><br />
specified aperture value in <strong>the</strong> manual<br />
aperture range. In <strong>the</strong> viewfinder, [F--]<br />
appears for <strong>the</strong> aperture indicator.<br />
When depth of field is checked<br />
(Optical Preview), AE Metering is<br />
switched on. Exposure check is<br />
possible.<br />
Pictures can be taken with <strong>the</strong> set<br />
aperture value and shutter speed. In<br />
<strong>the</strong> viewfinder, [F--] appears for <strong>the</strong><br />
aperture indicator. When depth of field<br />
is checked (Optical Preview), AE<br />
Metering is switched on. Exposure<br />
check is possible.
Cleaning <strong>the</strong> CCD<br />
185<br />
Shadows may appear in <strong>the</strong> image for white backgrounds and o<strong>the</strong>r<br />
shooting conditions if <strong>the</strong> CCD becomes dirty or dusty. This indicates that<br />
<strong>the</strong> CCD must be cleaned. Please contact PENTAX service center for<br />
professional cleaning because <strong>the</strong> CCD is a precision part.<br />
• Do not use a spray type blower.<br />
• Do not clean <strong>the</strong> CCD when <strong>the</strong> exposure mode is set to p (Bulb) mode.<br />
• Always cap <strong>the</strong> lens mount area to prevent dirt and dust from accumulating<br />
on <strong>the</strong> CCD when no lens is on <strong>the</strong> camera.<br />
• It is recommended to use <strong>the</strong> AC adapter when cleaning <strong>the</strong> CCD.<br />
• When <strong>the</strong> battery level is low, [Not enough battery remaining to clean sensor]<br />
is displayed on <strong>the</strong> LCD monitor.<br />
• If you are not using <strong>the</strong> AC adapter, please use batteries with ample capacity<br />
remaining. A warning beep will sound if <strong>the</strong> battery capacity becomes low<br />
during cleaning. Please stop cleaning immediately.<br />
• Do not put <strong>the</strong> tip of <strong>the</strong> blower inside <strong>the</strong> lens mount area. If <strong>the</strong> power is<br />
turned off, this could cause damage to <strong>the</strong> shutter or <strong>the</strong> CCD sensor.<br />
• Use of <strong>the</strong> AC adapter (optional) is recommended.<br />
• The self-timer lamp blinks and [Cln] appears on <strong>the</strong> LCD panel while cleaning<br />
<strong>the</strong> CCD.<br />
6<br />
Appendix<br />
1 Turn <strong>the</strong> camera off and remove <strong>the</strong> lens.<br />
2 Turn <strong>the</strong> camera on.<br />
3 Select [Sensor Cleaning] on <strong>the</strong> [H Set-up] menu.<br />
4 <strong>Press</strong> <strong>the</strong> four-way controller (5).<br />
The Sensor Cleaning screen appears.
186<br />
5 Use <strong>the</strong> four-way controller (2)<br />
to select [Mirror Up].<br />
Sensor Cleaning<br />
Mirror Up to Clean CCD<br />
Turn <strong>the</strong> power OFF<br />
to end<br />
Mirror Up<br />
Cancel<br />
OK OK<br />
6 <strong>Press</strong> <strong>the</strong> 4 button.<br />
The mirror is locked in <strong>the</strong> up position.<br />
6<br />
7 Clean <strong>the</strong> CCD.<br />
Use a brush-less blower to remove dirt<br />
and dust from <strong>the</strong> CCD. Using a blower<br />
with a brush may scratch <strong>the</strong> CCD. Do<br />
not wipe <strong>the</strong> CCD with a cloth.<br />
Appendix<br />
8 Turn <strong>the</strong> camera off.<br />
9 Attach <strong>the</strong> lens after <strong>the</strong> mirror returns to its original<br />
position.
Optional Accessories<br />
187<br />
A number of dedicated accessories are available for this camera. Please<br />
contact a service center for details regarding accessories.<br />
AC Adapter D-AC10<br />
This AC adapter supplies power from <strong>the</strong> outlet into your camera.<br />
Cable Switch CS-205<br />
This is a remote shutter release cord. The cord length is 0.5 m.<br />
Remote Control F<br />
Shoot pictures from within 5 m of <strong>the</strong> front of <strong>the</strong> camera.<br />
6<br />
Flash Accessories<br />
Auto Flash AF360FGZ<br />
This is an auto flash unit with a maximum guide number of 36 (ISO 100/<br />
m). Its features include slave-sync flash, contrast-control-sync flash, AF<br />
spot beam, high-speed sync, wireless flash and front/rear curtain-sync.<br />
Appendix
188<br />
Off-camera Shoe Clip CL-10<br />
This is a setting clip for using <strong>the</strong> AF360FGZ as a wireless slave flash.<br />
Hot Shoe Adapter FG<br />
Extension Cord F5P<br />
Off-camera Shoe Adapter F<br />
Use <strong>the</strong> adapters and cords to use <strong>the</strong> external flash away from <strong>the</strong><br />
camera.<br />
For Viewfinder<br />
Magnifier FB<br />
This viewfinder accessory is for magnifying <strong>the</strong> central area of <strong>the</strong><br />
viewfinder.<br />
6<br />
Appendix<br />
Ref-converter A<br />
This is an accessory that changes <strong>the</strong> viewfinder viewing angle at 90°<br />
intervals. The viewfinder magnification can be switched between 1× and<br />
2×.<br />
Diopter correction lens adapter M<br />
This accessory adjusts <strong>the</strong> diopter. Install it on <strong>the</strong> viewfinder.<br />
If it is difficult to see <strong>the</strong> viewfinder image clearly, choose one of <strong>the</strong> eight<br />
correction lens adapter M of –5 to +3 m -1 (per meter).
Camera Case<br />
189<br />
Camera Case O-CC34<br />
O<strong>the</strong>rs<br />
The accessories below are <strong>the</strong> same as <strong>the</strong> accessories that are<br />
packaged with <strong>the</strong> camera.<br />
ME viewfinder cap<br />
Eyecup FN<br />
6<br />
Strap O-ST10<br />
Appendix
190<br />
Error Messages<br />
6<br />
Appendix<br />
Error Message<br />
Memory card full<br />
No image<br />
Camera cannot display this<br />
image<br />
No card in camera<br />
Memory card error<br />
Card not formatted<br />
Card locked<br />
Card is locked<br />
Rotation information cannot be<br />
saved<br />
This image is protected<br />
Rotation information cannot be<br />
saved<br />
Cannot use this card<br />
Battery depleted<br />
Not enough battery remaining<br />
to clean sensor<br />
Description<br />
The SD Memory Card is full and no more images<br />
can be saved. Insert a new SD Memory Card or<br />
delete unwanted images. (p.29, p.75)<br />
You may be able to save new images by<br />
changing <strong>the</strong> quality level or recorded pixels.<br />
(p.111, p.112)<br />
There are no images for playback on <strong>the</strong> SD<br />
Memory Card.<br />
You are trying to play back an image in a format<br />
not supported by this camera. You may be able<br />
to play it back on ano<strong>the</strong>r brand of camera or<br />
your computer.<br />
The SD Memory Card is not inserted in <strong>the</strong><br />
camera. (p.29)<br />
The SD Memory Card has a problem, and image<br />
capture and playback are impossible. It may be<br />
viewable on a PC but not <strong>the</strong> camera.<br />
The SD Memory Card you have inserted is<br />
unformatted or has been formatted on a<br />
computer or o<strong>the</strong>r device and is not compatible<br />
with this camera. Use after formatting with <strong>the</strong><br />
camera. (p.164)<br />
A locked SD Memory Card is inserted in <strong>the</strong><br />
camera. Unlock <strong>the</strong> SD Memory Card. (p.30)<br />
The selected rotated image is protected.<br />
Remove protection from <strong>the</strong> image. (p.79)<br />
The inserted card cannot be used on a camera.<br />
Insert a usable card.<br />
The batteries are exhausted. Install new<br />
batteries in <strong>the</strong> camera. (p.25)<br />
Appears during CCD cleaning if battery set level<br />
is insufficient. Replace <strong>the</strong> battery set with a new<br />
one or use an AC adaptor (optional). (p.28)
Error Message<br />
Image folder could not be<br />
created<br />
The image is not stored<br />
Settings not stored<br />
RAW images cannot be set<br />
RAW images are not<br />
supported<br />
No image to be filtered<br />
This image cannot be<br />
filtered<br />
No DPOF files<br />
Printer error<br />
No paper in a printer<br />
No ink in a printer<br />
Paper stuck in a printer<br />
Data error<br />
Description<br />
The maximum folder number (999) and file<br />
number (9999) are being used, and no more<br />
images can be saved. Insert a new SD Memory<br />
Card or format <strong>the</strong> card. (p.164)<br />
The image could not be saved because of an SD<br />
Memory Card error.<br />
The DPOF settings file could not be saved<br />
because SD Memory Card is full. Delete<br />
unwanted images and set DPOF again. (p.75)<br />
DPOF cannot be applied to <strong>the</strong> RAW images.<br />
RAW images cannot be processed using <strong>the</strong><br />
digital filter.<br />
When digital filter is started from [Q Playback]<br />
menu, this message appears if all saved images<br />
are RAW files or images captured with o<strong>the</strong>r<br />
cameras.<br />
Appears when digital filter is started from Fn<br />
menu for images captured with o<strong>the</strong>r cameras.<br />
No file set with DPOF. Set DPOF and print.<br />
(p.81)<br />
There is an error with <strong>the</strong> printer and <strong>the</strong> file<br />
cannot be printed. Fix error and print.<br />
Printer has run out of paper. Put paper in printer<br />
and print.<br />
Printer has run out of ink. Replace ink and print.<br />
Paper is jammed in printer. Remove paper and<br />
print.<br />
A data error has occurred during printing.<br />
191<br />
6<br />
Appendix
192<br />
Troubleshooting<br />
We recommend checking <strong>the</strong> following items before contacting a service center.<br />
6<br />
Appendix<br />
Problem Cause Remedy<br />
Camera does<br />
not turn on<br />
The shutter<br />
does not release<br />
The Autofocus<br />
does not work<br />
Batteries are not<br />
installed<br />
Batteries are not<br />
installed properly<br />
Battery power is low<br />
The lens aperture<br />
ring setting is o<strong>the</strong>r<br />
than <strong>the</strong> s position<br />
Flash is charging<br />
No available space on<br />
SD Memory Card<br />
Recording<br />
Subject is difficult to<br />
focus on<br />
Subject is not in<br />
focusing area<br />
Subject is too close<br />
The focus mode is<br />
set to \<br />
The [AF Mode] in <strong>the</strong><br />
[A Rec. Mode] is<br />
set to k<br />
(Continuous mode)<br />
The Capture mode is<br />
set to \ (Moving<br />
Object) mode<br />
Check if batteries are installed. If not, install<br />
batteries.<br />
Check orientation of batteries.<br />
Re-insert batteries according to <strong>the</strong> +-<br />
symbols. (p.25)<br />
Replace with a charged battery set or use <strong>the</strong><br />
AC adapter. (p.28)<br />
Set <strong>the</strong> lens aperture ring to <strong>the</strong> s position<br />
(p.134) or select [Permitted] in [Using<br />
aperture ring] in <strong>the</strong> [A Custom Setting]<br />
menu (p.184).<br />
Wait until charging is finished.<br />
Insert SD Memory Card with available space or<br />
delete unwanted images. (p.29, p.75)<br />
Wait until recording is finished.<br />
Autofocus cannot focus well on subjects that<br />
have low contrast (<strong>the</strong> sky, white walls), dark<br />
colors, intricate designs, are moving quickly<br />
or scenery shot through a window or a netlike<br />
pattern. Lock focus on ano<strong>the</strong>r object<br />
located at same distance (press shutter<br />
release button halfway), <strong>the</strong>n aim at target<br />
and press shutter release button fully.<br />
Alternatively, use manual focus. (p.127)<br />
Position subject in focus frame in middle of<br />
viewfinder. If <strong>the</strong> subject is outside <strong>the</strong><br />
focusing area, aim <strong>the</strong> camera at <strong>the</strong> subject<br />
and lock <strong>the</strong> focus (press shutter release<br />
button halfway), <strong>the</strong>n compose picture and<br />
press <strong>the</strong> shutter release button fully.<br />
Move away from <strong>the</strong> subject and take a picture.<br />
Set <strong>the</strong> focus mode lever to =. (p.120)<br />
Set <strong>the</strong> [AF Mode] in <strong>the</strong> [A Rec. Mode] to<br />
l (Single mode). (p.124)<br />
Set <strong>the</strong> Capture mode to setting o<strong>the</strong>r than<br />
\ (Moving Object) mode. (p.47)
Problem Cause Remedy<br />
AE lock function<br />
does not<br />
operate<br />
Flash does not<br />
discharge<br />
The power<br />
zoom system<br />
does not<br />
function<br />
USB connection<br />
with computer<br />
does not work<br />
properly*<br />
USB connection<br />
with printer does<br />
not work<br />
properly<br />
AE lock is not<br />
available when set to<br />
a (Manual) mode or<br />
p (Bulb) mode<br />
When flash mode is<br />
set to [Auto<br />
discharge] or [Auto<br />
flash+Redeye<br />
reduct], <strong>the</strong> flash will<br />
not discharge if <strong>the</strong><br />
subject is bright<br />
Mode dial is set to<br />
a (Flash OFF)<br />
H (Scene) mode is<br />
set to A (Night<br />
Scene), K (Sunset),<br />
D (Candlelight) or<br />
E (Museum)<br />
The camera does<br />
not have <strong>the</strong> power<br />
zoom function<br />
The transfer mode is<br />
set to [PictBridge]<br />
An error occurred<br />
while sending USB<br />
data<br />
The transfer mode is<br />
set to [PC] or [PC-F]<br />
Use AE lock with any setting o<strong>the</strong>r than a<br />
(Manual) mode or p (Bulb) mode.<br />
Set flash mode to [Manual discharge] or<br />
[Manl flash+Redeye reduct]. (p.51)<br />
Set mode dial to any setting o<strong>the</strong>r than<br />
a (Flash OFF). (p.47)<br />
Set H (Scene) mode to any setting o<strong>the</strong>r<br />
than A (Night Scene), K (Sunset),<br />
D (Candlelight) or E (Museum). (p.47)<br />
Use manual zoom. (p.50)<br />
Set transfer mode to [PC].<br />
Change <strong>the</strong> transfer mode to [PC-F].<br />
Set transfer mode to [PictBridge]. (p.85)<br />
In rare cases, <strong>the</strong> camera may not operate correctly due to static<br />
electricity. This can be remedied by taking <strong>the</strong> batteries out and putting<br />
<strong>the</strong>m back in again. When <strong>the</strong> mirror remains in <strong>the</strong> up position, take <strong>the</strong><br />
batteries out and put <strong>the</strong>m back in again. Then, turn <strong>the</strong> power on. The<br />
mirror will retract. After <strong>the</strong> procedure is done, if <strong>the</strong> camera operates<br />
correctly, it does not require any repairs.<br />
* Refer to p.13 of <strong>the</strong> “PENTAX PHOTO Browser 2.1/PENTAX PHOTO<br />
Laboratory 2.1 Operating Manual” for details on connecting <strong>the</strong> camera to a PC.<br />
193<br />
6<br />
Appendix
194<br />
Main Specifications<br />
6<br />
Appendix<br />
Type<br />
Effective Pixels<br />
Sensor<br />
Recorded Pixels<br />
Sensitivity<br />
File Format<br />
Quality Level<br />
Storage Medium<br />
Number of Shots<br />
Size<br />
P<br />
3008×2008<br />
P<br />
3008×2000<br />
Q<br />
2400×1600<br />
R<br />
1536×1029<br />
Quality<br />
Level<br />
TTL autofocus, auto-exposure SLR digital-still camera with builtin<br />
retractable P-TTL flash<br />
6.10 megapixels<br />
Total pixels 6.31 megapixels, interline/interlace scan CCD with<br />
a primary color filter<br />
P (RAW: 3008×2008/JPEG: 3008×2000 pixels),<br />
Q (2400×1600 pixels), R (1536×1024 pixels)<br />
Auto, Manual (200/400/800/1600/3200: Standard Output<br />
Sensitivity)<br />
RAW, JPEG (Exif2.21), DCF compliant, DPOF compatible, Print<br />
Image Matching III compatible<br />
|, C (Best), D (Better), and E (Good)<br />
SD Memory Card<br />
Capacity<br />
1 GB 512 MB 256 MB 128 MB<br />
| Approx. 90 Approx. 46 Approx. 22 Approx. 11<br />
C Approx. 330 Approx. 167 Approx. 78 Approx. 34<br />
D Approx. 607 Approx. 311 Approx. 149 Approx. 70<br />
E Approx. 966 Approx. 498 Approx. 242 Approx. 117<br />
C Approx. 459 Approx. 234 Approx. 111 Approx. 51<br />
D Approx. 807 Approx. 415 Approx. 201 Approx. 96<br />
E Approx. 1397 Approx. 674 Approx. 330 Approx. 161<br />
C Approx. 880 Approx. 453 Approx. 220 Approx. 106<br />
D Approx. 1397 Approx. 722 Approx. 354 Approx. 173<br />
E Approx. 2151 Approx. 1115 Approx. 549 Approx. 271<br />
Compression: C (Best) = 1/3, D (Better) = 1/6, E (Good) = 1/12<br />
White Balance<br />
LCD Monitor<br />
Playback Function<br />
Digital Filter<br />
Auto, Daylight, Shade, Cloudy, Fluorescent Light (D: Daylight,<br />
N: Neutral White, W: White), Tungsten Light, Flash, Manual<br />
2.5 inch low-temperature poly-silicon TFT color LCD with<br />
approx. 210,000 pixels (with backlight)<br />
Single frame, nine-image display, zoom display (up to 12 times,<br />
scrolling possible), rotating, slideshow, histogram, bright portion<br />
B&W, Sepia, Soft, Slim, Brightness (only for processing after<br />
shooting)
Exposure Mode<br />
Shutter<br />
Lens Mount<br />
Lens Used<br />
Autofocus System<br />
Viewfinder<br />
Viewfinder Indication<br />
LCD Panel Display<br />
Preview Function<br />
Self-timer<br />
Mirror<br />
Auto Bracket<br />
e Program, b Shutter priority, c Aperture priority, a Manual, p Bulb<br />
Picture mode I Auto Picture, = Portrait, s Landscape,<br />
q Macro, \ Moving Object, . Night Scene<br />
Portrait, a Flash OFF<br />
Scene mode A Night Scene, i Surf & Snow, B Text, K Sunset,<br />
C Kids, E Pet, D Candlelight, E Museum.<br />
Electronically controlled vertical-run focal-plane shutter, Speed<br />
range (1) Auto 1/4000 to 30 sec. (stepless), (2) Manual 1/4000 to<br />
30 sec. [1/2 EV step or 1/3 EV step] (3) Bulb, Shutter lock by<br />
setting Main switch in OFF position.<br />
<strong>Pentax</strong> KAF bayonet mount (K-mount with AF coupler, lens<br />
information contacts)<br />
<strong>Pentax</strong> KAF2 (not power zoom compatible), KAF mount lenses, KA<br />
mount lenses<br />
TTL phase-matching autofocus system (SAFOX VIII), AF<br />
operational brightness range: EV –1 to 18 (at ISO 100 with f/1.4<br />
lens), Focus lock available, Focus Mode: l (Single)/k<br />
(Continuous)/\, Switch Focusing Area (Wide/Spot) available<br />
Penta-mirror viewfinder, Natural-Bright-Matte II focusing screen,<br />
Field of view: 96%, Magnification 0.85× (with 50 mm f/1.4 lens at<br />
∞), Diopter: –2.5m -1 to +1.5m -1 (per meter)<br />
Focus information: ] is lit when in-focus and blinking when<br />
unable to focus, b is lit=Built-in flash ready, Blinking=Flash<br />
should be used or incompatible lens is being used, Shutter<br />
speed, Aperture value, e-dial enabled indicator, @=AE lock,<br />
Capacity remaining and m=Exposure compensation,<br />
k=Continuous mode, Picture mode icon, Scene mode icon,<br />
\=Manual focus, o=ISO warning<br />
b is lit=Built-in flash ready, Blinking=Flash should be used or<br />
incompatible lens is being used, E=Auto discharge,<br />
E>=Auto flash+Redeye reduct, 9=Single frame shooting,<br />
j=Continuous shooting, g=Self-timer, h=Remote control<br />
shooting, ?=Battery exhaustion warning, ]=Auto bracketing<br />
exposure (exposure setting steps can be set to 1/2 EV or 1/3 EV),<br />
M=Center-weighted metering, N=Spot metering, M=Spot AF,<br />
Shutter speed, Aperture value, White Balance, Capacity remaining<br />
and m=Exposure compensation, PC (mass storage)/Pb<br />
(PictBridge) appears when <strong>the</strong> USB cable is connected<br />
Digital Preview: Composition, exposure and focus confirmation<br />
Optical Preview: Depth of field confirmation (electronically<br />
controlled and usable in all exposure modes)<br />
Electronically controlled with delay time of 12 sec./2 sec. (with<br />
mirror lock up). Start by pressing shutter release button. Operation<br />
confirmation: Possible to set beep. Can be cancelled after operation<br />
Quick-return mirror, mirror lock up function (available at 2 sec.<br />
self-timer)<br />
Three frames (under exposed, proper exposure and overexposed)<br />
are shot continuously with exposure bracketing. (Selectable<br />
between 1/2 EV and 1/3 EV for Exposure setting steps)<br />
195<br />
6<br />
Appendix
196<br />
6<br />
Appendix<br />
Exposure Meter/<br />
Metering Range<br />
EV Compensation<br />
AE Lock<br />
Built-in Flash<br />
External Flash Sync<br />
Custom Function<br />
Time Function<br />
Power<br />
Battery Exhaustion<br />
TTL multi (16)-segment metering, Metering range from EV 1 to<br />
EV 21.5 at ISO 200, with 50 mm f/1.4 lens, Center-weighted and<br />
Spot metering mode can be set<br />
±2.0 EV (Selectable between 1/2 EV and 1/3 EV for Exposure<br />
setting steps)<br />
Button type (timer type default: 20 sec. or continuous as long as<br />
<strong>the</strong> shutter button is halfway pressed)<br />
P-TTL built-in flash with serial control, GN 15.6 (ISO 200/m),<br />
Angles of coverage: 18 mm lens angle of view, Flash<br />
synchronization speed range at 1/180 sec. and slower, Daylightsync<br />
flash, Slow-speed-sync flash, ISO range = P-TTL: 200 to 3200<br />
Hot shoe with X-contact, which couples with <strong>Pentax</strong> dedicated auto flashes,<br />
ISO range = P-TTL: 200-3200, Automatic flash, Red-eye reduction flash<br />
function, High-speed-sync, wireless-sync with PENTAX dedicated flash.<br />
18 functions can be set<br />
World Time settings for 72 cities (28 time zones)<br />
Two CR-V3, four AA lithium, AA Ni-MH rechargeable, or AA<br />
alkaline batteries<br />
Battery exhaustion symbol ? is lit. The shutter is locked and<br />
no indication appears in <strong>the</strong> viewfinder when ? starts blinking<br />
USB/Video terminal (USB 2.0 (high speed compatible)), DC<br />
In/Out Port<br />
input terminal, Cable switch terminal<br />
Video Output Format NTSC/PAL<br />
PictBridge<br />
Dimensions and<br />
Weight<br />
Accessories<br />
Languages<br />
Compatible printer<br />
Print mode<br />
125 mm (W) × 92.5 mm (H) × 67 mm (D)<br />
470 g (body only without batteries)<br />
PictBridge-compatible printer<br />
Print One, Print All, DPOF AUTOPRINT<br />
Hot shoe cover FK, Eyecup FN, ME viewfinder cap, Body mount<br />
cover, USB Cable I-USB17, Video cable I-VC28, Software (CD-<br />
ROM) S-SW43, Strap O-ST10, Four AA alkaline batteries,<br />
Operating manual (this book) and PENTAX PHOTO Browser<br />
2.1/PENTAX PHOTO Laboratory 2.1 operating manual<br />
English, French, German, Spanish, Italian, Swedish, Dutch,<br />
Russian, Korean, Chinese (Traditional / Simplified) and Japanese<br />
Specifications for Remote Control F (Optional)<br />
Remote Control<br />
Power<br />
Dimensions<br />
Weight<br />
Infrared Remote Control unit, captured about three seconds after remote<br />
control shutter button is pressed or immediate capture on pressing <strong>the</strong><br />
button, operating distance = within approx. 5 m in front of <strong>the</strong> camera.<br />
One lithium battery (CR1620)<br />
22 mm (W) × 53 mm (H) × 6.5 mm (D)<br />
7 g (including battery)
Glossary<br />
197<br />
AdobeRGB<br />
Color space recommended by Adobe Systems, Inc. for commercial<br />
printing. Wider range of color reproduction than sRGB. Covers most of <strong>the</strong><br />
color range so colors only available when printed are not lost when editing<br />
images from a computer. When image is opened by non-compatible<br />
software, <strong>the</strong> colors look lighter.<br />
AE Metering<br />
Brightness of subject is measured to determine exposure. In this camera,<br />
select from [Multi-segment Metering], [Center-weighted Metering] and<br />
[Spot Metering].<br />
Aperture<br />
The aperture increases or reduces <strong>the</strong> light beam (thickness) that passes<br />
through <strong>the</strong> lens.<br />
Auto Bracket<br />
For automatically changing <strong>the</strong> shooting conditions. When <strong>the</strong> shutter<br />
button is pressed, three images are shot. The first one has no<br />
compensation, <strong>the</strong> second is underexposed and <strong>the</strong> third is over-exposed.<br />
6<br />
Appendix<br />
Bright Portion<br />
Overexposed area in <strong>the</strong> image loses contrast and appears white.<br />
Camera Shake (Blur)<br />
When <strong>the</strong> camera moves while <strong>the</strong> shutter is open, <strong>the</strong> entire image<br />
appears as if flowing. This occurs more often when shutter speed is low.<br />
Prevent camera shake by raising <strong>the</strong> sensitivity, using <strong>the</strong> flash, and<br />
raising <strong>the</strong> shutter speed. Alternatively, use a tripod to stabilize <strong>the</strong><br />
camera. Because camera motion causes camera shake, use <strong>the</strong> selftimer,<br />
<strong>the</strong> remote control unit, and <strong>the</strong> cable switch to prevent camera<br />
movement.<br />
CCD (Charge Coupled Devices)<br />
Photography element which converts <strong>the</strong> light entering through <strong>the</strong> lens<br />
into electric signals that create <strong>the</strong> image.
198<br />
Color space<br />
A defined range of colors from <strong>the</strong> spectrum which are used. In digital<br />
cameras, [sRGB] is defined as <strong>the</strong> standard by Exif. In this camera,<br />
[AdobeRGB] is also used because of <strong>the</strong> richer color expression over<br />
sRGB.<br />
Color Temperature<br />
This numerically expresses <strong>the</strong> color of <strong>the</strong> light source illuminating <strong>the</strong><br />
subject. This is indicated in absolute temperature, using Kelvin (K) units.<br />
The color of light shifts to a bluish color as <strong>the</strong> color temperature rises, and<br />
to a reddish color as <strong>the</strong> color temperature falls.<br />
DCF (Design Rule for Camera File System)<br />
A digital camera file system standard established by <strong>the</strong> Japan Electronics<br />
and Information Technology Industries Association (JEITA).<br />
6<br />
Depth of Field<br />
Area of focus. This depends on <strong>the</strong> aperture, lens focal length, and<br />
distance to <strong>the</strong> subject. For example, select a smaller aperture to increase<br />
<strong>the</strong> depth of field or use a larger aperture to decrease <strong>the</strong> depth of field.<br />
Appendix<br />
DPOF (Digital Print Order Format)<br />
Rules for writing information onto a card with recorded images regarding<br />
<strong>the</strong> specific images and number of copies to be printed. Prints can easily<br />
be made by taking images to a DPOF photo printing store.<br />
EV (Exposure Value)<br />
Exposure Value is determined by <strong>the</strong> combination of <strong>the</strong> aperture value<br />
and <strong>the</strong> shutter speed.<br />
EV Compensation<br />
Process of adjusting <strong>the</strong> image brightness by changing <strong>the</strong> shutter speed<br />
and aperture value.<br />
Exif (Exchangeable image file format for digital still camera)<br />
A standard digital camera file format established by <strong>the</strong> Japan Electronics<br />
and Information Technology Industries Association (JEITA).<br />
Focus point<br />
Position in <strong>the</strong> viewfinder that determines focus.
Histogram<br />
A graph that shows <strong>the</strong> darkest and brightest points in an image. The<br />
horizontal axis represents <strong>the</strong> brightness and <strong>the</strong> vertical axis represents<br />
<strong>the</strong> number of pixels. This is useful when you wish to refer to <strong>the</strong> exposure<br />
status of an image.<br />
199<br />
JPEG<br />
An image compression method. The image is recorded in JPEG format<br />
when <strong>the</strong> quality level is set to C (Best), D (Better), or E (Good).<br />
Images recorded in JPEG format are suited for viewing on your PC or for<br />
attaching to e-mail.<br />
ND (Neutral Density) Filter<br />
A filter with many saturation levels that adjusts <strong>the</strong> brightness without<br />
affecting <strong>the</strong> picture itself.<br />
Noise Reduction<br />
Process to reduce noise (image roughness or unevenness) caused by low<br />
shutter speed.<br />
NTSC/PAL<br />
These are video output formats. NTSC is mainly used in Japan, North<br />
America, and South Korea. PAL is mainly used in Europe and in China.<br />
6<br />
Appendix<br />
Quality Level<br />
This refers to <strong>the</strong> image compression ratio. The lower <strong>the</strong> compression,<br />
<strong>the</strong> more detailed <strong>the</strong> image. The image becomes rougher as <strong>the</strong><br />
compression rate rises.
200<br />
| data<br />
Unedited image data output from <strong>the</strong> CCD. RAW data is data before being<br />
internally processed by <strong>the</strong> camera. Camera settings at <strong>the</strong> time of<br />
capture, such as White Balance, Contrast, Saturation, Tone, Color Space,<br />
Sensitivity and Sharpness, are also stored but not applied to <strong>the</strong> image. In<br />
addition, RAW data is 12 bit data that contains 16 times <strong>the</strong> information of<br />
8 bit JPEG and TIFF data. Rich gradations are possible. Transfer RAW<br />
data to your computer and use <strong>the</strong> provided software to create image data<br />
with different settings, such as JPEG or TIFF.<br />
Recorded Pixels<br />
Indicates <strong>the</strong> size of <strong>the</strong> image by <strong>the</strong> number of pixels. The more pixels<br />
that compose a picture, <strong>the</strong> larger <strong>the</strong> image size.<br />
Sensitivity<br />
The degree of light. With a high sensitivity, images can be shot with a<br />
high shutter speed even in dark places, reducing camera shake.<br />
However, images with high sensitivity are more susceptible to noise.<br />
6<br />
Appendix<br />
Shutter Speed<br />
The length of time that <strong>the</strong> shutter is open and light strikes <strong>the</strong> CCD. The<br />
amount of light that strikes <strong>the</strong> CCD can be changed by altering <strong>the</strong> shutter<br />
speed.<br />
sRGB (standard RGB)<br />
International standard of color space established by <strong>the</strong> IEC (International<br />
Electrotechnical Commission). This is defined from color space for PC<br />
monitors and is also used as <strong>the</strong> standard color space for Exif.<br />
Vignetting<br />
Vignetting occurs when corners of pictures are blackened because <strong>the</strong><br />
subject was blocked by <strong>the</strong> hood or filter or <strong>the</strong> flash was blocked.<br />
White Balance<br />
While shooting, color temperature is adjusted to match <strong>the</strong> light source so<br />
that <strong>the</strong> subject appears to have correct color.
Memo<br />
201
202<br />
Index<br />
6<br />
Appendix<br />
Symbols<br />
[A Rec. Mode] Menu ...100, 178<br />
[Q Playback] Menu ....100, 178<br />
[H Set-up] Menu ..........101, 179<br />
[A Custom Setting]<br />
Menu ............................102, 180<br />
I Auto Picture ............43, 47<br />
= Portrait ...............................47<br />
s Landscape .........................47<br />
q Macro .................................47<br />
\ Moving Object ...................47<br />
. Night Scene Portrait ..........47<br />
a Flash OFF ..........................47<br />
A Night Scene ......................48<br />
i Surf & Snow .....................48<br />
B Text ....................................48<br />
K Sunset .............................48<br />
C Kids ...................................48<br />
E Pet ....................................48<br />
D Candlelight ........................48<br />
E Museum ............................48<br />
Q button .........................95, 97<br />
i button .................................96<br />
K button ............................95<br />
Z button ..............................97<br />
mc button ............................95<br />
| Preview ....................147, 148<br />
A<br />
AC Adapter .............................28<br />
Adding <strong>the</strong> Date .....................81<br />
AdobeRGB ...........................119<br />
AE lock .................................143<br />
AE Metering .........................131<br />
L button ..........................95<br />
AF Mode ...............................124<br />
AF360FGZ ...........................155<br />
k (Continuous mode) ..... 124<br />
l (Single mode) ............. 124<br />
Alkaline batteries .................... 26<br />
Aperture ............................... 130<br />
Aperture Priority Mode c ... 137<br />
Auto Bracket ........................ 144<br />
Auto Picture I ............ 43, 47<br />
Auto Power Off ..................... 171<br />
= (Autofocus) .................... 120<br />
Autofocus = ...................... 120<br />
Automatic Sensitivity<br />
Correction ............................ 117<br />
AV Equipment ........................ 72<br />
c (Aperture Priority)<br />
mode .................................... 137<br />
B<br />
B&W (Digital Filter) ................ 73<br />
Batteries ................................. 25<br />
Beep ..................................... 165<br />
Bright .................................... 110<br />
Bright Portion ............... 162, 173<br />
Brightness (Digital Filter) ........ 73<br />
Brightness of <strong>the</strong> LCD<br />
Monitor ................................. 170<br />
Built-in flash ................... 51, 149<br />
p (Bulb) Mode ..................... 141<br />
Bulb Mode p ........................ 141<br />
C<br />
Cable Switch ........................ 141<br />
Candlelight D ........................ 48<br />
Capture Information ......... 17, 18<br />
Card access lamp .................. 15<br />
CCD Cleaning ...................... 185<br />
Center-weighted ................... 132<br />
Cloudy (White Balance) ....... 114<br />
Color space .......................... 119
Color Temperature ...............115<br />
Continuous Autofocus ..........126<br />
Continuous mode k .......124<br />
Continuous Shooting ..............55<br />
Contrast ................................113<br />
Contrast-Control-Sync<br />
Flash ....................................161<br />
Correct exposure ..................129<br />
CR-V3 ....................................26<br />
Custom Function ..................102<br />
[A Custom Setting]<br />
Menu ............................102, 180<br />
D<br />
Date Adjust .............................35<br />
Date change .........................165<br />
Daylight (White Balance) ......114<br />
Daylight-Sync Shooting ..........54<br />
Default Setting ................33, 178<br />
Delete .....................................75<br />
Delete All Images ...................76<br />
i (Delete) button ...................96<br />
Deleting a Single Image .........75<br />
Depth of Field .......................130<br />
Digital Filter ............................73<br />
Digital Preview .....................147<br />
Diopter Adjust .........................39<br />
Direct Printing .........................84<br />
Display Language ................169<br />
Display Style ........................162<br />
DPOF AUTOPRINT ...............91<br />
DPOF Settings .......................81<br />
Drive Mode ...........................104<br />
E<br />
e-dial ......................................95<br />
Error Message ......................190<br />
EV Compensation ................142<br />
mc (EV Compensation/Av)<br />
button .....................................95<br />
Exposure ..............................129<br />
Exposure metering timer ...... 145<br />
Exposure Mode .................... 133<br />
Exposure<br />
Warning ................ 136, 138, 140<br />
External flash ....................... 155<br />
F<br />
File # .................................... 172<br />
Filter ....................................... 73<br />
Fireworks ............................. 141<br />
Fix Exposure ........................ 126<br />
Fix Focus ............................. 125<br />
Flash .............................. 51, 149<br />
Flash (White Balance) .......... 114<br />
Flash Compensation ............ 149<br />
Flash Off ................................ 47<br />
Flash OFF a ......................... 47<br />
K (Flash pop-up) button ... 95<br />
Fluorescent Light<br />
(White Balance) ................... 114<br />
{ button .......................... 95, 97<br />
Fn Menu ............................... 104<br />
Focus Indicator ............ 103, 127<br />
Focus Lock ........................... 125<br />
Focus mode lever .................. 95<br />
Focusing .............................. 120<br />
Focusing Area ...................... 123<br />
Folder Name ........................ 171<br />
Format .................................. 164<br />
Four-way controller .......... 95, 97<br />
G<br />
Guide display ................. 16, 169<br />
H<br />
High-Speed Flash Sync<br />
Mode .................................... 157<br />
Histogram ....................... 19, 173<br />
I<br />
Image Tone .......................... 110<br />
203<br />
6<br />
Appendix
204<br />
6<br />
Appendix<br />
M button ....................95, 97<br />
Instant Review ......................172<br />
ISO Sensitivity ......................117<br />
ISO Sensitivity Warning<br />
Display .................................118<br />
K<br />
Kids C ...................................48<br />
L<br />
Landscape s .........................47<br />
Language ...............................33<br />
Last Memory ........................178<br />
LCD Monitor ...........................16<br />
LCD panel ..............................22<br />
Lens ...............................37, 182<br />
Lens unlock button ...........38, 94<br />
Lithium batteries .....................26<br />
M<br />
Macro q .................................47<br />
Main switch ......................94, 96<br />
\ (Manual focus) ..............127<br />
Manual focus \ .................127<br />
Manual White Balance .........115<br />
Matte Field ...........................128<br />
3 button ...................95, 96<br />
Menu Operation .....................98<br />
Meter Operating Time ..........132<br />
Mirror Lock Up ................64, 186<br />
Mode dial ........................95, 106<br />
Mode Palette ..........................49<br />
Moving Object \ ...................47<br />
Multiple Flashes ...................160<br />
Multi-segment .......................131<br />
Museum E ............................48<br />
N<br />
Natural ..................................110<br />
Night Scene A ......................48<br />
Night Scene (Bulb Mode) .....141<br />
Night Scene Portrait . .......... 47<br />
Ni-MH ..................................... 26<br />
Ni-MH rechargeable<br />
batteries ................................. 26<br />
Nine-Image Display ................ 68<br />
Noise Reduction ................... 141<br />
NTSC ................................... 170<br />
O<br />
4 button ........................ 95, 97<br />
Optical Preview .................... 147<br />
Optional Accessories ........... 187<br />
P<br />
e (Program) Mode .............. 134<br />
PAL ...................................... 170<br />
PC-F ..................................... 193<br />
Pet E .................................... 48<br />
PictBridge ............................... 84<br />
Pixels ................................... 111<br />
Playback .......................... 18, 65<br />
Q (Playback) button ....... 95, 97<br />
[Q Playback] Menu .... 100, 178<br />
Playback Time ....................... 27<br />
Portrait = ............................... 47<br />
Power ..................................... 32<br />
<strong>Press</strong> fully .............................. 45<br />
<strong>Press</strong> halfway ......................... 45<br />
Preview | .................... 147, 148<br />
Preview Display ................... 173<br />
Preview Method ................... 148<br />
Print All ................................... 89<br />
Print One ................................ 87<br />
Print Service ........................... 81<br />
Printer connection .................. 86<br />
Program Mode e ................. 134<br />
Protect .................................... 79<br />
Z (Protect) button ............... 97<br />
P-TTL (Auto) ........................ 156<br />
P-TTL (Flash) ....................... 158
Q<br />
Quality Level ..................31, 112<br />
R<br />
RAW .....................................112<br />
Rear Curtain Sync Flash ......159<br />
[A Rec. Mode] Menu ...100, 178<br />
Recorded Pixels .............31, 111<br />
Red-eye reduction ..........54, 159<br />
Remaining image storage<br />
capacity ..................................27<br />
Remote Control ......................61<br />
Reset ............................174, 175<br />
Rotate .....................................66<br />
S<br />
Saturation .............................113<br />
H (Scene) ...........................47<br />
SD Memory Card ...................29<br />
Select&Delete ........................77<br />
Self-Timer ...............................57<br />
Sensitivity .............................117<br />
Sepia (Digital Filter) ................73<br />
[H Set-up] Menu ..........101, 179<br />
Shade (White Balance) ........114<br />
Sharpness ............................113<br />
Shutter Priority Mode b ......135<br />
Shutter release<br />
button .........................45, 94, 96<br />
Shutter speed .......................129<br />
Single mode l ................124<br />
Slideshow .......................70, 163<br />
Slim (Digital Filter) ..................73<br />
Soft (Digital Filter) ..................73<br />
Spot (=) .............................123<br />
Spot Metering .......................132<br />
sRGB ....................................119<br />
Strap .......................................24<br />
Sunset K .............................48<br />
Surf & Snow i .....................48<br />
T<br />
Text B .................................... 48<br />
Transfer Mode ........................ 85<br />
Tungsten Light<br />
(White Balance) ................... 114<br />
TV .......................................... 72<br />
b (Shutter Priority) mode ... 135<br />
U<br />
USB cable .............................. 84<br />
Using aperture ring .............. 184<br />
V<br />
Video cable ............................ 72<br />
Video Output Format ............ 170<br />
Viewfinder ........................ 20, 39<br />
Vignetting ............................. 200<br />
W<br />
White Balance ...................... 114<br />
Wide (=) ............................ 123<br />
Wireless Mode ..................... 157<br />
World Time ........................... 166<br />
Z<br />
Zoom Display ......................... 67<br />
Zoom Lens ............................. 50<br />
205<br />
6<br />
Appendix
206<br />
WARRANTY POLICY<br />
6<br />
All PENTAX cameras purchased through authorized bona fide<br />
photographic distribution channels are guaranteed against defects of<br />
material or workmanship for a period of twelve months from date of<br />
purchase. Service will be rendered, and defective parts will be replaced<br />
without cost to you within that period, provided <strong>the</strong> equipment does not<br />
show evidence of impact, sand or liquid damage, mishandling, tampering,<br />
battery or chemical corrosion, operation contrary to operating instructions,<br />
or modification by an unauthorized repair shop. The manufacturer or its<br />
authorized representatives shall not be liable for any repair or alterations<br />
except those made with its written consent and shall not be liable for<br />
damages from delay or loss of use or from o<strong>the</strong>r indirect or consequential<br />
damages of any kind, whe<strong>the</strong>r caused by defective material or<br />
workmanship or o<strong>the</strong>rwise; and it is expressly agreed that <strong>the</strong> liability of<br />
<strong>the</strong> manufacturer or its representatives under all guarantees or warranties,<br />
whe<strong>the</strong>r expressed or implied, is strictly limited to <strong>the</strong> replacement of parts<br />
as hereinbefore provided. No refunds will be made on repairs by<br />
nonauthorized PENTAX service facilities.<br />
Appendix<br />
Procedure During 12-month Warranty Period<br />
Any PENTAX which proves defective during <strong>the</strong> 12-month warranty period<br />
should be returned to <strong>the</strong> dealer from whom you purchased <strong>the</strong> equipment<br />
or to <strong>the</strong> manufacturer. If <strong>the</strong>re are no representatives of <strong>the</strong> manufacturer<br />
in your country, send <strong>the</strong> equipment to <strong>the</strong> manufacturer, with postage<br />
prepaid. In this case, it will take a considerable length of time before <strong>the</strong><br />
equipment can be returned to you owing to <strong>the</strong> complicated customs<br />
procedures required. If <strong>the</strong> equipment is covered by warranty, repairs will<br />
be made and parts replaced free of charge, and <strong>the</strong> equipment will be<br />
returned to you upon completion of servicing. If <strong>the</strong> equipment is not<br />
covered by warranty, regular charges of <strong>the</strong> manufacturer or of its<br />
representatives will apply. Shipping charges are to be borne by <strong>the</strong> owner.<br />
If your PENTAX was purchased outside of <strong>the</strong> country where you wish to<br />
have it serviced during <strong>the</strong> warranty period, regular handling and servicing<br />
fees may be charged by <strong>the</strong> manufacturer’s representatives in that<br />
country. Notwithstanding this, your PENTAX returned to <strong>the</strong> manufacturer<br />
will be serviced free of charge according to this procedure and warranty<br />
policy. In any case, however, shipping charges and customs clearance<br />
fees to be borne by <strong>the</strong> sender. To prove <strong>the</strong> date of your purchase when
equired, please keep <strong>the</strong> receipt or bills covering <strong>the</strong> purchase of your<br />
equipment for at least a year. Before sending your equipment for servicing,<br />
please make sure that you are sending it to <strong>the</strong> manufacturer’s authorized<br />
representatives or <strong>the</strong>ir approved repair shops, unless you are sending it<br />
directly to <strong>the</strong> manufacturer. Always obtain a quotation for <strong>the</strong> service<br />
charge, and only after you accept <strong>the</strong> quoted service charge, instruct <strong>the</strong><br />
service station to proceed with <strong>the</strong> servicing.<br />
207<br />
• This warranty policy does not affect <strong>the</strong> customer’s statutory<br />
rights.<br />
• The local warranty policies available from PENTAX distributors in<br />
some countries can supersede this warranty policy. Therefore, we<br />
recommend that you review <strong>the</strong> warranty card supplied with your<br />
product at <strong>the</strong> time of purchase, or contact <strong>the</strong> PENTAX distributor<br />
in your country for more information and to receive a copy of <strong>the</strong><br />
warranty policy.<br />
6<br />
Appendix<br />
The CE Mark is a Directive conformity mark of <strong>the</strong> European<br />
Union.
208<br />
6<br />
Appendix<br />
For customers in USA<br />
STATEMENT OF FCC COMPLIANCE<br />
This device complies with Part 15 of <strong>the</strong> FCC Rules. Operation is subject<br />
to <strong>the</strong> following two conditions: (1) This device may not cause harmful<br />
interference, and (2) this device must accept any interference received,<br />
including interference that may cause undesired operation.<br />
Changes or modifications not approved by <strong>the</strong> party responsible for<br />
compliance could void <strong>the</strong> user’s authority to operate <strong>the</strong> equipment.<br />
This equipment has been tested and found to comply with <strong>the</strong> limits for a<br />
Class B digital device, pursuant to part 15 of <strong>the</strong> FCC Rules.<br />
These limits are designed to provide reasonable protection against<br />
harmful interference in a residential installation. This equipment<br />
generates, uses and can radiate frequency energy and, if not installed and<br />
used in accordance with <strong>the</strong> instructions, may cause harmful interference<br />
to radio communications. However, <strong>the</strong>re is no guarantee that interference<br />
will not occur in a particular installation.<br />
If this equipment does cause harmful interference to radio or television<br />
reception, which can be determined by turning <strong>the</strong> equipment off and on,<br />
<strong>the</strong> user is encouraged to try to correct <strong>the</strong> interference by one or more of<br />
<strong>the</strong> following measures:<br />
• Reorient or relocate <strong>the</strong> receiving antenna.<br />
• Increase <strong>the</strong> separation between <strong>the</strong> equipment and receiver.<br />
• Connect <strong>the</strong> equipment into an outlet on a circuit different from that to<br />
which <strong>the</strong> receiver is connected.<br />
* Consult <strong>the</strong> dealer or an experienced radio/TV technician for help.<br />
For customers in Canada<br />
This Class B digital apparatus meets all requirements of <strong>the</strong> Canadian<br />
Interference - Causing Equipment Regulations.<br />
Pour les utilisateurs au Canada<br />
Cet apareil numérique de la classe B respecte toutes les exigences du<br />
Règlement sur le matériel brouilleur du Canada.
Declaration of Conformity<br />
According to 47CFR, Parts 2 and 15 for<br />
Class B Personal Computers and Peripherals<br />
We:<br />
PENTAX Imaging Company<br />
A Division of PENTAX of America, Inc.<br />
th<br />
Located at: 600 12 Street, Suite 300<br />
Golden, Colorado 80401 U.S.A.<br />
Phone: 303-799-8000 FAX: 303-790-1131<br />
Declare under sole responsibility that <strong>the</strong> product identified herein<br />
complies with 47CFR Parts 2 and 15 of <strong>the</strong> FCC rules as a Class B digital<br />
device. Each product marketed is identical to <strong>the</strong> representative unit tested<br />
and found to be compliant with <strong>the</strong> standards. Records maintained<br />
continue to reflect <strong>the</strong> equipment being produced can be expected to be<br />
within <strong>the</strong> variation accepted, due to quantity production and testing on <strong>the</strong><br />
statistical basis as required by 47CFR §2.909. Operation is subject to <strong>the</strong><br />
following two conditions: (1) This device may not cause harmful<br />
interference, and (2) This device must accept any interference received,<br />
including interference that may cause undesired operation. The above<br />
named party is responsible for ensuring that <strong>the</strong> equipment complies with<br />
<strong>the</strong> standards of 47CFR §15.101 to §15.109.<br />
Product Name:<br />
Model Number:<br />
PENTAX Digital Still Camera<br />
F<br />
Contact person: Customer Service Manager<br />
Date and Place: January, 2006, Colorado
Information on disposal for users<br />
1. In <strong>the</strong> European Union<br />
If your product is marked with this symbol, it means that used<br />
electrical/electronic products should not be mixed with general<br />
household waste. There exists a separate collection system for<br />
<strong>the</strong>se products.<br />
Used electric/electronic equipment must be treated separately<br />
and in accordance with legislation that requires proper<br />
treatment, recovery and recycling of <strong>the</strong>se products.<br />
Following <strong>the</strong> implementation by member states, private<br />
households within <strong>the</strong> EU states may return <strong>the</strong>ir used<br />
electrical/electronic equipments to designated collection<br />
facilities free of charge*. In some countries your local retailer<br />
may also take back your old product free of charge if you<br />
purchase a similar new one.<br />
*Please contact your local authority for fur<strong>the</strong>r details.<br />
By disposing of this product correctly you will help ensure that<br />
<strong>the</strong> waste undergoes <strong>the</strong> necessary treatment, recovery and<br />
recycling and thus prevent potential negative effects on <strong>the</strong><br />
environment and human health which could o<strong>the</strong>rwise arise<br />
due to inappropriate waste handling.<br />
2. In o<strong>the</strong>r countries outside <strong>the</strong> EU<br />
If you wish to discard this product, please contact your local<br />
authorities and ask for <strong>the</strong> correct method of disposal.<br />
For Switzerland: Used electrical/electronic equipment can be<br />
returned free of charge to <strong>the</strong> dealer, even when you don’t<br />
purchase a new product. Fur<strong>the</strong>r collection facilities are listed<br />
on <strong>the</strong> home page of www.swico.ch or www.sens.ch.
Memo
Memo
PENTAX Corporation<br />
PENTAX Europe GmbH<br />
(European Headquarters)<br />
2-36-9, Maeno-cho, Itabashi-ku, Tokyo 174-8639, JAPAN<br />
(http://www.pentax.co.jp/)<br />
Julius-Vosseler-Strasse, 104, 22527 Hamburg,<br />
GERMANY<br />
(HQ - http://www.pentaxeurope.com)<br />
(Germany - http://www.pentax.de)<br />
PENTAX U.K. Limited PENTAX House, Heron Drive, Langley, Slough, Berks<br />
SL3 8PN, U.K.<br />
(http://www.pentax.co.uk)<br />
PENTAX France S.A.S. 112 Quai de Bezons, B.P. 204<br />
95106 Argenteuil Cedex, FRANCE<br />
(http://www.pentax.fr)<br />
PENTAX Benelux B.V. (for Ne<strong>the</strong>rlands)<br />
Spinveld 25, 4815 HR Breda, NETHERLANDS<br />
(http://www.pentax.nl)<br />
(for Belgium & Luxembourg)<br />
Weiveldlaan 3-5, 1930 Zaventem, BELGIUM<br />
(http://www.pentax.be)<br />
PENTAX (Schweiz) AG Widenholzstrasse 1 Postfach 367 8305 Dietlikon,<br />
SWITZERLAND<br />
(http://www.pentax.ch)<br />
PENTAX Scandinavia AB P.O. Box 650, 75127 Uppsala, SWEDEN<br />
(http://www.pentax.se)<br />
PENTAX Imaging Company<br />
A Division of PENTAX of America, Inc.<br />
(Headquarters)<br />
600 12th Street, Suite 300 Golden, Colorado 80401, U.S.A.<br />
(PENTAX Service Department)<br />
12000 Zuni Street, Suite 100B<br />
Westminster, Colorado 80234,<br />
U.S.A. (http://www.pentaximaging.com)<br />
PENTAX Canada Inc. 1770 Argentia Road Mississauga, Ontario L5N 3S7,<br />
CANADA<br />
(http://www.pentax.ca)<br />
http://www.pentax.co.jp/english<br />
• Specifications and external dimensions are subject to change without notice.<br />
57648 Copyright © PENTAX Corporation 2006<br />
02-200601 Printed in Philippines