BA Mediasat ID Sat URC 3000 v3, 105x210 mm CS4.indd - Ruwido
BA Mediasat ID Sat URC 3000 v3, 105x210 mm CS4.indd - Ruwido
BA Mediasat ID Sat URC 3000 v3, 105x210 mm CS4.indd - Ruwido
You also want an ePaper? Increase the reach of your titles
YUMPU automatically turns print PDFs into web optimized ePapers that Google loves.
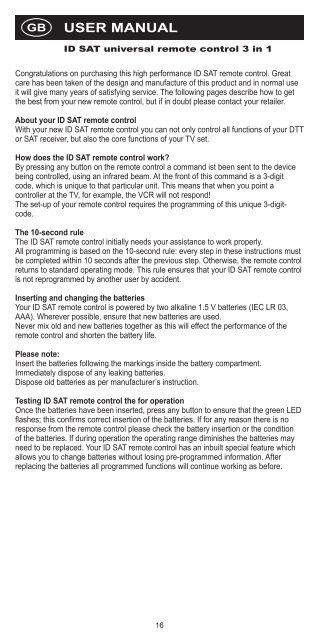
GB<br />
USER MANUAL<br />
<strong>ID</strong> SAT universal remote control 3 in 1<br />
Congratulations on purchasing this high performance <strong>ID</strong> SAT remote control. Great<br />
care has been taken of the design and manufacture of this product and in normal use<br />
it will give many years of satisfying service. The following pages describe how to get<br />
the best from your new remote control, but if in doubt please contact your retailer.<br />
About your <strong>ID</strong> SAT remote control<br />
With your new <strong>ID</strong> SAT remote control you can not only control all functions of your DTT<br />
or SAT receiver, but also the core functions of your TV set.<br />
How does the <strong>ID</strong> SAT remote control work?<br />
By pressing any button on the remote control a co<strong>mm</strong>and ist been sent to the device<br />
being controlled, using an infrared beam. At the front of this co<strong>mm</strong>and is a 3-digit<br />
code, which is unique to that particular unit. This means that when you point a<br />
controller at the TV, for example, the VCR will not respond!<br />
The set-up of your remote control requires the progra<strong>mm</strong>ing of this unique 3-digitcode.<br />
The 10-second rule<br />
The <strong>ID</strong> SAT remote control initially needs your assistance to work properly.<br />
All progra<strong>mm</strong>ing is based on the 10-second rule: every step in these instructions must<br />
be completed within 10 seconds after the previous step. Otherwise, the remote control<br />
returns to standard operating mode. This rule ensures that your <strong>ID</strong> SAT remote control<br />
is not reprogra<strong>mm</strong>ed by another user by accident.<br />
Inserting and changing the batteries<br />
Your <strong>ID</strong> SAT remote control is powered by two alkaline 1.5 V batteries (IEC LR 03,<br />
AAA). Wherever possible, ensure that new batteries are used.<br />
Never mix old and new batteries together as this will effect the performance of the<br />
remote control and shorten the battery life.<br />
Please note:<br />
Insert the batteries following the markings inside the battery compartment.<br />
I<strong>mm</strong>ediately dispose of any leaking batteries.<br />
Dispose old batteries as per manufacturer’s instruction.<br />
Testing <strong>ID</strong> SAT remote control the for operation<br />
Once the batteries have been inserted, press any button to ensure that the green LED<br />
fl ashes; this confi rms correct insertion of the batteries. If for any reason there is no<br />
response from the remote control please check the battery insertion or the condition<br />
of the batteries. If during operation the operating range diminishes the batteries may<br />
need to be replaced. Your <strong>ID</strong> SAT remote control has an inbuilt special feature which<br />
allows you to change batteries without losing pre-progra<strong>mm</strong>ed information. After<br />
replacing the batteries all progra<strong>mm</strong>ed functions will continue working as before.<br />
16<br />
<strong>BA</strong> <strong>Mediasat</strong> <strong>ID</strong> <strong>Sat</strong> <strong>URC</strong> <strong>3000</strong> <strong>v3</strong>, <strong>105x210</strong> <strong>mm</strong> <strong>CS4.indd</strong> 16 19.05.2010 17:52:09


