rubber band powered cars - NPASS2 - Education Development ...
rubber band powered cars - NPASS2 - Education Development ...
rubber band powered cars - NPASS2 - Education Development ...

Create successful ePaper yourself
Turn your PDF publications into a flip-book with our unique Google optimized e-Paper software.
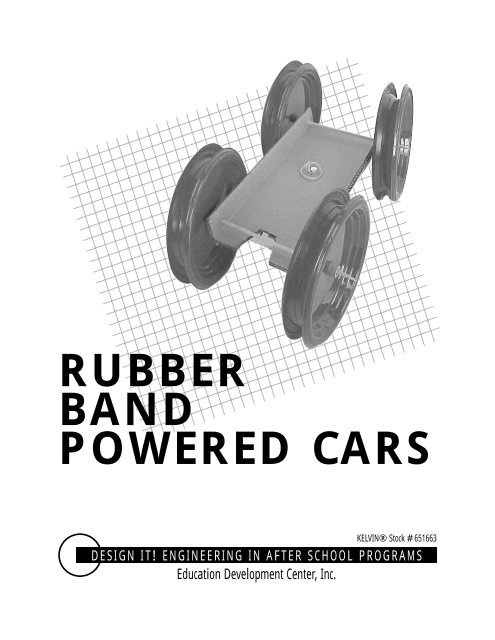
RUBBER<br />
BAND<br />
POWERED CARS<br />
KELVIN® Stock #651663<br />
DESIGN IT! ENGINEERING IN AFTER SCHOOL PROGRAMS<br />
<strong>Education</strong> <strong>Development</strong> Center, Inc.
DESIGN IT! Engineering in After School Programs<br />
Table of Contents<br />
Overview ........................................................................................3<br />
Activity 1: Assembling a Car ....................................................7<br />
Activity 2: Attaching a Rubber Band to<br />
Power the Car........................................................17<br />
Activity 3: Testing Different Kinds of Rubber Bands....25<br />
Activity 4: Testing Different-Sized Wheels ....................35<br />
Activity 5: Designing a Body for the Car............................41<br />
Appendix......................................................................................47<br />
Letter to Families ........................................................49<br />
Ways to Find the Center of a Plate ........................51<br />
Bull’s-Eye Template ......................................................53<br />
Kelvin Materials Order Form ....................................55
Challenge Sheet<br />
ACTIVITY<br />
1<br />
Activity 1: Assembling a Car<br />
Here is your chance to build a toy car.<br />
What Materials Do I Have?<br />
• cardboard (16 inches x 8 inches)<br />
• 2 dowels (3/16-inch diameter, 12 inches long)<br />
• 8 plastic plates (5 or 7 inches in diameter)<br />
• 1 brass fastener<br />
• 8 beveled plastic washers<br />
• 8 pieces of plastic tubing<br />
(3/16-inch inner diameter, 1/2 inch long)<br />
• masking tape<br />
• scissors<br />
• Data Sheet—Activity 1<br />
Alternative:<br />
• 8 <strong>rubber</strong> bumpers or<br />
• 8 <strong>rubber</strong> stoppers<br />
THE CHALLENGE<br />
Make a car out of the available materials.<br />
How far will your car travel when placed on a ramp?<br />
What Do I Do?<br />
1. Talk with the members of your team about how you will assemble a car with the<br />
materials provided.<br />
2. Decide which materials would be best to use to hold the wheels on the axle, and<br />
attach them.<br />
3. Decide how you will attach some of the materials to the cardboard so the wheels<br />
spin freely.<br />
4. When you think your car is ready, test it by rolling it down the ramp.<br />
5. How far did it go? Write down the results on Data Sheet—Activity 1.<br />
6. Make changes to the car or wheels that might make it run more smoothly. Test it and<br />
record the results.<br />
Rubber Band Powered Cars<br />
Activity 1: Assembling a Car<br />
7
ACTIVITY<br />
1<br />
Challenge Sheet<br />
Data Sheet—Activity 1<br />
Team Members: __________________<br />
__________________<br />
__________________<br />
When you think you have a good working design for a car, make a drawing of it here.<br />
Top View<br />
Side View<br />
How far did your car travel? Write the distance (in feet and inches) in the chart below<br />
during each test.<br />
Test # 1 2 3 4 5 6 7<br />
Distance<br />
8 Rubber Band Powered Cars<br />
Activity 1: Assembling a Car
ACTIVITY<br />
Guiding the Activity<br />
1<br />
Activity 1: Assembling a Car<br />
PREPARING AHEAD<br />
The pieces of cardboard should be cut and scored (so that the edges can<br />
easily be folded) before the first session.<br />
1. From large pieces of cardboard,<br />
cut rectangles 16 inches x 8<br />
inches. This should be done so<br />
that the longer side is cutting<br />
across the cardboard’s<br />
corrugation (Figure 1.1).<br />
2. To score the cardboard, measure<br />
off a line as shown in Figure 1.2.<br />
3. Carefully cut into the cardboard along these lines (Figure 1.3, a) just deep<br />
enough so that only one side of the cardboard has been cut (b). Make<br />
SURE not to cut through both sides (c). The aim of this operation is to be<br />
able to fold the cardboard easily along the cut lines (d).<br />
a<br />
Figure 1.3<br />
Cut the cardboard like<br />
this.<br />
16”<br />
Figure 1.1<br />
Note how the ridges are<br />
parallel to the shorter side.<br />
Figure 1.2<br />
Measure approximately 1 inch<br />
from the edge.<br />
b<br />
c<br />
d<br />
8”<br />
Materials<br />
FOR EACH TEAM<br />
• cardboard (16 inches x<br />
8 inches)<br />
• 2 dowels (3/16-inch<br />
diameter, 12 inches<br />
long)<br />
• 1 brass fastener<br />
• 8 plastic plates (5 or 7<br />
inches in diameter)<br />
• 8 plastic washers and<br />
8 pieces of plastic<br />
tubing (3/16-inch i.d.,<br />
1/2 inch long)<br />
alternative: 8 <strong>rubber</strong><br />
bumpers or 8 <strong>rubber</strong><br />
stoppers<br />
• Data Sheet—Activity 1<br />
FOR THE WHOLE GROUP<br />
• masking tape<br />
(3/4-inch wide)<br />
• pencil compass<br />
• paper punch<br />
• plate template, having a<br />
hole in the center<br />
• scissors<br />
• pieces of cardboard or<br />
wood (at least 24 inches<br />
x 36 inches)<br />
• yardstick<br />
FOR THE PROGRAM<br />
LEADER<br />
• 1 retractable blade<br />
knife or craft knife<br />
• nail or push pin (optional)<br />
Rubber Band Powered Cars<br />
Activity 1: Assembling a Car<br />
9
1<br />
ACTIVITY<br />
Guiding the Activity<br />
Creating plate templates<br />
One important detail the children may not notice at first is that the wheels<br />
work much better if the axle (dowel) passes exactly through the center of<br />
each plate.<br />
?<br />
Three methods for finding the center of the plates that you might use yourself<br />
or show to the children are given on page 51. When you have found the center<br />
of one plate quite accurately with any of these methods, you can use the<br />
master plate (template) to find the center of other plates. If you are making<br />
the holes, you may find it easiest to heat the tip of a nail and melt a hole in<br />
the center of the plate. Children should not use this method.<br />
Building a ramp<br />
Once you have completed the templates, find a place in your center where<br />
the assembled <strong>cars</strong> can be tested. Although the <strong>cars</strong> in Activity 1 will likely<br />
not travel far, you should find a space for your ramp with a<br />
“runway” of at least 25 feet to<br />
accommodate the<br />
testing in the rest of<br />
the activities. Also,<br />
prepare a piece of<br />
cardboard 3 feet<br />
long and 2 feet<br />
wide, which will be<br />
used as a ramp (see<br />
Figure 1.4). Find some books, blocks of wood, or other objects to prop up<br />
one end of the ramp.<br />
For ease in measuring the distance traveled, you can place pieces of tape on<br />
the floor marking every foot. If the children are testing their <strong>cars</strong> on a floor<br />
with tiles, children can count the number of tiles their <strong>cars</strong> traveled.<br />
Make enough copies of the Challenge Sheet, including Data Sheet—Activity<br />
1, for each team.<br />
INTRODUCING THE ACTIVITY<br />
Figure 1.4<br />
The ramp looks like this.<br />
Tell the children that they will be working on an extended project where they<br />
will be challenged to build a model car to be <strong>powered</strong> by a <strong>rubber</strong> <strong>band</strong>.<br />
They will not be doing this all at once, but will work toward this goal one<br />
step at a time.<br />
The goal of the first activity is to construct a car and see how far it can travel<br />
when allowed to roll down a ramp. Before showing them the materials, ask<br />
them what they know about toy <strong>cars</strong>.<br />
• How are toy <strong>cars</strong> constructed?<br />
• How are the wheels placed on the car?<br />
10 Rubber Band Powered Cars<br />
Activity 1: Assembling a Car
Show them the materials and explain that, working in teams, they will use<br />
only these materials to make model <strong>cars</strong> in this first activity. Also, show them<br />
the plate templates and how they can be used to make holes in the center of<br />
the plates they will be given. Make it clear that these templates are for<br />
everyone to use.<br />
Form teams and have them first discuss among themselves how they will use<br />
the materials. After each team has come up with a way of assembling a car,<br />
hand out the materials.<br />
ACTIVITY<br />
Guiding the Activity<br />
1<br />
THE CHALLENGE<br />
Make a car out of the available materials.<br />
How far will your <strong>cars</strong> travel when placed on a ramp?<br />
LEADING THE ACTIVITY<br />
Assembling the car<br />
Bumper or washers<br />
Tubing provides a<br />
tight fit to keep the<br />
plates secured to the<br />
dowel<br />
Figure 1.5<br />
Different configurations of wheels.<br />
Notice how the plates in the top row are<br />
facing outward whereas the plates in<br />
the bottom row are facing inward.<br />
The children will readily adapt the plates to make wheels and slide them onto<br />
the dowels (see Figure 1.5). There will probably be differences among the<br />
teams as to where and how they attach the dowels to the cardboard. The<br />
axles may be mounted on the base of the cardboard so that they are fixed or<br />
move freely. If they are fixed, the wheels must be able to move freely for the<br />
car to travel. If the axles move freely, the wheels must be fixed to the axles<br />
for the car to travel effectively. Either arrangement can work in the first<br />
Rubber Band Powered Cars<br />
Activity 1: Assembling a Car<br />
11
1<br />
ACTIVITY<br />
Guiding the Activity<br />
activity. At this point, the main goal is to construct a functioning car—one<br />
that rolls easily and in a relatively straight line. Let them place the dowels<br />
and wheels whatever way they think will work. When they test the <strong>cars</strong>, they<br />
will quickly discover some of the problems of their arrangements.<br />
Children may be unsure about how they are going to mount the dowels so<br />
that they are attached to the cardboard but still move freely. You will have to<br />
discuss this with some teams to help them think about the best way to<br />
accomplish this.<br />
SAFETY<br />
Make sure the children are using the compass or scissors in<br />
a safe way.<br />
12<br />
Once each team has their car assembled, they can immediately test it on the<br />
table or floor. Tell them to push it gently to see how it rolls. There are three<br />
considerations they should address. If they have any of the following<br />
problems, they need to figure out how to correct them.<br />
• Does the car roll straight or does it curve to one side as it moves?<br />
• Do the wheels move with a minimum of friction and not rub against the<br />
side of the cardboard?<br />
• Does the car stop quickly after it has been pushed?<br />
Testing the car with a ramp<br />
Set up the ramp where the <strong>cars</strong> can roll on a flat surface for a long distance.<br />
If a team feels confident with the design of their car, have them place it at the<br />
top of the ramp, release it, and see how far it travels. Have them use the<br />
yardstick to measure the distance, and then record their results on Data<br />
Sheet—Activity 1. They can use “feet” as the unit of measurement.<br />
After each trial, encourage the teams to make adjustments to their <strong>cars</strong> with<br />
the goal of having them travel farther on the next trial.<br />
Troubleshooting<br />
The <strong>cars</strong> for some teams may not travel very far.<br />
1. The dowels are taped to the cardboard. The plates must rotate freely<br />
on the axles if the car is going to move.<br />
2. The axles are pushed through holes they punched in the cardboard.<br />
Have them check to see how freely the axles rotate in these holes. The<br />
holes in the cardboard may be too small, causing the axles to experience<br />
a lot of friction. These teams will have to take the axles off of the<br />
cardboard and use a pencil or the points of a pair of scissors to enlarge<br />
the holes. Caution them to not make the holes too big because the axles<br />
will start to wobble.<br />
3. The holes were made poorly, leaving pieces of cardboard rubbing<br />
against the dowels. These teams will have to make new holes. The paper<br />
punch creates a clean hole, but it will have to be enlarged slightly to let<br />
the dowels rotate freely.<br />
Rubber Band Powered Cars<br />
Activity 1: Assembling a Car<br />
12
ACTIVITY<br />
Guiding the Activity<br />
1<br />
4. The <strong>cars</strong> do not move in a straight<br />
line. Have teams check the alignment<br />
of their axles. Both axles need to be<br />
parallel to each other and to the front<br />
and back edges of the cardboard (see<br />
Figure 1.6). Point out to the children<br />
that the corrugation of the cardboard<br />
can be used to line up the axles so that<br />
they are parallel to each other.<br />
Just before the children launch their <strong>cars</strong>,<br />
they need to push the tubing and washers<br />
tightly together so that the wheels don’t<br />
slip or wobble.<br />
Make sure each team records the distance<br />
their <strong>cars</strong> traveled. Tell them this will help<br />
them determine whether changes they<br />
make on their <strong>cars</strong> result in a better performance.<br />
CORRECT<br />
INCORRECT<br />
Figure 1.6<br />
Alignment of axles.<br />
LEADING THE DISCUSSION<br />
Have the children gather in a Discussion Circle when they’ve finished the<br />
ramp tests to talk about their results and about how their designs could be<br />
improved. It is best if the children do not have direct access to their <strong>cars</strong> and<br />
materials during this discussion so that they can give full attention to what is<br />
being said. Have them gather at the front of the room in their teams. First,<br />
have each team report the longest distance their car traveled. Teams will tend<br />
to want to be “better” than other teams, but explain to them that this is also a<br />
time where they can combine their experiences and help each other improve<br />
the performance of their <strong>cars</strong>.<br />
Have the more successful teams show how they constructed their <strong>cars</strong>. What<br />
allowed their <strong>cars</strong> to travel well? You can also have the less successful teams<br />
show their <strong>cars</strong> to the other children. Ask the whole group to make<br />
suggestions on how these <strong>cars</strong> might be improved so that they will move<br />
better. There are at least three design issues that should be discussed.<br />
1. Friction of the axle. The paper punch creates a hole in the cardboard that<br />
is just big enough to allow a dowel to slide through. This results in a lot of<br />
rubbing or friction between the dowel and the cardboard. Ask the children<br />
what they could do to the hole to reduce this rubbing or friction. One possibility<br />
is to use the dowel, itself, to push slightly against the sides of the<br />
hole so as to enlarge it.<br />
Rubber Band Powered Cars<br />
Activity 1: Assembling a Car<br />
13
1<br />
ACTIVITY<br />
Guiding the Activity<br />
Figure 1.7<br />
Plates facing the same<br />
direction. Note the<br />
single point of contact<br />
with the dowel.<br />
2. Wobble. Depending on how the plates were placed on the dowels (for<br />
instance, if both plates on a wheel are facing in the same direction), the<br />
wheels may wobble as the car moves forward (see Figure 1.7).<br />
The wobble may also cause the car to travel off to one side. Ask the<br />
children how they might lessen the wobble. Here is one possibility: Line<br />
up two plates so that the edges of the plates face each other (see Figure<br />
1.8). In this manner, there are two surfaces instead of one for the dowel<br />
to support. However, the edges of the plates have to be lined up carefully<br />
or there still may be some wobble.<br />
Figure 1.8<br />
Plates facing each<br />
other.<br />
There are two<br />
points of contact<br />
between the plates<br />
and the dowel.<br />
Tape<br />
Place tape around<br />
the edge of the<br />
plates to help hold<br />
them together and<br />
to make them<br />
sturdier.<br />
3. Car does not travel straight. Ask those teams whose <strong>cars</strong> do not travel<br />
in a straight line to show them to the whole group. Have them discuss<br />
what might be changed to correct this problem. One problem, as discussed<br />
above, is that the car is wobbling, causing it to roll to the side.<br />
Other possibilities include that the axles are not lined up parallel to each<br />
other (as they are in Figure 1.9) or that the plates on one or<br />
both axles are not centered properly and the wheels are<br />
rotating in an uneven manner.<br />
Those unsuccessful teams should also show how<br />
they constructed their <strong>cars</strong>. Ask everyone if they<br />
can make suggestions that will help these<br />
teams.<br />
Figure 1.9<br />
This is the best<br />
arrangement to get the car<br />
to travel straight.<br />
14 Rubber Band Powered Cars<br />
Activity 1: Assembling a Car
ACTIVITY<br />
Background<br />
1<br />
Activity 1: Assembling a Car<br />
RATIONALE<br />
The overall challenge in this project is to build and test a <strong>rubber</strong> <strong>band</strong><br />
<strong>powered</strong> car. Younger children will need to be taken through a series of steps<br />
to arrive at this goal. Some children have problems simply assembling a car,<br />
particularly when trying to figure out ways to attach the <strong>rubber</strong> <strong>band</strong>s to the<br />
<strong>cars</strong>’ axles.<br />
This first activity is solely for children to construct their <strong>cars</strong> and to make<br />
them move well, go straight, and travel easily. They need to be able to give<br />
their full attention to these tasks before moving on. Once they feel<br />
comfortable with how their <strong>cars</strong> are constructed, they will be challenged to<br />
add a <strong>rubber</strong> <strong>band</strong> propulsion system.<br />
INTRODUCING THE ACTIVITY<br />
In their first attempts to construct a car, some teams might attach their axles<br />
to the cardboard in ways that will not be useful later on. Also, the way the<br />
plates function as wheels may not work when the <strong>rubber</strong> <strong>band</strong>s are used to<br />
power the car. This may not be apparent to the children even during the<br />
testing in this activity. Use the results from the testing with the ramp to get<br />
them to pay special attention to these two design features. When a car<br />
doesn’t travel very far, try to have the children examine their <strong>cars</strong> and isolate<br />
what they think can be improved. The two most important concerns is to get<br />
the <strong>cars</strong> traveling as straight as possible, and to have the wheels and axles<br />
moving with little friction.<br />
When introducing this activity, you may also want to have the children think<br />
ahead about how the axles should be lined up on the cardboard. Will all of<br />
the different arrangements of axles suggested by the children allow the <strong>cars</strong><br />
to travel straight (see Figure 1.10)?<br />
Figure 1.10<br />
Arrangements of axles.<br />
15<br />
Rubber Band Powered Cars<br />
Activity 1: Assembling a Car<br />
15
ACTIVITY<br />
1<br />
Background<br />
LEADING THE ACTIVITY<br />
Urge the members of each team to talk to each other about what they are about<br />
to do with the piece of cardboard. Rather than randomly putting materials<br />
together, they should try to think ahead to the results they want to achieve. For<br />
instance, what might happen if they attach the axles so they are not parallel, or<br />
if the wheels don’t move freely on the axles? Sometimes children will have a<br />
problem finding the words to describe their thoughts. Encourage them to<br />
demonstrate with their hands or with their <strong>cars</strong> what they think will happen.<br />
Troubleshooting<br />
Given the type of materials being used, it is likely that the <strong>cars</strong> will not work<br />
well during the very first tests. Sometimes they will blame the poor<br />
performance on the materials. Try to get the children in the habit of making<br />
changes to their <strong>cars</strong>. Encourage them to watch closely how the car moves<br />
and try to isolate what may be causing the problems. Some of these problems<br />
may not be obvious to them, so you may need to give a little guidance.<br />
Rather than telling them what may be wrong, ask questions about the<br />
different parts of the car to draw the children’s attention to these problems.<br />
LEADING THE DISCUSSION<br />
It is important that time be taken after each activity for children to discuss<br />
what they have been doing. They probably expect to have immediate success.<br />
Tell them that for most projects, engineers have to make adjustments after<br />
first assembling something. Given their limited experience, the children can<br />
expect that their first efforts may not work well. Part of the design process is<br />
to try to figure out why something doesn’t work well and to find ways to<br />
improve its performance. Isolating the different problems at this point is<br />
important. It will help the children make a car that will be ready for the next<br />
step: attaching a <strong>rubber</strong> <strong>band</strong> to make it move.<br />
ASSESSMENT<br />
During the first activity, you should observe each team closely with respect<br />
to three behaviors and watch how these behaviors change over the course of<br />
the project:<br />
• How do they talk and plan their design? Do they immediately start<br />
working with the materials without discussing with each other how they<br />
will proceed?<br />
• How do they carry out the construction? Do they discuss with each other<br />
where to place holes in the cardboard for the dowels or does one child<br />
just start making holes without thinking where may be the best place for<br />
the axles? Are they careful in finding the center of the plates? Do they<br />
make the right size holes in the plates?<br />
• How well are they working as a team? Does each child stay in his or her<br />
role? Do they argue over who does the construction?<br />
16<br />
Rubber Band Powered Cars<br />
Activity 1: Assembling a Car