PINBALL: DESIGNING A GAME - NPASS2 - Education Development ...
PINBALL: DESIGNING A GAME - NPASS2 - Education Development ...
PINBALL: DESIGNING A GAME - NPASS2 - Education Development ...

You also want an ePaper? Increase the reach of your titles
YUMPU automatically turns print PDFs into web optimized ePapers that Google loves.
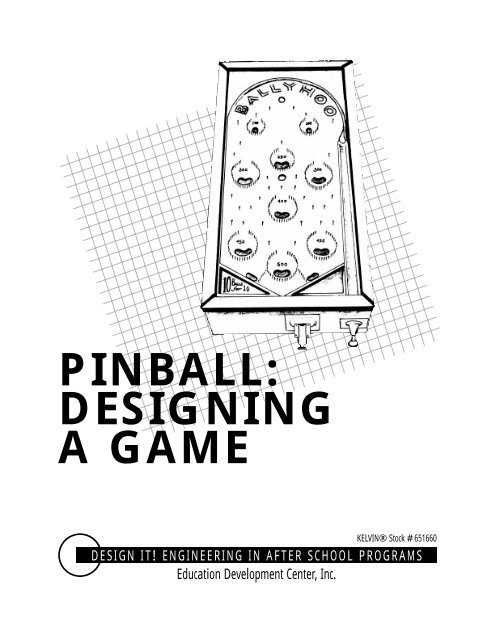
<strong>PINBALL</strong>:<br />
<strong>DESIGNING</strong><br />
A <strong>GAME</strong><br />
KELVIN® Stock #651660<br />
DESIGN IT! ENGINEERING IN AFTER SCHOOL PROGRAMS<br />
<strong>Education</strong> <strong>Development</strong> Center, Inc.
DESIGN IT! Engineering in After School Programs<br />
Table of Contents<br />
Overview ........................................................................................3<br />
Activity 1: Setting Up a Pinball Game ....................................9<br />
Activity 2: Making More Traps..............................................19<br />
Activity 3: Giving Number Values to Your Traps ............27<br />
Activity 4: Making Rubber Band Launchers<br />
and Flippers ..........................................................35<br />
Activity 5: Making Spring Plungers ......................................43<br />
Appendix ......................................................................................51<br />
Reference Materials ....................................................53<br />
Letter to Families ........................................................55<br />
Pegboard Template ......................................................57<br />
Kelvin Materials Order Form ....................................59
Challenge Sheet<br />
ACTIVITY<br />
1<br />
Activity 1: Setting Up a Pinball Game<br />
What Materials Do I Have?<br />
• 1 pegboard<br />
• 2 yardsticks<br />
• 5 marbles (1 inch in diameter)<br />
• 3 16-ounce cups<br />
• 1 empty half-gallon milk carton<br />
• 30 flexible drnking straws<br />
• masking tape<br />
• scissors<br />
• 1 pegboard template<br />
THE CHALLENGE<br />
Design a pinball game using a pegboard and drinking straws.<br />
What arrangements will be the most fun for others to play?<br />
What Do I Do?<br />
1. Lay the pegboard on a table and prop up one end with the large cups.<br />
2. Using the flexible drinking straws, make a guardrail around the edges of the<br />
pegboard. This arrangement will keep the ball from rolling off the board.<br />
3. Talk to your teammates about where to place the traps. Cut short lengths of straw<br />
and place them into the holes where you want the traps to be. Don’t forget to<br />
squeeze the end of the straw pieces to make it easier to get them into the holes.<br />
Squeeze the straw so it<br />
fits in the hole.<br />
Pinball: Designing a Game<br />
Activity 1: Setting Up a Pinball Game<br />
9
ACTIVITY<br />
1<br />
Challenge Sheet<br />
4. Assemble a ramp by taping two yardsticks together into a “V” along their long<br />
edges. Place the tape on the top (inside the V) of the yardsticks so the ramp is easy to<br />
fold in half. Make sure you can still read the numbers on the yardstick.<br />
Yardstick ramp with tape<br />
5. Test your design by launching the ball using the ramp.<br />
SAFETY<br />
Do not throw marbles at anyone or launch the marbles on the ramp with a great deal of<br />
force.<br />
What to Think About<br />
• Can you get the ball to travel the same path if you launch it in the same way<br />
each time?<br />
• Can you get the ball to roll into all of your traps by changing how the ball is<br />
launched before each roll?<br />
• Can you get the ball to go into the same trap several times in a row?<br />
10<br />
Pinball: Designing a Game<br />
Activity 1: Setting Up a Pinball Game
Activity 1: Setting Up a<br />
Pinball Game<br />
ACTIVITY<br />
Guiding the Activity<br />
1<br />
PREPARING AHEAD<br />
1. Make copies of the pictures of the pinball games (pages 53–54) to show<br />
the children.<br />
2. Make enough copies of the Challenge Sheet and the pegboard template<br />
(page 57) for each team.<br />
3. Plan how you will divide the children into teams.<br />
4. Construct a game yourself as suggested in Introducing the Activity to get<br />
a feel for the game and to anticipate some of the difficulties the children<br />
might encounter. You can then show your constructed game to the<br />
children when you are explaining the project to them.<br />
5. Find a place to store the children’s games between sessions. The games<br />
can be set against the wall at an angle, but only if in an area where others<br />
won’t disturb them. If you must store them in a place accessible to<br />
others, prepare to cover them with cloth or some large pieces of<br />
cardboard for protection.<br />
Materials<br />
FOR EACH TEAM<br />
• 1 pegboard<br />
• 2 yardsticks<br />
• 5 marbles (1 inch in<br />
diameter)<br />
• 3 16-ounce cups<br />
• 1 empty half-gallon milk<br />
carton<br />
• 30 flexible drinking<br />
straws<br />
• 1 pegboard template<br />
INTRODUCING THE ACTIVITY<br />
Ask the children if they have seen or played pinball games. Nowadays,<br />
pinball games for individual home use are not as popular as they once were,<br />
and pinball arcades no longer exist in every shopping mall. There are,<br />
however, some smaller versions sold by toy companies that children may<br />
have played. Also, some pinball games exist in the form of video games, so<br />
perhaps the children have been<br />
introduced to them through that<br />
medium.<br />
Ask those children who have seen<br />
or played pinball games to<br />
describe to the whole group as best<br />
they can what the game is about.<br />
To the right is a picture<br />
of an earlier version of a pinball<br />
game. There is a larger version of<br />
this picture at the back of the<br />
booklet (page 54) that children can<br />
pass around to get some sense of<br />
what the game looks like.<br />
Show the children the materials<br />
and explain how they can use them<br />
to create their own pinball games.<br />
FOR THE WHOLE GROUP<br />
• masking tape<br />
• scissors<br />
Figure 1.1<br />
Ballyhoo: The first coinoperated<br />
pinball machine.<br />
Pinball: Designing a Game<br />
Activity 1: Setting Up a Pinball Game<br />
11
1<br />
ACTIVITY<br />
Guiding the Activity<br />
1. Lay the pegboard on a table, propping up one end with 2 16-ounce cups,<br />
as shown in Figure 1.2.<br />
Figure 1.2<br />
Pegboard propped up<br />
by cups.<br />
2. Assemble a ramp by taping two yardsticks along their long edges together<br />
so that they form a “V.” Place the tape on the top (inside of the V)<br />
(Figure 1.3) of the yardsticks so the ramp can easily be folded in half.<br />
Figure 1.3<br />
Yardstick ramp.<br />
3. Place the ramp on top of a half-gallon milk carton next to the bottom of the<br />
pegboard. Bend the top of the milk carton so that the ramp sits snugly on<br />
top of it (Figure 1.4). (Stacks of books or pieces of wood can also be used<br />
as supports.) You can add some rocks or other kind of small, heavy objects<br />
to the milk carton to keep it steady.<br />
Figure 1.4<br />
Open the top of the<br />
carton and rest the<br />
ramp in the opening.<br />
4. Show the children how a marble can be rolled down the ramp so that it<br />
travels up the tilted pegboard and then rolls off (Figure 1.5). Point out<br />
that they will need to keep the marble from falling off the board.<br />
Figure 1.5<br />
Roll a marble down<br />
the ramp; it falls off<br />
the board.<br />
12<br />
Pinball: Designing a Game<br />
Activity 1: Setting Up a Pinball Game
5. Demonstrate how the<br />
flexible straws can be<br />
used to make guardrails<br />
(Figures 1.6 and 1.7).<br />
6. Cut off short segments<br />
of straw. Place several<br />
segments in the holes<br />
on the pegboard to<br />
make traps (Figure 1.8).<br />
Point out that the ends<br />
of the straws will have<br />
to be squeezed first to<br />
fit them into the holes.<br />
Figure 1.7<br />
You may tape the joint of the<br />
connected straws to the<br />
pegboard so that the guardrail<br />
stays in position.<br />
Guiding the Activity<br />
1<br />
Figure 1.6<br />
Insert pinched end of straw<br />
into the end of another straw.<br />
Make sure to join the long<br />
ends of the straws.<br />
ACTIVITY<br />
Figure 1.8<br />
Squeeze the straw so it<br />
fits in the hole.<br />
7. Roll the marble down the ramp again and show how it can land in a trap<br />
(Figures 1.9 and 1.10).<br />
Tell the children that in this first session,<br />
they will begin to set up their games. At<br />
this point, they should only make two or<br />
three traps. Later, they will be given more<br />
materials to add more traps and develop<br />
other ways of trapping or guiding the<br />
movement of the ball. Help them<br />
understand the second provision of the<br />
challenge. They are making their games<br />
not only for themselves, but also for<br />
others to play. Therefore, they need to<br />
consider how others will use their<br />
designs. Ultimately, children should aim<br />
to create games that are challenging for<br />
the players to get the balls to land in the<br />
traps, gaining points for each trap. This<br />
should be in the back of their minds while<br />
designing this first phase of the game.<br />
Figure 1.9<br />
Marbles landing<br />
in traps.<br />
Figure 1.10<br />
A trap: A 1-inch ball or<br />
marble cannot pass through<br />
the spaces between the<br />
straws.<br />
Pinball: Designing a Game<br />
Activity 1: Setting Up a Pinball Game<br />
13
1<br />
ACTIVITY<br />
Guiding the Activity<br />
THE CHALLENGE<br />
Design a pinball game using a pegboard and drinking straws.<br />
What arrangements will be the most fun for others to play?<br />
LEADING THE ACTIVITY<br />
In this first session, children will probably need help in the use of the straws.<br />
Check in with each team to see how they are connecting the straws and how<br />
they are placing them into the holes of the pegboard. If the children crush the<br />
straws as they join them together or put them in the hole, the straws will not<br />
function very well as guardrails.<br />
Children will likely need more than one session to construct and test their<br />
designs and to share their results.<br />
USEFUL TERMS<br />
Pin: Individual pieces of<br />
straw stuck here and<br />
there to divert the pathway<br />
of a moving ball.<br />
Trap: Several straws<br />
placed together where a<br />
ball can come to rest.<br />
Guardrail: Length of<br />
drinking straws on the<br />
edge of the pegboard that<br />
keeps the ball from falling<br />
off the board.<br />
Bumper: Length of straw<br />
parallel to the pegboard<br />
used to guide a ball into a<br />
trap or toward a section<br />
of the board with several<br />
traps.<br />
?<br />
Terminology<br />
It is helpful when having discussions to come up with some agreed upon<br />
terminology to describe the different arrangements that children assemble.<br />
You do not have to use the terms in the margin and in Figure 1.11 if the<br />
children prefer to invent their own terms. It is suggested, however, that the<br />
parts be named to help describe the set-up and to promote easier discussion<br />
about the pinball game designs.<br />
Figure 1.11<br />
Terminology.<br />
Pin<br />
Bumper<br />
Guardrail<br />
When the children are making their traps, try to get them to decide with their<br />
team members where the best place would be to put them. Ask:<br />
• Do you want to make it easy or hard to get the balls into the traps?<br />
• Do you want a combination of easy and hard traps?<br />
• Will you allow the player to put the ramp anywhere on the board or will<br />
it be anchored in one spot?<br />
• Can the player raise or lower the ramp to change the movement of<br />
the ball?<br />
• Can the player change the ramp so the ball can be aimed at different<br />
parts of the board?<br />
Trap<br />
14<br />
Pinball: Designing a Game<br />
Activity 1: Setting Up a Pinball Game
These questions are to get children to think explicitly about the different<br />
design features of the game. Some may have definite opinions about these<br />
considerations while others may only decide what to do as they start to play<br />
their game. Each team should spend some time playing their game to get a<br />
sense of where the ball can roll and how often it goes into the different traps.<br />
Troubleshooting<br />
Perhaps the most prominent problem children may have in this activity is<br />
caused by their carelessness when anchoring the guardrails on the pegboard.<br />
To be effective, the guardrails need to keep the balls from slipping under or<br />
over the straws. Suggest that they test their guardrails by rolling a marble<br />
against different parts to see whether it will keep the marble on the board.<br />
Some teams may decide to use the straws to build a structure to support the<br />
ramp. Any support will have to be sturdy so the ramp does not collapse.<br />
Also, the support for the ramp cannot be taped to the pegboards since the<br />
games may have to be disassembled after each session for storage.<br />
Recording the designs<br />
When teams have decided on a design for their games that works, have each<br />
team’s recorder use a copy of the pegboard template (page 57) to record the<br />
team’s design. This should be done at this point during each of the following<br />
activities. Teams can then compare their new designs with their old, see what<br />
has worked in the past, and watch their progress.<br />
Storing the games<br />
Care should be taken in storing the games. They need to be placed in such a<br />
way that the straws are not crushed.<br />
LEADING THE DISCUSSION<br />
After all the teams have had a chance to test their designs, have the children<br />
gather in one group. Tell them that they will now have the opportunity to test<br />
each others’ games. Each team will demonstrate their game, and then a few<br />
children will try it out. Explain that there are several reasons for doing this:<br />
• To show each other what they have accomplished.<br />
• To get new ideas for their own games.<br />
• To offer suggestions of how to improve other teams’ games.<br />
After some children have tested a particular game, ask them if they think the<br />
game is too easy or too hard to play. To be considered “easy,” a child should be<br />
able to get the ball into one or all of the traps with little effort. To be<br />
considered “hard,” the traps should be situated in a way that makes it almost<br />
impossible for a child to get the ball into one or all of the traps. Ask the group<br />
to make suggestions of how the game might be improved. Carry out this<br />
process with each of the teams.<br />
ACTIVITY<br />
Guiding the Activity<br />
1<br />
Pinball: Designing a Game<br />
Activity 1: Setting Up a Pinball Game<br />
15
ACTIVITY<br />
Background<br />
1<br />
Activity 1: Setting Up a<br />
Pinball Game<br />
RATIONALE<br />
In this activity, children become acquainted with the available materials and<br />
begin to get a sense of how the ball moves on the pegboard. Some children<br />
may have difficulty squeezing the straws into the holes of the pegboard, but<br />
practice and experience should bring success.<br />
After setting up a few traps, they should also get a sense of how the ball rolls<br />
down the ramp and along the board. Because the board has holes, the path of<br />
the ball isn’t totally predictable. Given these conditions, it will be difficult<br />
for children to have a full scheme in mind of how they will design their<br />
games. There will be plenty of time for them to make more elaborate designs<br />
in later activities.<br />
It is important to limit the materials available to the children. Given<br />
unlimited access to materials, some children will have a tendency to keep<br />
adding traps and other kinds of barriers without thinking about how it affects<br />
the overall game.<br />
LEADING THE ACTIVITY<br />
In the excitement of assembling their game, each child in the team will<br />
probably put straws in holes without consulting with their teammates.<br />
Although it is difficult for some children to collaborate in this kind of<br />
situation, you should moderate the interaction among members of a team. Try<br />
to get them to talk to each other before placing their traps. Encourage them<br />
to discuss where they all think the best place is for the traps. The traps do not<br />
have to be permanently placed. After a few trials, they can be removed and<br />
placed elsewhere. Point this out to the children so they realize that they can<br />
try out different arrangements. Also, tasks can be divided up so that everyone<br />
is doing something and no one person is dominating the action. For instance,<br />
the materials manager can get pieces of tape for wherever it is needed and<br />
cut the straws; the designer can place them in the holes; and the launcher can<br />
test the game by launching balls down the ramp.<br />
LEADING THE DISCUSSION<br />
Children enjoy showing off their work. Although sharing their games may<br />
take significant time during each session, it is very useful because it provides<br />
a more explicit and formal way of sharing discoveries and experiences<br />
compared with just allowing the children to wander around during the<br />
activity observing what other teams are doing. It also relates directly to the<br />
design challenge. How do others react to the games they have designed so<br />
Pinball: Designing a Game<br />
Activity 1: Setting Up a Pinball Game<br />
17
ACTIVITY<br />
1<br />
Background<br />
far? There is a tendency with children this age to be self-centered in the<br />
sense that if the game is fun for them, it must be fun for others. One of the<br />
central issues in the design process is assembling products that are useable<br />
and interesting for a wide audience. As each team presents their game,<br />
remind them that they are also designing for others.<br />
At a more specific level, you should also try to get the children to pay attention<br />
to the correlation between the height of where the ball is released and how far<br />
it rolls up the inclined pegboard. This determines where it might land and is<br />
one reason for using the yardsticks. Children can use the numbers along the<br />
yardsticks to measure the starting point and highest point for their balls.<br />
Demonstration<br />
To emphasize this point, do a demonstration. Choose a point on the ramp<br />
from which to launch the ball. Ask the children to observe the path of the<br />
ball while you launch it four or five times from the same spot. Then release<br />
the ball halfway down the ramp four or five times. Ask them to describe the<br />
difference. Also, have them observe whether the ball moves in exactly the<br />
same path for the same kind of release. It should be apparent that because of<br />
the holes in the pegboard, the marble will sometimes be diverted from a<br />
smooth trajectory (path of movement).<br />
ASSESSMENT<br />
You can assess what children are gaining from this activity by having them<br />
share with the whole group. Sharing with others encourages them to be more<br />
explicit in what they were attempting to do. It also provides an occasion for<br />
discussing what they understand about the design process.<br />
Use the drawings of the pinball game designs (on the pegboard template) as<br />
a reference point at the end of each of the next activities so that the children<br />
can see the evolution of their games throughout the project. This kind of<br />
comparison will give you some sense of how they are progressing.<br />
The extent to which they make adjustments to their traps is one indicator of<br />
how closely they are thinking about their designs. Do they move the traps<br />
around trying to make the game easier or harder? Are they working<br />
cooperatively?<br />
18<br />
Pinball: Designing a Game<br />
Activity 1: Setting Up a Pinball Game