EDC Cake Chemistry - NPASS2
EDC Cake Chemistry - NPASS2
EDC Cake Chemistry - NPASS2

Create successful ePaper yourself
Turn your PDF publications into a flip-book with our unique Google optimized e-Paper software.
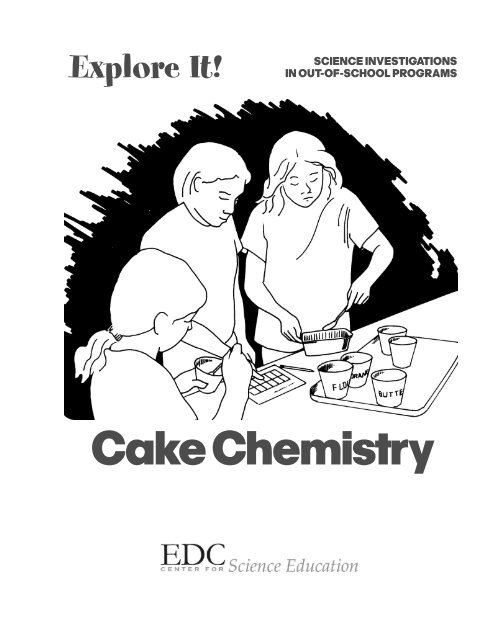
Explore It!SCIENCE INVESTIGATIONSIN OUT-OF-SCHOOL PROGRAMS<strong>Cake</strong> <strong>Chemistry</strong>
<strong>Cake</strong> <strong>Chemistry</strong>How to Use This Guide..........................................................................................ixOverview................................................................................................................xiExploration 1: Making Up Your Own Recipe ........................................................1Exploration 2: Changing Your Recipe and Collecting Baking Powder Gas ........13Exploration 3: Taking a More Careful Look at Baking Powder Gas....................25Exploration 4: Using Baking Soda and Buttermilk ..............................................33Exploration 5: Capturing Baking Soda Gas..........................................................43Exploration 6: Experimenting with Yeast ............................................................53Exploration 7: Testing the Gas from Different Ingredients ..................................65AppendixMaterials Shopping List..................................................................................81Additional Resources......................................................................................83Letter to Families ............................................................................................85Explore It!vii
MAKING UP YOUR OWN RECIPEEXPLORATION 1WHAT TO DOPART 1Discovery QuestionWhat are the right amounts of ingredients usedto make a recipe for a good cake?Mixing the Ingredients1. Decide with your teammates on the ingredients for your recipe.How many spoonfuls of each ingredient you will use?2. Measure out the dry ingredients in one cup.3. Measure out the wet ingredients in another cup.4. Mix both sets of ingredients well in the aluminum pan until the batter is smooth.5. Wait for further instructions.PART 2 Which Combinations of Ingredients Fizz?Your program leader will give you further instructions.WHAT TO THINK ABOUT• How much of the wet ingredients do you think you should usecompared with the dry ingredients?• How important is the baking powder?• What do the eggs add to the cake?• What does the cooking oil add to the cake?• What is it about a cake that makes it taste “good?”1EXPLORERS’ SHEET1GUIDING THE EXPLORATION1BACKGROUNDExplore It!1
MAKING UP YOUR OWN RECIPEEXPLORATION 11EXPLORERS’ SHEETOUR RECIPEIngredientNumber of Spoonfuls or Drops1GUIDING THE EXPLORATION1BACKGROUND2 <strong>EDC</strong>’s Center for Science Education
MAKING UP YOUR OWN RECIPEEXPLORATION 1MIXING WET AND DRY INGREDIENTSWhile waiting for your cake to bake, you can carry out some testing of youringredients. Which combinations of ingredients give off gas bubbles when mixedtogether? Use the grid sheet of aluminum foil to make your mixtures. Write theresults of your wet/dry mixtures in the appropriate squares below.MilkCookingOilFlourSugarBakingPowder1EXPLORERS’ SHEET1GUIDING THE EXPLORATION1EggBACKGROUNDExplore It!3
MAKING UP YOUR OWN RECIPEEXPLORATION 1MATERIALSFor Each Team• 8 clear plastic cups (6- to 7-ounce)• 8 plastic spoons* (standard)• 1/2 cup flour• 1/2 cup sugar• 1/2 cup baking powder• 1/2 cup milk• 1/2 cup cooking oil (any type)• 1/2 cup liquid egg or egg substitute* (unflavored) (alternative: 1whole egg, beaten)• 1 small aluminum cake pan* (approximately 4 inches indiameter) or mini loaf pan• 1 12-inch ruler• 1 sheet of aluminum foil (12 inches long)• 1 Explorers’ Sheet, including the Our Recipe chart and MixingWet and Dry Ingredients chartShared• permanent markers• additional amounts of all ingredients• newspapers and sponges (for cleanup)• access to an oven (or toaster oven or cardboard box oven)• optional: trays or stiff sheets of cardboard(8-1/2 inches x 11 inches)For the Program Leader• toothpicks• 1 eyedropper• vanilla extract*Additional information is available under Special Notes AboutMaterials (page xvi) for those materials noted with an asterisk.PREPARING FOR THE EXPLORATION• Before the start of each exploration, place newspapers onthe tables. This will make cleanup easier and faster. Also,the explorations should take place near a sink so that water canbe accessed easily for some of the explorations and for easiercleanup. If this is not possible, you will need to provide somebuckets or large containers of water so that any spillage orcleanup can be done with a minimum of work.1EXPLORERS’ SHEET1GUIDING THE EXPLORATION1BACKGROUNDExplore It!5
MAKING UP YOUR OWN RECIPEEXPLORATION 11EXPLORERS’ SHEET1GUIDING THE EXPLORATION1BACKGROUNDThe cardboard box 1oven is the same asthat presented in theExplore It! project“Heating a House andan Oven.” You willhave to use a 100-wattbulb to get thetemperature highenough to bake a cake(350º). However, thiskind of oven can onlyhandle two containersat a time, so you mayhave to make severalof them. Consult thecurriculum guidefor this project toconstruct one ofthese ovens.• Label a set of cups for each team with a permanent marker(Figure 1). Create a set of six cups for each team filled withabout ? cup of each of the ingredients listed above. You candecide to put more or less of the ingredients in these cups.Figure 1A set of cups for one team.• If you are preparing the materials long before the session, coverthe cups with paper or some other material to keep anythingfrom getting into the cups before students use them. To make iteasier for handing out to each team, you could place each set ofmaterials in some kind of tray or on a sheet of stiff cardboard.• You will need access to an oven to bake the small cakes.Alternatives include a toaster oven or a cardboard box oven. 1• Turn on your oven(s) before the start of each session and set thetemperature to 350º.• Make one copy of the Explorers’ Sheet, including the OurRecipe chart and Mixing Wet and Dry Ingredients chart, for eachteam. However, wait to pass them out until after you haveexplained the task at hand.SAFETY: Some children may be allergic to eggs or someof the other ingredients used in this project. Make sure tocheck with parents before beginning.INTRODUCING THE EXPLORATIONStart off by asking the children if they have done any baking athome with their parents. Specifically:• Have they helped their parents or watched them make a cakefrom scratch?• What do they remember about the amount of ingredients in therecipe and how it was baked?• What ingredients do they recall were needed to bake the cake?• If they haven’t participated in cake baking at home, what do theythink the ingredients are that make up a cake?6 <strong>EDC</strong>’s Center for Science Education
MAKING UP YOUR OWN RECIPEEXPLORATION 1Make the following list of ingredients on a sheet of chart paperor white board 2 :• Flour• Sugar• Baking powder• Milk• Cooking oil• Eggs• FlavoringIf they mention other ingredients, such as butter or baking soda,include these on the list. Circle those that you will make available tothem during this exploration.Tell them that they will have the chance to make up and baketheir own cake recipes. First, they need to think about the amount ofeach ingredient to use. Explain to children that to conserve materialsand to help make comparisons among the recipes, each team will belimited to 15 spoonfuls of flour. (Teams can use fewer than 15spoonfuls if they prefer, but no more than 15.) They can decide theirown amounts of the other ingredients, but they must measureeverything out in spoonfuls. Refer to the Discovery Question on theExplorer’s Sheet. 3To help them think about relative proportions, have a generaldiscussion about the relative number of spoonfuls of each ingredient.• What do they think should be the amount of wet ingredientscompared with dry ingredients?• Do they need lots of baking powder?• Show them the size of the bottle of vanilla extract. Does this sizesuggest that they use many spoonfuls?Then assign members to each team and review the roles they canhave. Have them talk among themselves first, deciding whatingredients they will include in their recipe and how many spoonfulsof each they will measure out.Show them how to measure out a level spoonful of material(Figures 2 and 3). Point out that they need to be precise and thatthey should write down the amounts they use on the Our Recipechart, because they may want to change their recipes later and it willbe helpful for them to compare.Figure 2A level spoonful.Figure 3This spoon is filledtoo high with dryingredients.2 There are lots ofdifferent recipes forcakes using differentingredients. Theingredients used herewill make a very basiccake. With the rightkind of proportions, adecent-tasting cakecan be produced.Since there will beopportunities forchildren to do morebaking in laterexplorations, limitthem to the ingredientssuggested in thematerials list.3 Teams are limited to15 spoonfuls of flouralso because childrenhave a tendency touse a lot of thisparticular ingredient.And, the larger amountof cake batter theymake up, the longer itwill take to cook andthe more room it willtake up in the pan.1EXPLORERS’ SHEET1GUIDING THE EXPLORATION1BACKGROUNDExplore It!7
MAKING UP YOUR OWN RECIPEEXPLORATION 11EXPLORERS’ SHEET1GUIDING THE EXPLORATION1BACKGROUNDSome teams may use 4several spoonfuls ofbaking powder. Sincethis is meant to be anexperiment, let themtry it. They will findout later that the cakemay either collapseor be bitter. They canmodify their recipethe next time.Have the materials manager from each team collect a set ofmaterials. One team member can measure out the dry ingredientsinto a clean cup and another team member can measure out the wetingredients into a different clean cup. Both wet and dry ingredientscan be mixed in the pan by a third person.LEADING THE EXPLORATIONPART 1As children are mixing the cake ingredients, go around the roomwith the bottle of vanilla extract and have teams decide how manydrops they want to use. You will need to do this for all explorationswhere children are working on their cake recipes.SAFETY: Make sure children are clear that they are not totaste the raw batter, because raw eggs can cause illness.Some teams may end up with a mixture that is very soupy or verydry. You might want to point this out to them. They can add a littlemore of some ingredient after they have mixed everything together. 4SAFETY: It is very tempting for children to lick the spoonafter mixing the batter. However, it is strongly urged thatyou discourage them from doing this.Some children may not thoroughly mix the wet and dryingredients. Watch the teams closely and remind them to do this.Check to see that each team has recorded their recipe on the OurRecipe chart.After the ingredients have been mixed and the batter has sat for afew minutes, there may be some bubbles emerging from the top ofthe batter. Point this out to the children. Ask them how these bubblesare being made. Did they just come about from the mixing or arethey coming from the ingredients? If from the ingredients, whatingredient or ingredients may be making the bubbles?Once all the teams have mixed their ingredients and their pansare ready, collect them and place them in the oven(s). Check thetemperature and time. The cakes should take around 12–15 minutesto bake, depending on the type of oven you use and the amount ofbatter in the pans.PART 2While waiting for the batter to cook, children can carry out a testrelated to the baking of the cakes. This will help them focus onsome of the science of cake baking. If their ingredient cups areempty, have the materials manager come up to central supply to geta little more (a couple of spoonfuls should be more than enough forthis part of the exploration).8 <strong>EDC</strong>’s Center for Science Education
MAKING UP YOUR OWN RECIPEEXPLORATION 1Recall to the children that you pointed out that some bubbleswere in the batter.• Can they think of a way of testing the ingredients to determinewhich ones may be producing the bubbles? (You can help themby pointing out that they need to mix a wet ingredient with adry ingredient.)• Which combination would they try?• How would they know if they have tried all possible combinations?From here you can go two routes.1. The children can set up their own tests and eventually report theresults. However, if they do their own, they may not end uptesting all possible combinations.2. Show them the Mixing Wet and Dry Ingredients chart on theExplorers’ Sheet and explain the instructions that follow:a. Give each team a sheet of aluminum foil about 12 inches long.b. Have children use a ruler and a pencil to gently make a gridoutline with labels like the one shown on the Mixing Wet andDry Ingredients chart.c. They should first put down a little of each dry ingredientinside the squares of the grid according to the labels. 5d. They should then pour a little of each liquid listed on the leftof the chart/grid onto the dry ingredients within the squares.You may need to explain how the different ingredientsintersect on the grid and how that will tell them what wetingredient goes with which dry ingredient.e. Have them look closely to see which dry ingredients fizzedwith a liquid. Make sure they record their results on theMixing Wet and Dry Ingredients chart.RETURN TO PART 1One way of testing a cake to see if it is done is to stick atoothpick in the middle. If it comes out dry, the cake is done.You should also press the middle lightly to see how soft it is.Let the children taste their cakes. Also, give them sometime to sample other teams’ cakes.Save the materials cups that each team used, but discard theingredients and wash them. You will refill the cups in the nextexploration. 65 In this activity, thechildren do not need touse a lot of materials.To conserve thematerials, tell them touse half a spoonful orless of each of theingredients.6 You will need to planan orderly way ofcleaning up thematerials andworkstations. Somechildren like theresponsibility ofcollecting the materialsto return to a centralpoint. At the end ofeach activity, you canappoint a few childrento do this.1EXPLORERS’ SHEET1GUIDING THE EXPLORATION1BACKGROUNDExplore It!9
MAKING UP YOUR OWN RECIPEEXPLORATION 11EXPLORERS’ SHEET1GUIDING THE EXPLORATION1BACKGROUNDWhen carrying out 7discussions, it ishelpful to havechildren first put awaythe materials or moveto an area wherethey do not haveaccess to materials.This will allow adiscussion to occurwithout the distractionof children playingaround with materialswhile others talk.LEADING THE DISCUSSION 7PART 1One way of fostering a lively comparison of recipes is to haveeach team put their recipe and the results of their “taste test” on alarge sheet of paper and tape the paper on a wall to see. Each teamcan reflect on their own results and make a decision on how theywould change their recipe. Also encourage them to think aboutthe results of other teams.• How did the cake turn out for the team that used the mostspoonfuls of baking powder?• How did the cake turn out for the team that used the leastspoonfuls of baking powder?• If a team’s batter started out thick, how did it look after baking?• If a team’s batter started out thin (liquidy), how did it lookafter baking?Go through the list of ingredients, comparing the relativeamounts of each and the results that were obtained. The purposehere is to get children to reconsider their recipe in light of their ownresults and others’.Once children have completed their first recipe and tasted theirsand the other teams’ cakes, settle them down away from the materialsto discuss what they just experienced. How would they modify theirown recipes? They should consider the taste and ingredients of theother cakes in the room. Which cake tasted the best and whatamounts did that team use for their ingredients? They can learn fromeach others’ recipes. Tell them to think about how they would changetheir recipes, as they will have another chance to bake a cake.PART 2After all the teams have completed the testing, move them awayfrom the materials. Create a large version of the Mixing Wet and DryIngredients chart on chart paper. While each team’s reporter givesthe results of their test, record these results on the large chart infront of the whole group. Some of the results should be as follows:• Nothing fizzed with cooking oil.• Flour and sugar did not fizz with milk.• Baking powder fizzed with milk.• The results with eggs were uncertain.As they saw, baking powder fizzed with milk. Ask them how thismight be important for the cakes they are baking. What wouldhappen if there was no baking powder?10 <strong>EDC</strong>’s Center for Science Education
MAKING UP YOUR OWN RECIPEEXPLORATION 1RATIONALECooking is a very popular activity with children. It offers opportunities to get at some basicscience in a tasty way. The first part of the exploration is more about design than inquiry. Thegoal for the children is to come up with a workable recipe. This necessarily involves some trialand error and some experimenting. With minimal coaching, they can come up with somethingthat may not be a terrific cake but is good enough for eating.While working with the recipes, children have to think about the proportions of eachingredient and, in doing so, are working with practical math. Ratios and proportions arechallenging relationships to understand, so giving children the opportunity to make a recipe willhelp them see how these relationships can be applied to real-life situations.The second part of the exploration, involving testing the different ingredients, is moreclosely related to the scientific process. It is especially so if done in a systematic manner assuggested by the use of a grid (or matrix). The activity opens with the general question, “Whatmakes the cake rise?” As scientific sleuths, children carry out some different tests to find outwhich ingredient in different recipes causes cakes and breads to rise, and how this ingredientbrings about this effect.SCIENCE/TECHNOLOGY BACKGROUNDComing up with a recipe for a cake is in some ways like trying to find the right combinationof ingredients to bring about a chemical change. If the proportions are just right, you will get thechemical product you want (i.e., the cake will be edible).Some of the cakes may collapse. There are a number of reasons why this may happen:• The recipes may have too much liquid.• There may be too much baking powder.• There may not be enough egg.After they have tasted their results, you may want to mention one point. In regular cakerecipes, the amount of baking powder is very small compared with the total amount of wet anddry ingredients. For example, for 2 cups (total) of flour and sugar, it is suggested that only 1 or 2teaspoons of baking powder be used. What does this suggest for the amount of baking powderchildren should use in their own recipes, considering they use no more than 15 spoonfuls offlour? This can be a way of thinking about proportionality.At this point, it may not be readily apparent to the children why baking powder is used. Youcan try to discuss with them what would happen if it was not added to the ingredients. From thetesting in Part 2, they saw that it fizzes with milk, making bubbles. You can point out that thewet flour is now dough—a clump of something that can be stretched. If bubbles form inside thisstretchy mass, they can cause it to grow or expand.OBSERVING PROGRESSThe first exploration of this project provides an important occasion for establishing abenchmark by which you can get a sense of what children are getting out of the series ofexplorations. In most of the activities within this project, children will be measuring ingredientsand carrying out operations that require the development of fine motor skills. During the firstexploration, observe and listen closely to how the children are working with the materials andhow they talk about what they are discovering and observing.1EXPLORERS’ SHEET1GUIDING THE EXPLORATION1BACKGROUNDExplore It!11
MAKING UP YOUR OWN RECIPEEXPLORATION 11EXPLORERS’ SHEET1GUIDING THE EXPLORATIONTake some notes of what is happening in regard to the extent to which children are notcareful in their measuring or if they are having problems manipulating the materials. Also, takenote of some of their comments during the follow-up discussion, which reveal their attemptedexplanations. Then, once you’ve completed the final exploration in this guide, compare thesefinal manipulations and the children’s talk with their original discussions and behaviors. You canalso make children aware of their newly gained skills and understanding as they move throughthe project.More specifically for this exploration:During Manipulation of MaterialsWhen measuring out the ingredients, it is important that the children measure out levelspoonfuls. In this manner, they can make comparisons to other recipes and make changes intheir recipe in a methodical manner. This is important throughout the remaining explorations.When carrying out the experiment using the matrix in Part 2, watch for the way children addthe liquids.• Do they add too much liquid or not enough?• Do they wait for a while to see what may happen?During Discussion• Do children become aware of trying to balance out the amount of wet ingredients to dryingredients?• Do they speculate about the bubbling action and attempt some kind of explanation?1BACKGROUND12 <strong>EDC</strong>’s Center for Science Education