7â Widescreen TFT LCD Color Monitor - DirectedDealers.com
7â Widescreen TFT LCD Color Monitor - DirectedDealers.com
7â Widescreen TFT LCD Color Monitor - DirectedDealers.com
Create successful ePaper yourself
Turn your PDF publications into a flip-book with our unique Google optimized e-Paper software.
O W N E R ’ S G U I D E<br />
INSTALLATION GUIDE<br />
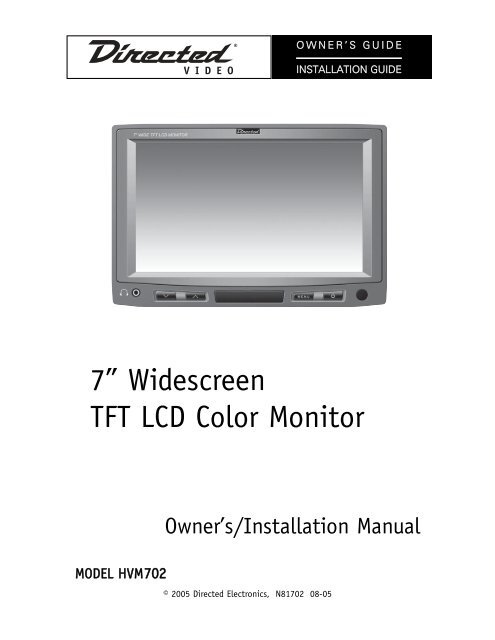
7” <strong>Widescreen</strong><br />
<strong>TFT</strong> <strong>LCD</strong> <strong>Color</strong> <strong>Monitor</strong><br />
Owner’s/Installation Manual<br />
MODEL HVM702<br />
© 2005 Directed Electronics, N81702 08-05
NON-TRANSFERABLE LIMITED ONE YEAR CONSUMER WARRANTY<br />
Directed Electronics, Inc. (Directed) promises to the original purchaser that the new automotive video monitor<br />
and/or source unit(s) (the Product), excluding accessories, that is purchased and installed from a Directed<br />
authorized dealer more than ninety (90) days after the purchase of a new vehicle is warranted for a period of<br />
one (1) year from date of purchase of the Product.<br />
Directed promises to the original purchaser that all video accessories will be free from defects in materials<br />
and workmanship under normal use and condition for a period of ninety (90) days after the date of purchase.<br />
A sales receipt and/or warranty registration card is required to provide proof of date of purchase of the<br />
Product or accessories.<br />
Should the Product prove to be defective during the applicable warranty period, the Product will be repaired<br />
or replaced with a new or <strong>com</strong>parable reconditioned part(s), at Directed's election. To obtain warranty service,<br />
the Product must be returned to a Directed authorized dealer along with proof of purchase and proof of installation<br />
by an Authorized Directed Dealer.<br />
Note: This warranty does not cover labor costs for the removal and/or reinstallation of the Product. IN ORDER<br />
FOR THIS WARRANTY TO BE VALID, YOUR PRODUCT MUST BE SHIPPED WITH PROOF OF PUR-<br />
CHASE AND INSTALLATION BY AN AUTHORIZED DIRECTED DEALER. ALL PRODUCTS RECEIVED BY<br />
DIRECTED FOR WARRANTY REPAIR WITHOUT PROOF OF DIRECTED DEALER INSTALLATION WILL<br />
BE DENIED.<br />
This warranty is non-transferable and does not apply to any Product that has been modified or used in a<br />
manner contrary to its intended purpose, and does not cover damage to the Product caused by installation or<br />
removal of the Product. This warranty is VOID if the product has not been purchased from an authorized<br />
Directed dealer or has been damaged by accident or unreasonable use, negligence, acts of God, neglect,<br />
improper service or other causes not arising out of defect in materials or construction. This warranty does not<br />
cover the elimination of externally generated static or noise, or the correction of antenna problems or weak<br />
television reception, damage to tapes, video games, software, camcorders, discs, speakers, accessories or<br />
vehicle electrical systems, cosmetic damage or damage due to negligence, misuse, abuse, failure to follow<br />
operating instructions, accidental spills or customer applied cleaners, damage due to environmental causes<br />
such as floods, airborne fallout, chemicals, salt, hail, windstorms, lightning or extreme temperatures, damage<br />
due to accidents, road hazards, fire, theft, loss or vandalism, damage due to improper connection to equipment<br />
of another manufacturer, modification of existing equipment, use of a faulty tape cartridge or cleaning of<br />
the VCR head, or Product which has been opened or tampered with for any reason or which has been damaged<br />
due to alteration or service performed by anyone other than Directed Electronics, Inc.<br />
ALL WARRANTIES INCLUDING BUT NOT LIMITED TO EXPRESS WARRANTY, IMPLIED WARRANTY,<br />
WARRANTY OF MERCHANTABILITY, FITNESS FOR PARTICULAR PURPOSE, AND WARRANTY OF<br />
NON-INFRINGEMENT OF INTELLECTUAL PROPERTY ARE EXPRESSLY EXCLUDED TO THE MAXIMUM<br />
EXTENT ALLOWED BY LAW, AND DIRECTED NEITHER ASSUMES NOR AUTHORIZES ANY PERSON TO<br />
ASSUME FOR IT ANY LIABILITY IN CONNECTION WITH THE SALE OF THE PRODUCT. DIRECTED HAS<br />
ABSOLUTELY NO LIABILITY FOR ANY AND ALL ACTS OF THIRD PARTIES INCLUDING ITS LICENSED<br />
DEALERS OR INSTALLERS. IN NO EVENT WILL DIRECTED ELECTRONICS, INC. BE LIABLE FOR ANY<br />
INCIDENTAL, SPECIAL OR CONSEQUENTIAL DAMAGES (INCLUDING LOSS OF PROFITS), BY PUR-<br />
CHASING THIS PRODUCT, THE CONSUMER AGREES AND CONSENTS THAT ALL DISPUTES<br />
BETWEEN THE CONSUMER AND DIRECTED SHALL BE RESOLVED IN ACCORDANCE WITH CALIFOR-<br />
NIA LAWS IN SAN DIEGO COUNTY, CALIFORNIA.<br />
Some states do not allow limitation on how long an implied warranty lasts. In such states, the limitations or<br />
exclusions of this Limited Warranty may not apply. Some states do not allow the exclusion or limitation of incidental<br />
or consequential damages. In such states, the exclusion or limitation of this Limited Warranty may not<br />
apply to you. This Limited Warranty gives you specific legal rights, and you may have other rights which vary<br />
from state to state.<br />
920-0001 Directed Video, 1 year Warranty Rev 11-04 Directed Video 1 year RSE warranty 11-17-04.doc<br />
2 © 2005 Directed Electronics—all rights reserved
Table of Contents<br />
Non-Transferable Limited One Year Consumer Warranty . . . . . . . . . . . . . . . . . .2<br />
Important Notes . . . . . . . . . . . . . . . . . . . . . . . . . . . . . . . . . . . . . . . . . . . .4<br />
Introduction . . . . . . . . . . . . . . . . . . . . . . . . . . . . . . . . . . . . . . . . . . . . . . .5<br />
Features . . . . . . . . . . . . . . . . . . . . . . . . . . . . . . . . . . . . . . . . . . . . . . . . . .5<br />
What is Included . . . . . . . . . . . . . . . . . . . . . . . . . . . . . . . . . . . . . . . . . . . .6<br />
System Description . . . . . . . . . . . . . . . . . . . . . . . . . . . . . . . . . . . . . . . . . .6<br />
Battery Replacement . . . . . . . . . . . . . . . . . . . . . . . . . . . . . . . . . . . . . . . . .7<br />
Operation . . . . . . . . . . . . . . . . . . . . . . . . . . . . . . . . . . . . . . . . . . . . . . . . .8<br />
Power On/Off ........................................................................................8<br />
Mute....................................................................................................8<br />
Menu (Adjustments)...............................................................................8<br />
Headrest Housing/Bezel Installation . . . . . . . . . . . . . . . . . . . . . . . . . . . . . . .9<br />
Headrest Installation . . . . . . . . . . . . . . . . . . . . . . . . . . . . . . . . . . . . . . . .11<br />
Typical Wiring Diagram . . . . . . . . . . . . . . . . . . . . . . . . . . . . . . . . . . . . . . .12<br />
Multiple A/V Input Selector . . . . . . . . . . . . . . . . . . . . . . . . . . . . . . . . . . . .13<br />
Connecting a monitor to multiple sources................................................13<br />
Troubleshooting . . . . . . . . . . . . . . . . . . . . . . . . . . . . . . . . . . . . . . . . . . . .15<br />
Specifications . . . . . . . . . . . . . . . . . . . . . . . . . . . . . . . . . . . . . . . . . . . . .16<br />
Notes . . . . . . . . . . . . . . . . . . . . . . . . . . . . . . . . . . . . . . . . . . . . . . . . . . .19<br />
© 2005 Directed Electronics—all rights reserved 3
Important Notes<br />
1. Before operating your <strong>LCD</strong> <strong>Monitor</strong> system, please read these instructions carefully.<br />
2. Retain this manual for future reference.<br />
3. Do not remove any WARNING stickers on the unit.<br />
4. Do not use any chemical solvent, cleaning agent or corrosive detergent to clean<br />
away dirt on the surface of the screen. Doing so may cause irreversible damage<br />
to the surface of the <strong>LCD</strong> screen. To clean off dirt or fingerprints, it is re<strong>com</strong>mended<br />
that a soft-damp lens-cleaning cloth be used.<br />
5. Using spare parts from another manufacturer may cause permanent damage to<br />
the unit.<br />
6. Avoid installing the monitor screen in a position that is exposed to direct sunlight<br />
and hot air vents.<br />
7. Install the unit in a dry location, avoid condensation.<br />
8. Ensure that all wiring is properly connected before operating the unit.<br />
9. Should the <strong>LCD</strong> panel break, avoid contact with the broken glass or fluid leaking<br />
out from the enclosure. If you <strong>com</strong>e into contact, flush and clean the affected<br />
areas with plenty of water. Seek medical attention immediately.<br />
10. When operating the monitor, avoid touching or pressing on the <strong>LCD</strong> screen.<br />
Excessive force will damage the <strong>LCD</strong> screen.<br />
11. When installing this unit in a vehicle, ensure that the installation and use of<br />
this unit is in <strong>com</strong>pliance with local vehicle rules and regulations.<br />
12. Before replacing a blown fuse, turn the unit off and disconnect all power. Ensure<br />
the replacement fuse is of the same rating (5A) of the fuse being replaced.<br />
13. If during operation the unit overheats or malfunctions, turn off the power and<br />
contact your dealer. Do NOT disassemble the unit, there are no user serviceable<br />
parts in the unit.<br />
14. Ensure that no foreign objects are in the unit when the <strong>LCD</strong> screen is closed.<br />
15. The battery (CR2025) in the remote control has a useful lifetime of approximately<br />
6-months. To ensure proper and reliable operation, replace the battery<br />
in a timely manner.<br />
16. When the unit is used in conjunction with a radio/TV tuner, reception quality<br />
will vary depending on the geographic location and weather conditions.<br />
17. The rated operating temperature range of the unit is 32º–92º F. Cool or warm<br />
the vehicle to within this temperature range prior to unit operation.<br />
18. The picture viewing quality of this <strong>LCD</strong> is dependent on the installed location.<br />
Adjust the brightness control and/or the angle of the screen to achieve the<br />
optimum visual quality.<br />
4 © 2005 Directed Electronics—all rights reserved
Introduction<br />
Congratulations on your purchase of the world’s finest video entertainment system.<br />
At Directed we are <strong>com</strong>mitted to bringing you the most technologically advanced<br />
products available. We are pleased that you chose a Directed Video product. Through<br />
years of critical testing and hand craftsmanship, we have created a wide range of<br />
video entertainment products for your viewing pleasure.<br />
This system incorporates the use of on screen display menu controls that allows you<br />
to configure the system to suit your own personal preferences. For your listening flexibility,<br />
audio can be heard by optional infrared (wireless) headphones.<br />
To view other great products from Directed Electronics, please visit the Directed<br />
Video page at www.directed.<strong>com</strong>.<br />
Features<br />
• High definition, low reflection <strong>TFT</strong> <strong>LCD</strong> screen – 1440 (W) X 234 (H)<br />
• 16:9 wide screen ratio (full, 4:3, or wide selectable)<br />
• All functions can be operated from the remote control (power, volume,<br />
source select, etc.)<br />
• OSD (On Screen Display) of all functions<br />
• Brightness, color, and tint controls provided<br />
• Invert image control (Up/Down, Left/Right)<br />
• One-touch dimmer control<br />
• Stereo audio output<br />
• Low power consumption (750 mA at 12VDC)<br />
• Input voltage tolerance (9VDC–16VDC)<br />
• External A/V input<br />
• 2-ch IR wireless stereo headphone<br />
• Front headphone stereo output<br />
• PAL/NTSC manual select<br />
© 2005 Directed Electronics—all rights reserved 5
What is Included<br />
• 7” <strong>TFT</strong> <strong>LCD</strong> <strong>Color</strong> <strong>Monitor</strong><br />
• Headrest housing<br />
• Headrest bezel<br />
• Mounting hardware package<br />
• EV sponge<br />
• DIN to RCA cable (for A/V input)<br />
• Remote Control Unit/battery<br />
System Description<br />
MONITOR<br />
REMOTE CONTROL<br />
8 9 10 11<br />
14<br />
12<br />
13<br />
1 2 3 4 5 6 7<br />
MONITOR<br />
1. Headphone jack<br />
2. Volume up/down buttons<br />
3. Wireless headphone IR transmitter<br />
4. Menu—changes the viewing aspect ratio (Full, 4:3, or Wide)<br />
5. Power On/Off button<br />
6. Remote control IR sensor receiver<br />
7. DIN jack for external audio/video input<br />
REMOTE CONTROL<br />
8. POWER On/Off button<br />
9. MENU/UP/DOWN/LEFT/RIGHT—use to adjust selected Menu setting<br />
10. MODE—use to select 4:3 or 16:9 picture display.<br />
6<br />
© 2005 Directed Electronics—all rights reserved
11. SOURCE—select the video source (AV1/AV2).<br />
12. DIM—dims the <strong>LCD</strong> screen<br />
13. MUTE—mutes the audio<br />
14. MENU—displays the menu screen. Each press advances through each of the<br />
menus<br />
Battery Replacement<br />
1. Follow the instructions given in the illustration below to open the battery<br />
holder.<br />
2. Remove the old battery and replace it with a CR2025 or equivalent. The positive<br />
(+) side of the battery must be facing upward in the clip.<br />
3. Push the battery holder into the body of the remote control until the battery<br />
holder is locked.<br />
4. Properly dispose of the old battery.<br />
2<br />
1<br />
© 2005 Directed Electronics—all rights reserved<br />
7
Operation<br />
POWER ON/OFF<br />
1. Press the POWER button on the <strong>LCD</strong> screen, or press the POWER button on the<br />
remote control to turn the monitor on/off.<br />
2. The Directed Electronics logo will display for 2-seconds.<br />
MUTE<br />
Press the MENU button on the <strong>LCD</strong> monitor and hold it for 2-seconds to mute the<br />
audio, press again and hold it for 2-seconds to restore the audio.<br />
Also you can use the MUTE button on the remote. Press to mute the audio, press<br />
again to restore the audio<br />
NOTE: The power on/off button on the monitor does not mute the audio when there<br />
is an A/V input selector (VS102), in which case the button selects the A/V input.<br />
Press the SEL button on the remote control to the mute the audio, press again to<br />
restore audio.<br />
NOTE: The MENU button on the monitor does not mute the audio when there is an<br />
A/V input selector, in which case the MENU button selects the A/V input.<br />
MENU (ADJUSTMENTS)<br />
1. Press the MENU button on the remote to display the following:<br />
MENU<br />
Bright 31<br />
Contrast 31<br />
<strong>Color</strong> 31<br />
Tint 31<br />
Screen 16:9<br />
Bass 0<br />
Treble 0<br />
IR<br />
ch1<br />
8<br />
© 2005 Directed Electronics—all rights reserved
2. Use the / buttons on the remote to highlight the desired setting.<br />
3. Use the / buttons to change the setting.<br />
4. If no entry or action is taken within approximately 8-seconds the Menu will<br />
disappear and any changes are saved. Pressing the MENU button will also exit<br />
the adjustments screen.<br />
IR: A-CH B-CH<br />
This setting allows the use of 2 headphones on different frequencies. If two video<br />
units are installed and each unit is playing a different video, using two headphones<br />
set at the same frequency may result in interference of the audio signal between<br />
the two headphones. Ensure that the headphones being used are capable of receiving<br />
different frequencies, and are capable of 2-channel reception.<br />
Headrest Housing/Bezel Installation<br />
1. Remove the cover from the headrest.<br />
2. Using the headrest housing as a template, position<br />
the housing over the backside of the headrest<br />
and mark the foam with a felt tip pen. Cut the<br />
marked portion of foam and pull out the cut portion.<br />
3. Insert the headrest housing into the headrest<br />
and secure the the headrest. Usually wire ties<br />
attached to the headrest posts is sufficient.<br />
NOTE: Ensure that the UP arrow on the headrest housing<br />
is pointing up.<br />
© 2005 Directed Electronics—all rights reserved<br />
9
4. Replace the cover over the headrest. Mark 1-<br />
1/2” from the inside of the headrest housing and<br />
cut the material away.<br />
5. Optional Step: Glue the material to the inside of<br />
the headrest housing. Take care not to use excessive<br />
glue so that the headrest bezel is not glued to<br />
the headrest housing.<br />
NOTE: Glue is not required if the material of the headrest<br />
covering is of sufficient thickness to be tensioned by the<br />
headrest bezel.<br />
6. Insert the headrest bezel into the headrest<br />
housing and secure the assembly using the provided<br />
hardware.<br />
NOTE: Ensure that the UP arrow on the headrest bezel is<br />
pointing up.<br />
10<br />
© 2005 Directed Electronics—all rights reserved
Headrest Installation<br />
1. Unplug the DIN cable from the monitor.<br />
8-pin main<br />
DIN cable<br />
5-pin adapter<br />
cable<br />
2. Connect the <strong>LCD</strong> screen’s 8-pin DIN plug into<br />
the 8-pin DIN plug of the headrest.<br />
NOTE: When assembling the cable, match the arrows at<br />
each end of the connector.<br />
NOTE: Feed and orient the connector assembly behind<br />
the shroud mount in the lower right hand corner. You<br />
may have to feed some of the DIN cable up into the<br />
headrest to ac<strong>com</strong>plish this positioning.<br />
3. Position the monitor over the mounting shroud<br />
and apply even pressure to each corner of the monitor<br />
until the internal clips lock the monitor in<br />
place.<br />
NOTE: Do not press on the <strong>LCD</strong> screen as this will damage<br />
the screen.<br />
4. Tape the end of the DIN plug to prevent damage<br />
to the pins. Then feed this cable from the hollow<br />
post of the headrest down through the seat<br />
back and connect it to the cable from the DVD player.<br />
NOTE: Ensure the cable does not entangle or interfere<br />
with the seat positioning/adjusting mechanism.<br />
© 2005 Directed Electronics—all rights reserved<br />
11
5. To remove the monitor from the mounting<br />
shroud for service or repair, insert and slide a plastic<br />
card at the edge of the monitor. This will remove<br />
the clip engagement of the monitor. Slightly lift<br />
this side of the monitor out, then repeat this procedure<br />
on the other side of the monitor.<br />
Typical Wiring Diagram<br />
12<br />
© 2005 Directed Electronics—all rights reserved
Multiple A/V Input Selector<br />
Refer to diagram on the next page for the discussion that follows:<br />
CONNECTING A MONITOR TO MULTIPLE SOURCES<br />
When the monitor(s) power is turned on the input source will appear in the upper<br />
right hand corner (AV1, AV2, etc.). Press the SOURCE button on the remote to<br />
switch between the available sources for that monitor.<br />
NOTE: If PARKING is displayed on the screen, it means that this monitor(s) will not<br />
display video until the parking brake is set (vehicle parked).<br />
NOTE: You cannot change sources on video output 3 using the source selector, Only<br />
the remote will switch #3 output between the 3 video inputs.<br />
For operating convienence, when the system is connected to several other devices<br />
which have their own remotes, you can use those remotes through the HVM702 to<br />
operate the other devices. This is done by connecting the Remote Eye IR interface<br />
cable from the other devices to the R(emote) Sensor Input at the VS102 video<br />
selector.<br />
© 2005 Directed Electronics—all rights reserved<br />
13
VS102<br />
14<br />
© 2005 Directed Electronics—all rights reserved
Troubleshooting<br />
Use the following chart to assist in troubleshooting the system.<br />
PROBLEM<br />
SOLUTION<br />
Power will not turn on<br />
No picture or sound<br />
Have picture, but no sound<br />
Remote control does not work<br />
Intermittent audio<br />
Check connections to the power<br />
supply and other devices.<br />
Check connections of external<br />
device.<br />
Check if the volume is set to low. If<br />
in A/V mode, check audio connections.<br />
Avoid using the product under<br />
strong & direct sunlight. Replace<br />
the battery in the remote control.<br />
Power supply voltage is too low.<br />
TV picture appear to shakes while<br />
driving<br />
Bad reception. Check antenna and<br />
try reception in a better area.<br />
No audio from headphone<br />
Ensure the Power is switched on at<br />
the headphone. Replace the<br />
batteries in the headphone. Check<br />
to ensure the frequency of the<br />
headphone is the same as set up in<br />
the monitor. Check the volume<br />
level setting on the headphone.<br />
© 2005 Directed Electronics—all rights reserved<br />
15
Specifications<br />
Power<br />
Power consumption<br />
12VDC (9–16VDC)<br />
750mA Maximum @ 12VDC<br />
Power consumption (stand-by) 50mA<br />
Video type<br />
Video input level<br />
IR frequency (left/right)<br />
IR range<br />
Headphone stereo output<br />
Actual screen size<br />
Dimensions<br />
Weight<br />
Remote control battery<br />
PAL/NTSC<br />
1Vp-p, 75 ohm (<strong>com</strong>posite)<br />
A-ch 2.3 MHz/2.8MHz<br />
B-ch 3.2 MHz/3.8MHz<br />
1m ±30º<br />
1m ±15º<br />
0.5 watts - 16 ohms/channel<br />
155 (W) X 880 (H) mm<br />
189.4 (W) X 126.5 (H) X 35 (D) mm<br />
536 ±3 grams<br />
lithium battery CR2025, 3V<br />
NOTE: Specifications are subject to change without notice.<br />
16<br />
© 2005 Directed Electronics—all rights reserved
© 2005 Directed Electronics—all rights reserved<br />
17
18 © 2005 Directed Electronics—all rights reserved
Notes<br />
______________________________<br />
______________________________<br />
______________________________<br />
______________________________<br />
______________________________<br />
______________________________<br />
______________________________<br />
______________________________<br />
______________________________<br />
______________________________<br />
______________________________<br />
______________________________<br />
______________________________<br />
______________________________<br />
______________________________<br />
______________________________<br />
______________________________<br />
______________________________<br />
______________________________<br />
© 2005 Directed Electronics—all rights reserved 19
The <strong>com</strong>pany behind this system is Directed Electronics.<br />
Since its inception, Directed has had one purpose, to provide consumers with the finest vehicle security, car stereo<br />
products, rear seat entertainment, and accessories available. The recipient of more than 20 patents in the field of<br />
advanced electronic technology, Directed is ISO 9001 registered.<br />
Quality Directed Electronics products are sold and serviced throughout North America and around the world.<br />
Call (800) 274-0200 for more information about our products and services.<br />
Directed ® is <strong>com</strong>mitted to delivering world-class quality products<br />
and services that excite and delight our customers.<br />
Directed Electronics<br />
Vista, CA 92081<br />
www.directed.<strong>com</strong><br />
© 2005 Directed Electronics—All rights reserved<br />
N81702 08-05


