4156 - Dynojet
4156 - Dynojet
4156 - Dynojet

Create successful ePaper yourself
Turn your PDF publications into a flip-book with our unique Google optimized e-Paper software.
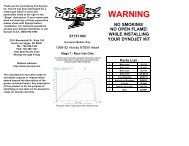
STAGE ONE INSTRUCTIONS<br />
1. Remove the vacuum slide from the carbs. Remove the<br />
stock needles & spacers, noting the order of assembly. Drill<br />
slides with the DD #29 drill bit provided.<br />
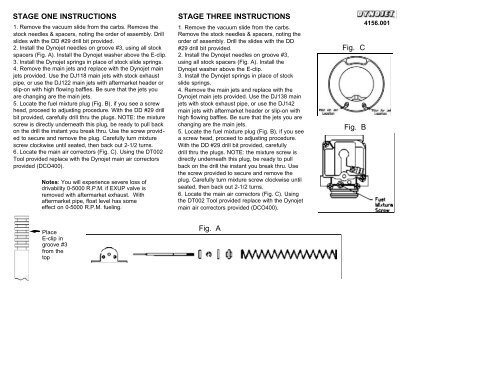
2. Install the <strong>Dynojet</strong> needles on groove #3, using all stock<br />
spacers (Fig. A). Install the <strong>Dynojet</strong> washer above the E-clip.<br />
3. Install the <strong>Dynojet</strong> springs in place of stock slide springs.<br />
4. Remove the main jets and replace with the <strong>Dynojet</strong> main<br />
jets provided. Use the DJ118 main jets with stock exhaust<br />
pipe, or use the DJ122 main jets with aftermarket header or<br />
slip-on with high flowing baffles. Be sure that the jets you<br />
are changing are the main jets.<br />
5. Locate the fuel mixture plug (Fig. B), if you see a screw<br />
head, proceed to adjusting procedure. With the DD #29 drill<br />
bit provided, carefully drill thru the plugs. NOTE: the mixture<br />
screw is directly underneath this plug, be ready to pull back<br />
on the drill the instant you break thru. Use the screw provided<br />
to secure and remove the plug. Carefully turn mixture<br />
screw clockwise until seated, then back out 2-1/2 turns.<br />
6. Locate the main air correctors (Fig. C). Using the DT002<br />
Tool provided replace with the <strong>Dynojet</strong> main air correctors<br />
provided (DCO400).<br />
Notes: You will experience severe loss of<br />
drivability 0-5000 R.P.M. if EXUP valve is<br />
removed with aftermarket exhaust. With<br />
aftermarket pipe, float level has some<br />
effect on 0-5000 R.P.M. fueling.<br />
STAGE THREE INSTRUCTIONS<br />
1. Remove the vacuum slide from the carbs.<br />
Remove the stock needles & spacers, noting the<br />
order of assembly. Drill the slides with the DD<br />
#29 drill bit provided.<br />
2. Install the <strong>Dynojet</strong> needles on groove #3,<br />
using all stock spacers (Fig. A). Install the<br />
<strong>Dynojet</strong> washer above the E-clip.<br />
3. Install the <strong>Dynojet</strong> springs in place of stock<br />
slide springs.<br />
4. Remove the main jets and replace with the<br />
<strong>Dynojet</strong> main jets provided. Use the DJ138 main<br />
jets with stock exhaust pipe, or use the DJ142<br />
main jets with aftermarket header or slip-on with<br />
high flowing baffles. Be sure that the jets you are<br />
changing are the main jets.<br />
5. Locate the fuel mixture plug (Fig. B), if you see<br />
a screw head, proceed to adjusting procedure.<br />
With the DD #29 drill bit provided, carefully<br />
drill thru the plugs. NOTE: the mixture screw is<br />
directly underneath this plug, be ready to pull<br />
back on the drill the instant you break thru. Use<br />
the screw provided to secure and remove the<br />
plug. Carefully turn mixture screw clockwise until<br />
seated, then back out 2-1/2 turns.<br />
6. Locate the main air correctors (Fig. C). Using<br />
the DT002 Tool provided replace with the <strong>Dynojet</strong><br />
main air correctors provided (DCO400).<br />
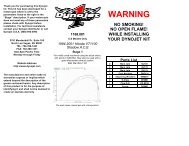
Fig. C<br />
Fig. B<br />
<strong>4156</strong>.001<br />
Place<br />
E-clip in<br />
groove #3<br />
from the<br />
top<br />
Fig. A