4156 - Dynojet
4156 - Dynojet
4156 - Dynojet

You also want an ePaper? Increase the reach of your titles
YUMPU automatically turns print PDFs into web optimized ePapers that Google loves.
Thank you for purchasing this <strong>Dynojet</strong><br />
kit. This kit has been developed for a<br />
motorcycle which is set to the<br />
parameters listed at the right in the<br />
“Stage” description. If your motorcycle<br />
does not meet any of these parameters<br />
please check with <strong>Dynojet</strong> before<br />
installation. For technical assistance<br />
contact your <strong>Dynojet</strong> distributor or call<br />
<strong>Dynojet</strong> U.S.A. (800)-992-4993<br />
2191 Mendenhall Dr. Suite 105<br />
North Las Vegas, NV 89031<br />
TEL: 702-399-1423<br />
FAX: 702-399-1431<br />
8am-5pm Pacific Time<br />
Monday through Friday<br />
Website Address<br />
http://www.dynojet.com<br />
The manufacturer and seller make no<br />
warranties express or implied which<br />
extend beyond the description of the<br />
goods contained herein. Any description<br />
of this product is for the purpose of<br />
identifying it and shall not be deemed to<br />
create an express warranty.<br />
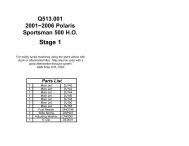
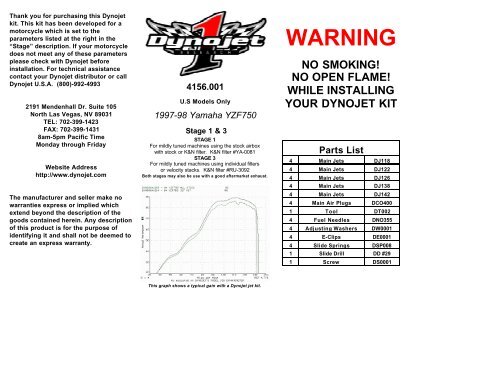
<strong>4156</strong>.001<br />
U.S Models Only<br />
1997-98 Yamaha YZF750<br />
Stage 1 & 3<br />
STAGE 1<br />
For mildly tuned machines using the stock airbox<br />
with stock or K&N filter. K&N filter #YA-0081<br />
STAGE 3<br />
For mildly tuned machines using individual filters<br />
or velocity stacks. K&N filter #RU-3092<br />
Both stages may also be use with a good aftermarket exhaust.<br />
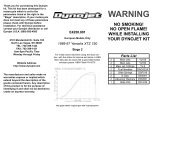
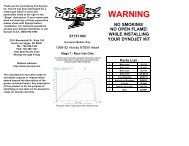
WARNING<br />
NO SMOKING!<br />
NO OPEN FLAME!<br />
WHILE INSTALLING<br />
YOUR DYNOJET KIT<br />
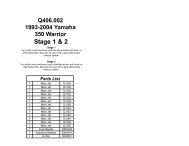
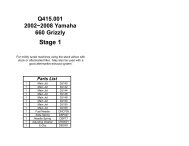
Parts List<br />
4 Main Jets DJ118<br />
4 Main Jets DJ122<br />
4 Main Jets DJ126<br />
4 Main Jets DJ138<br />
4 Main Jets DJ142<br />
4 Main Air Plugs DCO400<br />
1 Tool DT002<br />
4 Fuel Needles DNO355<br />
4 Adjusting Washers DW0001<br />
4 E-Clips DE0001<br />
4 Slide Springs DSP008<br />
1 Slide Drill DD #29<br />
1 Screw DS0001<br />
This graph shows a typical gain with a <strong>Dynojet</strong> jet kit.
STAGE ONE INSTRUCTIONS<br />
1. Remove the vacuum slide from the carbs. Remove the<br />
stock needles & spacers, noting the order of assembly. Drill<br />
slides with the DD #29 drill bit provided.<br />
2. Install the <strong>Dynojet</strong> needles on groove #3, using all stock<br />
spacers (Fig. A). Install the <strong>Dynojet</strong> washer above the E-clip.<br />
3. Install the <strong>Dynojet</strong> springs in place of stock slide springs.<br />
4. Remove the main jets and replace with the <strong>Dynojet</strong> main<br />
jets provided. Use the DJ118 main jets with stock exhaust<br />
pipe, or use the DJ122 main jets with aftermarket header or<br />
slip-on with high flowing baffles. Be sure that the jets you<br />
are changing are the main jets.<br />
5. Locate the fuel mixture plug (Fig. B), if you see a screw<br />
head, proceed to adjusting procedure. With the DD #29 drill<br />
bit provided, carefully drill thru the plugs. NOTE: the mixture<br />
screw is directly underneath this plug, be ready to pull back<br />
on the drill the instant you break thru. Use the screw provided<br />
to secure and remove the plug. Carefully turn mixture<br />
screw clockwise until seated, then back out 2-1/2 turns.<br />
6. Locate the main air correctors (Fig. C). Using the DT002<br />
Tool provided replace with the <strong>Dynojet</strong> main air correctors<br />
provided (DCO400).<br />
Notes: You will experience severe loss of<br />
drivability 0-5000 R.P.M. if EXUP valve is<br />
removed with aftermarket exhaust. With<br />
aftermarket pipe, float level has some<br />
effect on 0-5000 R.P.M. fueling.<br />
STAGE THREE INSTRUCTIONS<br />
1. Remove the vacuum slide from the carbs.<br />
Remove the stock needles & spacers, noting the<br />
order of assembly. Drill the slides with the DD<br />
#29 drill bit provided.<br />
2. Install the <strong>Dynojet</strong> needles on groove #3,<br />
using all stock spacers (Fig. A). Install the<br />
<strong>Dynojet</strong> washer above the E-clip.<br />
3. Install the <strong>Dynojet</strong> springs in place of stock<br />
slide springs.<br />
4. Remove the main jets and replace with the<br />
<strong>Dynojet</strong> main jets provided. Use the DJ138 main<br />
jets with stock exhaust pipe, or use the DJ142<br />
main jets with aftermarket header or slip-on with<br />
high flowing baffles. Be sure that the jets you are<br />
changing are the main jets.<br />
5. Locate the fuel mixture plug (Fig. B), if you see<br />
a screw head, proceed to adjusting procedure.<br />
With the DD #29 drill bit provided, carefully<br />
drill thru the plugs. NOTE: the mixture screw is<br />
directly underneath this plug, be ready to pull<br />
back on the drill the instant you break thru. Use<br />
the screw provided to secure and remove the<br />
plug. Carefully turn mixture screw clockwise until<br />
seated, then back out 2-1/2 turns.<br />
6. Locate the main air correctors (Fig. C). Using<br />
the DT002 Tool provided replace with the <strong>Dynojet</strong><br />
main air correctors provided (DCO400).<br />
Fig. C<br />
Fig. B<br />
<strong>4156</strong>.001<br />
Place<br />
E-clip in<br />
groove #3<br />
from the<br />
top<br />
Fig. A