Ricoh GX e3300N - Signwarehouse.com
Ricoh GX e3300N - Signwarehouse.com
Ricoh GX e3300N - Signwarehouse.com

Create successful ePaper yourself
Turn your PDF publications into a flip-book with our unique Google optimized e-Paper software.
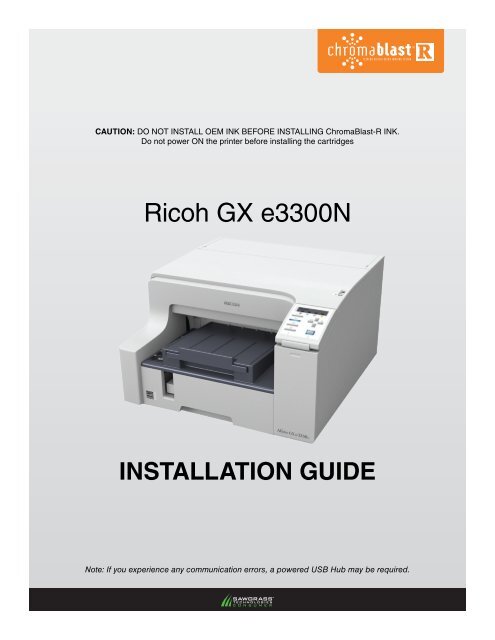
CAUTION: DO NOT INSTALL OEM INK BEFORE INSTALLING ChromaBlast-R INK.<br />
Do not power ON the printer before installing the cartridges<br />
<strong>Ricoh</strong> <strong>GX</strong> <strong>e3300N</strong><br />
Installation Guide<br />
Note: If you experience any <strong>com</strong>munication errors, a powered USB Hub may be required.
SECTIONS:<br />
Printer Setup & OEM Driver Installation (2 pages)<br />
OEM Driver Initialization (2 pages)<br />
ChromaBlast <strong>GX</strong><strong>e3300N</strong> Installation & Registration (7 pages)
<strong>Ricoh</strong> <strong>GX</strong><strong>e3300N</strong><br />
Printer Setup & OEM Driver Installation<br />
1.) Open the printer box, remove the cables and other accessories, and place them aside. Next, remove<br />
the printer from the box, and place it on a sturdy work surface with sufficient operational clearances (the<br />
printer weighs approximately 31 lb). Finally, remove the orange adhesive tape and attach the power cord<br />
and the USB cable. DO NOT POWER ON THE PRINTER AT THIS TIME.<br />
2.) Remove the ChromaBlast-R ink cartridges from their packages. Open the right front cover on the printer,<br />
and insert the cartridges in the order indicated—from left to right (as you face the printer): black (K), cyan<br />
(C), magenta (M) and yellow (Y). Press each cartridge in until it engages securely, and close the cover<br />
once all of the cartridges are in place. Never shake or agitate the cartridges.<br />
3.) Remove the paper tray, pull the cover straight up, and adjust the guides for the paper size you will be<br />
using. Load the paper, put the cover back on, and reinsert the tray into the printer. For larger paper sizes,<br />
refer to the documentation provided with your <strong>Ricoh</strong> printer for extending the paper tray.<br />
PAGE 1 of 2 >>
ChromaBlast-R: <strong>Ricoh</strong> <strong>GX</strong><strong>e3300N</strong><br />
Printer Setup & OEM Driver Installation (cont’d 2:2)<br />
4.) Plug the power cord into a power outlet and plug the USB cable into your <strong>com</strong>puter. DO NOT POWER<br />
ON THE PRINTER AT THIS TIME.<br />
5.) Start your <strong>com</strong>puter, wait until Windows is fully operational, and then insert the <strong>Ricoh</strong> CD in the CD-ROM<br />
drive. The CD contains the printer driver, and the program will start automatically. Follow the on-screen<br />
instructions, beginning with the selection of the language.<br />
6.) Once you have installed the <strong>Ricoh</strong> OEM Driver, restart your <strong>com</strong>puter and proceed to the OEM Driver<br />
Initialization portion of the installation guide.<br />
PAGE 2 of 2 >>
<strong>Ricoh</strong> <strong>GX</strong><strong>e3300N</strong> OEM Driver Initialization<br />
Before you install the ChromaBlast <strong>GX</strong><strong>e3300N</strong> driver, you will need to initialize the <strong>Ricoh</strong> OEM driver.<br />
Note: Your screens and menus may differ depending on the version of software and operating<br />
system you are using. However, the settings will be the same.<br />
1.) Begin by clicking your Start icon (see Figure 1 > 1) and select Printers and Faxes (see Figure 1 > 2).<br />
This will open the Printers and Faxes window (see Figure 2).<br />
1<br />
2<br />
2<br />
1<br />
Figure 1 Figure 2<br />
2.) Right-click on the <strong>Ricoh</strong> <strong>GX</strong> <strong>e3300N</strong> printer icon (see Figure 2 > 1) and select Properties (see Figure 2<br />
> 2). This will open the GelSprinter <strong>GX</strong> <strong>e3300N</strong> Properties window (see Figure 3).<br />
Note: If you are running Widows 7, you will need to select Printer Properties.<br />
PAGE 1 of 2 >>
ChromaBlast-R: <strong>Ricoh</strong> <strong>GX</strong><strong>e3300N</strong> OEM Driver Initialization (cont’d 2:2)<br />
3.) Click Print Test Page (see Figure 3 > 1). A test page will print signifying that <strong>com</strong>munication has been<br />
bridged between your <strong>com</strong>puter and printer.<br />
1<br />
Figure 3<br />
Congratulations! The <strong>Ricoh</strong> <strong>e3300N</strong> OEM Driver has now been initialized and is ready to use in conjunction<br />
with ChromaBlast <strong>GX</strong><strong>e3300N</strong>. Please proceed to the ChromaBlast <strong>GX</strong><strong>e3300N</strong> Installation portion of your<br />
Installation Guide.<br />
PAGE 2 of 2 >>
<strong>Ricoh</strong> <strong>GX</strong><strong>e3300N</strong><br />
ChromaBlast <strong>GX</strong><strong>e3300N</strong> Installation & Registration<br />
ChromaBlast <strong>GX</strong><strong>e3300N</strong> Installation<br />
Note: Your screens and menus may differ depending on the version of software and operating<br />
system you are using. However, the settings will be the same.<br />
1.) Visit the Sawgrass Technologies web site at www.sawgrassink.<strong>com</strong> and navigate to the Download<br />
Chromablast Drivers page (http://www.sawgrassink.<strong>com</strong>/v.php?pg=365). First highlight Technical<br />
Support, next highlight ChromaBlast Tech Support, then highlight ChromaBlast Downloads, and finally<br />
highlight and click on Download ChromaBlast Drivers (see Figure 1). This will open the Download<br />
ChromaBlast Drivers window (see Figure 2).<br />
Figure 1<br />
2.) From the list, click on the name of your printer that is associated with your operating system, and save<br />
the file to your desktop (see Figure 2). You should now see the following Executable icon on your<br />
desktop (see Figure 3).<br />
<strong>GX</strong><strong>e3300N</strong>CB_v2.9.4.exe<br />
Figure 2 Figure 3<br />
PAGE 1 of 7 >>
ChromaBlast-R: <strong>Ricoh</strong> <strong>GX</strong><strong>e3300N</strong><br />
ChromaBlast <strong>GX</strong><strong>e3300N</strong> Installation & Registration (cont’d 2:7)<br />
3.) On your desktop, double-click on the Executable icon to begin the installation (see Figure 3). This<br />
will open the ChromaBlast <strong>GX</strong><strong>e3300N</strong> Setup window (see Figure 4). When you are ready to begin the<br />
installation, click Install (see Figure 4). Check that you are installing ChromaBlast <strong>GX</strong><strong>e3300N</strong> v2.9.4<br />
and click Next (Figure 5). This will open the License Agreement window (see Figure 6).<br />
Figure 4 Figure 5<br />
4.) If you agree with the terms of the License Agreement, click I Agree (see Figure 6). Then, choose the<br />
<strong>com</strong>ponents you wish to install and click Next (see Figure 7). This will open the Choose Install Location<br />
window (see Figure 8).<br />
Figure 6 Figure 7<br />
PAGE 2 of 7 >>
ChromaBlast-R: <strong>Ricoh</strong> <strong>GX</strong><strong>e3300N</strong><br />
ChromaBlast <strong>GX</strong><strong>e3300N</strong> Installation & Registration (cont’d 3:7)<br />
5.) Click Install and setup will install ChromaBlast <strong>GX</strong><strong>e3300N</strong> in the specified Destination Folder (see Figure<br />
8). To install in a different folder, click Browse and select another folder. Once you click Install, you will<br />
see the installation progress bar (see Figure 9).<br />
Figure 8 Figure 9<br />
6.) While installing, you will see a Hardware Installation window. Click Continue Anyway to ignore this<br />
warning and continue with the installation (see Figure 10). As installation nears <strong>com</strong>pletion, a new<br />
window will prompt you to register your product (see Figure 11). DO NOT SKIP THIS STEP, registration<br />
is required to use the software. Click Yes to continue (see Figure 11).<br />
Figure 10 Figure 11<br />
PAGE 3 of 7 >>
ChromaBlast-R: <strong>Ricoh</strong> <strong>GX</strong><strong>e3300N</strong><br />
ChromaBlast <strong>GX</strong><strong>e3300N</strong> Installation & Registration (cont’d 4:7)<br />
7.) You will use your Product ID to register your product. A Registration Code can be obtained in any of<br />
the following ways:<br />
a. On-line: Receive your Registration Code via E-mail.<br />
b. Phone: Contact Sawgrass Technologies, Inc directly. (888) 253-1679<br />
c. Fax: Send in a form and receive a phone call with your Code. (843) 849-3847<br />
Note: You must have a separate Registration Code for every machine on which the ChromaBlast<br />
<strong>GX</strong><strong>e3300N</strong> is installed.<br />
8.) The following instructions will show how to register On-line. Start by selecting Click Here to Obtain<br />
Registration Code (see Figure 12). The Product Registration Web Page will appear (see Figure 13).<br />
Complete the requested information on the form and click Submit (see Figure 13).<br />
Figure 12 Figure 13<br />
PAGE 4 of 7 >>
ChromaBlast-R: <strong>Ricoh</strong> <strong>GX</strong><strong>e3300N</strong><br />
ChromaBlast <strong>GX</strong><strong>e3300N</strong> Installation & Registration (cont’d 5:7)<br />
9.) Type in the Registration Code you receive and click Apply Code (see Figure 14). Next, click OK to<br />
<strong>com</strong>plete the registration process (see Figure 15). During the installation you will be asked to disable the<br />
color management in your graphics software. Click Continue to proceed (see Figure 16).<br />
Figure 15<br />
Figure 14<br />
Figure 16<br />
10.) When installation has <strong>com</strong>pleted, you will receive the following window asking you to reboot your<br />
<strong>com</strong>puter and initialize ChromaBlast <strong>GX</strong><strong>e3300N</strong> upon restart. Click Yes to reboot your <strong>com</strong>puter (see<br />
Figure 17).<br />
Figure 17<br />
PAGE 5 of 7 >>
ChromaBlast-R: <strong>Ricoh</strong> <strong>GX</strong><strong>e3300N</strong><br />
ChromaBlast <strong>GX</strong><strong>e3300N</strong> Installation & Registration (cont’d 6:7)<br />
11.) Once your <strong>com</strong>puter has been restarted, click your Start icon and click Printers and Faxes (see Figure<br />
18). This will open the Printers and Faxes window (see Figure 19).<br />
Figure 18 Figure 19<br />
12.) Right-click on the Chromablast <strong>GX</strong><strong>e3300N</strong> icon and click Printing Preferences (see Figure 19). This<br />
will open a window asking you to select your OEM printer. Click OK to continue (see Figure 20). This will<br />
open the ChromaBlast <strong>GX</strong><strong>e3300N</strong> Printing Preferences window (see Figure 21).<br />
PAGE 6 of 7 >>
ChromaBlast-R: <strong>Ricoh</strong> <strong>GX</strong><strong>e3300N</strong><br />
ChromaBlast <strong>GX</strong><strong>e3300N</strong> Installation & Registration (cont’d 7:7)<br />
13.) Click the drop-down arrow and select the GelSprinter <strong>GX</strong> <strong>e3300N</strong> as the OEM Printer. Once you<br />
have selected your printer, click Apply to finalize the initialization process (see Figure 21).<br />
Congratulations! The ChromaBlast <strong>GX</strong><strong>e3300N</strong> installation and setup is now <strong>com</strong>plete. Click OK to exit<br />
and begin using.<br />
NOTE: For the absolute latest Information and Updates on all Products, Materials, Processes, and/or<br />
Procedures relative to all offerings by or through Sawgrass Technologies, Inc., please refer to<br />
our Website: www.sawgrassink.<strong>com</strong>.<br />
PAGE 7 of 7 >>