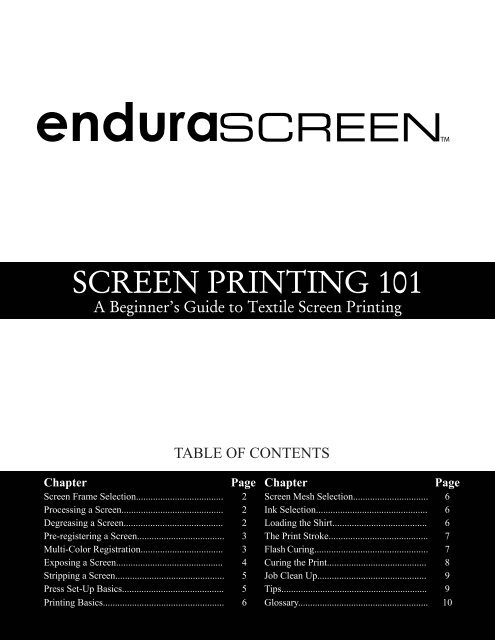
SCREEN PRINTING 101 - Signwarehouse.com
SCREEN PRINTING 101 - Signwarehouse.com
SCREEN PRINTING 101 - Signwarehouse.com

You also want an ePaper? Increase the reach of your titles
YUMPU automatically turns print PDFs into web optimized ePapers that Google loves.
TM<br />
<strong>SCREEN</strong> <strong>PRINTING</strong> <strong>101</strong><br />
A Beginner’s Guide to Textile Screen Printing<br />
TABLE OF CONTENTS<br />
Chapter Page Chapter Page<br />
Screen Frame Selection.................................... 2 Screen Mesh Selection............................... 6<br />
Processing a Screen.......................................... 2 Ink Selection.............................................. 6<br />
Degreasing a Screen......................................... 2 Loading the Shirt....................................... 6<br />
Pre-registering a Screen.................................... 3 The Print Stroke......................................... 7<br />
Multi-Color Registration.................................. 3 Flash Curing............................................... 7<br />
Exposing a Screen............................................ 4 Curing the Print......................................... 8<br />
Stripping a Screen............................................. 5 Job Clean Up............................................. 9<br />
Press Set-Up Basics.......................................... 5 Tips............................................................ 9<br />
Printing Basics.................................................. 6 Glossary...................................................... 10
This booklet is a step by step reference guide to the<br />
basics of screen-printing. It assists in the selection<br />
of tools and materials and briefly describes the<br />
proper methods for their use. Although it will not<br />
provide every detail, it provides the basic information<br />
necessary for any beginner to get a successful<br />
start in the basics of screen printing t-shirts.<br />
Screen Frame Selection<br />
Screen print supply <strong>com</strong>panies distribute them all<br />
over the country. A standard size is 20” x 24” OD<br />
(outside dimension). There are three types to<br />
choose from.<br />
1. Standard wood frame<br />
The plus — they are inexpensive and<br />
today’s wooden frames hold tension reasonably<br />
well.<br />
The minus — they are not forever, do not<br />
clean up well, get heavier with age and have<br />
a tendency to warp. They also must be restretched<br />
on a stretching machine. To do<br />
this your self would cost about $2000-<br />
$3000 dollars. Most shops send their<br />
frames to screen-print supply <strong>com</strong>panies to<br />
get them re-stretched. You can expect to<br />
get approximately twenty jobs out of the<br />
fabric before they need re-stretching<br />
2. Rigid aluminum frame<br />
The plus - they are forever, stay flat and<br />
clean up well.<br />
The minus - they are not re-tensionable and<br />
must be re-stretched on a stretching machine<br />
just like the wood frame mentioned above.<br />
3. Self-tensioning frame.<br />
The plus – they are forever (with a little<br />
maintenance), they clean up well and you<br />
can re-stretch and re-tension them your self.<br />
The minus – they can be a challenge to learn<br />
to stretch.<br />
Each of the frame choices will provide positive<br />
results. Don’t spend a lot of time worrying<br />
about the choice. You will get an opportunity to<br />
work with all of them eventually.<br />
Re<strong>com</strong>mendation: rigid aluminum. Easy to use,<br />
clean up well and last forever.<br />
Processing a screen.<br />
Also referred to as making a stencil. There are<br />
many manufacturers of the products needed to<br />
process a screen. They all work the same, just<br />
follow the steps listed below for perfect results.<br />
1. Degreasing the screen. A degreaser removes<br />
the grease, oil and dirt from the screen fabric so<br />
that the emulsion adheres well. For <strong>com</strong>plete<br />
product information, follow the guidelines from<br />
the manufacturer.<br />
A. Place your screen into your sink get it wet<br />
B. Using a soft nylon bristle brush, scrub the<br />
mesh on both sides with a degreasing agent.<br />
C. Rinse the screen thoroughly with cool water.<br />
D. Allow the screen to dry. Normally done by<br />
placing them in front of a fan making sure<br />
that no dirt gets blown into the mesh.<br />
2. Coating the screen. This is done with a<br />
product called emulsion. Basically, a modified<br />
Elmer’s glue that is light sensitive. Mix and store<br />
it according to the manufacturer’s directions.<br />
A. Pour the scoop coater full of emulsion.<br />
B. Secure the screen frame in an upright<br />
position, preferably so that you can use two<br />
hands to hold the coater. If not this can be<br />
done, hold the frame with one hand and the<br />
coater with the other.<br />
C. Press the rounded edge of the coater tight<br />
against the bottom of the print side of the<br />
mesh and tilt the coater forward until the flat<br />
left and right edges of the coater touch the<br />
mesh.<br />
D. With some pressure, slowly drag the coater<br />
up the mesh slowly until you reach the last<br />
inch or so at the top.<br />
E. Tilt the coater back, wait for about 5<br />
2
seconds for the extra emulsion to flow back<br />
into the coater and then continue up and out<br />
at the same time to finish this side.<br />
F. Turn the screen frame around to the squeegee<br />
side and repeat the same process from<br />
step B.<br />
to be done in a yellow lit or a dimly lit<br />
room. White light is the vehicle for<br />
exposure of the emulsion, therefore<br />
keep it to a minimum.<br />
3. Pre-registering the screen.<br />
To minimize the press time set up it is re<strong>com</strong>mended<br />
that you pre-register the art to the<br />
screen before you expose it.<br />
When artwork is created, a set of registration<br />
marks, or bulls-eyes, should be included on all<br />
the color separations.<br />
A “master art positive” or MAP is a <strong>com</strong>posite<br />
of all the colors with the registration marks<br />
included. This is a sample.<br />
Tips to consider:<br />
Make sure the screen is thoroughly dry<br />
before you start.<br />
You will achieve a more even coat of<br />
emulsion if you secure the screen so that<br />
you can handle the coater with two<br />
hands.<br />
You are trying to achieve an even coat<br />
so that your emulsion will expose at the<br />
same rate in all areas.<br />
The screen should be laid horizontal,<br />
print side down after coating for drying.<br />
Blowing warm air, not over 110°F, is<br />
re<strong>com</strong>mended for a faster and more<br />
thorough drying of the emulsion.<br />
The process of mixing the emulsion,<br />
coating the screen, drying the screen,<br />
and storing the dry coated screen need<br />
Master Art Positive<br />
3
A. Tape your MAP to your screen registration<br />
viewing table. It should be placed centered<br />
and square in a reverse position so that it<br />
reads backward.<br />
Just place each MAP you want on the screen<br />
onto the viewing area before you start preregistering<br />
the frames. Keep in mind that<br />
printing is easier when you allow for 2 or 3<br />
inches of free mesh area around each job.<br />
5. Exposing the screen.<br />
The key to getting perfectly exposed screens is<br />
establishing the correct time.<br />
B. Place the frame onto your viewing table over<br />
your MAP. By using transparent tape,<br />
attach your first color separation to your<br />
screen taking care to match the registration<br />
marks to each other.<br />
Separation #1 Separation #2<br />
C. The positive should be taped in an upright<br />
but reversed position on the mesh so that the<br />
design reads backward.<br />
D. Leaving your MAP in place repeat this<br />
process with every screen required for the<br />
job.<br />
4. Multiple image pre-registration.<br />
There are times when you would like to expose<br />
more than one job on the same screen. To do<br />
this follow the same steps outlined in step 3.<br />
A. Included with your exposure unit manual is<br />
an exposure step wedge guide. Tape it to<br />
your coated screen and place it into your<br />
exposure unit with the guide facing the light.<br />
B. Start exposing the entire image for five<br />
minutes. This is just a suggested random<br />
starting place. The emulsion manufacturer<br />
will be able to suggest specific times for<br />
each product.<br />
C. Place a light blocker on the glass covering<br />
only two inches of the step wedge guide and<br />
continue your exposure to the light for one<br />
minute. Step the blocker over two inches<br />
every minute until you have covered the<br />
entire image.<br />
D. After you have finished you will have a<br />
screen that has been exposed from 5<br />
minutes to 12 minutes.<br />
E. Remove the step wedge guide and place the<br />
frame into your sink with the print side facing<br />
you.<br />
4
F. Wash out your exposure with cool water.<br />
Start by rinsing the print side and then the<br />
squeegee side. Let the screen soak for a<br />
minute or so and then continue rinsing on the<br />
print side only.<br />
G. Record the time that gives you the best<br />
exposure result. Use that time for that<br />
emulsion and mesh count <strong>com</strong>bination. Be<br />
aware that each mesh count will require a<br />
different exposure time.<br />
What to look for:<br />
If the whole design area washes away<br />
you have underexposed. You need more<br />
time under the light.<br />
If you cannot wash out the entire image<br />
area you have overexposed. You need<br />
less time under the light.<br />
You are looking for the time in between<br />
that washes out the cleanest and is the<br />
least slimly to the touch on the squeegee<br />
side.<br />
H. After you wash out the screen you should<br />
squeegee out the excess water with a<br />
window squeegee and then place the screen<br />
in front of a fan to dry.<br />
I. When the screen is dry place it back in front<br />
of your viewing light. Look for pinholes,<br />
imperfections in the screen, anything that<br />
needs to be blocked out. Use a dab of your<br />
emulsion with a small piece of card or a<br />
paintbrush to fill in the opening. Place the<br />
screen back in front of your exposure light<br />
to expose the touched up area. Your screen<br />
does not need to be placed into the hold<br />
down area for this re-exposure.<br />
6. Stripping a screen.<br />
This is to remove a stencil from a screen to use it<br />
for another job. A screen can be used for<br />
approximately 20 jobs before it needs to be<br />
remeshed.<br />
A. After your screen has been cleaned from its<br />
last job, place it in your sink and rinse with<br />
cool water.<br />
B. Spray with stencil remover and let soak for<br />
a few minutes.<br />
C. Scrub with a nylon brush.<br />
D. Rinse the image off the screen with cool<br />
water.<br />
E. You may need to repeat this procedure for<br />
<strong>com</strong>plete stencil removal.<br />
F. Return to step 1 to use the screen again.<br />
Note: An electric power wash unit with about<br />
1000 psi is helpful for this process.<br />
Press Set-Up Basics<br />
1. Place each screen into a screen holder loosely.<br />
2. Tape up the screens before printing. You can<br />
use masking tape, carton sealing tape or, our<br />
favorite, split tape. Tape the four inside walls of<br />
the frame. Tape all the way up the frame side<br />
with the remaining tape edge onto the screen<br />
mesh. Remember, more tape means less clean<br />
up.<br />
5
3. Tape the MAP to a platen. Make sure that it is<br />
square and centered to the platen.<br />
hand feel. Very good for high detail artwork.<br />
2. Ink selection.<br />
There are many brands of quality plastisol inks<br />
to choose from. It will be difficult to choose a<br />
bad ink product. Some brands may need to be<br />
modified with a product called curable reducer<br />
to achieve the desired printing viscosity. The<br />
modification is usually to thin the ink so that it<br />
flows smoother through the screen. Another<br />
<strong>com</strong>mon ink additive is a bonding agent that is<br />
added to improve adhesion to non-absorbent<br />
fabrics like nylon and polyester. Check with<br />
your ink manufacturer for more details.<br />
4. Bring the first screen down to the platen. Move<br />
it around until the registration marks on the<br />
screen match the marks on the MAP. When it<br />
does tighten the screen clamp knobs to secure<br />
the frame.<br />
5. You may find that the screen moves. At this time<br />
use your micro adjustments to re-align the<br />
screen to its proper position.<br />
6. Repeat this process with each screen required<br />
for the job.<br />
7. Remove your MAP.<br />
8. If you choose to print off contact use your off<br />
contact knob to make that adjustment. Normally<br />
the distance equal to the thickness of a<br />
quarter is a good place to start.<br />
Printing Basics<br />
Most ink manufactures provide inks in three<br />
formulations<br />
A. Multipurpose – normally used right out of<br />
the container. It is terrific for printing on light<br />
colored goods. Especially good on multicolored<br />
“wet on wet” printing jobs.<br />
B. Low Bleed – normally used right out of the<br />
container. These are used on dark colored<br />
shirts to obtain the best ink coverage.<br />
C. Athletic ink - designed to achieve the “bullet<br />
proof” athletic look desired on uniforms.<br />
3. Loading the shirt.<br />
Since the screens will meet the platen in the<br />
same position each time, you need to determine<br />
where to put the shirt.<br />
1. Screen mesh selection.<br />
Use the following guidelines for general purpose<br />
printing jobs.<br />
A. 76 count – Printing bold copy onto dark<br />
colored fabrics. Gives a heavy ink deposit<br />
for high opacity. Very athletic print.<br />
B. 110 count – By far the industries choice as<br />
the “do it all” mesh.<br />
C. 150 count – Printing onto light colored<br />
fabrics with regular detail and medium ink<br />
deposit.<br />
D. 200 count – Printing onto white or light<br />
colored goods with low opacity. Nice soft<br />
6
A. Spray the platen with spray adhesive. This<br />
is an aerosol glue that will hold the shirt to<br />
the platen to keep it from moving between<br />
colors.<br />
B. Determine whether the design goes on the<br />
front or the back of the shirt.<br />
C. Slide the shirt over the platen until the<br />
shoulders of the garment are square with the<br />
front edge of the platen.<br />
D. Holding the shoulders, pull the shirt toward<br />
you until your design will print in the proper<br />
location. For front prints it is usually 3” from<br />
the bottom of the collar and for the back<br />
prints 4” is typical.<br />
E. Smooth all of the wrinkles out of the garment.<br />
4. The print stroke.<br />
A. Place a bead of ink across the back edge of<br />
the design.<br />
B. Select a square edged medium hardness<br />
squeegee (70 durometer).<br />
C. Hold the squeegee firmly with two hands<br />
spreading your fingers evenly across the<br />
handle.<br />
E. Press the squeegee down evenly and pull<br />
forward. A clean print means that there is<br />
no ink residue remaining in the image area of<br />
the screen. You can pull the squeegee as<br />
many times as necessary to achieve this.<br />
F. Lift up the screen with one hand and, with<br />
the other, push the remaining ink across the<br />
image to the rear of the screen. This is<br />
referred to as flooding the screen. The<br />
purpose of flooding the screen is to prime it<br />
and to put the left over ink back into the<br />
proper position for printing the next shirt.<br />
TIPS: By adjusting the angle of the squeegee<br />
you will effect the deposit of the ink. If you<br />
require more ink try a stronger angle, for<br />
less ink a more vertical position will help.<br />
You may find that pushing the squeegee is a<br />
more <strong>com</strong>fortable printing stroke. Keep the<br />
angle of the squeegee the same only flood<br />
toward you and print back. However, once<br />
you choose a stroke style you need keep it<br />
for the entire job to minimize the possibility<br />
of shadowing the print.<br />
Note: Printing the job. Most designs need to be<br />
printed using the following guidelines.<br />
Print light colors first with darker colors<br />
overlapping them.<br />
Print smallest part of the design first.<br />
Print specialty inks, such as metallic and<br />
puff, last.<br />
D. Place the squeegee blade at the rear of the<br />
image with the front edge of the blade at a<br />
slight forward angle to screen. The handle<br />
of the squeegee should be pointing at you<br />
with the blade pointing toward the back of<br />
the screen.<br />
5. Flash curing<br />
This is a major part of the screen printing<br />
process and is done for several reasons.<br />
Pre-shrink the garment before you print<br />
it. This is usually done on nylon, polyester,<br />
or 100% cotton garments where the<br />
registration is tight. Load the garment,<br />
send it under the flash and leave it there<br />
longer than what the actual flash time<br />
would require.<br />
To enhance ink coverage or to prevent<br />
“bleeding” of the shirt color into the ink<br />
7
color. Print the first color onto the<br />
garment and flash it until it is just dry to<br />
the touch. Let the print cool and then<br />
use the same screen to print it again.<br />
To prevent “muddy” prints. This<br />
happens in multicolor printing when one<br />
ink sits directly on top of another. The<br />
ink colors eventually will mix resulting in<br />
a muddy appearance of color. To<br />
prevent this, flash after each color.<br />
To avoid pick-up on the screen when<br />
printing a multi-color job. If you flash<br />
between each color, the print side of the<br />
screen will stay clean and reduce the<br />
possibility of shadowing.<br />
The flash unit should be set on “high” and be<br />
approximately 3” away from the garment. It will<br />
take anywhere from 5 to 20 seconds to flash an<br />
ink. Remember that you are not trying to cure<br />
the ink on the shirt. Over flashing will cause its<br />
own list of problems<br />
6. Curing the print<br />
The basic principle of plastisol ink curing is<br />
obtaining 320°F throughout the entire ink<br />
deposit. The thicker the deposit of ink, the<br />
longer it may take.<br />
A. To get started adjust your belt speed to run<br />
at 60 seconds inside of the oven.<br />
B. Select the air settings and oven rack height.<br />
C. Apply a temperature strip on a T-shirt and<br />
run the shirt through the oven. You are<br />
looking for a temperature of 320°F to<br />
330°F. If the temperature is to low, slow<br />
the belt down. If the temperature is to high,<br />
speed the belt up. Rerun a cool test shirt<br />
until you get the desired result. You may<br />
want to do this test in the middle of your<br />
print run as well.<br />
D. A standard quality check is to stretch your<br />
print left to right after it <strong>com</strong>es through the<br />
oven and cools. If the print does not crack<br />
then your print is most likely cured. If the<br />
print does crack it is under-cured. Slow<br />
down your belt speed and rerun the garments.<br />
An exception to this process would<br />
be if your initial ink deposit were so thin that<br />
there was not enough of an ink film to make<br />
the stretch test possible. Example: black ink<br />
on a white shirt printed through a 150 mesh.<br />
There is a sample log sheet included with all<br />
Brown brand conveyor ovens. It is a good<br />
idea to continue the temperature strip testing<br />
for a good month of jobs. Record on your<br />
log sheet enough different examples so you<br />
can to refer to it before each job. Track the<br />
Dryer Cure Log<br />
Garment Color Ink Color CureTime Air Settings Rack Level<br />
8
garment color, belt speed, heater height and<br />
air settings. Even after you have developed<br />
a solid base of information about the variables<br />
of each job you run you should always<br />
use the crack test just to be safe.<br />
Note: The only way to know if a job is really<br />
cured is to wash a sample garment.<br />
8. After job clean up.<br />
Screen wash is available from your local screen<br />
printing supply <strong>com</strong>pany. Any textile version will<br />
work fine. Follow the manufacturer’s product<br />
specifications but the process is as follows:<br />
A. Leave the screen in the screen clamps.<br />
B. Remove any excess ink from the screen<br />
using a card and place it back into the ink<br />
container.<br />
C. Remove the tape from the screen and<br />
discard.<br />
D. Moisten paper towel with your screen wash<br />
and wipe the screen. Keep washing with<br />
clean moist towels until the screen is clean.<br />
E. Remove from the screen clamps and strip<br />
the image for further frame use.<br />
Different ink deposits and different garment<br />
types will affect your cure rate. Keep a dryer<br />
log.<br />
Use screen opener during print runs if your<br />
screen gets clogged.<br />
Spot cleaning guns (available from your local<br />
screen print supplier) will take cured, unwanted<br />
ink spots out of shirts.<br />
If you plan to use the same screen for printing<br />
both light and dark ink, start with the light color.<br />
It is easier to clean and will be hidden in the<br />
darker color.<br />
Try to overlap your last color in every job, this<br />
makes registration easier.<br />
Tips<br />
Take the time to organize the entire order before<br />
starting.<br />
Think clean.<br />
The first print is always done on sample material.<br />
Imprint placement on the front is usually 3” from<br />
the neck on the front and 4” down on the back.<br />
Load the shirt all the way into the shoulders and<br />
then pull the shoulders back into the proper<br />
position.<br />
Unload the garment by pulling from the shoulders<br />
in an up and out motion.<br />
Use the crack test to make sure the print is<br />
cured.<br />
For placket printing, build up the platen so that<br />
the print area is above the placket height.<br />
Check with you shirt supplier because some<br />
garments are designed to be embroidered, not<br />
printed.<br />
9
Glossary<br />
Bleeding – Underlying color garment blending with an<br />
upper color layer of ink.<br />
Cure -- Plastisol ink is cured when it reaches 320°F and has<br />
be<strong>com</strong>e a solid plastic film.<br />
Cure Rate – The number of pieces that can be cured in a<br />
given period of time.<br />
Curable reducer – Additive designed to reduce the<br />
thickness of plastisol ink.<br />
Degreaser – Product designed to remove dirt, grease and<br />
oil from screen mesh.<br />
Durometer – Squeegee blade hardness. 60° is soft, 70° is<br />
medium and 80° is hard.<br />
Emulsion – Light sensitive product for creating a stencil on<br />
a screen.<br />
Exposure – The process of placing an emulsion coated<br />
screen, with desired artwork, in front of light for a<br />
specified period of time.<br />
Film Positive – An art color separation on acetate or vellum<br />
that is black and very opaque.<br />
Flash curing – Using heat to gel the top of an ink film.<br />
Flood stroke – Pulling ink across the image area of a screen<br />
to prime it for a print stroke.<br />
Free Mesh area – The distance between the edge of two<br />
designs on a screen or from the edge of a design to the<br />
frame.<br />
Master Art Positive – MAP. A <strong>com</strong>posite of the artwork of<br />
a job, including registration marks.<br />
Off contact – The distance between the garment and the<br />
print side of the screen. Often used to affect ink<br />
deposit.<br />
Opacity – Ability of an ink to cover an underlying color of<br />
ink or garment.<br />
Pin-hole – An open area of a stencil that should be sealed<br />
with emulsion. Usually caused by dust or air bubbles.<br />
Plastisol – The predominant textile printing ink. Requires<br />
heat to cure and will not air dry. A liquid plastic that<br />
cures to a flexible film and adheres to textiles.<br />
Placket – The button area of a shirt.<br />
Pre-registration – Placement of art to a screen before<br />
exposure.<br />
Print Side -- The side of the screen that the screen that<br />
touches the shirt.<br />
Registration – Placement of colors together to ensure<br />
design effect.<br />
Registration Mark -- Bulls-eye on each art separation to aid<br />
in press set up.<br />
Scoop Coater – Trough like device used in applying<br />
emulsion to screens.<br />
Screen Frame – Wood or aluminum with mesh stretch<br />
across.<br />
Screen opener – Aerosol product designed to clean<br />
clogged ink in screens during a print run.<br />
Separation – Each color in a design printed on a separate<br />
sheet of vellum or film.<br />
Squeegee Side -- The inside of a screen and where the ink<br />
is placed.<br />
Split Tape – Screen tape that is sticky on one half but not<br />
on the other. The adhesive part adheres to the mesh<br />
and the other side sits against the screen frame wall.<br />
Stencil – Emulsion with a processed image.<br />
Stencil remover – Product designed to remove an unwanted<br />
stencil from a screen frame.<br />
Step wedge guide – Emulsion exposure rate tester.<br />
Stretch test – Stretch a cured, cooled garment across the<br />
grain of the t-shirt. If the ink does not crack then it is<br />
probably cured.<br />
Thermolabel – A pressure sensitive tag that changes color<br />
when exposed to heat. Sold in different heat levels. #5<br />
is used in the t-shirt business.<br />
Viscosity – Thickness of ink.<br />
10