estefold 2200/2100 - es-te.de
estefold 2200/2100 - es-te.de
estefold 2200/2100 - es-te.de

Create successful ePaper yourself
Turn your PDF publications into a flip-book with our unique Google optimized e-Paper software.
ES-TE<br />
Folding Sys<strong>te</strong>ms GmbH<br />
Zita<strong>de</strong>llenweg 34<br />
13599 Berlin<br />
Telefon:<br />
Fax:<br />
eMail:<br />
In<strong>te</strong>rnet:<br />
030 369961-3<br />
030 369961-59<br />
info@<strong>es</strong>-<strong>te</strong>.<strong>de</strong><br />
www.<strong>es</strong>-<strong>te</strong>.com<br />
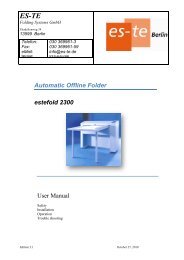
Automatic Fol<strong>de</strong>r<br />
<strong><strong>es</strong><strong>te</strong>fold</strong> <strong>2200</strong>/<strong>2100</strong><br />
Application:<br />
Folding of Drawings/Diagrams<br />
Operating Instructions<br />
Precautions<br />
Installation<br />
Operation<br />
Trouble shooting<br />
Switching Plans
Operating Instructions Automatic Fol<strong>de</strong>r <strong><strong>es</strong><strong>te</strong>fold</strong> <strong>2200</strong> (<strong>2100</strong>)<br />
Con<strong>te</strong>nts<br />
Precautionary/safety measur<strong>es</strong> 3<br />
1. Assembly of the machine 4<br />
2. Installation of feeding table 4<br />
3. Plug in power cord 4<br />
4. Switch on machine 5<br />
5. Select folding program 5<br />
6. What can be fol<strong>de</strong>d? 6<br />
7. Introduce drawing to the fol<strong>de</strong>r 6<br />
8. Introduce for cross folding 6<br />
9. Folding programm<strong>es</strong> 7<br />
10. Amend folding programm<strong>es</strong> 7<br />
11. When you are in trouble… 8<br />
12. Technical data… 9<br />
Spare parts list Annex<br />
Switching plan Annex<br />
Service menu Annex<br />
2 version 19.02.03
Operating Instructions Automatic Fol<strong>de</strong>r <strong><strong>es</strong><strong>te</strong>fold</strong> <strong>2200</strong> (<strong>2100</strong>)<br />
Precautionary/safety measur<strong>es</strong><br />
The supplied power cord must only be used in a safety plug socket.<br />
Care should be taken to avoid the removal of this pro<strong>te</strong>ctive measure by<br />
using ex<strong>te</strong>nsion cabl<strong>es</strong> without pro<strong>te</strong>ctive conductors.<br />
Any in<strong>te</strong>rruptions with the pro<strong>te</strong>ctive conductor (e.g. by loosening the<br />
pro<strong>te</strong>ctive conductor at the point of connection) insi<strong>de</strong> or outsi<strong>de</strong> the<br />
machine can lead to danger, <strong>es</strong>pecially by breakdown.<br />
Any in<strong>te</strong>ntional in<strong>te</strong>rruption with the pro<strong>te</strong>ctive conductor is not<br />
permit<strong>te</strong>d.<br />
Removal of cover bands and casings of the machine will release life or<br />
rotating parts. For this reason the removal of coverings is not permit<strong>te</strong>d.<br />
In case of repair requirements, the r<strong>es</strong>ponsible ES-TE Service Station<br />
should be notified.<br />
In case the machine has to be opened exceptionally, it must be first<br />
separa<strong>te</strong>d from all life/high voltage sourc<strong>es</strong>: Pull out the mains plug.<br />
An expert who is aware of the dangers/risks involved must only carry out<br />
repairs or adjustments of an open machine.<br />
Warning: Do not touch any parts of the open machine since they might<br />
be of very high voltage, this could be extremely dangerous, and at<strong>te</strong>ntion<br />
should be paid to this.<br />
Unauthorized or high-han<strong>de</strong>d changing and remo<strong>de</strong>lling, which in<strong>te</strong>rfere<br />
with the working safety, is not allowed.<br />
Switch off the machine, when operation is no longer possible or<br />
consi<strong>de</strong>red to be unsafe.<br />
The reasons for this could for example be:<br />
Visible damag<strong>es</strong> or faults of the electrical functions,<br />
occasional occurrence of abnormal operational procedur<strong>es</strong>.<br />
The machine should immedia<strong>te</strong>ly be insured against unin<strong>te</strong>n<strong>de</strong>d usage<br />
(pull out the plug, remove the machine, carry with the operating<br />
instructions).<br />
Before the machine starts being opera<strong>te</strong>d again, inspection by<br />
specialists of ES-TE Service Station according to the valid prof<strong>es</strong>sional<br />
co<strong>de</strong> of practice/Standard for machin<strong>es</strong> 89/392 EWG is required.<br />
How to use Operating Instructions effectively<br />
Keep the operating instructions always close to the machine, so that you<br />
can be informed any time about the phas<strong>es</strong>/s<strong>te</strong>ps for operation and the<br />
safety measur<strong>es</strong>.<br />
For orientation purpos<strong>es</strong> there is a table of con<strong>te</strong>nts, marginal not<strong>es</strong> and<br />
an in<strong>de</strong>x inclu<strong>de</strong>d in the operating instructions.<br />
Plug socket with<br />
pro<strong>te</strong>ctive contact<br />
Pull out plug<br />
Repair by expert<br />
Prof<strong>es</strong>sional inspection<br />
3 version 19.02.03
Operating Instructions Automatic Fol<strong>de</strong>r <strong><strong>es</strong><strong>te</strong>fold</strong> <strong>2200</strong> (<strong>2100</strong>)<br />
Putting the Machine into Operation<br />
1. Assembly of the Machine<br />
The room to be used should be dry and dust free. The humidity 65% and<br />
room <strong>te</strong>mperature of 20° C to 22° C.<br />
The machine must stand horizontally and very stable without any shaky<br />
movements.<br />
Take into consi<strong>de</strong>ration when assembling that emergency outlets are not<br />
blocked and that ergonomic work is possible.<br />
Remove all packing ma<strong>te</strong>rials and adh<strong>es</strong>iv<strong>es</strong> from the <strong>de</strong>livered fol<strong>de</strong>r.<br />
For the pro<strong>te</strong>ction of the machine, a sheet of paper has been inser<strong>te</strong>d.<br />
Remove by turning the roller.<br />
Loosen the bolts with which the machine is screwed to the pallet.<br />
First place the longitudinal fol<strong>de</strong>r in such a way that it stands fixed,<br />
stable and horizontally on the floor. Minor imbalanc<strong>es</strong> can be<br />
compensa<strong>te</strong>d by using the balancing feet (1).<br />
Move the collecting tray upwards from the position of transport and<br />
screw tightly with the second fixing bolt (2).<br />
1<br />
2. Installation of feeding table<br />
6<br />
5<br />
Screw the feet below the table pla<strong>te</strong> (3).<br />
Insert the cable from the table into the right machine chamber.<br />
Screw the table to the machine (5).<br />
Plug the cable into the plug <strong>de</strong>vice of the p. c. board (6).<br />
Place the table in horizontal position by using the balancing screws (4).<br />
3. Plug in power cord<br />
The power supply box is positioned at the right bottom si<strong>de</strong> of the<br />
machine. Please use only the <strong>de</strong>livered connecting cable or cabl<strong>es</strong> of<br />
the same safety standard.<br />
The fol<strong>de</strong>r is pre-adjus<strong>te</strong>d to 230 Volts/50 cycl<strong>es</strong>.<br />
Make sure that the mains supply voltage is i<strong>de</strong>ntical with your supply.<br />
3<br />
4<br />
Suitable working room<br />
Machine in horizontal<br />
position<br />
Screw the feeding<br />
table to the machine<br />
Use only approved<br />
connecting cabl<strong>es</strong><br />
4 version 19.02.03
Operating Instructions Automatic Fol<strong>de</strong>r <strong><strong>es</strong><strong>te</strong>fold</strong> <strong>2200</strong> (<strong>2100</strong>)<br />
4. Switch on the machine<br />
The main switch is at the right front si<strong>de</strong> of the machine.<br />
Switch on the button.<br />
The signal lamp “power” above the display glows.<br />
The display shows the software version and the <strong>es</strong>tablishing da<strong>te</strong> for a<br />
short time.<br />
The machine mak<strong>es</strong> a brief self t<strong>es</strong>t and will be ready for operation af<strong>te</strong>r<br />
confirming by a double peep.<br />
The last used programme will be called up.<br />
In case an error is <strong>de</strong><strong>te</strong>c<strong>te</strong>d during the self-t<strong>es</strong>t phase, a m<strong>es</strong>sage will be<br />
shown in the display, e.g. light barrier 1 in<strong>te</strong>rrup<strong>te</strong>d.<br />
Make sure that there is no paper on the machine table or insi<strong>de</strong> the<br />
machine.<br />
Remove the paper and confirm by button �.<br />
5. Select folding programme<br />
There are 8 folding programm<strong>es</strong> available.<br />
On the left si<strong>de</strong> of the display the selec<strong>te</strong>d programme number will<br />
appear.<br />
Below “Panel” the width of the package is shown.<br />
Below “Mar.” the width of the margin edge is shown.<br />
Below “CF” it is shown whether the automatic cross fold is switched on.<br />
In mo<strong>de</strong> “auto” all inser<strong>te</strong>d packag<strong>es</strong> of a width of l<strong>es</strong>s than 215 mm will<br />
be fol<strong>de</strong>d in the height of 297 mm.<br />
Power<br />
select select mod / set<br />
up<br />
down<br />
With the keys �and � you can select a folding programme of your own<br />
choice.<br />
Switch on<br />
the machine<br />
Indication and<br />
operation elements<br />
5 version 19.02.03
Operating Instructions Automatic Fol<strong>de</strong>r <strong><strong>es</strong><strong>te</strong>fold</strong> <strong>2200</strong> (<strong>2100</strong>)<br />
6. What can be fol<strong>de</strong>d?<br />
Longitudinal folding: All drawings with length up to 4 m and width up to<br />
max. 930 mm. The paperweight should be not l<strong>es</strong>s than 60 g/m² and not<br />
more than 110 g/m² (favoured 80 g/m²).<br />
Cross folding: Maximum paper length of 1200 mm.<br />
Film or ma<strong>te</strong>rials with glossy shiny surfac<strong>es</strong> are not suitable.<br />
Some kinds of paper offered on the market are of variable qualiti<strong>es</strong>. This<br />
could cause crumpl<strong>es</strong> or substantial folding toleranc<strong>es</strong>. Th<strong>es</strong>e low-gra<strong>de</strong><br />
papers should be replaced with those of bet<strong>te</strong>r quality.<br />
7. Introduce drawing to fol<strong>de</strong>r<br />
The drawing should always be inser<strong>te</strong>d with the heading (legend)<br />
towards the front.<br />
Lay the drawing compactly on the right si<strong>de</strong> of the table and introduce it<br />
into the machine. The drawing will be drew in and fol<strong>de</strong>d according to<br />
the selec<strong>te</strong>d programme.<br />
The package will be ejec<strong>te</strong>d at the back of the machine.<br />
8. Introduce for cross folding (max. A0)<br />
Introduce the longitudinally fol<strong>de</strong>d package again with the heading<br />
towards the front. Before that, smoothen and flat<strong>te</strong>n the package to<br />
avoid creasing.<br />
Lay the drawing compactly on the right si<strong>de</strong> of the table and introduce it<br />
into the machine. During the inserting proc<strong>es</strong>s make sure that the<br />
drawing cannot come out of the right position. We recommend<br />
supporting the paper slightly with the hand.<br />
The cross folding 297 mm is only active, when CF is in auto position<br />
(see “Select folding programme”).<br />
Important:<br />
A permanent high quality cross fold can hardly be achieved by the roller<br />
folding method. Due to the multiplayer folding package and the different<br />
distribution of the layers, loss<strong>es</strong> in quality can be caused. Ask for our<br />
li<strong>te</strong>rature about cross-fol<strong>de</strong>r.<br />
Longitudinal Folding<br />
Cross Folding<br />
Heading facing<br />
in front<br />
Introduction for<br />
longitudinal fold<br />
Heading facing in front<br />
6 version 19.02.03
Operating Instructions Automatic Fol<strong>de</strong>r <strong><strong>es</strong><strong>te</strong>fold</strong> <strong>2200</strong> (<strong>2100</strong>)<br />
9. Folding programm<strong>es</strong><br />
Prog. 1 Prog. 2 Prog. 3 Prog. 4<br />
20 190 190 198 + HF 210<br />
S07a100<br />
The folding programm<strong>es</strong> 1 – 4 are already provi<strong>de</strong>d as standards.<br />
Usually th<strong>es</strong>e programm<strong>es</strong> should cover your requirements.<br />
10. Amend folding programm<strong>es</strong><br />
In case you should need another package width, you can amend the<br />
programm<strong>es</strong> 5 – 8.<br />
Example:<br />
Program 5 should proc<strong>es</strong>s packag<strong>es</strong> of 185 mm with a margin of 25 mm.<br />
- Select folding programme 5 with button � or �.<br />
- Pr<strong>es</strong>s button � until the indicator below Panel blinks.<br />
- With buttons � or � select 185 mm.<br />
- The cursor mov<strong>es</strong> forward, the indicator below Marg. blinks.<br />
- With buttons � or � select 25 mm.<br />
- Pr<strong>es</strong>s button �.<br />
- The cursor mov<strong>es</strong> forward, the indicator below CF blinks.<br />
- Pr<strong>es</strong>s button �.<br />
Please notice that the adjustable width of the package must be at least<br />
180 mm up to at most 210 mm. The range of adjustment of the margin is<br />
0 – 30 mm. A package of 165/35 is therefore not adjustable.<br />
Introduction for<br />
cross-fold<br />
Standard<br />
folding-programs<br />
Individual<br />
folding programm<strong>es</strong><br />
7 version 19.02.03
Operating Instructions Automatic Fol<strong>de</strong>r <strong><strong>es</strong><strong>te</strong>fold</strong> <strong>2200</strong> (<strong>2100</strong>)<br />
11. When you are in trouble…<br />
Fault Possible cause Possible remedy<br />
Automat do<strong>es</strong> not switch on when Safety switch above the covering is Close covering.<br />
switching I/O.<br />
not on.<br />
Mains fus<strong>es</strong> <strong>de</strong>fect.<br />
Renew the fus<strong>es</strong>.<br />
Micro fus<strong>es</strong> <strong>de</strong>fective.<br />
Renew the fus<strong>es</strong>.<br />
Af<strong>te</strong>r switching on or during<br />
operation the m<strong>es</strong>sage<br />
“top is open”<br />
appears in the display.<br />
Af<strong>te</strong>r switching on or during<br />
operation the m<strong>es</strong>sage<br />
“light barrier # cut” appears in the<br />
display.<br />
The margin do<strong>es</strong> not corr<strong>es</strong>pond<br />
with the chosen folding<br />
programme.<br />
Strong formation of creas<strong>es</strong> at the<br />
folding package<br />
The upper covering is open or not<br />
closed properly.<br />
The safety switch is not positioned<br />
correctly.<br />
Paper r<strong>es</strong>ts near the relevant light<br />
barrier (see diagram below).<br />
Thick layer of dust on the light<br />
barrier or prism.<br />
Prism un<strong>de</strong>rneath the light barrier<br />
is not positioned correctly or has<br />
fallen off.<br />
Incorrect adjustments of light<br />
barriers or mechanical transfer<br />
problems.<br />
Belts of the fold roller have been<br />
run out of the gui<strong>de</strong>. Ina<strong>de</strong>qua<strong>te</strong><br />
paper quality<br />
Substantial variation within the fold Chain of folding motor has been<br />
loosened.<br />
Chain of folding motor is too tight.<br />
There are loss<strong>es</strong> in s<strong>te</strong>ps.<br />
Brake strap at entry roller is dirty or<br />
<strong>de</strong>fective.<br />
LB0<br />
LB4<br />
Postion <strong>de</strong>r Lichtschranken <strong><strong>es</strong><strong>te</strong>fold</strong> <strong>2100</strong><br />
Position of light barriers (LB)<br />
LB 1 LB2 LB3<br />
Close the covering.<br />
Adjust the safety switch.<br />
Remove paper r<strong>es</strong>ts.<br />
Clean the prism un<strong>de</strong>r the<br />
light barrier with a soft<br />
brush or cloth.<br />
Adjust the prism or renew<br />
it.<br />
Change the value for the<br />
margin in programm<strong>es</strong> 5-8<br />
until the correct length is<br />
reached.<br />
Contact customer servic<strong>es</strong><br />
Align belts.<br />
Use bet<strong>te</strong>r quality.<br />
Tigh<strong>te</strong>n chain.<br />
Loosen chain.<br />
Clean or exchange brake<br />
strap.<br />
8 version 19.02.03
Operating Instructions Automatic Fol<strong>de</strong>r <strong><strong>es</strong><strong>te</strong>fold</strong> <strong>2200</strong> (<strong>2100</strong>)<br />
Technical data<br />
Paper length 420 - 4000 mm Power supply 115/230V, 50/60Hz, 6/3A<br />
Paper width 275 – 930 mm Weight 145 kg<br />
Paper weight 60 – 110 g/m 2<br />
Dimensions:<br />
Package width 180 – 210 mm Width 1350 mm<br />
Filling edge adjustable from 0 – 30 mm Height 1010 mm<br />
Folding programm<strong>es</strong> 8 longitudinal / 2 cross Depth 1315 mm<br />
Fold according to DIN 824 Table height 860 mm<br />
9 version 19.02.03