Using tables for organisation and display in Word - Docs.is.ed.ac.uk
Using tables for organisation and display in Word - Docs.is.ed.ac.uk
Using tables for organisation and display in Word - Docs.is.ed.ac.uk

You also want an ePaper? Increase the reach of your titles
YUMPU automatically turns print PDFs into web optimized ePapers that Google loves.
<strong>Us<strong>in</strong>g</strong> <strong>tables</strong> <strong>for</strong> <strong>organ<strong>is</strong>ation</strong><br />
<strong>and</strong> <strong>d<strong>is</strong>play</strong> <strong>in</strong> <strong>Word</strong><br />
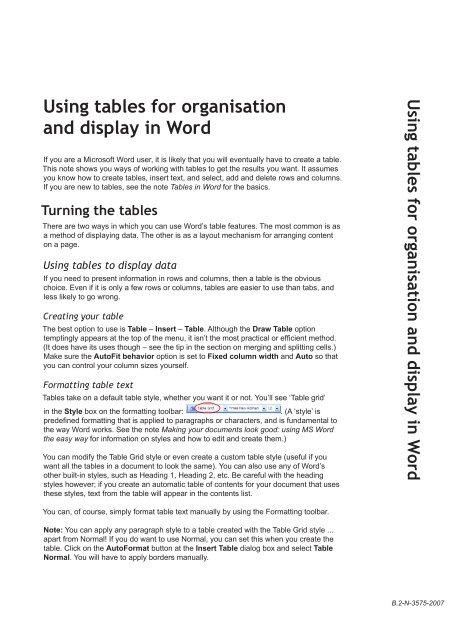
If you are a Microsoft <strong>Word</strong> user, it <strong>is</strong> likely that you will eventually have to create a table.<br />
Th<strong>is</strong> note shows you ways of work<strong>in</strong>g with <strong>tables</strong> to get the results you want. It assumes<br />
you know how to create <strong>tables</strong>, <strong>in</strong>sert text, <strong>and</strong> select, add <strong>and</strong> delete rows <strong>and</strong> columns.<br />
If you are new to <strong>tables</strong>, see the note Tables <strong>in</strong> <strong>Word</strong> <strong>for</strong> the basics.<br />
Turn<strong>in</strong>g the <strong>tables</strong><br />
There are two ways <strong>in</strong> which you can use <strong>Word</strong>’s table features. The most common <strong>is</strong> as<br />
a method of <strong>d<strong>is</strong>play</strong><strong>in</strong>g data. The other <strong>is</strong> as a layout mechan<strong>is</strong>m <strong>for</strong> arrang<strong>in</strong>g content<br />
on a page.<br />
<strong>Us<strong>in</strong>g</strong> <strong>tables</strong> to <strong>d<strong>is</strong>play</strong> data<br />
If you ne<strong>ed</strong> to present <strong>in</strong><strong>for</strong>mation <strong>in</strong> rows <strong>and</strong> columns, then a table <strong>is</strong> the obvious<br />
choice. Even if it <strong>is</strong> only a few rows or columns, <strong>tables</strong> are easier to use than tabs, <strong>and</strong><br />
less likely to go wrong.<br />
Creat<strong>in</strong>g your table<br />
The best option to use <strong>is</strong> Table – Insert – Table. Although the Draw Table option<br />
tempt<strong>in</strong>gly appears at the top of the menu, it <strong>is</strong>n’t the most pr<strong>ac</strong>tical or efficient method.<br />
(It does have its uses though – see the tip <strong>in</strong> the section on merg<strong>in</strong>g <strong>and</strong> splitt<strong>in</strong>g cells.)<br />
Make sure the AutoFit behavior option <strong>is</strong> set to Fix<strong>ed</strong> column width <strong>and</strong> Auto so that<br />
you can control your column sizes yourself.<br />
Formatt<strong>in</strong>g table text<br />
Tables take on a default table style, whether you want it or not. You’ll see ‘Table grid’<br />
<strong>in</strong> the Style box on the <strong>for</strong>matt<strong>in</strong>g toolbar:<br />
. (A ‘style’ <strong>is</strong><br />
pr<strong>ed</strong>ef<strong>in</strong><strong>ed</strong> <strong>for</strong>matt<strong>in</strong>g that <strong>is</strong> appli<strong>ed</strong> to paragraphs or char<strong>ac</strong>ters, <strong>and</strong> <strong>is</strong> fundamental to<br />
the way <strong>Word</strong> works. See the note Mak<strong>in</strong>g your documents look good: us<strong>in</strong>g MS <strong>Word</strong><br />
the easy way <strong>for</strong> <strong>in</strong><strong>for</strong>mation on styles <strong>and</strong> how to <strong>ed</strong>it <strong>and</strong> create them.)<br />
You can modify the Table Grid style or even create a custom table style (useful if you<br />
want all the <strong>tables</strong> <strong>in</strong> a document to look the same). You can also use any of <strong>Word</strong>’s<br />
other built-<strong>in</strong> styles, such as Head<strong>in</strong>g 1, Head<strong>in</strong>g 2, etc. Be careful with the head<strong>in</strong>g<br />
styles however; if you create an automatic table of contents <strong>for</strong> your document that uses<br />
these styles, text from the table will appear <strong>in</strong> the contents l<strong>is</strong>t.<br />
<strong>Us<strong>in</strong>g</strong> <strong>tables</strong> <strong>for</strong> <strong>organ<strong>is</strong>ation</strong> <strong>and</strong> <strong>d<strong>is</strong>play</strong> <strong>in</strong> <strong>Word</strong><br />
You can, of course, simply <strong>for</strong>mat table text manually by us<strong>in</strong>g the Formatt<strong>in</strong>g toolbar.<br />
Note: You can apply any paragraph style to a table creat<strong>ed</strong> with the Table Grid style ...<br />
apart from Normal! If you do want to use Normal, you can set th<strong>is</strong> when you create the<br />
table. Click on the AutoFormat button at the Insert Table dialog box <strong>and</strong> select Table<br />
Normal. You will have to apply borders manually.<br />
B.2-N-3575-2007
If you are us<strong>in</strong>g a table to present f<strong>in</strong>ancial <strong>in</strong><strong>for</strong>mation, create your data <strong>in</strong> Excel then<br />
paste the cells as a <strong>Word</strong> table. You can get Excel to do your calculations, then <strong>for</strong>mat<br />
the table as you w<strong>is</strong>h <strong>in</strong> <strong>Word</strong>. See the note Work<strong>in</strong>g Together with <strong>Word</strong>, Excel <strong>and</strong><br />
PowerPo<strong>in</strong>t <strong>for</strong> <strong>in</strong><strong>for</strong>mation.<br />
Position<strong>in</strong>g your table<br />
You can change where your table appears on the page. Select Table – Table Properties, click on the Table<br />
tab <strong>and</strong> choose the Alignment sett<strong>in</strong>g.<br />
Note: Avoid dragg<strong>in</strong>g the table with the table move h<strong>and</strong>le:<br />
Th<strong>is</strong> pl<strong>ac</strong>es the table <strong>in</strong>side a hidden frame <strong>and</strong> turns it <strong>in</strong>to a float<strong>in</strong>g<br />
object which <strong>is</strong> not anchor<strong>ed</strong>, <strong>and</strong> can be difficult to work with.<br />
Siz<strong>in</strong>g rows, columns <strong>and</strong> <strong>tables</strong><br />
You can quickly resize columns <strong>and</strong> rows – simply move your cursor over the border until it becomes<br />
, <strong>and</strong> drag to a new location. You can also drag the column markers on the ruler.<br />
or<br />
Column marker<br />
If you try to move a column a small amount you might f<strong>in</strong>d the change does not stick. Try<br />
hold<strong>in</strong>g down the Alt key while you drag; th<strong>is</strong> allows you to move more prec<strong>is</strong>ely.<br />
You don’t ne<strong>ed</strong> to drag columns around <strong>for</strong> a perfect fit. To make a table fit the page, select Table – Autofit<br />
– Autofit to W<strong>in</strong>dow. The table will fit between the page marg<strong>in</strong>s (or column marg<strong>in</strong>s if the table <strong>is</strong> <strong>in</strong> a<br />
column). To make a table fit to its content, <strong>for</strong> example, a table nest<strong>ed</strong> <strong>in</strong> a table cell, select Table – Autofit –<br />
Autofit to Content.<br />
Autofit to W<strong>in</strong>dow <strong>is</strong> a great solution if you have <strong>in</strong>sert<strong>ed</strong> new columns or past<strong>ed</strong> an<br />
Excel spreadsheet <strong>and</strong> your table has gone beyond the <strong>ed</strong>ge of the page. Once it’s<br />
b<strong>ac</strong>k <strong>in</strong>side the marg<strong>in</strong>s, you can resize the columns to suit. Another method <strong>is</strong> to use<br />
the Preferr<strong>ed</strong> width option on the Table tab <strong>in</strong> the Table Properties dialog box. Set<br />
Measure <strong>in</strong> to Percent <strong>and</strong> enter the width.<br />
If you are try<strong>in</strong>g to make rows <strong>and</strong> columns equal sizes, don’t try to drag them; you will never get them<br />
ex<strong>ac</strong>tly right. Instead, first select the rows or columns <strong>and</strong> use Table – Autofit – D<strong>is</strong>tribute Rows Evenly or<br />
D<strong>is</strong>tribute Columns Evenly.<br />
To resize your entire table, move your cursor to the bottom right corner to <strong>d<strong>is</strong>play</strong> the table resize h<strong>and</strong>le:<br />
Align<strong>in</strong>g content<br />
Sett<strong>in</strong>g alignment<br />
Click on the h<strong>and</strong>le <strong>and</strong> drag. A dott<strong>ed</strong> l<strong>in</strong>e shows the dimensions of the table as it <strong>is</strong> be<strong>in</strong>g<br />
resiz<strong>ed</strong>. To resize proportionally, hold down Shift <strong>and</strong> drag. The table resizes rows <strong>and</strong><br />
columns, but not the content; you may ne<strong>ed</strong> to change the font size.<br />
You can control how your content looks <strong>in</strong> the table by align<strong>in</strong>g it horizontally <strong>and</strong> vertically with<strong>in</strong> the table’s<br />
cells.<br />
To align content horizontally, use paragraph alignment <strong>and</strong> paragraph <strong>in</strong>dentation (select Format –<br />
Paragraph <strong>and</strong> click on the Indents <strong>and</strong> Sp<strong>ac</strong><strong>in</strong>g tab). If you are us<strong>in</strong>g the same sett<strong>in</strong>gs over aga<strong>in</strong>,<br />
remember that you can create <strong>and</strong> apply a paragraph style rather than <strong>for</strong>mat text directly.<br />
To align cells vertically, select Table – Table Properties <strong>and</strong> click on the Cell tab. Select from Top, Center<br />
or Bottom. To apply the same alignment to a row, column, or the entire table, make your selection first.
A quick way to align vertically <strong>and</strong> horizontally <strong>in</strong> one step <strong>is</strong> to use the<br />
alignment icon on the Tables <strong>and</strong> Borders toolbar:<br />
Sett<strong>in</strong>g tabs<br />
You can also use tabs to control position<strong>in</strong>g with<strong>in</strong> cells. Make sure you can see the ruler (View – Ruler).<br />
Click <strong>in</strong> the cell where you want to <strong>in</strong>sert the tab. Click the tab button at the left end of the ruler until it<br />
changes to the tab type you ne<strong>ed</strong> <strong>and</strong> click on the ruler. To move to the tab, click <strong>in</strong> the cell <strong>and</strong> press Ctrl<br />
<strong>and</strong> Tab.<br />
Sett<strong>in</strong>g repeat<strong>in</strong>g head<strong>in</strong>g rows<br />
If you have column head<strong>in</strong>gs, you will want these to repeat if your table flows onto a new page. To do th<strong>is</strong>,<br />
click <strong>in</strong> the first row <strong>and</strong> select Table – Head<strong>in</strong>g Rows Repeat. The head<strong>in</strong>g will <strong>d<strong>is</strong>play</strong> on every page. If<br />
your head<strong>in</strong>g <strong>is</strong> more than one row, select the rows (hold down Shift <strong>and</strong> click), then select Table – Head<strong>in</strong>g<br />
Rows Repeat.<br />
Controll<strong>in</strong>g page breaks<br />
If your table does flow over pages, it <strong>is</strong> useful to be able to control where it breaks. There are two aspects to<br />
th<strong>is</strong>:<br />
• In the table itself, you can prevent content with<strong>in</strong> a row from break<strong>in</strong>g <strong>ac</strong>ross pages. You can do th<strong>is</strong> <strong>for</strong><br />
<strong>in</strong>dividual rows, or <strong>for</strong> the entire table. Select the row, then choose Table – Table Properties, click on the<br />
Row tab <strong>and</strong> deselect Allow row to break <strong>ac</strong>ross pages. For the entire table, select Table – Select –<br />
Table first.<br />
• To <strong>for</strong>ce a page break at a particular pl<strong>ac</strong>e, without splitt<strong>in</strong>g the table (a must if you have repeat<strong>in</strong>g<br />
head<strong>in</strong>g rows), click <strong>in</strong> the first cell of the row that <strong>is</strong> to move to a new page <strong>and</strong> select Format –<br />
Paragraph. Click on the L<strong>in</strong>e <strong>and</strong> Page Breaks tab <strong>and</strong> select Page break be<strong>for</strong>e.<br />
Apply<strong>in</strong>g borders <strong>and</strong> shad<strong>in</strong>g<br />
If you are us<strong>in</strong>g the default table style, borders are appli<strong>ed</strong> to the whole table. You can change the borders<br />
<strong>and</strong> shad<strong>in</strong>g <strong>for</strong> rows, columns, or even <strong>in</strong>dividual cells by us<strong>in</strong>g the Format – Borders <strong>and</strong> Shad<strong>in</strong>g dialog<br />
box. Remember to look at the Apply to box to check you have made the correct selection.<br />
When apply<strong>in</strong>g borders, there are a couple of po<strong>in</strong>ts to watch out <strong>for</strong>:<br />
• If you are us<strong>in</strong>g the default table styles, your first change to the border style, colour or width will take<br />
effect imm<strong>ed</strong>iately. Once you have alter<strong>ed</strong> the borders, even if it <strong>is</strong> only <strong>for</strong> one cell anywhere <strong>in</strong> the table,<br />
you may have to deselect <strong>and</strong> reselect an ex<strong>is</strong>t<strong>in</strong>g border, or make a selection from the Sett<strong>in</strong>g panel, <strong>for</strong><br />
further changes to take effect.<br />
• Although you can apply borders <strong>and</strong> shad<strong>in</strong>g to the table or to select<strong>ed</strong> cells, there <strong>is</strong> a difference<br />
between table <strong>and</strong> cell borders. If you set a border <strong>for</strong> the table, th<strong>is</strong> will override cell borders if the table<br />
flows over a page. The top <strong>and</strong> bottom borders will repeat when the table splits <strong>ac</strong>ross the page. Th<strong>is</strong> <strong>is</strong><br />
the reason <strong>for</strong> borders appear<strong>in</strong>g at page breaks even though they have been remov<strong>ed</strong> from the cells<br />
themselves.<br />
As well as apply<strong>in</strong>g shad<strong>in</strong>g manually, you can also create an automatic strip<strong>ed</strong> pattern by modify<strong>in</strong>g the<br />
table style. Click to open the Styles <strong>and</strong> Formatt<strong>in</strong>g task pane. Click the down arrow at the style name<br />
<strong>and</strong> click Modify. In the Apply <strong>for</strong>matt<strong>in</strong>g to box, select a stripe pattern. Click the arrow next to Shad<strong>in</strong>g<br />
Color<br />
<strong>and</strong> choose a colour <strong>for</strong> the stripes.
You can change the number of rows or columns <strong>in</strong> the pattern by select<strong>in</strong>g Format – Stripes from the<br />
Modify Style dialog box.<br />
Note: You can only modify a table style <strong>in</strong> th<strong>is</strong> way.<br />
Re-us<strong>in</strong>g your table<br />
It can take a significant ef<strong>for</strong>t to create <strong>and</strong> <strong>for</strong>mat a table. If you have creat<strong>ed</strong> someth<strong>in</strong>g you want to use<br />
aga<strong>in</strong>, you can save it as an AutoText entry.<br />
To save your table structure, first delete the content <strong>and</strong> select Table – Select – Table. Next, select Insert –<br />
AutoText – New. Enter a name <strong>for</strong> your table <strong>and</strong> click OK.<br />
To <strong>in</strong>sert your table <strong>in</strong> a document, click Insert – AutoText. The categories <strong>Word</strong> uses to store entries are<br />
deriv<strong>ed</strong> from the paragraph style <strong>in</strong> the first cell. If you have us<strong>ed</strong> a table style, your AutoText will be <strong>in</strong> one of<br />
the table categories; if not, it <strong>is</strong> likely to be <strong>in</strong> the Normal category. Locate your entry <strong>and</strong> select it. Your table<br />
structure appears <strong>in</strong> your document.<br />
<strong>Us<strong>in</strong>g</strong> <strong>tables</strong> to organ<strong>is</strong>e content<br />
If you ne<strong>ed</strong> to organ<strong>is</strong>e <strong>in</strong><strong>for</strong>mation on a page, <strong>tables</strong> are much simpler to use than tabs or columns,<br />
particularly if you have a mixture of m<strong>ed</strong>ia. A table <strong>is</strong> essentially a conta<strong>in</strong>er; it can help you to align text <strong>and</strong><br />
images easily, <strong>and</strong> you can even nest one table <strong>in</strong>side another to h<strong>and</strong>le complex layouts.<br />
Remov<strong>in</strong>g borders<br />
If you are us<strong>in</strong>g a table <strong>for</strong> pl<strong>ac</strong>ement, it <strong>is</strong> likely that you will not want a border round the cells. To create a<br />
table with no borders:<br />
ÂÂ<br />
ÂÂ<br />
ÂÂ<br />
Select Table – Insert – Table <strong>and</strong> choose the number of rows <strong>and</strong> columns.<br />
Click the Auto<strong>for</strong>mat button.<br />
In the Table styles l<strong>is</strong>t, select Table Normal <strong>and</strong> click OK.<br />
If you have already creat<strong>ed</strong> the table, click <strong>in</strong> the table <strong>and</strong> select select Format – Borders <strong>and</strong> Shad<strong>in</strong>g.<br />
Make sure Apply to <strong>is</strong> set to Table <strong>and</strong> select None.<br />
You can apply borders <strong>and</strong> shad<strong>in</strong>g to rows, columns <strong>and</strong> cells to create different effects. See the section<br />
Apply<strong>in</strong>g borders <strong>and</strong> shad<strong>in</strong>g above <strong>for</strong> more <strong>in</strong><strong>for</strong>mation.<br />
Controll<strong>in</strong>g pl<strong>ac</strong>ement<br />
For more ex<strong>ac</strong>t pl<strong>ac</strong>ement of items with<strong>in</strong> a table, you can set alignment <strong>and</strong> marg<strong>in</strong>s <strong>for</strong> <strong>in</strong>dividual cells.<br />
Select the cells <strong>and</strong> choose Table – Table Properties then click on the Cell tab. Select the alignment option<br />
you ne<strong>ed</strong>.<br />
To change cell marg<strong>in</strong>s, click the Options button. Deselect Same as the whole table <strong>and</strong> set the value.<br />
Remember that the table style may have been set with paragraph sp<strong>ac</strong><strong>in</strong>g be<strong>for</strong>e <strong>and</strong> after, which will affect<br />
pl<strong>ac</strong>ement. You can either modify the style or use Format – Paragraph to apply manual <strong>for</strong>matt<strong>in</strong>g.<br />
Merg<strong>in</strong>g <strong>and</strong> splitt<strong>in</strong>g cells<br />
You are not limit<strong>ed</strong> to us<strong>in</strong>g a table with uni<strong>for</strong>m cells. You can merge <strong>and</strong> split cells to get the shapes you<br />
ne<strong>ed</strong>. Select the cells then use Table – Merge Cells or Table – Split Cells.<br />
Use th<strong>is</strong> with caution, however – once cells have been merg<strong>ed</strong> or split, <strong>for</strong>matt<strong>in</strong>g can become difficult to<br />
manage (particularly <strong>in</strong>sert<strong>in</strong>g or delet<strong>in</strong>g rows <strong>and</strong> columns), <strong>and</strong> your table can become unstable. Consider<br />
us<strong>in</strong>g nest<strong>ed</strong> <strong>tables</strong> <strong>in</strong>stead (see below). If you want a merg<strong>ed</strong> head<strong>in</strong>g over several columns, wait until you<br />
have complet<strong>ed</strong> resiz<strong>in</strong>g the columns be<strong>for</strong>e carry<strong>in</strong>g out the merge.
Use Table - Draw Table (or the Draw Table icon on the Tables <strong>and</strong> Borders toolbar)<br />
to split cells ex<strong>ac</strong>tly where you want. Drag the cursor over the area where you want the<br />
new cell to appear. You may ne<strong>ed</strong> to zoom <strong>in</strong> to draw <strong>ac</strong>curately.<br />
<strong>Us<strong>in</strong>g</strong> nest<strong>ed</strong> <strong>tables</strong><br />
Nest<strong>in</strong>g a table means creat<strong>in</strong>g one table <strong>in</strong>side another. Use th<strong>is</strong> whenever you want content next to a table.<br />
For example, you might have a chart <strong>and</strong> want to show the data <strong>in</strong> a table beside it, as <strong>in</strong> the picture below.<br />
To create your layout:<br />
ÂÂ Insert a table with as many rows <strong>and</strong> columns as you ne<strong>ed</strong>. The example above has two rows (one <strong>for</strong><br />
the head<strong>in</strong>gs) <strong>and</strong> two columns. Th<strong>is</strong> <strong>is</strong> your host table.<br />
ÂÂ<br />
ÂÂ<br />
ÂÂ<br />
ÂÂ<br />
Select Table – Table Properties. Click on the Cell tab <strong>and</strong> the Options button <strong>and</strong> set all cell marg<strong>in</strong>s to<br />
0.<br />
Select Table – AutoFit – AutoFit to W<strong>in</strong>dow.<br />
Select Table – Autofit – Fix<strong>ed</strong> Column Width. Th<strong>is</strong> stops <strong>Word</strong> from automatically resiz<strong>in</strong>g columns.<br />
Remove unwant<strong>ed</strong> borders us<strong>in</strong>g Format – Borders <strong>and</strong> Shad<strong>in</strong>g.<br />
You can now put anyth<strong>in</strong>g you want <strong>in</strong>to the host table. To create a table <strong>in</strong>side the host table, click <strong>in</strong> the cell<br />
<strong>and</strong> <strong>in</strong>sert it. To make the nest<strong>ed</strong> table fit the cell ex<strong>ac</strong>tly, use Table – AutoFit – AutoFit to W<strong>in</strong>dow (the cell<br />
<strong>is</strong> the nest<strong>ed</strong> table’s w<strong>in</strong>dow).<br />
If you want to add content to the host cell (as oppos<strong>ed</strong> to the nest<strong>ed</strong> table) click <strong>in</strong> the last<br />
cell <strong>in</strong> the nest<strong>ed</strong> table <strong>and</strong> press the right arrow key twice.<br />
Add<strong>in</strong>g images<br />
Images can be ‘<strong>in</strong>l<strong>in</strong>e’ or ‘float<strong>in</strong>g’. An <strong>in</strong>l<strong>in</strong>e image <strong>is</strong> ‘<strong>in</strong> l<strong>in</strong>e with text’ <strong>and</strong> can be <strong>for</strong>matt<strong>ed</strong> the same way;<br />
<strong>for</strong> example, you can apply paragraph alignment <strong>and</strong> sp<strong>ac</strong><strong>in</strong>g to it. A float<strong>in</strong>g image floats over text <strong>and</strong> can<br />
be pick<strong>ed</strong> up <strong>and</strong> mov<strong>ed</strong> <strong>in</strong>dependently of the text; the text can also be set to wrap around, above <strong>and</strong> below<br />
it. While float<strong>in</strong>g graphics might seem an attr<strong>ac</strong>tive option, they can be much harder to work with <strong>and</strong> can<br />
produce unpr<strong>ed</strong>ictable results when you are <strong>ed</strong>it<strong>in</strong>g the text. They can also cause problems <strong>in</strong> <strong>tables</strong>. If you<br />
do want text to wrap around your image, you can simulate the effect by pl<strong>ac</strong><strong>in</strong>g the image <strong>in</strong> one cell <strong>and</strong> the<br />
text <strong>in</strong> cells around it.<br />
To avoid problems, you should paste graphics <strong>in</strong>to <strong>Word</strong> as pictures rather than objects. Select Edit – Paste<br />
Special <strong>and</strong> select the Picture (Enhanc<strong>ed</strong> Metafile) option <strong>for</strong> best results. Click on the image <strong>and</strong> select<br />
Format – Picture. Click on the Layout tab <strong>and</strong> make sure Wrapp<strong>in</strong>g <strong>is</strong> set to In l<strong>in</strong>e with text. The note<br />
Work<strong>in</strong>g Together with <strong>Word</strong>, Excel <strong>and</strong> PowerPo<strong>in</strong>t provides advice on cutt<strong>in</strong>g <strong>and</strong> past<strong>in</strong>g between<br />
applications.