

TM9-2320-211-10-1 - JATONKAM35s HOME ON THE WEB
TM9-2320-211-10-1 - JATONKAM35s HOME ON THE WEB
TM9-2320-211-10-1 - JATONKAM35s HOME ON THE WEB

You also want an ePaper? Increase the reach of your titles
YUMPU automatically turns print PDFs into web optimized ePapers that Google loves.
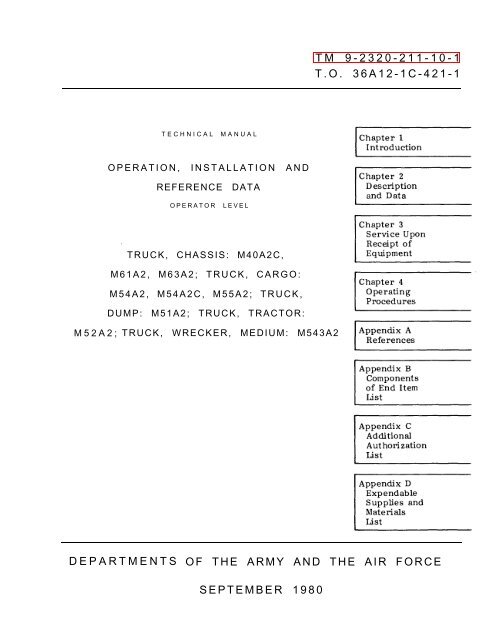
TM 9-<strong>2320</strong>-<strong>211</strong>-<strong>10</strong>-1<br />
T.O. 36A12-1C-421-1<br />
TECHNICAL MANUAL<br />
OPERATI<strong>ON</strong>, INSTALLATI<strong>ON</strong> AND<br />
REFERENCE DATA<br />
OPERATOR<br />
LEVEL<br />
.<br />
TRUCK, CHASSIS: M40A2C,<br />
M61A2, M63A2; TRUCK, CARGO:<br />
M54A2, M54A2C, M55A2; TRUCK,<br />
DUMP: M51A2; TRUCK, TRACTOR:<br />
M52A2; TRUCK, WRECKER, MEDIUM: M543A2<br />
DEPARTMENTS<br />
OF <strong>THE</strong> ARMY AND <strong>THE</strong> AIR FORCE<br />
SEPTEMBER 1980
WARNING<br />
EXHAUST GASES CAN BE DEADLY<br />
Exposure to exhaust gases produces symptoms of headache, dizziness, loss of muscular<br />
control, apparent drowsiness, and coma. Permanent brain damage or death can result<br />
from severe exposure.<br />
Carbon monoxide occurs in the exhaust fumes of fuel burning heaters and internal<br />
combustion engines, and becomes dangerously concentrated under conditions of inadequate<br />
ventilation. The following precautions must be observed to insure the safety of<br />
personnel whenever fuel burning heater(s) or engine of any vehicle is operated for<br />
maintenance purposes or tactical use.<br />
Do not operate heater of engine of vehicle in an enclosed area unless it is adequately<br />
ventilated.<br />
Do not idle engine for long periods without maintaining adequate ventilation in personnel<br />
compartments.<br />
Do not drive any vehicle with inspection plates or cover plates removed unless<br />
necessary for maintenance purposes.<br />
Be alert at all times during vehicle operation for exhaust odors and exposure symptoms.<br />
If either are present , immediately ventilate personnel compartments. If symptoms<br />
persist, remove affected personnel from vehicle and treat as follows: expose to fresh<br />
air; keep warm; do not permit physical exercise; if necessary, administer artifical<br />
respiration.<br />
If exposed, seek prompt medical attention for possible delayed onset of acute lung —<br />
congestion. Administer oxygen if available.<br />
The best defense against exhaust gas poisoning is adequate ventilation.<br />
Use extreme care when removing radiator cap, especially when temperature<br />
above 180°F.<br />
gage shows<br />
Always wear leather gloves when handling winch cable never allow cable to slip<br />
through hands. Do not operate winch with less than four turns of cable drum.<br />
Do not drive truck until the low air pressure warning buzzer is silent and the air<br />
pressure gage shows at least 65 PSI. This is the minimum pressure required for safe<br />
braking action.<br />
Do not use hand throttle to drive the vehicle.<br />
Do not park truck with front transmission gearshift lever in gear.<br />
When used to carry flammables, explosives, or other hazardous material, equip truck<br />
with a fire extinguisher.<br />
If your vehicle class number is greater than the bridge class number, your vehicle is<br />
too heavy for the bridge; DO NOT CROSS.<br />
This vehicle has been designed to operate safely and efficiently within the limits specified in this TM.<br />
Operation beyond these limits is prohibited IAW AR 70-1 without written approval from the Commander,<br />
U.S. Army Tank-Automotive Command, AlT’IN: AMSTA-CM-S, Warren, MI 48397-5000.<br />
Change 1<br />
PIN: 046780-001
TECHNICAL MANUAL<br />
NO. 9-<strong>2320</strong>-<strong>211</strong>-<strong>10</strong>-1<br />
TECHNICAL ORDER<br />
NO. 36A12-lC-421-1<br />
Change<br />
No. 1<br />
TM 9-<strong>2320</strong>-<strong>211</strong>-<strong>10</strong>-1<br />
Cl<br />
HEADQUARTERS<br />
DEPARTMENT OF <strong>THE</strong> ARMY<br />
Washington D. C., 5 December 1989<br />
TECHNICAL MANUAL<br />
OPERATI<strong>ON</strong>, INSTALLATI<strong>ON</strong> AND<br />
REFERENCE DATA<br />
OPERATOR LEVEL<br />
TRUCK, CHASSIS M40A2C,<br />
M61A2, M63A2; TRUCK, CARGO:<br />
M54A2, M54A2C, M55A2; TRUCK<br />
DUMP: M51A2; TRUCK, TRACTOR:<br />
M52A2; TRUCK, WRECKER, MEDIUM: M543A2<br />
TM 9-<strong>2320</strong>-<strong>211</strong>-<strong>10</strong>-1/TO 36A12-lC-421-1, dated 5 September 1980, is changed as follows:<br />
1. Change to narrative material is indicated by a vertical bar in the outside margin of the page. Added or<br />
revised illustrations are indicated by a vertical bar adjacent to the identification number.<br />
2. Remove old pages and insert new pages as indicated below..<br />
3. File this change sheet in front of the publication for reference purposes.<br />
Remove Pages<br />
Insert Pages<br />
2-1 and 2-2 2-1 and 2-2<br />
4-29 and 4-30 4-29 and 4-30<br />
over and Warning<br />
Cover and Warning
By Order of the Secretary of the Army<br />
CARL E. VU<strong>ON</strong>O<br />
General, United States Army<br />
Chief of Staff<br />
Official:<br />
WILLIAM J. MEEHAN 11<br />
Brigadier General, United States Army<br />
The Adjutant General<br />
Distribution:<br />
To be distributed in accordance with DA Form 12-38-R (Block 209) Operator maintenance requirements<br />
for Truck, Cargo, 5-ton, 6x6, Multifuel, M39-series.
*TM <strong>2320</strong>-<strong>211</strong>-<strong>10</strong>-1<br />
TO 36A12-1C-421-1<br />
TECHNICAL MANUAL<br />
NO. 9-<strong>2320</strong>-<strong>211</strong>-<strong>10</strong>-1<br />
TECHNICAL ORDER<br />
NO. 36A12-1C-421-1<br />
DEPARTMENT OF <strong>THE</strong> ARMY<br />
A N D<br />
T H E A I R F O R C E<br />
Washington, DC, 5 September 1980<br />
TECHNICAL MANUAL<br />
OPERATI<strong>ON</strong>, INSTALLATI<strong>ON</strong> AND<br />
REFERENCE DATA<br />
OPERATOR LEVEL<br />
5-T<strong>ON</strong>, 6X6, M39 SERIES TRUCKS<br />
(MULTIFUEL)<br />
Model<br />
NSN without Winch<br />
NSN with Winch<br />
Chassis M40A2C <strong>2320</strong>-00-969-4114<br />
M61A2 <strong>2320</strong>-00-055-9264<br />
M63A2 <strong>2320</strong>-00-226-6251<br />
Truck, Cargo M54A2 <strong>2320</strong>-00-055-9266<br />
M54A2C <strong>2320</strong>-00-926-0874<br />
M55A2 <strong>2320</strong>-00-073-8476<br />
Truck, Dump M51A2 <strong>2320</strong>-00-055-9262<br />
Truck, Tractor M52A2 <strong>2320</strong>-00-055-9260<br />
<strong>2320</strong>-00-965-0321<br />
<strong>2320</strong>-00-285-3757<br />
<strong>2320</strong>-00-055-9265<br />
<strong>2320</strong>-00-926-0874<br />
<strong>2320</strong>-00-055-9259<br />
<strong>2320</strong>-00-055-9263<br />
<strong>2320</strong>-00-055-9261<br />
Truck, Wrecker, Medium<br />
M543A2<br />
Current as of 25 March 1980.<br />
<strong>2320</strong>-00-055-9258<br />
*This manual, together with TM 9-<strong>2320</strong>-<strong>211</strong>-<strong>10</strong>-2, 5 September 1980; -<strong>10</strong>.3,<br />
5 September 1980 ; and -<strong>10</strong>-4, 5 September 1980 supersedes so much of<br />
TM 9-<strong>2320</strong>-<strong>211</strong>-<strong>10</strong>, 20 November 1977 as pertains to multifuel vehicles.
TM 9-<strong>2320</strong>-<strong>211</strong>-<strong>10</strong>-1<br />
REPORTING OF ERRORS AND RECOMMENDING IMPROVEMENTS<br />
You can help improve this manual. If you find any mistakes or if you know<br />
of a way to improve the procedure, please let us know. Mail your letter,<br />
DA Form 2028 (Recommended Changes to Publication and Blank Forms) , or<br />
DA Form 2028-2 located in the back of this manual direct to: Commander,<br />
U.S. Army Tank Automotive Materiel Readiness Command, ATTN: DRSTA-<br />
MB, Warren, Michigan 48090. A reply will be furnished to you.<br />
Paragraph Page<br />
CHAPTER 1.<br />
CHAPTER 2.<br />
Section 1.<br />
INTRODUCTI<strong>ON</strong><br />
Scope . . . . . . . . . .. . . . . . . . . . .<br />
Forms and Records . . . . . . . . . . . . . . . .<br />
Equipment Improvement Report and<br />
Maintenance Digest (EIR MD) and<br />
Equipment Improvement Report and<br />
Maintenance Summary (EIR MS) . . . . . . . . .<br />
Reporting Improvement Recommendations . . . . .<br />
Metric System . . . . . . . . . . . . . . . . . .<br />
Destruction to Prevent Enemy Use . . . . . . . .<br />
Manual Organization . . . . . . . . . . . . . . .<br />
Vehicle /Bridge Classification . . . , . . . . . . .<br />
DESCRIPTI<strong>ON</strong> AND DATA<br />
Functional Description<br />
General . . . . . . . . . . . . . . . . . . . . .<br />
Overall Equipment Function Description . . . . . .<br />
Engine . . . . . . . . . . . . . . . . . . . . .<br />
Clutch . . . . . . . . . . . . . . . . . . . . .<br />
Electrical System . . . . . . . . . . . . . . . .<br />
Fuel System . . . . . . . . . . . . . . . . . .<br />
Cooling System . . . . . . . . . . . . . . . . .<br />
Exhaust System . . . . . . . . . . . . . . . .<br />
Transmission System . . . . . . . . . . . . . .<br />
Transfer System . . . . . . . . . . . . . . . .<br />
Transmission Power Takeoff System . . . . . . .<br />
Transfer Power Takeoff System . . . . . . ● ● ●<br />
Propeller Shafts . . . . . . . . . . . . . . . .<br />
Steering System . ..... ● ... .......<br />
Compressed Air System . . . . . . . . . . . . .<br />
Brake System . . . . . . . . . . . . . . . . .<br />
Axles, Wheels and Hubs . . . . . . . . . . . .<br />
Auxiliary Equipment and Accessories . . . . . .<br />
1-1<br />
1-2<br />
1-3<br />
1-4<br />
1-5<br />
1-6<br />
1-7<br />
1-8<br />
2-1<br />
2-2<br />
2-2a<br />
2-2b<br />
2-2c<br />
2-2d<br />
2-2e<br />
2-2f<br />
2-2g<br />
2-2h<br />
2-2i<br />
2-2j<br />
2-2k<br />
2-2l<br />
2-2m<br />
2-2n<br />
2-2o<br />
2-2p<br />
1-1<br />
1-1<br />
1-1<br />
1-1<br />
1-1<br />
1-2<br />
1-2<br />
1-2<br />
2-1<br />
2-1<br />
2-1<br />
2-1<br />
2-1<br />
2-1<br />
2-1<br />
2-1<br />
2-1<br />
2-1<br />
2-1<br />
2-1<br />
2-2<br />
2-2<br />
2-2<br />
2-2<br />
2-2<br />
2-2<br />
2-2<br />
ii
TM 9-<strong>2320</strong>-<strong>211</strong>-<strong>10</strong>-1<br />
Paragraph<br />
Page<br />
Section II. Physical Description<br />
General . . . . . . . . . . . . . . .<br />
Overall Equipment Physical Description<br />
III.<br />
CHAPTER 3.<br />
Engine . . . . . . . . . . . . . .<br />
Clutch . . . . . . . . . . . . . .<br />
Electrical System . . . . . . . . .<br />
Fuel and Air Intake System . . .<br />
Cooling System . . . . . . . . . .<br />
Exhaust System. . . . . . . . . .<br />
Transmission . . . . . . . . . . .<br />
Transmission Power Takeoff . . .<br />
Transfer . . . . . . . . . . . . .<br />
Transfer Power Takeoff . . . . .<br />
Propeller and Drive Shaft Systems<br />
Steering System . . . . . . . . .<br />
Brake System . . . . . . . . . .<br />
Axles, Wheels, and Hubs . . . . .<br />
Tabulated Data<br />
General . . . . . . . . . . . . .<br />
Weight . . . . . . . . . . . . . .<br />
Dimensions . . . . . . . . . . .<br />
Capacities . . . . . . . . . . . .<br />
Tire Inflation Data . . . . . . . .<br />
Environmental Characteristics . .<br />
Functional Characteristics . . . .<br />
Components of End Item List . . .<br />
Additional Authorization List . . .<br />
Expendable Supplies and Materials List<br />
SERVICE UP<strong>ON</strong> RECEIPT OF EQUIPMENT<br />
General . . . . . . . . . . . . . . . .<br />
Break-in Operation . . . . . . . . . .<br />
General . . . . . . . . . . . . . . .<br />
Break-in . . . . . . . . . . . . . . .<br />
Road Test . . . . . . . . . . . . . .<br />
After the Road Test . . . . . . . . .<br />
CHAPTER 4. OPERATING PROCEDURES<br />
Section I.<br />
Description and Use of Operator’s Controls<br />
and Indicators . . . . . . . . . . . . .<br />
General . . . . . . . . . . . . . . . .<br />
Chassis Controls and Indicators . . . .<br />
Instrument Panel . . . . . . . . . . .<br />
Windshield . . . . . . . . . . . . . .<br />
Driverts Compartment . . . . . . . .<br />
Front Winch . . . . . . . . . . . . .<br />
TrailerB rake . . . . . . . . . . . .<br />
Equipment Body Controls and Indicators<br />
Tractor Truck (M52A2) . . . . . . . .<br />
Dump Truck (M51A2) . . . . . . . . . . .<br />
Wrecker Truck (M543A2) . . . . . . .<br />
.<br />
.<br />
.<br />
.<br />
.<br />
.<br />
.<br />
●<br />
✎<br />
✎<br />
✎<br />
✎<br />
✎<br />
✎<br />
✎<br />
✎<br />
✎<br />
✎<br />
✎<br />
✎<br />
✎<br />
✎<br />
✎<br />
.<br />
.<br />
.<br />
.<br />
.<br />
.<br />
.<br />
.<br />
.<br />
●<br />
✎<br />
✎<br />
✎<br />
✎<br />
●<br />
✎<br />
✎<br />
✎<br />
✎<br />
✎<br />
✎<br />
✎<br />
✎<br />
✎<br />
✎<br />
.<br />
.<br />
.<br />
.<br />
.<br />
.<br />
.<br />
.<br />
●<br />
✎<br />
●<br />
✎<br />
✎<br />
✎<br />
✎<br />
✎<br />
✎<br />
✎<br />
✎<br />
✎<br />
✎<br />
✎<br />
✎<br />
✎<br />
✎<br />
✎<br />
●<br />
✎<br />
●<br />
✎<br />
✎<br />
●<br />
.<br />
.<br />
.<br />
.<br />
.<br />
.<br />
.<br />
.<br />
.<br />
.<br />
.<br />
.<br />
.<br />
.<br />
●<br />
✎<br />
✎<br />
●<br />
✎<br />
✎<br />
✎<br />
✎<br />
✎<br />
✎<br />
✎<br />
✎<br />
✎<br />
✎<br />
✎<br />
✎<br />
✎<br />
✎<br />
✎<br />
✎<br />
✎<br />
✎<br />
●<br />
✎<br />
●<br />
●<br />
●<br />
✎<br />
✎<br />
●<br />
✎<br />
●<br />
✎<br />
●<br />
✎<br />
●<br />
✎<br />
✎<br />
✎<br />
●<br />
✎<br />
✎<br />
.<br />
.<br />
●<br />
✎<br />
✎<br />
✎<br />
✎<br />
✎<br />
●<br />
✎<br />
●<br />
✎<br />
✎<br />
✎<br />
✎<br />
✎<br />
✎<br />
✎<br />
✎<br />
✎<br />
✎<br />
✎<br />
✎<br />
✎<br />
✎<br />
✎<br />
✎<br />
✎<br />
✎<br />
✎<br />
✎<br />
✎<br />
✎<br />
●<br />
●<br />
●<br />
✎<br />
✎<br />
✎<br />
●<br />
✎<br />
✎<br />
✎<br />
✎<br />
2-3<br />
2-4<br />
2-4a<br />
2-4b<br />
2-4c<br />
2-4d<br />
2-4e<br />
2-4f<br />
2-4g<br />
2-4h<br />
2-4i<br />
2-4j<br />
2-4k<br />
2-4l<br />
2-4m<br />
2-4n<br />
2-5<br />
2-6<br />
2-7<br />
2-8<br />
2-9<br />
2-<strong>10</strong><br />
2-11<br />
2-12<br />
2-13<br />
2-14<br />
3-1<br />
3-2<br />
3-2a<br />
3-2b<br />
3-2c<br />
3-2d<br />
4-1<br />
4-2<br />
4-2a<br />
4-2b<br />
4-2c<br />
4-2d<br />
4-2e<br />
4-3<br />
4-3a<br />
4-3b<br />
4-3c<br />
2-2<br />
2-2<br />
2-2<br />
2-2<br />
2-6<br />
2-7<br />
2-8<br />
2-9<br />
2-<strong>10</strong><br />
2-12<br />
2-12<br />
2-12<br />
2-12<br />
2-13<br />
2-16<br />
2-17<br />
2-21<br />
2-22<br />
2-22<br />
2-22<br />
2-22<br />
2-22<br />
2-22<br />
2-22<br />
2-22<br />
2-22<br />
2-22<br />
2-22<br />
3-1<br />
3-1<br />
3-1<br />
3-1<br />
3-2<br />
3-2<br />
4-1<br />
4-1<br />
4-2<br />
4-2<br />
4-7<br />
4-8<br />
4-14<br />
4-15<br />
4-16<br />
4-16<br />
4-18<br />
4-19<br />
. . .<br />
111
TM 9-<strong>2320</strong>-<strong>211</strong>-<strong>10</strong>-1<br />
Section I — Continued<br />
Paragraph<br />
Page<br />
Section II.<br />
Special Kits Controls and Indicators . . .<br />
Hot Water Personnel Heater Kit . . . . .<br />
Fuel Burning Personnel Heater Kit . . .<br />
Power Plant Heater Kit . . . . . . . . .<br />
Deep Water Fording Kit . . . . . . . . .<br />
Electric Brake Kit . . . . . . . . . . .<br />
Operation Under Usual Conditions<br />
Scope . . . . . . . . . . . . . . . . . .<br />
General Operating Procedures . . . . . .<br />
Before Engine Startup . . . . . . . . .<br />
Starting the Engine Above +20°F . . . .<br />
Cold Weather Starting Below +20°F . . .<br />
Placing and Keeping the Truck in Motion<br />
Stopping the Truck and Engine . . . . .<br />
Operation of Front Winch . . . . . . . .<br />
General . . . . . . . . . . . . . . . .<br />
Before Operation . . . . . . . . . . . .<br />
Unwinding the Winch Line . . . . . . .<br />
Pulling the Load . . . . . . . . . . . .<br />
Stopping the Winch . . . . . . . . . .<br />
Releasing the Load . . . . . . . . . .<br />
Winding the Winch Line on the Drum . . .<br />
Securing Equipment for Travel .<br />
operation of Cargo Trucks . . . .<br />
General . . . . . . . . . . . .<br />
Removal of Front and Side Racks<br />
Installing Front and Side Racks .<br />
Removal of Front and Side Racks<br />
Dropside Type Cargo Trucks .<br />
. .<br />
. .<br />
. .<br />
. .<br />
. .<br />
. .<br />
. . ...*<br />
. . . . . .<br />
. . . . . .<br />
. . . . . .<br />
. . . . * .<br />
from<br />
. . . . . .<br />
Installing Front and Side Racks on<br />
Dropside Type Cargo Trucks . . . . . . .<br />
Lowering Dropsides on Dropside Type<br />
Cargo Trucks . . . . . . . . . . . . . .<br />
Raising Dropsides on Dropside Type<br />
Cargo Trucks . . . . . . . . . . . . . .<br />
Removing Drop sides, Tailgate or Both . . . .<br />
Installing Dropsides, Tailgate, or Both . . .<br />
Operation of Tractor Trucks . . . . . . . . .<br />
General . . . . . . . . . . . . . . . . . .<br />
Coupling the Semitrailer . . . . . . . . . .<br />
Uncoupling Semitrailer . . . . . . . . . . .<br />
Securing Equipment for Travel . . . . . . .<br />
Operation of Dump Trucks . . . . . . . . . .<br />
General . . . . . . . . . . . . . . . . . .<br />
Rigging the Tailgate-Regular Dump<br />
Operation . . . . . . . . . . . . . . . . .<br />
Rigging the Tailgate-Rocker Type Operation .<br />
●<br />
✎<br />
✎<br />
✎<br />
✎<br />
✎<br />
✎<br />
✎<br />
✎<br />
✎<br />
✎<br />
✎<br />
✎<br />
✎<br />
✎<br />
✎<br />
✎<br />
✎<br />
✎<br />
✎<br />
✎<br />
✎<br />
✎<br />
✎<br />
☛<br />
✎<br />
✎<br />
✎<br />
✎<br />
✎<br />
4-4<br />
4-4a<br />
4-4b<br />
4-4c<br />
4-4d<br />
4-4e<br />
4-5<br />
4-6<br />
4-6a<br />
4-6b<br />
4-6c<br />
4-6d<br />
4-6e<br />
4-7<br />
4-7a<br />
4-7b<br />
4-7c<br />
4-7d<br />
4-7e<br />
4-7f<br />
4-7g<br />
4-7h<br />
4-8<br />
4-8a<br />
4-8b<br />
4-8c<br />
4-8d<br />
4-8e<br />
4-8f<br />
4-8g<br />
4-8h<br />
4-8i<br />
4-9<br />
4-9a<br />
4-9b<br />
4-9c<br />
4-9d<br />
4-<strong>10</strong><br />
4-<strong>10</strong>a<br />
4-<strong>10</strong>b<br />
4-<strong>10</strong>c<br />
4-21<br />
4-21<br />
4-23<br />
4-25<br />
4-28<br />
4-29<br />
4-30<br />
4-30<br />
4-31<br />
4-37<br />
4-43<br />
4-45<br />
4-58<br />
4-63<br />
4-63<br />
4-64<br />
4-65<br />
4-74<br />
4-78<br />
4-79<br />
4-81<br />
4-86<br />
4-91<br />
4-91<br />
4-91<br />
4-95<br />
4-99<br />
4-<strong>10</strong>5<br />
4-1<strong>10</strong><br />
4-113<br />
4-115<br />
4-117<br />
4-119<br />
4-119<br />
4-119<br />
4-133<br />
4-138<br />
4-139<br />
4-139<br />
4-140<br />
4-141<br />
iv
TM 9-<strong>2320</strong>-<strong>211</strong>-<strong>10</strong>-1<br />
Section II — Continued<br />
Rigging the Tailgate-Spreader Type<br />
Operation . . . . . . . . . . . . . . . .<br />
Rigging the Tailgate-Regular Cargo<br />
Operation .......................<br />
Loading the Truck-All Types of Dump<br />
Operation . . . . . . . . . . . . . . . .<br />
Unloading the Truck-Regular Dump<br />
Operation . . . . . . . . . . . . . . . .<br />
Unloading the Dump Truck-Rocker Type<br />
Operation .,....... . . . . . . .<br />
Changing the Tailgate Rigging-Rocker<br />
Type Operation . . . . . . . . . . . . . .<br />
Unloading the Truck-Spreader Type<br />
Operation . . . . . . . . . . . . . . . .<br />
Changing Tailgate Rigging-Spreader Type<br />
Operation . . . . . . . . . . . . . . . .<br />
Lowering the Tailgate-Regular Cargo<br />
Operation . . . . . . . . . . . . . . . .<br />
Raising the Tailgate-Regular Cargo<br />
Operation . . . . . . . . . . . . . . . .<br />
Changing Tailgate Rigging-Regular Cargo<br />
Operation . . . . . . . . . . . . . . . .<br />
M543A2 Medium Wrecker Rear Winch Operation<br />
General . . . . . . . . . . . . . . . . . .<br />
Before Operation . . . . . . . . . . . . . .<br />
Unwinding the Winch Cable . . . . . . . . .<br />
Rigging the Winch Cable and Wrecker . . . .<br />
Pulling the Load . . . . . . . . . . . . . .<br />
Releasing the Load . . . . . . . . . . . . .<br />
Securing for Travel . . . . . . . . . . . .<br />
M543A2 Medium Wrecker Crane Operation . . .<br />
General . . . . . . . . . . . . . . . . . .<br />
Direct Rear Lift . . . . . . . . . . . . . .<br />
Lifting and Swinging . . . . . . . . . . . .<br />
Heavy Rear Lift with Boom Jacks . . . . . .<br />
Side Lift with Boom Jacks . . . . . . . . . .<br />
Rigging Crane Lines.... . . . . . . . .<br />
Making Fast for Travel . . . . . . . . . . .<br />
Making Fast for Travel-Lift and Swing. . . .<br />
Making Fast for Travel-Heavy Rear Lift<br />
with Boom Jacks.... . . . . . . . . .<br />
Making Fast for Travel-Heavy Side Lift<br />
with Boom Jacks.... . . . . . . . . .<br />
Operation of Hot Water Personnel Heater Kit. .<br />
Operation of Arctic Winterization Kit . . . . .<br />
General . . . . . . . . . . . . . . . . . .<br />
Operating Radiator Brushguard Cover. . . .<br />
Para grap n<br />
4-<strong>10</strong>d<br />
4-<strong>10</strong>e<br />
4-<strong>10</strong>f<br />
4-<strong>10</strong>g<br />
4-<strong>10</strong>h<br />
4-<strong>10</strong>i<br />
4-<strong>10</strong>j<br />
4-<strong>10</strong>k<br />
4-<strong>10</strong>l<br />
4-<strong>10</strong>m<br />
4-<strong>10</strong>n<br />
4-11<br />
4-11a<br />
4-llb<br />
4-11c<br />
4-11d<br />
4-11e<br />
4-11f<br />
4-11g<br />
4-12<br />
4-12a<br />
4-12b<br />
4-12c<br />
4-12d<br />
4-12e<br />
4-12f<br />
4-12g<br />
4-12h<br />
4-12i<br />
4-12j<br />
4-13<br />
4-14<br />
4-14a<br />
4-14b<br />
Page<br />
4-142<br />
4-143<br />
4-144<br />
4-145<br />
4-150<br />
4-154<br />
4-155<br />
4-160<br />
4-161<br />
4-162<br />
4-163<br />
4-164<br />
4-164<br />
4-164<br />
4-165<br />
4-169<br />
4-172<br />
4-173<br />
4-175<br />
4-179<br />
4-179<br />
4-180<br />
4-189<br />
4-192<br />
4-196<br />
4-197<br />
4-199<br />
4-204<br />
4-206<br />
4-209<br />
4-2<strong>10</strong><br />
4-<strong>211</strong><br />
4-<strong>211</strong><br />
4-<strong>211</strong><br />
v
TM 9-<strong>2320</strong>-<strong>211</strong>-<strong>10</strong>-1<br />
Section II — Continued<br />
Paragraph<br />
P a g e<br />
Section III.<br />
Using the Engine Compartment Cover . . . .<br />
Operation of Fuel Burning Personnel<br />
Heater . . . . . . . . . . . . . . . . . .<br />
Operation of Fuel Burning Power Plant<br />
Heater . . . . . . . . . . . . . . . . . .<br />
Using the Slave Receptacle . . . . . . . . .<br />
Operation of Deep Water Fording Kit . . . . .<br />
Operating the Electric Brake Kit . . . . . . .<br />
Operation Under Unusual Conditions<br />
Scope . . . . . . . . . . . . . . . . . . . .<br />
General . . . . . . . . . . . . . . . . . . .<br />
Operation in Extreme Cold Weather . . . . . .<br />
General . . . . . . . . . . . . . . . . . .<br />
Related Publications . . . . . . . . . . . .<br />
Winterization Kits . . . . . . . . . . . . .<br />
Moving the Truck . . . . . . . . . . . . . .<br />
Parking . . . . . . . . . . . . . . . . . .<br />
Refueling . . . . . . . . . . . . . . . . .<br />
Operation in Extreme Hot Weather . . . . . .<br />
General . . . . . . . . . . . . . . . . . .<br />
Cooling System . . . . . . . . . . . . . . .<br />
Batteries . . . . . . . . . . . . . . . . . .<br />
Body and Chassis . . . . . . . . . . . . .<br />
Parking the Truck.... .. . . . . . . .<br />
Operation on Unusual Terrain . . . . . . . .<br />
Operation in Deep Snow or Mud. . . . . . . . . .<br />
Operation on Hard Baked Sand . . . . . . . . . .<br />
Operation on Ice...... . . . . . . . . .<br />
Operation on Dusty or Sandy Roads . . . . . . . .<br />
Operation on Rocks and Boulders . . . . . . . . .<br />
Operation in High Altitudes . . . . . . . . . . .<br />
Fording Operation . . . . . . . . . . . . . .<br />
General . . . . . . . . . . . . . . . . . .<br />
Normal Fording through 30 Inches of<br />
Water or Less . . . . . . . . . . . . . . .<br />
Emergency Procedures . . . . . . . . . . . .<br />
Using Slave Receptacle to Start the<br />
Engine . . . . . . . . . . . . . . . . . .<br />
Using Jumper Cables to Start the Engine . .<br />
Towing Truck to Start Engine. . . . . . . .<br />
Highway Towing . . . . . . . . . . . . . .<br />
4-14c<br />
4-14d<br />
4-14e<br />
4-14f<br />
4-15<br />
4-16<br />
4-17<br />
4-18<br />
4-19<br />
4-19a<br />
4-19b<br />
4-19c<br />
4-19d<br />
4-19e<br />
4-19f<br />
4-20<br />
4-20a<br />
4-20b<br />
4-20c<br />
4-20d<br />
4-20e<br />
4-21<br />
4-21a<br />
4-21b<br />
4-21c<br />
4-21d<br />
4-21e<br />
4-21f<br />
4-22<br />
4-22a<br />
4-22b<br />
4–23<br />
4–23a<br />
4–23b<br />
4–23c<br />
4–23d<br />
4-212<br />
4-213<br />
4-216<br />
4-220<br />
4-223<br />
4-228<br />
4-229<br />
4-229<br />
4-229<br />
4-229<br />
4-229<br />
4-229<br />
4-229<br />
4-230<br />
4-231<br />
4-232<br />
4-233<br />
4-233<br />
4-233<br />
4-233<br />
4-234<br />
4-234<br />
4-234<br />
4-234<br />
4-235<br />
4-235<br />
4-235<br />
4-235<br />
4-235<br />
4-236<br />
4-236<br />
4-236<br />
4–236<br />
4–239<br />
4–239<br />
4–243<br />
4–254<br />
APPENDIX A. REFERENCES<br />
Publication Indexes and General Reference . . A-1<br />
Military Publications Indexes . . . . . . . . A-1a<br />
General Reference . . . . . . . . . . . . .<br />
Forms . . . . . . . . . . . . . . . . . . . .<br />
A-1b<br />
A-2<br />
A-1<br />
A-1<br />
A-1<br />
A-1<br />
vi
TM 9-<strong>2320</strong>-<strong>211</strong>-<strong>10</strong>-1<br />
APPENDIX A — Continued<br />
Other Publications . . . . . . . . . . . . .<br />
Truck . . . . . . . . . . . . . . . . . . .<br />
General . . . . . . . . . . . . . . . . . .<br />
COMP<strong>ON</strong>ENTS OF END ITEM LIST<br />
Introduction . . . . . . . . . . . . . . . . .<br />
Scope . . . . . . . . . . . . . . . . . . . .<br />
General . . . . . . . . . . . . . . . . . . .<br />
Explanation of Columns . . . . . . . . . . .<br />
Abbreviations . . . . . . . . . . . . . . . .<br />
Integral Component of the End Item . . . . . .<br />
Basic Issue Items. .,... . . . . . . . . .<br />
ADDITI<strong>ON</strong>AL AUTHORIZATI<strong>ON</strong> LIST<br />
Introduction . . . . . . . . . . . . . . . . .<br />
Scope . . . . . . . . . . . . . . . . . . . .<br />
General . . . . . . . . . . . . . . . . . . .<br />
Explanation of Listing . . . . . . . . . . . .<br />
Additional Authorization List<br />
EXPENDABLE SUPPLIES AND MATERIALS LIST<br />
Introduction . . . . . . . . . . . . . . . . .<br />
Scope . . . . . . . . . . . . . . . . . . . .<br />
Explanation of Columns . . . . . . . . . . .<br />
II. Expendable Supplies and Materials List . . . . .<br />
INDEX . . . . . . . . . . . . . . . . . . . . . . . . . .<br />
APPENDIX B.<br />
Section I.<br />
II.<br />
III.<br />
APPENDIX C .<br />
Section I.<br />
II.<br />
APPENDIX D .<br />
Section I.<br />
VOLUME 2 OF 4<br />
SCHEDULED MAINTENANCE<br />
Paragraph<br />
A-3<br />
A-3a<br />
A-3b<br />
B-1<br />
B-2<br />
B-3<br />
B-4<br />
C-1<br />
C-2<br />
C-3<br />
D-1<br />
D-2<br />
Page<br />
A-1<br />
A-2<br />
A-2<br />
B-1<br />
B-1<br />
B-1<br />
B-1<br />
B-3<br />
B-4<br />
B-6<br />
C-1<br />
C-1<br />
C-1<br />
C-1<br />
C-2<br />
D-1<br />
D-1<br />
D-1<br />
D-2<br />
1-1<br />
CHAPTER 1. PREVENTIVE MAINTENANCE . . . . . . . . . . . . . . *<br />
2. CHECKOUT , ALINEMENT , AND ADJUSTMENT . . . . . .<br />
3. LUBRICATI<strong>ON</strong><br />
4. SCHEDULED MAINTENANCE OF MATERIAL USED IN<br />
C<strong>ON</strong>JUNCTI<strong>ON</strong> WITH MAJOR ITEMS. . . . . . . . . .<br />
1-1<br />
2-1<br />
3-1<br />
4-1<br />
CHAPTER 1.<br />
2.<br />
3.<br />
4.<br />
5.<br />
6.<br />
7.<br />
8.<br />
VOLUME 3 OF 4<br />
TROUBLESHOOTING<br />
GENERAL INFORMATI<strong>ON</strong><br />
TROUBLESHOOTING APPROACH . . . . . . . . . . . . . . . . . . .<br />
TROUBLESHOOTING INDEX . . . . . . . . . . . . . . .<br />
TEST EQUIPMENT PROCEDURES INDEX . . . . . . . . .<br />
TROUBLESHOOTING ROADMAPS . . . . . . . . . . . . .<br />
FAULT SYMPTOM INDEXES . . . . . . . . . . . . . . .<br />
SAMPLE TROUBLESHOOTING PROCEDURE . . . . . . . .<br />
FUEL SYSTEM TROUBLESHOOTING PROCEDURES . . . .<br />
1-1<br />
2-1<br />
3-1<br />
4-1<br />
5-1<br />
6-1<br />
7-1<br />
8-1<br />
vii
TM 9-<strong>2320</strong>-<strong>211</strong>-<strong>10</strong>-1<br />
CHAPTER 9.<br />
<strong>10</strong>.<br />
11.<br />
12.<br />
13.<br />
14.<br />
15.<br />
16.<br />
17.<br />
18.<br />
19.<br />
20.<br />
COOLING SYSTEM TROUBLESHOOTING PROCEDURES. . .<br />
TRANSMISSI<strong>ON</strong> SYSTEM TROUBLESHOOTING<br />
PROCEDURES<br />
TRANSFER SYSTEM TROUBLESHOOTING . . . . . . . . . . . . . . .<br />
PROCEDURES<br />
FR<strong>ON</strong>T AXLE SYSTEM TROUBLESHOOTING . . . . . . .<br />
PROCEDURES<br />
REAR AXLE SYSTEM TROUBLESHOOTING . . . . . . . . .<br />
PROCEDURES . . . . . . . . . . . . . . . . . . . .<br />
BRAKE SYSTEM TROUBLESHOOTING PROCEDURES. . . .<br />
WHEEL SYSTEM TROUBLESHOOTING PROCEDURES. . . .<br />
STEERING SYSTEM TROUBLESHOOTING PROCEDURES . .<br />
DUMP TRUCK TROUBLESHOOTING PROCEDURES . . . .<br />
FR<strong>ON</strong>T WINCH TROUBLESHOOTING PROCEDURES . . . .<br />
REAR WINCH TROUBLESHOOTING PROCEDURES . . . . .<br />
HOT WATER HEATER TROUBLESHOOTING<br />
PROCEDURES . . . . . . . . . . . . . . . . . . . ●<br />
Page<br />
9-1<br />
<strong>10</strong>-1<br />
11-1<br />
12-1<br />
13-1<br />
14-1<br />
15-1<br />
16-1<br />
17-1<br />
18-1<br />
19-1<br />
20-1<br />
VOLUME 4 OF 4<br />
MAINTENANCE<br />
CHAPTER 1. GENERAL MAINTENANCE INFORMATI<strong>ON</strong>. . . . . . . . .<br />
2. EQUIPMENT GROUP MAINTENANCE . . . . . . . . . ● .<br />
Section 1. Scope . . . . . . . . . . . . . . . . . . . . . . . .<br />
II. Engine Equipment Items Maintenance . . . . . . . . .<br />
III. Fuel System Equipment Items Maintenance . . . . . . .<br />
IV. Electrical System Equipment Items Maintenance . . . .<br />
v. Wheels Equipment Items Maintenance . . . . . . . . .<br />
1-1<br />
2-1<br />
2-1<br />
2-2<br />
2-8<br />
2-12<br />
2-15<br />
viii
TM 9-<strong>2320</strong>-<strong>211</strong>-<strong>10</strong>-1<br />
LIST OF ILLUSTRATI<strong>ON</strong>S<br />
Figure<br />
Number<br />
1-1<br />
1-2<br />
1-3<br />
1-4<br />
1-5<br />
2-1<br />
2-2<br />
2-3<br />
2-4<br />
2-5<br />
2-6<br />
2-7<br />
2-8<br />
2-9<br />
2-<strong>10</strong><br />
2-11<br />
2-12<br />
2-13<br />
2-14<br />
2-15<br />
2-16<br />
2-17<br />
2-18<br />
2-19<br />
B-1<br />
B-2<br />
B-2<br />
B-3<br />
B-4<br />
B-4<br />
Title<br />
Typical 5-Ton, 6x6 Cargo Truck (M54A2, M54A2C) . . . . . .<br />
Typical 5-Ton, 6x6 Cargo Truck (M55A2) . . . . . . . . . . .<br />
Typical 5-Ton, 6x6 Tractor Truck (M52A2) . . . . . . . . . .<br />
Typical 5-Ton, 6x6 Medium Wrecker Truck (M543A2) . . . . . .<br />
Typical 5-Ton, 6x6 Dump Truck (M51A2) . . . . . . . . . . .<br />
OveraH Equipment Block Diagram . . . . . . . . . . . . . . .<br />
Engine Components Location (Left Side) . . . . . . . . . . . .<br />
Engine Components Location (Right Side) . . . . . . . . . . .<br />
Clutch Components Location. . . . . . . . . . . . . . . . . .<br />
Electrical System Components Location . . . . . . . . . . . .<br />
Fuel and Air Intake System Components Location . . . . . . .<br />
Cooling System Components Location , . . . . . . . . . . . .<br />
Horizontal Exhaust System Components Location . . . . . . . .<br />
Vertical Exhaust System Components Location . . . . . . . . .<br />
Transmission, Transfer and Power Takeoffs Components<br />
Location . . . . . . . . . . . . . . . . . . . . . . . . . ●<br />
Axle Driving Propeller Shafts Components Location . . . . . .<br />
Auxiliary Equipment Propeller Shafts Components<br />
Location (M51A2) . . . . . . . . . . . . . . . . . . . . . .<br />
Auxiliary Equipment Propeller Shafts Components<br />
Location (M543A2) . . . . . . . . . . . . . . . . . . . . .<br />
Steering System Components Location . . . . . . . . . . . . .<br />
Handbrake System Components Location . . . . . . . . . . . .<br />
Service Brake System Components Location . . . . . . . . . .<br />
Compressed Air System Components Location . . . . . . . . .<br />
Trailer Airbrake System Components Location . . . . . . . . .<br />
Axles, Wheels and Hubs System Components Location . . . . .<br />
Integral Components . . . . . . . . . . . . .. . . .<br />
Tools and Equipment Used on All Trucks (Sheet 1 of 2) . . . .<br />
Tools and Equipment Used on All Trucks ( Sheet 2 of 2) . . . .<br />
Miscellaneous Tools and Equipment. . . . . . . . . . . . . . ●<br />
Wrecker Tools and Equipment (M543A2) (Sheet 1 of 2) . . . . .<br />
Wrecker Tools and Equipment (M543A2) (Sheet 2 of 2) . . . . .<br />
Page<br />
Number<br />
1-4<br />
1-4<br />
1-5<br />
1-5<br />
1-6<br />
2-3<br />
2-4<br />
2-5<br />
2-6<br />
2-7<br />
2-8<br />
2-9<br />
2-<strong>10</strong><br />
2-11<br />
2-12<br />
2-13<br />
2-14<br />
2-15<br />
2-16<br />
2-17<br />
2-18<br />
2-19<br />
2-20<br />
2-21<br />
B-4<br />
B-6<br />
B-8<br />
B-<strong>10</strong><br />
B-12<br />
B-14<br />
ix
TM 9-<strong>2320</strong>-<strong>211</strong>-<strong>10</strong>-1<br />
LIST OF TABLES<br />
Number<br />
1-1<br />
2-1<br />
2-2<br />
2-3<br />
2-4<br />
2-5<br />
2-6<br />
2-7<br />
2-8<br />
2-9<br />
2-<strong>10</strong><br />
4-1<br />
Title<br />
Vehicle Class Information .<br />
Weight (Pounds) . . . . .<br />
Dimensions (Inches) . . .<br />
Operating Dimensions. . .<br />
Capacities . . . .<br />
Tire Inflation Data<br />
Permissible Fuels<br />
Performance Data<br />
Shifting Speeds in<br />
. . . .<br />
. . . .<br />
. . . .<br />
. . . .<br />
MPH .<br />
Engine-and Radiator Data<br />
Winch Data . . . . . . .<br />
Vehicle Light Chart . . .<br />
.<br />
.<br />
.<br />
●<br />
✎<br />
✎<br />
●<br />
✎<br />
✎<br />
✎<br />
✎<br />
✎<br />
.<br />
.<br />
.<br />
●<br />
✎<br />
●<br />
✎<br />
✎<br />
✎<br />
✎<br />
●<br />
✎<br />
.<br />
.<br />
.<br />
.<br />
.<br />
●<br />
✎<br />
✎<br />
✎<br />
✎<br />
✎<br />
✎<br />
.<br />
.<br />
●<br />
✎<br />
●<br />
✎<br />
✎<br />
✎<br />
✎<br />
✎<br />
✎<br />
✎<br />
.<br />
.<br />
.<br />
.<br />
.<br />
●<br />
✎<br />
✎<br />
✎<br />
✎<br />
✎<br />
✎<br />
.<br />
●<br />
✎<br />
✎<br />
●<br />
✎<br />
✎<br />
✎<br />
✎<br />
✎<br />
✎<br />
✎<br />
.<br />
.<br />
.<br />
●<br />
●<br />
✎<br />
✎<br />
✎<br />
✎<br />
✎<br />
✎<br />
✎<br />
.<br />
.<br />
.<br />
.<br />
.<br />
.<br />
.<br />
.<br />
.<br />
●<br />
✎<br />
✎<br />
.<br />
.<br />
.<br />
.<br />
.<br />
●<br />
✎<br />
✎<br />
✎<br />
●<br />
✎<br />
●<br />
.<br />
.<br />
.<br />
.<br />
.<br />
.<br />
.<br />
.<br />
.<br />
.<br />
.<br />
.<br />
.<br />
.<br />
.<br />
.<br />
.<br />
.<br />
.<br />
.<br />
.<br />
.<br />
.<br />
.<br />
.<br />
.<br />
.<br />
.<br />
.<br />
.<br />
.<br />
.<br />
.<br />
.<br />
.<br />
.<br />
Page<br />
1-3<br />
2-23<br />
2-23<br />
2-24<br />
2-24<br />
2-24<br />
2-25<br />
2-27<br />
2-28<br />
2-28<br />
2-28<br />
4-46<br />
x
TM 9-<strong>2320</strong>-<strong>211</strong>-<strong>10</strong>-1<br />
CHAPTER 1<br />
INTRODUCTI<strong>ON</strong><br />
1-1. SCOPE. This technical manual contains operating instructions for the 5-ton,<br />
6x6, M39 series trucks (figures 1-1 through 1-5) equipped with multifuel engines, and<br />
operator level maintenance instructions in accordance with the maintenance allocation<br />
chart. Operating instructions for special purpose kits used with these trucks are<br />
also included. The purpose of this manual is to give the operator the information he<br />
needs for safe, trouble–free operation of the equipment under usual and unusual<br />
conditions.<br />
1-2. FORMS AND RECORDS. Maintenance forms, records and reports which are to<br />
be used by maintenance personnel at all levels are listed and prescribed by TM 38-750.<br />
1-3. EQUIPMENT IMPROVEMENT REPORT AND MAINTENANCE DIGEST (EIR MD)<br />
AND EQUIPMENT IMPROVEMENT REPORT AND MAINTENANCE SUMMARY (EIR MS).<br />
The quarterly Equipment Improvement Report and Maintenance Digest, T-B 43-0001-39<br />
series, contains valuable field information on the equipment covered in this manual.<br />
The information in the TB 43-0001-39 series is compiled from some of the Equipment<br />
Improvement Reports that you prepared on the vehicles covered in this manual. Many<br />
of these articles result from comments, suggestions, and improvement recommendations<br />
that you submitted to the EIR program. The TB 43-0001-39 series contains information<br />
on equipment improvements, minor alterations, proposed Modification Work Orders<br />
( MWO’s) , warranties (if applicable), actions taken on some of your DA form 2080’s<br />
( Recommended Changes to Publications), and advance information on proposed changes<br />
that may affect this manual. In addition, the more maintenance significant articles,<br />
including minor alterations, field-fixes, etc, that have a more permanent and continuing<br />
need in the field are republished in the Equipment Improvement Report and<br />
Maintenance Summary (EIR MS) for TARCOM Equipment (TM 43-0143). Refer to both<br />
of these publications ( TB 43-0001– 39 series and TM 43-0143) periodically, especially<br />
the TB 43-0001-39 series, for the most current and authoritative information on your<br />
equipment. The information will help you in doing your job better and will help you<br />
in keeping you advised of the latest changes to this manual. Also refer to DA Pam<br />
3<strong>10</strong>-4, index of Technical Publications, and Appendix A, References, of this manual.<br />
1-4. REPORTING EQUIPMENT IMPROVEMENT RECOMMENDATI<strong>ON</strong>S. If your truck<br />
needs improvement, let us know. Send us an EIR. You, the user, are the only one<br />
who can tell us what you don’t like about your equipment. Let us know why YOU<br />
don’t like the design. Tell us why a procedure is hard to perform. Put it on an<br />
SF 368 (Quality Deficiency Report). Mail it to us at: Commander, U.S. Army Tank-<br />
Automotive Materiel Readiness Command, ATTN: DRSTA-MB, Warren, Michigan 48090. We’ll send uou<br />
a reply.<br />
1-5. METRIC SYSTEM. The equipment /system described herein is nonmetric and<br />
does not require metric common or special tools. Therefore, metric units are not<br />
supplied. Tactical instructions, for sake of clarity, will also remain nonmetric.<br />
1-1
TM 9-<strong>2320</strong>-<strong>211</strong>-<strong>10</strong>-1<br />
1-6. DESTRUCTI<strong>ON</strong> TO PREVENT ENEMY USE. Follow procedures given in<br />
TM 750-244-6 for destruction of Army material to prevent enemy use.<br />
1-7. MANUAL ORGANIZATI<strong>ON</strong> . This manual is divided into four volumes. Volumes<br />
are divided into chapters and sections depending on the amount of subject material.<br />
The content of each volume is as follows:<br />
Volume 1. TM 9-<strong>2320</strong>-<strong>211</strong>-<strong>10</strong>-1<br />
Operation, Installation, and Reference Data<br />
Volume 2. TM 9-<strong>2320</strong>-<strong>211</strong>-<strong>10</strong>-2<br />
Scheduled Maintenance<br />
Volume 3. TM 9-<strong>2320</strong>-<strong>211</strong>-<strong>10</strong>-3<br />
Troubleshooting<br />
Volume 4. TM 9-<strong>2320</strong>-<strong>211</strong>-<strong>10</strong>-4<br />
Maintenance<br />
1-8. VEHICLE/BRIDGE CLASSIFICATI<strong>ON</strong>. Refer to table 1-1 and find your vehicle<br />
class number. Table columns are marked as follows:<br />
E - Class number of vehicle with no payload.<br />
C - Class number of vehicle with cross country payload.<br />
H - Class number of vehicle with highway payload.<br />
a. Bridges along your route may be marked with a class number. The bridge<br />
class number shows the safe capacity of the bridge. If your vehicle class number is<br />
equal to or less than the bridge class number, the bridge will hold your vehicle.<br />
WARNING<br />
If your vehicle class number is greater than the<br />
bridge class number, your vehicle is too heavy<br />
for the bridge; DO NOT CROSS.<br />
1-2
TM 9-<strong>2320</strong>-<strong>211</strong>-<strong>10</strong>-1<br />
b. For more information refer to FM 5-36.<br />
Table 1-1. Vehicle Class Information<br />
Class Number<br />
Vehicle Model NSN E c H<br />
Cargo M54A2 <strong>2320</strong>-00-055-9265 8 14 19<br />
and <strong>2320</strong>-00-055-9266 8 14 19<br />
M54A2C <strong>2320</strong>-00-926-0874 9 15 19<br />
and <strong>2320</strong>-00-761-2854 8 14 19<br />
M55A2 <strong>2320</strong>-00-055-9259 <strong>10</strong> 16 21<br />
and <strong>2320</strong>–00–073–8476 <strong>10</strong> 16 20<br />
Dump M51A2 <strong>2320</strong>-00-055-9263 <strong>10</strong> 16 22<br />
and <strong>2320</strong>-00-055-9262 <strong>10</strong> 20 40<br />
Tractor M52A2 <strong>2320</strong>-00-055-9261 8 - -<br />
and <strong>2320</strong>-00-055-9260 7 16 21<br />
Medium Wrecker M543A2 <strong>2320</strong>-00-055-9258 17 17 17<br />
1-3
TM 9-<strong>2320</strong>-<strong>211</strong>-<strong>10</strong>-1<br />
TA 08<strong>10</strong>42<br />
Figure 1-1. Typical 5-Ton, 6x6, Cargo Truck (M54A2, M54A2C).<br />
TA 08<strong>10</strong>64<br />
Figure 1-2. Typical 5-Ton, 6x6, Cargo Truck (M55A2) .<br />
1-4
TM 9-<strong>2320</strong>-<strong>211</strong>-<strong>10</strong>-1<br />
TA 08<strong>10</strong>43<br />
Figure 1-3. Typical 5-Ton, 6x6, Tractor Truck (M52A2).<br />
TA 08<strong>10</strong>65<br />
Figure 1-4. Typical 5-Ton, 6x6, Medium Wrecker Truck (M543A2).<br />
1-5
TM 9-<strong>2320</strong>-<strong>211</strong>-<strong>10</strong>-1<br />
TA 08<strong>10</strong>44<br />
Figure 1-5. Typical 5-Ton, 6x6, Dump Truck (M51A2) .<br />
1-6
TM 9-<strong>2320</strong>-<strong>211</strong>-<strong>10</strong>-1<br />
CHAPTER 2<br />
DESCRIPTI<strong>ON</strong> AND DATA<br />
Section 1. FUNCTI<strong>ON</strong>AL DESCRIPTI<strong>ON</strong><br />
2-1. GENERAL. The 5-ton, 6x6, M39 series trucks are tactical trucks, designed<br />
for use on all types of roads, highways, and cross-country terrain. They will ford<br />
hard bottom water crossings up to 30 inches deep without special fording equipment.<br />
Three basic wheelbase chassis are available for mounting various body types, (cargo,<br />
dump, medium wrecker and tractor) . The following paragraphs are provided to give<br />
the operator an overall understanding of the equipment and its main functions. The<br />
descriptive text is keyed to an overall equipment block diagram , which shows each<br />
functional group of the equipment as a block. Arrows are used to show the flow of<br />
power to and from each functional block on the diagram.<br />
WARNING<br />
This vehicle has been designed to operate safely<br />
and efficiently within the limits specified in<br />
this TM. Operation beyond these limits is<br />
prohibited IAW AR 70-1 without written approval<br />
from the Commander, U.S. Army Tank-<br />
Automotive Command, ATTN: AMSTA-CM-S,<br />
Warren, MI 48397-5000.<br />
2-2. OVERALL EQUIPMENT FUNCTI<strong>ON</strong>AL DESCRIPTI<strong>ON</strong>. (See Fig. 2-1. )<br />
a. Engine The engine supplies power<br />
.<br />
to move the truck and operate equipment<br />
b. Clutch . The clutch by means of mechanical linkage, joins power produced by<br />
the engine, to the transmission. The clutch also separates power from the transmission<br />
when not needed, or while shifting transmission gears.<br />
c. Electrical System. The 24 volt electrical system supplies electrical current to start the<br />
engine, operate lights, equipment and accessories, and to charge the batteries.<br />
d. Fuel System. The fuel system stores fuel in the tanks, delivers fuel to the<br />
engine, as required, and returns excess fuel to the tanks.<br />
e. Cooling Svstem. The cooling system removes excess heat produced while the<br />
engine is running, and keeps the engine at normal operating temperature. The<br />
cooling system also supplies heat to warm the cab or personnel compartment, when<br />
required.<br />
f. Exhaust System. The exhaust system collects and removes exhaust gases<br />
produced when the engine is operating.<br />
. Transmission System. The transmission system gives the operator a choice<br />
five g forward gear combinations (speeds) , reverse, and neutral position for best<br />
operation of the truck at all speeds and conditions.<br />
of<br />
Change 1 2-1
TM 9-<strong>2320</strong>-<strong>211</strong>-<strong>10</strong>-1<br />
I<br />
I<br />
h. Transfer System. The transfer system sends power from the transmission<br />
to the propeller shafts to drive the front and rear wheels. The system gives an<br />
additional gear combination ( speed) for each transmission speed.<br />
i. Transmission Power Takeoff System. This system sends power to the propeller<br />
shafts to operate auxiliary equipment.<br />
j. Transfer Power Takeoff System. This system sends power from the transfer<br />
unit to the propeller shafts to operate auxiliary equipment and accessories.<br />
k. Propeller Shafts. Propeller shafts are used to send power from the transmission<br />
to the transfer system and from the transfer system to the axles. Propeller<br />
shafts also send power from the power takeoff assemblies to auxiliary equip-merit and<br />
accessories.<br />
1. Steering System. When the operator turns the steering wheel, the steering<br />
system sends this action to the front wheels. This system controls the direction of<br />
the truck while in motion.<br />
m. Compressed Air System. The compressed air system provides air for service<br />
use and also for a power assist to the hydraulic brake system.<br />
n. Brakes System, When the operator steps on service brake pedal, the brakes<br />
system slows down or stops the truck. A handbrake, when set to up position by the<br />
operator, is used for parking the truck.<br />
o. Axles, Wheels, and Hubs. The axles support the weight of the truck and<br />
sends power to the hubs and wheels.<br />
p. Auxiliary Equipment and Accessories. These components do required tasks,<br />
such as pulling, lifting, heating, and towing.<br />
Section II.<br />
PHYSICAL DESCRIPTI<strong>ON</strong><br />
2-3.<br />
of the<br />
GENERAL. The following paragraphs describe systems, units and components<br />
various trucks. The diagrams show the location of these items on the vehicle.<br />
2-4.<br />
OVERALL EQUIPMENT PHYSICAL DESCRIPTI<strong>ON</strong> .<br />
a. Engine. M39 series trucks are equipped with US Army LDS 465-1 and<br />
LDS 465-1A six-cylinder, in-line, liquid-cooled, multifuel engines. The multifuel<br />
engine (fig. 2-2 and 2-3) uses the fuel injection compression-ignition principle which<br />
permits the use of various grades of fuel. Refer to table 2-6 for fuel grades to be<br />
used.<br />
2-2 Change 1
TM 9-<strong>2320</strong>-<strong>211</strong>-<strong>10</strong>-1<br />
Figure 2-1.<br />
Overall Equipment Block Diagram.<br />
2-3
TM 9-<strong>2320</strong>-<strong>211</strong>-<strong>10</strong>-1<br />
TA 08<strong>10</strong>46<br />
1. Cylinder head 6. Fuel filter<br />
2. Air compressor 7. Flywheel housing<br />
3. Oil filler cap 8. Starter<br />
4. Oil filter 9. Crankcase<br />
5. Oil cooler <strong>10</strong>. Hydraulic pump (steering system)<br />
Figure 2-2. Engine Components Location (Left Side).<br />
2-4
TM 9-<strong>2320</strong>-<strong>211</strong>-<strong>10</strong>-1<br />
TA 08<strong>10</strong>47<br />
1. Intake manifold 6. Oil pan<br />
2. Water temperature sending unit 7. Turbocharger<br />
3, Thermostat housing 8. Exhaust manifold<br />
4. Water pump 9, Manifold heater<br />
5. Generator <strong>10</strong>. Oil pressure sending unit<br />
Figure 2-3. Engine Components Location (Right Side) .<br />
2-5
TM 9-<strong>2320</strong>-<strong>211</strong>-<strong>10</strong>-1<br />
b . Clutch. The clutch (fig. 2-4) is a single plate, dry disk type. The purpose<br />
of the clutch is to separate the engine from the transmission when shifting gears.<br />
The disk of the clutch is joined to the engine flywheel. A pressure plate is joined to<br />
the input shaft of the transmission. When the clutch pedal is up, the pressure plate<br />
is forced against the disk on the flywheel and turns with the flywheel. Pushing the<br />
clutch pedal down separates the transmission by separating the pressure plate from<br />
the disk. When the transmission is separated from the engine, the transmission gears<br />
can be shifted.<br />
TA 08<strong>10</strong>48<br />
1. Clutch pedal 4. Clutch<br />
2. Transmission 5. Flywheel housing<br />
3. Clutch linkage 6. Engine<br />
Figure 2-4.<br />
Clutch Components Location.<br />
2-6
TM 9-<strong>2320</strong>-<strong>211</strong>-<strong>10</strong>-1<br />
c. Electrical System. The electrical system (fig. 2-5) is a 24-volt dc negative<br />
ground system. Two 12-volt storage batteries are connected in series to provide<br />
24 volts. The engine starter motor operates directly from the 24-volt source. The<br />
system uses a belt–driven, 24–volt generator. A battery generator indicator is found on<br />
the instrument panel. Wiring harnesses are used to carry current to operate equipment<br />
and accessories. Circuit breakers are included to protect circuits from overload.<br />
TA 08<strong>10</strong>49<br />
1. Trailer electrical coupling<br />
2. Fuel level sending unit<br />
3. Driver's cent rols and indicators<br />
4. Regulator<br />
5. Starter motor<br />
6. Lights<br />
7. Generator<br />
8. Batteries<br />
9. Battery ground strap<br />
Figure 2-5.<br />
Electrical System Components Location.<br />
2-7
TM 9-<strong>2320</strong>-<strong>211</strong>-<strong>10</strong>-1<br />
d. Fuel and Air Intake System. The fuel and air intake system (fig. 2-6)<br />
includes an intake manifold flame heater, air cleaner, fuel tanks, fuel supply pump,<br />
primary, secondary, and final fuel filters, injection pump, nozzle, fuel lines and<br />
fittings, accelerator pedal and linkage, engine stop, and hand throttle.<br />
1.<br />
2.<br />
3.<br />
4.<br />
5.<br />
6.<br />
7.<br />
8.<br />
Fuel injector nozzles and holder<br />
Engine stop control<br />
Hand throttle<br />
Accelerator pedal and linkage<br />
Fuel supply pump<br />
Fuel tank<br />
Secondary fuel filter<br />
Primary fuel filter<br />
9. Final fuel filter<br />
<strong>10</strong>. Injection pump<br />
11. Intake manifold flame heater<br />
12. Flame heater pump<br />
(Note 1: On late model trucks)<br />
13.<br />
(Note 2: On early model trucks)<br />
Turbosupercharger<br />
14. Air cleaner<br />
Figure 2-6.<br />
Fuel and Air Intake System Components Location.<br />
2-8
TM 9-<strong>2320</strong>-<strong>211</strong>-<strong>10</strong>-1<br />
e. Cooling System. The cooling system (fig. 2-7) is a sealed-type system made up<br />
of the radiator, fan, drive belts, thermostat, water pump, temperature gage, and<br />
pressure filler cap.<br />
TA 08<strong>10</strong>51<br />
1. Water temperature sending unit 4. Water pump drive belts<br />
2. Thermostat housing 5. Radiator /shroud<br />
3. Pressure filler cap 6. Fan and drive belts<br />
Figure 2-7.<br />
Cooling System Components Location.<br />
2-9
TM 9-<strong>2320</strong>-<strong>211</strong>-<strong>10</strong>-1<br />
f. Exhaust System. The exhaust gases of the engine pass from<br />
manifold into the turbo- supercharger. The pressurized gases drive<br />
charger and then pass into the exhaust pipe assembly.<br />
the exhaust<br />
the turbo-<br />
(1) Horizontal exhaust system. The horizontal exhaust system (fig. 2-8)<br />
consists of three sections and extends back along the right side of the truck to the<br />
outlet located in front of the right rear tandem wheels.<br />
1. Air intake manifold 3. Turbosupercharger<br />
2. Exhaust manifold 4. Exhaust piping<br />
Figure 2-8.<br />
Horizontal Exhaust System Components Location.<br />
2-<strong>10</strong>
TM 9-<strong>2320</strong>-<strong>211</strong>-<strong>10</strong>-1<br />
(2) Vertical exhaust system. Vertical exhaust stack kits are installed on<br />
some of the trucks. The vertical exhaust system (fig. 2-9) consists of two sections<br />
of pipe with the vertical part mounted on th-e right side of the cab and extending<br />
above the cab top.<br />
TA 08<strong>10</strong>53<br />
1. Exhaust pipe extension 4. Air intake manifold<br />
2. Shield 5. Exhaust manifold<br />
3. Exhaust pipe 6. Turbo supercharger<br />
Figure 2-9.<br />
Vertical Exhaust System Components Location.<br />
2-11
TM 9-<strong>2320</strong>-<strong>211</strong>-<strong>10</strong>-1<br />
g. Transmission. The transmission (fig. 2-<strong>10</strong>) is a manually operated synchromesh<br />
type mounted on the rear of the engine. The transmission supplies one reverse<br />
and five forward speeds.<br />
h. Transmission Power Takeoff (Fig. 2- <strong>10</strong>) . All trucks, except dump trucks,<br />
have single ended transmission power takeoff units. The dump truck has a doubleended<br />
unit.<br />
(1) Single-ended unit is a two-speed-and-reverse drive, mounted on the<br />
right side of the transmission. It is controlled by a shifting lever in the cab and<br />
supplies power to the front winch.<br />
(2) Double-ended unit is mounted on the right side of the transmission. The<br />
forward output shaft is a two-speed-and-reverse drive to the front winch with shifting<br />
lever in the cab. The rear accessory drive shaft drives the hydraulic hoist pump on<br />
dump trucks and is controlled by the driver’s dump body control lever in the cab.<br />
i. Transfer. The transfer (fig. 2-<strong>10</strong>) is a two-speed synchromesh unit driven by<br />
the transmission through a propeller shaft. The transfer drives propeller shafts to<br />
the front and rear wheels. The handbrake drum is mounted on the transfer rear<br />
output companion shaft.<br />
j. Transfer Power Takeoff. The transfer power takeoff (fig. 2-<strong>10</strong>) is attached to<br />
the rear of the transfer, and is controlled by a lever in the cab. The transfer<br />
supplies power to auxiliary equipment.<br />
1.<br />
2.<br />
3.<br />
Front transmission gearshift lever 4. Transfer<br />
Transmission 5. Transfer power takeoff<br />
Transmission power takeoff’<br />
(single-ended or double-ended)<br />
Figure 2-<strong>10</strong>.<br />
Transmission, Transfer and Power Takeoffs<br />
Components Location.<br />
2-12
TM 9-<strong>2320</strong>-<strong>211</strong>-<strong>10</strong>-1<br />
k. Propeller and Drive Shaft Systems. All propeller and drive shafts are double<br />
universal type. Axle driving propeller shafts are shown in fig. 2-11 and auxiliary<br />
equipment propeller shafts in fig. 2-12 and 2– 13.<br />
TA 08<strong>10</strong>55<br />
1. Transmission<br />
2. Transmission-to-transfer propeller shaft<br />
3. Transfer-to-forward-rear axle propeller shaft<br />
4. Forward-rear-axle-to-rear-rear axle propeller shaft<br />
5. Transfer<br />
6. Transfer-to-front axle propeller shaft<br />
Figure 2-11.<br />
Axle Driving Propeller Shafts Components Location.<br />
2-13
TM 9-<strong>2320</strong>-<strong>211</strong>-<strong>10</strong>-1<br />
TA 08<strong>10</strong>56<br />
1.<br />
2.<br />
3.<br />
4.<br />
5.<br />
6.<br />
7.<br />
8.<br />
9.<br />
Transmission power takeoff to hydraulic pump propeller shaft<br />
Front winch control lever<br />
Dump body control lever<br />
Front transmission gearshift lever<br />
Transmission power takeoff to front winch propeller shaft<br />
Front winch<br />
Transmission<br />
Transmission power takeoff<br />
Hydraulic pump<br />
Figure 2-12. Auxiliary Equipment Propeller Shafts<br />
Components Location (M51A2) .<br />
2-14
TM 9-<strong>2320</strong>-<strong>211</strong>-<strong>10</strong>-1<br />
1.<br />
2.<br />
3.<br />
4.<br />
5.<br />
6.<br />
7.<br />
8.<br />
9.<br />
<strong>10</strong>.<br />
Pillow block-to-rear winch propeller shaft<br />
Power divider-to-crane bevel gearcase propeller shaft<br />
Power divider-to-rear pillow block propeller shaft<br />
Power divider<br />
Power divider control lever<br />
Transfer case lever<br />
Transmission power takeoff to front winch propeller shaft<br />
Transmission power takeoff<br />
Transfer power takeoff<br />
Transfer takeoff-to-power divider propeller shaft<br />
Figure 2-13. Auxiliary Equipment Propeller Shafts,<br />
Components Location (M543A2) .<br />
2-15
TM 9-<strong>2320</strong>-<strong>211</strong>-<strong>10</strong>-1<br />
1. Steering System. The steering system (fig. 2-14) consists of a hydraulically<br />
assisted steering gear with pitman arm , steering wheel, hydraulic oil reservoir,<br />
hydraulic pump and steering linkage. Turning motion applied to the steering wheel<br />
is sent through these components to steer the front wheels.<br />
TA 08<strong>10</strong>58<br />
.<br />
1. Tie Rod 5. Upper drag link<br />
2. Hydraulic oil reservoir 6. Lower ‘ -<br />
drag link<br />
3. Steering wheel 7. Hydraulic pump (on engine)<br />
4. Steering gear housing with<br />
pitman arm and power cylinder<br />
Figure 2-14.<br />
Steering System Components Location.<br />
2-16
TM 9-<strong>2320</strong>-<strong>211</strong>-<strong>10</strong>-1<br />
m. Brake System. The brake system (fig 2-15 through 2-18) includes the handbrake<br />
and the service brakes. The compressed air system is covered here since it is<br />
part of the brake system.<br />
(1) The handbrake system (fig. 2-15) is made up of a handbrake lever and<br />
cable, a brakedrum and brake shoes. The drum and brakeshoes are mounted on the<br />
rear output shaft of the transfer. The handbrake lever is located inside the cab at<br />
the left of the drivers seat, When the handbrake lever is pulled up, the cable is<br />
tightened which makes the brakeshoes clamp the brakedrum and lock the rear output<br />
shaft. When the handbrake lever is pushed down, the brakeshoes let go and unlock<br />
the rear output shaft.<br />
TA 08<strong>10</strong>59<br />
1. Handbrake lever<br />
2. Handbrake cable<br />
3. Handbrake brakeshoes and drum<br />
Figure 2-15.<br />
Handbrake System Components Location.<br />
2-17
TM 9-<strong>2320</strong>-<strong>211</strong>-<strong>10</strong>-1<br />
(2) The service brake system is an air-hydraulic system made up of the<br />
foot brake pedal, pedal linkage, master cylinder, air-hydraulic cylinder, hydraulic<br />
lines to all wheels, wheel cylinders, brake drums, and shoes. The master cylinder<br />
contains hydraulic fluid. Pressure on the brake pedal is sent to the air-hydraulic<br />
cylinder. The air-hydraulic cylinder increases pressure to the wheel cylinders.<br />
The wheel cylinders expand and press the brakeshoes against the drum to slow or<br />
stop the truck. The system components are shown in fig. 2-16.<br />
TA 08<strong>10</strong>60<br />
1. Foot brake pedal<br />
2. Master cylinder<br />
3. Wheel cylinders<br />
4. Hydraulic lines<br />
5. Air-hydraulic brake cylinder<br />
Figure 2-16.<br />
Service Brake System Components Location,<br />
2-18
TM 9-<strong>2320</strong>-<strong>211</strong>-<strong>10</strong>-1<br />
(3) The compressed air system (fig. 2-17 and 2-18) consists of an air compressor,<br />
air governor and air reservoirs, and the trailer airbrake components. The<br />
compressed air system supplies air to the air–hydraulic cylinder, windshield wiper<br />
motors, horn, and air supply valves. Air from the supply valves can be used to<br />
inflate the tires. When air pressure in the air reservoir tanks is low , a buzzer is set<br />
off in the driver’s compartment to warn the driver.<br />
TA 08<strong>10</strong>61<br />
1. Air compressor (on engine) 7. Windshield wiper control<br />
2. Horn 8. Air supply valve<br />
3. Air governor 9. Air reservoirs<br />
4. Windshield wiper motors <strong>10</strong>. Drain cock<br />
5. Compressed air manifold 11. Safety valve<br />
6. Low air pressure switch 12. Air pressure gage<br />
Figure 2-17.<br />
Compressed Air System Components Location.<br />
2-19
TM 9-<strong>2320</strong>-<strong>211</strong>-<strong>10</strong>-1<br />
(4) The trailer airbrake system (fig. 2- 18) consists of the hand operated<br />
airbrake control lever, air-hydraulic cylinder, check valves, air lines, and trailer<br />
brake couplings.<br />
TA 08<strong>10</strong>62<br />
1. Trailer brake coupling ( SERVICE)<br />
2. Compressed air lines<br />
3. Compressed air manifold<br />
4. Hand operated irbrake control lever<br />
5. Trailer brake coupling (EMERGENCY)<br />
6. Air reservoirs<br />
7. Air hydraulic brake cylinder<br />
Figure 2-18.<br />
Trailer Airbrake System Components Location.<br />
2-20
TM 9-<strong>2320</strong>-<strong>211</strong>-<strong>10</strong>-1<br />
n. Axles, Wheels and Hubs ( Fig. 2-19) .<br />
(1) The front axle is made up of a housing, differential and carrier<br />
assembly, axle shaft, and universal joint. Power is sent from the differential to<br />
the wheels, through the axle shaft. Universal joints permit continuous delivery of<br />
power to the wheels while the truck is turning right or left.<br />
(2) Both rear axles are made up of a housing, differential and carrier<br />
assembly, and an axle shaft. Forward-rear and rear-rear axles are mounted one<br />
behind the other. Torque rods send driving and braking forces to the frame.<br />
There are two sets of torque rods on the right and one on the left. Power is sent<br />
from the transfer to the front rear differential by a propeller shaft, and from the<br />
forward-rear axle to the rear-rear axle differential by another propeller shaft.<br />
Axle shafts send power from the differential to the wheels.<br />
(3) The wheels are offset disk-type, fastened by capnuts to ten studs on<br />
the wheel hubs. They are equipped with snap-on type side rings for tire mounting.<br />
Tire size is 11 x 20. The capnuts can be changed between hubs on the same side,<br />
but not between hubs on opposite sides.<br />
(4) The wheel hubs are mounted on roller bearings. Each hub is fastened<br />
to an axle with an inner bearing adjusting nut, bearing nut washer, and outer bearing<br />
nut washer, and outer bearing adjusting nut. All hubs have inner seals and<br />
1. Torque rods 6.<br />
2. Differential and carrier 7.<br />
3. Rear-rear axle 8.<br />
4. Front-rear axle 9.<br />
5. Hubs<br />
Wheels<br />
Tires<br />
Front axle<br />
Steering knuckle<br />
Figure 2-19.<br />
Axles, Wheels and Hubs System<br />
Components Location.<br />
2-21
TM 9-<strong>2320</strong>-<strong>211</strong>-<strong>10</strong>-1<br />
Section III. TABULATED DATA<br />
2-5. GENERAL. This section contains reference data, in table form, for use by<br />
the operator when using the equipment. Data is given for the following areas:<br />
a. Physical data<br />
b. Functional characteristics<br />
c. Capabilities and limitations<br />
d. Environmental characteristics<br />
2-6. WEIGHT . Table 2-1 gives the weight of all trucks covered in this manual<br />
under various conditions.<br />
2-7. DIMENSI<strong>ON</strong>S . Tables 2-2 and 2-3 give overall and operating dimensions for<br />
all vehicles covered in this manual.<br />
2-8. CAPACITIES . Table 2-4 gives the liquid capacities for various systems.<br />
2-9. TIRE INFLATI<strong>ON</strong> DATA. Table 2-5 gives tire inflation data for all vehicles<br />
covered in this manual.<br />
2-<strong>10</strong>. ENVIR<strong>ON</strong>MENTAL CHARACTERISTICS. Table 2-6 lists the fuels that can be<br />
used in all vehicles, under various temperature conditions.<br />
2-11. FUNCTI<strong>ON</strong>AL CHARACTERISTICS. Table 2-7, 2-8, 2-9, and 2-<strong>10</strong> give data<br />
relating to the functional characteristics of all trucks covered in this manual.<br />
2-12. COMP<strong>ON</strong>ENTS OF END ITEM LIST. Integral components and basic issue<br />
items required for the 5-ton trucks are listed in appendix B .<br />
2-13. ADDITI<strong>ON</strong>AL AUTHORIZATI<strong>ON</strong> LIST. Additional items authorized for the<br />
support of the 5-ton trucks are listed in appendix C.<br />
2-14. EXPENDABLE SUPPLIES AND MATERIALS LIST . Expendable supplies and<br />
materials needed to operate and maintain the 5-ton trucks are listed in appendix D .<br />
2-22
TM 9-<strong>2320</strong>-<strong>211</strong>-<strong>10</strong>-1<br />
Table 2-1.<br />
Weight (Pounds)<br />
Pay Load<br />
Towed Load<br />
Truck Net Cross-<br />
Type w /winch High way Country High way Cross-Country<br />
M51A2 (a) 21986 20,000 <strong>10</strong>,000 (e) 30,000 (e) 15,000<br />
M52A2 (a) 18560 (b) 25,000 (c) 15,000 (b) 55,000 (b) 30,000<br />
M54A2 (a) 19480 20,000 <strong>10</strong>,000 (e) 30,000 (e) 15,000<br />
M54A2C (a) 19946 20,000 <strong>10</strong>,000 (e) 30,000 (e) 15,000<br />
M55A2 (a) 20606 20,000 <strong>10</strong>,000 (e) 30,000 (e) 15,000<br />
M543A2 34690 (d) (d) (e) 30,000 (e) 15,000<br />
(a) Add 714 pounds for truck equipped with front winch.<br />
(b) On fifth wheel.<br />
(c) 15,000 lb load on fifth wheel for limited cross-country operation.<br />
(d) See crane safe load plate.<br />
(e) On pintle.<br />
Truck<br />
Type<br />
M51A2<br />
M52A2<br />
M54A2<br />
M54A2C<br />
M55A2<br />
M543A2<br />
Overall<br />
Length<br />
w /winch<br />
281 5/8<br />
273<br />
314 1/4<br />
314 1/4<br />
385 15/16<br />
349<br />
Table 2-2. Dimensions (Inches)<br />
I<br />
Overall<br />
Overall<br />
Ground<br />
Height Width Clearance<br />
1<strong>10</strong> 5/8<br />
<strong>10</strong>3 1/8<br />
116<br />
116<br />
117 1/2<br />
<strong>10</strong>8 5/8<br />
97 1/4<br />
97<br />
97<br />
97<br />
97 1/2<br />
96 1/4<br />
<strong>10</strong> 1/2<br />
<strong>10</strong> 1/2<br />
<strong>10</strong> 1/2<br />
<strong>10</strong> 1/2<br />
<strong>10</strong> /2<br />
11<br />
I<br />
Subtract<br />
15 1/2 inches fro<br />
length for truck not equipped with forward winch.<br />
2-23
TM 9-<strong>2320</strong>-<strong>211</strong>-<strong>10</strong>-1<br />
Truck Type<br />
Table 2-3.<br />
Wheelbase<br />
(inches)<br />
Operating Dimensions<br />
Turning Radius<br />
W /Winch I Wo /Winch<br />
M51A2<br />
167<br />
39 ft 3 in.<br />
38 ft 9 in.<br />
M52A2<br />
167<br />
39 ft 3 in.<br />
38 ft 9 in.<br />
M54A2<br />
179<br />
41 ft 7 in.<br />
41 ft 1 in.<br />
M54A2C<br />
179<br />
41 ft 7 in.<br />
41 ft 1 in.<br />
M55A2<br />
215<br />
46 ft 6 in.<br />
46 ft<br />
M543A2<br />
179<br />
46 ft 8 in.<br />
Table 2-4.<br />
Capacities<br />
Description Capacity Truck (s)<br />
Cooling system 44 qt All trucks<br />
Crankcase 18 qt All trucks<br />
Oil filter (each) 2 qt All trucks<br />
Differentials (each) 12 qt All trucks<br />
Fuel tank 78 gal M54A2, M54A2C , M55A2<br />
Fuel tank 1<strong>10</strong> gal M51A2, M52A2 (2 tanks)<br />
Fuel tank 133 gal M543A2 (2 tanks)<br />
Transmission w/o PTO 9 qt All trucks<br />
Transfer 5 1/4 qt All trucks<br />
Front winch 2.6 qt All trucks<br />
Rear winch 3 qt M543A2<br />
Table 2-5,<br />
Tire Inflation Data<br />
Condition<br />
Pressure (psi)<br />
Highway 70<br />
Cross-country 35<br />
Mud, snow , and sand 25<br />
2-24
TM 9-<strong>2320</strong>-<strong>211</strong>-<strong>10</strong>-1<br />
Table 2-6.<br />
Permissible Fuels<br />
Ambient Temperature<br />
Fuel<br />
Primary Fuels<br />
No Limit<br />
Above - 51°F<br />
Above - <strong>10</strong>°F<br />
Above +32°F<br />
Diesel fuel, VV-F-800, grade DF-A<br />
(NATO code no. F-54)<br />
Turbine fuel, MIL-T-5624, grade JP-5<br />
(NATO code no. F- 44)<br />
Diesel fuel, VV-F-800, grade DF-1<br />
(NATO code no. F-54)<br />
Diesel fuel, VV-F-800, grade DF-2<br />
(NATO code no F-54)<br />
Alternate Fuels<br />
Above -76°F<br />
Aviation gasoline, MIL-G-5572,<br />
AVGAS 80/87 (NATO code no. F-12)<br />
* Commercial aviation gasoline<br />
(ASTM D9<strong>10</strong>) , grade 80/87<br />
* Commercial gasoline, leaded, lowlead,<br />
or unleaded, when research<br />
octane number (R<strong>ON</strong> ) is 89 or below,<br />
or Octane Number display on<br />
retail gasoline pumps in C<strong>ON</strong>US is<br />
85 or below<br />
Above -58°F<br />
Turbine fuel, aviation, kerosenetype,<br />
MIL-T-83133, grade JP-8<br />
(NATO code no. F-34)<br />
Above -46°F<br />
Turbine fuel, low volatility,<br />
MIL-T-38219, grade JP-7<br />
* Commercial aviation turbine fuel<br />
(ASTM D1655) , jet A and jet A-1<br />
*Any temperature at which the fuel will flow.<br />
CAUTI<strong>ON</strong><br />
Other fuels may be used to run multifuel engines.<br />
If engine runs rough when using a new fuel, add<br />
<strong>10</strong>% to 30% diesel fuel to smooth engine performance.<br />
Failure to add diesel fuel to smooth engine performance<br />
will result in burned pistons.<br />
2-25
TM 9-<strong>2320</strong>-<strong>211</strong>-<strong>10</strong>-1<br />
Ambient Temperature<br />
Table 2-6.<br />
Permissible Fuels - Cent<br />
Fuel<br />
Alternate Fuels<br />
Above -<strong>10</strong>°F Commercial diesel fuel (ASTM D975)<br />
1-D and no. 1<br />
Above +15°F<br />
Above +32°F<br />
Diesel fuel, MIL-F-16884<br />
(NATO code no. F-75 or F-76)<br />
Commercial diesel fuel<br />
(ASTM D975) , 2-D and no. 2<br />
Above +40°F<br />
Distillate fuel, MIL-F-24397, ND<br />
(NATO code no. F-85)<br />
* Any mixture of primary and/or<br />
alternate fuels listed above<br />
*Any temperature at which the fuel will flow.<br />
CAUTI<strong>ON</strong><br />
Other fuels may be used to run multifuel engines,<br />
If engine runs rough when using a new fuel, add<br />
<strong>10</strong>% to 30% diesel fuel to smooth engine performance.<br />
Failure to add diesel fuel to smooth engine performance<br />
will result in burned pistons.<br />
2-26
TM 9-<strong>2320</strong>-<strong>211</strong>-<strong>10</strong>-1<br />
Table 2-7.<br />
Performance Data<br />
Maximum Maximum Cruising Range Idle Engine<br />
Speed Grade (miles ) Speed Operating<br />
Model (mph) (%) Diesel Gasoline (rpm) Temperature<br />
M54A2 54 60 350 290 650-700 160°-180°F<br />
M54A2 w/<br />
towed load 54 47 — 650-700 160°-180°F<br />
M54A2C 54 60 350 290 650-700 160°-180°F<br />
M54A2C w/<br />
towed load 54 47 — — 650-700 160°-180°F<br />
M55A2 54 60 350 290 650-700 160°-180°F<br />
M55A2 w/<br />
towed load 54 47 — — 650-700 160°-180°F<br />
M51A2 54 60 477 395 650-700 160°-180°F<br />
M51A2 w/<br />
towed load 54 47 — — 650-700 160°-180°F<br />
M52A2 54 60 477 395 650-700 160°-180°F<br />
M52A2 w/<br />
towed load 54 47 — — 650-700 160°-180°F<br />
M543A2 52 61 583 484 650-700 160°-180°F<br />
Fuel consumption (approx)<br />
Fording depth:<br />
With fording kit<br />
Without fording kit<br />
5 mpg<br />
78 in.<br />
30 in.<br />
2-27
TM 9-<strong>2320</strong>-<strong>211</strong>-<strong>10</strong>-1<br />
Table 2-8.<br />
Shifting Speeds in Mph<br />
Transmission<br />
1st gear<br />
2nd gear<br />
3rd gear<br />
4th gear<br />
5th gear<br />
Reverse<br />
Transfer Low<br />
3 1/2<br />
6<br />
<strong>10</strong><br />
18<br />
26<br />
3 1/2<br />
Transfer High<br />
7<br />
13<br />
21<br />
35<br />
53<br />
7<br />
Table 2-9.<br />
Engine and Radiator Data<br />
Attribute<br />
Make<br />
Model<br />
Cylinders (in-line)<br />
Brake horsepower<br />
Ignition system<br />
Firing order<br />
Cooling<br />
Thermostat opens<br />
Specification<br />
Continental<br />
LDS-465-1, LDS-465-1A<br />
6<br />
175-180 (gross at 2,600 rpm)<br />
Compression<br />
1-5- 3-6-2-4<br />
Liquid<br />
180°F<br />
Table 2-<strong>10</strong>. Winch Data<br />
I<br />
Front winch capacity (max) (all models)<br />
Cable length (M543A2)<br />
Cable length (all other models)<br />
M543A2 rear winch capacity (max)<br />
Cable length<br />
M543A2 boom hoist winch cable length<br />
20,000 lb<br />
280 ft<br />
200 ft<br />
45,000 lb<br />
280 ft<br />
95 ft, 5 in.<br />
2-28
TM 9-<strong>2320</strong>-<strong>211</strong>-<strong>10</strong>-1<br />
CHAPTER 3<br />
SERVICE UP<strong>ON</strong> RECEIPT OF EQUIPMENT<br />
3-1. GENERAL. When a new , used or reconditioned truck is first received by<br />
the using organization, it is the responsibility of the using organization to see that<br />
the truck has been inspected and prepared for service by the supporting service<br />
unit. This will be shown on DA Forms 2408-5, 2408-6, 2408-7 and 2408-8, which<br />
are a record of all services and corrective maintenance. If not done before, the<br />
following services must be done before placing the truck into service:<br />
a. Oil and grease the truck in accordance with lubrication order<br />
LO 9-<strong>2320</strong>-<strong>211</strong>-12, regardless of interval, except for gearcases and engine<br />
crankcase.<br />
b. Check the processing tab for gearcase and engine oil. If the tag shows<br />
that the engine oil is good for 500 miles of operation, and is the proper grade for<br />
the local climate, check the oil level but do not change the oil.<br />
c. Plan for<br />
tive Maintenance<br />
a second preventive maintenance service on DD Form 314 Preven-<br />
Schedule and Record, and arrange for an oil change at 500 miles.<br />
d. Services to be done by organizational maintenance personnel when trucks<br />
are received are designated in TM 9-<strong>2320</strong>-<strong>211</strong>-20. Whenever possible the operator<br />
will help organizational maintenance personnel in doing these services.<br />
3-2. BREAK-IN OPERATI<strong>ON</strong>.<br />
a. General. Before starting the truck, the operator must become familiar with<br />
the truck controls and operation as given in chapter 4.<br />
b. Break-in. When break-in of a new or rebuilt truck is done in normal<br />
service, the operator is cautioned to take special care in doing all before operation<br />
checks and inspections given in preventive maintenance checks and services , volume<br />
2, chapter 1, of this manual. The following precautions must be taken during<br />
break in:<br />
(1) Do not go above the speed shown on the truck instruction and data<br />
plate found on the instrument panel directly in front of the driver.<br />
(2) Pick the best gear selection for the driving conditions. Do not skip<br />
speeds when shifting gears .<br />
(3) Avoid fast starts and stops.<br />
(4) Avoid sudden stops (unless in an emergency) .<br />
3-1
TM 9-<strong>2320</strong>-<strong>211</strong>-<strong>10</strong>-1<br />
terrain.<br />
(5) Avoid<br />
long runs under other than normal weather, and on rough<br />
(6) Avoid<br />
(7) Avoid<br />
(8) Avoid<br />
c. Road Test.<br />
sudden forced movement<br />
overheating the engine.<br />
operating the engine or<br />
of an operating control.<br />
the power train at full speed.<br />
CAUTI<strong>ON</strong><br />
Do not go faster than the maximum allowable<br />
speeds shown on the MAXIMUM ROAD SPEED<br />
data plate. Refer to paragraph 4-6 d. Do<br />
not drive continuously at the maximum allow–<br />
able speeds. Be alert for signs of equipment<br />
failure.<br />
All trucks received by the using organization must be road tested to check operation<br />
and condition. For all new or reconditioned trucks, except those driven 50<br />
miles or more during deliver, the road test will be a minimum of 50 miles. For used<br />
trucks and trucks driven 50 miles or more during delivery, the road test will be long _<br />
enough to see vehicle operation and condition. The operator will look at the instrument<br />
panel and gages, as often as possible, for signs of unsatisfactory performance.<br />
Stops will be made at least every <strong>10</strong> miles to give the operator a chance to check<br />
the truck for possible coolant, oil, fuel or exhaust leaks and any signs that may<br />
show the engine, transmission, wheel hubs , brakedrums , axle differential or transfer<br />
assemblies are overheated. The truck must be checked thoroughly for any control<br />
hard to operate and any instrument not operating properly. Unusual noises and<br />
vibrations will be noted. All unusual conditions will be told to the organizational<br />
maintenance unit.<br />
d. After the Road Test. After the road test, fix any faulty condition which<br />
can be done at operator’s maintenance level. Tell the organizational maintenance<br />
unit about any other faulty conditions.<br />
3-2
TM 9-<strong>2320</strong>-<strong>211</strong>-<strong>10</strong>-1<br />
CHAPTER 4<br />
OPERATING PROCEDURES<br />
Section I.<br />
DESCRIPTI<strong>ON</strong> AND USE OF OPERATOR’S C<strong>ON</strong>TROLS<br />
AND INDICATORS<br />
4-1. GENERAL. Before trying to operate equipment, be sure you know where all<br />
controls and indicators are found, what each control does, and what information each<br />
indicator is giving.<br />
NOTE<br />
Controls and indicators described in this section are<br />
generally the same for all trucks covered in this manual,<br />
except where noted.<br />
In this manual the term “left” is the driver’s side.<br />
The term “right” is the opposite side.<br />
4-1
TM 9-<strong>2320</strong>-<strong>211</strong>-<strong>10</strong>-1<br />
4-2. CHASSIS C<strong>ON</strong>TROLS AND INDICATORS.<br />
a. Instrument Panel.<br />
INSTRUMENT PANEL LEFT SIDE<br />
1. START button. When pressed, 4. BATTERY switch. When set to<br />
electric current is sent to starter<br />
<strong>ON</strong> position, power is sent to<br />
to crank engine.<br />
all electrical circuits except the<br />
horn, lights, and intake manifold<br />
2. THROTTLE control. Lets you<br />
airheater.<br />
set engine to any speed without<br />
stepping on accelerator pedal. 5. ENG. STOP control. When pulled<br />
When THROTTLE control is<br />
out, stops engine by cutting off<br />
pulled out, it locks in any engine<br />
fuel to engine.<br />
speed position. Turning control<br />
right or left unlocks it.<br />
3. INTAKE MANIFOLD AIRHEATER<br />
switch. When held in <strong>ON</strong> position,<br />
turns intake manifold airheater on.<br />
Used for starting engine when<br />
temperature is below +20°F.<br />
TA 053801<br />
4-2
TM 9-<strong>2320</strong>-<strong>211</strong>-<strong>10</strong>-1<br />
a. Instrument Panel - Cent,<br />
INSTRUMENT PANEL LEFT SIDE - C<strong>ON</strong>T<br />
1. WARNING light switch (on wrecker 2. Windshield wiper control knob.<br />
trucks). When set to <strong>ON</strong> position, When turned to the right, starts<br />
a warning light on left front fender wipers and makes wipers go faster.<br />
is lit. Used for towing and crane When turned to the left, slows down<br />
operations.<br />
wiper speed and stops wiper.<br />
1. FUEL tank selector switch (on dual 3. FUEL tank selector switch (on<br />
fuel tank trucks except wreckers) .<br />
wrecker trucks ). Works in same<br />
When switch is set to L position,<br />
way as FUEL tank selector<br />
fuel gage will show the amount of switch (1) .<br />
fuel in the left fuel tank. When<br />
set to R position, fuel gage will<br />
4. Vehicle lights switch. Used to<br />
show the amount of fuel in right<br />
turn truck lights on or off.<br />
fuel tank.<br />
TA 053802<br />
4-3
TM 9-<strong>2320</strong>-<strong>211</strong>-<strong>10</strong>-1<br />
a. Instrument Panel - Cent.<br />
INSTRUMENT PANEL RIGHT SIDE<br />
1. Electric BRAKE LOCK button (on 3. FLOOD LT (floodlight) master<br />
wrecker trucks) . When pressed in control switch (on wrecker trucks )<br />
at the same time the service brake<br />
When set to <strong>ON</strong> position, sends<br />
pedal is pressed, service brakes<br />
electric power to each of three<br />
will lock in hold position. Service floodlight toggle switches.<br />
brakes become unlocked if service<br />
brake pedal is pressed without<br />
4. Fuel transfer pump green inpressing<br />
electric BRAKE LOCK<br />
dicator light (on trucks with dual<br />
button.<br />
fuel tanks ) . Is lit when FUEL<br />
TRANSFER PUMP switch is turned<br />
2. FUEL TRANSFER PUMP switch (on to <strong>ON</strong> position.<br />
dual fuel tank trucks) . When set<br />
to <strong>ON</strong> position, fuel is pumped 5. Air restriction indicator. When red<br />
from reserve tank to main tank.<br />
band shows in window, engine air<br />
Switch must be kept in OFF posifilter<br />
needs servicing.<br />
tion when not in use.<br />
TA 053803<br />
4-4
TM 9-<strong>2320</strong>-<strong>211</strong>-<strong>10</strong>-1<br />
a. Instrument panel controls and Indicators - Cont.<br />
INSTRUMENT PANEL CENTER SECTI<strong>ON</strong><br />
(All trucks except some later model M52A2 tractor trucks)<br />
1. Fuel gage. Shows fuel level in it shows batteries and charging<br />
fuel tank(s) .<br />
system are normal. When needle<br />
2.<br />
is in yellow or left red area,<br />
Speedometer-odometer. Speed-<br />
it means low battery voltage.<br />
ometer shows truck roadspeed<br />
When needle is in right red area,<br />
from O to 60 miles per hour (mph).<br />
it means charging system is<br />
Odometer shows total mileage<br />
overcharging.<br />
truck has traveled.<br />
6. Air pressure gage. Shows<br />
3. Tachometer-total engine time<br />
pressure in the compressed air<br />
meter. Tachometer shows engine<br />
reservoir tanks from O to 120<br />
speed from O to 4000 revolutions<br />
pounds per square inch (psi).<br />
per minute (rpm) . Total engine<br />
time meter gives total hours 7. Oil pressure gage. Shows engine<br />
engine has run.<br />
oil pressure from O to 60 psi.<br />
4. Water temperature gage. Shows 8. High beam indicator. Is lit<br />
temperature of engine coolant<br />
when headlights are on high<br />
from 120° to 240°F.<br />
beam.<br />
5. Battery-generator indicator.<br />
When needle stays in green area,<br />
TA 053804<br />
4-5
TM 9-<strong>2320</strong>-<strong>211</strong>-<strong>10</strong>-1<br />
a. Instrument panel - Cent.<br />
INSTRUMENT PANEL CENTER SECTI<strong>ON</strong><br />
(Some later model M5242 tractor trucks)<br />
1. Tachograph. Shows: 4. Fuel gage. Show fuel level<br />
(a) Truck roadspeed from in fuel tanks.<br />
0 to 70 mph.<br />
(b) Total mileage truck has<br />
traveled.<br />
(c) Engine speed from 0 to<br />
2800 rpm.<br />
(d) Time of day. Inner scale is<br />
a clock.<br />
(e) Engine overspeed warning<br />
light. Is lit when engine<br />
speed is 3000 rpm or more.<br />
2. Oil pressure gage. Shows engine<br />
oil pressure from 0 to 120 psi.<br />
3. Water temperature gage. Shows<br />
temperature of engine coolant<br />
from 120° to 240°F.<br />
5. Battery-generator indicator.<br />
When needle stays in green area,<br />
it shows batteries and charging<br />
system are normal. When needle<br />
is in yellow or left red area it<br />
means low battery voltage. When<br />
needle is in right red area, it<br />
means charging system is<br />
o v e r c h a r g i n g .<br />
6. Air pressure gage. Shows<br />
pressure in compressed air<br />
reservoir tanks from 0 to 120 psi.<br />
7. High beam indicator. Is lit<br />
when headlights are on high<br />
beam.<br />
4-6
TM 9-<strong>2320</strong>-<strong>211</strong>-<strong>10</strong>-1<br />
b. Windshield.<br />
1. Windshield wiper motor reset 3. Windshield<br />
button. When in the out position, windshield<br />
wiper motor will not operate.<br />
Press in before turning windshield<br />
wiper control knob to <strong>ON</strong> position.<br />
2, Windshield wiper lever. Gives a<br />
way to move the windshield wiper<br />
manually.<br />
4. Windshield<br />
windshield<br />
clamping screws. Locks<br />
in any open position.<br />
locking handle. Locks<br />
in closed position.<br />
4-7
TM 9-<strong>2320</strong>-<strong>211</strong>-<strong>10</strong>-1<br />
c. Driver’s Compartment.<br />
1. Steering wheel. Controls both levers are pulled up, turns<br />
direction of the truck.<br />
hazard flasher signals on. When<br />
2. Directional turn signal control directional turn signal control<br />
lever. When lever is pushed lever is pushed down to center<br />
down, turns left turn signals<br />
position, turns hazard flasher<br />
on. When pushed up turns signals off.<br />
right turn signals on. Lever 4. Horn button. When pressed in,<br />
must be pushed back to center<br />
sounds horn.<br />
position (off) when turn is<br />
finished. 5. Hand operated air brake control<br />
lever (on tractor trucks and some<br />
3. Hazard flasher lever. When lever wrecker trucks) . When lever is<br />
is pulled and held against direc–<br />
moved down toward driver, controls<br />
tional turn signal control lever and<br />
air brakes in towed load.<br />
TA 053806<br />
4-8
TM 9-<strong>2320</strong>-<strong>211</strong>-<strong>10</strong>-1<br />
c. Driver’s Compartment.<br />
1. Air supply valve. Is an emer- 4. Accelerator foot pedal. When<br />
gency source of compressed air<br />
pressed in, engine will speed up.<br />
for filling tires with air, clean-<br />
When let go, engine — will slow down.<br />
ing air filters, etc.<br />
5. Dimmer foot switch. When pressed<br />
2. Cowl ventilators. When open, in, raises or lowers headlight<br />
lets air flow into driver’s<br />
beam.<br />
compartment.<br />
6. Clutch foot pedal. When pressed<br />
3. Service foot brake. When in, disconne-cts the clutch so that<br />
pressed in, slows down and<br />
gears can be shifted.<br />
stops truck.<br />
TA 053807<br />
4-9
TM 9-<strong>2320</strong>-<strong>211</strong>-<strong>10</strong>-1<br />
c. Driver’s Compartment.<br />
1. TRANSFER CASE lever. Is 3. Front WINCH C<strong>ON</strong>TROL lever hinge<br />
pushed down to LOW position for lock . Is used to lock front WINCH<br />
heavy load conditions. Is pulled<br />
C<strong>ON</strong>TROL lever in neutral position<br />
up to HIGH position for light load<br />
when not in use.<br />
conditions.<br />
NOTE<br />
2. Front WINCH C<strong>ON</strong>TROL lever<br />
(on trucks with front winch) .<br />
The location of the TRANSFER<br />
Is moved down to H (high) or<br />
CASE lever and the front WINCH<br />
L (low) position to give power<br />
C<strong>ON</strong>TROL lever are reversed on<br />
to front winch for reeling in a<br />
some trucks. There are several<br />
load. Move to R (reverse)<br />
differences that help to name the<br />
position to let go of a load.<br />
levers. The TRANSFER CASE<br />
lever has 3 positions. The front<br />
WINCH C<strong>ON</strong>TROL lever has 5<br />
positions and a hinge lock to lock<br />
it in neutral position.<br />
LATE MODE<br />
EARLY MODE<br />
LATE MODEL TRUCKS<br />
EARLY MODEL TRUCKS<br />
TA 053808<br />
4-<strong>10</strong>
TM 9-<strong>2320</strong>-<strong>211</strong>-<strong>10</strong>-1<br />
c. Driver’s Compartment.<br />
1. FR<strong>ON</strong>T TRANSMISSI<strong>ON</strong> gearshift brake cable tension higher. Knob is<br />
lever. Used to place the trans- turned left to set brake cable<br />
mission in one of five forward<br />
tension lower.<br />
positions, reverse or neutral.<br />
3. Operator’s seat adjuster handle.<br />
2. Handbrake lever. Is pulled up to When handle is pulled up, seat is<br />
set handbrake and pushed down<br />
unlocked and can be pushed forto<br />
release brakes. Knob at top ward or backward. When handle<br />
of handle is turned right to set<br />
is let go, set will lock in position.<br />
TA 053809<br />
4-11
TM 9-<strong>2320</strong>-<strong>211</strong>-<strong>10</strong>-1<br />
c. Driver’s Compartment.<br />
1. POWER DIVIDER control lever (on<br />
wrecker trucks). When lever is<br />
moved forward to ENGAGE position,<br />
the power divider will drive<br />
the rear winch and crane hydraulic<br />
pump. When lever is moved<br />
backward to DISENGAGE position,<br />
power to the rear winch and crane<br />
hydraulic pump is cut off.<br />
2. Safety lock. Locks POWER<br />
DIVIDER control lever in<br />
DISENGAGE position when<br />
turned to side position.<br />
4-12
TM 9-<strong>2320</strong>-<strong>211</strong>-<strong>10</strong>-1<br />
c. Driver’s Compartment.<br />
I<br />
1. Dump body control lever (on 2.<br />
dump trucks) . Is moved forward<br />
or backward to control dump body.<br />
(a) POWER UP position raises<br />
dump body.<br />
(b) HOLD position holds dump<br />
body up.<br />
(c) POWER DOWN position<br />
lowers dump body.<br />
(d) NEUTRAL position turns off<br />
hydraulic power to dump<br />
body .<br />
Safety lock. Locks dump body<br />
control lever in NEUTRAL<br />
position (dump body down) when<br />
turned to side position.<br />
WARNING<br />
Dump body control lever must<br />
always be locked in NEUTRAL<br />
position when not in use or<br />
when truck is used as a troop<br />
transport.<br />
I<br />
4-13
TM 9-<strong>2320</strong>-<strong>211</strong>-<strong>10</strong>-1<br />
d. Front Winch.<br />
1. Front winch drum clutch lever. 5. Front winch cable tension control<br />
Is moved away from winch drum<br />
lever (on trucks with level wind<br />
to mesh clutch with drum. Is device) . Used to put tension on<br />
moved toward drum to free drum.<br />
winch cable when rewinding without<br />
2, Front winch drum clutch lever<br />
a load.<br />
hinge lock. Used to lock front 6. Front winch cable tension control<br />
winch drum clutch lever ( 1)<br />
lever lock knob. Is used to lock<br />
in free position,<br />
front winch cable tension control<br />
3. Front winch drum lock knob.<br />
lever (5) in OFF or in tension<br />
Used to lock the drum when front<br />
position.<br />
winch is not in use. 7. Front winch control lever (not<br />
4. Front winch level wind lock knob<br />
shown). Refer to driver’s compartment<br />
controls and indicators, para<br />
(on trucks with level wind<br />
device) , Is used to lock front<br />
4- C ,<br />
winch level wind device when not<br />
in use.<br />
TA 053812<br />
4-14
TM 9-<strong>2320</strong>-<strong>211</strong>-<strong>10</strong>-1<br />
e. Trailer Brake.<br />
1. EMERG. air valve handles. Found 2. Service air valve handle. Found<br />
on left front and right rear of<br />
on left rear of truck. Valve<br />
truck. Valve handle is turned 90° handle is turned 90° left to open<br />
left to open to send or get com-<br />
and join brake systems of truck<br />
pressed air from another truck.<br />
with another truck.<br />
TA 053813<br />
4-15
TM 9-<strong>2320</strong>-<strong>211</strong>-<strong>10</strong>-1<br />
4-3. EQUIPMENT BODY C<strong>ON</strong>TROLS AND INDICATORS .<br />
a. Tractor Truck (M52A2).<br />
1. Airbrake hose coupling shutoff 2. Hand operated air brake control<br />
cocks . Are turned on (side lever (not shown). Controls air<br />
position) to let air come in semi-<br />
brakes for towed loads only.<br />
trailer brake system after it is<br />
Refer to driver’s compartment conhooked<br />
up. Must be turned off trols and indicators, para 4-2C.<br />
(in line, up position) before semitrailer<br />
is unhooked.<br />
TA 053814<br />
4-16
TM 9-<strong>2320</strong>-<strong>211</strong>-<strong>10</strong>-1<br />
a. Tractor Truck (M52A2) - Cont.<br />
1. Fifth wheel (semitrailer coupler) 90° left or right, jaws can be<br />
locking plunger lever. Is pulled<br />
unlocked by locking plunger<br />
forward to make fifth wheel ready lever ( 1).<br />
for coupling, and to unlock jaws (4)<br />
to separate semitrailer from tractor.<br />
Fifth wheel wedges. Full-in<br />
position locks walking beam for on-<br />
2. Locking plunger safety latch. When highway travel. Full-out position<br />
in down position, keeps jaws from<br />
unlocks walking b earn for offbeing<br />
opened. When latch is moved highway travel.<br />
4-17
TM 9-<strong>2320</strong>-<strong>211</strong>-<strong>10</strong>-1<br />
b. Dump Truck (M51A2) .<br />
1. Tailgate control rod hand lever.<br />
Is pulled forward and down as<br />
far as it will go to open the lower<br />
tailgate latches.<br />
partment controls and indicators,<br />
para 4-2c.<br />
3. Dump body control lever safety<br />
lock (not shown) . Refer to<br />
2. Dump body control lever (not driver’s compartment controls and<br />
shown) . Refer to driver’s com- indicators, para 4–2C.<br />
TA 053816<br />
4-18
TM 9-<strong>2320</strong>-<strong>211</strong>-<strong>10</strong>-1<br />
c. Wrecker Truck (M543A2).<br />
1.<br />
2.<br />
3.<br />
Cable tensioner valve control.<br />
Used to put tension on rear winch<br />
cable when rewinding without a<br />
load.<br />
CRANE DRIVE hydraulic pump control<br />
lever. When pulled toward<br />
front of wrecker to ENGAGE posiition,<br />
sends hydraulic power to<br />
crane control bank. Is pushed<br />
toward rear of wrecker to DIS-<br />
ENGAGE position to disconnect<br />
hydraulic power for crane.<br />
Throttle control lever. Is used to<br />
set engine speed for rear winch<br />
and crane operation. When pulled<br />
toward front of wrecker, speeds up<br />
engine. Pushing it back toward<br />
rear of wrecker slows engine<br />
speed.<br />
4.<br />
5.<br />
6.<br />
Rear WINCH SHIFT lever. Is<br />
pushed toward rear of wrecker to<br />
WIND position to reel in a load.<br />
Pulled to UNWIND position to<br />
let go of a load.<br />
ENGINE CLUTCH C<strong>ON</strong>TROL lever<br />
Is pushed down to ENGAGE<br />
position to operate rear winch or<br />
crane. Is pulled up to DISENGAGE<br />
position before shifting rear winch<br />
lever or crane hydraulic pump<br />
control.<br />
Rear winch level wind lock knob.<br />
Is used to lock rear winch level<br />
wind device when not in use.<br />
4-19
TM 9-<strong>2320</strong>-<strong>211</strong>-<strong>10</strong>-1<br />
c. Wrecker Truck (M543A2) - Cent.<br />
1. B00M control lever. Is pulled 5. THROTTLE switch. Is used to cut<br />
toward operator to raise boom<br />
out (override) the crane engine<br />
and is pushed away from operator<br />
speed governor. When placed in<br />
to move boom down. Maximum<br />
<strong>ON</strong> position, engine speed is not<br />
elevation is about 45°.<br />
controlled by governor.<br />
2. HOIST control lever. Is pulled 6. Floodlight switches. On each of<br />
toward operator to raise cable<br />
three crane floodlights. Used to<br />
hook . When lever is pushed away turn floodlights on or off.<br />
from operator, the cable hook is<br />
moved down.<br />
7. Electric BRAKE lock switch (not<br />
shown). Refer to instrument panel<br />
3. CROWD control lever. When lever controls and indicators, para 4-2a.<br />
is pushed away from operator<br />
(EXTEND position) , boom exten-<br />
8. WARNING light switch (not shown).<br />
sion moves out making boom<br />
Refer to instrument panel controls<br />
longer. Is pulled toward operator<br />
and indicators, para 4–2a.<br />
(RETRACT position) to pull boom 9. FLOOD LT master control switch<br />
extension in. Minimum boom (not shown). Refer to instrument<br />
length is <strong>10</strong> feet, maximum is<br />
panel controls and indicators,<br />
18 feet. para 4-2a.<br />
4. SWITCH control lever. When the <strong>10</strong>. POWER DIVIDER control lever<br />
lever is pulled toward the operator (not shown) . Refer to driver’s<br />
( RIGHT position) , the boom compartment controls and<br />
swings to the right. When the lever indicator’s, para 4-2a.<br />
is pushed away from the operator<br />
(LEFT position) , The beam swings<br />
to the left.<br />
TA 053818<br />
4-20
TM 9-<strong>2320</strong>-<strong>211</strong>-<strong>10</strong>-1<br />
4-4. SPECIAL KITS C<strong>ON</strong>TROLS AND INDICATORS.<br />
a. Hot Water Personnel Heater Kit.<br />
1. AIR knob. Is pulled out all of the 2. DEFROSTER knob. Is pulled out<br />
way to let maximum amount of<br />
to send more heated air to windheated<br />
air into cab.<br />
shield and less heated air to cab.<br />
Knob should be pulled out about<br />
NOTE<br />
half way to heat both windshield<br />
AIR knob is pulled out<br />
and cab.<br />
before HEATER blower<br />
3. HEATER blower switch. Is placed<br />
switch is turned on.<br />
in HI (high) or LO (low) position<br />
to control flow of forced air into<br />
cab.<br />
TA 053819<br />
4-21
TM 9-<strong>2320</strong>-<strong>211</strong>-<strong>10</strong>-1<br />
a. Hot Water Personnel Heater Kit - Cont.<br />
4-22
TM 9-<strong>2320</strong>-<strong>211</strong>-<strong>10</strong>-1<br />
b. Fuel Burning Personnel Heater Kit.<br />
1. HI-LO switch. Controls rate of maximum heated air to cab. Is<br />
fuel burning and speed of blower<br />
placed half way out to send heated<br />
in personnel heater.<br />
air to both windshield and cab.<br />
2. Red indicator light. Is lit when 5. AIR control knob. Is pulled all<br />
the personnel heater is running.<br />
the way out to get maximum air<br />
flow . Is pushed in to slow or<br />
3. START-OFF-RUN switch. Is set<br />
shut off air flow.<br />
to START position to start per-<br />
sonnel heater. Set to RUN posi- 6. Emergency switch (on some trucks) .<br />
tion to run heater and to OFF to<br />
Is used for emergency conditions,<br />
stop heater. only. Switch is pushed down to<br />
4. DEFROSTER control knob. When<br />
turn off fuel burning heaters fast.<br />
pulled all the way out, sends maxi-<br />
Switch is protected by a metal<br />
mum heater air to windshield.<br />
guard to stop accidental turn off.<br />
When pushed all the way in, sends<br />
I<br />
TA 053821<br />
4-23
TM 9-<strong>2320</strong>-<strong>211</strong>-<strong>10</strong>-1<br />
b. Fuel Burning Personnel Heater Kit - Cent.<br />
1. Personnel heater main fuel shutoff cock. Is turned left to open and let fuel<br />
into personnel heater.<br />
TA 053822<br />
4-24
TM 9-<strong>2320</strong>-<strong>211</strong>-<strong>10</strong>-1<br />
c. Powerplant Heater Kit.<br />
1. HI-LO switch. Controls rate of 3. START-OFF-RUN switch. Is set<br />
fuel burning and speed of blower<br />
to START position to start powerin<br />
powerplant heater. plant heater. Set to RUN position<br />
to run heater and to OFF to stop<br />
2. Red indicator light. Is lit when<br />
heater.<br />
the powerplant heater is running.<br />
4-25
TM 9-<strong>2320</strong>-<strong>211</strong>-<strong>10</strong>-1<br />
c. Powerplant Heater Kit - Cent.<br />
1. Powerplant heater fuel shutoff cock. 2. Powerplant heater coolant shutoff<br />
Is turned left to open and let fuel cock . Is turned left to open and<br />
into powerplant heater.<br />
let coolant into the powerplant<br />
heater.<br />
TA 053824<br />
4-26
TM 9-<strong>2320</strong>-<strong>211</strong>-<strong>10</strong>-1<br />
c. Powerplant Heater Kit - Cent.<br />
1. Inlet coolant shutoff cock. Is 2. Outlet coolant shutoff cock. Is<br />
opened (turned left) to let<br />
opened (turned left) to let<br />
coolant from powerplant<br />
coolant from heating chamber of<br />
cooling system enter heating<br />
powerplant heater enter powerchamber<br />
of powerplant heater.<br />
plant cooling system.<br />
TA 053825<br />
4-27
TM 9-<strong>2320</strong>-<strong>211</strong>-<strong>10</strong>-1<br />
d. Deep Water Fording Kit.<br />
1. Crankcase ventilating shutoff control. Control is pulled out before fording<br />
operations and is pushed in after fording.<br />
4-28
TM 9-<strong>2320</strong>-<strong>211</strong>-<strong>10</strong>-1<br />
e. Electric Brake Kit.<br />
1. Rheostat control handle. Is turned to right to increase braking action in<br />
towed loads with electric brakes. The lighter the towed load, the lower the<br />
number setting. The heavier the towed load, the higher the number setting.<br />
TA 053827<br />
4-29
TM 9-<strong>2320</strong>-<strong>211</strong>-<strong>10</strong>-1<br />
Section II.<br />
OPERATI<strong>ON</strong> UNDER USUAL C<strong>ON</strong>DITI<strong>ON</strong>S<br />
4-5. SCOPE. This section describes general operating procedures which are the<br />
same for all trucks. Operating procedures that apply only to some models will follow<br />
under separate paragraph headings. Each frame gives step-by-step instructions<br />
and detailed illustrations to cover all operating controls and show how these controls<br />
are set for each function.<br />
4-6. GENERAL OPERATING PROCEDURES.<br />
WARNING<br />
This vehicle has been designed to operate safely<br />
and efficiently within the limits specified in<br />
this TM. Operation beyond these limits is<br />
prohibited IAW AR 70-1 without written approval<br />
from the Commander, U.S. Army Tank-<br />
Automotive Command, ATTN: AMSTA-CM-S,<br />
Warren, MI 48397-5000.<br />
NOTE<br />
Before engine start up, be sure that you know where<br />
all controls and indicators are, what the purpose of<br />
each one is and what it does. Refer to Section 1.<br />
Make sure that all preventive maintenance checks and<br />
services (PMCS) were done. Refer to PMCS, volume<br />
2, chapter 1. Lock up truck whenever you leave it.<br />
Refer to Security of Tactical Wheeled Vehicles,<br />
TB 9-2300-422-20.<br />
*U.S. GOVERNMENT PRINTING OFFICE: 1990 743-015/00076<br />
4-30 Change 1
TM 9-<strong>2320</strong>-<strong>211</strong>-<strong>10</strong>-1<br />
a. Before Engine Startup.<br />
FRAME 1<br />
1. Pull handbrake lever (1) up to on position. If handbrake goes more than<br />
halfway up, push it down again to off position.<br />
2. Turn knob (2) on top of handbrake lever right one or two turns and pull handbrake<br />
lever up again. Repeat as many times as needed to properly adjust hand<br />
brake.<br />
3.. If handbrake cannot be adjusted, tell organizational maintenance.<br />
GO TO FRAME 2<br />
TA 053828<br />
4-31
TM 9-<strong>2320</strong>-<strong>211</strong>-<strong>10</strong>-1<br />
FRAME 2<br />
I<br />
1. Set FR<strong>ON</strong>T TRANSMISSI<strong>ON</strong> gearshift lever (1) to N (neutral) position as<br />
shown on data plate ( 2) .<br />
GO TO FRAME 3<br />
4-32
TM 9-<strong>2320</strong>-<strong>211</strong>-<strong>10</strong>-1<br />
1. On trucks with a front winch, make sure that front WINCH C<strong>ON</strong>TROL lever (1)<br />
is in upper N (neutral) position, as shown on data plate ( 2) , with hinge<br />
lock (3) closed.<br />
GO TO FRAME 4<br />
NOTE<br />
Location of the WINCH C<strong>ON</strong>TROL<br />
earlier trucks. Refer to driver’s<br />
and indicators, para 4-2C.<br />
lever is different on<br />
compartment controls<br />
TA 053830<br />
4-33
TM 9-<strong>2320</strong>-<strong>211</strong>-<strong>10</strong>-1<br />
FRAME 4<br />
1. On dump trucks, make sure that dump body is down, with dump body<br />
control lever (1) in NEUTRAL position, as shown on data plate ( 2) , with<br />
lock (3) set.<br />
GO TO FRAME 5<br />
4-34
TM 9-<strong>2320</strong>-<strong>211</strong>-<strong>10</strong>-1<br />
FRAME 5<br />
I<br />
1. On wrecker trucks, make sure that POWER DIVIDER control lever (1) is in<br />
DISENGAGE position as shown on data plate (2) with lock (3) set.<br />
GO TO FRAME 6<br />
4-35
TM 9-<strong>2320</strong>-<strong>211</strong>-<strong>10</strong>-1<br />
FRAME 6<br />
1. Set TRANSFER CASE lever (1) in either of 2 positions shown on data plate (2):<br />
(a) LOW (for greater power, lower speed) or<br />
(b) HIGH (for greater speed, lower power) .<br />
The location of the lever ( 1) is different on early model trucks; refer to<br />
driver’s compartment controls and indicators, para 4-2C.<br />
TA 053833<br />
4-36
TM 9-<strong>2320</strong>-<strong>211</strong>-<strong>10</strong>-1<br />
b. Starting the Engine Above +20°F.<br />
FRAME 1<br />
I<br />
1.<br />
2.<br />
3.<br />
4.<br />
5.<br />
6.<br />
7.<br />
8.<br />
Make sure engine is not hydrostatically locked.<br />
Step down on clutch pedal (1) , press it all the way down and hold it down.<br />
Pull ENG. STOP control (2) out as far as it will go and hold it out.<br />
TURN BATTERY switch (3) to <strong>ON</strong> position.<br />
Press engine START button (4) and hold it in for five seconds.<br />
Stop cranking immediately if:<br />
(a) Engine starts to turn over with starter and stops.<br />
(b) Starter sounds as if it is straining when cranking.<br />
(c) Engine seems to be binding.<br />
Turn BATTERY switch (3) to OFF position and tell organizational maintenance.<br />
If there is no sign of hydrostatic lock, push ENG. STOP control (2) all the way<br />
in.<br />
GO TO FRAME 2<br />
TA 053835<br />
4-37
TM 9-<strong>2320</strong>-<strong>211</strong>-<strong>10</strong>-1<br />
FRAME 2<br />
I<br />
1.<br />
2.<br />
3.<br />
GO<br />
Turn BATTERY switch (1) to <strong>ON</strong> position.<br />
CAUTI<strong>ON</strong><br />
Do not hold START button (2) in for more than ten<br />
seconds at one time. If engine does not start in ten<br />
seconds, wait two minutes before pressing START<br />
button again. Do not press START button while headlights<br />
are on. Doing either of the above may cause<br />
damage to the starter or battery.<br />
Press engine START button (2) to crank engine and step down on accelerator<br />
pedal (3) a little until engine starts.<br />
Let clutch pedal (4) up slowly as soon as engine starts.<br />
TO FRAME 3<br />
4-38
TM 9-<strong>2320</strong>-<strong>211</strong>-<strong>10</strong>-1<br />
FRAME 3<br />
CAUTI<strong>ON</strong><br />
Use hand THROTTLE (1) for cold engine starting and<br />
warm up only, Do not let engine speed get above<br />
<strong>10</strong>00 rpm on warm up. Never use THROTTLE to control<br />
the speed of the truck.<br />
1. To warm up engine, pull hand THROTTLE ( 1) out until the engine is running—<br />
at 800 rpm-as shown on tachometer (2) or tachograph (3) , -<br />
GO TO FRAME 4<br />
4-39
TM 9-<strong>2320</strong>-<strong>211</strong>-<strong>10</strong>-1<br />
FRAME 4<br />
1.<br />
2.<br />
CAUTI<strong>ON</strong><br />
If oil pressure gage (1) does not show correct pressure<br />
within 20 seconds or if you notice any unusual noises,<br />
stop the engine immediately.<br />
Check oil pressure gage (1). If gage shows less than 15 psi (at idle speed)<br />
stop engine immediately (refer to para 4–6e) and tell organizational<br />
maintenance.<br />
Check battery generator indicator (2). If pointer is not in green area, stop<br />
engine (refer to para 4-6e) and tell organizational maintenance.<br />
GO TO FRAME 5<br />
4-40
TM 9-<strong>2320</strong>-<strong>211</strong>-<strong>10</strong>-1<br />
FRAME 5<br />
I<br />
WARNING<br />
1.<br />
2.<br />
Do not drive truck until air pressure gage (1) shows at<br />
least 65 psi and the low air pressure warning buzzer has<br />
stopped. Air brakes may not work when air pressure is<br />
too low .<br />
Check air pressure gage (1).<br />
(a) If low air pressure buzzer stops before gage shows 60 psi, stop engine<br />
(refer to para 4-6e) and tell organizational maintenance.<br />
(b) If the air pressure will not rise to 65 psi or above, stop engine (refer to<br />
para 4-6e) and tell organizational maintenance.<br />
Check air restriction indicator (2) . Red band should not show. If red band<br />
shows in window, stop engine (refer to para 4–6e) and tell organizational<br />
maintenance.<br />
GO TO FRAME 6<br />
4-41
TM 9-<strong>2320</strong>-<strong>211</strong>-<strong>10</strong>-1<br />
FRAME 6<br />
1. Check temperature gage (1). It should show a slow rise to operating temperature<br />
of between 160 and <strong>10</strong>8°F.<br />
(a) If gage (1) shows a fast rise in temperature to 180°F or more, stop<br />
engine (refer to para 4–6e) and tell organizational maintenance.<br />
(b) If gage (1) does not show a rise in temperature as engine warms up,<br />
stop engine (refer to para 4-6e) and tell organizational maintenance.<br />
4-42
I<br />
TM 9-<strong>2320</strong>-<strong>211</strong>-<strong>10</strong>-1<br />
c. Cold Weather Starting Below +20°F.<br />
1.<br />
2.<br />
3.<br />
4.<br />
5.<br />
6.<br />
7.<br />
8.<br />
Make sure engine is not hydrostatically locked.<br />
Step on clutch pedal (1) , press it all the way down and hold it down.<br />
Pull ENG. STOP control (2) out as far as it will go and hold it out.<br />
Turn BATTERY switch (3) to <strong>ON</strong> position.<br />
Press engine START button (4) and hold it in for about 5 seconds.<br />
Stop cranking immediately if:<br />
(a) Engine starts to turn over with starter and stops.<br />
(b) Starter sounds as if it is straining when cranking.<br />
(c) Engine seems to be binding.<br />
Turn BATTERY switch (3) to OFF position and tell organizational maintenance.<br />
If there is no sign of hydrostatic lock, push ENG. STOP control (2) all the way<br />
in.<br />
GO TO FRAME 2<br />
TA 053835<br />
4-43
TM 9-<strong>2320</strong>-<strong>211</strong>-<strong>10</strong>-1<br />
1. Turn BATTERY switch (1) to <strong>ON</strong> position.<br />
2. Pull hand THROTTLE (2) out half way.<br />
3. Press engine START button (3) to crank engine.<br />
4. While engine is being cranked, do the following:<br />
(a) Press accelerator pedal (4) down two thirds of the way.<br />
CAUTI<strong>ON</strong><br />
Do not operate intake manifold air heater unless engine is<br />
running at low speed or being cranked.<br />
(b) Turn INTAKE MANIFOLD AIR HEATER switch (5) to <strong>ON</strong> position,<br />
5. If engine does not start in 30 seconds , do the following:<br />
(a)<br />
(b)<br />
(c)<br />
6. Wait<br />
Turn INTAKE MANIFOLD AIR HEATER switch (5) to OFF position.<br />
Let accelerator pedal (4) up,<br />
Let START button (3) up.<br />
two minutes and do steps 3 through 5 again.<br />
NOTE<br />
If engine misses or does not run smoothly after starting,<br />
turn INTAKE MANIFOLD AIR HEATER switch (5) to <strong>ON</strong><br />
position , for 30 seconds, then to OFF position. Wait a<br />
few seconds and do it again until engine runs smoothly.<br />
4-44
TM 9-<strong>2320</strong>-<strong>211</strong>-<strong>10</strong>-1<br />
d. Placing and Keeping Truck in Motion.<br />
FRAME 1<br />
I<br />
1.<br />
2,<br />
3.<br />
4.<br />
5.<br />
6.<br />
Check to make sure that all equipment and tools are made fast for travel.<br />
Turn hand THROTTLE ( 1) left or right a little to unlock it and push it all<br />
way in.<br />
Set light switch (2) for lighting required, Refer to table 4-1 for switch<br />
positions.<br />
Step on clutch pedal (3) and press it all the way down.<br />
Place FR<strong>ON</strong>T TRANSMISSI<strong>ON</strong> gearshift lever (4) in neutral (N) position.<br />
Place TRANSFER CASE lever (5) in LOW or HIGH position, depending on load.<br />
LOW position is used for heavy loads and HIGH for light loads. -<br />
the<br />
NOTE<br />
Location of TRANSFER CASE lever is different on earlier<br />
trucks. Refer to driver’s compartment controls and indicators,<br />
para 4-2c.<br />
GO TO FRAME 2<br />
4-45
TM 9-<strong>2320</strong>-<strong>211</strong>-<strong>10</strong>-1<br />
Table 4-1.<br />
Vehicle Light Chart<br />
NOTE<br />
TO MOVE MAIN<br />
SWITCH LEVER<br />
FROM OFF TO<br />
ANY <strong>ON</strong> PO-<br />
SITI<strong>ON</strong> EXCE PT<br />
B.O. MARKER,<br />
UNLOCK SWITCH<br />
MUST BE LIFTED<br />
TO “UNLOCK”<br />
P05ITI0N<br />
LEFT<br />
B. O. DRIVE<br />
INCLUDES<br />
B. O. STOP<br />
AUXILIARY SWITCH OPERATES IN-<br />
STRUMENT PANEL LIGHTS WHEN<br />
MAIN SWITCH IS IN ANY <strong>ON</strong><br />
POSITI<strong>ON</strong><br />
1<br />
FOR SERVICE PARK, SET MAIN<br />
SWITCH TO SERVICE OR IV E, SET<br />
AUXILIARY SWITCH TO PARK<br />
TA 047841-1<br />
4-46
TM 9-<strong>2320</strong>-<strong>211</strong>-<strong>10</strong>-1<br />
Table 4-1.<br />
Vehicle Light Chart<br />
FOR TURN<br />
SIGNALS SET<br />
MOVE MAIN<br />
SWITCH TO<br />
EI<strong>THE</strong>R<br />
SERVICE DRIVE<br />
OR STOPLIGHT<br />
POSITI<strong>ON</strong>. MOVE<br />
SET TURN<br />
SIGNAL C<strong>ON</strong>TROL<br />
LEVER UP FOR<br />
RIGHT TURN<br />
ANO OOWN FOR<br />
LEFT TURN.<br />
SET MOVE TO<br />
NEUTRAL TO<br />
DEACTIVATE<br />
TURN SIGNALS<br />
MAIN<br />
SWITCH<br />
AUXILIARY<br />
SWITCH<br />
UNLOCK<br />
SWITCH<br />
FOR HAZARD<br />
WARNING, SET<br />
MOVE MAIN<br />
SWITCH TO<br />
EI<strong>THE</strong>R<br />
SERVICE DRIVE<br />
OR STOPLIGHT<br />
POSITI<strong>ON</strong>. PULL<br />
HAZARD FLASHER<br />
LEVER AGAINST<br />
<strong>THE</strong> DIRECTI<strong>ON</strong>AL<br />
TURN SIGNAL<br />
C<strong>ON</strong>TROL LEVER<br />
AND PULL BOTH<br />
LEVERS UP TO<br />
DEACTIVATE PUSH<br />
<strong>THE</strong> DIRECTI<strong>ON</strong>AL<br />
TURN SIGNAL<br />
C<strong>ON</strong>TROL LEVER<br />
D0WN TO CENTER<br />
POSITI<strong>ON</strong>.<br />
1 “ HAZARD WARNING TA 047841-2<br />
4-47
TM 9-<strong>2320</strong>-<strong>211</strong>-<strong>10</strong>-1<br />
FRAME 2<br />
1. To move truck forward on level ground:<br />
(a) Place FR<strong>ON</strong>T TRANSMISSI<strong>ON</strong> gearshift lever (1) in position 1.<br />
NOTE<br />
Position 1 (low gear) must always be used to put truck<br />
in forward motion.<br />
(b) Set handbrake lever (2) to down position.<br />
(C) Let clutch pedal (3) come up slowly, while stepping down on accelerator<br />
pedal (4) lightly.<br />
CAUTI<strong>ON</strong><br />
The clutch pedal must be all the way up when the truck<br />
is moving. Do not ride the clutch pedal.<br />
(d) Keep pressing down on accelerator pedal (4) to move truck slowly and<br />
keep from stalling.<br />
GO TO FRAME 3<br />
4-48
TM 9-<strong>2320</strong>-<strong>211</strong>-<strong>10</strong>-1<br />
FRAME 3<br />
1. To move truck backward on level ground, make sure that condition of truck is:<br />
Truck stopped.<br />
Engine running.<br />
Handbrake on.<br />
Clutch pedal down.<br />
FR<strong>ON</strong>T TRANSMISSI<strong>ON</strong> gearshift lever in N (neutral) position.<br />
TRANSFER CASE lever in LOW or HIGH position.<br />
(a) Place FR<strong>ON</strong>T TRANSMISSI<strong>ON</strong> gearshift lever (1) in R (reverse) position.<br />
(b) Set handbrake lever (2) to down (brake off) position.<br />
(c) Let clutch pedal (3) come up slowly while stepping down on accelerator<br />
pedal (4) .<br />
(d) Keep pressing down on accelerator pedal (4) to move truck slowly and<br />
keep from stalling.<br />
GO TO FRAME 4<br />
TA 053848<br />
4-49
TM 9-<strong>2320</strong>-<strong>211</strong>-<strong>10</strong>-1<br />
FRAME 4<br />
1.<br />
2.<br />
3.<br />
4.<br />
5.<br />
To move truck forward on upgrade terrain, make sure that condition of truck<br />
is:<br />
Truck stopped.<br />
Engine running.<br />
Handbrake on.<br />
Clutch pedal down.<br />
FR<strong>ON</strong>T TRANSMISSI<strong>ON</strong> gearshift lever in N (neutral) position.<br />
TRANSFER CASE lever in LOW or HIGH position.<br />
Place FR<strong>ON</strong>T TRANSMISSI<strong>ON</strong> gearshift lever (1) in position 1.<br />
Let clutch pedal (2) up slowly.<br />
While letting clutch pedal (2) up,<br />
(a) Press down on accelerator pedal (3) to keep engine from stalling.<br />
(b) Slowly push handbrake (4) down toward off position.<br />
When truck starts to move up grade,<br />
(a) Push handbrake (4) down all the way.<br />
(b) Let clutch pedal (2) up all the way.<br />
(c) Press down on accelerator pedal (3) to increase speed.<br />
GO TO FRAME 5<br />
TA 053849<br />
4-50
TM 9-<strong>2320</strong>-<strong>211</strong>-<strong>10</strong>-1<br />
FRAME 5<br />
I<br />
1. To move truck backward on downhill terrain, make sure that condition of<br />
truck is:<br />
Truck stopped.<br />
Engine running.<br />
Handbrake on.<br />
Clutch pedal down.<br />
FR<strong>ON</strong>T TRANSMISSI<strong>ON</strong> gear shift lever in N (neutral) position.<br />
TRANSFER CASE lever in LOW or HIGH position.<br />
(a)<br />
(b)<br />
(c)<br />
(d)<br />
GO TO FRAME 6<br />
Place FR<strong>ON</strong>T TRANSMISSI<strong>ON</strong> gearshift lever (1) in R position.<br />
Let clutch pedal (2) up slowly until vehicle starts to move.<br />
Move handbrake lever (3) to down (brake off) position.<br />
Step down on accelerator pedal (4) slowly to increase speed.<br />
TA 053850<br />
I<br />
4-51
TM 9-<strong>2320</strong>-<strong>211</strong>-<strong>10</strong>-1<br />
FRAME 6<br />
I<br />
1. To shift from first gear to second gear, make sure that condition of truck is:<br />
Engine running.<br />
Handbrake off.<br />
Clutch pedal up.<br />
FR<strong>ON</strong>T TRANSMISSI<strong>ON</strong> gearshift lever in position 1.<br />
TRANSFER CASE lever in LOW or HIGH position.<br />
Truck moving forward,<br />
Accelerator pedal pressed down a little.<br />
(a)<br />
(b)<br />
(c)<br />
(d)<br />
(e)<br />
GO TO FRAME 7<br />
.<br />
CAUTI<strong>ON</strong><br />
Shift to next highest gear position when truck has reached<br />
a speed just below maximum shown on data plate for the posi–<br />
tion being used. Shifting too soon or too late causes extra<br />
heavy wear on engine, transmission and other parts of the<br />
vehicle.<br />
When truck speed shown on speedometer (1) or tachograph (2) is just<br />
below maximum speed shown on data plate ( 3) for first gear, step on<br />
clutch pedal ( 4) and press it all the way down.<br />
Let accelerator pedal (5) up.<br />
Move the FR<strong>ON</strong>T TRANSMISSI<strong>ON</strong> gearshift lever (6) to position 2.<br />
Let clutch pedal (4) up slowly, press down on accelerator pedal (5),<br />
bring truck to just below maximum speed for second gear.<br />
Do steps l(a) through l(d) again to shift to third, fourth, and fifth gear.<br />
CAUTI<strong>ON</strong>! DO NOT EXCEED!<br />
MAXIMUM ROAD SPEED IN MPH<br />
TRANSMISSI<strong>ON</strong><br />
TRANSFER CASE<br />
HIGH<br />
LOW<br />
FIFTH (DIRECT) 53 26<br />
FOURTH 36 18<br />
THIRD 21 <strong>10</strong><br />
SEC<strong>ON</strong>D 13 6<br />
FIRST 7 3½<br />
REVERSE 7 3½<br />
4-52
TM 9-<strong>2320</strong>-<strong>211</strong>-<strong>10</strong>-1<br />
FRAME 7<br />
1. To shift from LOW to HIGH TRANSFER CASE range at any speed:<br />
(a) Step on clutch pedal (1) and press it all the way down.<br />
(b) Move TRANSFER CASE lever (2) up to HIGH position.<br />
(c) Move FR<strong>ON</strong>T TRANSMISSI<strong>ON</strong> gearshift lever (3) to a position, shown on<br />
the data plate (4) matching the speed of the truck. The maximum speed<br />
of the new FR<strong>ON</strong>T TRANSMISSI<strong>ON</strong> gearshift lever position should be just<br />
over the truck speed shown on the speedometer ( 5) or tachograph (6) .<br />
(d) Press down on accelerator pedal (7) to increase speed of engine to<br />
match truck speed.<br />
(e) Let clutch pedal (1) come up slowly.<br />
GO TO FRAME 8<br />
CAUTI<strong>ON</strong>! DO NOT EXCEED!<br />
MAXIMUM ROAD SPEED IN MPH<br />
TRANSMISSI<strong>ON</strong> TRANSFER CASE<br />
HIGH<br />
LOW<br />
FIFTH (DIRECT) 53 26<br />
FOURTH 36 18<br />
THIRD 21 <strong>10</strong><br />
SEC<strong>ON</strong>D 13 6<br />
FIRST 7 3½<br />
REVERSE 7 3½<br />
<strong>ON</strong> ALL TRUCKS EXCEPT<br />
LATER MODEL M52A2<br />
TRACTORS<br />
<strong>ON</strong> LATER MODEL<br />
M52A2 TRACTORS<br />
TA 053852<br />
4-53
TM 9-<strong>2320</strong>-<strong>211</strong>-<strong>10</strong>-1<br />
FRAME 8<br />
1. To downshift when truck cannot keep speed:<br />
CAUTI<strong>ON</strong><br />
(a)<br />
(b)<br />
(c)<br />
(d)<br />
(e)<br />
Do not downshift until engine speed is below 1800 rpm.<br />
Let accelerator pedal (1) up.<br />
Step down on clutch pedal ( 2).<br />
Move FR<strong>ON</strong>T TRANSMISSI<strong>ON</strong> gearshift lever ( 3) to next lower position.<br />
Step down on accelerator pedal (1) to speed up engine to between 1600<br />
and 1800 rpm as shown on tachometer (4) or tachograph (5) .<br />
Let clutch pedal (2) up slowly.<br />
I<br />
(f)<br />
Step down on accelerator pedal (1) to hold truck in new speed range on<br />
data plate (6) .<br />
(g) Do steps l(a) through l(f) again if truck cannot hold speed.<br />
GO TO FRAME 9<br />
CAUTI<strong>ON</strong>! DO NOT EXCEED!<br />
MAXIMUM ROAD SPEED IN MPH<br />
TRANSMISSI<strong>ON</strong> TRANSFER CASE<br />
HIGH<br />
LOW<br />
FIFTH (DIRECT) 53 26<br />
FOURTH 36 18<br />
THIRD 21 <strong>10</strong><br />
SEC<strong>ON</strong>D 13 6<br />
FIRST 7 3½<br />
REVERSE 7 3½<br />
<strong>ON</strong> ALL TRUCKS<br />
EXCEPT LATER<br />
MODEL M52A2<br />
TRACTORS<br />
<strong>ON</strong> LATER<br />
M52A2 TRACTORS<br />
4-54
TM 9-<strong>2320</strong>-<strong>211</strong>-<strong>10</strong>-1<br />
FRAME 9<br />
I<br />
CAUTI<strong>ON</strong><br />
Do not use engine alone without help of service foot brake<br />
to slow down or stop truck. To do so would overspeed the<br />
engine and damage it.<br />
1. To downshift for going down a hill:<br />
(a) Let accelerator pedal (1) up.<br />
(b) Press service foot brake (2) to slow truck to next lower speed range as<br />
shown on data plate ( 3) .<br />
(c) Step down on clutch (4).<br />
(d) Move FR<strong>ON</strong>T TRANSMISSI<strong>ON</strong> gearshift lever (5) to next lower position.<br />
(e) Step down on accelerator pedal (1) to speed up engine to between 1600<br />
and 1800 rpm as shown on tachometer (6) or tachograph (7) .<br />
(f) Let up clutch pedal (4) slowly.<br />
(g) DO steps 1(a) through l(f) again if truck cannot stay in speed range of<br />
last FR<strong>ON</strong>T TRANSMISSI<strong>ON</strong> gearshift position.<br />
GO TO FRAME <strong>10</strong><br />
NOTE<br />
To prevent overheating brakeshoe linings when going down<br />
a steep hill, keep putting service foot brake off and on as<br />
you need it. Do not keep the brake on all of the time.<br />
If you have to step on clutch pedal twice (double clutching)<br />
before it works, tell organizational maintenance.<br />
CAUTI<strong>ON</strong>! DO NOT EXCEED!<br />
MAXIMUM ROAD SPEED IN MPH<br />
TRANSMISSI<strong>ON</strong> TRANSFER CASE<br />
HIGH<br />
LOW<br />
FIFTH (DIRECT) 53 26<br />
TA 053854<br />
4-55
TM 9-<strong>2320</strong>-<strong>211</strong>-<strong>10</strong>-1<br />
1. To shift from HIGH to LOW TRANSFER CASE position when truck is heavily<br />
loaded or if terrain is hilly, soft, or rough:<br />
(a) Slow truck down to a speed below speed shown on data plate (1):<br />
(1) Letting up on accelerator pedal ( 2).<br />
(2) Pressing down on service foot brake (3) slowly.<br />
(b) Press clutch pedal (4) down all the way.<br />
(c) Move TRANSFER CASE lever (5) down to LOW position.<br />
(d) Let up on service foot brake (3).<br />
(e) Let clutch pedal (4) up slowly.<br />
(f) Step down on accelerator pedal (2) to bring truck to the speed you want.<br />
GO TO FRAME 11<br />
WARNING!<br />
DO NOT SHIFT TRANSFER CASE<br />
TO LOW WHEN VEHICLE SPEED<br />
IS OVER<br />
FIFTH<br />
FOURTH<br />
THIRD<br />
SEC<strong>ON</strong>D<br />
FIRST<br />
REVERSE<br />
26 MPH<br />
18 MPH<br />
<strong>10</strong> MPH<br />
6 MPH<br />
3 MPH<br />
3 MPH<br />
TA 053855<br />
4-56
TM 9-<strong>2320</strong>-<strong>211</strong>-<strong>10</strong>-1<br />
1. Trucks covered by this rnanual should be operated within the following rpm<br />
limits, as shown on tachometer ( 1) , or tachograph (2) :<br />
(a) 1400<br />
(b) 1600 to 1800<br />
(e) 1800 to 2400<br />
(d) 2600<br />
Lowest engine rpm recommended for<br />
operating under load.<br />
Engine rpm recommended for downshifting.<br />
Engine rpm recommended for cruising.<br />
Highest engine operating rpm when under<br />
load in any gear.<br />
<strong>ON</strong> LATER MODEL<br />
M52A2 TRACTORS<br />
<strong>ON</strong> ALL TRUCKS EXCEPT<br />
LATER MODEL M52A2<br />
TRACTORS<br />
TA 053856<br />
4-57
TM 9-<strong>2320</strong> -<strong>211</strong>-<strong>10</strong>-1<br />
e. Stopping the Truck and Engine.<br />
FRAME 1<br />
1. To stop truck, take foot off accelerator pedal ( 1 ) .<br />
2. Step on service foot brake (2) and press down evenly.<br />
Do not pump service foot brake or press down on clutch<br />
pedal yet. When the truck is in gear, the engine helps to<br />
slow down the truck .<br />
GO TO FRAME 2<br />
TA 053857<br />
4-58
TM 9-<strong>2320</strong>-<strong>211</strong>-<strong>10</strong>-1<br />
1. When the truck has been slowed down to where engine runs at near idle<br />
speed ( 600 to 700 rpm ) as shown on tachometer (1) or tachograph (2):<br />
(a) Step on clutch pedal (3) and press it all the way down.<br />
(b) Move FR<strong>ON</strong>T TRANSMISSI<strong>ON</strong> gearshift lever (4) to N (neutral position).<br />
GO TO FRAME 3<br />
4 - 5 9
TM 9-<strong>2320</strong>-<strong>211</strong>-<strong>10</strong>-1<br />
FRAME 3<br />
1. When truck has come to a complete stop, pull handbrake lever (1) up,<br />
2. Take foot off service brake pedal (2) .<br />
3. Let clutch pedal (3) come up.<br />
CAUTI<strong>ON</strong><br />
GO TO FRAME 4<br />
Do not let truck roll.<br />
TA 053859<br />
4-60
TM 9-<strong>2320</strong>-<strong>211</strong>-<strong>10</strong>-1<br />
FRAME 4<br />
CAUTI<strong>ON</strong><br />
After starting an engine, run at slow speed for five<br />
minutes before shutdown to prevent damage to turbo–<br />
charger. This five minutes at slow speed also lets<br />
a hot engine cool off.<br />
1. To stop engine normally after letting it run at idle speed for five minutes:<br />
(a) Turn BATTERY switch (1) and all other switches in driver’s compartment<br />
to OFF positions.<br />
WARNING<br />
If engine does not stop after you have pulled the ENG.<br />
STOP control (2) out, leave the truck immediately and<br />
take cover to avoid personal injury.<br />
(b) Pull ENG. STOP control (2) out to cut off flow of fuel. Leave it in out<br />
position.<br />
(c) Do all after-operation preventive maintenance checks and services. Refer<br />
to PMCS , vol 2, chapter 1 for procedures.<br />
GO TO FRAME 5<br />
4-61
TM 9-<strong>2320</strong>-<strong>211</strong>-<strong>10</strong>-1<br />
FRAME 5<br />
. . Immediate engine stop, done to prevent serious damage to engine.<br />
(a) Turn BATTERY switch (1) to OFF position.<br />
WARNING<br />
If engine does not stop after you have pulled the ENG.<br />
STOP control knob (2) out, leave the truck immediately<br />
and take cover to avoid personel injury.<br />
(b) Pull ENG. STOP control knob (2) out to cut off flow of fuel. Leave it in<br />
out position.<br />
(c) Turn all other switches in driver’s compartment to OFF positions.<br />
(d) Do all after-operation preventive maintenance checks and services. Refer<br />
to PMC S , vol 2, chapter 1 for procedures.<br />
4-62
TM 9-<strong>2320</strong>-<strong>211</strong>-<strong>10</strong>-1<br />
4-7. OPERATI<strong>ON</strong> OF FR<strong>ON</strong>T WINCH.<br />
a. General. Any of the 5-ton 6 x 6 trucks covered in this manual can be equipped<br />
with a front winch. Some of the trucks may also have a level wind device with a cable<br />
tensioner joined to the winch. The front winch is mounted on the front of the truck<br />
on support brackets joined to the left and right side rail extensions. The level wind<br />
devices and tensioner are mounted on the winch. Movement of cable under tension<br />
over the level wind sheave causes the sheave trolley to move from side to side and wind<br />
the cable in layers. Power to drive the winch drum is supplied through a propellor<br />
shaft extending from a power takeoff mounted on the transmission. The control for<br />
the power takeoff is located in the driver’s compartment. The winch has an automatic<br />
safety brake to hold the winch load when the power takeoff is shifted. The winch<br />
load capacity is 20,000 pounds with one cable layer on the drum, the capacity becomes<br />
less with each additional layer of cable on the drum . Refer to Vehicle Recovery<br />
Operations, FM 20–22.<br />
4-63
TM 9-<strong>2320</strong>-<strong>211</strong>-<strong>10</strong>-1<br />
b. Before Operation.<br />
FRAME 1<br />
I<br />
WARNING<br />
Do not operate winch with a shear pin other than the<br />
aluminum alloy pin shown in the parts list for winch<br />
being used. Always stand clear of the winch cable<br />
under load. A snapped cable can cause serious injury.<br />
1. From underneath truck, check shear pin (1) in universal joint yoke (2) and<br />
winch shaft (3) and make sure that it is the aluminum alloy pin called for in<br />
parts list.<br />
4-64
TM 9-<strong>2320</strong>-<strong>211</strong>-<strong>10</strong>-1<br />
c. Unwinding the Winch Line.<br />
1.<br />
2.<br />
GO<br />
Start engine. Refer to para 4-6a, b.<br />
Place truck in line with object (1) to be reeled in. This makes it easier to wind<br />
the cable level on winch ( 2).<br />
TO FRAME 2<br />
4-65
TM 9-<strong>2320</strong>-<strong>211</strong>-<strong>10</strong>-1<br />
FRAME 2<br />
I<br />
1. Pull handbrake (1) up to on position.<br />
2. On wrecker trucks, set electric brake.<br />
(a) Press down on service foot brake (2),<br />
(b) Press electric BRAKE LOCK button ( 3).<br />
(c) Let up on service foot brake (2).<br />
(d) Let up on electric BRAKE LOCK button (3).<br />
3. Press clutch pedal (4) all of the way down.<br />
4. Place FR<strong>ON</strong>T TRANSMISS1<strong>ON</strong> gearshift lever (5) in N (neutral) position.<br />
5. Let clutch pedal (4) up.<br />
6. Turn front winch control lever hinge lock (6) to unlocked position.<br />
7. Keep front WINCH C<strong>ON</strong>TROL lever (7) in upper N position as shown on data<br />
plate (S) .<br />
GO TO FRAME 3<br />
4–66
TM 9-<strong>2320</strong>-<strong>211</strong>-<strong>10</strong>-1<br />
FRAME 3<br />
I<br />
1. Pull front winch drum lock knob (1) out of deep slot, turn it 90°, and let it<br />
go into shallow slot (unlocked position).<br />
GO TO FRAME 4<br />
TA 053864<br />
4-67
TM 9-<strong>2320</strong>-<strong>211</strong>-<strong>10</strong>-1<br />
FRAME 4<br />
I<br />
1. On trucks with level wind device:<br />
(a)<br />
(b)<br />
(c)<br />
(d)<br />
GO TO FRAME 5<br />
Pull front winch level wind lock knob ( 1) out of deep slot, turn it 90°,<br />
and let it go into shallow slot to unlock level wind device.<br />
Pull front winch cable tension control lever latch (2) out, turn it 90°, and<br />
let it go into shallow slot to unlock cable tension control lever (2) .<br />
Move front winch cable tension control lever (3) toward the left side of<br />
truck as far as it will go to take tension off the cable (4).<br />
Pull front winch cable tension control lever latch (2) out , turn it 90°, and<br />
let it go into deep slot. Move cable tension control lever’ (3) a little so<br />
that plunger slips into hole locking lever ( 3) in off position.<br />
4-68
TM 9-<strong>2320</strong>-<strong>211</strong>-<strong>10</strong>-1<br />
FRAME 5 I I<br />
WARNING<br />
Always wear protective gloves when handling winch cable. Do<br />
not let winch cable slip through hands. Rusty or broken wires<br />
can cause serious injury.<br />
CAUTI<strong>ON</strong><br />
Do not operate winch with less than four turns of cable on drum.<br />
The cable clamp screw alone will not hold against a load. Do<br />
not kink winch cable.<br />
1. Pull end of winch cable (1) out to reach object to be pulled (2) .<br />
2. Tie winch cable (1) to object to be pulled (2) and make it fast.<br />
GO TO FRAME 6<br />
TA 053866<br />
4-69
TM 9-<strong>2320</strong>-<strong>211</strong>-<strong>10</strong>-1<br />
FRAME 6<br />
1. For heavier loads (1) , use a single sheave snatch block (2) as shown.<br />
G0 TO FRAME 7<br />
TA 053867<br />
4-70
TM 9-<strong>2320</strong>-<strong>211</strong>-<strong>10</strong>-1<br />
FRAME 7<br />
I<br />
1.<br />
GO<br />
On wrecker trucks for recovery of heavier loads, if field chocks are needed to<br />
hold truck in position:<br />
(a) Using adjustable wrench, take out stowage bolts ( 1) holding ball end of<br />
field chocks (2) to shipper ( 3).<br />
(b) Using 9/16-inch box wrench and adjustable wrench, take out stowage bolts<br />
(4) and nuts (5) holding other end of field chocks (2) to shipper (3).<br />
(c) Take field chocks (2) off the shipper (3) .<br />
(d) Screw stowage bolts (1) back into shipper (3) so that they will not get<br />
lost .<br />
(e) Place stowage bolts (4) back into holes in shipper and screw on nuts (5).<br />
TO FRAME 8<br />
TA 053868<br />
4-71
TM 9-<strong>2320</strong>-<strong>211</strong>-<strong>10</strong>-1<br />
1. Place two field chocks (1) in brackets (2) on front of truck. Place pins<br />
(3) through holes in brackets (2) and field chocks (1) , locking them.<br />
2. Use a single sheave snatch block (4) as shown.<br />
GO TO FRAME 9<br />
TA 053869<br />
4-72
TM 9-<strong>2320</strong>-<strong>211</strong>-<strong>10</strong>-1<br />
FRAME 9<br />
I<br />
1. To pull an object (1) that is not in a straight line (directional pull) , use<br />
snatch block (2) and utility chain ( 3) , as shown.<br />
TA 053870<br />
4-73
TM 9-<strong>2320</strong>-<strong>211</strong>-<strong>10</strong>-1<br />
d. Pulling the Load,<br />
WARNING<br />
During all winch operations, the instant that slack<br />
in winch cable ( 1) is taken up is critical. Tell all<br />
personnel to stand clear of winch cable and load (2).<br />
A snapped winch cable or shifting load can be very<br />
dangerous. If load shifts to present a hazard, stop<br />
pulling and spread load. If any part of the equipment<br />
fails, stop operations and tell organizational maintenance.<br />
Stand at least 5 feet from front winch while guiding cable<br />
on drum to prevent hands and clothing from being snagged<br />
and pulled onto the drum.<br />
FRAME 1<br />
1. Take up slack in winch cable ( 1) by backing truck slowly, if there is room<br />
behind truck and conditions permit.<br />
GO TO FRAME 2<br />
4-74
TM 9-<strong>2320</strong>-<strong>211</strong>-<strong>10</strong>-1<br />
FRAME 2<br />
I<br />
CAUTI<strong>ON</strong><br />
Make sure drum is unlocked before operating winch.<br />
1. Turn front winch drum clutch lever latch (1) up to unlocked position.<br />
2. Move front winch drum clutch lever (2) as far as it will go away from the drum<br />
(ENGAGE position) .<br />
GO TO FRAME 3<br />
NOTE<br />
Never use front winch drum clutch lever (2) to control winch,<br />
always use front WINCH C<strong>ON</strong>TROL lever in driver’s compartment<br />
and engine clutch.<br />
I<br />
I<br />
I<br />
I<br />
TA 053872<br />
4-75
TM 9-<strong>2320</strong>-<strong>211</strong>-<strong>10</strong>-1<br />
FRAME 3<br />
1. With engine running, leave FR<strong>ON</strong>T TRANSMISSI<strong>ON</strong> gearshift lever (1) in<br />
N position.<br />
2. Press down on clutch pedal (2).<br />
3. Move front WINCH C<strong>ON</strong>TROL lever (3) to L (low) for heavy loads or H (high)<br />
for normal loads. If not sure, use L position.<br />
GO TO FRAME 4<br />
TA 053873<br />
4-76
TM 9-<strong>2320</strong>-<strong>211</strong>-<strong>10</strong>-1<br />
FRAME 4<br />
I<br />
1.<br />
2.<br />
Let clutch pedal (1) come up slowly.<br />
Wind in winch cable to take up slack.<br />
CAUTI<strong>ON</strong><br />
3.<br />
Always use hand THROTTLE (2) to control engine speed<br />
when operating winch. Avoid sudden changes in speed<br />
or high speed.<br />
Rough , jerky operation may cause broken shear pins and<br />
snapped cables, damage to vehicle, or injury to personnel.<br />
Use hand THROTTLE (2) to control speed and continue smooth operation. Wind<br />
in winch cable as needed to pull or lift load.<br />
4-77
TM 9-<strong>2320</strong>-<strong>211</strong>-<strong>10</strong>-1<br />
e. Stopping the Winch.<br />
FRAME 1<br />
1. Step on and press clutch pedal (1) all the way down.<br />
Place front WINCH C<strong>ON</strong>TROL lever (2) in upper N (neutral position) .<br />
Let clutch pedal (1) come up slowly.<br />
The winch automatic safety brake will<br />
hold the load.<br />
4-78
TM 9-<strong>2320</strong>-<strong>211</strong>-<strong>10</strong>-1<br />
f. Releasing the Load.<br />
FRAME 1<br />
1.<br />
2.<br />
3.<br />
4.<br />
5.<br />
6.<br />
GO<br />
Step on and press clutch pedal (1) all the way down.<br />
Place front WINCH C<strong>ON</strong>TROL lever (2) in R (reverse) position.<br />
Let clutch pedal ( 1) come up slowly until there is a little slack in the winch<br />
cable to the load.<br />
Step on and press clutch pedal (1) all the way down.<br />
Place front WINCH C<strong>ON</strong>TROL lever (2) in N (neutral) position.<br />
Let clutch pedal (1) up.<br />
TO FRAME 2<br />
4-79
TM 9-<strong>2320</strong>-<strong>211</strong>-<strong>10</strong>-1<br />
FRAME 2<br />
1. Unhook winch cable (1) and (if used) snatch block (2) and utility chain (3) .<br />
2. If wrecker truck was used with field chocks:<br />
(a) Back up truck a little to free field chocks from ground. For backing<br />
up procedure, refer to para 4-6d, frame 3.<br />
(b) Pull pins (4) out of holes in brackets (5) and field chocks (6).<br />
(c) Pull field chocks (6) from brackets (5) .<br />
1<br />
TA 053877<br />
4-80
TM 9-<strong>2320</strong>-<strong>211</strong>-<strong>10</strong>-1<br />
g. Winding Winch Line on the Drum.<br />
WARNING<br />
Always wear protective gloves when handling<br />
winch cable. Do not allow winch cable to run<br />
through hands. Rusty or broken wires can<br />
cause serious injury.<br />
Stand at least 5 feet from front winch while guiding<br />
cable on drum to prevent hands and clothing from<br />
being snagged and pulled onto the drum.<br />
FRAME 1<br />
1. On trucks without level wind device, join a load to end of winch cable ( 1) . If<br />
no load is available, join the cable to a tree or another truck with brakes set.<br />
GO TO FRAME 2<br />
TA 053870<br />
4-81
TM 9-<strong>2320</strong>-<strong>211</strong>-<strong>10</strong>-1<br />
FRAME 2<br />
I<br />
1. Step on and press clutch pedal ( 1) all the way down.<br />
2. Make sure that FR<strong>ON</strong>T TRANSMISSI<strong>ON</strong> gearshift lever (2) is in N position.<br />
3. Place front WINCH C<strong>ON</strong>TROL lever (3) in H (high) position.<br />
4. Set handbrake lever (4) to down (brake off) position.<br />
WARNING<br />
Stand at least 5 feet from front winch, while guiding cable<br />
on drum, to stop hands and clothing from being snagged and<br />
pulled onto the drum.<br />
NOTE<br />
Make sure that first layer of winch cable goes onto drum in<br />
order and that each additional layer starts back across drum.<br />
If necessary, use wooden block to push or hammer cable<br />
closely wrapped.<br />
5. Let clutch pedal (1) come up slowly. The front winch will pull truck forward<br />
and wind winch cable onto drum.<br />
6. Step on service foot brake (5) and press down lightly to make sure of a tight,<br />
neat wind.<br />
GO TO FRAME 3<br />
4-82
TM 9-<strong>2320</strong>-<strong>211</strong>-<strong>10</strong>-1<br />
FRAME 3<br />
I<br />
1. On trucks with level wind device and cable tensioner:<br />
(a) Pull front winch cable tension control lever latch (1) out.<br />
(b) Hold latch (1) out, and push front winch cable tension control lever (2)<br />
toward right side of truck as far as it will go.<br />
(c) Turn latch (1) 90° and setitin deep slot. Move cable tension control<br />
lever (2) a little so that plunger slips into hole, locking lever (2)<br />
in <strong>ON</strong> position.<br />
GO TO FRAME 4<br />
TA 053880<br />
4-83
TM 9-<strong>2320</strong>-<strong>211</strong>-<strong>10</strong>-1<br />
FRAME 4<br />
1. Keep handbrake (1) in <strong>ON</strong> position.<br />
2. Make sure FR<strong>ON</strong>T TRANSMISSI<strong>ON</strong> gearshift lever (2) is in N (neutral) position<br />
3. Place front WINCH C<strong>ON</strong>TROL lever (3) in H (high) position.<br />
4. Let clutch pedal (4) come up slowly. Front winch will begin to wind cable on<br />
drum in tight and neat layers.<br />
GO TO FRAME 5<br />
TA053B81<br />
4 - 8 4
TM 9-<strong>2320</strong>-<strong>211</strong>-<strong>10</strong>-1<br />
FRAME 5<br />
1.<br />
2.<br />
3.<br />
4.<br />
5.<br />
6.<br />
When winch cable is fully wound on drum,<br />
it all the way down.<br />
step on clutch pedal ( 1) and press<br />
Place front WINCH C<strong>ON</strong>TROL lever (2) in upper N (neutral) position.<br />
Set handbrake (3) to on position.<br />
Push front winch drum clutch lever (4) as far as it will go toward the drum to<br />
DISENGAGE position.<br />
Turn front winch drum clutch lever latch (5) down to locked position.<br />
To stop engine after letting it run at idle speed for 5 minutes :<br />
(a) Turn all switches in driver’s compartment to OFF positions.<br />
(b) Pull ENG. STOP control (6) out to cut off flow of fuel. Leave it in out<br />
position.<br />
TA 053882<br />
4-85
TM 9-<strong>2320</strong>-<strong>211</strong>-<strong>10</strong>-1<br />
h. Securing Equipment for Travel.<br />
TOOLS :<br />
Adjustable wrench<br />
Box wrench, 9/16-inch<br />
FRAME 1<br />
1. For trucks without level wind device:<br />
(a) Place chain (1) under left frame extension (2) , then put it up and across<br />
the top of bumper (3), and hook it to right lifting shackle (4).<br />
(b) Take locking pin (5) out of shackle pin (6).<br />
(c) Take out shackle pin (6) .<br />
(d) Take off shackle (7) and place it over chain (1).<br />
(e) Aline holes in shackle (7) and bracket (8).<br />
(f) Put shackle pin (6) through holes.<br />
(g) Put locking pin (5) through hole in end of shackle pin (6) and lock pin (5)<br />
GO TO FRAME 2<br />
TA 053883<br />
4-86
TM 9-<strong>2320</strong>-<strong>211</strong>-<strong>10</strong>-1<br />
T<br />
FRAME 2<br />
1. For trucks with level wind device and tensioner:<br />
(a) Pull chain (1) up between bumper (2) and winch (3) on right side.<br />
(b) Wind the chain around back of level wind frame (4) and then across front.<br />
Hook chain to left lifting shackle (5).<br />
GO TO FRAME 3<br />
TA 053884<br />
4-87
TM 9-<strong>2320</strong>-<strong>211</strong>-<strong>10</strong>-1<br />
FRAME 3 1<br />
1.<br />
2.<br />
3.<br />
Move front winch drum clutch lever (1) as far as it will go toward winch to<br />
take drum out of gear.<br />
Pull front winch drum lock knob (2) out, turn it 90°, and set in deep slot.<br />
Turn drum left or right a little until plunger slips into a hole on drum<br />
flange, locking drum.<br />
If winch has a level wind device:<br />
(a) Pull front winch cable tension control lever latch (3) out and hold it out.<br />
Move front winch cable tension control lever (4) toward left side of<br />
truck (off position ) . Set latch (3) in deep slot to lock lever (4) in<br />
off position.<br />
(b) Pull front winch level wind lock knob (5) out, turn it 90°, and set it in<br />
deep slot. Move trolley (6) so that lock plunger slips into hole in<br />
trolley (6) , locking it.<br />
GO TO FRAME 4<br />
TA 053885<br />
4-88
TM 9-<strong>2320</strong>-<strong>211</strong>-<strong>10</strong>-1<br />
FRAME 4<br />
1. On dump trucks, cargo trucks, and tractor trucks, stow utility chain and<br />
snatch block (if used) in tool box (1) .<br />
TA 053886<br />
4-89
TM 9-<strong>2320</strong>-<strong>211</strong>-<strong>10</strong>-1<br />
FRAME 5<br />
1. On wrecker trucks:<br />
(a) Place utility chain (1) on floor near spare tire.<br />
(b) Place snatch block (2) in compartment 8,<br />
(c) Place field chocks (3) on top of shipper (4) as shown.<br />
(d) Using adjustable wrench, place stowage bolts (5) through holes in field<br />
chocks (3) and screw in and tighten into threaded holes in shipper (4) .<br />
(e) Place stowage bolts (6) through holes in shipper (4) and field chocks ( 3).<br />
Screw nuts (7) onto bolts (6) . Using adjustable wrench and 9/16-inch<br />
box wrench, hold bolt (6) and tighten nuts ( 5).<br />
TA 053887<br />
4-90
TM 9-<strong>2320</strong>-<strong>211</strong>-<strong>10</strong>-1<br />
4-8. OPERATI<strong>ON</strong> OF CARGO TRUCKS.<br />
a. General. The M54A2 and M54A2C cargo trucks covered in this manual are<br />
equipped with a 7 x 14-foot steel cargo bed. The M55A2 has a 7 x 20-foot steel cargo<br />
bed. All trucks have removable front and side racks and a hinged tailgate. The<br />
trucks can be equipped with a wood frame and tarpaulin cover for cargo protection.<br />
The M 54A2C truck also has hinged drop sides so that it can be loaded or unloaded from<br />
either side.<br />
b. Removal of Front and Side Racks.<br />
FRAME 1<br />
1. Take hooks (1) out of retainer slots (2) on both sides of truck.<br />
GO TO FRAME 2<br />
TA 053888<br />
4-91
TM 9-<strong>2320</strong>-<strong>211</strong>-<strong>10</strong>-1<br />
1.<br />
Take hold of top of tailgate (1) and pull it<br />
toward rear<br />
of truck.<br />
2.<br />
Let tailgate (1) come down slowly. Do not<br />
let it drop.<br />
GO<br />
TO FRAME 3<br />
TA 053889<br />
4-92
TM 9-<strong>2320</strong>-<strong>211</strong>-<strong>10</strong>-1<br />
FRAME 3<br />
1. On M54A2 trucks:<br />
(a) Fold troop seat (1) up and lock it in place with troop seat latches (2),<br />
(b) Lift and takeoff left side rack gate (3).<br />
(c) Lift and takeoff front rack (4).<br />
(d) Lift and take off side racks with seat (5).<br />
GO TO FRAME 4<br />
TA 053890<br />
4-93
TM 9-<strong>2320</strong>-<strong>211</strong>-<strong>10</strong>-1<br />
FRAME 4<br />
1. On M55A2 trucks:<br />
(a) Fold troop seat (1) up and lock it in place with troop seat latches (2) .<br />
(b) Lift and take off front rack (3) .<br />
(c) Lift and take off side racks with seats ( 4).<br />
TA 053891<br />
4-94
TM 9-<strong>2320</strong>-<strong>211</strong>-<strong>10</strong>-1<br />
c. Installing Front and Side Racks.<br />
1. On M54A2 trucks:<br />
(a) Put side racks<br />
truck.<br />
(b) Put front rack<br />
with seats ( 1) into sockets ( 2) on right and left sides of<br />
(3) into front rack sockets ( 4).<br />
(c) Put left side rack gate (5) into gate socket (6).<br />
(d) Make sure that retainers (7) on front rack go into retainer rings (8)<br />
on side rack.<br />
GO TO FRAME 2<br />
TA 053892<br />
4-95
TM 9-<strong>2320</strong>-<strong>211</strong>-<strong>10</strong>-1<br />
FRAME 2<br />
I<br />
1. On M55A2 trucks:<br />
(a) Put side racks<br />
truck.<br />
(b) Put front rack<br />
(c) Make sure that<br />
side rack.<br />
GO TO FRAME 3<br />
with seats ( 1) into sockets (2) on right and left sides of<br />
(3) into front rack sockets (4) .<br />
retainers ( 5) on front rack go into retainer rings (6) on<br />
4-96
TM 9-<strong>2320</strong>-<strong>211</strong>-<strong>10</strong>-1<br />
FRAME 3<br />
1. M54A2 and M55A2 trucks:<br />
(a) Turn troop seat latches (1) up.<br />
(b) Move seats (2) down into position slowly. Do not let them drop.<br />
GO TO FRAME 4<br />
TA 053894<br />
4-97
TM 9-<strong>2320</strong>-<strong>211</strong>-<strong>10</strong>-1<br />
FRAME 4<br />
I<br />
1. On M54A2 and M55A2<br />
(a) Lift tailgate (1)<br />
(b) Place hooks (2)<br />
trucks:<br />
up to closed position.<br />
through retainer slots (3) .<br />
TA 053895<br />
4-98
TM 9-<strong>2320</strong>-<strong>211</strong>-<strong>10</strong>-1<br />
d. Removal of Front and Side Racks from Dropside Type Cargo Trucks.<br />
FRAME 1<br />
I<br />
1. Turn left and loosen locking handles (1) on each side of tailgate.<br />
2. Turn rings (2) 90° to line up T-bolts (3) with slots (4).<br />
3. Pull T-bolts (3) through slots (4) .<br />
GO TO FRAME 2<br />
TA 053896<br />
4-99
TM 9-<strong>2320</strong>-<strong>211</strong>-<strong>10</strong>-1<br />
1. Move tailgate (1) down by taking hold of it on top and pulling toward rear.<br />
Let it come down slowly. Do not let it drop.<br />
GO TO FRAME 3<br />
TA 053897<br />
4 - 1 0 0
TM 9-<strong>2320</strong>-<strong>211</strong>-<strong>10</strong>-1<br />
FRAME 3<br />
1. If troop seats ( 1) are not up and locked, fold the seats (1) up and lock them in<br />
place with troop seat latches (2) .<br />
GO TO FRAME 4<br />
TA 053898<br />
4-<strong>10</strong>1
TM 9-<strong>2320</strong>-<strong>211</strong>-<strong>10</strong>-1<br />
FRAME 4<br />
1.<br />
2.<br />
GO<br />
Unhook the troop seat locking rods (1) from the troop seat locking rod<br />
holes (2) in floor on right and left sides of truck.<br />
Turn the rods (1) up and place them in retainers (3).<br />
TO FRAME 5<br />
TA 05389!3<br />
4-<strong>10</strong>2
TM 9-<strong>2320</strong>-<strong>211</strong>-<strong>10</strong>-1<br />
FRAME 5<br />
1.<br />
2.<br />
3.<br />
4.<br />
GO<br />
Pull side rack locking pins (1) from retainers (2) (front and rear, on both<br />
sides of truck) .<br />
Move side rack locking pins (1) away from rack sockets (3).<br />
Pull pins (1) through holes in brackets (4).<br />
Place pins (1) in holes in brackets (5) and in retainers (2).<br />
TO FRAME 6<br />
TA 053900<br />
4-<strong>10</strong>3
TM 9-<strong>2320</strong>-<strong>211</strong>-<strong>10</strong>-1<br />
1. Lift front and side rack locking pins (1) out of retainer rings (2).<br />
2. Swing movable retaining ring (2) away from rack.<br />
3. Lift side rack (3) with seats out of its sockets.<br />
4. Lift bow storage side rack (4) out of its sockets.<br />
5. Lift front rack (5) out of its sockets.<br />
TA 053901<br />
4-<strong>10</strong>4
TM 9-<strong>2320</strong>-<strong>211</strong>-<strong>10</strong>-1<br />
e. Installing Front and Side Racks on Dropside Type Cargo Trucks.<br />
FRAME 1<br />
I<br />
1.<br />
2.<br />
3.<br />
4.<br />
GO<br />
Put side racks with seats ( 1) into sockets (2) on right and left sides of truck.<br />
Put front rack (3) into front rack sockets (4) .<br />
Put bow storage side racks (5) into their sockets.<br />
Line up retaining rings (6) and lock with locking pins (7) .<br />
TO FRAME 2<br />
TA 053902<br />
4-<strong>10</strong>5
TM 9-<strong>2320</strong>-<strong>211</strong>-<strong>10</strong>-1<br />
1. Pull side rack locking pins ( 1) from retainers (2) and from hole in<br />
brackets (3) on both sides, front and rear of truck.<br />
2, Place side rack locking pins (1) in holes in brackets (4) , rack sockets (5) ,<br />
and retainers ( 2).<br />
GO TO FRAME 3<br />
TA 053903<br />
4-<strong>10</strong>6
TM 9-<strong>2320</strong>-<strong>211</strong>-<strong>10</strong>-1<br />
1. Lift tailgate (1) up to closed position.<br />
2. Place T-bolts (2) through slots (3) on both sides of tailgate.<br />
3. Turn rings (4) 90°.<br />
4. Hold rings (4) and turn handles (5) right until they are tight.<br />
GO TO FRAME 4<br />
4-<strong>10</strong>7
TM 9-<strong>2320</strong>-<strong>211</strong>-<strong>10</strong>-1<br />
FRAME 4<br />
1. Hold the troop seats (1) in up position and turn troop seat latches (2) up to<br />
free seats.<br />
2. Set troop seats (1) in down position.<br />
3. Make sure that seat supports (3) touch floor and sides of truck body.<br />
GO TO FRAME 5<br />
TA 053905<br />
4-<strong>10</strong>8
TM 9-<strong>2320</strong>-<strong>211</strong>-<strong>10</strong>-1<br />
FRAME 5<br />
1. Pull troop seat locking rods (1) from retainers (2) on left and right side of<br />
truck,<br />
2. Set lower end of rods (1) in troop seat locking rod holes (3) in floor near tailgate.<br />
3. If rod (1) is too short or too long:<br />
(a) Turn locking nut (4) left to loosen it.<br />
(b) Turn lower end of rod (1) right to shorten rod, or turn it left to make rod<br />
longer.<br />
(c) When rod (1) is correct length, turn locking nut (4) right to tighten it.<br />
(d) Set lower end of rod (1) in locking rod hole (3).<br />
TA 053906<br />
4-<strong>10</strong>9
TM 9-<strong>2320</strong>-<strong>211</strong>-<strong>10</strong>-1<br />
f. Lowering Drop sides on Drop side Type Cargo Trucks.<br />
FRAME 1<br />
CAUTI<strong>ON</strong><br />
Use care when putting dropsides down. Put them down<br />
slowly . Do not let them fall. Letting sides fall can cause<br />
damage to side racks, mud guards, or both.<br />
NOTE<br />
Dropsides can be let down either with side racks in position<br />
or after side racks have been taken off. Either drop side<br />
can be let down without lowering the tailgate. If both dropsides<br />
are to be let down, the tailgate should be let down first.<br />
1. Make sure that troop seats are in stowed position. Refer to para 4-8d , frame 3.<br />
2. Make sure that troop seat locking rods are in retainer ( stowed position) . Refer<br />
to para 4-8d, frame 4.<br />
3. Take out locking pins between side racks and bow storage side rack. Refer to<br />
para 4-8d, frame 6.<br />
4. Make sure that side rack locking pins are in locked position. Refer to para<br />
4-8e, frame 2.<br />
5. Letting down one side, left or right:<br />
(a) Turn locking handles (1) , on each end of dropside, left to loosen it.<br />
(b) Turn rings (2) 90° to line up T-bolts (3) with slots (4).<br />
(c) Pull T-bolts (3) from slots (4) .<br />
GO TO FRAME 2<br />
4-1<strong>10</strong>
TM 9-<strong>2320</strong>-<strong>211</strong>-<strong>10</strong>-1<br />
PERS<strong>ON</strong>NEL:<br />
TWO<br />
FRAME 2<br />
1. Use two soldiers, one on each end of drop side (1) to lower it.<br />
2. Pull side (1) toward you and let it come down slowly. Do not let it drop.<br />
GO TO FRAME 3<br />
TA 053908<br />
4-111
TM 9-<strong>2320</strong>-<strong>211</strong>-<strong>10</strong>-1<br />
FRAME 3<br />
I<br />
1.<br />
2.<br />
3.<br />
When letting down both sides, lower tailgate. Refer<br />
and 2.<br />
To lower right dropside:<br />
(a) Turn forward locking handle (1) , on drop side,<br />
(b) Turn ring (2) 90° to aline T-bolt with slot (3).<br />
(c) Pull T-bolt from slot ( 3).<br />
(d) Lower right dropside. Refer to frames 1 and 2.<br />
to para 4-8d, frames 1<br />
left to loosen.<br />
To lower left dropside, do steps 2 (a) through 2 (d) again for left side.<br />
TA 053909<br />
4-112
TM 9-<strong>2320</strong>-<strong>211</strong>-<strong>10</strong>-1<br />
g. Raising Dropsides on Dropside Type Cargo Trucks.<br />
PERS<strong>ON</strong>NEL : two<br />
FRAME 1<br />
I<br />
1. If only one dropside is down:<br />
(a) Use two soldiers to push drop side (1) up into position.<br />
(b) Place T-bolts (2) through slots (3) on both ends of dropside.<br />
(c) Turn rings (4) 90°.<br />
(d) Hold rings (4) and turn handles (5) right until they are tight.<br />
GO TO FRAME 2<br />
0539<strong>10</strong><br />
4-113
TM 9-<strong>2320</strong>-<strong>211</strong>-<strong>10</strong>-1<br />
FRAME 2<br />
1. If both dropsides are down:<br />
(a) Use two soldiers to push one of the dropsides (1) up into position.<br />
(b) Place T-bolt through slots (2) on forward end of dropside.<br />
(c) Turn ring (3) 90°.<br />
(d) Hold ring (3) and turn handle (4) right until it is tight.<br />
(e) Do steps 1 (a) through 1 (d) again for other dropside (5).<br />
(f) Raise and lock tailgate. Refer to para 4-8e, frame 3.<br />
.<br />
4-114
TM 9-<strong>2320</strong>-<strong>211</strong>-<strong>10</strong>-1<br />
h. Removing Dropsides, Tailgate or Both.<br />
TOOLS: Pliers<br />
PERS<strong>ON</strong>NEL: Two<br />
NOTE<br />
Use two soldiers to do this job. One soldier is needed to<br />
keep tailgate or dropside steady while other works on hinges.<br />
1. On tailgate (1) or dropside (2) to be taken off, on each hinge (3):<br />
(a) Using pliers, straighten cotter pins (4) on one end of hinge pin (5) .<br />
(b) Using pliers, pull cotter pin (4) out of hinge pin (5).<br />
(c) Take washer (6) off hinge pin (5) .<br />
2. Take out all hinge pins (5) except the two on end of tailgate (1) or dropside<br />
(2).<br />
3. Unlock tailgate (1) or dropside (2) being taken off.<br />
(a) For tailgate (1) , refer to para 4-8d, frame 1.<br />
(b) For dropside (2), refer to para 4-8f, frames 1 and 2.<br />
GO TO FRAME 2<br />
4-115
TM 9-<strong>2320</strong>-<strong>211</strong>-<strong>10</strong>-1<br />
FRAME 2<br />
1. Take out two end hinge pins (1) .<br />
2. Use one soldier at each end of tailgate (2) or dropside (3) to move tailgate or<br />
dropside down from cargo bed.<br />
4-116
TM 9-<strong>2320</strong>-<strong>211</strong>-<strong>10</strong>-1<br />
i. Installing Dropsides Tailgate or Both.<br />
TOOLS : Pliers<br />
PERS<strong>ON</strong>NEL:<br />
TWO<br />
CAUTI<strong>ON</strong><br />
Sides of dropside cargo body are interchangeable. When<br />
putting back sides, be sure that amber reflectors (1) are<br />
at front of body and red reflectors (2) are at rear of body.<br />
1, Use two soldiers, one at each end of tailgate (3) or dropside (4) to lift them<br />
into place and put hinge pins (5) back into hinge (6) .<br />
2. Lock tailgate or dropside when placed in position.<br />
(a) For drop sides, refer to para 4-8g, frame 1.<br />
(b) For tailgate, refer to para 4-8e, frame 3.<br />
TA 053914<br />
I<br />
4-117
TM 9-<strong>2320</strong>-<strong>211</strong>-<strong>10</strong>-1<br />
FRAME 2<br />
1. Put washers (1) and cotter pins (2) back onto hinge pin (3).<br />
2. Using pliers, spread open ends of cotter pin (2) .<br />
I<br />
TA 053915<br />
4-118
TM 9-<strong>2320</strong>-<strong>211</strong>-<strong>10</strong>-1<br />
4-9, OPERATI<strong>ON</strong> OF TRACTOR TRUCKS.<br />
a. General. The M52A1 tractor truck can tow a semitrailer with a maximum<br />
travel load of 30,000 pounds for cross-country operations and 55,000 pounds for highway<br />
travel.<br />
b. Coupling the Semitrailer,<br />
TOOLS :<br />
PERS<strong>ON</strong>NEL:<br />
Wheel chocks<br />
Adjustable wrench<br />
TWO<br />
FRAME 1<br />
1. Make sure wheel chocks (1) are behind semitrailer rear wheels.<br />
2. Start engine. Refer to para 4-6 a, b.<br />
3. Place tractor truck in front of and almost touching the semitrailer<br />
of fifth wheel (2) in line with semitrailer king pin (3) .<br />
4. Push clutch pedal (4) all the way down.<br />
5. Place FR<strong>ON</strong>T TRANSMISSI<strong>ON</strong> gearshift lever (5) in N position.<br />
6. Let clutch pedal (4) up.<br />
7. Pull handbrake lever (6) to up (brake on) position.<br />
GO TO FRAME 2<br />
with center<br />
4-119
TM 9-<strong>2320</strong>-<strong>211</strong>-<strong>10</strong>-1<br />
1. Set semitrailer landing gear (1) to raise or lower semitrailer skid plate (2).<br />
Skid plate should be slightly lower than tractor fifth wheel (3).<br />
GO TO FRAME 3<br />
NOTE<br />
Refer to the operator’s manual, for the semitrailer to be<br />
coupled, for instructions on how to raise or lower landing<br />
gear.<br />
TA 053918<br />
4-120
TM 9-<strong>2320</strong>-<strong>211</strong>-<strong>10</strong>-1<br />
1. Turn locking plunger operating handle safety latch (1) to right or left to<br />
set locking plunger free.<br />
2. Move locking plunger operating handle (2) forward until it stays in forward<br />
position. Coupler jaws (3) are now unlocked.<br />
GO TO FRAME 4<br />
TA 053919<br />
4-121
TM 9-<strong>2320</strong>-<strong>211</strong>-<strong>10</strong>-1<br />
1. Set handbrake lever (1) to down (brake off) position.<br />
2. Slowly back tractor until tractor approach plates (2) just touch semitrailer<br />
skid plate (3) .<br />
3. Push down on clutch pedal (4).<br />
4. Place FR<strong>ON</strong>T TRANSMISSI<strong>ON</strong> gearshift lever (5) in N position.<br />
5. Let clutch pedal (4) up.<br />
6. Pull handbrake lever (1) to up (brake on) position.<br />
GO TO FRAME 5<br />
4-122
TM 9-<strong>2320</strong>-<strong>211</strong>-<strong>10</strong>-1<br />
1. Turn tractor air service hose coupling (1) and emergency air hose coupling<br />
(2) left to free them from dummy stowage couplings (3) mounted on air hose<br />
rack (4) . Tractor air valves (5) are marked SERVICE or EMERGENCY.<br />
GO TO FRAME 6<br />
4-123
TM 9-<strong>2320</strong>-<strong>211</strong>-<strong>10</strong>-1<br />
FRAME 6<br />
NOTE<br />
When joining the tractor air hoses to the semitrailer, make<br />
sure the tractor service air hose is joined to the service<br />
coupling on the semitrailer and that the tractor emergency<br />
air hose is joined to the emergency coupling on semitrailer.<br />
The service air hose joins the air brake systems of the<br />
tractor and semitrailer into one unit. The emergency<br />
air hose joins the semitrailer to the tractor air reservoir.<br />
1. Turn the dummy air service ( 1) and emergency air (2) coupling left (up) to<br />
unlock and take them off of semitrailer couplings ( 3 and 4) . Semitrailer air<br />
couplings are marked SERVICE and EMERGENCY or EMERG.<br />
2. Put tractor air service coupling (5) to air service coupling (3) on semitrailer.<br />
Turn tractor coupling (5) down to lock in position.<br />
3. Put tractor emergency air coupling (6) to air service coupling (4) on semitrailer<br />
Turn tractor coupling (6) down to lock in position.<br />
GO TO FRAME 7<br />
TA 053922<br />
4-124
TM 9-<strong>2320</strong>-<strong>211</strong>-<strong>10</strong>-1<br />
FRAME 7<br />
I<br />
1. Turn the air service cutoff cock (1) and the emergency cutoff cock (2) left to<br />
the side position to open them.<br />
2. Pull hand operated air brake control lever (3) down to check air brake system.<br />
Air should be heard passing through air service system.<br />
3. Move air brake control lever (3) to off position.<br />
CAUTI<strong>ON</strong><br />
GO TO FRAME 8<br />
If air flow is not<br />
of cutoff cocks .<br />
maintenance.<br />
heard, check hose connections and positions<br />
If they are correct, tell organizational<br />
4-125
<strong>TM9</strong>-<strong>2320</strong>-<strong>211</strong>-<strong>10</strong>-1<br />
FRAME 8<br />
1. Set handbrake lever (1) to down (brake off) position.<br />
2. Move hand operated air brake control lever (2) down to set semitrailer brakes.<br />
3. Slowly back tractor under semitrailer, keeping center of fifth wheel (3) aligned<br />
with king pin (4).<br />
4. Keep backing tractor until king pin (4) slides into center of fifth wheel (3)<br />
and frees locking plunger of fifth wheel.<br />
GO TO FRAME 9<br />
----- . . . . . . _______ ._. _<br />
TA 053924<br />
4-126
TM 9-<strong>2320</strong>-<strong>211</strong>-<strong>10</strong>-1<br />
FRAME 9<br />
1. Check that fifth wheel coupler jaws are locked:<br />
(a) Press down on clutch pedal (1).<br />
(b) Place FR<strong>ON</strong>T TRANSMISSI<strong>ON</strong> gearshift lever (2) in position 1.<br />
(c) Make sure hand operated air brake control lever (3) is in down position<br />
to set semitrailer brakes.<br />
(d) Let clutch (1) up a little until tractor pulls on semitrailer king pin (4) .<br />
2. Press down on clutch pedal ( 1) all of the way.<br />
3. Place FR<strong>ON</strong>T TRANSMISSI<strong>ON</strong> gearshift lever (2) in N position.<br />
4. Pull handbrake lever (5) to up (brake on) position.<br />
5. Move air brake control lever (3) up to off position.<br />
6. Stop engine. Refer to para 4-6e.<br />
GO TO FRAME <strong>10</strong><br />
TA053925<br />
4 127
TM 9-<strong>2320</strong>-<strong>211</strong>-<strong>10</strong>-1<br />
FRAME <strong>10</strong><br />
I<br />
1.<br />
2.<br />
3.<br />
4.<br />
5.<br />
GO<br />
Make sure that:<br />
(a) Locking plunger has pulled locking plunger operating lever (1) to its rear<br />
position.<br />
(b) Locking plunger operating lever safety latch (2) has dropped down to<br />
locking position.<br />
Raise semitrailer<br />
for semitrailer.<br />
Using adjustable<br />
Slide wedges (5)<br />
highway travel.<br />
Using adjustable<br />
TO FRAME 11<br />
landing gear (3) .<br />
wrench, turn two<br />
all the way in for<br />
wrench, turn two<br />
Refer to instructions in operating manual<br />
capscrews ( 4) left to loosen them.<br />
highway travel or all the way out for<br />
capscrews (4) right to tighten them.<br />
off-<br />
TA 053926<br />
4-128
TM 9-<strong>2320</strong>-<strong>211</strong>-<strong>10</strong>-1<br />
FRAME 11<br />
1. Take tractor electrical cable with connector (1) from retainer (2) on tractor<br />
hose rack (3).<br />
GO TO FRAME 12<br />
4-129
TM 9-<strong>2320</strong>-<strong>211</strong>-<strong>10</strong>-1<br />
FRAME 12<br />
1. Open hinge cover (1) on tractor electrical cable connector (2) and lock cover<br />
open with latch (3) .<br />
2. Open hinge cover (4) on electrical connector (5) on semitrailer and hold it<br />
open.<br />
3. Plug connector (2) into connector (5) . The lip (6) on cover (4) of connector<br />
(5) will lock into slot (7) on connector (2).<br />
GO TO FRAME 13<br />
TA 053928<br />
4- 130
TM 9-<strong>2320</strong>-<strong>211</strong>-<strong>10</strong>-1<br />
Soldier A<br />
Soldier B<br />
Soldier A<br />
Soldier B<br />
Soldier A<br />
Soldier B<br />
Soldier A<br />
Soldier B<br />
Soldier A<br />
Soldier B<br />
Soldier A<br />
1.<br />
2.<br />
3.<br />
4.<br />
5.<br />
6.<br />
7.<br />
8.<br />
9.<br />
<strong>10</strong>.<br />
11.<br />
12.<br />
13.<br />
GO TO FRAME 14<br />
NOTE<br />
Use two soldiers, one in tractor cab and one at rear of<br />
semitrailer.<br />
Turn light switch (1) on and off to SERVICE DRIVE position several<br />
times.<br />
Check semitrailer clearance lights (2) , if on semitrailer, and running<br />
lights (3) to see if they go on and off.<br />
Turn light switch (1) to STOP LIGHT position and press service<br />
foot brake (4) several times.<br />
Check semitrailer stop lights (5) to see if they go on and off.<br />
With light switch (1) in STOP LIGHT position, push directional turn<br />
signal control lever (6) down.<br />
Check to see if left turn light (7) blinks.<br />
With light switch (1) in STOP LIGHT position, push directional turn<br />
signal control lever (6) up.<br />
Check to see if right turn light (8) blinks.<br />
Push directional turn signal control lever (6) to center (off)<br />
position.<br />
Push hazard flasher lever (9) against directional turn signal control<br />
lever (6) and push lever (6) all the way up.<br />
Check to see if turn lights ( 7 and 8) blink at the same time.<br />
Push directional turn signal control lever (6) to center (off)<br />
position.<br />
Turn light switch ( 1) to OFF position.<br />
NOTE<br />
If lights do not work correctly, tell organizational maintenance.<br />
4-131
TM 9-<strong>2320</strong>-<strong>211</strong>-<strong>10</strong>-1<br />
1. Pick up landing gear float pads (1) and wheel chocks (2) and stow on underside<br />
of semitrailer. Refer to operating manual on semitrailer for stowage<br />
instructions.<br />
TA 053930<br />
4-132
TM 9-<strong>2320</strong>-<strong>211</strong>-<strong>10</strong>-1<br />
c. Uncoupling Semitrailer.<br />
FRAME 1<br />
1. Start engine. Refer to para 4-6 a, b.<br />
2. Place semitrailer where you want to leave it.<br />
3. Move hand operated air brake control lever ( 1) to down position to set semitrailer<br />
brakes.<br />
4. Set handbrake lever (2) to up (brake on) position.<br />
5. Push clutch pedal (3) all the way down.<br />
6. Place FR<strong>ON</strong>T TRANSMISSI<strong>ON</strong> gearshift lever (4) in N position.<br />
7. Let clutch pedal (3) up.<br />
GO TO FRAME 2<br />
TA 053931<br />
4-133
TM 9-<strong>2320</strong>-<strong>211</strong>-<strong>10</strong>-1<br />
FRAME 2<br />
1.<br />
2.<br />
3.<br />
4.<br />
5.<br />
6,<br />
7.<br />
8.<br />
9.<br />
GO<br />
Take wheel chocks (1) and float pads (2) from stowage on underside of semitrailer.<br />
Refer to operating manual on semitrailer for instructions.<br />
Place wheel chocks (1) in front of rear wheels.<br />
Place landing gear float pads (2) under landing gear (3) .<br />
Move landing gear (3) down.<br />
instructions.<br />
Refer to operating manual on semitrailer for<br />
Pull hinge cover (4) back on semitrailer electrical connector (5). At same time,<br />
pull tractor electrical cable connector (6) out of connector (5).<br />
Let cover (4) on connector (5)<br />
Unlatch cover (7) on connector<br />
Place connector (6) in retainer<br />
Unlock fifth wheel jaws:<br />
close.<br />
(6) and close cover.<br />
(8) on air hose mounting rack (9).<br />
(a) Turn locking plunger operating lever safety latch ( <strong>10</strong>) to left or right side<br />
(b) Move locking plunger operating lever ( 11) forward until it stays in forward<br />
position.<br />
TO FRAME 3<br />
4-134
TM 9-<strong>2320</strong>-<strong>211</strong>-<strong>10</strong>-1<br />
FRAME 3<br />
1.<br />
2.<br />
3.<br />
4.<br />
5.<br />
6.<br />
7.<br />
GO<br />
Move handbrake lever (1) to down (brake off) positon.<br />
Slowly move tractor forward until fifth wheel (2) just clears semitrailer skid<br />
plate (3) .<br />
Press clutch pedal (4) all the way down.<br />
Place FR<strong>ON</strong>T TRANSMISSI<strong>ON</strong> gearshift lever (5) in N position.<br />
Let clutch pedal (4) up.<br />
Set handbrake lever (1) to up (brake<br />
Move hand operated air brake control<br />
TO FRAME 4<br />
on) position.<br />
lever (6) to off (up) position.<br />
TA 053933<br />
4-135
TM 9-<strong>2320</strong>-<strong>211</strong>-<strong>10</strong>-1<br />
FRAME 4<br />
I<br />
1. Move both cutoff cocks (1) to off (up and down) position to turn off service air<br />
and emergency air to the semitrailer.<br />
2. Unlock and separate tractor emergency air and service air hose coupling halves<br />
(2) from semitrailer coupling halves (3) .<br />
3. Join tractor air hose couplings (2) to dummy couplings (4) on air hose mounting<br />
rack ( 5) and turn them left (down) to lock.<br />
GO TO FRAME 5<br />
4-136
TM 9-<strong>2320</strong>-<strong>211</strong>-<strong>10</strong>-1<br />
FRAME 5<br />
I<br />
1. Push handbrake (1) to down (brake off) position.<br />
2, Move tractor to where it should be parked.<br />
3. Set handbrake (1) to up (brake on) position.<br />
4. Stop engine. Refer to para 4-6e.<br />
4-137
TM 9-<strong>2320</strong>-<strong>211</strong>-<strong>10</strong>-1<br />
d. Securing Equipment for Travel,<br />
FRAME 1 I<br />
1. Check to make sure the following have been secured or stowed:<br />
(a) Front winch, if on truck. Refer to securing equipment for travel,<br />
para 4-7h.<br />
(b) Tractor air service hose (1) , emerg-ency air hose (2) , and electrical<br />
cable ( 3) , if not attached to semitrailer. Refer to uncoupling semitrailer,<br />
para 4-9c.<br />
(c) Any other unstowed equipment or tools should be put in proper stowage<br />
place.<br />
TA 053936<br />
4-138
TM 9-<strong>2320</strong>-<strong>211</strong>-<strong>10</strong>-1<br />
4-<strong>10</strong>. OPERATI<strong>ON</strong> OF DUMP TRUCKS.<br />
a. General. The M51A2 dump truck may be used as a regular cargo carrier, or<br />
as a regular, rocker type or spreader type dump truck. Payload capacity for crosscountry<br />
operations is <strong>10</strong>,000 pounds. Payload capacity for prepared roads is 20,000<br />
pounds. Payload volume capacity is 5 cubic yards.<br />
WARNING<br />
Dump body control lever must always be locked<br />
in NEUTRAL position when not in use or when<br />
truck is used as a troop transport.<br />
CAUTI<strong>ON</strong><br />
The truck must be stopped and the clutch pedal<br />
pressed all the way down to shift the dump body<br />
control lever out of NEUTRAL. Once the dump<br />
body control lever is in POWER UP, HOLD, or<br />
POWER DOWN position, it can be shifted while<br />
the truck is moving and without pressing<br />
the clutch pedal until it is shifted into NEUTRAL<br />
again.<br />
4-139
TM 9-<strong>2320</strong>-<strong>211</strong>-<strong>10</strong>-1<br />
b. Rigging the Tailgate - Regular Dump Operation.<br />
1. Make sure hinge pins (1) are held in slots (2) by retainer pins (3) on both<br />
right and left sides.<br />
2. Make sure tailgate chains (4) are under retainer hooks (5) and in holes and<br />
slots (6) . Leave just enough slack in chains (4) to let tailgate (7) swing free<br />
when lower tailgate latch (8) is unlocked.<br />
3. Make sure tailgate wings (9) are hooked to truck dump body sides by harness<br />
hooks (<strong>10</strong>) .<br />
TA 053937<br />
4-140
TM 9-<strong>2320</strong>-<strong>211</strong>-<strong>10</strong>-1<br />
c. Riggin g the Tailgate - Rocker Type Operation,<br />
FRAME 1<br />
1. Star ing from regular dump rigging:<br />
(a)<br />
(b)<br />
(c)<br />
(d)<br />
(e)<br />
(f)<br />
(g)<br />
Take tailgate chains (1) from upper holes and slots (2) near tailgate (3)<br />
and from retainer hooks (4) on both right and left sides.<br />
Unhook harness hooks (5) from wing gates (6) .<br />
Swing wing gates (6) to rear of truck.<br />
Pull retainer pins (7) out of holes (8) .<br />
Pull tailgate (3) down so that hinge pins (9) fall into grooves ( <strong>10</strong>) on wing<br />
gates (6) .<br />
Place retainer pins (7) back in holes (8).<br />
Place end of chains (1) in holes and slots ( 2). Take up slack in chains (1)<br />
4-141
TM 9-<strong>2320</strong>-<strong>211</strong>-<strong>10</strong>-1<br />
d. Rigging the Tailgate - Spreader Type Operation.<br />
1. Starting from regular dump rigging:<br />
(a) Take tailgate chains (1) from holes and slots (2) near top of truck dump<br />
body sides (3) on both right and left sides.<br />
(b) Keep chains (1) in retainer hooks (4) on tailgate (5).<br />
(c) Place end of chains (1) in holes and slots (6) near bottom of truck dump<br />
body sides ( 3). Set chain (1) lengths so that they will hold tailgate (5)<br />
to opening you want for spreader operation.<br />
TA 053939<br />
4-142
TM 9-<strong>2320</strong>-<strong>211</strong>-<strong>10</strong>-1<br />
. Rigging the Tailgate - Regular Cargo Operation.<br />
1. Starting from regular dump rigging.<br />
(a) Take tailgate chains (1) from upper holes and slots (2) near tailgate (3)<br />
and from retainer hooks (4) on both right and left sides.<br />
(b) Put end of chains (1) back into holes and slots ( 2). Let enough chain (1)<br />
out to hold tailgate (3) in “level position when moved down.<br />
4-143
TM 9-<strong>2320</strong>-<strong>211</strong>-<strong>10</strong>-1<br />
f. Loading the Truck - All Types of Dump Operation.<br />
1. Rig tailgate for the type of dumping needed. Refer to:<br />
(a) Rigging the tailgate - regular dump operation, para 4-<strong>10</strong>b.<br />
(b) Rigging the tailgate - rocker type operation, para 4-<strong>10</strong>C.<br />
(c) Rigging the tailgate - spreader type operation, para 4-<strong>10</strong>d.<br />
2 Start . engine. Refer to paras 4-6a, b.<br />
3. Move truck so that dump body (1) is under loading device ( 2).<br />
4. Load truck.<br />
5. For heavy loads use LOW position of TRANSFER CASE lever ( 3). Refer to<br />
placing and keeping truck in motion, para 4-6d.<br />
6. Move truck to dumping location.<br />
4-144
TM 9-<strong>2320</strong>-<strong>211</strong>-<strong>10</strong>-1<br />
g. Unloading the Truck - Regular Dump Operation.<br />
FRAME 1<br />
1. Place truck so that tailgate (1) is over dumping area.<br />
2. Pull handbrake lever (2) to up (brake on) position.<br />
3. Press clutch pedal (3) down all the way.<br />
4. Place FR<strong>ON</strong>T TRANSMISS1<strong>ON</strong> gearshift lever (4) in N position.<br />
5. Let clutch pedal (3) come up.<br />
GO TO FRAME 2<br />
TA 053942<br />
4-145
TM 9-<strong>2320</strong>-<strong>211</strong>-<strong>10</strong>-1<br />
FRAME 2<br />
1. Open lower tailgate latches (1) by pulling tailgate control rod hand lever (2)<br />
forward and down as far as it will go.<br />
GO TO FRAME 3<br />
TA 053943<br />
4-146
TM 9-<strong>2320</strong>-<strong>211</strong>-<strong>10</strong>-1<br />
1.<br />
2.<br />
3.<br />
4.<br />
5.<br />
6.<br />
Turn safety lock (1) on dump body control lever (2) to unlocked (up)<br />
position.<br />
Step down on clutch pedal (3) all the way.<br />
Move dump body control lever (2) forward to POWER UP position shown on<br />
data plate (4) .<br />
NOTE<br />
The dump body will stop rising automatically when it<br />
reaches its limit (about 70° ) .<br />
Let clutch pedal (3) up and step down on accelerator pedal (5) enough to<br />
keep engine from stalling.<br />
Dump body (6) will start to go Up, tailgate (7) will swing out at bottom, and<br />
load will start to spill out.<br />
When dump body is up as high as needed to dump load, move lever (2) to<br />
HOLD position shown on data plate (4) . Dump body will stop going “up and<br />
will stay in position.<br />
GO TO FRAME 4<br />
TA053944<br />
4-147
TM 9-<strong>2320</strong>-<strong>211</strong>-<strong>10</strong>-1<br />
FRAME 4<br />
I<br />
1.<br />
2.<br />
GO<br />
After dumping, clear dump body (1) near tailgate (2) of all material.<br />
Move dump body control lever (3) to POWER DOWN position shown on<br />
data plate (4) to let dump body down.<br />
TO FRAME 5<br />
TA 053945<br />
4-148
TM 9-<strong>2320</strong>-<strong>211</strong>-<strong>10</strong>-1<br />
FRAME 5<br />
I<br />
1. After dump body (1) is down, move dump body control lever (2) to NEUTRAL<br />
position shown on data plate (3) .<br />
2. Push safety lock (4) to left side to lock dump body control lever (2) .<br />
3. Push tailgate control rod hand lever (5) up and toward rear of truck to<br />
close lower tailgate latches (6) , locking tailgate (7) closed.<br />
4. Step down on clutch pedal (8) all the way.<br />
5. If TRANSFER CASE lever (9) is in LOW position, move it to HIGH.<br />
6. Let clutch pedal (8) up.<br />
TA 053946<br />
4-149
TM 9-<strong>2320</strong>-<strong>211</strong>-<strong>10</strong>-1<br />
h. Unloading the Dump Truck - Rocker Type Dump Operation.<br />
FRAME 1<br />
1. Place truck in dumping location.<br />
2. Pull handbrake lever ( 1) to up (brake on) position.<br />
3. Press clutch pedal (2) all the way in.<br />
4. Place FR<strong>ON</strong>T TRANSMISSI<strong>ON</strong> gearshift lever (3) in N position.<br />
5. Let clutch pedal (2) come up.<br />
GO TO FRAME 2<br />
TA 053947<br />
4-150
TM 9-<strong>2320</strong>-<strong>211</strong>-<strong>10</strong>-1<br />
FRAME 2<br />
1. Turn safety lock (1) on dump body control lever (2) to unlocked (up)<br />
position.<br />
2. Step down on clutch pedal (3) all the way,<br />
3. Move dump body control lever (2) forward to POWER UP position shown on<br />
data plate (4) .<br />
4. Let clutch pedal (3) up and step on accelerator pedal (5) enough to keep<br />
engine from stalling.<br />
5. When dump body (6) is up as high as needed to start to dump load, move<br />
lever (2) to HOLD position shown on data plate (4) .<br />
GO TO FRAME 3<br />
4-151
TM 9-<strong>2320</strong>-<strong>211</strong>-<strong>10</strong>-1<br />
FRAME 3<br />
I<br />
1.<br />
2.<br />
3.<br />
4.<br />
5.<br />
Step down on clutch pedal (1) all the way.<br />
Place FR<strong>ON</strong>T TRANSMISSI<strong>ON</strong> gearshift lever (2) in position 1.<br />
Set handbrake lever (3) to down (brake off) position.<br />
Step down on accelerator pedal (4) slowly and let clutch pedal (1) up at same<br />
time. Keep truck moving forward smoothly.<br />
Raise dump body (5) , in steps, to keep dumping load. Do this by moving dump<br />
body control lever (6) to POWER UP position shown on data plate (7) and then<br />
back to HOLD<br />
GO TO FRAME 4<br />
TA 053949<br />
4-152
TM 9-<strong>2320</strong>-<strong>211</strong>-<strong>10</strong>-1<br />
FRAME 4<br />
1.<br />
2.<br />
3.<br />
4.<br />
5.<br />
6.<br />
7,<br />
8.<br />
9.<br />
<strong>10</strong>.<br />
After dumping load let accelerator pedal (1) up.<br />
Step down on clutch pedal (2) all the way.<br />
Place FR<strong>ON</strong>T TRANSMISSI<strong>ON</strong> gearshift lever (3) in N position.<br />
If TRANSFER CASE lever (4) is in LOW position, move it to HIGH.<br />
Let clutch pedal (2) up.<br />
Pull handbrake lever (5) to up (brake on) position.<br />
Clear tailgate area (6) of all material.<br />
Move dump body control lever (7) to POWER DOWN position shown on data<br />
plate (8) to let dump body (9) down.<br />
After dump body (9) is down, move dump body control lever (7) to NEUTRAL<br />
position.<br />
Push safety latch ( <strong>10</strong>) to left side to lock dump body control lever (7) in<br />
NEUTRAL position.<br />
TA 053950<br />
4-153
TM 9-<strong>2320</strong>-<strong>211</strong>-<strong>10</strong>-1<br />
. Changing Tailgate Rigging - Rocker Type Operation.<br />
1. To change from rocker type rigging to regular dump rigging:<br />
(a) Take tailgate chains (1) from holes and slots (2) on both right and<br />
left sides.<br />
(b) Pull retainer pins (3) from holes (4) .<br />
(c) push tailgate (5) up into closed position and at same time swing wing<br />
gates (6) toward front of truck.<br />
(d) Place retainer pins (3) back in holes (4) locking hinge pins (7).<br />
(e) Hook harness hooks (8) to wing gates (6).<br />
(f) Place tailgate chains (1) under retainer hooks (9) andin holes and<br />
slots (2). Leave just enough slack in chains (1) to let tailgate swing<br />
free if lower tailgate latch ( <strong>10</strong>) is unlocked.<br />
TA 053951<br />
4-154
TM 9-<strong>2320</strong>-<strong>211</strong>-<strong>10</strong>-1<br />
j. Unloading the Truck - Spreader Type Operation.<br />
FRAME 1<br />
I<br />
1. Place the truck in dumping area.<br />
2. Pull handbrake lever ( 1) to up (brake on) position.<br />
3. Press clutch pedal (2) all the way in.<br />
4. Place FR<strong>ON</strong>T TRANSMISSI<strong>ON</strong> gearshift lever (3) in N position.<br />
5. Let clutch pedal (2) come up,<br />
GO TO FRAME 2<br />
TA 053952<br />
4-155
TM 9-<strong>2320</strong>-<strong>211</strong>-<strong>10</strong>-1<br />
FRAME 2<br />
I<br />
1.<br />
2.<br />
3.<br />
4.<br />
5.<br />
Turn safety lock (1) on dump body control lever (2) to unlocked (up)<br />
position.<br />
Step down on clutch pedal (3) all the way.<br />
Move dump body control lever (2) forward to POWER UP position shown on<br />
data plate (4) .<br />
Let clutch pedal (3) up and step on accelerator pedal (5) enough to keep<br />
engine from stalling.<br />
When dump body (6) comes up about two or three feet move dump body<br />
control lever ( 2) to HOLD position.<br />
GO TO FRAME 3<br />
NOTE<br />
The height needed for best spreading will depend on<br />
the material being spread and the tailgate opening.<br />
Raise the dump body and change the tailgate opening<br />
as needed.<br />
TA 053953<br />
4-156
TM 9-<strong>2320</strong>-<strong>211</strong>-<strong>10</strong>-1<br />
FRAME 3<br />
1.<br />
2.<br />
3.<br />
4.<br />
5.<br />
6.<br />
I<br />
Pull tailgate control rod hand lever (1) forward and down as far as it will<br />
go to unlock tailgate (2). Tailgate will swing open a little and load should<br />
just start to spill out.<br />
Step down on clutch pedal (3) all the way.<br />
Place FR<strong>ON</strong>T TRANSMISSI<strong>ON</strong> gearshift lever (4) in position 1.<br />
Push handbrake lever (5) to down (brake off) position.<br />
Step down on accelerator pedal (6) slowly and let clutch pedal ( 3) up at same<br />
time, Keep truck moving forward smoothly.<br />
Raise dump body (7) in steps to keep spilling load. Do this by moving dump<br />
body control lever (8) to POWER UP position, shown on data plate ( 9) , and<br />
then back to HOLD position.<br />
GO TO FRAME 4<br />
TA 053954<br />
4-157
TM 9-<strong>2320</strong>-<strong>211</strong>-<strong>10</strong>-1<br />
FRAME 4<br />
After dumping, let accelerator pedal (1) up.<br />
Step down on clutch pedal (2) all of the way.<br />
Place FR<strong>ON</strong>T TRANSMISSI<strong>ON</strong> gearshift lever (3) in N position,<br />
Place TRANSFER CASE lever (4) in HIGH position.<br />
Let clutch pedal (2) up.<br />
Pull handbrake lever (5) to up (brake on) position.<br />
Clear tailgate (6) of all material.<br />
Move dump body control lever (7) to POWER DOWN position shown on data<br />
plate (8) to let dump body (9) down.<br />
TO FRAME 5<br />
TA 053955<br />
4-158
TM 9-<strong>2320</strong>-<strong>211</strong>-<strong>10</strong>-1<br />
FRAME 5<br />
I<br />
1. After dump body is down, move dump body control lever (1) to NEUTRAL<br />
position.<br />
2. Push safety lock (2) to left side to lock dump body control lever (1) in<br />
NEUTRAL position.<br />
3. Push tailgate control rod hand lever (3) up and back, as far as it will go, to<br />
close lower tailgate latches (4) , locking tailgate ( 5) closed.<br />
TA 053956<br />
4-159
TM 9-<strong>2320</strong>-<strong>211</strong>-<strong>10</strong>-1<br />
. Changing Tailgate Rigging - Spreader Type Operation.<br />
1. To change from spreader type rigging to regular dump rigging:<br />
(a) Take tailgate chains (1) from holes and slots (2) on both right and left<br />
sides.<br />
(b)<br />
place tailgate chains (1) in holes and slots ( 3). Leave just enough slack<br />
in chains to let tailgate (4) swing free if lower tailgate latch ( 5)<br />
is unlocked.<br />
4 - 1 6 0
TM 9-<strong>2320</strong>-<strong>211</strong>-<strong>10</strong>-1<br />
1. Lowering the Tailgate - Regular Cargo Operation.<br />
FRAME 1<br />
1<br />
1. Pull retainer pins (1) out of holes (2) on both left and right sides.<br />
2. Slowly lower tailgate (3) . Do not let it drop.<br />
3. Put retainer pins (1) back in holes (2).<br />
4. Change tailgate chain (4) length, if needed to make tailgate level, by putting<br />
more or less chain in holes and slots (5) .<br />
5. Cargo (6) can be loaded and unloaded from lowered tailgate (3).<br />
TA 053958<br />
4-161
TM 9-<strong>2320</strong>-<strong>211</strong>-<strong>10</strong>-1<br />
m. Raising the Tailgate - Regular Cargo Operation.<br />
FRAME 1<br />
1. Take retainer pins (1) out of holes (2) on both right and left sides.<br />
2. Push tailgate (3) up to closed position.<br />
3. Place retainer pins (1) back in holes (2) to lock hinge pins (4) in position.<br />
TA 053959<br />
4-162
TM 9-<strong>2320</strong>-<strong>211</strong>-<strong>10</strong>-1<br />
n. Changing Tailgate Rigging - Regular Cargo Operation.<br />
FRAME 1<br />
I<br />
I<br />
1. To change from regular cargo rigging to regular dump rigging.<br />
(a) Take tailgate chains (1) from holes and slots (2) on both left and right<br />
sides.<br />
(b) Place chains (1) under retainer hooks (3) and in holes and slots (2).<br />
Leave just enough slack in chains to let tailgate (4) swing free when<br />
lower tailgate latch (5) is unlocked.<br />
TA 053960<br />
4-163
TM 9-<strong>2320</strong>-<strong>211</strong>-<strong>10</strong>-1<br />
4-11. M543A2 MEDIUM WRECKER REAR WINCH OPERATI<strong>ON</strong> .<br />
a. General. The rear winch is a worm-geared type with a horizontal drum.<br />
Power to drive the winch drum is supplied through a propeller shaft extending from<br />
the power divider through a drive sprocket chain link to the winch drive shaft. The<br />
power divider control is found in the driver’s compartment. The winch has an automatic<br />
safety brake to hold the winch load when the winch shift lever is being ussed.<br />
It also has a level wind and a pneumatically controlled cable tensioner. Maximum<br />
rated pull for the winch is 45,000 pounds when the drum has only one cable layer,<br />
. Before Operation.<br />
NOTE<br />
General instructions for winching, towing, and lifting<br />
are given in Vehicle Recovery Operations, FM 20-22.<br />
WARNING<br />
Do not operate winch with a shear pin other than the aluminum<br />
pin shown in the parts list for winch being used. Always<br />
stand clear of the winch cable under load. A snapped cable<br />
can cause serious injury.<br />
1. From underneath truck, check shear pin (1) in sprocket gear hub (2) and winch<br />
(3) shaft and make sure that it is the aluminum alloy pin called for in parts list.<br />
TA 053961<br />
4-164
TM 9-<strong>2320</strong>-<strong>211</strong>-<strong>10</strong>-1<br />
c. Unwinding the Winch Cable.<br />
PERS<strong>ON</strong>NEL : TWO<br />
1. Start engine. Refer to para 4-6a, b.<br />
NOTE<br />
To use the winch at maximum capacity, place truck with<br />
load directly behind and in line with truck. Guide rollers<br />
on the rear winch to allow pulling a load at any angle up<br />
to 90° left or right or any angle 60° above or below the<br />
horizontal centerline of the winch at reduced winch<br />
capacity.<br />
2. Place truck in front of load (1) with rear winch (2) in line with the load to be<br />
reeled in.<br />
GO TO FRAME 2<br />
TA 053962<br />
4-165
TM 9-<strong>2320</strong>-<strong>211</strong>-<strong>10</strong>-1<br />
FRAME 2<br />
I<br />
1. Pull handbrake ( 1) to up (brake on) position.<br />
2. Set electric brake:<br />
(a) Press downon service foot brake (2).<br />
(b) Press electric BRAKE LOCK button (3) .<br />
(c) Let up on service foot brake (2).<br />
(d) Let upon electric BRAKE LOCK button (3).<br />
GO TO FRAME 3<br />
4-166
TM 9-<strong>2320</strong>-<strong>211</strong>-<strong>10</strong>-1<br />
FRAME 3<br />
1.<br />
2.<br />
3.<br />
4.<br />
5.<br />
6.<br />
7.<br />
Press clutch pedal ( 1) all the way down.<br />
Place FR<strong>ON</strong>T TRANSMISSI<strong>ON</strong> gear shift lever (2) in 5 position for light loads<br />
or 3 position for heavy loads. Positions are shown on data plate (3).<br />
Place TRANSFER CASE lever (4) in neutral position (half way between HIGH<br />
and LOW shown on data plate (5) .<br />
Turn POWER DIVIDER control lever safety lock (6) up.<br />
Move POWER DIVIDER control lever (7) forward to ENGAGE position shown on<br />
data plate (8) .<br />
Let clutch pedal (1) up.<br />
Place throttle control (9) so that tachometer ( <strong>10</strong>) shows engine speed of <strong>10</strong>00<br />
rpm.<br />
GO TO FRAME 4<br />
TA 053964<br />
4-167
TM 9-<strong>2320</strong>-<strong>211</strong>-<strong>10</strong>-1<br />
FRAME 4<br />
I<br />
1. Pull out level wind lock knob (1) , turn it 90°, and let it go.<br />
2. Lift CLUTCH C<strong>ON</strong>TROL lever (2) to DISENGAGE position shown on data<br />
plate (3).<br />
3. Take<br />
4. Move<br />
plate<br />
5. Move<br />
6. Move<br />
out pin (4) from WINCH SHIFT control lever (5) .<br />
WINCH SHIFT control lever (5) to UNWIND position<br />
(6).<br />
cable tensioner valve control ( 7) to OFF position,<br />
WARNING<br />
shown on data<br />
Always wear protective gloves when handling winch cable.<br />
Do not let winch cable slip through hands. Rusty or broken<br />
wires can cause serious injury.<br />
CLUTCH C<strong>ON</strong>TROL lever (2) to ENGAGE position.<br />
7. Drum (8) will now turn and unwind cable (9) .<br />
Do not operate<br />
on drum. The<br />
a load.<br />
CAUTI<strong>ON</strong><br />
winch with less than four turns of cable<br />
cable clamp screw alone will not hold against<br />
NOTE<br />
Keep tension on cable while drum is turning to prevent kinks<br />
or snarled cable on drum.<br />
8. After enough cable is unwound, move CLUTCH C<strong>ON</strong>TROL lever (2) to<br />
DISENGAGE position.<br />
9. Move WINCH SHIFT control lever (5) to NEUTRAL position.<br />
TA 053965<br />
4-168
TM 9-<strong>2320</strong>-<strong>211</strong>-<strong>10</strong>-1<br />
d. Rigging the Winch Cable and Wrecker.<br />
NOTE<br />
Rigging of the winch cable and truck will depend on<br />
size and type of load, direction of pull, terrain, weather,<br />
and how well the wrecker is anchored. Different ways to<br />
do the rigging one given in the following instructions.<br />
If you need more information refer to FM 20-22.<br />
(1) For light loads.<br />
FRAME 1<br />
I<br />
1. For light loads, hook winch cable (1) to object to be pulled.<br />
2, For light load angle recovery:<br />
(a) Hook winch cable (1) to load.<br />
(b) Use field chocks (2) as shown, one toward rear and one toward side.<br />
Steps for putting field chocks (2) in rear are same as for the front.<br />
Refer to operation of front winch, para 4-7C.<br />
TA 053966<br />
4-169
TM 9-<strong>2320</strong>-<strong>211</strong>-<strong>10</strong>-1<br />
(2) For medium loads.<br />
I<br />
1. For medium loads, use a snatch block (1) to rig winch cable (2).<br />
(a) Turn hook (3) of snatch block (1) to the right and lift latch (4) up.<br />
(b) Open shell (5) on one side of snatch block (l). Put cable (2) over sheave<br />
(6). Close latch (4) and straighten hook (3) to lock it.<br />
(c) Run snatch block (1) to load. Hook snatch block to load and hook cable<br />
(2) with chain and hook to pintle (7) of anchor vehicle.<br />
TA 053916<br />
4-170
TM 9-<strong>2320</strong>-<strong>211</strong>-<strong>10</strong>-1<br />
(3) For heavy loads.<br />
1. For heavy loads:<br />
(a) Use a double sheave snatch block (1) and a single sheave snatch block (2)<br />
as shown.<br />
(b) Use field chocks (3) at the rear of the<br />
chocks (3) in rear are the same as for<br />
front winch, para 4-7C.<br />
(c) Hook front winch cable (4) to a utility<br />
utility chain (5) and take up cable (4)<br />
winch, para 4-7C.<br />
truck. Steps for putting field<br />
the front. Refer to operation of<br />
pole, tree, or ground anchor with<br />
slack. Refer to operation of front<br />
HEAVY LOAD REAR RECOVERY<br />
TA 08<strong>10</strong>09<br />
4-171
TM 9-<strong>2320</strong>-<strong>211</strong>-<strong>10</strong>-1<br />
e. Pulling in the Load.<br />
FRAME 1<br />
1. Take up all slack in winch cable (1).<br />
(a)<br />
(b)<br />
(c)<br />
(d)<br />
(e)<br />
2. Pull<br />
(a)<br />
(b)<br />
(c)<br />
(d)<br />
(e)<br />
Place cable tensioner valve control (2) to <strong>ON</strong> position.<br />
Move WINCH SHIFT control lever (3) to WIND position.<br />
Place CLUTCH C<strong>ON</strong>TROL lever (4) in ENGAGE position.<br />
After all cable slack is taken up, move CLUTCH C<strong>ON</strong>TROL lever (4) to<br />
DISENGAGE position.<br />
Move cable tensioner valve control (2) to OFF position.<br />
in the load:<br />
Move CLUTCH C<strong>ON</strong>TROL lever (4) to ENGAGE position.<br />
Pull THROTTLE control (5) out as necessary to keep up engine speed<br />
while pulling load in.<br />
After load is pulled in, move CLUTCH C<strong>ON</strong>TROL lever (4) to DISENGAGE<br />
position.<br />
Twist THROTTLE control a little left or right and push it in when tachometer<br />
(6) shows <strong>10</strong>00 rpm.<br />
Move WINCH SHIFT control lever (3) to NEUTRAL position.<br />
TA 053967<br />
4-172
TM 9-<strong>2320</strong>-<strong>211</strong>-<strong>10</strong>-1<br />
f. Releasing the Load.<br />
FRAME 1<br />
f<br />
1. Place WINCH SHIFT control lever (1) to UNWIND position.<br />
2. Check that cable tensioner valve control (2) is in OFF position.<br />
3. Move CLUTCH C<strong>ON</strong>TROL lever (3) to ENGAGE position.<br />
4. Let drum (4) unwind a couple of turns to put slack in winch cable (5) .<br />
5. Move CLUTCH C<strong>ON</strong>TROL lever ( 3) to DISENGAGE position.<br />
6. Move WINCH SHIFT control lever (1) to NEUTRAL position.<br />
GO TO FRAME 2<br />
TA 053968<br />
4-173
TM 9-<strong>2320</strong>-<strong>211</strong>-<strong>10</strong>-1<br />
FRAME 2<br />
1. Unhook rigging:<br />
(a)<br />
Unhook rear winch cable (1) from truck.<br />
(b) Unhook cable (1) from snatch block (2).<br />
(c) Unhook single sheave snatch block (2) and double sheave snatch block (3).<br />
(d)<br />
(e)<br />
Take off field chocks (4). Refer to operation of front winch, para 4-7d.<br />
Unhook and rewind front winch cable (5). Refer to operation of front winch,<br />
para 4-7d.<br />
(f) Unhook utility chain (6).<br />
LIGHT LOAD<br />
REAR RECOVERY<br />
MEDIUM LOAD<br />
REAR RECOVERY<br />
HEAVY LOAD<br />
REAR RECOVERY<br />
LIGHT LOAD<br />
ANGLE RECOVERY<br />
4-174
TM 9-<strong>2320</strong>-<strong>211</strong>-<strong>10</strong>-1<br />
g. Securing for Travel.<br />
FRAME 1<br />
1.<br />
2.<br />
3.<br />
4.<br />
5.<br />
GO<br />
Check that the last couple of coils of cable ( 1) on the winch drum (2) are in<br />
position.<br />
Place cable tensioner valve control (3) to <strong>ON</strong> position.<br />
Move WINCH SHIFT control lever (4) to WIND position.<br />
Move CLUTCH C<strong>ON</strong>TROL lever (5) to ENGAGE position.<br />
When chain of winch cable (1) reaches rollers, move CLUTCH C<strong>ON</strong>TROL lever<br />
(5) to DISENGAGE position.<br />
TO FRAME 2<br />
TA 053970<br />
4-175
TM 9-<strong>2320</strong>-<strong>211</strong>-<strong>10</strong>-1<br />
FRAME 2<br />
1.<br />
2.<br />
3.<br />
4.<br />
5.<br />
6.<br />
7.<br />
8.<br />
9.<br />
Pull cable hook (1) up through right bumperette (2) across and down through left<br />
bumperette (3).<br />
Put cable hook (1) around chain between bumperettes (2 and 3).<br />
Move CLUTCH C<strong>ON</strong>TROL lever (4) to ENGAGE position to take up any cable slack.<br />
When cable is snug, move CLUTCH C<strong>ON</strong>TROL lever (4) to DISENGAGE position.<br />
Place WINCH SHIFT control lever (5) in NEUTRAL position.<br />
Place cable tensioner valve (6) in OFF position.<br />
Pull level wind lock knob (7), turn it 90° , and let it go into deep slot to lock level<br />
wind trolley (8).<br />
Push pin (9) through holes in WINCH SHIFT control lever (5) and bracket (<strong>10</strong>) to<br />
lock lever (5).<br />
Move CLUTCH C<strong>ON</strong>TROL lever (4) to ENGAGE position.<br />
GO TO FRAME 3<br />
TA 053971<br />
4-176
TM 9-<strong>2320</strong>-<strong>211</strong>-<strong>10</strong>-1<br />
FRAME 3<br />
1. Twist throttle control (1) left or right a little and push it in all of the way.<br />
2. Press clutch pedal (2) down all the way.<br />
3. Push POWER DIVIDER control lever (3) back to DISENGAGE position.<br />
4. Place POWER DIVIDER control lever safety lock (4) in side position to lock<br />
lever (3) .<br />
5. Place TRANSFER CASE lever (5) in HIGH or LOW position,<br />
6. Move FR<strong>ON</strong>T TRANSMISSI<strong>ON</strong> gearshift lever (6) to N (neutral) position.<br />
7. Let clutch pedal (2) up.<br />
8. Step on service foot brake (7) , then let it up to unlock electric brake.<br />
9. Check that handbrake (8) is in up (brake on) position.<br />
GO TO FRAME 4<br />
4-177
<strong>TM9</strong>-<strong>2320</strong>-<strong>211</strong>-<strong>10</strong>-1<br />
1.<br />
2.<br />
3.<br />
4,<br />
5.<br />
6.<br />
Stow single sheeve snatch block and double sheeve snatch block in compartment<br />
6 (l).<br />
Stow utility chain on floor near spare tire (2).<br />
Stow field chocks (3) on top of shipper (4) ●<br />
4-7h.<br />
Stow front winch chain (5).<br />
Refer to operation of front winch, para<br />
Refer to operation of front winch, para 4-7h.<br />
Stow all other tools or equipment used in proper stowage Place.<br />
Operation is now completed.<br />
Stop engine (refer to paragraph 4-6e).<br />
TA 053973<br />
4-178
TM 9-<strong>2320</strong>-<strong>211</strong>-<strong>10</strong>-1<br />
4-12. M543A2 MEDIUM WRECKER CRANE OPERATI<strong>ON</strong>.<br />
a. General. The crane of the M543A2 medium wrecker is engine driven and<br />
hydraulically operated. It is capable of 360° rotation and approximately 45° elevation.<br />
The boom is extendable from <strong>10</strong> to 18-feet. Maximum lifting loads are shown on the<br />
CRANE CAPACITY data chart located at the crane operator’s station.<br />
NOTE<br />
General instructions for winching, towing, and lifting are<br />
given in Vehicle Recovery Operations, FM 20-22.<br />
Crane load capacity becomes less as the beam radius is<br />
increased as shown on the CRANE CAPACITY data plate<br />
located at the crane operator’s station. Beam radius is<br />
measured as shown. The wrecker must be positioned for<br />
the type of operation required within the safe beam radius<br />
and on as firm and level ground as possible.<br />
NOTE: SAFE LOAD RADIUS FOR OPERATING <strong>THE</strong> CRANE IS<br />
<strong>THE</strong> HORIZ<strong>ON</strong>TAL DISTANCE BETWEEN <strong>THE</strong> PIVOT POST<br />
CENTERLINE AND <strong>THE</strong> HOIST HOOK REGARDLESS OF <strong>THE</strong><br />
BOOM ANGLE OR LENGTH.<br />
TA 053974<br />
4-179
TM 9-<strong>2320</strong>-<strong>211</strong>-<strong>10</strong>-1<br />
b. Direct Rear Lift.<br />
FRAME 1<br />
I<br />
1.. Start engine. Refer to para 4-6a, b.<br />
2. Place wrecker so that load (1) is directly behind and in line with crane (2)<br />
and within safe beam radius shown on CRANE CAPACITY data plate (3) .<br />
GO TO FRAME 2<br />
TA 053975<br />
4-180
TM 9-<strong>2320</strong>-<strong>211</strong>-<strong>10</strong>-1<br />
FRAME 2<br />
I<br />
1. Step on clutch pedal (1) and push it all the way down.<br />
2, Place FR<strong>ON</strong>T TRANSMISSI<strong>ON</strong> gearshift lever (2) in N position.<br />
3. Let clutch pedal (1) up.<br />
4. Pull handbrake (3) to up (brake on) position.<br />
5. Set electric brake:<br />
(a) Press down on service foot brake (4).<br />
(b) Press electric BRAKE LOCK button (5).<br />
(c) Let up on service foot brake (4).<br />
(d) Let up on electric BRAKE LOCK button (5).<br />
GO TO FRAME 3<br />
4-181
TM 9-<strong>2320</strong>-<strong>211</strong>-<strong>10</strong>-1<br />
1. If floodlights are needed:<br />
(a) Turn FLOOD LT master control switch (1) to <strong>ON</strong> position.<br />
(b) Push switch (2) on floodlights (3) to on position.<br />
2. Turn WARNING light switch (4) to <strong>ON</strong> position to light warning signal<br />
lamp (5) on left front fender.<br />
GO TO FRAME 4<br />
TA 053977<br />
4-182
TM 9-<strong>2320</strong>-<strong>211</strong>-<strong>10</strong>-1<br />
RAME 4<br />
Positioning outriggers for heavy rear lift:<br />
(a)<br />
(b)<br />
(c)<br />
(d)<br />
(e)<br />
(f)<br />
(g)<br />
(h)<br />
(i)<br />
(j)<br />
(k)<br />
GO TO FRAME 5<br />
Take pin (1) from end of L-shaped retaining pin (2).<br />
Take L-shaped retaining pin (2) out of outrigger frame tube (3) .<br />
Pull outrigger (4) out until it hits stop (5).<br />
Turn outrigger (4) toward the ground.<br />
Aline holes in outrigger (4) and frame tube (3).<br />
Put L-shaped retaining pin (2) through holes.<br />
Place pin (1) through hole in end of pin (2) and close pin.<br />
Turn base (6) until it reaches the ground.<br />
Put jack adjusting bar (7) in hole in adjusting screw (8).<br />
Turn bar (7) until there is a little pressure between base (6) and<br />
ground.<br />
Do steps (a) through (j) again for three other outriggers.<br />
TA 053978<br />
4-183
TM 9-<strong>2320</strong>-<strong>211</strong>-<strong>10</strong>-1<br />
1.<br />
2.<br />
3.<br />
4.<br />
5.<br />
6.<br />
Press clutch pedal (1) all the way down.<br />
Place FR<strong>ON</strong>T TRANSMISSI<strong>ON</strong> gearshift lever (2) in 4 position. Positions are<br />
shown on data plate (3) . -<br />
Place TRANSFER CASE lever (4) in<br />
and LOW shown on data plate (5) .<br />
Turn POWER DIVIDER control lever<br />
Move POWER DIVIDER control lever<br />
on data plate (8) .<br />
Let clutch pedal (1) up.<br />
GO TO FRAME 6<br />
neutral position,<br />
safety lock (6) up.<br />
half way between HIGH<br />
(7) forward to ENGAGE position shown<br />
TA 053979<br />
4-184
TM 9-<strong>2320</strong>-<strong>211</strong>-<strong>10</strong>-1<br />
FRAME 6<br />
I<br />
1.<br />
2.<br />
3.<br />
4.<br />
5.<br />
At rear of wrecker, check that CLUTCH C<strong>ON</strong>TROL lever (1) is in DISENGAGE<br />
position shown on data plate ( 2).<br />
Pull lock pin (3) from CRANE DRIVE hydraulic pump control lever (4) .<br />
Move CRANE DRIVE hydraulic pump control lever (4) to ENGAGE position shown<br />
on data plate (5) .<br />
Move CLUTCH C<strong>ON</strong>TROL lever ( 1) to ENGAGE position.<br />
Pull hand THROTTLE control lever (6) toward operator to full open position.<br />
No-load engine speed must be 1600 plUs or minus 50 rpm shown on - -<br />
tachometer (7) .<br />
GO TO FRAME 7<br />
NOTE<br />
Engine governor will govern engine rpm at various loads to<br />
crane.<br />
When smoother operation is required for handling loads<br />
weighing 8000 pounds or less, use a three-part line (refer<br />
to para 4-11e , frame 2) and adjust hand THROTTLE control<br />
lever to give an engine speed of 1250 rpm.<br />
Do not attempt to operate crane at low engine idle speeds<br />
because hydraulic pump will not give enough pressure for<br />
proper crane operation.<br />
TA 053980<br />
4-185
TM 9-<strong>2320</strong>-<strong>211</strong>-<strong>10</strong>-1<br />
FRAME 7<br />
1 0<br />
Push HOIST control lever (1) away from operator a little to loosen lifting<br />
sling (2) . Let lever come back to neutral. Refer to data plate ( 3).<br />
2. Take lifting sling (2) off of cable hook (4) and outrigger frame tube eyes (5).<br />
GO TO FRAME 6<br />
TA 053981<br />
4-186
TM 9-<strong>2320</strong>-<strong>211</strong>-<strong>10</strong>-1<br />
Pull BOOM control lever (1) toward operator a little to take load off<br />
shipper braces (2) .<br />
Unlock pin (3) and pull it from hole in T-pin (4).<br />
Pull T-pin (4) from telescoping shipper braces ( 2).<br />
Pull BOOM control lever (1) toward operator until boom (5) reaches<br />
height needed.<br />
Aline holes in telescoping shipper braces (2) and push T-pins (4)<br />
through holes.<br />
Push pin (3) through hole in end of T-pin (4) and lock pin (3).<br />
Push BOOM control lever (1) away from operator a little to slightly<br />
boom (5) to put boom load on shipper braces (2).<br />
G0 TO FRAME 9<br />
lower<br />
TA 053982<br />
4-187
TM 9-<strong>2320</strong>-<strong>211</strong>-<strong>10</strong>-1<br />
FRAME 9<br />
I<br />
WARNING<br />
1.<br />
2.<br />
To lift load:<br />
During crane operation, tell all personnel to stand clear<br />
of crane or load. A strapped cable, or shifting or<br />
swinging load can cause serious injury.<br />
Never go above the crane safe load limits.<br />
NOTE<br />
Do not let hoist cable unwind after hook has reached load<br />
or ground or cable coils on hoist drum will loosen.<br />
(a) Push HOIST control lever (1) away from operator until<br />
moved down to load (3) .<br />
(b) Secure hook (2) to load (3).<br />
CAUTI<strong>ON</strong><br />
B e careful not to jam hoist block (4) against boom<br />
sheaves (5) ,<br />
(c) Pull HOIST control lever (1) toward operator to lift load (3).<br />
To lower load:<br />
hook (2) is<br />
(a) Push HOIST control lever (1) away from operator to move load down<br />
lower load (3) to the resting place.<br />
(b) Block load (3) as needed to keep it from tipping or shifting.<br />
(c) Take hoist hook (2) from load ( 3).<br />
TA 053983<br />
I<br />
4-188
TM 9-<strong>2320</strong>-<strong>211</strong>-<strong>10</strong>-1<br />
c. Lifting and Swinging.<br />
1.<br />
2.<br />
3.<br />
4.<br />
5.<br />
6.<br />
7.<br />
8.<br />
Do para 4-12b, frames 1 through 7.<br />
Pull BOOM control lever ( 1) toward operator a little to take load off shipper<br />
braces (2) .<br />
Pull pins ( 3) from L-shaped pins (4) on right and left sides.<br />
Pull L-shaped pins (4) out of shipper brace brackets (5).<br />
Swing shipper braces (2) and place them on shipper brace retainer<br />
brackets (6) .<br />
Push pins (7) through hole in retainer bracket (6).<br />
Push L-shaped pins (4) in holes in shipper brace bracket (5).<br />
Push pins (3) through holes in end of L-shaped pins (4).<br />
GO TO FRAME 2<br />
TA053984<br />
4-189
TM 9-<strong>2320</strong>-<strong>211</strong>-<strong>10</strong>-1<br />
FRAME 2<br />
CAUTI<strong>ON</strong><br />
1.<br />
Do not move boom up or down with load lifted. Always<br />
put load down with hoist if boom angle is to be changed<br />
or boom hydraulic cylinder can become damaged.<br />
Push BOOM control lever (1) toward operator to raise boom to elevation<br />
needed.<br />
CAUTI<strong>ON</strong><br />
2.<br />
3.<br />
When operating the CROWD control lever, be careful that<br />
hoist block does not jam into the boom sheaves. To stop<br />
a jam, move hoist block down when extending boom.<br />
Push CROWD control lever (2) away from operator to extend boom (3) to<br />
position needed. At same time, push HOIST control lever (4) away from<br />
operator to keep hoist block ( 5 ) at same distance from boom sheaves (6) .<br />
Push HOIST control lever (4) away from operator to move lower hoist hook (7)<br />
down to load (8).<br />
GO TO FRAME 3<br />
4-190
TM 9-<strong>2320</strong>-<strong>211</strong>-<strong>10</strong>-1<br />
FRAME 3<br />
1.<br />
2.<br />
To lift load:<br />
(a) Join hook (1) to load (2).<br />
(b) Pull HOIST control lever (3) toward operator to lift load.<br />
(c) Move SWING control lever (4) away or toward operator to swing crane<br />
left or right as needed.<br />
(d) Move HOIST control lever (3) and CROWD control lever (5) as needed to<br />
position load.<br />
NOTE<br />
Boom elevation may change due to oil leakage in the<br />
hydraulic system. If the boom settlement (rate of<br />
descent) with a <strong>10</strong>,000 pound load at <strong>10</strong>-foot beam<br />
radius and oil temperature at <strong>10</strong>0°F, is more than 3<br />
inches in 6 minutes, tell organizational maintenance.<br />
To move load down:<br />
(a) Push HOIST control lever (3) away from operator to move load (2) down<br />
to its resting place.<br />
(b) Block load (2) as needed to keep it from tipping or shifting.<br />
(c) Take hoist hook (1) from load (2).<br />
4-191
TM 9-<strong>2320</strong>-<strong>211</strong>-<strong>10</strong>-1<br />
d. Heavy Rear Lift with Boom Jacks.<br />
FRAME 1<br />
1.<br />
2.<br />
3.<br />
4.<br />
5.<br />
6.<br />
7.<br />
Do para 4-12b, frames 1, 2, 3, 5, 6, and 7, DO not do frame 4 since<br />
outriggers are not needed.<br />
Move BOOM control lever (1) away from operator and bring boom (2) down<br />
to lowest position.<br />
Move CROWD control lever (3) away from operator to extend boom (2) so<br />
that 15-foot marker shows. Move HOIST control lever (4) at same time so that<br />
hoist block (5) does not jam against boom sheaves (6).<br />
Take inner jack pin (7) from number 7 left rear storage compartment.<br />
Take boom jacks (8) and tie bar (9) from stowed position along left side of<br />
wrecker body.<br />
Put boom jacks (8) on ground under boom (2) in line with the boom and with<br />
base plate ends away from truck.<br />
Take boom jack base plates (<strong>10</strong>) from locating pins at each side of rear winch.<br />
GO TO FRAME 2<br />
4-192
TM 9-<strong>2320</strong>-<strong>211</strong>-<strong>10</strong>-1<br />
FRAME 2<br />
1. Change length of telescoping boom jacks (1) to length needed:<br />
(a) Take pins (2) from T-shaped pins (3).<br />
(b) Pull T-shaped pins (3) out.<br />
(c) Move inner section of boom jacks (1) to change overall length to that<br />
needed.<br />
(d) Aline holes in two sections of boom jacks (1).<br />
(e) Put T-pins (3) through holes.<br />
(f) Put pins (2) through holes in end of T-pins (3).<br />
2. Put inner jack pin (4) through hole in boom (5) near 12-foot mark.<br />
3. Put upper ends of boom jacks (1) over inner jack pin (4).<br />
4. Place pins (6) through holes in inner jack pin (4).<br />
5. Push BOOM control lever (7) away from operator to raise boom (5) to<br />
height needed.<br />
6. Change boom jack (1) length if needed. Refer to steps (a) through (f) above.<br />
7. Push CROWD control lever (8) away from operator to draw boom (5) out if<br />
needed.<br />
GO TO FRAME 3<br />
4-193
TM 9-<strong>2320</strong>-<strong>211</strong>-<strong>10</strong>-1<br />
1. Place boom jacks (1) at right angles to ground.<br />
2. Place tie bar (2) between boom jacks (1) and aline holes.<br />
3. Place tie bar pins (3) through holes and make fast with pins (4).<br />
4. Place boom jack base plates (5) on ends of boom jacks (1) and aline holes.<br />
5. Put boom jack pins (6) through holes and make fast with pins (7).<br />
6. Push BOOM control lever (8) away from operator to lower boom (9) slightly<br />
to put boom load on boom jacks (1).<br />
GO TO FRAME 4<br />
4-194
TM 9-<strong>2320</strong>-<strong>211</strong>-<strong>10</strong>-1<br />
FRAME 4<br />
1.<br />
2.<br />
To lift load:<br />
(a) Push HOIST control lever (1) away from operator to move hook (2)<br />
down to load (3).<br />
(b) Join hook (2) to load (3).<br />
(c) Pull HOIST control lever (1) toward operator to lift load (3).<br />
To move load down:<br />
(a) Push HOIST control lever (1) away from<br />
to the resting place.<br />
(b) Block load (3) as needed to keep it from<br />
(c) Take hook (2) from load (3).<br />
operator to move load (3) down<br />
tipping or shifting.<br />
4-195
TM 9-<strong>2320</strong>-<strong>211</strong>-<strong>10</strong>-1<br />
e. Side Lift with Boom Jacks.<br />
FRAME 1<br />
Operations for heavy side lifts are same as for heavy rear lifts except that<br />
boom jacks (1) are placed on right or left side of wrecker. Refer to heavy<br />
rear lift with boom jacks, para 4-12d, frames 1 through 4.<br />
4-196
TM 9-<strong>2320</strong>-<strong>211</strong>-<strong>10</strong>-1<br />
f. Rigging Crane Lines.<br />
FRAME 1<br />
1. To rig two-part line:<br />
(a) Place crane hoist cable (1) over one boom sheave and down through<br />
boom (2) end.<br />
(b) Put crane hoist cable around block sheave (3).<br />
(c) Aline holes in clevis (4) and boom (2) and place anchor pin (5)<br />
through holes.<br />
(d) Put pin (6) through hole in anchor pin (5) and close pin.<br />
GO TO FRAME 2<br />
4-197
TM 9-<strong>2320</strong>-<strong>211</strong>-<strong>10</strong>-1<br />
FRAME 2<br />
1. To rig three-part line:<br />
(a) Place crane hoist cable (1) over one boom sheave and down through<br />
boom (2) end.<br />
(b) Place crane hoist cable around block sheave (3).<br />
(c) Put cable (1) up over second boom sheave and down through boom (2) end.<br />
(d) Aline holes in clevis (4) and block sheave (3) and place anchor pin (5)<br />
through holes.<br />
(e) Put pin (6) through hole in anchor pin (5) and close pin.<br />
4-198
TM 9-<strong>2320</strong>-<strong>211</strong>-<strong>10</strong>-1<br />
g. Making Fast for Travel - Rear Lift.<br />
1. To lower shipper braces:<br />
(a) Move BOOM control lever (1) slightly toward operator to take load off<br />
shipper braces (2).<br />
(b) Pull pins (3) from T-pins (4).<br />
(c) Pull T-pins (4) out of shipper braces (2).<br />
(d) Move BOOM control lever (1) away from operator and lower boom (5) all<br />
the way.<br />
(e) Move BOOM control lever (1) slightly toward operator a little to aline<br />
holes in shipper braces (2).<br />
(f) Put T-pins (4) through holes.<br />
(g) Put pins (3) through holes in T-Pins (4) and lock pins.<br />
GO TO FRAME 2<br />
4-199
TM 9-<strong>2320</strong>-<strong>211</strong>-<strong>10</strong>-1<br />
FRAME 2<br />
1. To make outriggers fast:<br />
(a) Put jack adjusting bar (1) in hole in adjusting screw<br />
(b) Turn adjusting screw (2) with bar (1) until base (3)<br />
ground.<br />
(c) Turn base (3) by hand as far as it will go to raise it<br />
ground.<br />
(2).<br />
does not touch<br />
further off the<br />
(d) Unlock pin (4) and take it from the end of L-shaped retaining pin (5).<br />
(e) Pull out L-shaped retaining pin (5).<br />
(f) Lift outrigger (6) up to level position and push it into outrigger frame<br />
tube (7).<br />
(g) Aline holes in outrigger frame tube (7) and hole (8) in base of<br />
outrigger (6).<br />
(h) Push L-shaped retaining pin (5) through holes.<br />
(i) Push pin (4) through hole in end of L-shaped retaining pin (5) and<br />
lock it.<br />
GO TO FRAME 3<br />
4-200
TM 9-<strong>2320</strong>-<strong>211</strong>-<strong>10</strong>-1<br />
FRAME 3<br />
1. To make block sheave and hook fast:<br />
(a) Pull HOIST control lever (1) toward operator to raise cable hook (2)<br />
until it is about arm level.<br />
(b) Place ring of lifting sling (3) on hook (2).<br />
(c) Place hooks of lifting sling (3) in outrigger frame tube eyes (4).<br />
(d) Push HOIST control lever (1) away from operator until lifting sling (3)<br />
holds hook (2) securely.<br />
GO TO FRAME 4<br />
4-201
TM 9-<strong>2320</strong>-<strong>211</strong>-<strong>10</strong>-1<br />
1. Move hand THROTTLE control lever (1) to closed position.<br />
2. Move CLUTCH C<strong>ON</strong>TROL lever (2) to DISENGAGE position.<br />
3. Move CRANE DRIVE hydraulic pump control lever (3) to DISENGAGE position<br />
and lock it with pin (4).<br />
4. Turn WARNING light switch (5) to OFF position.<br />
5. Turn FLOOD LT master control switch (6) to OFF position.<br />
GO TO FRAME 5<br />
4-202
TM 9-<strong>2320</strong>-<strong>211</strong>-<strong>10</strong>-1<br />
FRAME 5<br />
1.<br />
2.<br />
3.<br />
4.<br />
5.<br />
6.<br />
7.<br />
8.<br />
9.<br />
Press clutch pedal (1) all the way down.<br />
Move POWER DIVIDER control lever (2) toward the rear to DISENGAGE<br />
position shown on data plate (3).<br />
Move safety lock (4) toward left side to lock POWER DIVIDER control lever (2)<br />
in DISENGAGE position.<br />
Move TRANSFER CASE lever (5) to HIGH or LOW position.<br />
Move FR<strong>ON</strong>T TRANSMISSI<strong>ON</strong> gearshift lever (6) to N position.<br />
Let clutch pedal (1) up.<br />
Step on service foot brake (7) and then let it up to unlock electric brake.<br />
Pull handbrake (8) up to on position.<br />
Operation is now completed.<br />
Stop engine, refer to para 4-6e.<br />
4-203
TM 9-<strong>2320</strong>-<strong>211</strong>-<strong>10</strong>-1<br />
h. Making Fast for Travel - Lift and Swing.<br />
FRAME 1<br />
1. To move shipper braces down:<br />
(a)<br />
(b)<br />
(c)<br />
(d)<br />
(e)<br />
(f)<br />
(g)<br />
(h)<br />
(i)<br />
(j)<br />
GO TO FRAME 2<br />
Pull CROWD control<br />
way. At same time,<br />
raise cable hook (4)<br />
Pull pins (5) out.<br />
lever (1) toward operator to retract boom (2) all the<br />
push HOIST control lever (3) away from operator to<br />
Take shipper braces (6) from shipper brace retainer brackets (7).<br />
Put pins (5) back in bracket (7).<br />
Swing shipper braces (6) down.<br />
Pull pins (8) from L-shaped pins (9).<br />
Take L-shaped pins (9) from shipper brace bracket (<strong>10</strong>).<br />
Aline holes in shipper braces (6) and brackets (<strong>10</strong>) and place L-shaped<br />
pins (9) through holes.<br />
Put pins (8) through holes in L-shaped pins (9).<br />
Move SWING control lever (11) away or toward operator so that boom (2)<br />
points straight back.<br />
4-204
TM 9-<strong>2320</strong>-<strong>211</strong>-<strong>10</strong>-1<br />
1. To make outriggers (1) fast refer to para 4-12g, frame 2.<br />
2. To make block sheave (2) and hook (3) fast, refer to para 4-12g, frame 3.<br />
3. Make crane controls fast on rear of wrecker and in driver’s compartment.<br />
Refer to para 4-12g, frames 4 and 5.<br />
4-205
TM 9-<strong>2320</strong>-<strong>211</strong>-<strong>10</strong>-1<br />
i. Making Fast for Travel - Heavy Rear Lift with Boom Jacks.<br />
PERS<strong>ON</strong>NEL:<br />
TWO<br />
FRAME 1<br />
Soldier A<br />
Soldier B<br />
Soldier A<br />
Soldier B<br />
GO TO FRAME 2<br />
1. To take down boom jacks:<br />
(a) Pull BOOM control lever (1) slightly toward operator to<br />
take boom load off boom jacks (2).<br />
(b) Take out pins (3) from tie bar pins (4).<br />
(c) Take out tie bar pins (4) from tie bar (5).<br />
(d) Take off tie bar (5).<br />
(e) Take off pins (6) from base plate pins (7).<br />
(f) Take out base plate pins (7) from boom jack base plates (8).<br />
(g) Take off boom jack base plates (8).<br />
(h) Hold lower ends of boom jacks (2) away from truck and<br />
in line with boom (9).<br />
(i) Push BOOM control lever (1) away from operator and bring<br />
boom (9) down all the way.<br />
(j) Place lower ends of boom jacks (2) on the ground.<br />
4-206
TM 9-<strong>2320</strong>-<strong>211</strong>-<strong>10</strong>-1<br />
1. Take out pins (1) from inner jack pin (2).<br />
2. Take boom jacks (3) from inner jack pin (2).<br />
3. Take inner jack pin (2) from boom extension (4).<br />
4. Take pins (5) from T-pins (6).<br />
5. Take T-pins (6) from boom jacks (3).<br />
6. Push inner section of boom jacks (3) into outer section until last holes line up.<br />
7. Push T-pins (6) through holes.<br />
8. Push pins (5) through holes in T-pins (6) and lock them.<br />
9. Pull CROWD control lever (7) toward operator to pull boom extension (4) in<br />
all the way. At same time, pull HOIST control lever (8) toward operator to<br />
keep cable hook (9) from hitting load or ground.<br />
GO TO FRAME 3<br />
4-207
TM 9-<strong>2320</strong>-<strong>211</strong>-<strong>10</strong>-1<br />
FRAME 3<br />
1. Stow boom jacks (1) and tie bar (2) on floor along left side of wrecker body.<br />
2. Stow inner jack pin (3) in number 7 left rear storage compartment.<br />
3. Stow boom jack base plates (4) on finding pins (5) on each side of rear<br />
winch (6).<br />
4. To make block sheave (7) and hook (8) fast, refer to para 4-12g, frame 3.<br />
5. To make shipper brace (9) fast, refer to para 4-12h, frame 1.<br />
6. Make crane controls fast on rear of wrecker and in driver’s compartment.<br />
Refer to para 4-12g, frames 4 and 5.<br />
4-208
TM 9-<strong>2320</strong>-<strong>211</strong>-<strong>10</strong>-1<br />
j. Making Fast for Travel - Heavy Side Lift with Boom Jacks.<br />
FRAME 1<br />
1. Making fast for travel from heavy side lift with boom jacks is the same as for<br />
heavy rear lift with boom jacks. Refer to para 4-12i, frames 1, 2, and 3.<br />
4-209
TM 9-<strong>2320</strong>-<strong>211</strong>-<strong>10</strong>-1<br />
4-13. OPERATI<strong>ON</strong> OF HOT WATER PERS<strong>ON</strong>NEL HEATER KIT.<br />
1.<br />
2.<br />
3.<br />
4.<br />
5.<br />
6.<br />
7.<br />
Start engine and let it warm up. Refer to paras 4-6a, b.<br />
CAUTI<strong>ON</strong><br />
In ice, snow, or 0°F weather do not damage glass by<br />
making sudden changes in temperature. Let more heated<br />
air flow to personnel compartment than to the windshield.<br />
Pull AIR knob (1) out to let warm air flow to personnel compartment.<br />
Pull DEFROSTER knob (2) out to let warm air flow to windshield.<br />
Move AIR knob (1) and DEFROSTER knob (2) in or out to control amount of<br />
warm air to windshield or personnel compartment.<br />
Set HEATER (blower motor) switch (3) in HI or LO position as needed.<br />
To stop heating or defrosting action, set HEATER (blower motor) switch (3)<br />
in OFF position.<br />
Stop engine.<br />
Refer to para 4-6e.<br />
4-2<strong>10</strong>
TM 9-<strong>2320</strong>-<strong>211</strong>-<strong>10</strong>-1<br />
4-14. OPERATI<strong>ON</strong> OF ARCTIC WINTERIZATI<strong>ON</strong> KIT.<br />
a. General. The arctic winterization kit is designed for use in areas where the<br />
average temperature is -25°F to –65°F.<br />
NOTE<br />
Installation of engine compartment cover is done<br />
at direct support maintenance level.<br />
b. Operating Radiator Brushguard Cover.<br />
1. Open (roll up) aperture flap (1) and tie with webbing straps (2) when<br />
engine temperature goes above 180°F.<br />
CAUTI<strong>ON</strong><br />
If engine temperature continues to rise after opening<br />
aperture flap (1), take off engine compartment cover (3)<br />
completely so that engine does not overheat. Refer to<br />
para 4-14c.<br />
2. Close (unroll) aperture flap (1) and secure with webbing straps (2) when<br />
engine opening temperature stays below 180°F.<br />
3. Close (unroll) aperture flap (1) and secure with webbing straps (2) during<br />
standby periods and overnight.<br />
4-<strong>211</strong>
TM 9-<strong>2320</strong>-<strong>211</strong>-<strong>10</strong>-1<br />
c. Using the Engine Compartment Cover.<br />
CAUTI<strong>ON</strong><br />
Open aperture flap (1) when engine temperature goes<br />
up above 180°F. If engine temperature keeps going up,<br />
take off engine compartment cover (3) completely, so<br />
that engine does not overheat.<br />
1. Open (roll up) aperture flap (1), when necessary, and tie flap with<br />
webbing straps (2).<br />
2. To take off engine compartment cover (3), when necessary, loosen lashing<br />
ropes (4) and pull off cover.<br />
4-212
TM 9-<strong>2320</strong>-<strong>211</strong>-<strong>10</strong>-1<br />
d. Operation of Fuel-Burning Personnel Heater.<br />
FRAME 1<br />
1. Open fuel shutoff cock (1) by turning it to the left.<br />
2. Make sure that personnel heater EMERGENCY switch (2) is in the up position.<br />
3. Pull AIR knob (3) to full out position.<br />
4. Place HI-LO switch (4) in HI or LO position, depending on heat needed.<br />
5. Hold START-OFF-RUN switch (5) in START position until indicator light (6)<br />
comes on. START-OFF-RUN switch is spring loaded and must be held in<br />
position.<br />
6. As soon as the indicator light (6) comes on, move START-OFF-RUN switch (5)<br />
quickly to RUN position.<br />
GO TO FRAME 2<br />
NOTE<br />
Moving START-OFF-RUN switch (5) lever from START<br />
position to RUN position too slowly will result in a heater<br />
shutdown. Move switch lever quickly. Warm air should<br />
be felt at the heat outlet within three minutes. If heater<br />
fails to start within two minutes (indicator light (6) remains<br />
off), move START–OFF–RUN switch to OFF posi–<br />
tion. Wait three minutes before trying to start heater<br />
again.<br />
4-213
TM 9-<strong>2320</strong>-<strong>211</strong>-<strong>10</strong>-1<br />
FRAME 2<br />
1. Pull AIR knob (1) out to get more heated air from the heat outlet.<br />
2. Push AIR knob (1) in to lower amount of heated air coming from the heat<br />
outlet.<br />
NOTE<br />
Do not operate the heater with the AIR knob (1) pushed<br />
all the way in. The unit does not work best with knob<br />
in this position.<br />
3. Pull DEFROSTER knob (2) out all the way for maximum defrosting. For even<br />
heating and defrosting, push DEFROSTER knob half way in.<br />
4. To stop the heater, set the HI-LO switch (3) in the LO position, and set the<br />
START-OFF-RUN switch (4) to OFF position.<br />
5. The burner will stop in a few seconds but indicator light (5) will stay on.<br />
6. When burner is cool and all unused gas is out, indicator light (5) will go out.<br />
NOTE<br />
Wait until indicator light (5) goes out before trying to<br />
restart heater.<br />
4-214
TM 9-<strong>2320</strong>-<strong>211</strong>-<strong>10</strong>-1<br />
FRAME 3<br />
CAUTI<strong>ON</strong><br />
1.<br />
2.<br />
Under normal conditions do not stop heater by setting<br />
personnel heater EMERGENCY switch (1) in off (down)<br />
position. Damage to equipment may result.<br />
In case of an emergency condition, set personnel heater<br />
EMERGENCY switch (1) in off (down) position. This may<br />
cause damage to equipment but crew compartment per–<br />
sonnel will be better protected.<br />
If heater fails to start or goes out after a short run, wait until indicator<br />
light (2) goes out.<br />
Try to restart heater. Refer to frame 1. If heater fails to operate after<br />
third try, notify direct support maintenance unit.<br />
4-215
TM 9-<strong>2320</strong>-<strong>211</strong>-<strong>10</strong>-1<br />
e. Operation of Fuel-Burning Power Plant Heater.<br />
NOTE<br />
The fuel-burning power plant heater is designed to keep<br />
the engine compartment warm when truck is not in use.<br />
This heater should not be used while operating the truck.<br />
1. Make sure heater coolant outlet shutoff cock (1) is fully open (turn left).<br />
2. Make sure heater coolant inlet shutoff cock (2) is fully open (turn left).<br />
GO TO FRAME 2<br />
4-216
TM 9-<strong>2320</strong>-<strong>211</strong>-<strong>10</strong>-1<br />
FRAME 2<br />
1. Turn power plant heater fuel shutoff cock (1) left to open position.<br />
2. Turn power plant heater coolant inlet cock (2) left to open position.<br />
GO TO FRAME 3<br />
4-217
TM 9-<strong>2320</strong>-<strong>211</strong>-<strong>10</strong>-1<br />
1. Set HI-LO switch (1) to LO position.<br />
2. Hold START-OFF-RUN switch (2) in START position until indicator light (3)<br />
comes on. Indicator light should come on within two minutes.<br />
NOTE<br />
START-OFF-RUN switch (2) is spring loaded and must<br />
be held in position.<br />
3. As soon as indicator light (3) comes on, quickly move START-OFF-RUN<br />
switch (2) to RUN position.<br />
NOTE<br />
Moving switch (2) lever from START to RUN too slowly<br />
will result in a heater shutdown. Warm air should be<br />
felt at the heat outlet within three minutes.<br />
4. If heater fails to start within two minutes (indicator light (3) will remain<br />
off), move START-OFF-RUN switch (2) to OFF position. Wait until three<br />
minutes before trying to start heater again.<br />
5. Set HI-LO switch (1) to HI or LO depending on heat needed.<br />
GO TO FRAME 4<br />
NOTE<br />
LO position of HI-LO switch (1) is suitable for standby<br />
periods when heater will operate for a long period of<br />
time.<br />
4-218
TM 9-<strong>2320</strong>-<strong>211</strong>-<strong>10</strong>-1<br />
FRAME 4<br />
1. To stop the power plant heater, set the HI–LO switch (1) to LO position.<br />
2. Set START-OFF-RUN switch (2) to OFF position. Burner will stop within<br />
a few seconds.<br />
3. Indicator light (3) will remain on. Blower will keep running until burner<br />
cools and unburned gases are out.<br />
NOTE<br />
Always wait until indicator light (3) goes out before trying<br />
to restart power plant heater.<br />
4. If heater fails to start after three tries or stops after a short run, tell direct<br />
support maintenance.<br />
4-219
TM 9-<strong>2320</strong>-<strong>211</strong>-<strong>10</strong>-1<br />
f. Using the Slave Receptacle.<br />
FRAME 1<br />
1.<br />
2.<br />
3.<br />
4.<br />
GO<br />
NOTE<br />
A truck with discharged batteries can get power from<br />
another truck through the slave receptacle.<br />
Start engine. Refer to para 4-6 a, b.<br />
Place truck so that slave receptacle (1) faces slave receptacle of disabled<br />
truck.<br />
Stop engine.<br />
Refer to para 4-6e.<br />
Turn left, unscrew protective cap (2) and swing it to the side.<br />
TO FRAME 2<br />
4-220
TM 9-<strong>2320</strong>-<strong>211</strong>-<strong>10</strong>-1<br />
FRAME 2<br />
1. Plug service cable connectors (1) into slave receptacle (2) on each truck.<br />
2. Start engine of slaving truck. Refer to para 4-6a, b.<br />
3. Set idle speed at <strong>10</strong>00 to 1<strong>10</strong>0 rpm.<br />
4. Start engine of disabled truck. Refer to para 4-6a, b.<br />
5. As soon as engine is running smoothly, remove service cable connectors (1)<br />
from receptacles (2).<br />
6. Swing protective caps (3) back into position and screw cap onto<br />
receptacles (2).<br />
7. Stop engine on slaving truck. Refer to para 4-6e.<br />
GO TO FRAME 3<br />
4-221
TM 9-<strong>2320</strong>-<strong>211</strong>-<strong>10</strong>-1<br />
1. Check battery generator indicator (1) on slaved truck. If indicator reading<br />
is in the yellow or red, stop engine (para 4-6e) and tell organizational<br />
maintenance.<br />
4-222
TM 9-<strong>2320</strong>-<strong>211</strong>-<strong>10</strong>-1<br />
4-15. OPERATI<strong>ON</strong> OF<br />
TOOLS:<br />
1/2-inch<br />
DEEP WATER FORDING KIT.<br />
square drive ratchet wrench.<br />
NOTE<br />
Trucks with deep water fording kits can ford hard bottom<br />
crossings up to 72 inches deep. Refer to TM 9-238 for<br />
general deep-water fording information.<br />
1. From underneath truck, using 1/2-inch square drive ratchet wrench, unscrew<br />
drain plug (1) from storage boss (2) on engine flywheel housing (3).<br />
2. Screw drain plug (1) into drain port (4).<br />
GO TO FRAME 2<br />
4-223
TM 9-<strong>2320</strong>-<strong>211</strong>-<strong>10</strong>-1<br />
1. Make fast all loose objects to the truck.<br />
2. Make sure the air intake extension (1) is secure.<br />
3. Tighten fuel tank filler cap(s) (2) securely.<br />
4. Make sure all battery filler caps (3) are all on securely.<br />
GO TO FRAME 3<br />
4-224
TM 9-<strong>2320</strong>-<strong>211</strong>-<strong>10</strong>-1<br />
FRAME 3<br />
1.<br />
2.<br />
3.<br />
4.<br />
5.<br />
GO<br />
Start engine. Refer to para 4-6a and 4-6b.<br />
Pull FORDING valve control cable handle (1) out.<br />
Step on and press clutch pedal (2) all the way down.<br />
Place FR<strong>ON</strong>T TRANSMISSI<strong>ON</strong> gearshift lever (3) in position 1.<br />
Move TRANSFER CASE shifting lever (4) to LOW position.<br />
TO FRAME 4<br />
4-225
TM 9-<strong>2320</strong>-<strong>211</strong>-<strong>10</strong>-1<br />
FRAME 4<br />
WARNING<br />
Do not attempt to ford your truck in depths greater than<br />
72-inches. While fording, keep your speed down to 3 or<br />
4 miles per hour.<br />
After fording, do not rely on brakes until they dry out.<br />
Keep putting them on and letting them go until truck<br />
stops without brakes grabbing.<br />
Failure to see these warnings could result in injury to<br />
personnel and damage to equipment.<br />
1. Make sure your engine is running correctly and start<br />
placing and keeping truck in motion, para 4-6d.<br />
2. After leaving the water, push FORDING valve control<br />
3. Stop engine. Refer to para 4-6e.<br />
GO TO FRAME 5<br />
fording.<br />
Refer to<br />
cable handle (1) in.<br />
4-226
TM 9-<strong>2320</strong>-<strong>211</strong>-<strong>10</strong>-1<br />
FRAME 5<br />
1. From underneath truck, using 1/2-inch square drive ratchet wrench, unscrew<br />
flywheel housing drain plug (1) from drain port (2).<br />
2. Screw drain plug (1) into storage boss (3).<br />
3. Wash off all salt water and salt deposits from every part of vehicle.<br />
4. As soon after fording as possible, take vehicle to organizational maintenance<br />
for lubrication and servicing. Be sure to tell organizational maintenance<br />
that truck has been used in fording operations.<br />
4-227
TM 9-<strong>2320</strong>-<strong>211</strong>-<strong>10</strong>-1<br />
4-16. OPERATING <strong>THE</strong> ELECTRIC BRAKE KIT.<br />
FRAME 1<br />
NOTE<br />
The electric brake kit is installed on trucks used to<br />
move trailers or semitrailers.<br />
CAUTI<strong>ON</strong><br />
Electric brakes on towed trucks operate when service<br />
brake pedal is pressed down, not when rheostat control<br />
handle (1) is turned. Make sure brakes work correctly<br />
at the number you set the rheostat to.<br />
1. Turn rheostat control handle (1) to setting shown on data plate (2).<br />
NOTE<br />
Exact setting needed for each load must be found by<br />
experience. Heavier loads need high number settings.<br />
4-228
TM 9-<strong>2320</strong>-<strong>211</strong>-<strong>10</strong>-1<br />
Section III. OPERATI<strong>ON</strong> UNDER UNUSUAL C<strong>ON</strong>DITI<strong>ON</strong>S<br />
4-17. SCOPE. Extremes of temperature, humidity and terrain conditions require<br />
special operating procedures. Instructions for operating under these unusual conditions<br />
are contained in this section.<br />
a. Refer to FM 55-30 for instruction on driver selection, training, and<br />
supervision.<br />
b. Refer to FM 21-305 for special driving instructions for operation of wheeled<br />
trucks under unusual conditions.<br />
4-18. GENERAL. When operating under unusual conditions, pay particular attention<br />
to all gages and indicators for signs of trouble.<br />
4-19. OPERATI<strong>ON</strong> IN EXTREME COLD WEA<strong>THE</strong>R.<br />
a. General. Extreme cold weather will cause:<br />
(1) Lubricants to thicken or get hard.<br />
(2) Batteries to freeze and keep them from supplying<br />
starting.<br />
(3) Electrical insulation to open a bit and cause short<br />
enough current for<br />
circuits.<br />
(4) Fuel not to vaporize and mix with air to form a combustible mixture<br />
for starting.<br />
b. Related Publications. Refer to the following for information relating to<br />
operation of a truck in cold weather conditions.<br />
FM 31-70<br />
FM 31-71<br />
FM 90-6(HTF)<br />
TM 9-207<br />
c. Winterization Kits.<br />
protection against extreme<br />
kits.<br />
(1) Refer to para<br />
(2) Refer to para<br />
Basic Cold Weather Manual<br />
Northern Operations<br />
Mountain Operations (How TO Fight)<br />
Operation and Maintenance of Army Materiel<br />
in Extreme Cold Weather (0°F to -65°F)<br />
WARNING<br />
FM 9-207 contains general information which applies<br />
to all Army Materiel. This information must be<br />
considered part of this manual.<br />
These practices and precautions must be followed<br />
for safe cold weather operation so that personnel<br />
will not be injured or equipment damaged.<br />
Special winterization equipment is given in kit form when<br />
cold (0°F to –65°F) is needed.<br />
4-13 operating instructions for hot water personnel heater<br />
4-14 operating instructions for arctic winterization kits.<br />
4-229
TM 9-<strong>2320</strong>-<strong>211</strong>-<strong>10</strong>-1<br />
d. Moving the Truck.<br />
FRAME 1<br />
CAUTI<strong>ON</strong><br />
After shutdown for long periods of time, lubricants<br />
harden and brakes and tires may freeze fast. Take<br />
each condition into account before moving truck so<br />
that equipment will not be damaged.<br />
NOTE<br />
Check that PMCS that apply to operation in extreme<br />
cold weather have been done.<br />
1. Start engine (refer to paras 4-6a and b) and let it warm up thoroughly.<br />
2. Place FR<strong>ON</strong>T TRANSMISSI<strong>ON</strong> gearshift lever (1) in position 1.<br />
3. Place TRANSFER CASE lever (2) to LOW position.<br />
4. Drive truck at lowest speed possible for about <strong>10</strong>0 yards. Be careful not to<br />
stall engine. This should heat gears and tires for normal operation.<br />
4-230
TM 9-<strong>2320</strong>-<strong>211</strong>-<strong>10</strong>-1<br />
e. Parking.<br />
(1) Park truck in a sheltered area out of the wind, where possible. If no<br />
shelter is available, park truck so that it does not face into the wind.<br />
(2) Park truck on high dry ground, if possible. If high dry ground is<br />
not available, spread out planks or brush and put wheel chocks in place, if needed.<br />
(3) Park truck on level ground so that body does not twist.<br />
(4) Place all control levers in neutral position to stop freezing in gear due<br />
to water condensation.<br />
(5) In areas where temperatures reach -50°F or colder, put an extra 20<br />
pounds of air (above normal) in tires for long standby periods or overnight. Refer<br />
to vol 2, chapter 1, table 1-1.<br />
(6) Let the extra air out of tires before starting normal operations. Do not<br />
let air out when tires are hot.<br />
(7) Turn power plant heater on. Refer to para 4-14e.<br />
(8) If truck does not have an arctic winterization kit, tell organizational<br />
maintenance to take batteries out. Store batteries in a warm place.<br />
(9) The cooling system must be serviced and protected for temperatures<br />
below 32°F. Refer to TB 750-651 and TM 9-207 for special procedures.<br />
(<strong>10</strong>) If no approved antifreeze solution is available, tell organizational<br />
maintenance to drain radiator and block.<br />
4-231
TM 9-<strong>2320</strong>-<strong>211</strong>-<strong>10</strong>-1<br />
f. Refueling.<br />
FRAME 1<br />
WARNING<br />
Authorized procedures must be used to get rid of drained<br />
fuel. Serious injury to personnel and damage to equipment<br />
may result if correct procedure is not used.<br />
NOTE<br />
Before refueling tell organizational maintenance to drain<br />
fuel tank of any water.<br />
1. Refuel immediately after operation to take away condensation that may form in<br />
fuel tank.<br />
2. Open drain cocks or plugs (1) to drain water from primary (2), secondary (3),<br />
and final (4) fuel filters before fuel system cools below freezing point.<br />
4-232
TM 9-<strong>2320</strong>-<strong>211</strong>-<strong>10</strong>-1<br />
4-20. OPERATI<strong>ON</strong> IN EXTREME HOT WEA<strong>THE</strong>R.<br />
WARNING<br />
When engine temperature is above 180°F use extreme<br />
care in taking off cooling system filter cap so that<br />
you do not get burned/scalded or both.<br />
a. General. Continuous operation of truck at high speeds, or under long hard<br />
pulls in low gear ratios on steep grades or in soft terrain may cause engine to overheat.<br />
Try not to use low gear ratios for long periods, when possible. Always watch<br />
for overheating. Halt equipment for a cooling-off period whenever necessary and<br />
tactical situation permits.<br />
b.<br />
Cooling System.<br />
WARNING<br />
When engine temperature is above 195°F, use<br />
great care in taking off cooling system filler cap<br />
so that you do not get burned.<br />
CAUTI<strong>ON</strong><br />
Do not add coolant to a hot engine unless the<br />
engine is running. You may damage the engine<br />
if you do not obey this caution.<br />
Scale and rust forms quicker in extremely high temperatures. Always add corrosioninhibiter<br />
compound to cooling liquid. Do not use water that contains alkali. Fill<br />
radiator with rain water whenever possible. Refer to TB 750-651 for engine cleaning<br />
compound to be used.<br />
(1)<br />
Check cooling system often. Look for following:<br />
(a) Proper coolant level in radiator.<br />
(b) Leaking hose connections.<br />
(c) Proper fan belt tension.<br />
(d) Cracked or leaking hose lines.<br />
(2) If engine is always overheating, check and clean radiator fins with<br />
compressed air to get rid of sand, dust, and insects.<br />
(3) If engine still overheats, tell organizational maintenance.<br />
c. Batteries.<br />
(1) In very hot zones check level of electrolyte in battery cells daily. If<br />
they are low, add distilled water. If distilled water is not available, use rain or<br />
drinking water. Use of water with a high mineral content will damage batteries.<br />
NOTE<br />
The use of water with high mineral content will do<br />
less damage to a battery than letting electrolyte level<br />
drop below the plates. A battery left dry has a short<br />
life.<br />
4-233
TM 9-<strong>2320</strong>-<strong>211</strong>-<strong>10</strong>-1<br />
(2) A battery will discharge faster if it is left standing for long periods at<br />
high temperatures. If necessary to park for several days, tell organizational<br />
maintenance to take out batteries and store them in a cool place.<br />
d. Body and Chassis. In hot damp climates, corrosion takes place quickly, especially<br />
during rainy seasons. Check often for the following:<br />
(1) Signs of pitting or paint blistering on metal surfaces.<br />
(2) Signs of mildew, mold, or fungus on fabrics, rubber, and glass.<br />
If you find signs of any of these,<br />
e. Parking the Truck.<br />
tell organizational maintenance.<br />
(1) Do not park truck in the sun for long periods. Heat and sunlight will<br />
shorten the life of tires. When possible, park under cover to keep truck from sun,<br />
sand, and dust.<br />
(2) Cover trucks<br />
is available. When entire<br />
etching of glass by sand,<br />
4-21.<br />
a.<br />
speed<br />
(3) Correct tire inflation.<br />
not being used with tarpaulins if no other suitable shelter<br />
truck cannot be covered, cover window glass to stop<br />
and cover engine compartment to keep out sand.<br />
When checking<br />
if tire is hot.<br />
Refer to table 2-5.<br />
NOTE<br />
OPERATI<strong>ON</strong> <strong>ON</strong> UNUSUAL TERRAIN.<br />
Operation in Deep Snow or Mud.<br />
tire pressure do not let out air<br />
(1) Choose a FR<strong>ON</strong>T TRANSMISSI<strong>ON</strong> position low enough to keep engine<br />
above recommended minimum speed (rpm) without making the wheels spin.<br />
(2) Take care to keep spinning wheels from becoming buried up to the axle<br />
housing.<br />
CAUTI<strong>ON</strong><br />
Do not let too much air out of tire so as to damage<br />
equipment. Refill tires to recommended pressure<br />
after emergency.<br />
(3) If necessary, let some air out. Refer to table 2-5.<br />
CAUTI<strong>ON</strong><br />
Do not drive with chains on only one wheel of a<br />
driving axle. This may result in damage to the<br />
tire or power train or both.<br />
(4) Tire chains should be used at all times when driving in deep snow, mud,<br />
or soft sand.<br />
WARNING<br />
Do not jam sticks or stones under a spinning<br />
wheel. This can cause injury to personnel or<br />
unnecessary tire wear.<br />
4-234
TM 9-<strong>2320</strong>-<strong>211</strong>-<strong>10</strong>-1<br />
(5) If one or more tires become stuck, use another truck to tow or winch<br />
the stuck truck. If a truck is not available, jack up stuck truck and put planking<br />
or matting under the wheel.<br />
(6) After operating truck on muddy or snowy surfaces, clean ice, snow, or<br />
mud from wheels, axles, radiator core, engine compartment steering knuckles and<br />
arms, air cleaner intake, and electrical connections.<br />
b. Operation on Hard Baked Sand. When driving on hard baked sand, try not<br />
to break through the crust. A roadbed of canvas or planking should be set down<br />
for short distances.<br />
c. Operation on Ice.<br />
(1) General. Skidding and loss of steering control are the main troubles<br />
found when driving on icy roads. Due to lack of traction, the truck may continue in<br />
a straight direction no matter which way you turn the wheels. When the wheels<br />
reach a point where you get traction back, the truck may veer sharply to left or<br />
right or stall.<br />
(2) Skidding. When the rear end of the truck skids to either right or left,<br />
instantly turn the front wheels in the same direction in which the rear end is skidding.<br />
Take your foot off the accelerator pedal but do not step down on the clutch pedal.<br />
Step down on the brakes very lightly.<br />
d. Dusty or Sandy Roads.<br />
(1) When operating truck on dusty or sandy terrain, clean air filter daily.<br />
e. Operating on Rocks and Boulders.<br />
CAUTI<strong>ON</strong><br />
Too much pressure in tires will cause more shock<br />
through the moving truck. Not enough pressure<br />
in tires can cause internal breaking of the tires<br />
or damage to the tube.<br />
(1) Refer to table 2-5 and fill the tires properly.<br />
(2) Check tire pressure when tires are cold.<br />
(3) Do not let out air when tires are hot.<br />
f. Operation in High Altitudes.<br />
(1) High altitude operation requires careful maintenance of the cooling<br />
system. As you go to a higher altitude, the boiling point of your coolant will become<br />
lower. The pressurized cooling system of your truck will operate at 220°F when taken<br />
care of in the right way.<br />
(2) Check all hose connections for leaks daily and be sure that radiator cap<br />
is closed properly.<br />
4-235
TM 9-<strong>2320</strong>-<strong>211</strong>-<strong>10</strong>-1<br />
4-22. FORDING OPERATI<strong>ON</strong>.<br />
a. General. Your truck can ford bodies of water up to a depth of 30-inches<br />
without the use of special equipment. Special kits are available for deep water<br />
fording. Refer to TM 9-238.<br />
b. Normal Fording through 30 Inches of Water or Less.<br />
TOOLS:<br />
Straight bar plug wrench<br />
Ratchet wrench<br />
FRAME 1<br />
1. Using straight bar plug wrench and ratchet wrench, unscrew drain plug (1)<br />
from storage boss (2) on flywheel housing.<br />
2. Screw drain plug (1) into drain port (3).<br />
GO TO FRAME 2<br />
4-236
TM 9-<strong>2320</strong>-<strong>211</strong>-<strong>10</strong>-1<br />
FRAME 2<br />
1. Start engine. Refer to para 4-6a, b.<br />
2. Step on clutch pedal (1) and press it all the way down.<br />
3. Place FR<strong>ON</strong>T TRANSMISSI<strong>ON</strong> gearshift lever (2) in position 1.<br />
4. Move TRANSFER CASE lever (3) down to LOW position.<br />
5. Let clutch pedal (1) up.<br />
5. Push handbrake (4) to down (brake off) position.<br />
WARNING<br />
Do not attempt to ford your truck in depths greater than<br />
30-inches without a deep water fording kit installed.<br />
Keep your speed, while fording, down to 3 to 4 miles<br />
per hour.<br />
After fording do not rely on brakes until they dry<br />
out. Keep putting them on until truck stops without<br />
brakes grabbing.<br />
7. Make sure your engine is running correctly and start fording.<br />
8. After leaving the water, stop engine. Refer to para 4-6e.<br />
GO TO FRAME 3<br />
4-237
TM 9-<strong>2320</strong>-<strong>211</strong>-<strong>10</strong>-1<br />
FRAME 3<br />
1. Using straight bar plug wrench and ratchet wrench unscrew flywheel housing<br />
drain plug (1) from drain port (2).<br />
2. Screw drain plug (1) into storage boss (3).<br />
3. Wash off all salt water and salt deposits from every part of truck.<br />
4-238
TM 9-<strong>2320</strong>-<strong>211</strong>-<strong>10</strong>-1<br />
4-23. EMERGENCY PROCEDURES.<br />
a. Using Slave Receptacle to Start the Engine. (Refer to para 4-14f.)<br />
b. Using Jumper Cables to Start the Engine.<br />
TOOLS: Jumper cables<br />
FRAME 1<br />
1.<br />
2.<br />
3.<br />
GO<br />
Start engine. Refer to para 4-6a, b.<br />
Position slave truck so that its batteries (1) are directly opposite batteries (2)<br />
of disabled truck.<br />
Stop engine.<br />
TO FRAME 2<br />
Refer to para 4-6e.<br />
4-239
TM 9-<strong>2320</strong>-<strong>211</strong>-<strong>10</strong>-1<br />
FRAME 2<br />
1.<br />
2.<br />
3.<br />
GO<br />
Open battery compartment doors (1) of both trucks.<br />
Loosen thumbscrews (2).<br />
Move clamps (3) as far as they go to the right.<br />
TO FRAME 3<br />
4-240
TM 9-<strong>2320</strong>-<strong>211</strong>-<strong>10</strong>-1<br />
FRAME 3<br />
1.<br />
Pull battery boxes (1) of both trucks out far enough for battery posts to be<br />
reached.<br />
CAUTI<strong>ON</strong><br />
2.<br />
3.<br />
Be sure to join positive post of disabled truck battery to<br />
positive post of slave truck battery, and negative post<br />
of disabled truck battery to negative post of slave truck.<br />
This will stop damage to truck battery alternator and<br />
other equipment.<br />
Clamp one end of positve (red) jumper cable (2) to positive battery post of<br />
disabled truck. Clamp other end (3) to positive battery post of slave truck.<br />
Clamp one end of negative (black) jumper cable (4) to negative battery post<br />
of disabled truck. Clamp other end (5) of jumper cable to negative battery<br />
post of slave truck.<br />
GO TO FRAME 4<br />
4-241
TM 9-<strong>2320</strong>-<strong>211</strong>-<strong>10</strong>-1<br />
FRAME 4<br />
1. Start engine of slave truck. Refer to paras 4-6a, b.<br />
2. Start engine of disabled truck. Refer to paras 4-6a, b.<br />
NOTE<br />
If engine of disabled truck does not start after three<br />
or four tries, tell organizational maintenance.<br />
WARNING<br />
Completely take off one jumper cable at a time so that<br />
ends of positive (red) and negative (black) cables do<br />
not touch each other. Shorting of battery can cause<br />
serious damage to alternator and injury to personnel.<br />
3. Take off jumper cables (1).<br />
4. Push battery boxes (2) back into place.<br />
5. Make battery boxes (2) fast with clamps (3) and thumbscrews (4).<br />
6. Close battery compartment doors.<br />
4-242
TM 9-<strong>2320</strong>-<strong>211</strong>-<strong>10</strong>-1<br />
c. Towing Truck to Start Engine.<br />
TOOLS:<br />
PERS<strong>ON</strong>NEL:<br />
7/16-inch open end wrench<br />
5/8-inch open end wrench<br />
Pliers<br />
Two<br />
Soldier A 1.<br />
GO TO FRAME 2<br />
CAUTI<strong>ON</strong><br />
Do not try to tow a disabled truck with a tow chain<br />
wrapped around the center of the bumper.<br />
Do not try to push a disabled truck. Tow only. Power<br />
train can be damaged by pushing a truck.<br />
NOTE<br />
Approval from maintenance officer must be obtained<br />
before towing your truck to start engine.<br />
Be sure that service brakes are operating properly<br />
before towing.<br />
Trucks with an inoperative compressed air system<br />
can be towed only with a tow bar.<br />
To tow a disabled truck with a tow chain, the disabled<br />
truck should have at least 75 psi in the air<br />
reservoirs.<br />
Check to see if air pressure gage (1) reads 75 psi.<br />
4-243
TM 9-<strong>2320</strong>-<strong>211</strong>-<strong>10</strong>-1<br />
FRAME 2<br />
Soldier B<br />
Soldier A<br />
Soldier B<br />
Soldier A<br />
Soldier B<br />
GO TO FRAME 3<br />
NOTE<br />
Air supply in disabled truck can be charged from towing<br />
truck. This can be done through trailer emergency air<br />
couplings or by using tire inflation hose.<br />
1. To build up disabled truck air pressure through the emergency<br />
air couplings:<br />
(a) Turn dummy couplings (1) left and take them from emergency<br />
air couplings (2) on disabled truck (left front) and towing<br />
truck (right rear).<br />
(b) Place coupling halves (3) of intravehicular air hose to<br />
emergency couplings (2) of both trucks and turn right to<br />
lock.<br />
(c) Check that engine is running on towing truck.<br />
(d) Turn emergency air valve handles (4) on both trucks 1/4-<br />
turn left to open.<br />
(e) Let air pressure in disabled truck build up to <strong>10</strong>0 psi shown<br />
on pressure gage (5).<br />
(f) Turn emergency air valve handles (4) on both trucks 1/4-<br />
turn to right to close valves.<br />
(g) Turn coupling halves (3) of intravehicular air hose left and<br />
take them off.<br />
(h) Put dummy couplings (1) on emergency air coupling halves<br />
(2) and turn them right to lock.<br />
4-244
TM 9-<strong>2320</strong>-<strong>211</strong>-<strong>10</strong>-1<br />
FRAME 2 - Continued<br />
4-245
TM 9-<strong>2320</strong>-<strong>211</strong>-<strong>10</strong>-1<br />
FRAME 3<br />
Soldier A<br />
Soldier B<br />
Soldier A<br />
Soldiers<br />
A and B<br />
Soldier B<br />
Soldiers<br />
A and B<br />
GO TO FRAME 4<br />
1. To build up disabled truck air pressure using air inflation hose:<br />
(a)<br />
(b)<br />
(c)<br />
(d)<br />
(e)<br />
(f)<br />
(g)<br />
(h)<br />
(i)<br />
Unscrew cap (1) from towing truck air valve (2).<br />
Screw inflation hose coupling nut (3) on towing truck air<br />
valve (2).<br />
Using 7/16-inch wrench,<br />
pipe plug (4).<br />
unscrew disabled truck air valve<br />
Using 5/8-inch wrench, hold inflation hose fitting (5) and<br />
unscrew inflation gage (6).<br />
Using 5/8-inch wrench, screw inflation hose fitting (5)<br />
into disabled truck air valve (7).<br />
Check that towing truck engine is running.<br />
Turn air valve handles (8) on both trucks 1/4-inch right to<br />
open valves.<br />
Let air pressure in disabled truck build up to <strong>10</strong>0 psi as<br />
shown on air pressure gage (9).<br />
Turn air valve handles (8) on both trucks 1/4-turn left<br />
to close valves (2 and 7).<br />
4-246
TM 9-<strong>2320</strong>-<strong>211</strong>-<strong>10</strong>-1<br />
Soldier B 1.<br />
Soldier A 4.<br />
GO TO FRAME 5<br />
Using 5/8-inch wrench, unscrew inflation hose fitting (1) from<br />
disabled truck air valve (2).<br />
2. Using 7/16-inch wrench, screw pipe plug (3) into air valve (2).<br />
3. Using 5/8-inch wrench, hold fitting (1) and screw inflation gage<br />
(4) to fitting.<br />
Unscrew inflation hose coupling nut (5) from towing truck air<br />
valve (6).<br />
5. Screw cap (7) on air valve (6).<br />
6. Stow inflation hose (8) in tool box.<br />
4-247
TM 9-<strong>2320</strong>-<strong>211</strong>-<strong>10</strong>-1<br />
Soldier B 1. Take locking pins (1) out of front shackle pins (2) on both right<br />
and left sides of disabled truck.<br />
GO TO FRAME 6<br />
2. Take shackle pins (2) out.<br />
3. Take shackles (3) off.<br />
4. Put shackles (3) through end links of chain (4).<br />
5. Place shackles (3) on brackets (5) and aline holes.<br />
6. Place shackle pins (2) through holes.<br />
7. Place locking pins (1) through holes in shackle pins (2) and<br />
lock pins.<br />
4-248
TM 9-<strong>2320</strong>-<strong>211</strong>-<strong>10</strong>-1<br />
FRAME 6<br />
1. Using pliers, straighten end of cotter pin (1) on towing truck and pull it out.<br />
2. Pull up hook latch (2) and lock (3).<br />
3. Place center of chain (4) in hook (5) of towing truck.<br />
4. Push latch (2) and lock (3) down and aline holes in latch and lock.<br />
5. Using pliers, put cotter pin (1) through holes and bend open ends of<br />
cotter pin.<br />
GO TO FRAME 7<br />
4-249
TM 9-<strong>2320</strong>-<strong>211</strong>-<strong>10</strong>-1<br />
FRAME 7<br />
1. Step down on clutch pedal (1) of disabled truck all the way.<br />
2. Place TRANSFER CASE lever (2) in HIGH position.<br />
3. Place FR<strong>ON</strong>T TRANSMISSI<strong>ON</strong> gearshift lever (3) in position 5.<br />
4. Pull hand THROTTLE control (4) out one-third of the way.<br />
5. Turn BATTERY switch (5) to <strong>ON</strong> position.<br />
6. Turn light switch (6) to STOP LIGHT position.<br />
7. Step down on service foot brake (7) to keep truck from coasting.<br />
8. Put handbrake (8) to down (brake off) position.<br />
GO TO FRAME 8<br />
4-250
TM 9-<strong>2320</strong>-<strong>211</strong>-<strong>10</strong>-1<br />
FRAME 8<br />
1.<br />
2.<br />
3.<br />
4.<br />
5.<br />
6.<br />
7.<br />
8.<br />
As soon as towing begins, let up service foot brake (1) of disabled truck.<br />
Hold clutch pedal (2) in until truck speed reaches <strong>10</strong>-miles per hour.<br />
Let clutch pedal (2) up slowly and operate accelerator pedal (3) as necessary.<br />
NOTE<br />
For cold weather starting, move INTAKE MANIFOLD AIR-<br />
HEATER switch (4) to <strong>ON</strong> position as soon as clutch pedal<br />
(2) is up.<br />
The towed truck should start within <strong>10</strong>0 yards. If it<br />
fails to start, stop towing operation and notify organizational<br />
maintenance.<br />
When engine starts, step down on clutch pedal (2).<br />
Put FR<strong>ON</strong>T TRANSMISSI<strong>ON</strong> gearshift lever (5) to N position.<br />
Signal to towing truck.<br />
Step on service foot brake (1) slowly and stop both trucks.<br />
Pull handbrake (6) to up (brake on) position.<br />
GO TO FRAME 9<br />
NOTE<br />
During cold weather turn INTAKE MANIFOLD AIR-HEATER<br />
switch (4) <strong>ON</strong> and OFF until engine runs smoothly.<br />
4-251
TM 9-<strong>2320</strong>-<strong>211</strong>-<strong>10</strong>-1<br />
FRAME 9<br />
1. Using pliers, straighten end of cotter pin (1) and pull it out.<br />
2. Pull up hook latch (2) and lock (3).<br />
3. Take chain (4) from hook (5).<br />
4. Push latch (2) and lock (3) down and aline holes in latch and lock.<br />
5. Using pliers, put cotter pin (1) through holes and bend open ends of<br />
cotter pin.<br />
GO TO FRAME <strong>10</strong><br />
4-252
TM 9-<strong>2320</strong>-<strong>211</strong>-<strong>10</strong>-1<br />
FRAME <strong>10</strong><br />
1. Take locking pins (1) out of front shackle pins (2) on both right and left<br />
sides.<br />
2. Take out shackle pins (2).<br />
3. Take off shackles (3).<br />
4. Take chain (4) from shackles (3).<br />
5. Place shackles (3) on bracket (5) and aline holes and put shackle pins (2)<br />
through holes.<br />
6. Place locking pins (1) through holes in shackle pins (2) and lock pins.<br />
4-253
TM 9-<strong>2320</strong>-<strong>211</strong>-<strong>10</strong>-1<br />
d. Highway Towing.<br />
TOOLS:<br />
PERS<strong>ON</strong>NEL:<br />
Tow bar<br />
Pliers<br />
Two<br />
FRAME 1<br />
Soldier A 1.<br />
GO TO FRAME 2<br />
CAUTI<strong>ON</strong><br />
Do not tow a truck that has become disabled because of<br />
a damaged transfer, axle, or transmission. Tell direct<br />
support maintenance.<br />
Do not try to tow with front or rear wheels off the<br />
ground. Tell direct support maintenance.<br />
Do not push a disabled truck. Using towing procedure<br />
only.<br />
Do not go over 20 mph when towing.<br />
Take locking pins (1) out of holes in front shackle pins (2) on<br />
both right and left sides of disabled truck.<br />
2. Take out shackle pins (2), from shackle brackets (7)<br />
3. Take off shackles (3).<br />
4. Using pliers, straighten end of cotter pin (4) in pintle lock (5)<br />
of towing truck and pull out pin.<br />
5. Pull hook latch (6) and lock (5) to up position.<br />
4-254
TM 9-<strong>2320</strong>-<strong>211</strong>-<strong>10</strong>-1<br />
FRAME 2<br />
Soldiers 1.<br />
A and B<br />
2.<br />
Soldier A 3.<br />
Soldier B 4.<br />
5.<br />
6.<br />
GO TO FRAME 3<br />
Aline holes in tow bar brackets (1) with holes in shackle brackets<br />
(2) and put shackle pins (3) through holes.<br />
Place locking pins (4) through holes in end of shackle pins (3) and<br />
lock pins.<br />
Move towing truck so that tow bar ring (5) will go on pintle<br />
hook (6).<br />
Place tow bar ring (5) in pintle hook (6) and push lock (7) and<br />
latch (8) down.<br />
Aline holes in pintle lock (7) and latch (8).<br />
Using pliers, push cotter pin (9) through holes and bend open<br />
ends of cotter pin.<br />
4-255
TM 9-<strong>2320</strong>-<strong>211</strong>-<strong>10</strong>-1<br />
FRAME 3<br />
Soldier B 1.<br />
2.<br />
3.<br />
4.<br />
5.<br />
6.<br />
7.<br />
8.<br />
GO TO FRAME<br />
Step down on disabled truck clutch pedal (1) all the way.<br />
Place FR<strong>ON</strong>T TRANSMISSI<strong>ON</strong> gearshift lever (2) in N position.<br />
Place TRANSFER CASE lever (3) in neutral position, half way<br />
between HIGH and LOW positions.<br />
Let clutch pedal (1) up.<br />
Turn BATTERY switch (4) to <strong>ON</strong> position.<br />
Turn light switch (5) to STOP LIGHT position.<br />
Push handbrake (6) to down (brake off) position.<br />
Signal to towing truck to start towing.<br />
4<br />
4-256
TM 9-<strong>2320</strong>-<strong>211</strong>-<strong>10</strong>-1<br />
FRAME 4<br />
1. When towing operation is completed:<br />
(a) Turn disabled truck light switch (1) to OFF position.<br />
(b) Turn BATTERY switch (2) to OFF position.<br />
(c) Pull handbrake (3) to up (brake on) position.<br />
GO TO FRAME 5<br />
4-257
TM 9-<strong>2320</strong>-<strong>211</strong>-<strong>10</strong>-1<br />
FRAME 5<br />
1.<br />
2.<br />
3.<br />
4.<br />
5.<br />
6.<br />
7.<br />
Soldiers 8.<br />
A and B<br />
Soldier B 9.<br />
<strong>10</strong>.<br />
11.<br />
Using pliers,<br />
straighten ends of cotter pin (1) and pull it out.<br />
Pull up hook latch (2) and lock (3).<br />
Take tow bar ring (4) off pintle hook (5).<br />
Push latch (2) and lock (3) down and aline holes in latch and lock.<br />
Using pliers, put cotter pin (1) through holes and bend open<br />
ends of cotter pin.<br />
Take locking pins (6) out of front shackle pins (7) on both right<br />
and left sides.<br />
Take shackle pins (7) out of tow bar brackets (8) and shackle<br />
brackets (9).<br />
Take tow bar brackets (8) from shackle brackets (9).<br />
Place shackle (<strong>10</strong>) on shackle bracket (9) and aline holes.<br />
Place shackle pins (7) through holes in shackle (<strong>10</strong>) and shackle<br />
bracket (9).<br />
Put locking pins (6) in holes in end of shackle pins (7) and lock pins.<br />
4-258
TM 9-<strong>2320</strong>-<strong>211</strong>-<strong>10</strong>-1<br />
APPENDIX A<br />
REFERENCES<br />
A-1.<br />
PUBLICATI<strong>ON</strong> INDEXES and GENERAL REFERENCE.<br />
Indexes should be checked often for the latest<br />
given in this appendix and for new publications on<br />
manual.<br />
a. Military Publications Indexes.<br />
changes or revisions of references<br />
materiel covered in this technical<br />
Index of Blank Forms.... . . . . . . .<br />
. . . . . . . . . . . DA Pam 3<strong>10</strong>-2<br />
Military Publications:<br />
Index of Technical Manuals, Technical<br />
Bulletins, Supply Bulletins, and<br />
Lubrication Orders . . . . . . . . . .<br />
. . . . . . . . . . . DA Pam 3<strong>10</strong>-4<br />
b. General Reference.<br />
Authorization Abbreviations and Brevity<br />
Codes . . . . . . . . . . . . . . . . . . . . . . . . . . . . . . AR 3<strong>10</strong>-50<br />
Dictionary of United States Army Terms. . . . . . . . . . . . AR 3<strong>10</strong>-25<br />
A-2.<br />
FORMS.<br />
The following forms are for this materiel (refer to DA Pamphlet 3<strong>10</strong>-2 for index of<br />
blank forms and to TM 38-750 for explanation of their use).<br />
Recommended Changes to Publications . . . . . . . . . . . . . DA Form 2028<br />
Maintenance Request - Continuation Sheet . . . . . . . . . . . DA Form 2407-1<br />
Equipment Log Assembly (Records) . . . . . . . . . . . . . . DA Form 2408<br />
A-1
TM 9-<strong>2320</strong>-<strong>211</strong>-<strong>10</strong>-1<br />
A-3. O<strong>THE</strong>R PUBLICATI<strong>ON</strong>S.<br />
a. Truck.<br />
Lubrication Order . . . . . . . . . . . . . . . . . . . . LO 9-<strong>2320</strong>-<strong>211</strong>-12<br />
b. General.<br />
Basic Cold Weather Manual . . . . . . . . . . . . . . . . FM 31-70<br />
Northern Operations . . . . . . . . . . . . . . . . . ..FM 31-71<br />
Mountain Operations How To Fight . . . . . . . . . . . . FM 90-6(HTF)<br />
Security of Tactical Wheeled Vehicles . . . . . . . . . . TB 9-2300-422-20<br />
Use of Antifreeze Solutions and Cleaning<br />
Compounds in Engine Cooling System . . . . . . . . . TB 750-651<br />
Operation and Maintenance of Ordnance Materiel<br />
in Cold Weather (0° to -65°F) . . . . . . . . . . . . . FM 9-207<br />
Vehicle Recovery Operation . . . . . . . . . . . . . . . . . FM 20-22<br />
Deep Water Fording of Ordnance Materiel . . . . . . . . . . . TM 9-238<br />
Material used for Cleaning, Preserving, Abrading, and<br />
Cementing Ordnance Materiel and Related materials<br />
Including Chemicals. . . . . . . . . . . . . . . . . . . . TM 9-247<br />
Operating and Maintenance Instructions for Portable<br />
Decontaminating Eguipment . . . . . . . . . . . . . . . . . TM 3-4230-204-12&P<br />
Use and Care of Handtools and Measuring tools . . . . . . . . . TM 9-243<br />
Army Motor Transport Units and Operations . . . . . . FM 55-30<br />
Manual for the Wheeled Vehicle Driver . . . . . . FM 21-305<br />
Army Maintenance Management System . . . . . . TM 38-750<br />
Equipment Improvement Report and Maintenance<br />
Summary for TARCOM Equipment . . . . . . . . . . . . . TM 43-0143<br />
A-2
TM 9-<strong>2320</strong>-<strong>211</strong>-<strong>10</strong>-1<br />
APPENDIX B<br />
COMP<strong>ON</strong>ENTS OF END ITEM LIST<br />
Section I. INTRODUCTI<strong>ON</strong><br />
B-1. SCOPE. This appendix lists integral components of and basic issue items for the<br />
5-ton, 6 x 6, M39 series trucks (multifuel) to help you find items needed for safe and<br />
efficient operation.<br />
B-2. GENERAL. This Components of End Item List is broken down into the following<br />
sections:<br />
a. Section II. Integral Components of the End Item. These items, when put on the<br />
truck, are part of the truck and must go with it whenever it is moved to another<br />
site or turned in. The illustration will help you find these items.<br />
b. Section III. Basic Issue Items. These are the minimum basic items needed to<br />
place the truck in operation, to operate it, and to do emergency repairs. Although<br />
packed and shipped separately, they must go with the truck during operation and<br />
whenever it is turned over to another accountable officer. The illustrations will<br />
help you with hard-to-find items. This manual is your authority to order<br />
replacement BII, based on TOE/MTOE authorization of the end item.<br />
B-3. EXPLANATI<strong>ON</strong> OF COLUMNS.<br />
a. Illustration. This column is broken down as follows:<br />
(1) Figure Number. The number of the illustration on which the item is shown.<br />
(2) Item Number. The number of the item called out in the illustration.<br />
b.<br />
National Stock Number. The National stock number given to the item which<br />
be used to order the item.<br />
will<br />
c.<br />
d.<br />
e.<br />
Part Number. The primary number used by the manufacturer which controls the<br />
design and characteristics of the item by means of its engineering drawings,<br />
specifications, standards, and inspection requirements to pin point the item or<br />
range of items.<br />
Description. Gives the Federal Item Name and, if needed, a minimum description<br />
of the item.<br />
Location. The location on the truck of each item listed is given in this column.<br />
The lists are made up to show all items in one area of the major item before<br />
moving on to the next area.<br />
B-1
TM 9-<strong>2320</strong>-<strong>211</strong>-<strong>10</strong>-1<br />
f.<br />
Usable on Code. Usable On codes are given to help you find which component items<br />
are used on the different models. The codes used in these lists are as follows:<br />
Code<br />
Used On<br />
g.<br />
A<br />
AA<br />
AB<br />
AC<br />
AD<br />
AE<br />
AF<br />
AG<br />
AH<br />
AI<br />
AJ<br />
AK<br />
Quantity Required (Reqd Qty).<br />
for a complete major item.<br />
All<br />
All w/w<br />
M51A2 wo/w<br />
M51A2 w/w<br />
M52A2 wo/w<br />
M54A2 wo/w<br />
M54A2 w/w<br />
M54A2C wo/w<br />
M54A2C w/w<br />
M55A2 wo/w<br />
M55A2 w/w<br />
M543A2 w/w<br />
This column lists the quantity of each item needed<br />
h.<br />
Quantity. This column is left blank and is to be used during an inventory. In the<br />
Rev'd column, list the quantity you actually get on your major item. The Date<br />
columns are for your use when you make an inventory of the major item at a later<br />
date, such as for shipment to another site.<br />
B-2
TM 9-<strong>2320</strong>-<strong>211</strong>-<strong>10</strong>-1<br />
B-4. ABBREVIATI<strong>ON</strong>S. The following abbreviations are found in the lists:<br />
Abbreviation<br />
assy<br />
compt<br />
dbl<br />
dia<br />
ft<br />
gal<br />
hex<br />
in<br />
L<br />
lb<br />
lg<br />
max<br />
RD<br />
sq<br />
w<br />
w/o<br />
Explanation<br />
assembly<br />
compartment<br />
double<br />
diameter<br />
foot, feet<br />
gallon(s)<br />
hexagon(al)<br />
inch(es)<br />
left<br />
pound(s)<br />
long<br />
maximum<br />
round<br />
square<br />
with<br />
without<br />
B-3
TM 9-<strong>2320</strong>-<strong>211</strong>-<strong>10</strong>-1<br />
Figure B-1.<br />
Section II.<br />
B -4
TM 9-<strong>2320</strong>-<strong>211</strong>-<strong>10</strong>-1<br />
Section II.<br />
B-5
TM 9-<strong>2320</strong>-<strong>211</strong>-<strong>10</strong>-1<br />
Section III.<br />
Figure B-2.<br />
B-6
TM 9-<strong>2320</strong>-<strong>211</strong>-<strong>10</strong>-1<br />
Section III.<br />
B-7
TM 9-<strong>2320</strong>-<strong>211</strong>-<strong>10</strong>-1<br />
Section III.<br />
Figure B-2.<br />
B-8
TM 9-<strong>2320</strong>-<strong>211</strong>-<strong>10</strong>-1<br />
Section III.<br />
B-9
TM 9-<strong>2320</strong>-<strong>211</strong>-<strong>10</strong>-1<br />
Figure B-3.<br />
Section III.<br />
B-<strong>10</strong>
TM 9-<strong>2320</strong>-<strong>211</strong>-<strong>10</strong>-1<br />
Section III.<br />
B-11
TM 9-<strong>2320</strong>-<strong>211</strong>-<strong>10</strong>-1<br />
Section III.<br />
Figure B-4.<br />
B-12
TM 9-<strong>2320</strong>-<strong>211</strong>-<strong>10</strong>-1<br />
Section III.<br />
B-13
TM 9-<strong>2320</strong>-<strong>211</strong>-<strong>10</strong>-1<br />
Section III.<br />
Figure B-4.<br />
B-14
TM 9-<strong>2320</strong>-<strong>211</strong>-<strong>10</strong>-1<br />
Section III.<br />
B15/(B16 blank)
TM 9-<strong>2320</strong>-<strong>211</strong>-<strong>10</strong>-1<br />
APPENDIX C<br />
ADDITI<strong>ON</strong>AL AUTHORIZATI<strong>ON</strong> LIST<br />
Section 1.<br />
INTRODUCTI<strong>ON</strong><br />
C-1.<br />
Scope.<br />
This appendix lists additional items you are authorized for the support of the<br />
5-ton, 6x6, M39 series truck.<br />
C-2. General.<br />
This list<br />
not have to be<br />
TDA, or JTA.<br />
identifies items that do not have to accompany the truck and that do<br />
turned in with it. These items are authorized to you by CTA, MTOE,<br />
C-3. Explanation of Listing.<br />
National stock numbers, descriptions, and quantities are provided to help you<br />
identify and request the additional items you require to support this equipment. If<br />
item required differs for different models of this equipment, the model is shown under<br />
the “Usable on” heading in the description column. These codes are identified as:<br />
CODE<br />
A<br />
USED <strong>ON</strong><br />
M543A2<br />
C-1
TM 9-<strong>2320</strong>-<strong>211</strong>-<strong>10</strong>-1<br />
Section II. ADDITI<strong>ON</strong>AL AUTHORIZATI<strong>ON</strong> LIST<br />
(1) (2) (3) (4)<br />
DESCRIPTI<strong>ON</strong><br />
NATI<strong>ON</strong>AL<br />
STOCK<br />
QTY<br />
NUMBER PART NUMBER & FSCM USABLE <strong>ON</strong> CODE U/M AUTH<br />
2540-00-040-2298 BAR: tie boom jack A Ea 1<br />
8330152 (19207)<br />
2540-00-040-2299 BASE: boom jack (grd-support) A Ea 2<br />
8330155 (19207)<br />
40<strong>10</strong>-00-473-6166 CHAIN, UTILITY: 518 in. link, A Ea 1<br />
16 ft lg<br />
7077062 (19207)<br />
5315-00-316-<strong>10</strong>14 PIN : boom jack, upper A Ea 1<br />
8333071 (19207)<br />
5315-00-740-9834 PIN: boom jack, w /lock pin A Ea 2<br />
7409834 (19207)<br />
5315-00-316-<strong>10</strong>08 PIN : boom jack, w /lock pin A Ea 2<br />
8327939 (19207)<br />
5315-00-854-4431 PIN : inner boom jack, w /lock pins A Ea 1<br />
<strong>10</strong>876413 (19207)<br />
2540-00-318-0326 SHACKLE : anchor, rd-pin, 7/8 in. A Ea 2<br />
dia<br />
7357967 (19207)<br />
2540-00-860-2359 SHAFT: cranking outrigger, 112 in. A Ea 2<br />
dia, 12 in. lg<br />
<strong>10</strong>900233 (19207)<br />
2540-00-040-2301 TUBE: boom jack (bottom) A Ea 2<br />
8330158 (19207)<br />
2540-00-040-2300 TUBE: boom jack (top) A Ea 2<br />
8330157 (19207)<br />
2590-00-<strong>10</strong>1-5594 TUBE : boom jack (bottom) A Ea 2<br />
<strong>10</strong>9<strong>10</strong>347 (19207)<br />
(MISCELLANEOUS TOOLS AND EQUIPMENT)<br />
9905-00-148-9546 REFLECTOR TRIANGLE WARNING A Ea 1<br />
KIT : reflector type, w/plastic box<br />
RRW-1817 (19207)<br />
C2
TM 9-<strong>2320</strong>-<strong>211</strong>-<strong>10</strong>-1<br />
Section II. ADDITI<strong>ON</strong>AL AUTHORIZATI<strong>ON</strong> LIST - Cent<br />
(2)<br />
(3)<br />
(4)<br />
DESCRIPTI<strong>ON</strong><br />
NATI<strong>ON</strong>AL<br />
STOCK<br />
NUMBER<br />
PART NUMBER & FSCM<br />
USABLE <strong>ON</strong> CODE<br />
U/M<br />
QTY<br />
AUTH<br />
5120-00-188-1790<br />
JACK : hydraulic, hand, selfeontained,<br />
30-ton cap. w /<br />
operating lever<br />
GGG-J-63 (81348)<br />
A<br />
1<br />
3230-00-498-9408<br />
LANTERN : electric, hand, 7–volt,<br />
w/lamp MIL-L-18838 (81349)<br />
A<br />
1<br />
4930-00-266-9182<br />
OILER: hand, push-button type,<br />
1/2 pt cap. MS15764 (96906)<br />
A<br />
1<br />
5120-00-197-9473<br />
PUNCH: blacksmith’s, round hdle,<br />
1/4 in. dia cutting edge GGG-T-563<br />
(81348)<br />
A<br />
1<br />
511 O–OO–242–T147<br />
SAW: crosscut, l-man, 4 1/2 ft<br />
blade, 5-ft lg, w /supplementary hdl<br />
GGG-S-0064 (81348)<br />
A<br />
1<br />
5120-00-243-9072<br />
VISE: bench and pipe, swv-base ,<br />
5 in. jaw width, 6 in. opng,<br />
1/3 to 1/4 pipe cap. GGG-V-41O<br />
(81348)<br />
A<br />
1<br />
5120-00-264-3793<br />
WRENCH: auto, adj, O to 3 in. jaw<br />
opng, 15 in. lg GGG-W-631 (81348)<br />
A<br />
1<br />
5120-00-277-1461<br />
WRENCH: pipe, hvy-duty, adj, 1 to<br />
2 in. pipe cap. 18 in. Ig GGG-W-651<br />
(81348)<br />
A<br />
1<br />
5120-00-277-1244<br />
WRENCH : open end, fixed sgl-hd, A<br />
15 deg hd-angle, 1-5/8 in. opng,<br />
14-7/8 in. lg GGG-W-636 (81348)<br />
1<br />
TOOLS AND EQUIPMENT FOR WELDING AND<br />
CUTTING<br />
6830-00-264-6751<br />
ACETYLENE, TECHNICAL: gas<br />
filled, acetylene, comp w /valve<br />
(to be refilled locally) DGA-<strong>10</strong>6<br />
(81348)<br />
A<br />
1<br />
C-3
TM 9-<strong>2320</strong>-<strong>211</strong>-<strong>10</strong>-1<br />
Section II. ADDITI<strong>ON</strong>AL AUTHORIZATI<strong>ON</strong> LIST - Cent<br />
(1) (2) (3) (4)<br />
DESCRIPTI<strong>ON</strong><br />
NATI<strong>ON</strong>AL<br />
STOCK<br />
QTY<br />
NUMBER PART NUMBER & FSCM USABLE <strong>ON</strong> CODE U/M AUTH<br />
TOOLS AND EQUIPMENT FOR WELDING AND<br />
CUTTING - Cent<br />
4720-00-356-8572 HOSE ASSEMBLY , RUBBER: A Ea 1<br />
braided green, w /rh thd female<br />
connections on both ends, attached<br />
by crimped on ferrules, 9/16-18 NF-3<br />
thd, 5/16 in. id, 25 ft lg ZZ-H-461<br />
(80244)<br />
4720-00-356-8571 HOSE ASSEMBLY, RUBBER: A Ea 1<br />
braided w /lh thd female connections<br />
each end attached by br<br />
ferrules, 9/16-18 NF-3 thd, 5/16<br />
in. id, 25 ft lg ZZ-H-461 (80244)<br />
6830-00-292-0129 OXYGEN, TECHNICAL: gas filled, A Ea 1<br />
oxygen, 220 cu ft, comp w /valve<br />
(to be refilled locally) DGO-925<br />
4820-00-285-6067 REGULATOR : pressure, com- A Ea 1<br />
pressed gas, acetylene,’ 2-stage,<br />
w /coupling, adapter and outlet<br />
VT S41O-968<br />
4820-00-641-3519 REGULATOR : pressure com- A Ea 1<br />
pressed gas, oxygen, 2–stage<br />
w/coupling, adapter and outlet<br />
MIL-R-13877<br />
5180-00-754-0661 TOOL KIT : welderfs components A Ea 1<br />
may be requisitioned separately<br />
7540661 (19207)<br />
5120-00-965-0603 1 BOX FLINT TIP, FRICTI<strong>ON</strong> Ea<br />
IGNITER : w /holder, sleeve<br />
type, threaded, 5-40NC , 6 per<br />
box, GGG-1271 (81348)<br />
7920-00-291-5815 1 BRUSH, WIRE: scratch, S-wire, Ea<br />
curved hdl, wire Ig outside<br />
block, 1-1/8 to 1-1/4 in. 4-rows<br />
w, 18 rows lg, 14 in. lg, WB-178<br />
(81348)<br />
C-4
TM 9-<strong>2320</strong>-<strong>211</strong>-<strong>10</strong>-1<br />
Section II. ADDITI<strong>ON</strong>AL AUTHORIZATI<strong>ON</strong> LIST - Cent<br />
(1)<br />
(2)<br />
(3)<br />
(4)<br />
DESCRIPTI<strong>ON</strong><br />
NATI<strong>ON</strong>AL<br />
STOCK<br />
NUMBER<br />
PART NUMBER & FSCM<br />
USABLE <strong>ON</strong> CODE<br />
U/M<br />
QTY<br />
AUTH<br />
51<strong>10</strong>-00-186-7<strong>10</strong>7<br />
51<strong>10</strong>–00-236-3272<br />
3437-00-270-6047<br />
TOOLS AND EQUIPMENT FOR WELDING AND<br />
CUTTING - Cent<br />
1 CHISEL, HAND, COLD:<br />
1/2 in. cut, 5-3/4 in. lg<br />
(rein) GGG-C-00313<br />
( 96906)<br />
1 CHISEL, HAND, COLD: 3/4<br />
in cut, 6-1/2 in. lg<br />
3/4-in. lg (rein)<br />
GGG-C-00313 (96906)<br />
1 CLEANER SET , WELDING<br />
AND CUTTING TIPS : sgl–end,<br />
75 to 49 drill sizes, 12 (in<br />
metal case) MIL-C-17223 (81349)<br />
Ea<br />
Ea<br />
Ea<br />
51<strong>10</strong>-00-234-6539<br />
1 FILE , HAND: American patt,<br />
flat type, dbl-cut bastard faces,<br />
sgl-cut bastard edges, 12 in. lg,<br />
heel to point GGG-F-00325 (81348)<br />
A<br />
Ea<br />
jl<strong>10</strong>-00-242–5386<br />
1 FILE, HAND: American patt,<br />
mill type, dbl–cut bastard faces,<br />
sgl–cut bastard edges, 12 in. lg,<br />
heel to point GGG-F-00325 (81348)<br />
A<br />
Ea<br />
jl<strong>10</strong>-00–234-6557<br />
1 FILE, HAND: American patt,<br />
rd-type, 1/2 in. dia large sect,<br />
dbl-cut bastard face, 12 in. lg,<br />
heel to point GGG-F-325 (81348)<br />
A<br />
Ea<br />
8415-00-263-7859<br />
1 GLOVES: welder’s leather,<br />
gauntlet, large size KKG-486 (81348)<br />
A<br />
Ea<br />
4240-00-203-3804<br />
5120-00-224-4047<br />
1 GOGGLES: (~elder’s) , w leye - A<br />
cups, plastic , ventilated, w /<br />
hardened glass filter lens, w /<br />
hardened glass cover lens, headband<br />
supported over spectacle<br />
type, w/o case GGGG-513 (81458)<br />
1 HAMMER, HAND : machinist’s A<br />
ball-peen , 2-lb , 16 in. lg,<br />
GGG-H-86 (81348)<br />
Ea<br />
Ea<br />
C-5
TM 9-<strong>2320</strong>-<strong>211</strong>-<strong>10</strong>-1<br />
Section II. ADDITI<strong>ON</strong>AL AUTHORIZATI<strong>ON</strong> LIST - Cent<br />
(1) (2) (3) (4)<br />
1<br />
DESCRIPTI<strong>ON</strong><br />
NATI<strong>ON</strong>AL<br />
STOCK<br />
(ITY<br />
NUMBER PART NUMBER & FSCM USABLE <strong>ON</strong> CODE UIM AUTH<br />
TOOLS AND EQUIPMENT FOR WELDING AND<br />
CUTTING - Cent<br />
5120-00-585-2383 1 HAMMER, HAND : Welder’s, A Ea<br />
14-02 stght-peen and punch-point,<br />
sgl–bevel. w /coiled S-hdle,<br />
<strong>10</strong> in. lg GGG-H-35 (81348)<br />
;1<strong>10</strong>-00-263-0341 1 HANDLE, FILE, WOOD: 1-1!2 in. A<br />
dia, 5-1/2 in. Ig, large size KKH-OO1O6<br />
Ea<br />
5120-00-965-0326 1 IGNITER, FRICTI<strong>ON</strong>: wire frame A Ea<br />
style, sgl-flint, round file, hooded<br />
type<br />
5120-00-223-7298 1 PLIERS, SLIP-JOINT: stght-nose, A Ea<br />
comb, w/cutter, <strong>10</strong> in. Ig MS5382-2<br />
(96906)<br />
5120-00-293-0448 1 PUNCH, DRIFT: 3/16 in. dia pt, A Ea<br />
3/8 in. dia stk, <strong>10</strong> in. lg GGG-P-831<br />
(81348)<br />
52<strong>10</strong>-00-239-0439 1 RULE, MULTIPLE FOLDING: steel, A Ea<br />
3-ft extended lg, 6-sect, smallest<br />
unit of grad-1/16 GGG-R-00791<br />
(81348)<br />
5905-00-222-8071 1 SCREWDRIVER, FLAT TIP: metal, A Ea<br />
w/wood insert-hall, 7/16-in. tip width,<br />
<strong>10</strong>-in. blade, 16-1/2-in. lg<br />
5120-00-596-1543 1 SCRIBER: machinist’s dbl-pt, A Ea<br />
screwed, l-stght and l-reg bent,<br />
removable, 8 to 9 in. lg GGG-S-131<br />
52<strong>10</strong>-00-221-2060 1 SQUARE: comb. 12 in. lg, 1/64, l/32, A Ea<br />
1/].6 and 1/8 in. grad edges, sq and<br />
Miter head, with scriber and level.<br />
GGG-S-656 (81348)<br />
5140-00-498-8772 TOOL BOX: mechanic’s general, w / A Ea<br />
tote tray, 21 in. Ig, 8-1/2 in. w, 7-3/8<br />
in. deep , od finish. GGG-T-558-2<br />
C-6
TM 9-<strong>2320</strong>-<strong>211</strong>-<strong>10</strong>-1<br />
Section II. ADDITI<strong>ON</strong>AL AUTHORIZATI<strong>ON</strong> LIST - Cent<br />
(1) (2) {3) (4)<br />
DESCRIPTI<strong>ON</strong><br />
NATI<strong>ON</strong>AL<br />
STOCK<br />
QTY<br />
NUMBER PART NUMBER & FSCM USABLE <strong>ON</strong> CODE U/M AUTH<br />
TOOLS AND EQUIPMENT FOR WELDING AND<br />
CUTTING - Cent<br />
5120-00-224-3153 1 WRENCH, BOX: dbl-hd, 12-pt , A Ea<br />
short-lg, 3/8 and 7/16 in. opng,<br />
4 in. lg.<br />
GGG-W-636 (96906)<br />
5120-00-224-3154 1 WRENCH BOX: dbl-offset, dbl- A Ea<br />
hd, 12-pt, short-lg, 1/2 and 9/16<br />
in. opng, 4 3/4 in. lg<br />
GGG-W-636 (96906)<br />
5120-00-224-3137 1 WRENCH BOX: dbl-offset, dbl-hd, A Ea<br />
12-pt, short lg, 5/8 and 3/4 in.<br />
opng, 6 in. lg GGG-W-636<br />
(96906)<br />
5120-00-240-5328 1 WRENCH, OPEN END: adj, sgl-hd A Ea<br />
type, 0.947 in. jaw opng, 12 in. lg<br />
GGG-W-631 (81348)<br />
5120-00-264-3796 1 WRENCH, OPEN END: adj, sgl-hd A Ea<br />
type, O to 1.322 in. jaw opng, 12 in.<br />
lg GGG-W-631 (81348)<br />
5120-00-277-2342 1 WRENCH, OPEN END: fixed, dbl- A Ea<br />
hd, 15 deg-hd-angle, 3/8 and 7/16<br />
in opng, 4 1/8 in. lg GGG-W-636<br />
(81348)<br />
5120-00-187-7124 1 WRENCH, OPEN END: fixed, dbl- A Ea<br />
hd, 15 deg-hd-angle, 1/2 and 9/16<br />
in opng, 5 1/2 in. lg GGG-W-636<br />
(81348)<br />
5120-00-277-8301 1 WRENCH, OPEN END: fixed, dbl- A Ea<br />
hd angle, 5/8 and 11/16 in opng,<br />
7 in. lg GGG-W-636 (81348)<br />
5120-00-494-1911 1 WRENCH, PLIER : curved jaw A Ea<br />
style, w /wire cutter, 8 1/2 in. lg<br />
GGG-P-00471.<br />
C-7
TM 9-<strong>2320</strong>-<strong>211</strong>-<strong>10</strong>-1<br />
Section II. ADDITI<strong>ON</strong>AL AUTHORIZATI<strong>ON</strong> LIST - Cent<br />
(1) (2) {3) (4)<br />
DESCRIPTI<strong>ON</strong><br />
NATI<strong>ON</strong>AL<br />
STOCK<br />
QTY<br />
NUMBER PART NUMBER & FSCM USABLE <strong>ON</strong> CODE U/M AUTH<br />
TOOLS AND EQUIPMENT FOR WELDING AND<br />
CUTTING - Cent<br />
3433-00-294-6743 TORCH SET : cutting and welding, A Ea<br />
oxygen-acetylene, med duty, w /<br />
cutting attachments, tips and<br />
wrench W68117<br />
Composed of:<br />
1 CUTTING ATTACHMENT: welding<br />
torch, angle of hd-90 deg,<br />
w /universal mixer ( 18075-6652391)<br />
1 TIP, OXYGEN ACETYLENE, CUTTING:<br />
drill size-68/73 (18075-lC)<br />
1 TIP, OXYGEN ACETYLENE, CUTTING:<br />
drill size-64/68 (18075--2C)<br />
1 TIP, OXYGEN ACETYLENE, CUTTING:<br />
drill size-60/64 (18075-3C)<br />
1 TIP, OXYGEN ACETYLENE, WELDING:<br />
drill size 65-70 (18075-2E)<br />
1 TIP, OXYGEN ACETYLENE, WELDING:<br />
drill size-60/65 (18075-3E)<br />
1 TIP, OXYGEN ACETYLENE, WELDING:<br />
drill size-52-58 (DOC-5E)<br />
1 TIP, OXYGEN ACETYLENE, WELDING:<br />
drill size-45/50 ( 18075-7E)<br />
1 TIP, OXYGEN ACETYLENE, WELDING:<br />
drill size-40/45 (18075-8E)<br />
1 TIP, OXYGEN ACETYLENE, WELDING:<br />
drill size-35/40 (18075 -1OE)<br />
1 TORCH HANDLE, WELDING: w/universal<br />
mixer (18075-6650841)<br />
1 TORCH WRENCH, WELDING: 6-way,<br />
opng - 112-3/4-718-7/16-11/16 and 1 1/8<br />
in. (18075-970)<br />
C-8
TM 9-<strong>2320</strong>-<strong>211</strong>-<strong>10</strong>-1<br />
Section II. ADDITI<strong>ON</strong>AL AUTHORIZATI<strong>ON</strong> LIST - Cent<br />
(1) (2) (3) (4)<br />
DESCRIPTI<strong>ON</strong><br />
NATI<strong>ON</strong>AL<br />
STOCK<br />
QTY<br />
NUMBER PART NUMBER & FSCM USABLE <strong>ON</strong> CODE U/M AUTH<br />
TOOLS AND EQUIPMENT FOR WELDING AND<br />
CUTTING - Cent<br />
3433-00-391-1216 1 MIXING HEAD, OXYGEN A Ea<br />
ACETYLENE WELDING TORCH :<br />
for tip size 72 to 31, no.<br />
42527 -54-5<br />
3433-00-373-1726 1 TIP, OXYGEN ACETYLENE, A Ea<br />
CUTTING : drill size 46,<br />
no. 42527-250-46<br />
3433-00-373-1731 1 TIP, OXYGEN ACETYLENE, A Ea<br />
WELDING : drill size 42,<br />
no. 42527 -GXU-42<br />
3433-00-373-1733 1 TIP, OXYGEN ACETYLENE, A Ea<br />
WELDING : drill size 50,<br />
no. 42527-870-50<br />
3433-00-373-1734 1 TIP, OXYGEN ACETYLENE, A Ea<br />
WELDING : drill size 53,<br />
no. 42527 -GXU-50<br />
3433-00-373-173 7 1 TIP, OXYGEN ACETYLENE, A Ea<br />
WELDING: drill size 58,<br />
no. 42527 -GXU-58<br />
3433-00-373-173 9 1 TIP, OXYGEN ACETYLENE, A Ea<br />
WELDING : drill size 62,<br />
no. 42527 -GXU-62<br />
3433-00-391-121 7 1 TORCH HANDLE, WELDING: A Ea<br />
no. 42527-54<br />
3433-00-391-121 8 1 TORCH WRENCH , OXYGEN A Ea<br />
ACETYLENE :<br />
no. 42527-78<strong>10</strong><br />
5120-00-277-269 4 1 WRENCH, OPEN END, FIXED: A Ea<br />
15 deg angle, dble-hd type,<br />
spear-hd, alloy-S , 1 1/8 in.<br />
and 1 1/4 in. cpngs, 1/2 in. thk,<br />
12 in. nom lg over-all<br />
GGG-W-636 (81348)<br />
C-9
TM 9-<strong>2320</strong>-<strong>211</strong>-<strong>10</strong>-1<br />
Section II.<br />
ADDITI<strong>ON</strong>AL AUTHORIZATI<strong>ON</strong> LIST - Cent<br />
(1) (2) (3) (4)<br />
DESCRIPTI<strong>ON</strong><br />
NATI<strong>ON</strong>AL<br />
STOCK<br />
QTY<br />
NUMBER PART NUMBER & FSCM USABLE <strong>ON</strong> CODE U/M AUT}<br />
TOOLS AND EQUIPMENT FOR WELDING AND<br />
CUTTING - Cent<br />
3433-00-391-1219 1 CUTTING ATTACHMENT, A Ea<br />
WELDING : angle of hd-75 deg,<br />
no. 63026 -C-145 O-1OO, use w/<br />
TORCH HANDLE 3433-391-1220<br />
3433-00-373-1729 1 TIP, OXYGEN ACETYLENE, A Ea<br />
CUTTING : drill size 54,<br />
no. 63026- 3-<strong>10</strong>0-1<br />
3433-00-373-1728 2 TIP, OXYGEN ACETYLENE, A Ea<br />
CUTTING : drill size 52,<br />
no. 63036 -3-<strong>10</strong>1-2<br />
3433-00-373-1725 1 TIP, OXYGEN ACETYLENE, A Ea<br />
CUTTING : drill size 45,<br />
no. 63036 -3-<strong>10</strong>1-4<br />
3433-00-373-1740 1 TIP, OXYGEN ACETYLENE, A Ea<br />
WELDING : drill size 65,<br />
no. 63026-13-0<br />
3433-00-373-1738 1 TIP, OXYGEN ACETYLENE, A Ea<br />
WELDING : drill size 60,<br />
no. 63026 -13-1<br />
3433-00-373-1736 1 TIP, OXYGEN ACETYLENE, A Ea<br />
WELDING : drill size 56,<br />
no, 63026- 13-2<br />
3433-00-373-1735 1 TIP, OXYGEN ACETYLENE, A Ea<br />
WELDING: drill size 53,<br />
no. 63026 -13-3<br />
3433-00-373-1732 1 TIP, OXYGEN ACETYLENE, A Ea<br />
WELDING: drill size 43,<br />
no. 63026 -13-5<br />
3433-00-391-1220 1 TORCH HANDLE WELDING: A Ea<br />
no. 63026-<strong>10</strong>0<br />
5120-00-316-9204 WRENCH : acetylene tank valve key, A Ea 1<br />
9/32 in. sq-opng ( 1<strong>10</strong>473)<br />
C-<strong>10</strong>
TM 9-<strong>2320</strong>-<strong>211</strong>-<strong>10</strong>-1<br />
APPENDIX D<br />
EXPENDABLE SUPPLIES AND MATERIALS LIST<br />
Section I.<br />
INTRODUCTI<strong>ON</strong><br />
D-1. SCOPE. This appendix lists expendable supplies and materials<br />
operate and maintain the 5-ton, 6 x 6, M39 series trucks (multifuel).<br />
authorized to you by CTA 50-970, Expendable Items (Except Medical,<br />
Parts, and Heraldic Items).<br />
you will need to<br />
These items are<br />
Class V, Repair<br />
D-2. EXPLANATI<strong>ON</strong> OF COLUMNS.<br />
a.<br />
Column 1 - Item number.<br />
This number is given to the entry in the listing.<br />
b.<br />
Column 2- Level.<br />
listed item.<br />
C - Operator/Crew<br />
This is the lowest level of maintenance that needs the<br />
c.<br />
d.<br />
e.<br />
Column 3 - National Stock Number. This is the National stock number given<br />
to the item; use it to order the item.<br />
Column 4 - Description. Shows the Federal item name and, if needed, a<br />
description to give more details about the item. The last line for each item<br />
shows the part number, followed by the Federal Supply Code for Manufacturer<br />
(FSCM) in brackets, if it applies.<br />
Column 5 - Unit of Measure (U/M). Shows the measure used in doing the<br />
actual maintenance function. This measure is shown by an alphabetical<br />
abbreviation (ea, in., qt). If the unit of measure is different from the unit<br />
of issue, order the lowest unit of issue that will give you what you need.<br />
D-1
TM 9-<strong>2320</strong>-<strong>211</strong>-<strong>10</strong>-1<br />
Section II. EXPENDABLE SUPPLIES AND MATERIALS LIST<br />
(1) (2) (3) (4) (5)<br />
NATI<strong>ON</strong>AL<br />
ITEM<br />
STOCK<br />
NUMBER LEVEL NUMBER DESCRIPTI<strong>ON</strong> U/M<br />
1 c 4930- oo- ADAPTER : grease gun, rigid, EA<br />
204-2550 thin-stem 6 in. lg 5349744 (19207)<br />
2 c 4930- oo- ADAPTER GREASE GUN COUP- EA<br />
228-1511 LING : lubr, flex hose, sleeve<br />
type, hyd to hyd, 12 in. lg (M543)<br />
41-E-485-12 (80244)<br />
3 c 51<strong>10</strong>- oo- AXE, SINGLE BIT : chopping hdl, EA<br />
293-2336 sgle bit, 4 lb brkt on frt lh side<br />
of body; (M543) 6150925 (19207)<br />
4 c 51<strong>10</strong>- oo- AXE, SINGLE BIT: M51, brkt EA<br />
293-2336 frt lh side of dump body; (M52)<br />
5 c 5120- 00- BAR, PINCH : bent chisel and EA<br />
224-1384 taper, 1 in. dia 26 in. lg (M543)<br />
GGG-B-<strong>10</strong>1 (81348)<br />
6 c 5120-00 BAR: wrecking, gooseneck, and EA<br />
242-0762 pinch point w /claw, 3/4 in. hex<br />
stk 36 in. lg (M543) 41-B-336<br />
(80244)<br />
7 c 6135- 00- BATTERY : dry 1. 5-volt (M543, i n EA<br />
120-<strong>10</strong>20 flashlights)<br />
MS75059 (96906)<br />
8 c 6135-00 BATTERY : lantern, 6-volt (M543 , EA<br />
050-3280 in lantern)<br />
BA200U (81350)<br />
9 c 51<strong>10</strong>- oo- BLADE : hacksaw (hand) 12 in. 1 g EA<br />
243-0901 (M543)<br />
GGG-B-451 (81348)<br />
<strong>10</strong> c 7240- 00- CAN : gasoline, military type, 5 EA<br />
222-3088 gal (in brkt, lh running board)<br />
42-C-2124 (80244)<br />
11 c 7240- 00- CAN : water, military type, 5 gal EA<br />
242-6153 (M543, brkt on rear deck, rh side )<br />
64C281 (80244)<br />
D-2
I<br />
TM 9-<strong>2320</strong>-<strong>211</strong>-<strong>10</strong>-1<br />
Section II. EXPENDABLE SUPPLIES AND MATERIALS LIST - Cent<br />
(1) (2) (3) (4) (5)<br />
1<br />
I<br />
NATI<strong>ON</strong>AL<br />
ITEM<br />
STOCK<br />
NUMBER LEVEL NUMBER DESCRIPTI<strong>ON</strong> U/M<br />
12 c 2540-00 CASE: crosscut saw, cotton duck EA<br />
860-2354 63 3/4 in. lg (closed) <strong>10</strong>876420<br />
(19207) (N1543)<br />
13 c 51<strong>10</strong>- oo- CHISEL, BLACKSMITH’S : hall, EA<br />
221-<strong>10</strong>75 cold, 1 1/2 in. cut (M543)<br />
GGG-T-00563 (81348)<br />
14 c 51<strong>10</strong>–00 CHISEL, MACHINIST’S: cold, EA<br />
~44–6034 hand, 1 in. cutting edge, 24 in. lg<br />
(M543)<br />
GGG-B-<strong>10</strong>1 (96906)<br />
15 c 6230–00– LIGHT: inspection, w/sgl plug EA<br />
~74_4018 and plug and socket, 25 ft lg<br />
w/o lamp (M543)<br />
17 C35079-47 (80244)<br />
16 c 6230- 00- CABLE : electrical extension, w / EA<br />
548-0387 single contact plug and socket, 25<br />
ft lg (M543)<br />
7326618 (19207)<br />
17 c 5120- 00- CROWBAR : pinch pt, 1 1/14 in. EA<br />
224-1390 dia 59 to 62 in. lg (M543) 9150189<br />
(18876)<br />
18 c 51<strong>10</strong>- oo- CUTTER: bolt, rigid-hd type, EA<br />
188-2524 clipper cut type, 35 to 39 in. lg<br />
9/16 in. dia (M543)<br />
GGGC740 (81348)<br />
19 c 49<strong>10</strong>- oo- EXTENSI<strong>ON</strong> CABLE: elec 24-volt, EA<br />
474-9135 20 ft lg w/cplg (slave) (M543)<br />
6257839 (19204)<br />
20 c 6230- 00- FLASHLIGHT : hand, 2-cell w / EA<br />
264-8261 lamp, w/o batteries (M543) - in<br />
map compartment MX991U ( 81349)<br />
21 c 51<strong>10</strong>–oo– FRAME : hacksaw, adj, pistol EA<br />
289–9657 grip hdl, thumb nut tension style,<br />
8 to 12 in. cap. (M543) GGG-G-67 1<br />
(81348)<br />
D-3
TM 9-<strong>2320</strong>-<strong>211</strong>-<strong>10</strong>-1<br />
Section II. EXPENDABLE SUPPLIES AND MATERIALS LIST - Cent<br />
(1) (2) (3)<br />
NATI<strong>ON</strong>AL<br />
ITEM<br />
STOCK<br />
NUMBER LEVEL NUMBER<br />
I<br />
I<br />
22<br />
c 4930-oo-<br />
253-2478<br />
I<br />
(4) (5)<br />
-----L<br />
GREASE GUN: hand, lever<br />
EA<br />
operated, 15–oz, 7000 psi, w/6 in.<br />
extension (M543) <strong>10</strong>08370 (<strong>10</strong>001)<br />
23<br />
c<br />
5120-00-<br />
230-7843<br />
HAMMER, HAND : blacksmith’s,<br />
dble face, sledge, 20 lb nom hd<br />
wt (M543)<br />
TADXID (19207)<br />
EA<br />
24<br />
c<br />
5120-00-<br />
288-6574<br />
HANDLE : mattock–pick, railroad EA<br />
or clay pick NNH 0093 (81348)<br />
25<br />
c<br />
4720-00-<br />
899-6721<br />
HOSE : tank drain, hyd oil, EA<br />
1 3/16 in. od x 60 in. lg (M543)<br />
<strong>10</strong>900093 (19207)<br />
26 c<br />
27 c<br />
6230-00-<br />
498-9408<br />
5120-00-<br />
243-2395<br />
LANTERN : hand, elec, 6 volts, EA<br />
w/lamp, w/o battery (M543) -<br />
compt 2 MIL L 18838B (81349)<br />
MATTOCK : pick type, 5 lb, w/o EA<br />
handle GGG-H-506 (81348)<br />
28 c<br />
5120- 00- PLIERS : slip-joint, stght nose, EA<br />
223-7398 comb w /cutter, <strong>10</strong> in, lg (in tool<br />
bag)<br />
41 P1654 (80244)<br />
29<br />
c<br />
51<strong>10</strong>-oo-<br />
223-5349<br />
SAW : crosscut, l-man, 4 l/2-ft EA<br />
blade, 5 ft lg w /supplementary<br />
handle (M543) GGG-S-64 (81348)<br />
30<br />
31<br />
c<br />
c<br />
4020-00-<br />
231-2581<br />
4020-00<br />
238-7734<br />
ROPE : manila, 3 strand, 3/8-in. EA<br />
dia, 1 l/8-in. circum , 50 ft lg.<br />
325-lb safe work cap. (IV!543)<br />
TR605 (81348)<br />
I<br />
ROPE : manila, 3 strand, 3/4 in. EA<br />
dia, 2-1/4 in. circum , (<strong>10</strong>0 ft lg) ,<br />
1350-lb safe work cap. (M543)<br />
TR605 (81348)<br />
D-4
TM 9-<strong>2320</strong>-<strong>211</strong>-<strong>10</strong>-1<br />
Section II. EXPENDABLE SUPPLIES AND MATERIALS LIST - Cent<br />
(1) (2) (3) (4) (5)<br />
NATI<strong>ON</strong>AL<br />
ITEM<br />
STOCK<br />
NUMBER LEVEL NUMBER DESCRIPTI<strong>ON</strong> U/M<br />
32 c 4020- 00- ROPE: manila, 3 strand l-in. dia, EA<br />
231-9014 3-in. circum, 300 ftlg, 2250-lb safe<br />
cap. (M543) TR605 (81348)<br />
33 c 5120- 00- SCREWDRIVER , FLAT-TIP: hv- EA<br />
227-7338 duty, flared sides, steel hdl w /<br />
wood inserts, sq-blade, l/2–in.<br />
tip , 5-in. blade, 9-1/2 in. lg (in<br />
tool box) D339 (77948)<br />
34 c 5120- 00- SCREWDRIVER, CROSS-TIP: EA<br />
234-8912 recessed screw Phillips No. 3 tip,<br />
comm, slow burning pastic hdl,<br />
6-in. blade (in tool bag)<br />
GGG S121 (81348)<br />
35 c 5120- 00- SCREWDRIVER, CROSS-TIP : EA<br />
234-8913 Phillips type tip, plastic hdl, no. 2<br />
size tip, 4-in. lgblade (in tool bag)<br />
36 c 5120- 00- SCREWDRIVER, FLAT TIP: con]- EA<br />
222-8852 mon, flared sides, plastic hdl,<br />
rd-blade, 1 /4-in. w /tip, 4-in.<br />
blade, 7 3/4-in. lg (nom)<br />
37 c 51~~_()()_ SHOVEL : hand, rd-pt, d-hdl, EA<br />
293–3356 short size (iM543-brkt on boom)<br />
GGG-S-326 (81348)<br />
38 c 7240- 00- SPOUT : can, flexible. gasoline EA<br />
177-6154 (M51, M52, M54 - tool compt behind<br />
cab, lh side: M55 - tool<br />
compt behind cab, rh side; M543 –<br />
compt 1)<br />
838A7511 (09647)<br />
39 c 5120- 00- WRENCH, OPEN END, ADJUST- EA<br />
264-3796 ABLE : sgle–hd, 12 in. lg over–al 1,<br />
1 15/16 in. opng (in tool bag)<br />
5323324 (19207)<br />
D-5
TM 9-<strong>2320</strong>-<strong>211</strong>-<strong>10</strong>-1<br />
Section II. EXPENDABLE SUPPLIES AND MATERIAL LIST - Cent<br />
(1) (2) (3) (4) (5)<br />
NATI<strong>ON</strong>AL<br />
ITEM<br />
STOCK<br />
NUMBER LEVEL NUMBER DESCRIPTI<strong>ON</strong> U/M<br />
40 c 5120- 00- WRENCH: open end, fixed, sgle- EA<br />
277-1242 hd, 15-deg hd-angle, 1 13/16 in.<br />
opng, 16 3/8 in lg (M543)<br />
41 c 5120- 00- WRENCH : open end, fixed sgl-hd, EA<br />
277-1245 15 deg hd angle, 1-11/16 in. opng<br />
14-7/8 in. lg (M543)<br />
TKBX3A (19207)<br />
D-6
TM 9-<strong>2320</strong>-<strong>211</strong>-<strong>10</strong>-1<br />
INDEX<br />
Subject Paragraph Page<br />
A<br />
Additional authorization list . . . . . . . . . . . . . . . . . . . . . . . . . . . . . . . . . . .<br />
Arctic winterization kit, operation of . . . . . . . . . . . . . . . . . . . . . . . . . .<br />
Engine compartment cover, using . . . . . . . . . . . . . . . . . . . . . . . .<br />
General . . . . . . . . . . . . . . . . . . . . . . . . . . . . . . . . . . . . . . . . . . . . . . . . .<br />
Personnel heater, fuel-burning, operation of . . . . . . . . . . . . .<br />
Power plant heater, fuel-burning, operation of . . . . . . . . . . .<br />
Radiator, brushguard cover, operating . . . . . . . . . . . . . . . . . . .<br />
Slave receptacle, use of . . . . . . . . . . . . . . . . . . . . . . . . . . . . . . . . .<br />
Before engine startup . . . . . . . . . . . . . . . . . . . . . . . . . . . . . . . . . . . . . . . .<br />
Break-in operation . . . . . . . . . . . . . . . . . . . . . . . . . . . . . . . . . . . . . . . . . . .<br />
After the road test . . . . . . . . . . . . . . . . . . . . . . . . . . . . . . . . . . . . . .<br />
Break-in . . . . . . . . . . . . . . . . . . . . . . . . . . . . . . . . . . . . . . . . . . . . . . . .<br />
General . . . . . . . . . . . . . . . . . . . . . . . . . . . . . . . . . . . . . . . . . . . . . . . . .<br />
Road test . . . . . . . . . . . . . . . . . . . . . . . . . . . . . . . . . . . . . . . . . . . . . . .<br />
Capacities . . . . . . . . . . . . . . . . . . . . . . . . . . . . . . . . . . . . . . . . . . . . . . . . . . . .<br />
Cargo trucks, operation of . . . . . . . . . . . . . . . . . . . . . . . . . . . . . . . . . . . .<br />
Dropsides, dropside type cargo trucks, lowering . . . . . . . . . .<br />
Dropsides, dropside type cargo trucks, raising. . . . . . . . . . . .<br />
Dropsides, tailgate or both, installing . . . . . . . . . . . . . . . . . . . . .<br />
Dropsides, tailgate or both, removing . . . . . . . . . . . . . . . . . . . . .<br />
General . . . . . . . . . . . . . . . . . . . . . . . . . . . . . . . . . . . . . . . . . . . . . . . . . .<br />
Racks, front and side, dropside type cargo trucks,<br />
installing . . . . . . . . . . . . . . . . . . . . . . . . . . . . . . . . . . . . . . . . . . . . . . .<br />
Racks, front and side, dropside type cargo trucks,<br />
removing . . . . . . . . . . . . . . . . . . . . . . . . . . . . . . . . . . . . . . . . . . . . . . .<br />
Racks, front and side, installing . . . . . . . . . . . . . . . . . . . . . . . . . .<br />
Racks, front and side, removal of . . . . . . . . . . . . . . . . . . . . . . . . .<br />
Characteristics, environmental . . . . . . . . . . . . . . . . . . . . . . . . . . . . . . . . .<br />
Characteristics, functional . . . . . . . . . . . . . . . . . . . . . . . . . . . . . . . . . . . . .<br />
Classification, vehicle/bridge . . . . . . . . . . . . . . . . . . . . . . . . . . . . . . . . . .<br />
Controls and indicators, chassis . . . . . . . . . . . . . . . . . . . . . . . . . . . . . . .<br />
Driver’s compartment . . . . . . . . . . . . . . . . . . . . . . . . . . . . . . . . . . . .<br />
Front winch . . . . . . . . . . . . . . . . . . . . . . . . . . . . . . . . . . . . . . . . . . . . . .<br />
Instrument panel . . . . . . . . . . . . . . . . . . . . . . . . . . . . . . . . . . . . . . . . .<br />
Trailer brake . . . . . . . . . . . . . . . . . . . . . . . . . . . . . . . . . . . . . . . . . . . .<br />
Windshield . . . . . . . . . . . . . . . . . . . . . . . . . . . . . . . . . . . . . . . . . . . . . . .<br />
Controls and indicators, equipment body . . . . . . . . . . . . . . . . . . . . . . .<br />
Controls and indicators, operator’s, description and use,<br />
general . . . . . . . . . . . . . . . . . . . . . . . . . . . . . . . . . . . . . . . . . . . . . . . . . . . .<br />
B<br />
C<br />
2-13<br />
4-14<br />
4-14c<br />
4-14a<br />
4-14d<br />
4-14e<br />
4-14b<br />
4-14f<br />
4-6a<br />
3-2<br />
3-2d<br />
3-2b<br />
3-2a<br />
3-2c<br />
2-8<br />
4-8<br />
4-8f<br />
4-8g<br />
4-8i<br />
4-8h<br />
4-8a<br />
4-8e<br />
4-8d<br />
4-8c<br />
4-8b<br />
2-<strong>10</strong><br />
2-11<br />
1-8<br />
4-2<br />
4-2c<br />
4-2d<br />
4-2a<br />
4-2e<br />
4-2b<br />
4-3<br />
4-1<br />
2-22<br />
4-<strong>211</strong><br />
4-212<br />
4-212<br />
4-213<br />
4-216<br />
4-<strong>211</strong><br />
4-220<br />
4-31<br />
3-1<br />
3-2<br />
3-1<br />
3-1<br />
3-2<br />
2-22<br />
4-91<br />
4-1<strong>10</strong><br />
4-113<br />
4-117<br />
4-115<br />
4-91<br />
4-<strong>10</strong>5<br />
4-99<br />
4-95<br />
4-91<br />
2-22<br />
2-22<br />
1-2<br />
4-2<br />
4-8<br />
4-14<br />
4-2<br />
4-15<br />
4-7<br />
4-16<br />
4-1<br />
Index 1
TM 9-<strong>2320</strong>-<strong>211</strong>-<strong>10</strong>-1<br />
INDEX - C<strong>ON</strong>T<br />
Subject<br />
Paragraph<br />
Page<br />
Controls and indicators,<br />
Deep water fording<br />
Electric brake kit ..<br />
C - Cont<br />
special kits . . . . . . . . . . . . . . . . . . . . . . . . . . .<br />
kit . . . . . . . . . . . . . . . . . . . . . . . . . . . . . . . . . . .<br />
. . . . . . . . . . . . . . . . . . . . . . . . . . . . . . . . . . . . . .<br />
Fuel burning personnel heater kit . . . . . . . . . . . . . . . . . . . . . . . .<br />
Hot water personnel heater kit . . . . . . . . . . . . . . . . . . . . . . . . . . .<br />
Powerplant heater kit . . . . . . . . . . . . . . . . . . . . . . . . . . . . . . . . . . . .<br />
Crane, medium wrecker M543A2, operation . . . . . . . . . . . . . . . . . . . . .<br />
Crane lines, rigging . . . . . . . . . . . . . . . . . . . . . . . . . . . . . . . . . . . .<br />
General . . . . . . . . . . . . . . . . . . . . . . . . . . . . . . . . . . . . . . . . . . . . . . . . .<br />
Lifting and swinging . . . . . . . . . . . . . . . . . . . . . . . . . . . . . . . . . . . .<br />
Lift and swing - making fast for travel . . . . . . . . . . . . . . . . . . .<br />
Rear lift, direct . . . . . . . . . . . . . . . . . . . . . . . . . . . . . . . . . . . . . . . . .<br />
Rear lift - making fast for travel . . . . . . . . . . . . . . . . . . . . . . . . .<br />
Rear lift, heavy, with boom jacks . . . . . . . . . . . . . . . . . . . . . . . .<br />
Rear lift, heavy, with boom jacks - making fast<br />
for travel . . . . . . . . . . . . . . . . . . . . . . . . . . . . . . . . . . . . . . . . . . . . . .<br />
Side lift with boom jacks . . . . . . . . . . . . . . . . . . . . . . . . . . . . . . . . .<br />
Side lift, heavy, with boom jacks - making fast<br />
for travel . . . . . . . . . . . . . . . . . . . . . . . . . . . . . . . . . . . . . . . . . . . . . .<br />
Deep water fording kit,<br />
Description, functional,<br />
Description, functional,<br />
D<br />
operation of . . . . . . . . . . . . . . . . . . . . . . . . . .<br />
general . . . . . . . . . . . . . . . . . . . . . . . . . . . . . . .<br />
overall equipment . . . . . . . . . . . . . . . . . . . . .<br />
Auxiliary equipment and accessories . . . . . . . . . . . . . . . . . . . . . .<br />
Axles, wheels and hubs . . . . . . . . . . . . . . . . . . . . . . . . . . . . . . . . .<br />
Brake system . . . . . . . . . . . . . . . . . . . . . . . . . . . . . . . . . . . . . . . . . . . .<br />
Clutch . . . . . . . . . . . . . . . . . . . . . . . . . . . . . . . . . . . . . . . . . . . . . . . . . .<br />
Compressed air system . . . . . . . . . . . . . . . . . . . . . . . . . . . . . . . . . . .<br />
Cooling system . . . . . . . . . . . . . . . . . . . . . . . . . . . . . . . . . . . . . . . . . .<br />
Electrical system . . . . . . . . . . . . . . . . . . . . . . . . . . . . . . . . . . . . . . . .<br />
Engine . . . . . . . . . . . . . . . . . . . . . . . . . . . . . . . . . . . . . . . . . . . . . . . . . .<br />
Exhaust system . . . . . . . . . . . . . . . . . . . . . . . . . . . . . . . . . . . . . . . . .<br />
Fuel system . . . . . . . . . . . . . . . . . . . . . . . . . . . . . . . . . . . . . . . . . . . . .<br />
Propeller shafts . . . . . . . . . . . . . . . . . . . . . . . . . . . . . . . . . . . . . . . . .<br />
Steering system . . . . . . . . . . . . . . . . . . . . . . . . . . . . . . . . . . . . . . . . .<br />
Transfer power takeoff system . . . . . . . . . . . . . . . . . . . . . . . . . . .<br />
Transfer system . . . . . . . . . . . . . . . . . . . . . . . . . . . . . . . . . . . . . . . . .<br />
Transmission power takeoff system . . . . . . . . . . . . . . . . . . . . . . .<br />
Transmission system . . . . . . . . . . . . . . . . . . . . . . . . . . . . . . . . . . . . .<br />
Description, physical, general . . . . . . . . . . . . . . . . . . . . . . . . . . . . . . . .<br />
4-4<br />
4-4d<br />
4-4e<br />
4-4b<br />
4-4a<br />
4-4c<br />
4-12<br />
4-12f<br />
4-12a<br />
4-12c<br />
4-12h<br />
4-12b<br />
4-12g<br />
4-12d<br />
4-12i<br />
4-12e<br />
4-12j<br />
4-15<br />
2-1<br />
2-2<br />
2-2p<br />
2-2o<br />
2-2n<br />
2-2b<br />
2-2m<br />
2-2e<br />
2-2c<br />
2-2a<br />
2-2f<br />
2-2d<br />
2-2k<br />
2-2l<br />
2-2j<br />
2-2h<br />
2-2i<br />
2-2g<br />
2-3<br />
4-21<br />
4-28<br />
4-29<br />
4-23<br />
4-21<br />
4-25<br />
4-179<br />
4-197<br />
4-179<br />
4-189<br />
4-204<br />
4-180<br />
4-199<br />
4-192<br />
4-206<br />
4-196<br />
4-209<br />
4-223<br />
2-1<br />
2-1<br />
2-2<br />
2-2<br />
2-2<br />
2-1<br />
2-2<br />
2-1<br />
2-1<br />
2-1<br />
2-1<br />
2-1<br />
2-2<br />
2-2<br />
2-2<br />
2-1<br />
2-1<br />
2-1<br />
2-2<br />
Index 2
TM 9-<strong>2320</strong>-<strong>211</strong>-<strong>10</strong>-1<br />
INDEX - C<strong>ON</strong>T<br />
Subject<br />
Paragraph<br />
Page<br />
D - Cont<br />
Description, physical, overall equipment . . . . . . . . . . . . . . . . . . . . . . .<br />
Axles, wheels and hubs . . . . . . . . . . . . . . . . . . . . . . . . . . . . . . . . . .<br />
Brake system . . . . . . . . . . . . . . . . . . . . . . . . . . . . . . . . . . . . . . . . . . . .<br />
Clutch . . . . . . . . . . . . . . . . . . . . . . . . . . . . . . . . . . . . . . . . . . . . . . . .<br />
Cooling system . . . . . . . . . . . . . . . . . . . . . . . . . . . . . . . . . . . . . . . . . .<br />
Electrical system . . . . . . . . . . . . . . . . . . . . . . . . . . . . . . . . . . . . . . . .<br />
Engine . . . . . . . . . . . . . . . . . . . . . . . . . . . . . . . . . . . . . . . . . . . . . . . . . .<br />
Exhaust system . . . . . . . . . . . . . . . . . . . . . . . . . . . . . . . . . . . . . . . . . .<br />
Fuel and air intake systems . . . . . . . . . . . . . . . . . . . . . . . . . . . . . .<br />
Propeller and drive shaft systems . . . . . . . . . . . . . . . . . . . . . . . .<br />
Steering system . . . . . . . . . . . . . . . . . . . . . . . . . . . . . . . . . . . . . . . . .<br />
Transfer . . . . . . . . . . . . . . . . . . . . . . . . . . . . . . . . . . . . . . . . . . . . . . . .<br />
Transfer power takeoff . . . . . . . . . . . . . . . . . . . . . . . . . . . . . . . . ..<br />
Transmission . . . . . . . . . . . . . . . . . . . . . . . . . . . . . . . . . . . . . . . . . . . .<br />
Transmission power takeoff . . . . . . . . . . . . . . . . . . . . . . . . . . . . . .<br />
Destruction to prevent enemy use . . . . . . . . . . . . . . . . . . . . . . . . . . . . .<br />
Dimensions . . . . . . . . . . . . . . . . . . . . . . . . . . . . . . . . . . . . . . . . . . . . . . . . . . .<br />
Driver’s compartment controls and indicators . . . . . . . . . . . . . . . . . .<br />
Dump truck (M51A2) controls and indicators . . . . . . . . . . . . . . . . . . .<br />
Dump trucks, operation of . . . . . . . . . . . . . . . . . . . . . . . . . . . . . . . . . . . .<br />
Cargo operation, regular - changing tailgate rigging . . . . .<br />
Cargo operation, regular - lowering the tailgate . . . . . . . . . .<br />
Cargo operation, regular - raising the tailgate . . . . . . . . . . . .<br />
Cargo operation, regular - rigging the tailgate . . . . . . . . . . .<br />
Dump operation,<br />
Dump operation,<br />
Dump operation,<br />
Dump operation,<br />
rigging . . . . . . .<br />
Dump operation,<br />
Dump operation,<br />
Dump operation,<br />
rigging . . . . . . .<br />
Dump operation,<br />
Dump operation,<br />
truck . . . . . . . . .<br />
General . . . . . . . .<br />
all types - loading the truck . . . . . . . . . . . .<br />
regular - rigging the tailgate . . . . . . . . . . .<br />
regular - unloading the truck . . . . . . . . . . .<br />
spreader type - changing the tailgate<br />
. . . . . . . . . . . . . . . . . . . . . . . . . . . . . . . . . . . . . . . . .<br />
spreader type - rigging the tailgate . . . . .<br />
spreader type - unloading the truck . . . . .<br />
rocker type - changing tailgate<br />
. . . . . . . . . . . . . . . . . . . . . . . . . . . . . . . . . . . . . . . . .<br />
rocker type - rigging the tailgate . . . . . . .<br />
rocker type – unloading the dump<br />
. . . . . . . . . . . . . . . . . . . . . . . . . . . . . . . . . . . . . . . . .<br />
. . . . . . . . . . . . . . . . . . . . . . . . . . . . . . . . . . . . . . . . .<br />
Electric brake kit, operation of . . . . . . . . . . . . . . . . . . . . . . . . . . . . . . .<br />
Emergency procedures . . . . . . . . . . . . . . . . . . . . . . . . . . . . . . . . . . . . . . . .<br />
Highway towing . . . . . . . . . . . . . . . . . . . . . . . . . . . . . . . . . . . . . . . . .<br />
Jumper cables to start engine, use of . . . . . . . . . . . . . . . . . . . .<br />
Slave receptacle to start engine, use of . . . . . . . . . . . . . . . . . .<br />
Towing truck to start engine . . . . . . . . . . . . . . . . . . . . . . . . . . . .<br />
E<br />
2-4<br />
2-4n<br />
2-4m<br />
2-4b<br />
2-4e<br />
2-4c<br />
2-4a<br />
2-4f<br />
2-4d<br />
2-4k<br />
2-4l<br />
2-4i<br />
2-4j<br />
2-4g<br />
2-4h<br />
1-6<br />
2-7<br />
4-2c<br />
4-3b<br />
4-<strong>10</strong><br />
4-<strong>10</strong>n<br />
4-<strong>10</strong>l<br />
4-<strong>10</strong>m<br />
4-<strong>10</strong>e<br />
4-<strong>10</strong>f<br />
4-<strong>10</strong>b<br />
4-<strong>10</strong>g<br />
4-<strong>10</strong>k<br />
4-<strong>10</strong>d<br />
4-<strong>10</strong>j<br />
4-<strong>10</strong>i<br />
4-<strong>10</strong>c<br />
4-<strong>10</strong>h<br />
4-<strong>10</strong>a<br />
4-16<br />
4-23<br />
4-23d<br />
4-23b<br />
4-23a<br />
4-23c<br />
2-2<br />
2-21<br />
2-17<br />
2-6<br />
2-9<br />
2-7<br />
2-2<br />
2-<strong>10</strong><br />
2-8<br />
2-13<br />
2-16<br />
2-12<br />
2-12<br />
2-12<br />
2-12<br />
1-2<br />
2-22<br />
4-8<br />
4-18<br />
4-139<br />
4-163<br />
4-161<br />
4-162<br />
4-143<br />
4-144<br />
4-140<br />
4-145<br />
4-160<br />
4-142<br />
4-155<br />
4-154<br />
4-141<br />
4-150<br />
4-139<br />
4-228<br />
4-239<br />
4-254<br />
4-239<br />
4-239<br />
4-243<br />
Index 3
TM 9-<strong>2320</strong>-<strong>211</strong>-<strong>10</strong>-1<br />
INDEX - C<strong>ON</strong>T<br />
Subject<br />
Paragraph<br />
Page<br />
E - Cont<br />
End item list, components of . . . . . . . . . . . . . . . . . . . . . . . . . . . . . . . . . .<br />
Equipment improvement report and maintenance digest<br />
(EIR MD) and equipment improvement report and<br />
maintenance summary (EIR MS) . . . . . . . . . . . . . . . . . . . . . . . . . . . . . .<br />
Expendable supplies and materials list . . . . . . . . . . . . . . . . . . . . . . . . .<br />
Extreme cold weather, operation in . . . . . . . . . . . . . . . . . . . . . . . . . . . .<br />
General . . . . . . . . . . . . . . . . . . . . . . . . . . . . . . . . . . . . . . . . . . . . . . . . .<br />
Moving the truck . . . . . . . . . . . . . . . . . . . . . . . . . . . . . . . . . . . . . . . .<br />
Parking . . . . . . . . . . . . . . . . . . . . . . . . . . . . . . . . . . . . . . . . . . . . . . . . .<br />
Refueling . . . . . . . . . . . . . . . . . . . . . . . . . . . . . . . . . . . . . . . . . . . . . . .<br />
Related publications . . . . . . . . . . . . . . . . . . . . . . . . . . . . . . . . . . . . .<br />
Winterization kits . . . . . . . . . . . . . . . . . . . . . . . . . . . . . . . . . . . . . . . .<br />
Extreme hot weather, operation in . . . . . . . . . . . . . . . . . . . . . . . . . . . . .<br />
Batteries . . . . . . . . . . . . . . . . . . . . . . . . . . . . . . . . . . . . . . . . . . . . . . .<br />
Body and chassis . . . . . . . . . . . . . . . . . . . . . . . . . . . . . . . . . . . . . . . .<br />
Cooling system . . . . . . . . . . . . . . . . . . . . . . . . . . . . . . . . . . . . . . . . . .<br />
General . . . . . . . . . . . . . . . . . . . . . . . . . . . . . . . . . . . . . . . . . . . . . . . . .<br />
Parking the truck . . . . . . . . . . . . . . . . . . . . . . . . . . . . . . . . . . . . . . .<br />
F<br />
2-12<br />
1-3<br />
2-14<br />
4-19<br />
4-19a<br />
4-19d<br />
4-19e<br />
4-19f<br />
4-19b<br />
4-19c<br />
4-20<br />
4-20c<br />
4-20d<br />
4-20b<br />
4-20a<br />
4-20e<br />
2-22<br />
1-1<br />
2-22<br />
4-229<br />
4-229<br />
4-230<br />
4-231<br />
4-232<br />
4-229<br />
4-229<br />
4-233<br />
4-233<br />
4-234<br />
4-233<br />
4-233<br />
4-234<br />
Fording operation . . . . . . . . . . . . . . . . . . . . . . . . . . . . . . . . . . . . . . . . . . . .<br />
General . . . . . . . . . . . . . . . . . . . . . . . . . . . . . . . . . . . . . . . . . . . . . . . . .<br />
Normal fording through 30 inches of water or less . . . . . . . .<br />
Forms and records . . . . . . . . . . . . . . . . . . . . . . . . . . . . . . . . . . . . . . . . . . .<br />
4-22 4-236<br />
4-22a 4-236<br />
4-22b 4-236<br />
1-2 1-1<br />
H<br />
Highway towing . . . . . . . . . . . . . . . . . . . . . . . . . . . . . . . . . . . . . . . . . . . . . .<br />
Hot water personnel heater kit, operation . . . . . . . . . . . . . . . . . . . . .<br />
4-23d 4-254<br />
4-13 4-2<strong>10</strong><br />
I<br />
Instrument panel controls and indicators . . . . . . . . . . . . . . . . . . . . . .<br />
Introduction, scope . . . . . . . . . . . . . . . . . . . . . . . . . . . . . . . . . . . . . . . . . .<br />
4-2a 4-2<br />
1-1 1-1<br />
Jumper cables<br />
Metric system<br />
J<br />
to start engine, use of . . . . . . . . . . . . . . . . . . . . . . . . .<br />
M<br />
. . . . . . . . . . . . . . . . . . . . . . . . . . . . . . . . . . . . . . . . . . . . . . . .<br />
4-23b 4-237<br />
1-5 1-1<br />
Index 4
TM 9-<strong>2320</strong>-<strong>211</strong>-<strong>10</strong>-1<br />
INDEX - C<strong>ON</strong>T<br />
Subject<br />
Paragraph<br />
Page<br />
Operating procedures, general . . . . . . . . . . . . . . . . . . . . . . . . . . . . . . . .<br />
Before engine startup . . . . . . . . . . . . . . . . . . . . . . . . . . . . . . . . . . . .<br />
Cold weather starting below +20°F . . . . . . . . . . . . . . . . . . . . . . . .<br />
Placing and keeping truck in motion . . . . . . . . . . . . . . . . . . . . . .<br />
Starting the engine above +20°F . . . . . . . . . . . . . . . . . . . . . . . . . .<br />
Stopping the truck and engine . . . . . . . . . . . . . . . . . . . . . . . . . . .<br />
Organization of manual . . . . . . . . . . . . . . . . . . . . . . . . . . . . . . . . . . . . . . .<br />
Recommendations, reporting equipment improvement. . . . . . . . . . . .<br />
Service upon receipt of equipment, general . . . . . . . . . . . . . . . . . . . .<br />
Slave receptacle to start engine, use of . . . . . . . . . . . . . . . . . . . . . . .<br />
Tabulated data, general l . . . . . . . . . . . . . . . . . . . . . . . . . . . . . . . . . . . . .<br />
Tire inflation data . . . . . . . . . . . . . . . . . . . . . . . . . . . . . . . . . . . . . . . . . . . .<br />
Towing truck to start engine . . . . . . . . . . . . . . . . . . . . . . . . . . . . . . . . . .<br />
Tractor truck (M52A2) controls and indicators . . . . . . . . . . . . . . . . .<br />
Tractor trucks, operation of . . . . . . . . . . . . . . . . . . . . . . . . . . . . . . . . . .<br />
General . . . . . . . . . . . . . . . . . . . . . . . . . . . . . . . . . . . . . . . . . . . . . . . . .<br />
Securing equipment for travel . . . . . . . . . . . . . . . . . . . . . . . . . . . .<br />
Semitrailer, coupling . . . . . . . . . . . . . . . . . . . . . . . . . . . . . . . . . . . .<br />
Semitrailer, uncoupling . . . . . . . . . . . . . . . . . . . . . . . . . . . . . . . . . .<br />
Unusual conditions, operation under, general . . . . . . . . . . . . . . . . . .<br />
Unusual conditions, operation under, scope. . . . . . . . . . . . . . . . . . . .<br />
Unusual terrain, operation on . . . . . . . . . . . . . . . . . . . . . . . . . . . . . . . . .<br />
Deep snow or mud . . . . . . . . . . . . . . . . . . . . . . . . . . . . . . . . . . . . . . .<br />
Dusty or sandy roads . . . . . . . . . . . . . . . . . . . . . . . . . . . . . . . . . . .<br />
Hard baked sand . . . . . . . . . . . . . . . . . . . . . . . . . . . . . . . . . . . . . . . .<br />
High altitudes . . . . . . . . . . . . . . . . . . . . . . . . . . . . . . . . . . . . . . . . . . .<br />
Ice . . . . . . . . . . . . . . . . . . . . . . . . . . . . . . . . . . . . . . . . . . . . . . . . . . . . . .<br />
Rocks and boulders . . . . . . . . . . . . . . . . . . . . . . . . . . . . . . . . . . . . .<br />
Usual conditions, operation under, scope . . . . . . . . . . . . . . . . . . . . .<br />
Vehicle/bridge classification . . . . . . . . . . . . . . . . . . . . . . . . . . . . . . . . . .<br />
O<br />
R<br />
S<br />
T<br />
U<br />
V<br />
4-6<br />
4-6a<br />
4-6c<br />
4-6d<br />
4-6b<br />
4-6e<br />
1-7<br />
1-4<br />
3-1<br />
4-23a<br />
2-5<br />
2-9<br />
4-23c<br />
4-3a<br />
4-9<br />
4-9a<br />
4-9d<br />
4-9b<br />
4-9c<br />
4-18<br />
4-17<br />
4-21<br />
4-21a<br />
4-21d<br />
4-21b<br />
4-21f<br />
4-21c<br />
4-21e<br />
4-5<br />
1-8<br />
4-30<br />
4-31<br />
4-43<br />
4-45<br />
4-37<br />
4-58<br />
1-2<br />
1-1<br />
3-1<br />
4-239<br />
2-22<br />
2-22<br />
4-243<br />
4-16<br />
4-119<br />
4-119<br />
4-138<br />
4-119<br />
4-133<br />
4-229<br />
4-229<br />
4-234<br />
4-234<br />
4-235<br />
4-235<br />
4-235<br />
4-235<br />
4-235<br />
4-30<br />
1-2<br />
Index 5
TM 9-<strong>2320</strong>-<strong>211</strong>-<strong>10</strong>-1<br />
INDEX - C<strong>ON</strong>T<br />
Subject<br />
Paragraph<br />
Page<br />
Weight . . . . . . . . . . . . . . . . . . . . . . . . . . . . . . . . . . . . . . . . . . . . . . . . . . . . . . .<br />
Winch, front, operation of . . . . . . . . . . . . . . . . . . . . . . . . . . . . . . . . . . . .<br />
Before operation . . . . . . . . . . . . . . . . . . . . . . . . . . . . . . . . . . . . . . . . .<br />
General . . . . . . . . . . . . . . . . . . . . . . . . . . . . . . . . . . . . . . . . . . . . . . . . .<br />
Pulling the load . . . . . . . . . . . . . . . . . . . . . . . . . . . . . . . . . . . . . . . . .<br />
Releasing the load . . . . . . . . . . . . . . . . . . . . . . . . . . . . . . . . . . . . . . .<br />
Securing equipment for travel . . . . . . . . . . . . . . . . . . . . . . . . . . .<br />
Stopping the winch . . . . . . . . . . . . . . . . . . . . . . . . . . . . . . . . . . . . . .<br />
Unwinding the winch line . . . . . . . . . . . . . . . . . . . . . . . . . . . . . . . .<br />
Winding winch line on the drum . . . . . . . . . . . . . . . . . . . . . . . . . .<br />
Winch, rear, medium wrecker M543A2, operation of . . . . . . . . . . . .<br />
Before operation . . . . . . . . . . . . . . . . . . . . . . . . . . . . . . . . . . . . . . . . .<br />
General . . . . . . . . . . . . . . . . . . . . . . . . . . . . . . . . . . . . . . . . . . . . . . . . .<br />
Pulling in the load . . . . . . . . . . . . . . . . . . . . . . . . . . . . . . . . . . . . . . .<br />
Releasing the load . . . . . . . . . . . . . . . . . . . . . . . . . . . . . . . . . . . . . . .<br />
Securing for travel . . . . . . . . . . . . . . . . . . . . . . . . . . . . . . . . . . . . . .<br />
Winch cable and wrecker, rigging . . . . . . . . . . . . . . . . . . . . . . . .<br />
Winch cable, unwinding . . . . . . . . . . . . . . . . . . . . . . . . . . . . . . . . . .<br />
Wrecker truck (M543A2), controls and indicators . . . . . . . . . . . . . .<br />
W<br />
2-6<br />
4-7<br />
4-7b<br />
4-7a<br />
4-7d<br />
4-7f<br />
4-7h<br />
4-7e<br />
4-7c<br />
4-7g<br />
4-11<br />
4-11b<br />
4-11a<br />
4-11e<br />
4-11f<br />
4-11g<br />
4-11d<br />
4-11c<br />
4-3c<br />
2-22<br />
4-63<br />
4-64<br />
4-63<br />
4-74<br />
4-79<br />
4-86<br />
4-78<br />
4-65<br />
4-81<br />
4-164<br />
4-164<br />
4-164<br />
4-172<br />
4-173<br />
4-175<br />
4-169<br />
4-165<br />
4-19<br />
Index 6
By Order of the Secretaries of the Army and the Air Force:<br />
Official:<br />
E. C. MEYER<br />
General, United States Army<br />
Chief of Staff<br />
J. C. PENNINGT<strong>ON</strong><br />
Major General, United States Army<br />
The Adjutant General<br />
Official:<br />
LEW ALLEN, JR., General, USAF<br />
Chief of Staff<br />
VAN L. CRAWFORD, JR., Colonel, USAF<br />
Director of Administration<br />
DISTRIBUTI<strong>ON</strong>:<br />
To be distributed in accordance with DA Form 12-38, Operator maintenance<br />
requirements for 5-Ton Truck Chassis: 5-Ton, 6x6, M39A2.


